
You know that feeling when you finally spot the ornament photo that looks exactly like the Christmas you keep picturing — and then you realize you could actually make it yourself? We spent a few evenings in Michaels, Etsy, Target, and Joann (plus a lot of late-night Pinterest scrolling) narrowing down 29 handmade ornament ideas that hold up in real homes, not just in perfect photos. Nothing here runs past $65, and plenty of it starts around $4 in materials.
Inside you’ll find rustic natural looks built on dried orange and cinnamon, nostalgic handprint keepsakes, folded-paper ornaments, and classic red-and-white traditional sets — and where it matters, we compare the budget version against the splurge side by side. In 2026, ornament-making has shifted from a crafty hobby into a genuine decorating style: people build whole trees around a single palette instead of buying another boxed set, and Pinterest saves for handmade ornaments keep climbing right along with it.
And stay until the end — we break down the most common mistakes that can ruin these looks. 📌 Save this to Pinterest for later — you’ll want to revisit these ideas.
1. White Stars, Red Candy Canes, and Pinecones With Twine
Three things are doing the heavy lifting here. First, repetition — the same small white star keeps appearing, so the eye reads pattern instead of clutter. Second, the natural pinecones and brown twine interrupt the red-and-green saturation; without them, the tree tips into candy-cane loud. Third, the string lights stay in the warm white range, which flatters cream and gold instead of turning them gray.
The palette math is roughly 50% green base, 25% white, 15% red, and 10% natural brown and gold. Change one slice and the mood moves: swap red for dusty blue and it reads Nordic, swap white for oatmeal and it turns farmhouse. Keep the gold at a tenth or less — it’s the salt, not the meal — and on a slim tree you can cut the pinecones in half and double up on the little white stars.
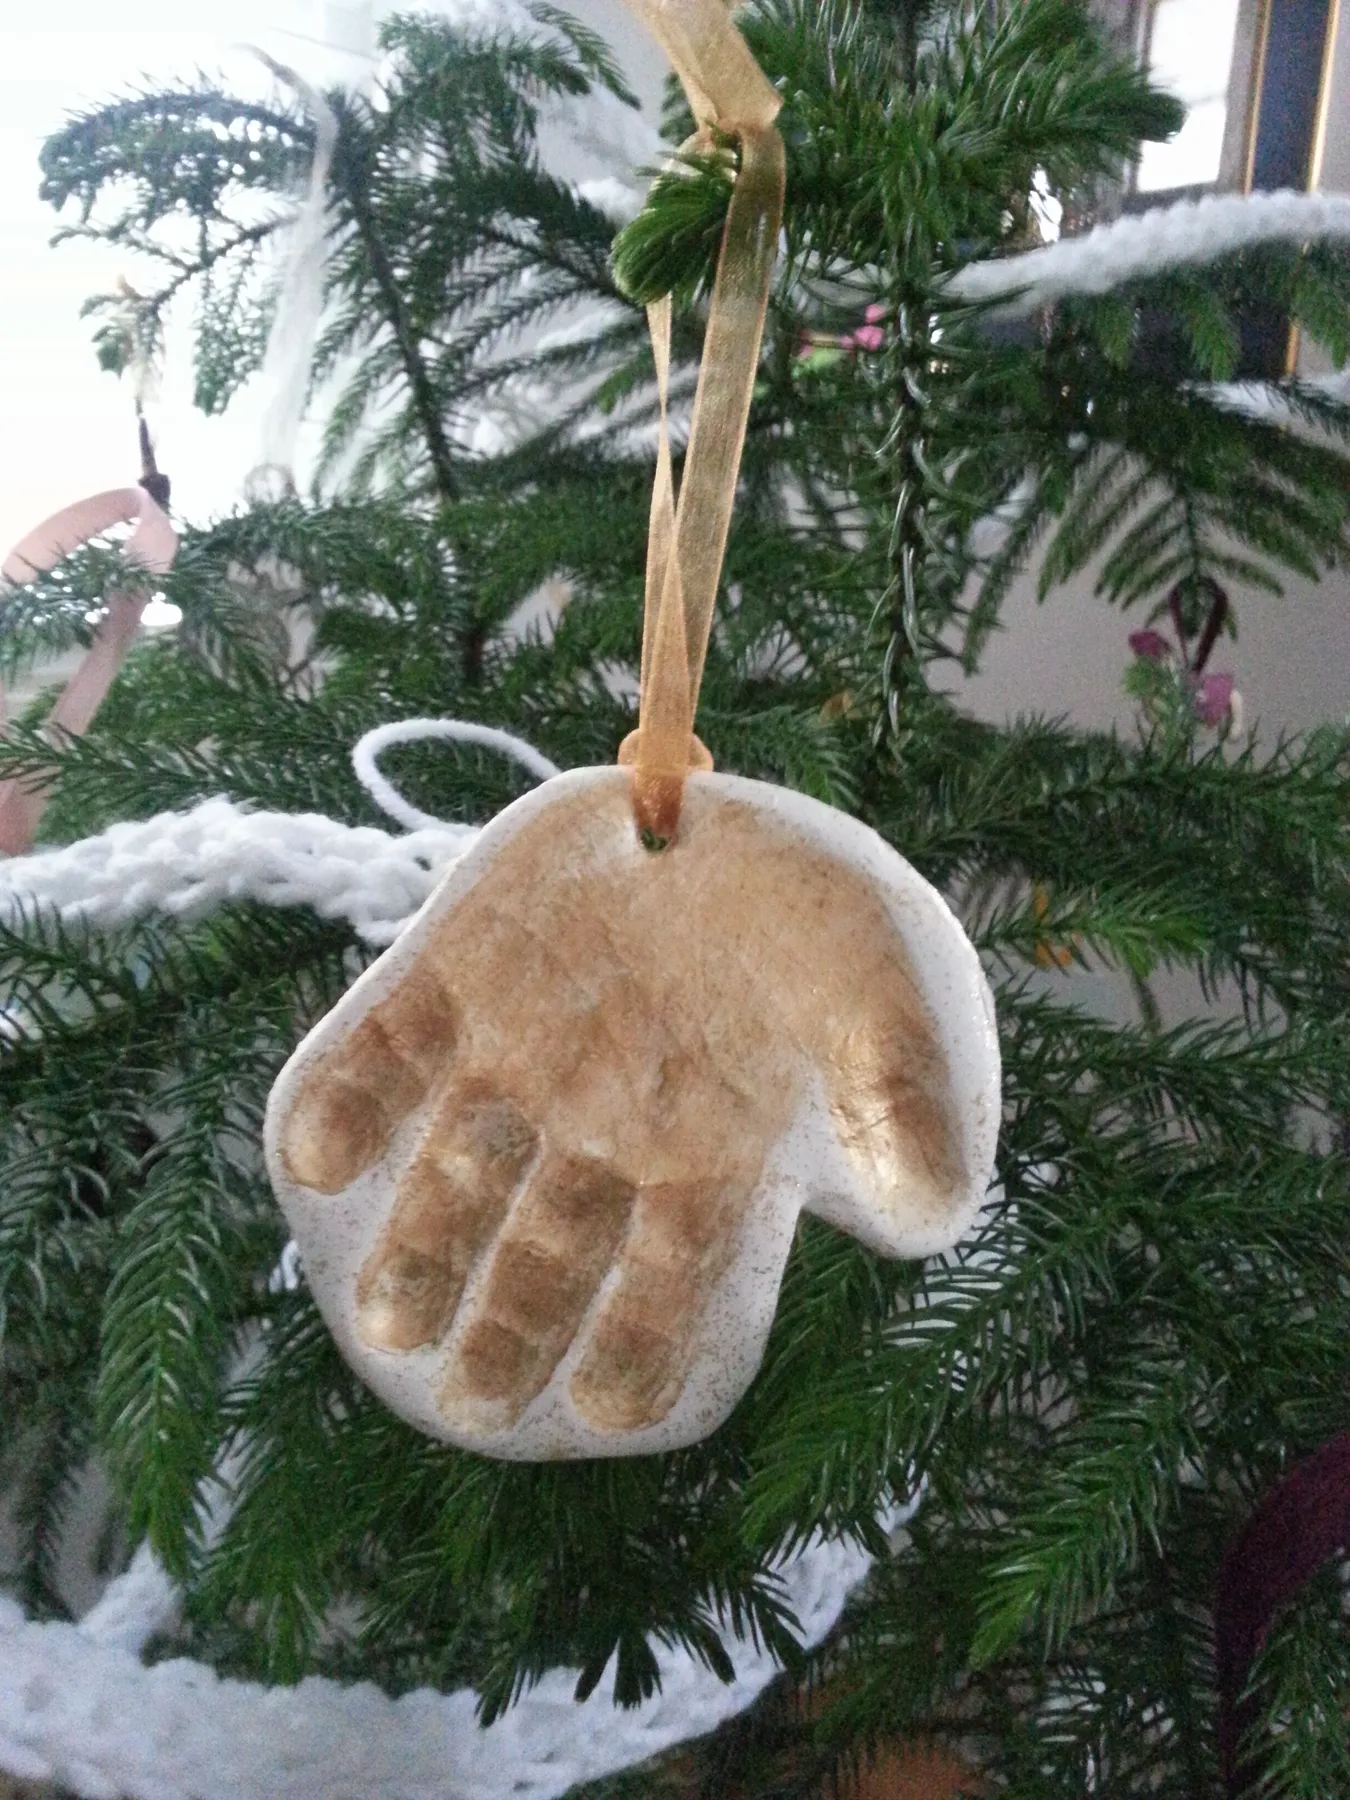
2. The Blue-and-Pink Handprint Ornament a Kid Holds Proudly
- Roll air-dry clay to about 1/4 inch — thicker holds a deeper print without cracking.
- Press the palm first, then each finger, rolling from wrist to fingertip so nothing smears.
- Poke the hanging hole with a skewer while the clay is still soft, about 1/2 inch in from the edge.
- Dry it 24 to 48 hours, flipping once at the halfway point.
- Paint the fingers blue and the palm pink, leave the background bare, and seal with matte varnish.
Twenty minutes of hands-on time and about $8-$12 in materials for a batch of six.
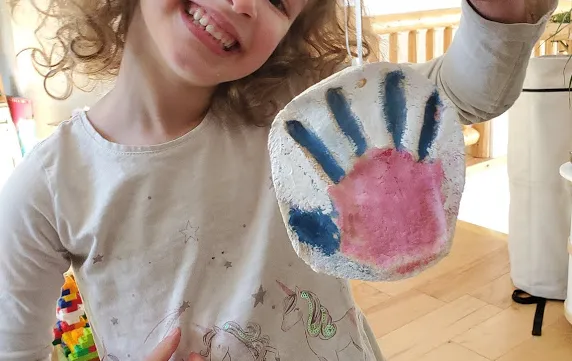
The off-white background is the entire trick. Those blue fingers and pink palm only read clearly because the surrounding clay was left bare — wash the whole disc in color first and the handprint dissolves into noise. That empty space is also what makes it look like a keepsake instead of a craft project, so resist the urge to ring it with dots, a date, or a border.
3. A Golden Clay Bird With Impressed Circles and Dot Eyes
Work the impressions while the clay is leather-hard — firm enough to hold an edge, soft enough to dent. A wooden skewer, a marker cap, or the end of a small brass tube makes those concentric circles; press once and lift straight up so the rim stays crisp. Keep the body around 1/8 inch thick, and let the silhouette stay a little irregular, because perfect symmetry is what kills the handmade read.
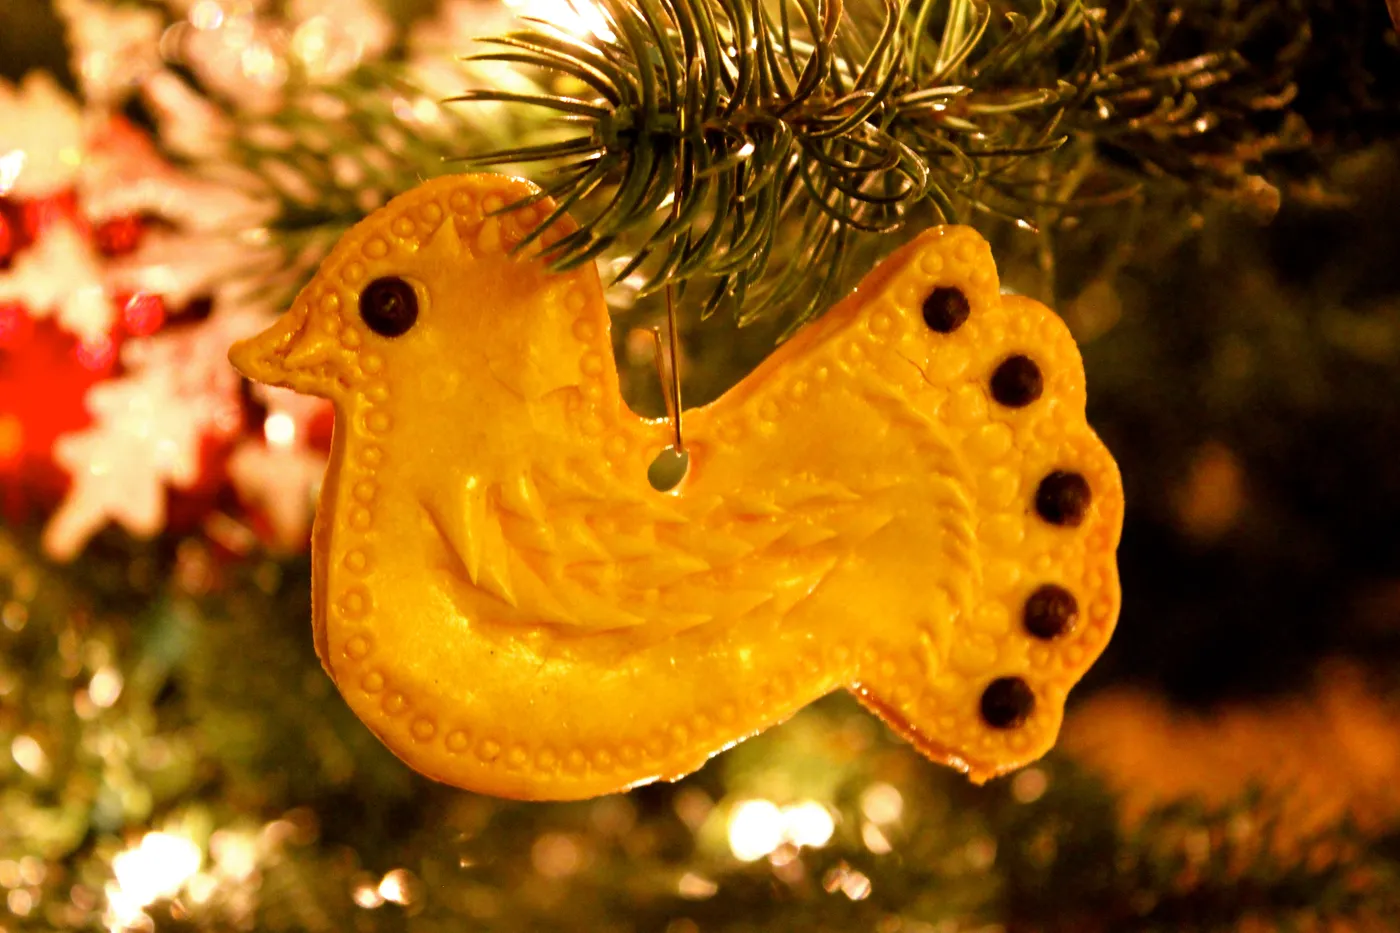
Birds, bells, and other vintage silhouettes are everywhere right now because they nod to mid-century German glass ornaments without the $40 price tag or the fragility. The gold finish does the nostalgia work, and the impressed texture keeps it from looking like a store-bought replica — same instinct behind all those mercury-glass lookalikes filling 2026 tree photos. We want heirloom energy without the heirloom anxiety.
4. Folded Paper Spheres in Gingham and Muted Plaid
- Patterned cardstock or scrapbook paper: $6-$12 for a 24-sheet pad
- Bone folder (or the back of a spoon): $0-$8
- Baker’s twine and thin ribbon: $4-$7
- Multi-colored string lights, if you need a strand: $18-$35
- Craft glue and small clips: $5-$9
Total: roughly $33-$71 for a tree’s worth of spheres, or about $1-$2 per ornament.
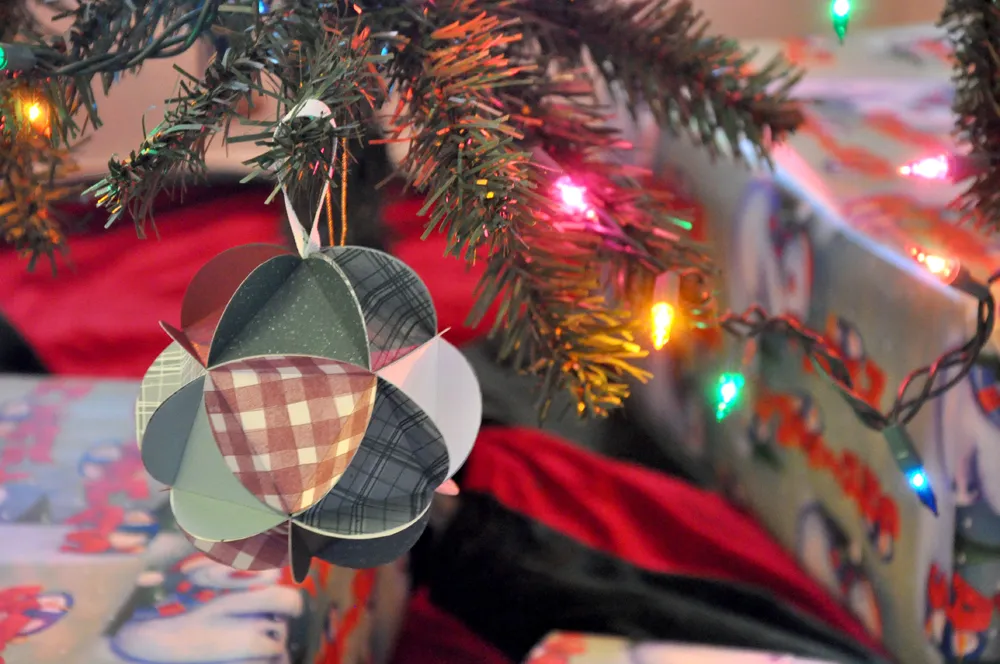
Paper spheres are lighter than they look, which is great for thin branches and terrible for drafts — crack a window and they spin like pinwheels. Keep them off the lowest branches where a tail can reach, store them in a rigid box with tissue between layers, and be honest about humidity: folded paper softens and loses its crisp creases in a damp basement. Budget move: cut last year’s wrapping paper and gift bags into 3-inch squares for the same folds at zero cost.
5. Cinnamon Bundles, Felt Stars, and Dried Orange Slices
This is a natural palette, so the math runs differently: about 45% brown from cinnamon, pinecones, and twine, 25% cream and beige from the felt stars and beaded strands, 20% green foliage, and 10% dried orange for the spark of color. Want it warmer? Push orange to 15% and pull the green back. Want it cooler? Swap the felt stars for undyed muslin and the whole thing turns Scandinavian.
Cinnamon and dried citrus are food, and they behave like it. Orange slices hold their color one season, maybe two if the room stays dry; in a humid kitchen they go soft and dark. A light coat of matte craft sealer buys you another year. Expect to remake the citrus every couple of years — the felt stars and beaded garlands will outlive your tree. For a version built entirely on naturals, see Idea #29.
6. Felt Trees, a Glittered 18, and a Folded Red Star
The glittered number is the reason this pairing works. A felt tree and a folded star on their own are sweet but anonymous — add the year and suddenly it’s a marker, not a decoration. Everything else is texture and color; the numeral carries the memory, which is why the shapes around it stay so plain.
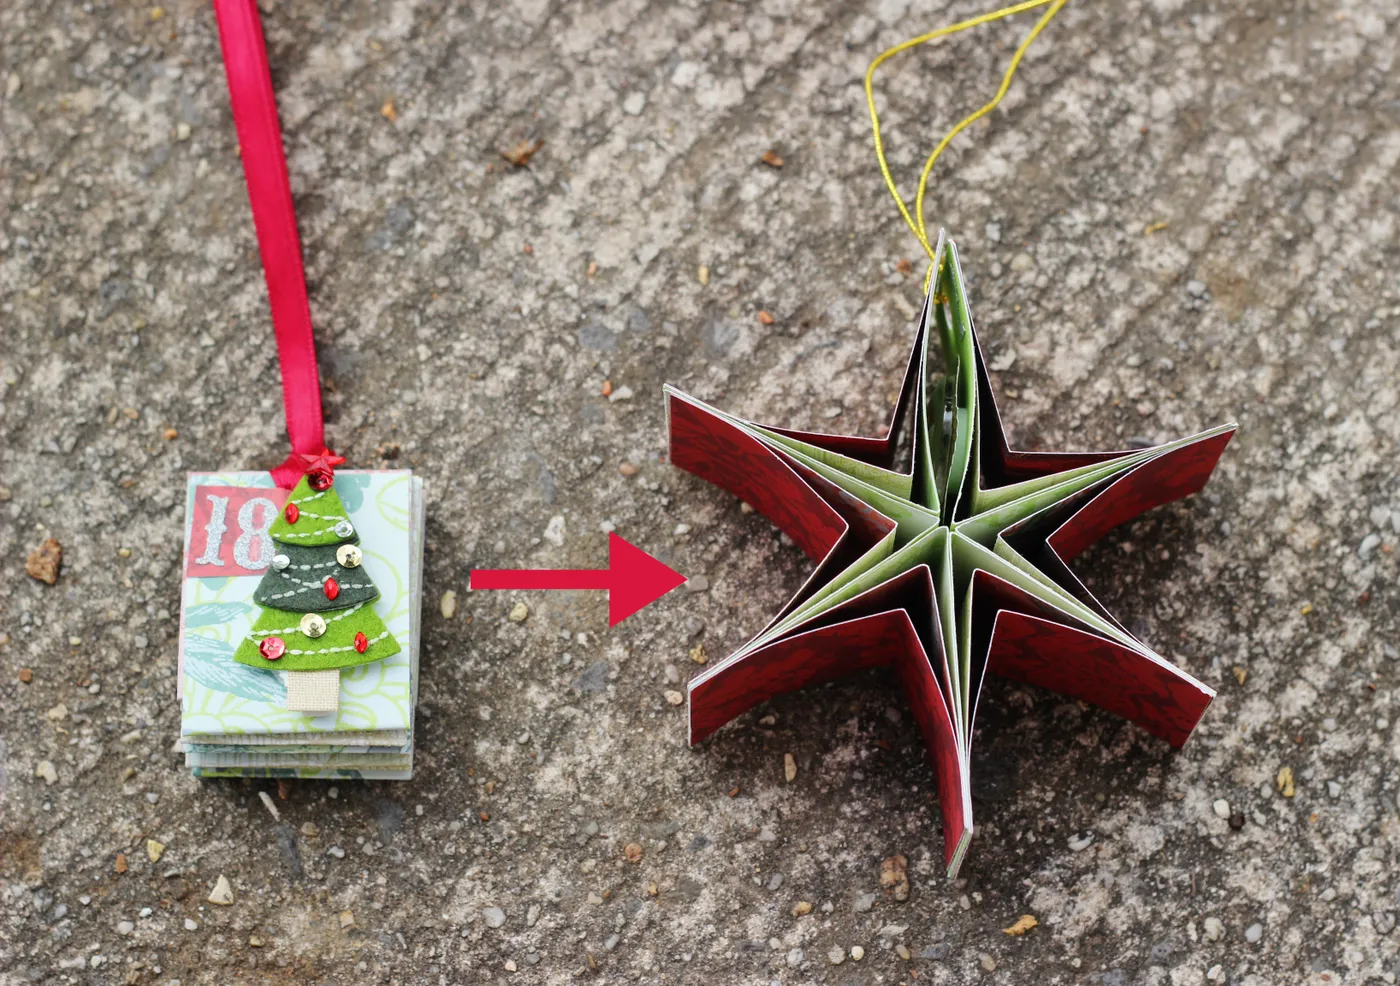
These read as small objects, so give them breathing room. A 6-foot tree wearing 2.5- to 3-inch ornaments wants 60 to 80 pieces total, and swapping these layered paper and felt pieces in for a third of them still leaves the tree looking full. On a tabletop tree under 4 feet, a dozen is the ceiling before the layers blur together. Working with a 9-foot tree? Scale the paper stacks up to 4 inches.
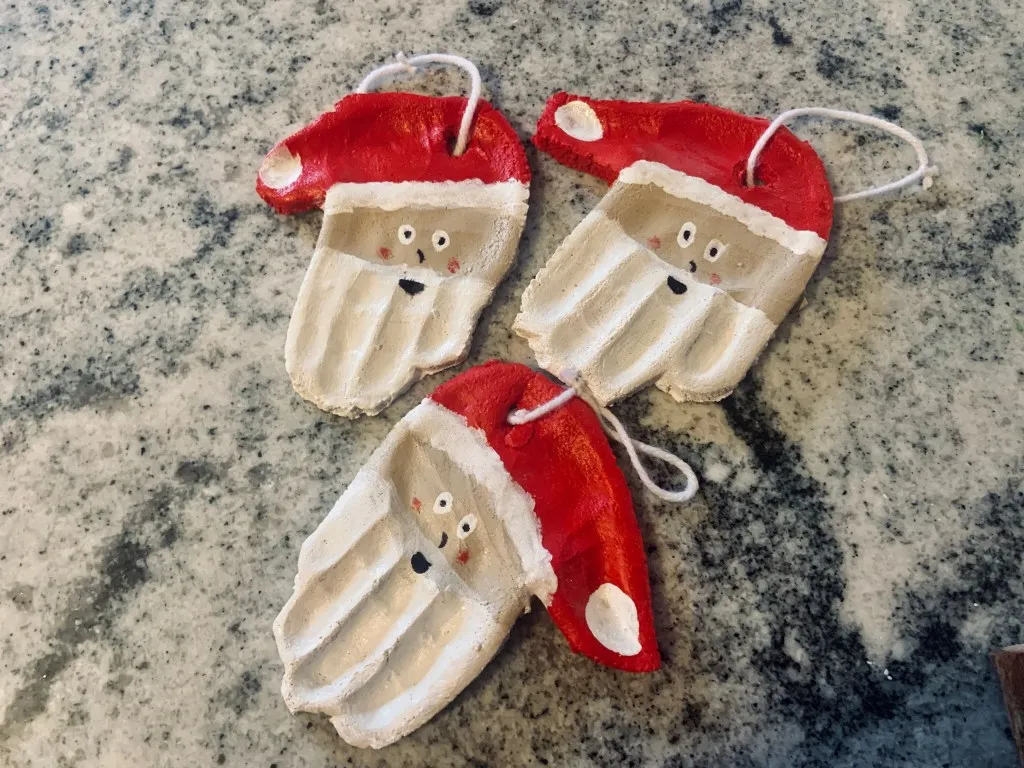
7. The Handprint Santa With a Thumbprint Pom-Pom
- Press a child’s hand into a disc of air-dry clay or salt dough, fingers spread, and dry it flat for 24 hours.
- Paint the red hat over the fingers — the thumbprint becomes the pom-pom.
- Leave the palm area bare for the beard, then add a peach oval for the face just below it.
- Dot on black eyes and a small red nose with a skewer tip rather than a brush.
- Seal with matte varnish so the paint stops flaking by January.
About twenty minutes of painting and $6-$10 in supplies.
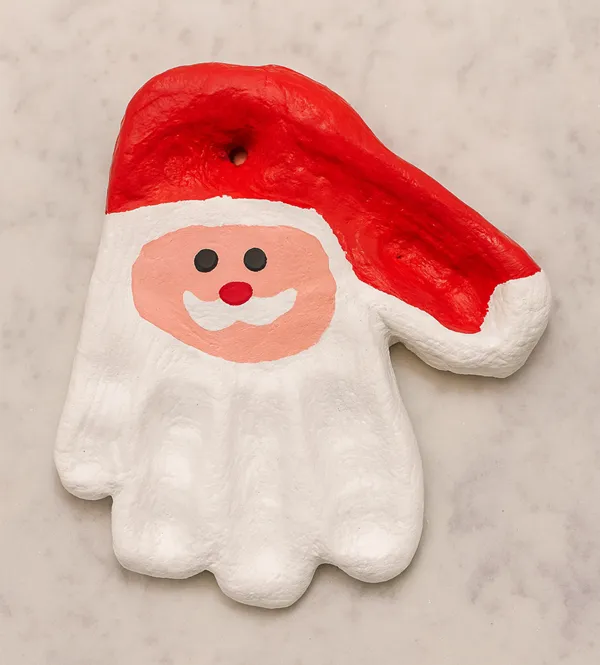
Paint the hat first, let it dry, then do the face. Red bleeding into a peach face is the number one way these go sideways, and no amount of varnish hides it. Two thin coats beat one thick one, since thick acrylic cracks as the clay expands and contracts with room temperature. Matte is the right finish here too — gloss makes handmade ornaments look like airport souvenirs.
8. Bright Embossed Clay Bells, Trees, and Candy Canes
The whole appeal of this set is that it costs almost nothing. Air-dry clay runs $8-$12 for a 5-pound block, and $1 acrylic paints in bright yellow, lime, sky blue, and red will cover dozens of shapes. The embossing is free — press a rubber stamp, a fork, or the back of a plastic ruler into the clay before it dries and the pattern stays put.
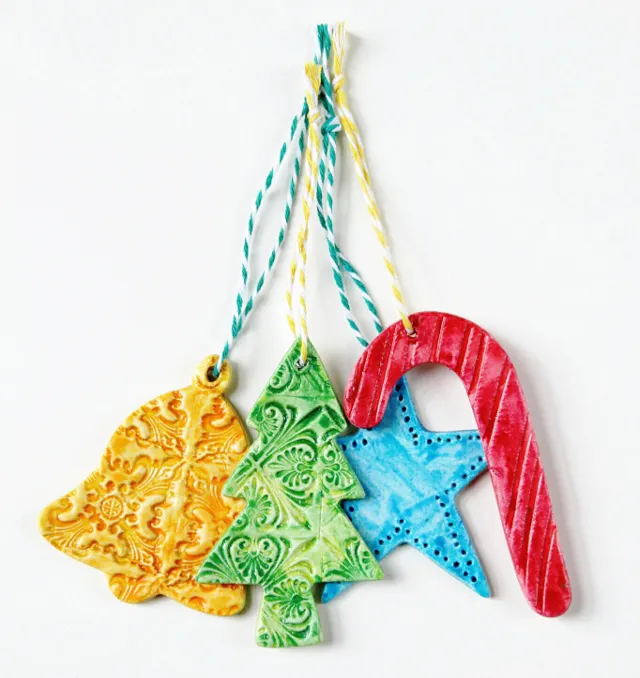
The colors are loud, so the shapes stay simple: a bell, a tree, a star, a candy cane, nothing more complicated than a cookie cutter. One repeating swirl pattern ties all four together, and the braided string hangers echo the candy-cane stripes. Without that shared texture, four bright colors would just look like four separate craft projects. Salt dough does the same job for pennies if you want to compare, as in Idea #17.
9. Fourteen Tiny Painted Critters on Baker’s Twine
Fourteen pieces is the right count for a tabletop tree, a mantel garland, or a small potted branch — not a full-size tree. At roughly 2 inches tall, they want a display area no wider than 3 feet, or they scatter visually and stop reading as a set. Dressing a 7-foot tree instead? Make them in batches of 40 and mix them with plain red and white balls so the whimsy has something neutral to sit against.
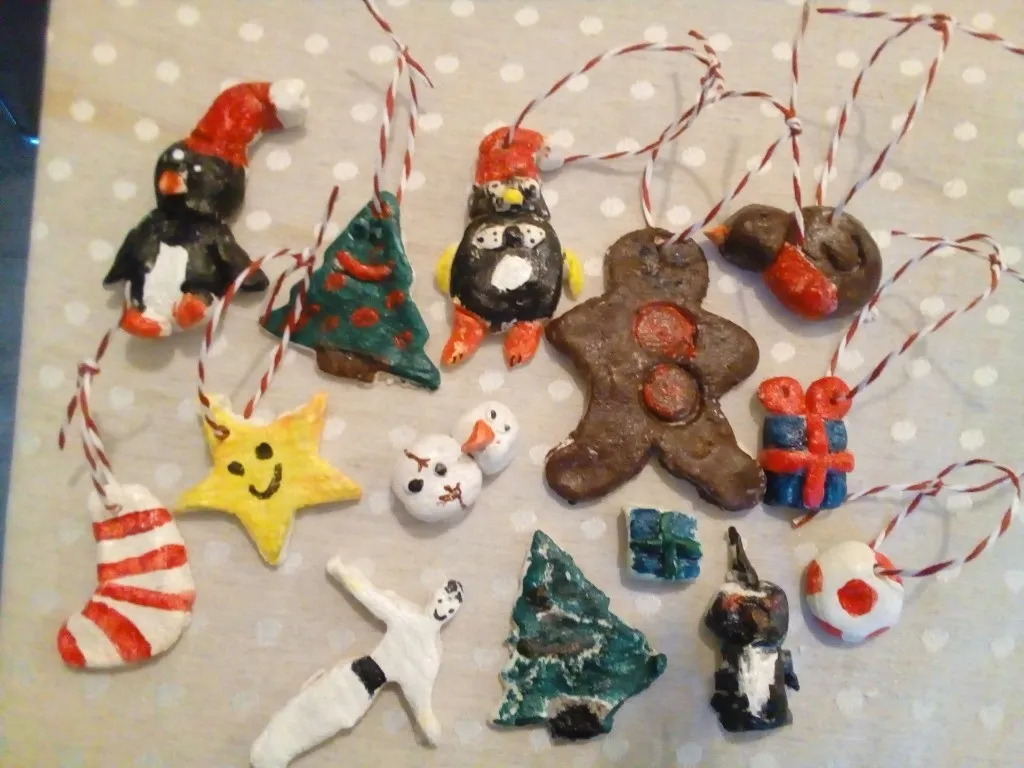
Clay figures with thin legs and gift-box corners will break; that’s physics, not a defect. Expect to lose one or two a season to a tail, a toddler, or a vacuum cord. Keep spares of the simple shapes, skip the lowest branch, and allow a full 48 hours of drying before you paint — rushing it means cracking. The penguins, snowman, and striped stocking are the ones kids reach for first.
10. Paper Stars and Numbered Blocks on a Simple Fir
The numbered-blocks-and-paper-stars look is what happens when people who love a gallery wall start decorating a tree. It’s very 2026: ornament sets now get sold as collections with a shared palette instead of random characters, and crafters treat the tree as a place to show off folding skills. It hangs on because it doesn’t depend on a trendy shape — paper, a fold, and a color story, that’s all.
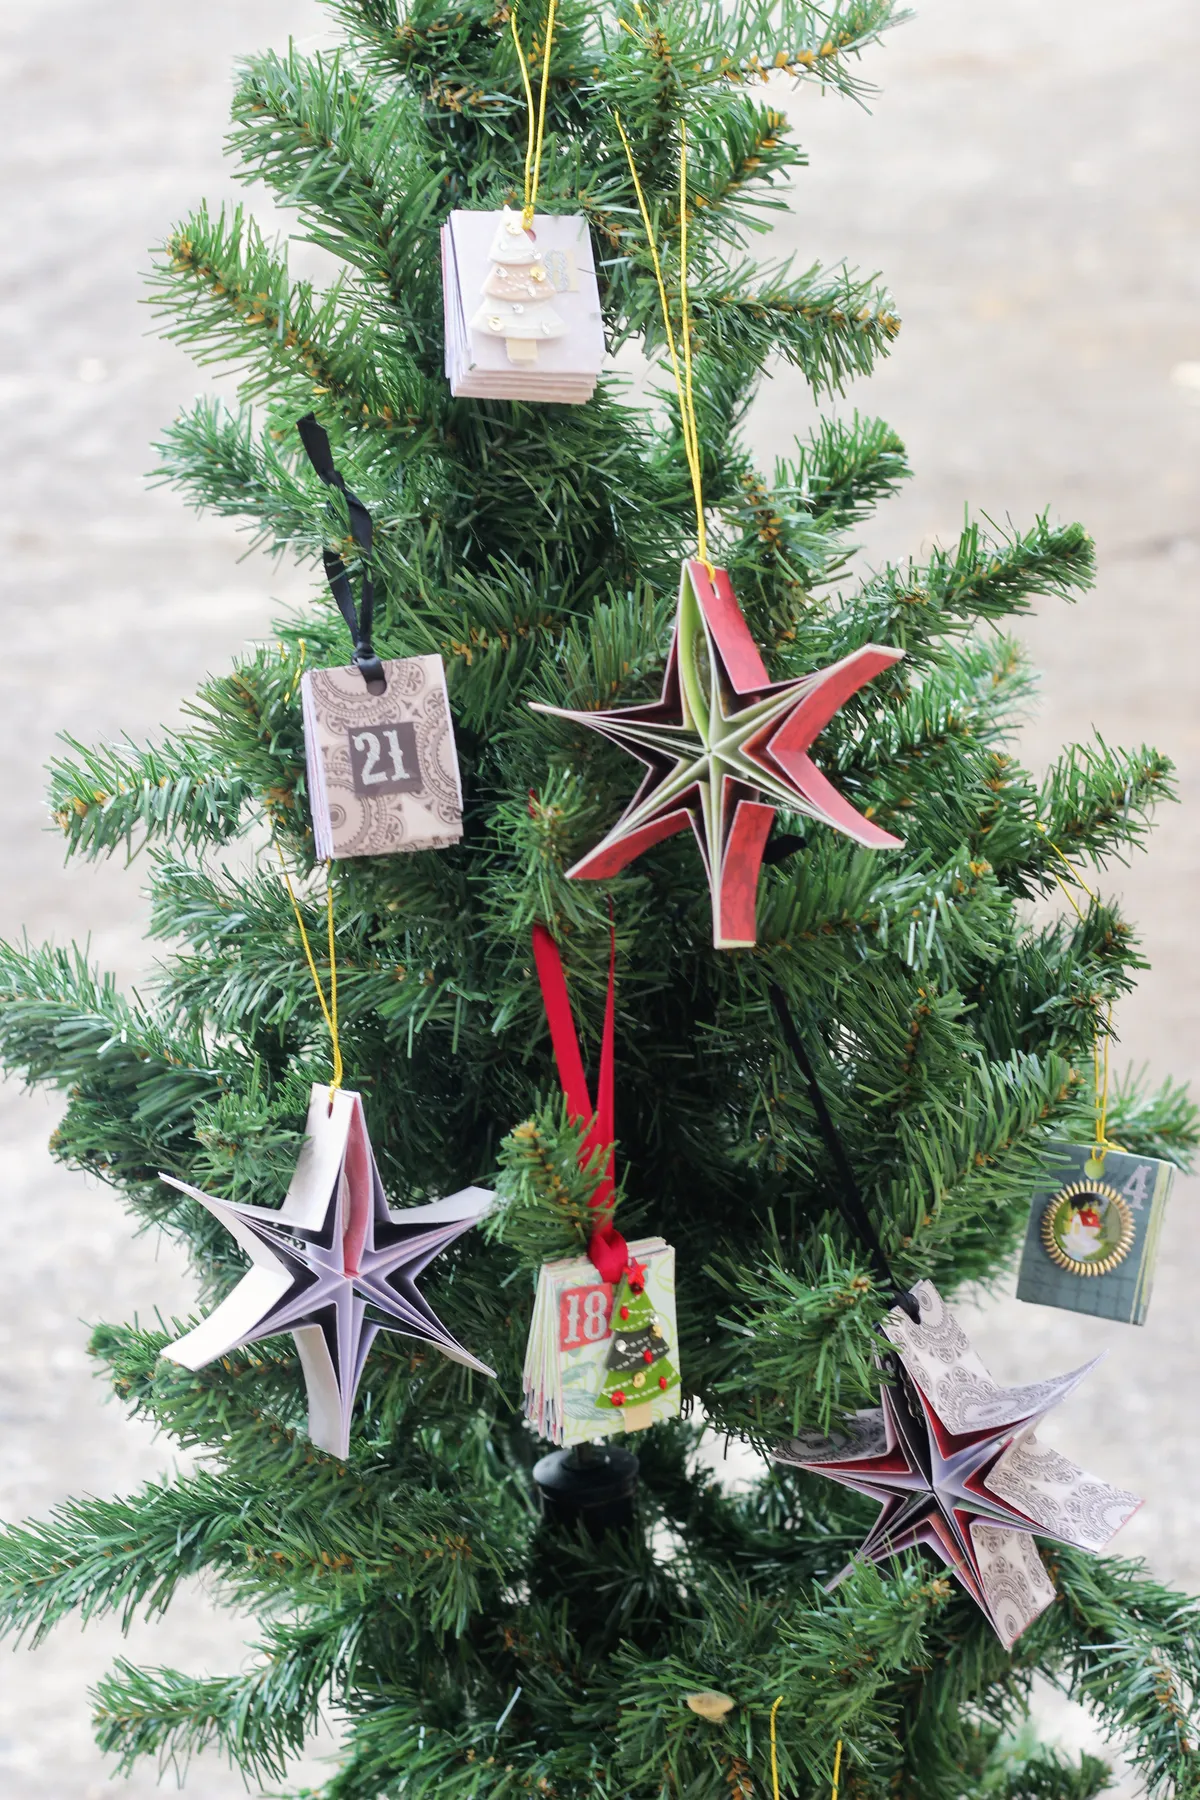
- Cardstock in red, white, and kraft: $8-$15
- Blank 1-inch wooden blocks: $10-$18 for 25
- Felt scraps and fabric glue: $6-$10
- Ribbon and thin yarn for hanging: $5-$9
- Number stamps or stickers: $6-$12
Total: $35-$64 for a mixed set, under $2 per ornament. Budget version: cut blocks from one scrap 2×4, sand the edges, and write the numbers with a marker.
11. A Honeycomb Paper Ornament on Bare Branches
Honeycomb paper needs light raking across it or it goes flat. Hang these in front of a window with the blinds half open, or string them 2 to 3 inches from a warm-white bulb, because the pleats only read when light hits them at an angle. Suspending from real branches? Keep the branch under 1/2 inch thick, and hang the ornament so its widest point sits below the branch line rather than level with it.
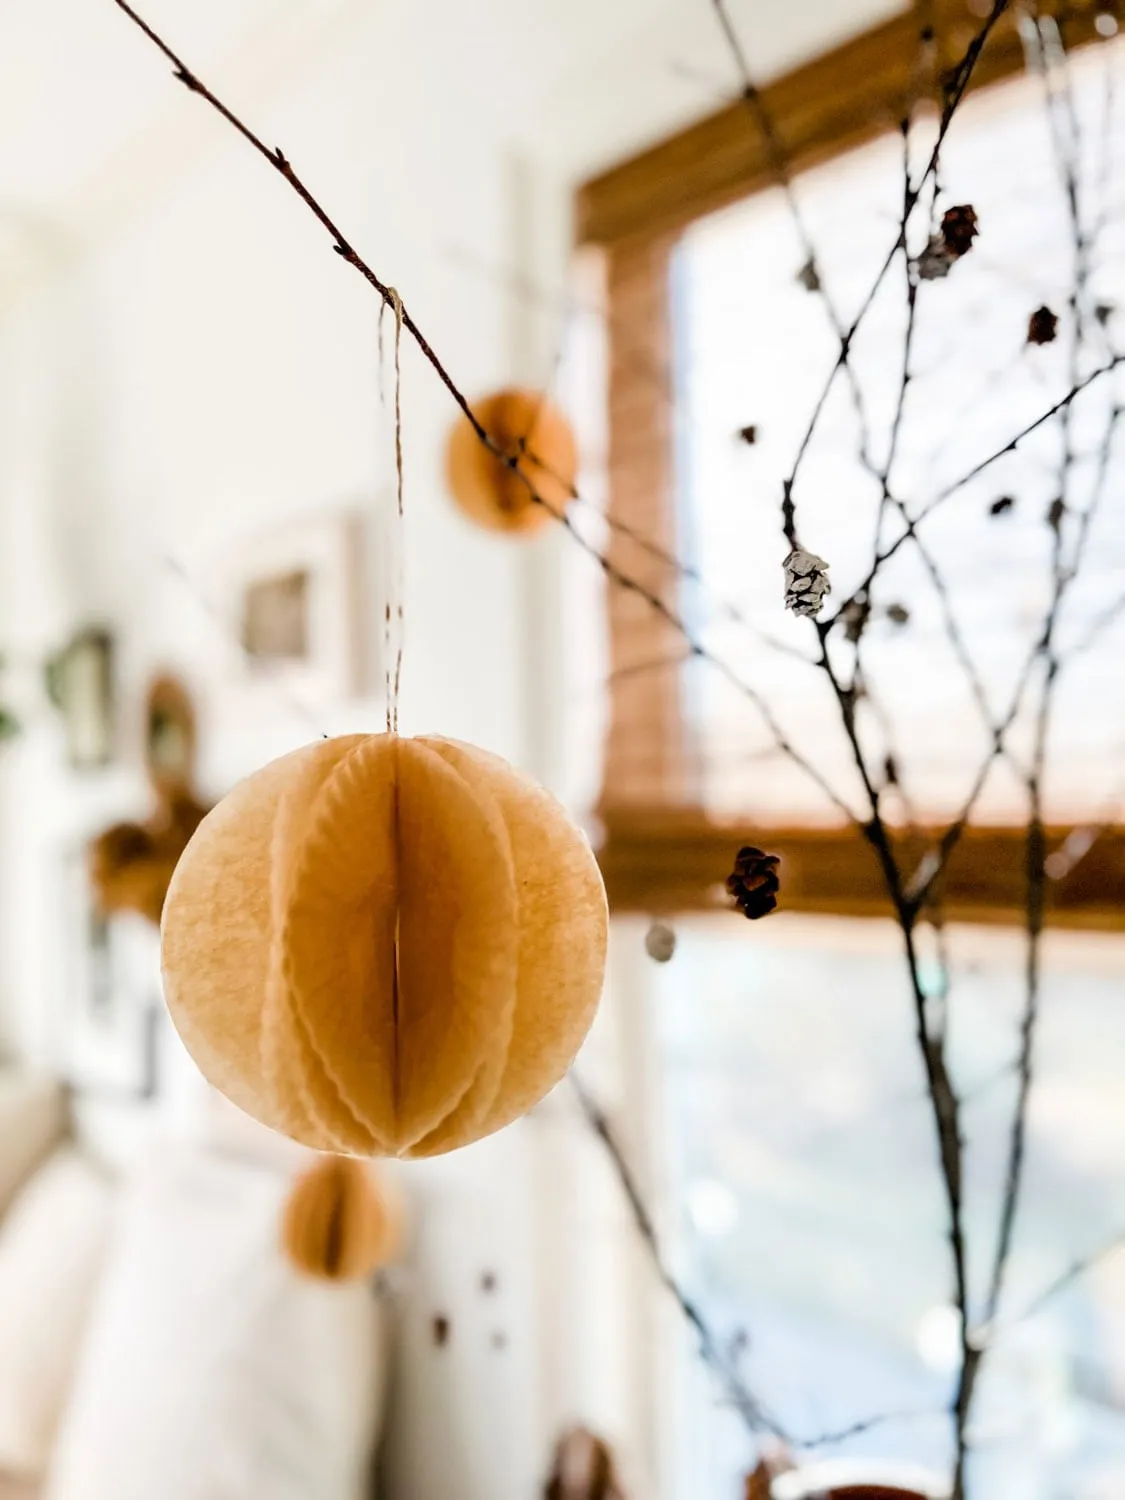
The bare branch is doing as much work as the paper. A light orange honeycomb ball on a green tree would vanish into the noise; on dark, leafless branches it becomes a small lantern. No branch handy? A single twig in a stoneware vase does the same job — the contrast is the design, not the ornament. Two is the limit, though; a third turns the whole thing into a mobile.
12. A White Bunny Ornament With Pink Painted Ears
- Start from a smooth blank: clay, wood, or a papier-mâché shape from the craft store.
- Base-coat in matte white — two thin layers, drying in between.
- Paint the inner ears and nose in soft pink with a liner brush, working from the center outward.
- Add eyes and whiskers with a skewer tip dipped in black: three strokes a side, no more.
- Thread a thin pink string through the hole and knot it close to the top.
Roughly an hour per ornament once the base coat dries.
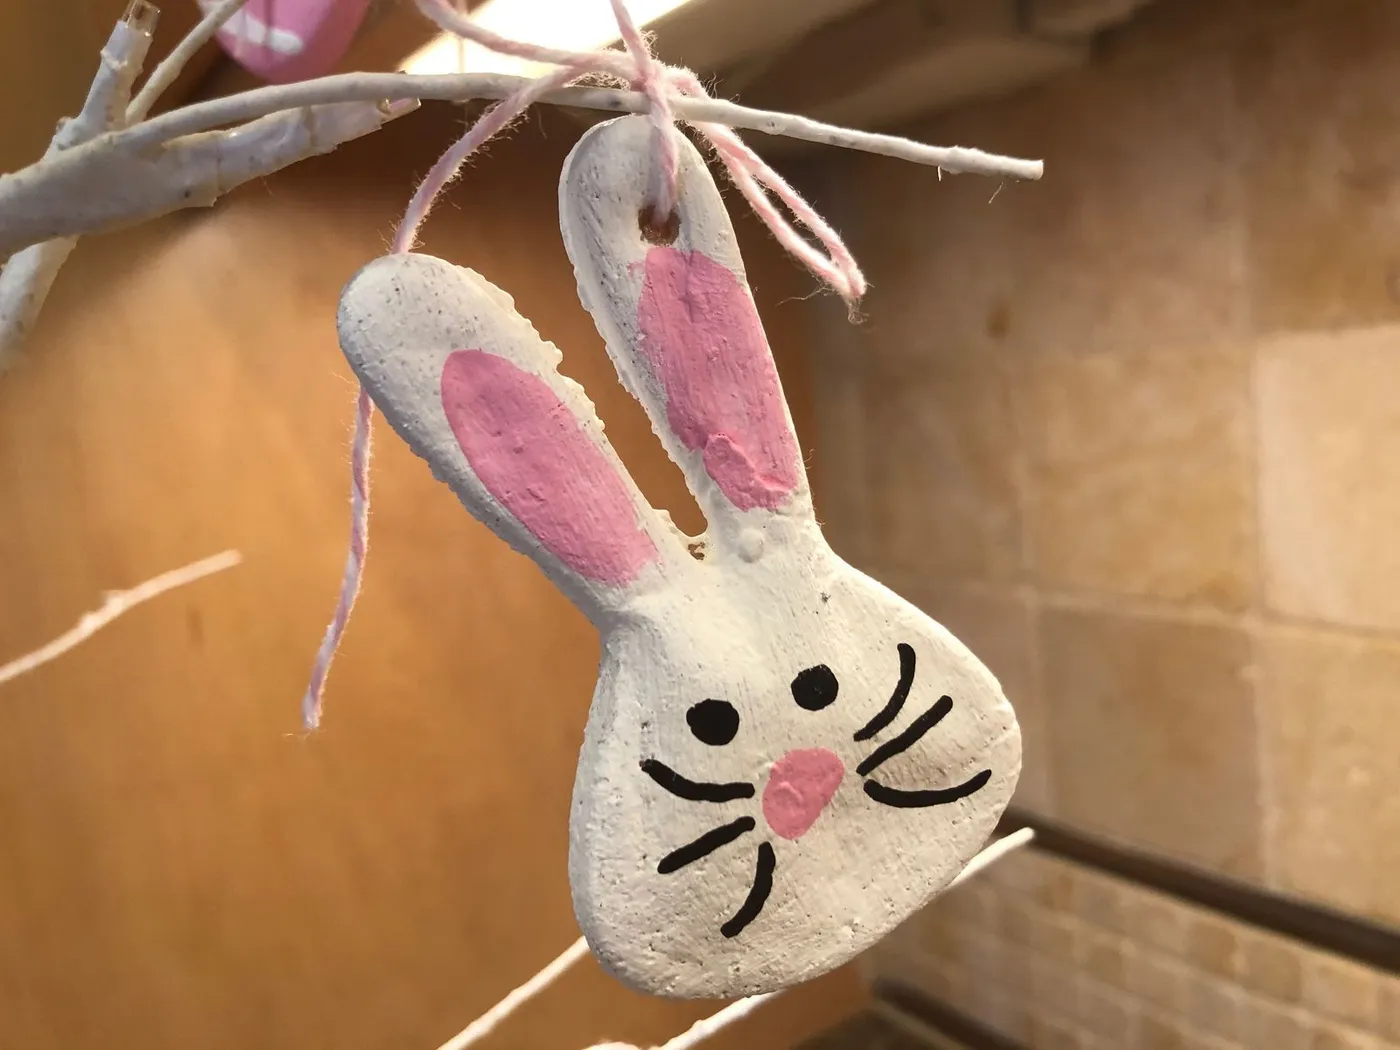
Blanks are the cheap part. Wooden and papier-mâché shapes run $1-$3 each at craft stores and dollar stores, and one $2 bottle of matte white covers a dozen. The detail work takes a $4 liner brush and two accent colors, so a set of six lands under $25. For the same charm from a pinecone and a felt scrap, see Idea #27.
13. Rows of Gingerbread Men With Checkered Ribbon
Rows and rows of the same figure create a pattern that reads as a collection rather than a crowd. The dark eyes and buttons stay minimal on purpose — every extra detail would fight the red-and-white check ribbon, which is the only place the eye needs to land. Think of it as the ornament equivalent of a uniform: repetition, plus one loud accessory.
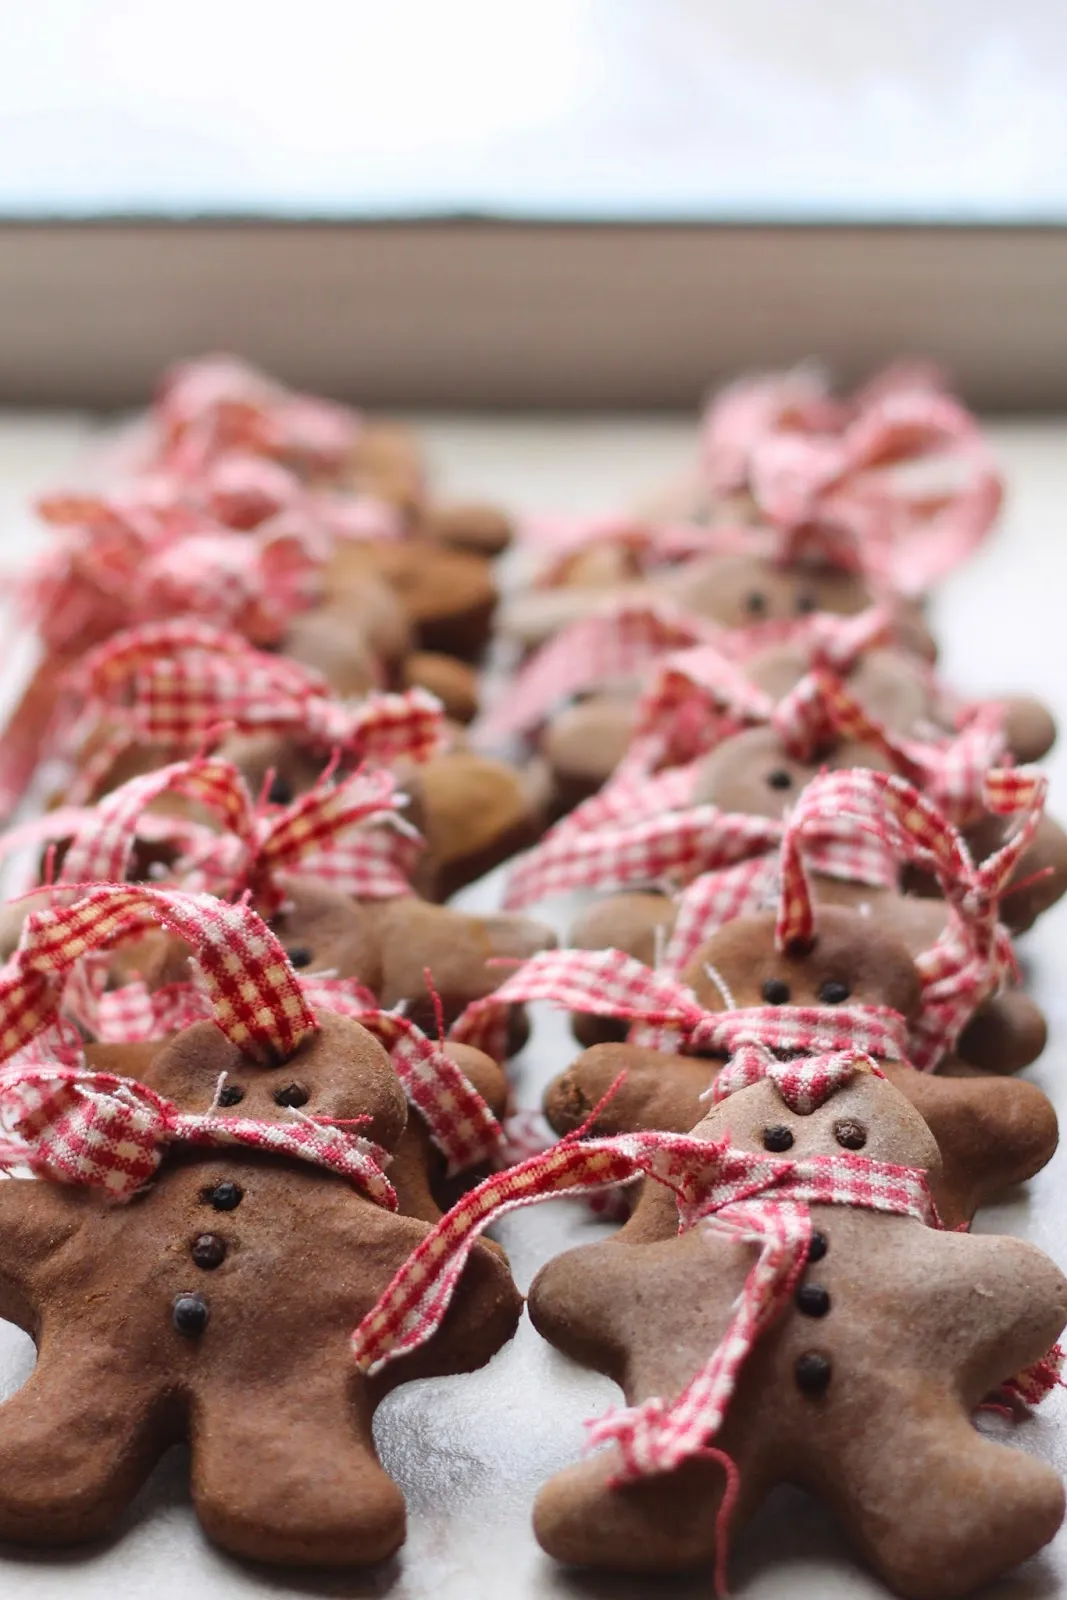
If these are actual cookies, they’re food, and they’ll attract insects, go soft, and crumble unless they’re sealed heavily and hung out of reach. Clay or salt-dough versions are far more forgiving, though the check ribbon will fray and the brown paint chips at the edges after a couple of seasons. Store them flat in a single layer — stacked gingerbread men end up with missing buttons.
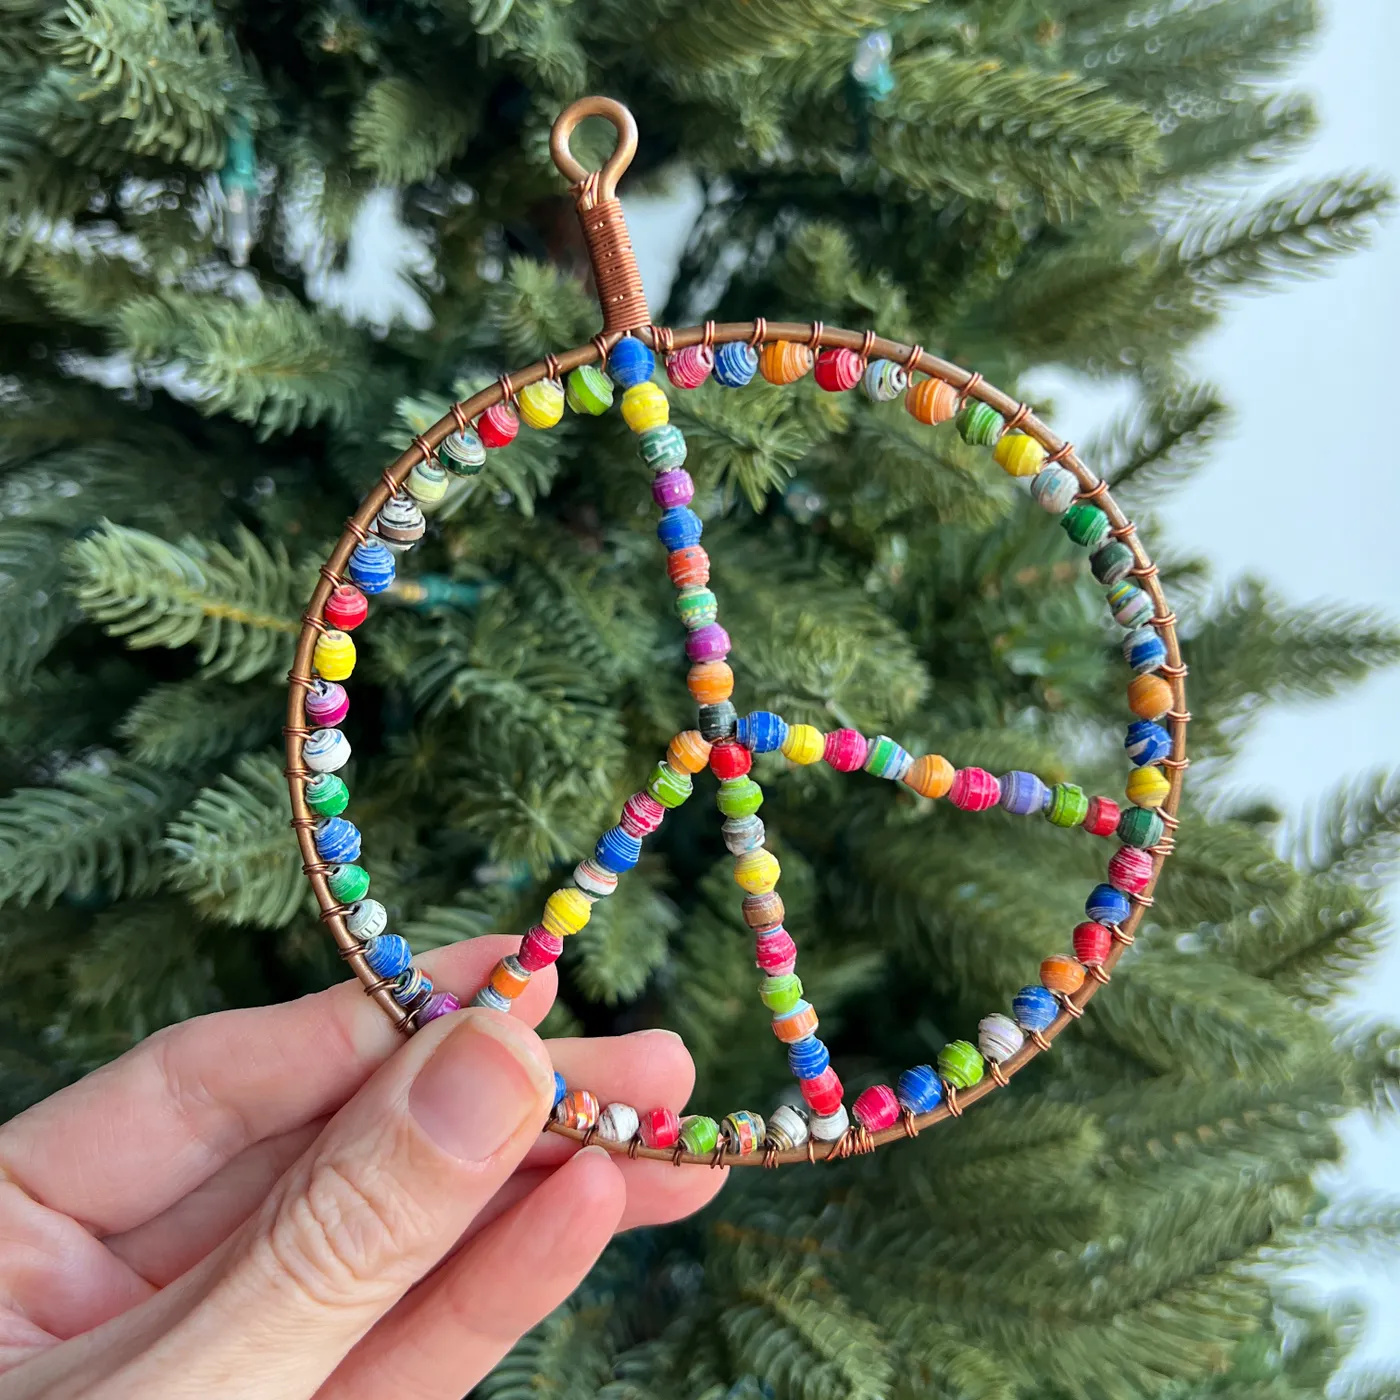
14. A Peace Sign Wrapped in Rolled Paper Beads
- Cut magazine pages, wrapping paper, or old maps into long thin triangles, about 1/2 inch at the wide end.
- Roll each triangle around a skewer from the wide end, keeping the tension even.
- Glue the final point down and slide the bead off to dry for an hour.
- Bend copper wire into a peace sign frame, twisting the ends together.
- Thread beads onto the wire in a loose color rhythm and wrap the ends to close the shape.
An evening’s work, and most of it is rolling.
- 20- or 22-gauge copper wire: $5-$9 a spool
- Magazines, maps, or scrap paper: $0
- Mod Podge or clear craft glue: $5-$8
- Jewelry pliers (or two household pliers): $0-$12
- Clear sealer spray: $7-$10
Total: $17-$39 for the first one, closer to $2 each after that. Skip the sealer and use a glossy glue finish to save another $10.
15. The Patterned Snowflake on a Striped String
This one is kid-sized on purpose — light, flat, and hard to shatter. The risk isn’t breakage, it’s the striped string: thin ribbon like that slips out of a knot on a branch tip. Double-knot it and trim the tails short so small hands don’t tug it loose. Check the painted or glittered edges for flaking before anyone under three gets a turn holding it.
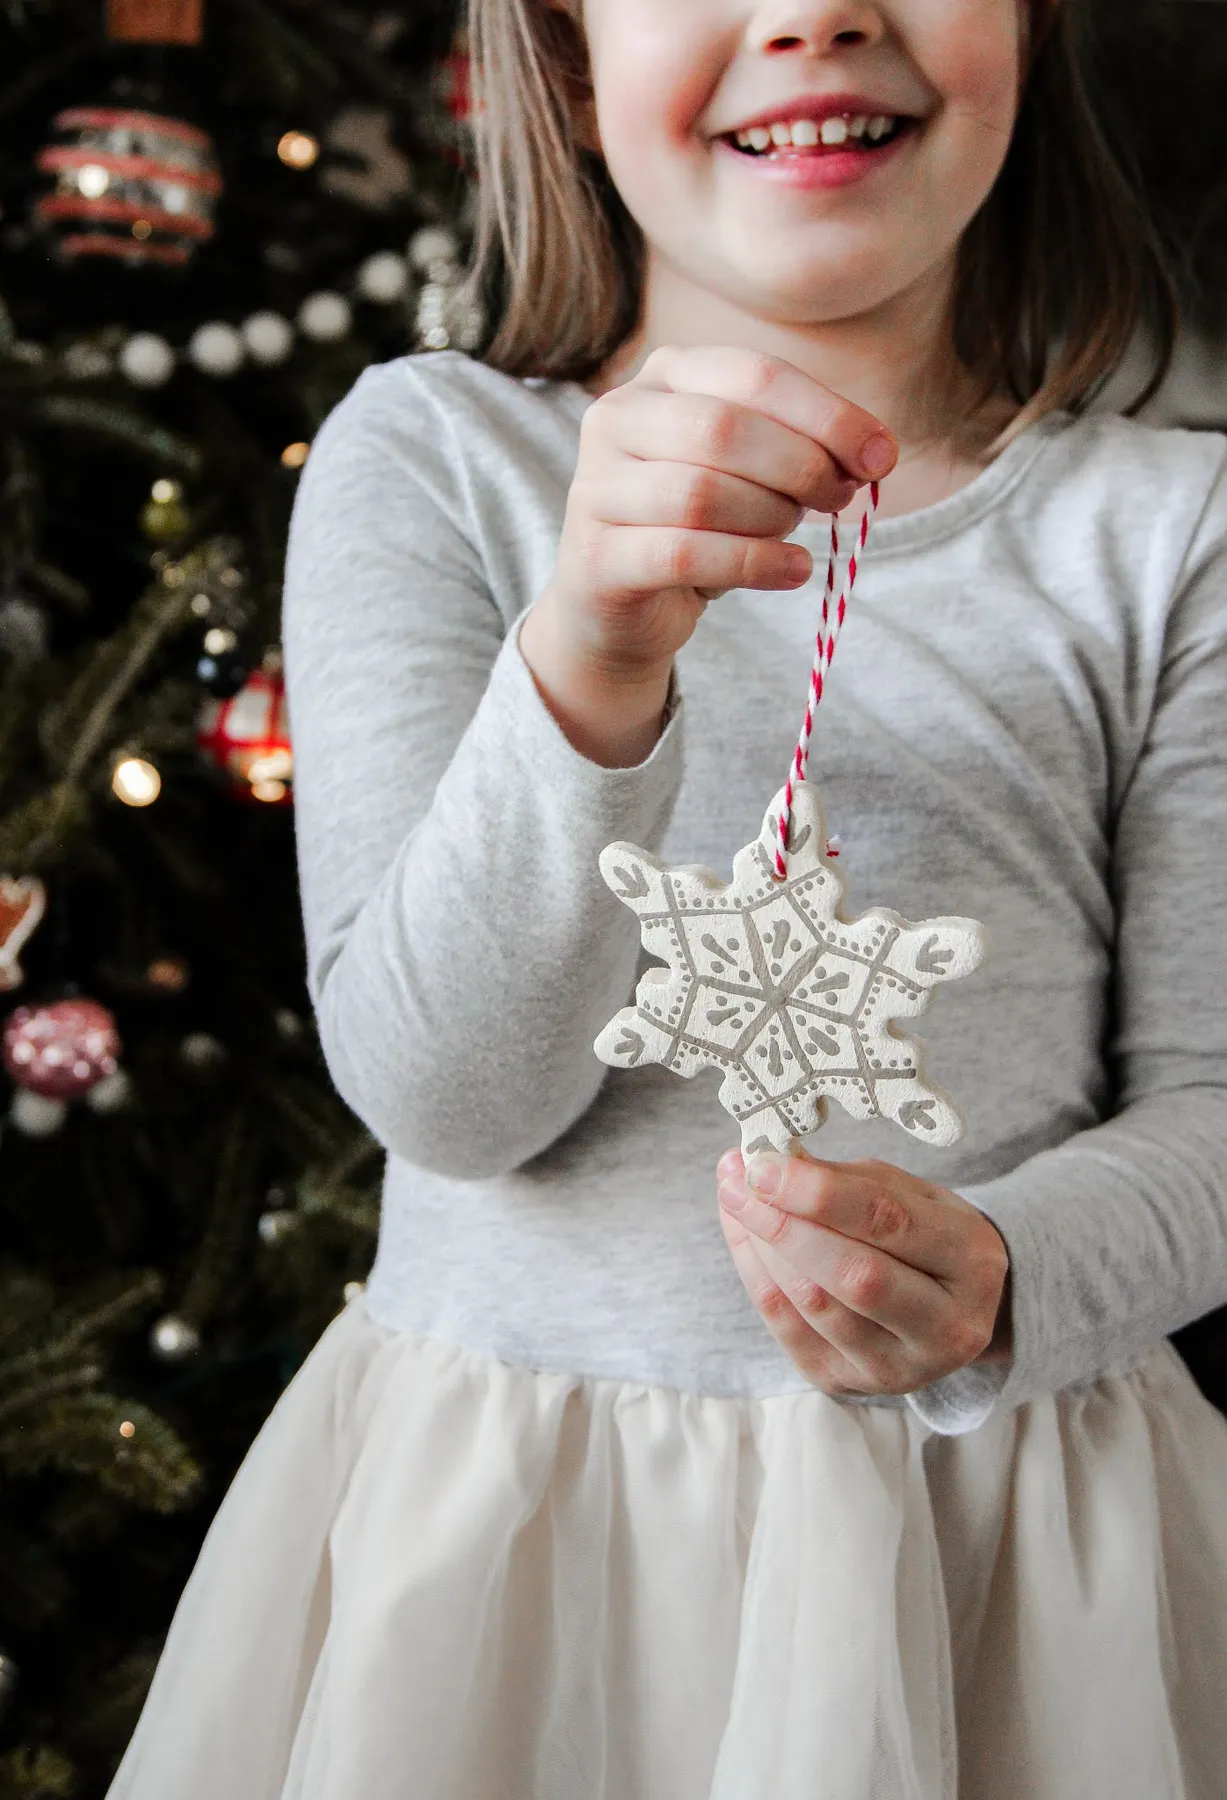
At roughly 4 inches across, this snowflake is a mid-size ornament, and it belongs on a 5- to 7-foot tree where it can be seen from the sofa. On a 3-foot tabletop tree it will dominate everything else on the branches. If your tree runs over 8 feet, either scale the shape up to 6 inches or make a set of five and cluster them in one zone so they hold their own.
16. Red and White Origami Ornaments Among String Lights
The formula here is about 60% red-and-white pattern, 25% warm wood, and 15% pine and light. There’s no third color competing — the rustic table and pine sprigs act as the neutral base, and all the personality lives in the folded pattern. Change it to navy-and-white stripes and the same setup turns coastal. Swap in kraft paper with black ink and it reads modern farmhouse. Same structure, new accent.
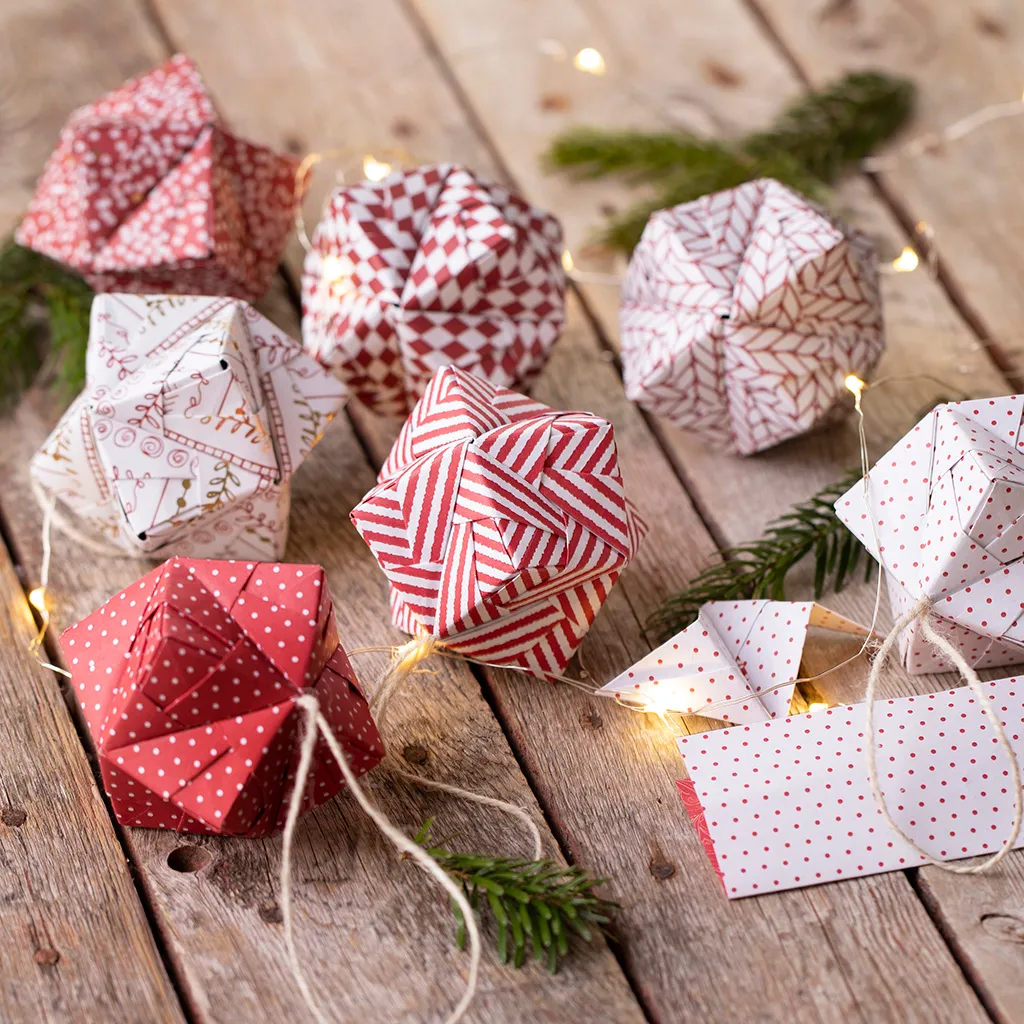
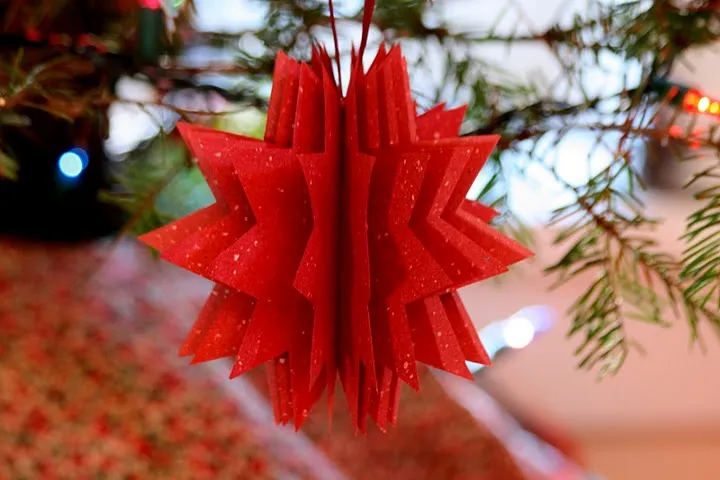
Crease every fold with a bone folder or the back of a spoon. Fingernail creases look soft and slightly greasy, and on a small ornament a soft crease is the difference between crisp and sad. Work on a hard surface, not a tablecloth, and score lightly before folding so the edges stay sharp. Also: warm white lights, not cool — cool white turns red paper pink. For a competing paper technique, see Idea #4.
17. Salt Dough Santas, Snowflakes, and Ugly Sweaters
The childlike painting is the point, but the detail holding it together is the red-and-white baker’s twine on every single ornament. It gives thirty mismatched shapes one shared note. Without it you have a pile of painted blobs; with it you have a collection. That’s the cheapest, fastest way to make a family craft session look intentional instead of chaotic.
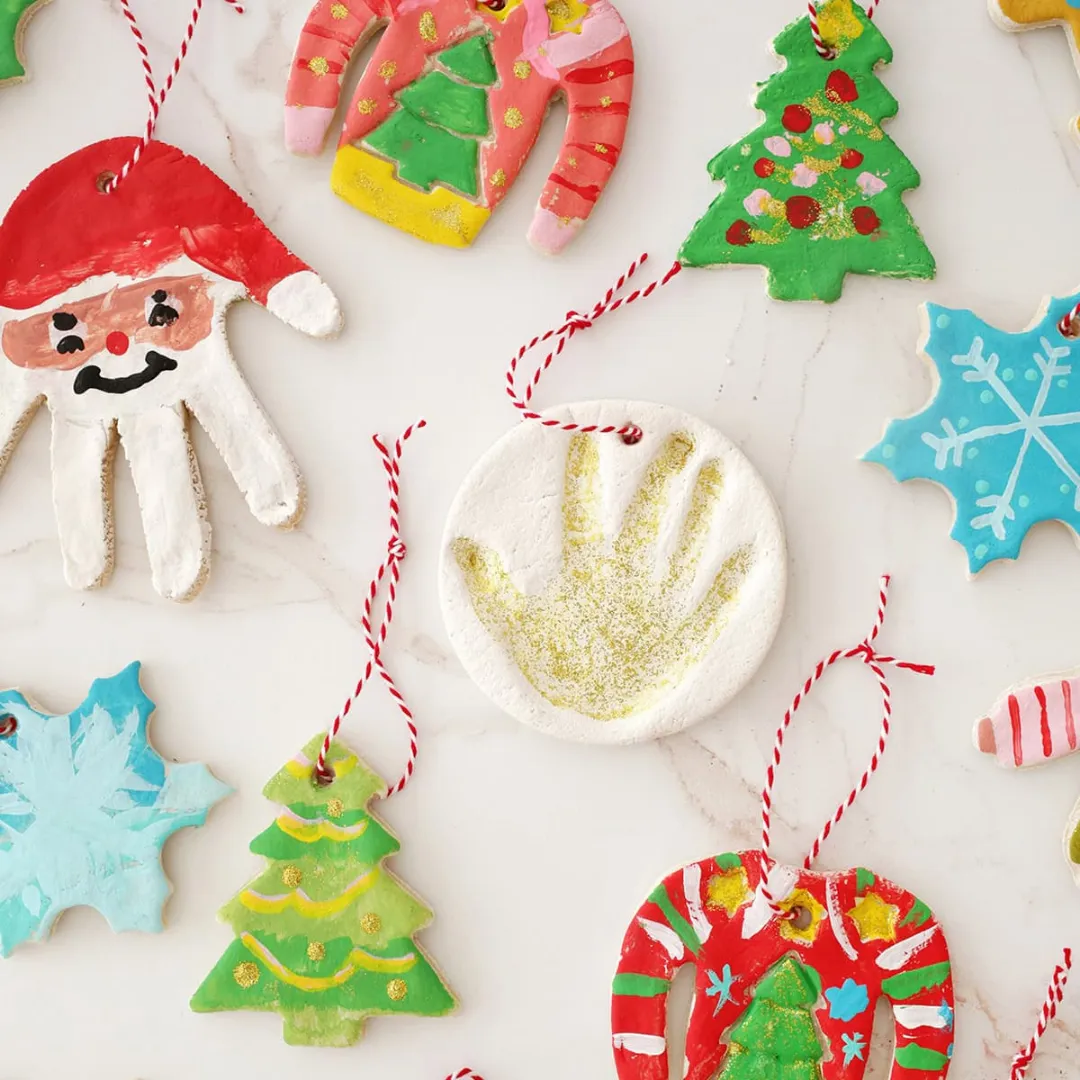
Salt dough is flour, salt, and water — call it 60 cents a batch. Add $6 in acrylic paint, $3 in twine, and a $4 set of cookie cutters and you’re under $15 for twenty ornaments. A matte sealer runs about $8 and buys you more than one December. Compared with a $40 boxed set of hand-painted ornaments, this is the same look for a third of the money and a much better afternoon.
18. Googly-Eyed Santa Faces With Handprint Beards
Googly eyes need to sit slightly above the paint line or they look sunken and a little worried. The other trick is the beard: press those indentations while the dough is soft, then let it dry completely before painting, because white paint cracks along the creases if the surface is still moving. Keep the pom-pom small, too — a big one turns a Santa into a snowman fast.
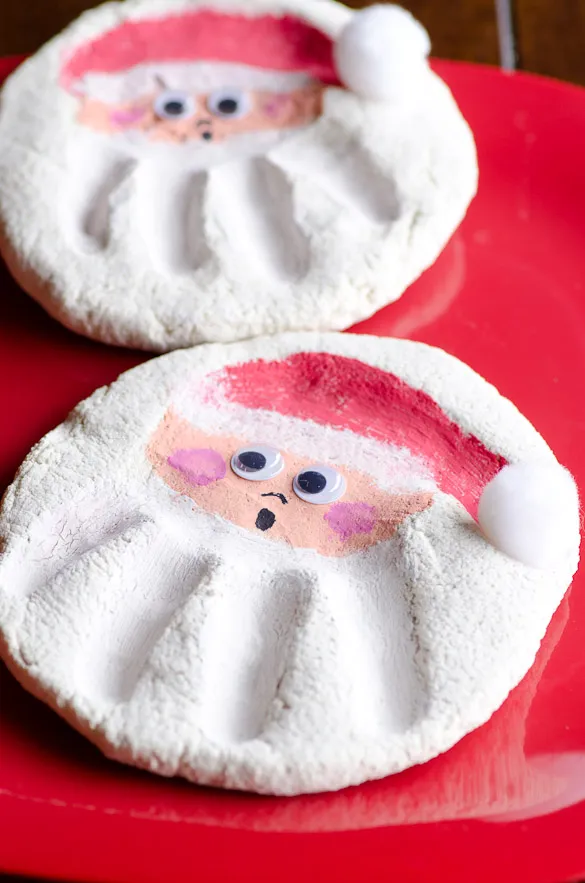
Googly eyes fall off. It’s a when, not an if, especially with a toddler handling them and a warm room in December. Keep a tube of strong craft glue in your ornament box and plan on repairs in January. Dough handprints also hold a faint salty smell for the first year — harmless, but worth knowing if you’re hanging them in a small entryway or a closed closet.
19. The Glitter Station Where Small Hands Do the Work
- Cover the entire work surface — loose glitter travels further than you think.
- Set out one container per embellishment so kids aren’t reaching across wet ornaments.
- Confirm the blanks are fully dry; glitter over damp clay slides right off.
- Keep a damp cloth and a dry brush within arm’s reach for quick fixes.
- Have a wax-paper drying tray ready before anyone starts squeezing glue.
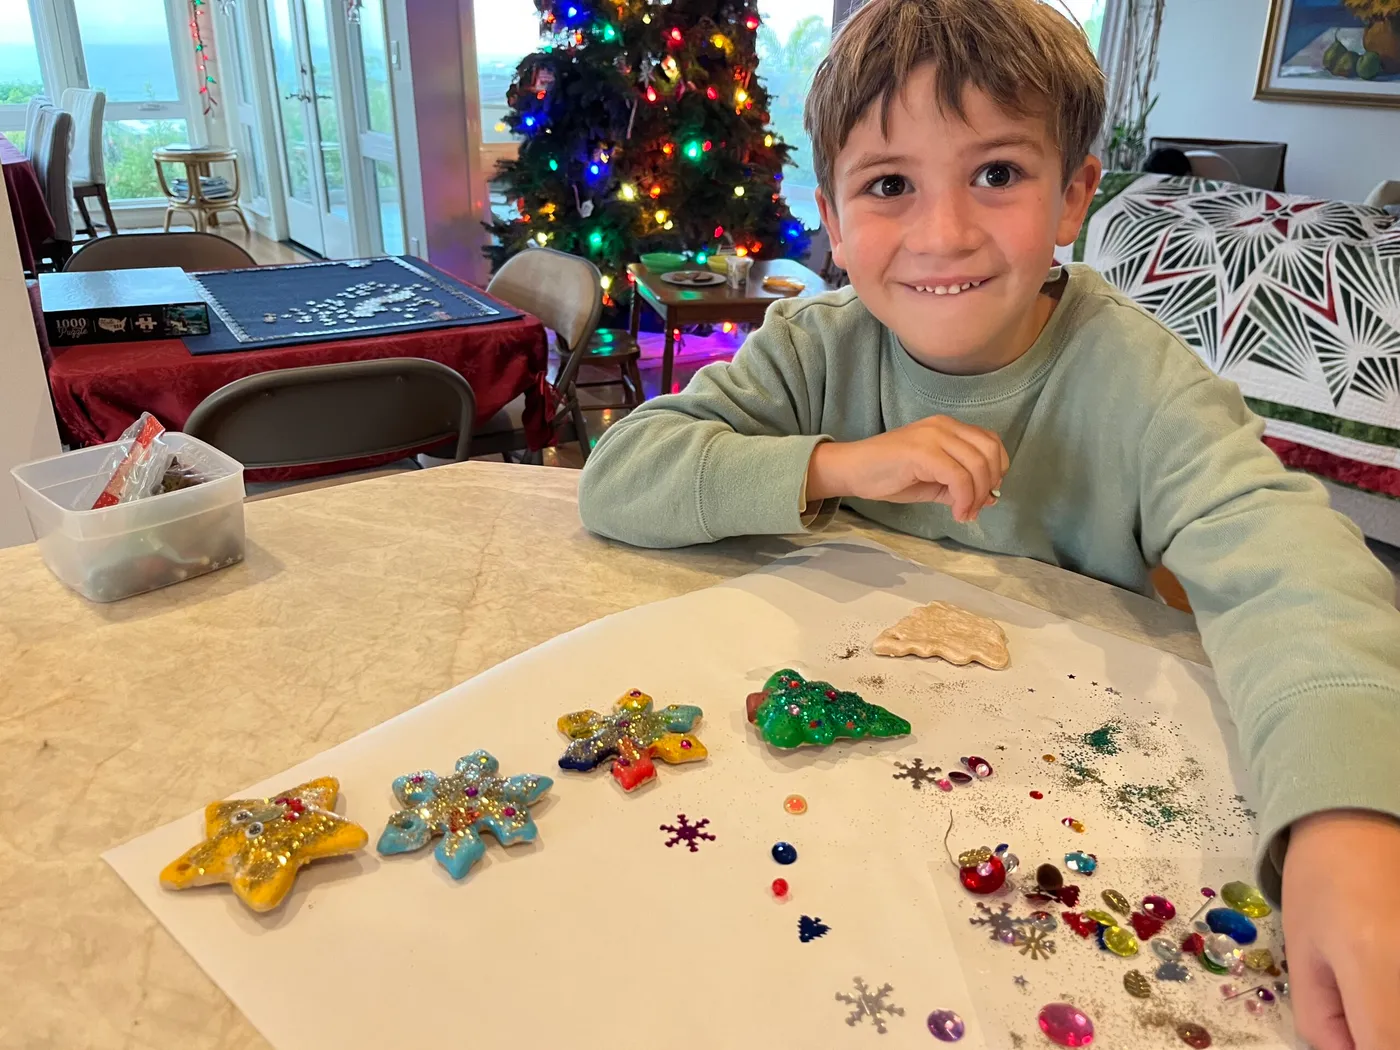
The setup matters more than the ornaments. Glitter, gems, and glitter glue are all flat, fine materials, so the light-colored star, snowflake, and tree shapes stay visible underneath instead of disappearing. Working on white paper means stray glitter reads as part of the design. Handing each kid one ornament at a time keeps the layers thin enough that the glue actually holds when it dries.
20. Kraft Paper Stars, Charcoal Matte, and Gold Pinecones
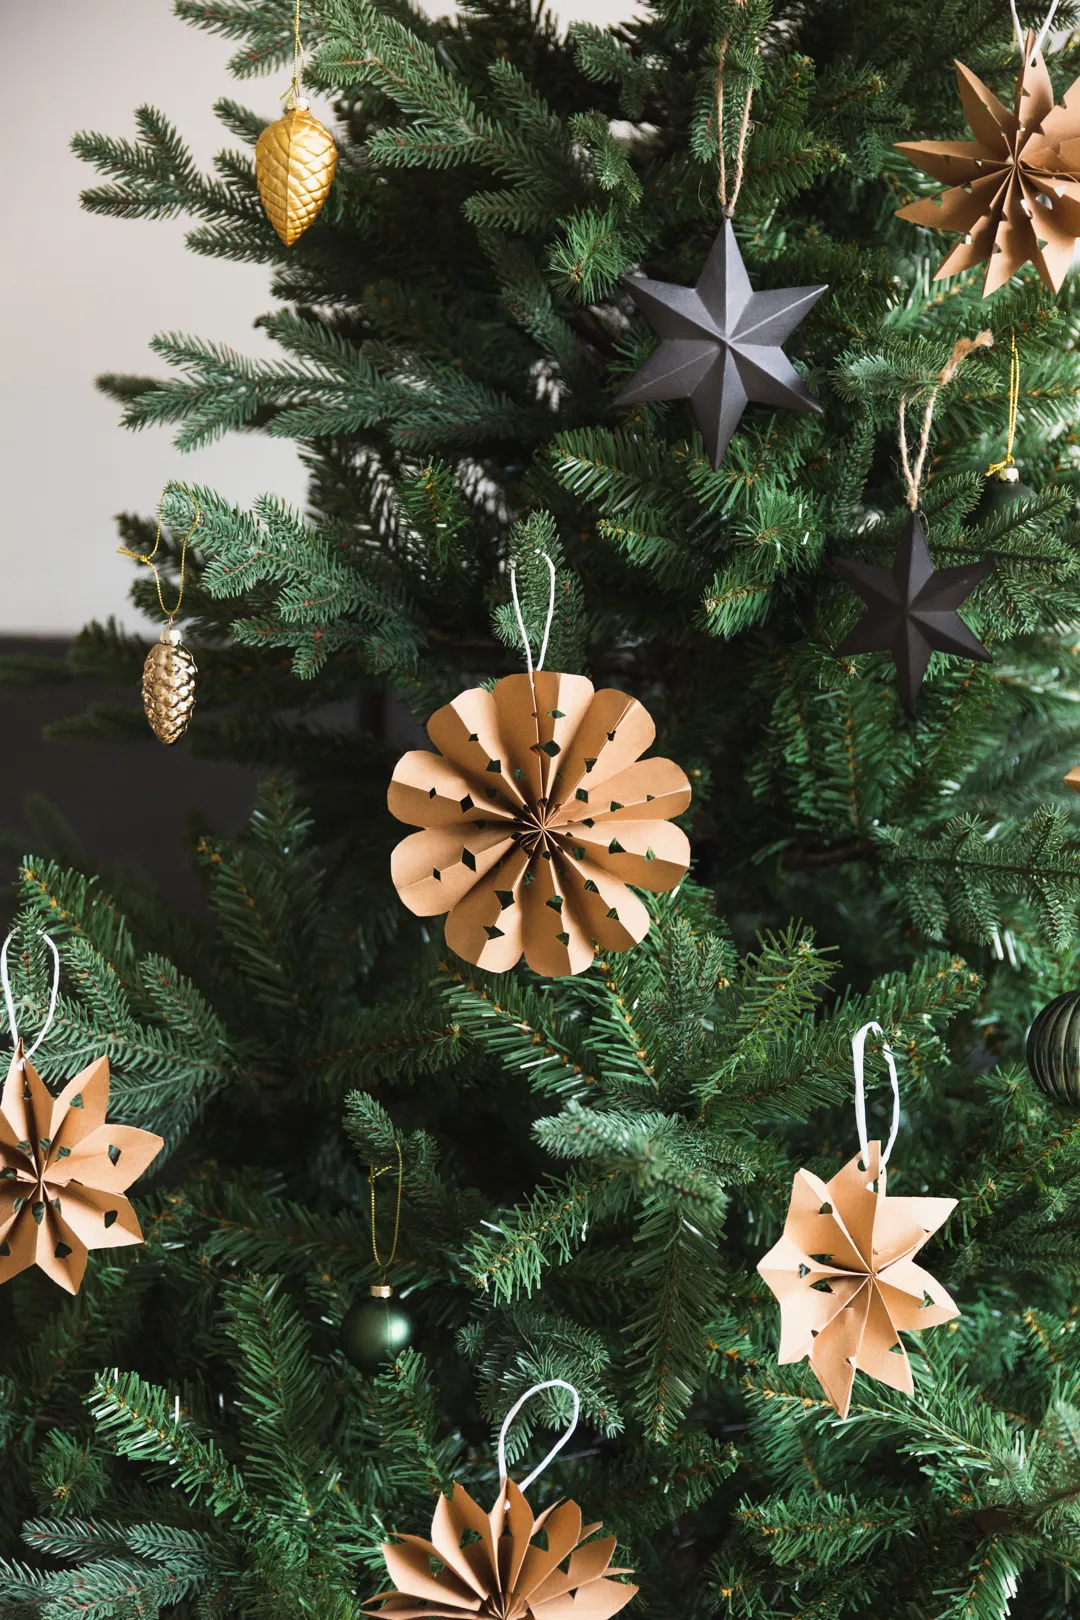
Think of it as 55% dark green, 20% kraft brown, 15% matte charcoal, and 10% gold. The gold is shiny and metallic, so it stays capped at a tenth — any more and the tree tips toward formal. Swap the kraft for white paper and it goes clean and modern; swap charcoal for black and the whole thing sharpens up. Keep the greens matte so the gold has something dull to work against.
- Kraft paper and cardstock: $6-$12
- Matte acrylic paint in gray and green: $8-$14
- Gold spray paint for the pinecones: $6-$10
- Twine, gold chain ribbon, and white string: $6-$12
- Plain green ball ornaments to fill gaps: $12-$20
Total: $38-$68, with the handmade pieces under $2 each. Collect pinecones on a walk and paint only the tips — one $7 can covers forty.
21. Santa Faces Made From a Cut-Up Egg Carton
This is the near-zero-dollar ornament. An egg carton, acrylic paint, and a fine brush — that’s the whole supply list. Cardboard cartons hold paint better than foam ones, and cutting each cup with a 1/4-inch rim leaves you a natural hat shape to work from. A $6 set of craft paint in red, white, green, and blue plus a $3 brush covers a full carton, which is twelve ornaments.
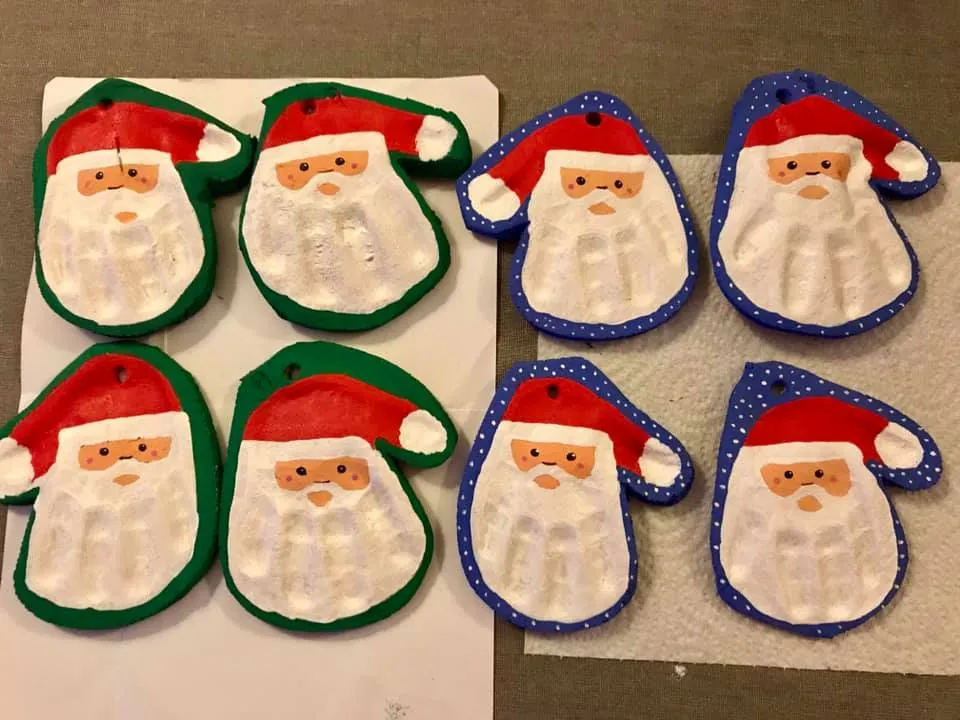
Recycled-material ornaments are surging because the craft internet rediscovered how beautifully cardboard takes paint. Egg cartons, paper tubes, and cereal boxes are the new blank canvas, and the dotted green-and-blue borders here are a very 2026 detail — that hand-drawn frame look showing up everywhere from stationery to cookie decorating. Keep the painted features simple so the faces stay charming instead of unsettling.
22. Cream Ornaments With One Line of Red and Green Dots
Four 3-inch ornaments are a tabletop story, not a tree’s worth. They suit a small potted spruce, a single arching branch in a vase, or a wreath where each one gets its own quadrant. On a full-size tree, make twenty and space them evenly — one cream ornament per branch tip — so the eye catches the red and green dots at regular intervals. It’s the same painted-detail restraint as Idea #12.
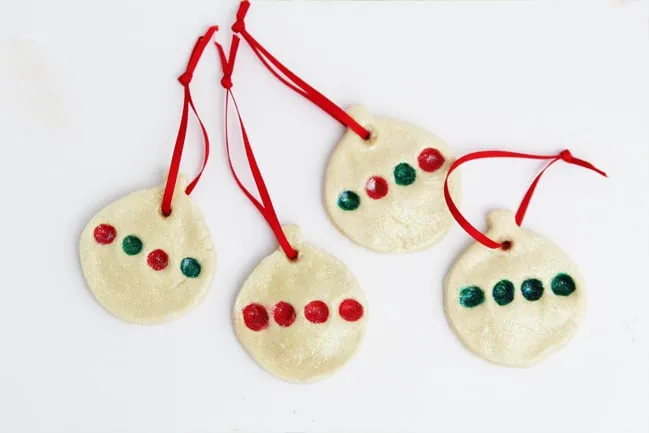
One thin horizontal line of dots beats a scattered pattern every time. Dip the handle end of a small brush in glossy paint, touch it down in a straight row with the dots about 1/4 inch apart, and let that row dry before starting the next. Gloss against the matte cream is the contrast that makes these look designed rather than decorated. Keep the ribbon loop short so they hang tight to the branch.
23. The Swirl Lollipop Ornament on a Popsicle Stick
- Glue a wooden popsicle stick to the back of a flat disc blank for the handle.
- Paint a red and white spiral on the front, starting at the center and pulling outward.
- Let it dry completely, then go over any thin spots with a second pass.
- Seal with gloss varnish so it reads like candy instead of chalk.
- Tie a small red satin bow at the base of the stick, right where it meets the disc.
About 30 minutes plus drying time, roughly $5 per ornament.
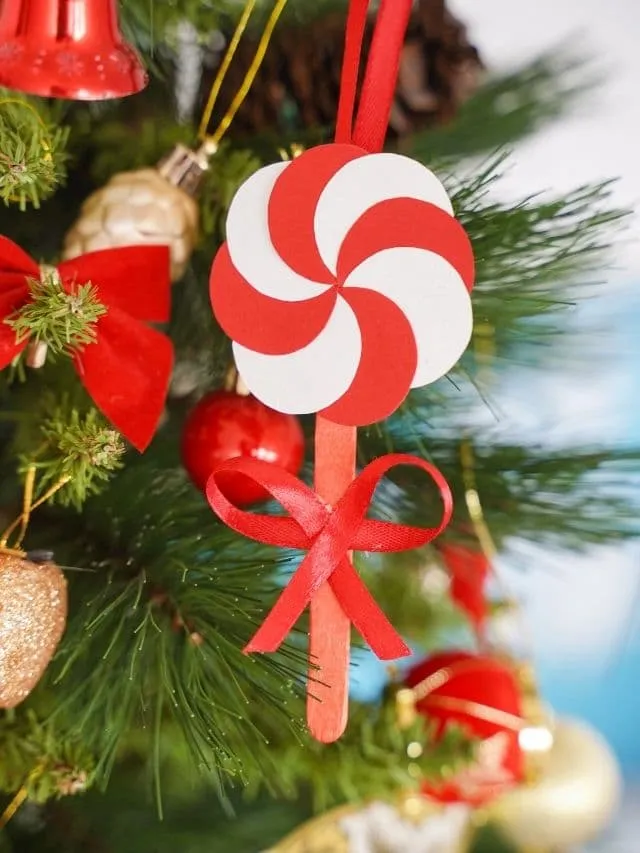
The popsicle stick is the whole idea. Without it you have another round painted ornament; with it, everyone instantly reads lollipop — including every kid who walks past the tree. It’s practical, too, since the stick gives small hands something to grab that isn’t wet paint. Buy the wide craft sticks rather than the skinny ones, and glue them slightly off-center so the disc still hangs level.
24. Metallic Silver Hearts and Stars on Blue Ribbon
- Air-dry clay or salt dough: $8-$14
- Metallic silver acrylic paint: $6-$10
- Blue satin ribbon: $4-$7
- Cookie cutters and a small embossing tool: $8-$15
- Clear satin or matte sealer: $7-$10
Total: $33-$56 for a large set, about $1.50-$2.50 per piece. Buy silver paint at a discount store and use shoe ribbon instead of satin — nearly half the price, and the knot hides the difference.
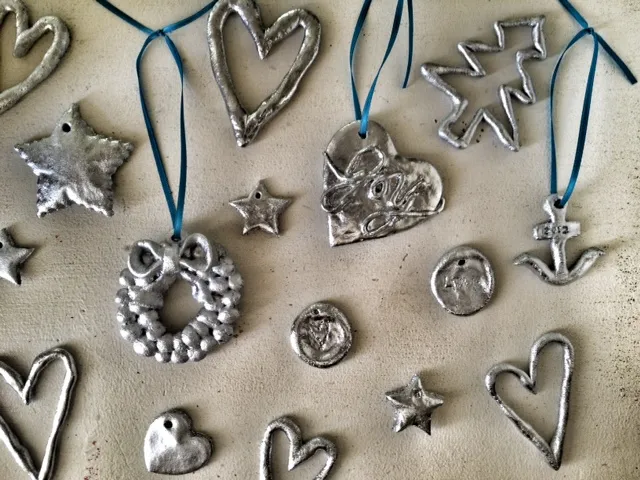
There’s exactly one accent color in this whole set, and it’s a very particular blue. That single choice keeps silver from reading cold or bridal; with red ribbon these would feel traditional, with white they’d look like wedding favors. The uneven, embossed surfaces matter too — smooth metallic ornaments look store-bought, and the small dents are the proof of a human hand.
25. A Red Teardrop Ornament in a Gnome-Print Bow
You don’t need handmade glass for this. Plain red teardrop ornaments come in packs of six for around $8-$12 at big-box stores, and all the personality lives in the ribbon. A yard of gnome-print ribbon with silver trim runs $4-$8 and dresses four ornaments, so a full set lands near $20 and reads like a boutique find. Thrift stores are also full of red ornaments in January, usually a quarter apiece.
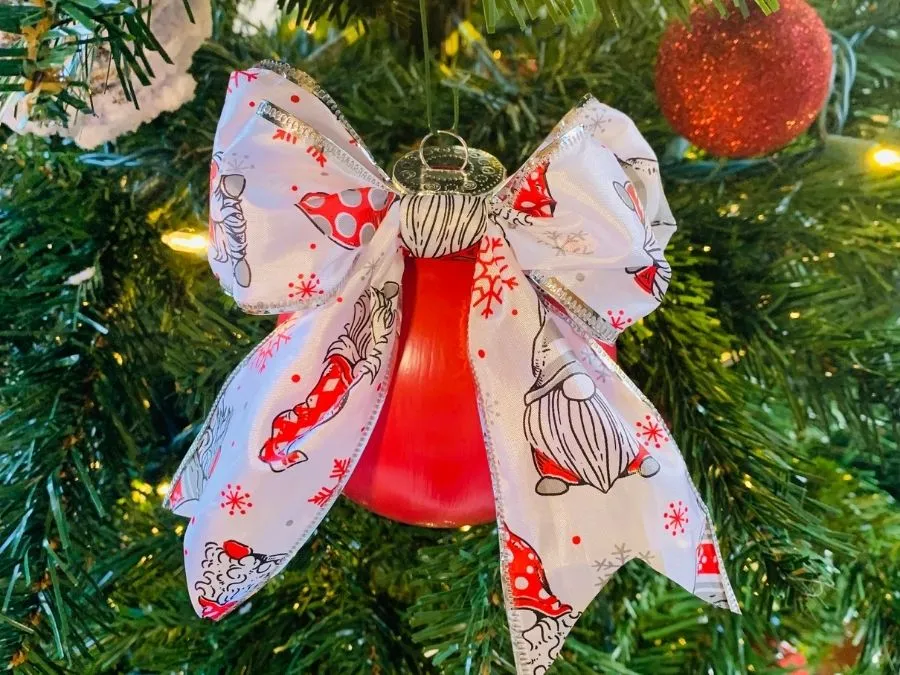
Ribbon bows flatten. After a season pressed against a tree, the loops lose their lift, and a flattened gnome-print bow looks tired in a hurry. Store them loose in a tray instead of crushed in a box, and re-fluff each bow with your fingers before hanging. If the ornament is glass, keep it off low branches and away from radiators — thermal shock breaks glass ornaments far more often than dropping them does.
26. Nutcrackers, Straw Stars, and Lanterns on Branches
Three different ornament types, one shared palette — that’s the entire formula. Nutcracker figures, straw stars, and paper lanterns have nothing in common structurally, but red, white, and gold makes them a family. The weathered green door behind them reinforces the palette instead of fighting it. On a white wall, you’d need half as many ornaments to get the same festive hit, and the arrangement would read noticeably cooler.
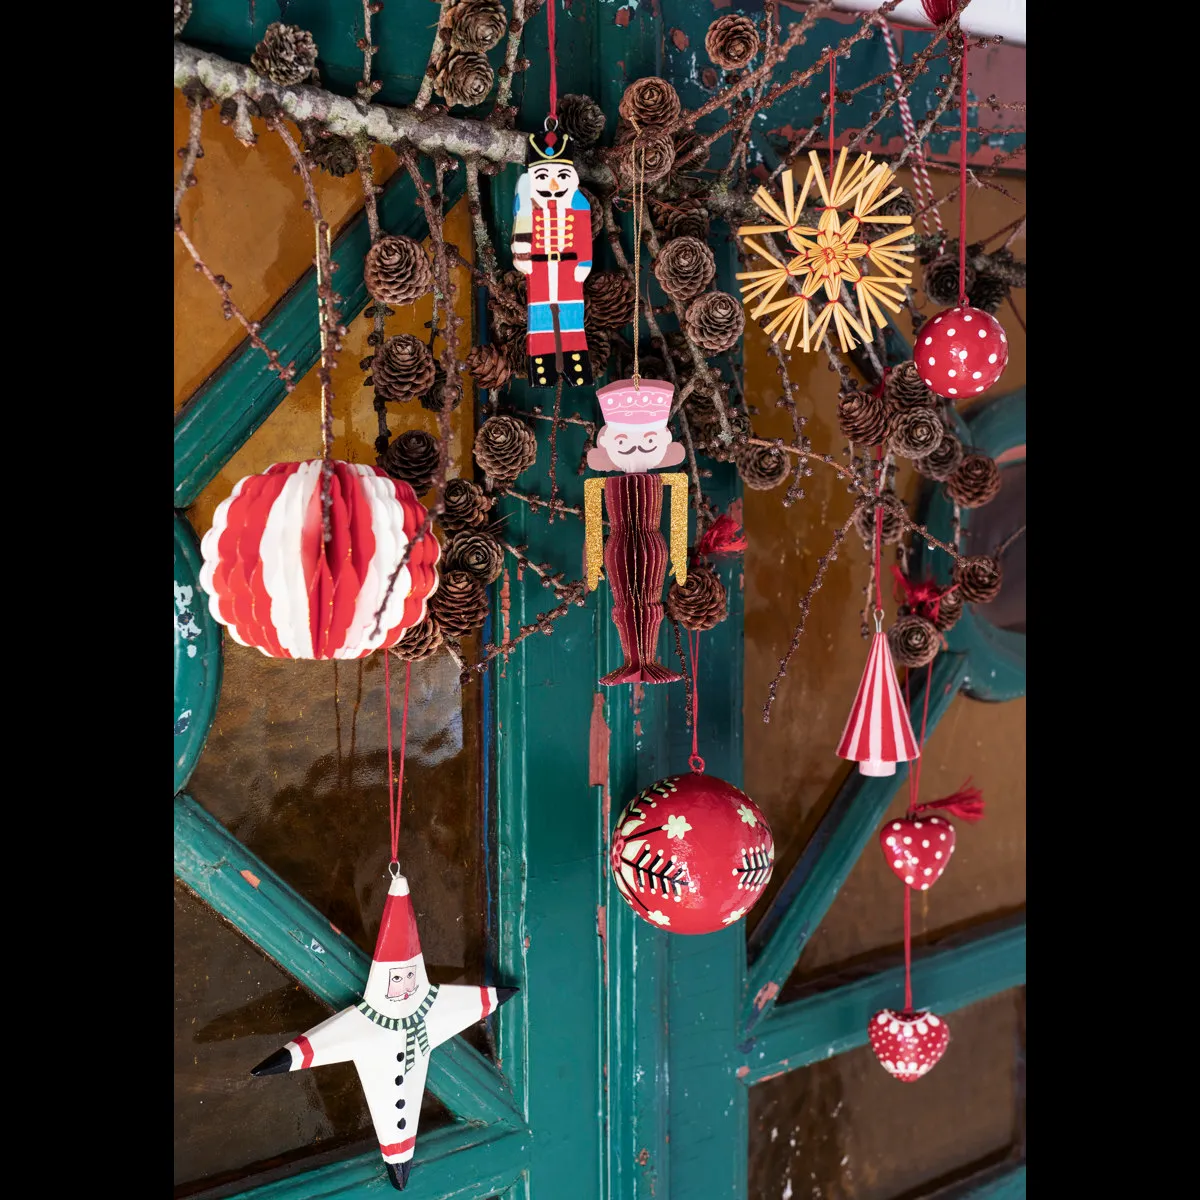
Branch displays like this work in narrow spots: a 2-foot-wide wall, a doorway, an entry alcove with a 7-foot ceiling. Hang the branch so the lowest ornament clears eye level by a few inches, which usually means mounting at 6.5 to 7 feet. On a tabletop, keep the branch under 18 inches wide. Small pinecones tucked along the length add weight at the bottom so the arrangement doesn’t float.
27. The Pinecone Owl in a Little Felt Santa Hat
- Choose a pinecone that stands on its base and pick off any loose scales.
- Cut two small felt wings and a triangle beak, then glue them into the side scales.
- Add two googly eyes just above the beak with a dot of strong craft glue.
- Cut a red felt hat with a white trim strip and glue it on top, tilted slightly.
- Hot-glue a twine loop to the back and let everything cure for an hour.
About 20 minutes and $4-$6 per owl.
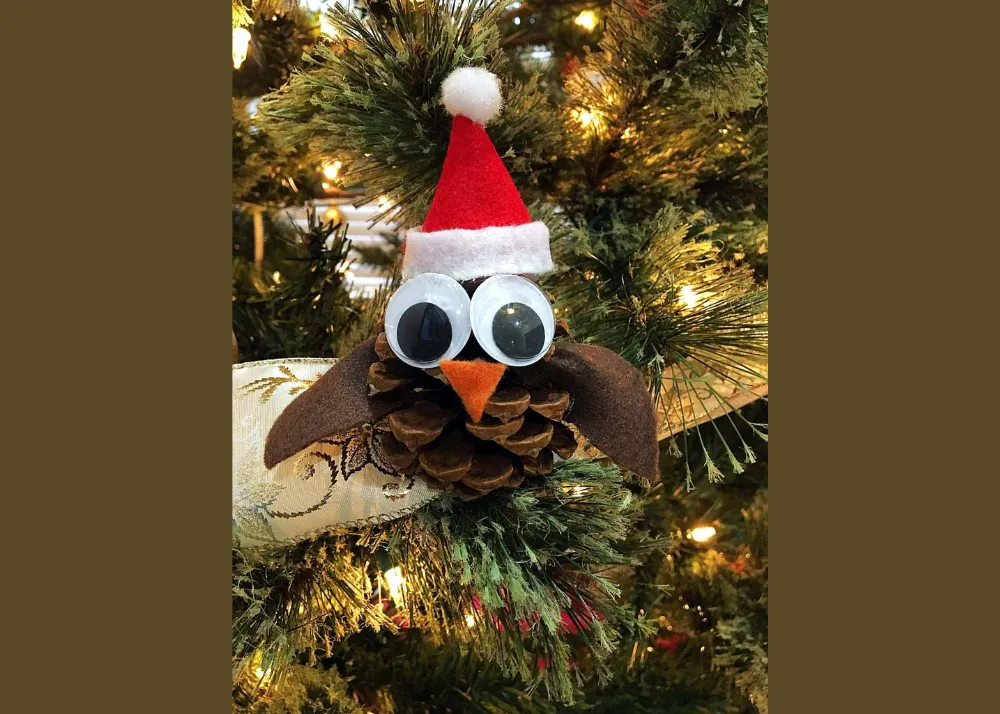
Bake or freeze the pinecones first — 200°F for about an hour on a foil-lined sheet closes the scales and deals with anything living inside. Do that before gluing anything on, because a pinecone that opens later will shed the beak and hat right off. Hot glue grips pinecone scales; white craft glue does not. Orange felt on the wings matches the natural cone color better than brown.
28. Glitter Glue Pens on Plain Star and Tree Blanks
- Check that the star and tree blanks are completely dry — glitter glue over damp dough slides off within a day.
- Test each glitter glue pen on scrap paper; some clog, then dump a puddle on the first squeeze.
- Set out a shallow tray so wet ornaments sit somewhere without smearing.
- Decide the design before the first line — bare blanks forgive mistakes, glitter does not.
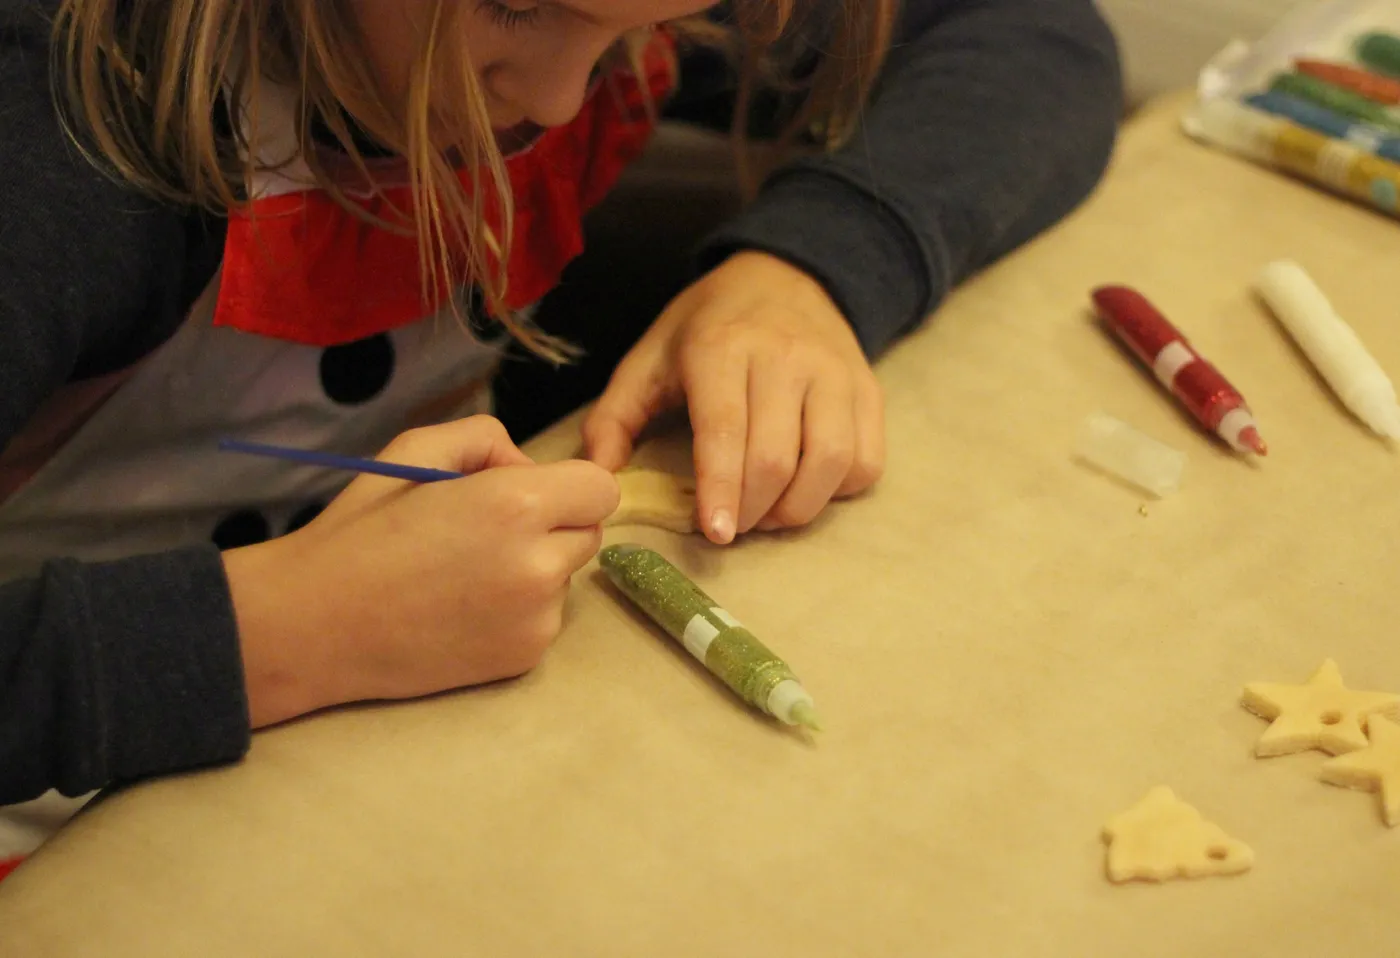
Glitter glue is the least durable finish on this list. It dries raised, so it catches on tissue paper in storage and flakes at the corners by the second season. One thin coat of clear sealer helps more than you’d expect; three coats dull the glitter into gray. If you want the look to survive a few Decembers, use flat sequins and tacky glue instead — a soft brush sweeps them clean.
29. A Tree of Dried Oranges, Cinnamon, and Pinecones
The math here is roughly 60% green foliage, 25% warm neutrals from cream twine and light wood, and 15% orange-brown from fruit, cones, and cinnamon. Lights stay warm white so the fruit looks fresh rather than dusty. Want it less rustic? Swap cinnamon for bay leaves and the palette turns a shade more elegant. Want more color? Add dried cranberries, but keep them under 5% or the tree reads autumn instead of Christmas.
Dried orange slices look beautiful for about eight weeks, then they dull. In a humid room they can go soft and grow mold by February. Slice them thin, dry at 200°F for three to four hours until brittle, and store them in a sealed jar with a silica packet off-season. For the felt-and-bead version that never fades, see Idea #5; to add red and white without losing the rustic read, Idea #1 is the move.
Start With One Ornament — Your Tree Will Follow
You don’t need a matching set, a craft room, or one perfect afternoon to pull this off — a single clay handprint, one pinecone owl, or one folded paper star is enough to start a collection that grows every December. Pick the idea here you can finish this weekend and let the rest of the tree fill in around it. 📌 Pin this guide now so next year’s ornaments come together even faster.