Kitchen organization has become one of the most searched home topics in 2026, especially among Americans looking to maximize every inch of their cooking spaces. Whether you’re dealing with a cramped apartment galley or a sprawling suburban kitchen that’s accumulated years of gadgets, the need for smart storage solutions has never been more urgent. Pinterest users are flocking to visual inspiration that blends function with beauty, seeking systems that actually work in real life—not just in staged photos. This guide walks you through actionable kitchen organization ideas that address everything from tiny pantries to aesthetic countertop displays, with strategies borrowed from Japanese minimalism, restaurant efficiency, and clever DIY hacks. You’ll find solutions for every budget, space constraint, and organizational challenge you’re facing right now.
1. Tiny Pantry Vertical Zoning
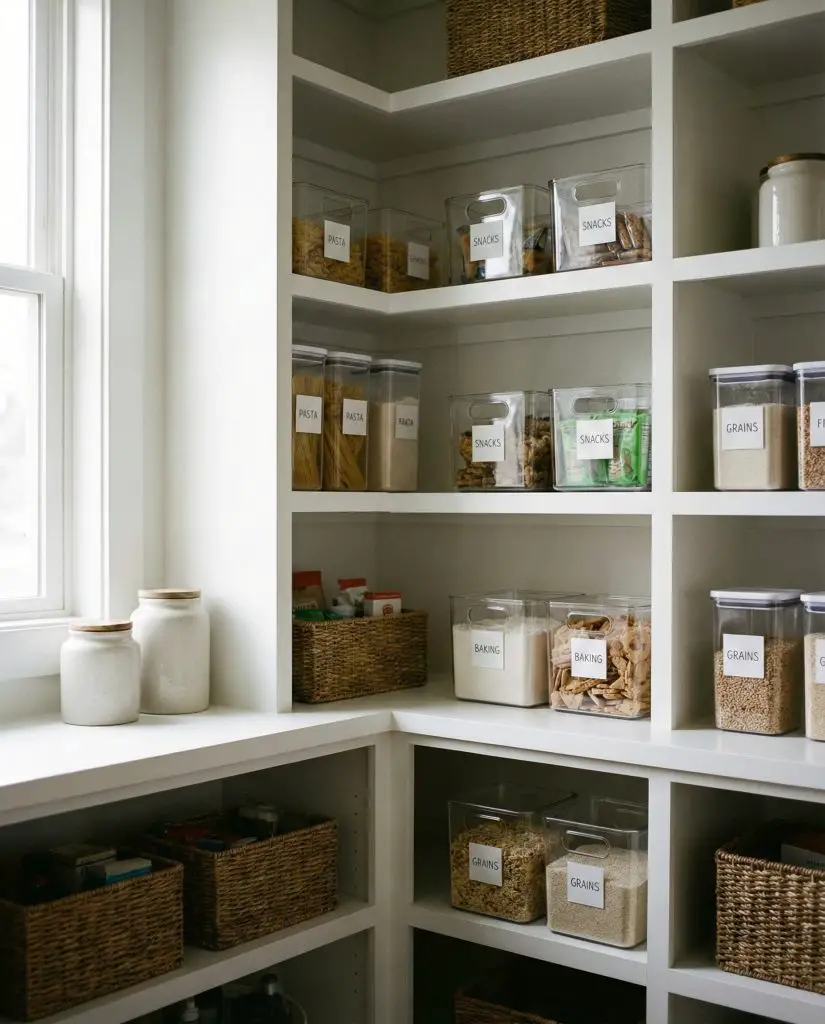
When you’re working with a tiny pantry that barely fits a vacuum cleaner, vertical zoning changes everything. This approach divides your pantry into distinct height-based zones—breakfast items up top, snacks at eye level, baking supplies below—so you’re not digging through chaos every morning. Use stackable clear bins from Dollar Tree or Amazon to create these visual boundaries, and suddenly that cramped closet feels like an intentional storage system. The key is assigning every inch a purpose before you buy a single container.
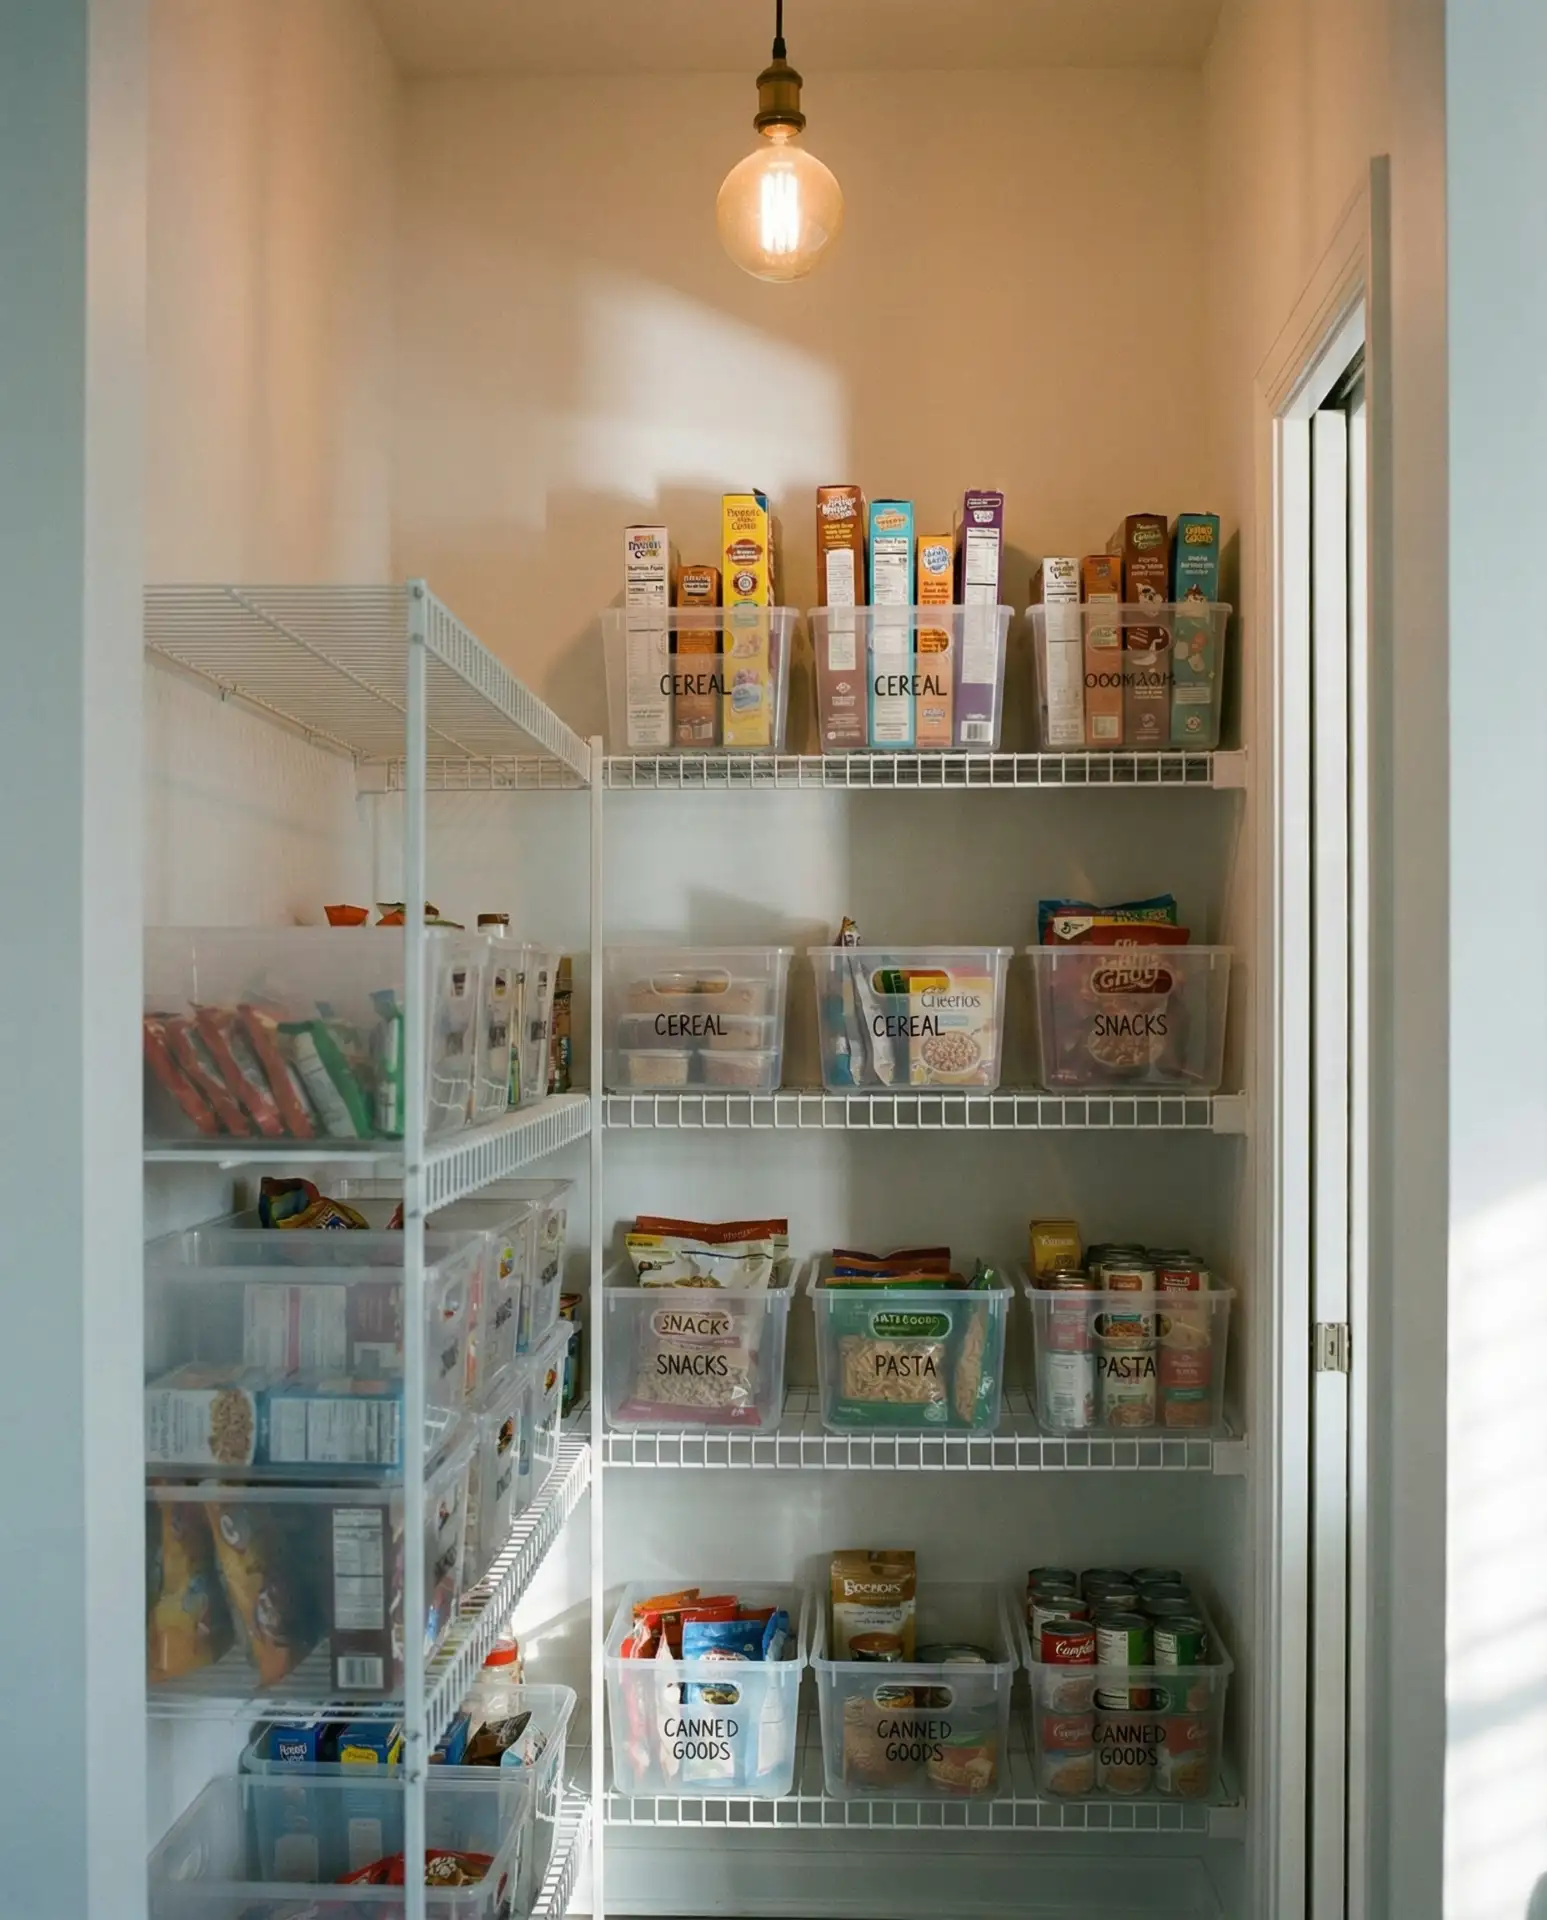
Most Americans underestimate how much vertical space they’re wasting in small pantries, leaving the top two shelves nearly empty while the middle section overflows. Install adjustable shelving or use freestanding wire racks that let you customize heights as your needs change—especially useful for tall cereal boxes versus short spice jars. This works best in apartments where you can’t modify built-ins, giving you flexibility without damaging walls or losing your security deposit.
2. Dollar Store Drawer Dividers
Kitchen drawer chaos is a universal frustration, but you don’t need expensive custom inserts to solve it. Hit your local dollar store and grab small plastic bins, utensil trays, and expandable dividers that cost a fraction of what you’d pay at container stores. These cheap solutions work surprisingly well for corralling everything from measuring spoons to wine openers, and if your drawer dimensions change or you move, you’re only out a few bucks. The trick is measuring your drawers first so you’re not guessing sizes in the aisle.
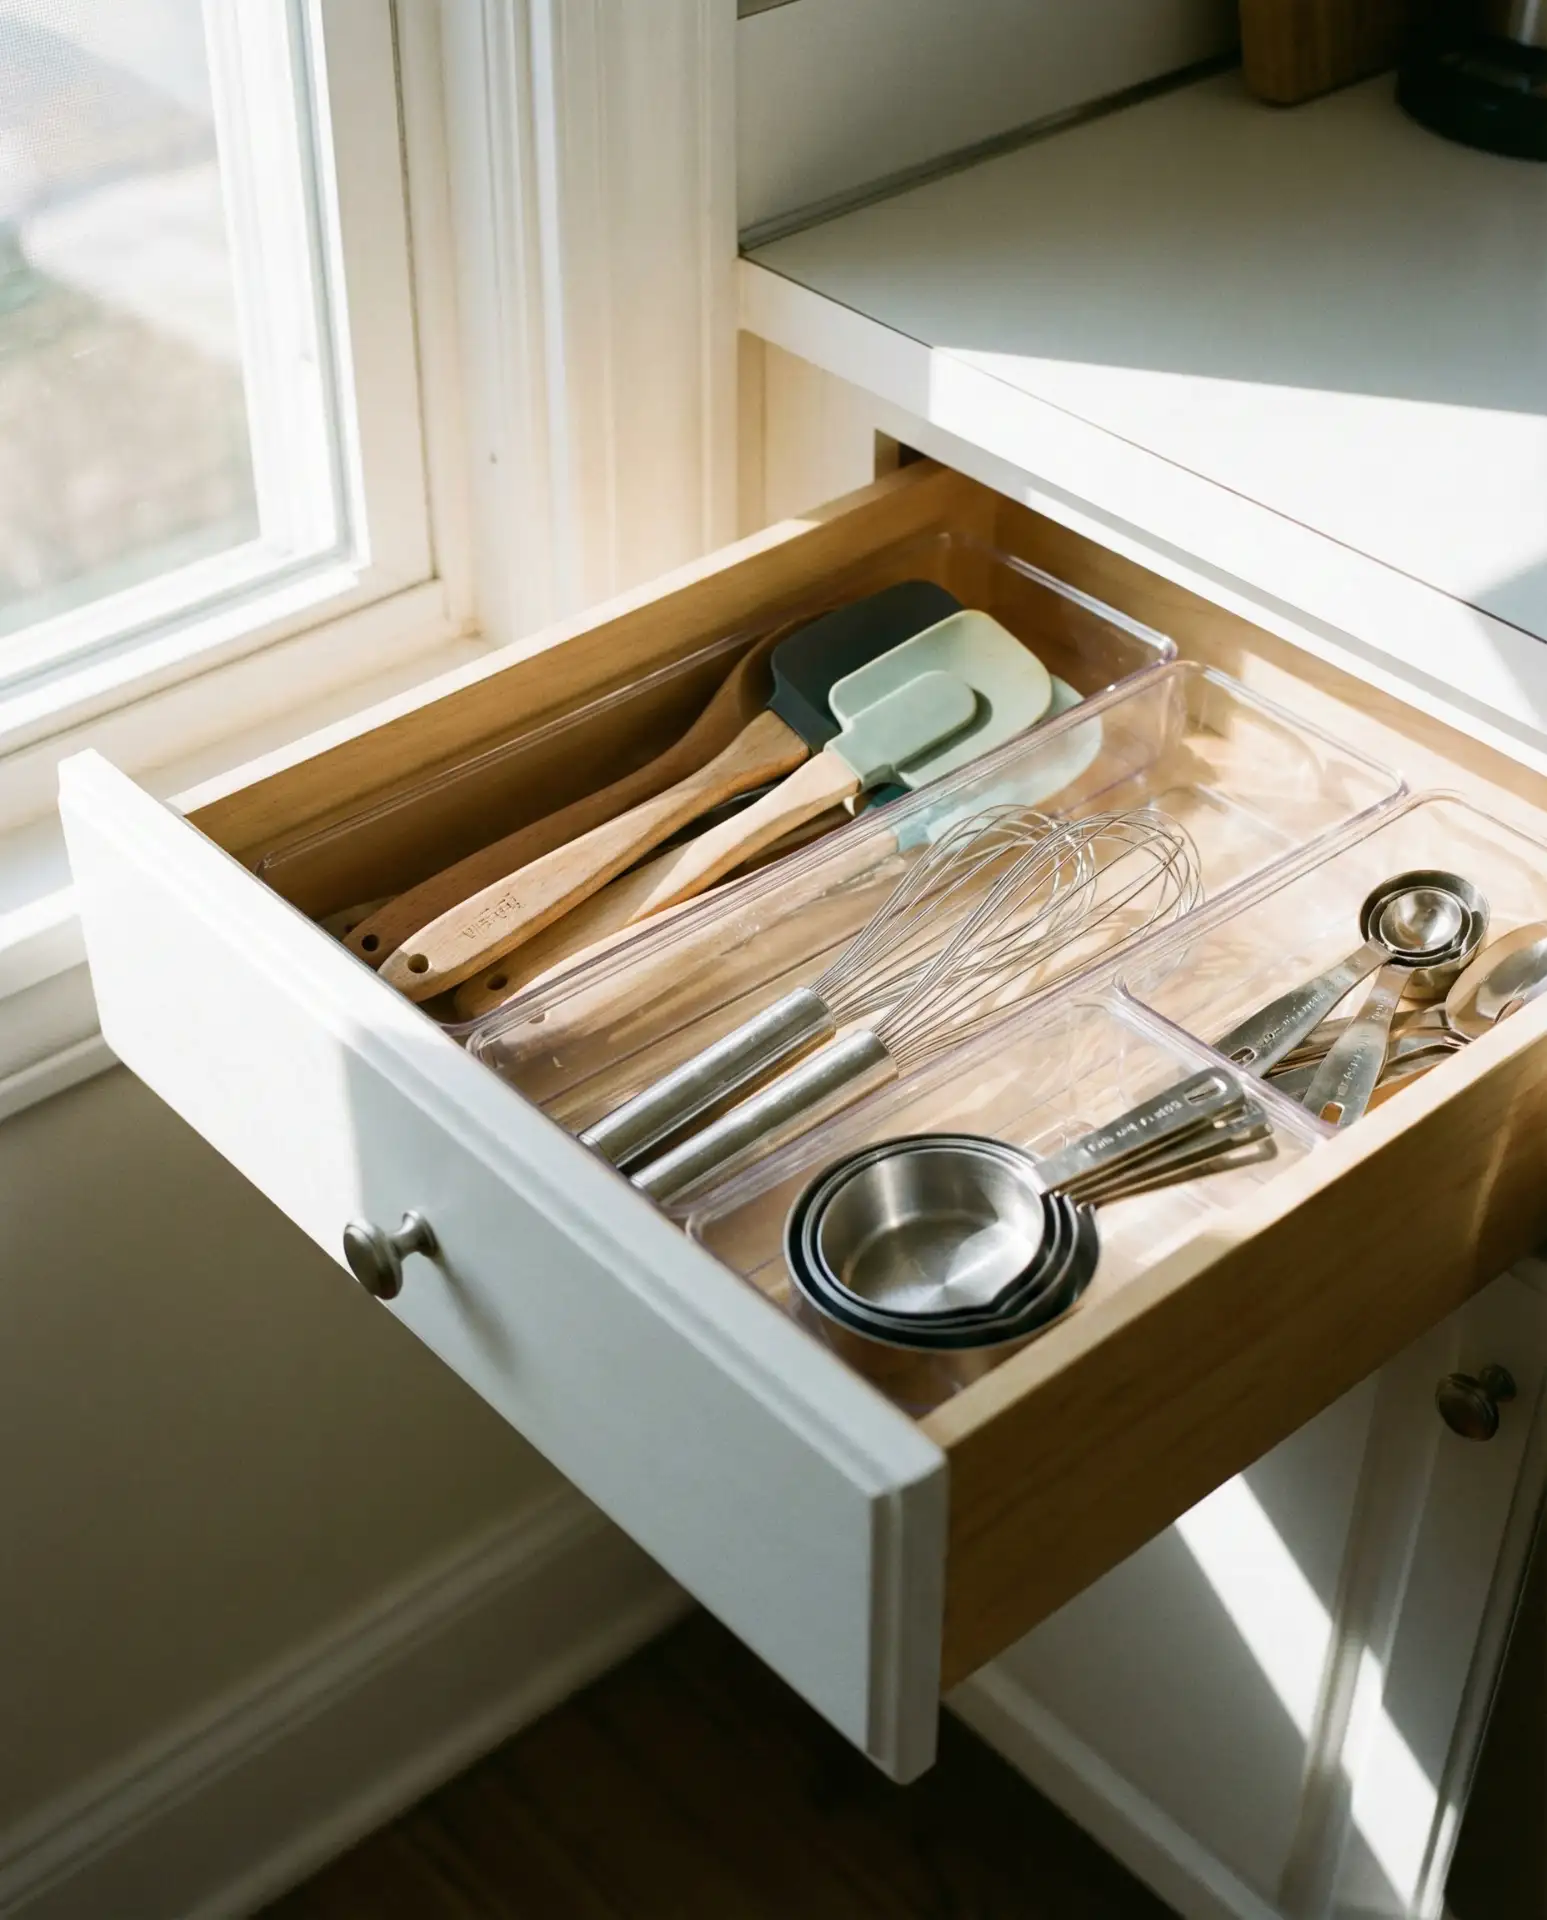
A common mistake is buying drawer organizers before decluttering, which means you end up with containers that preserve your mess rather than fix it. Spend fifteen minutes emptying your junk drawer completely, toss what’s broken or duplicate, then organize what’s left into dollar store bins. You’ll often find you need fewer dividers than expected, and the whole project costs under ten dollars instead of fifty.
3. IKEA Lazy Susan Corners
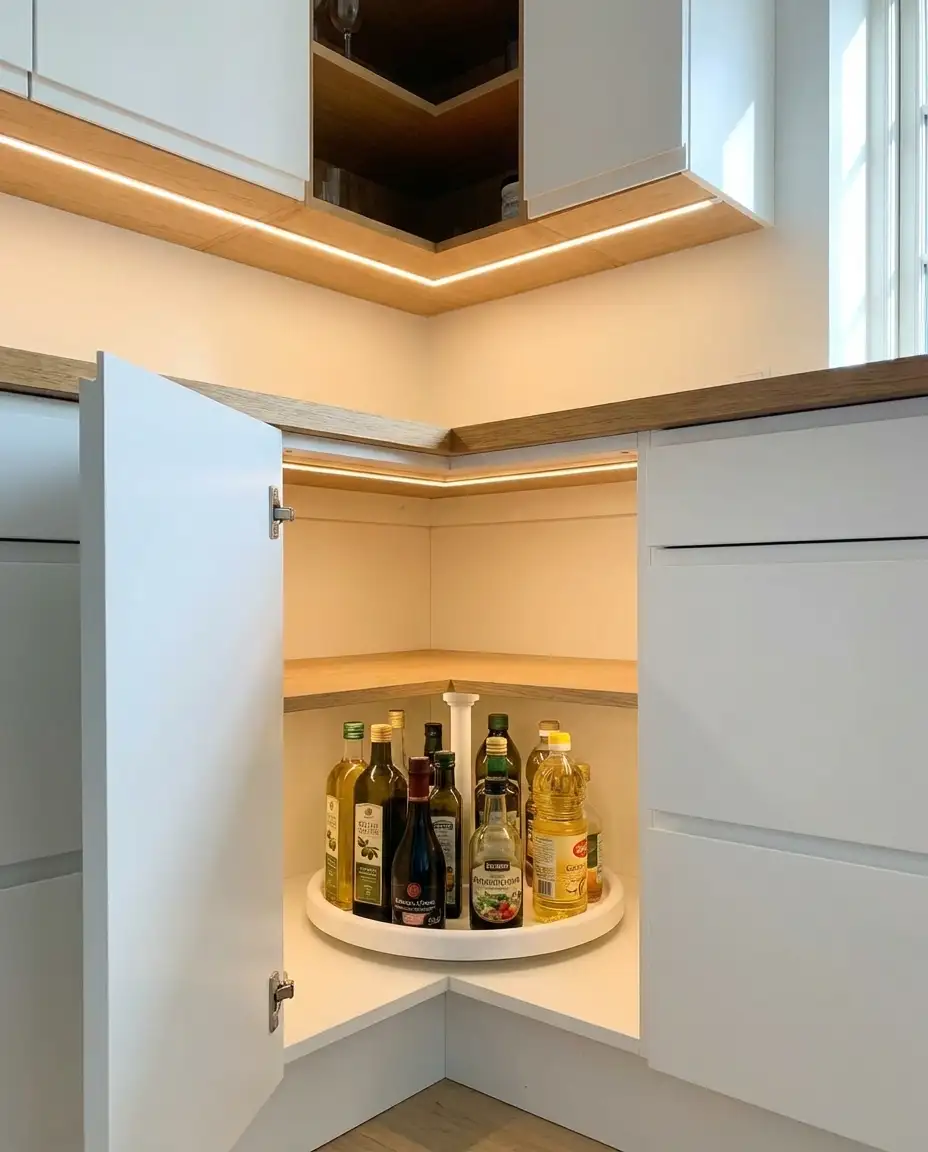
Corner cabinets are where kitchen items go to die, buried under layers of forgotten Tupperware and ancient spice jars. IKEA’s affordable lazy Susan turntables transform these dead zones into accessible storage, letting you spin condiments, oils, or baking supplies into view with one hand. Install two or three at different shelf heights to maximize the awkward L-shaped space, and suddenly you’re using every inch of that corner. This hack works equally well in upper cabinets where reaching deep is a nightmare.

In Midwestern homes with older cabinetry, corner access is often the biggest pain point because builders prioritized aesthetics over function decades ago. IKEA’s budget-friendly lazy Susans (usually under twenty dollars) give you a quick fix without remodeling, and they’re shallow enough to fit in cabinets with plumbing obstacles. Just measure your cabinet depth before ordering to avoid the frustration of a turntable that won’t rotate fully.
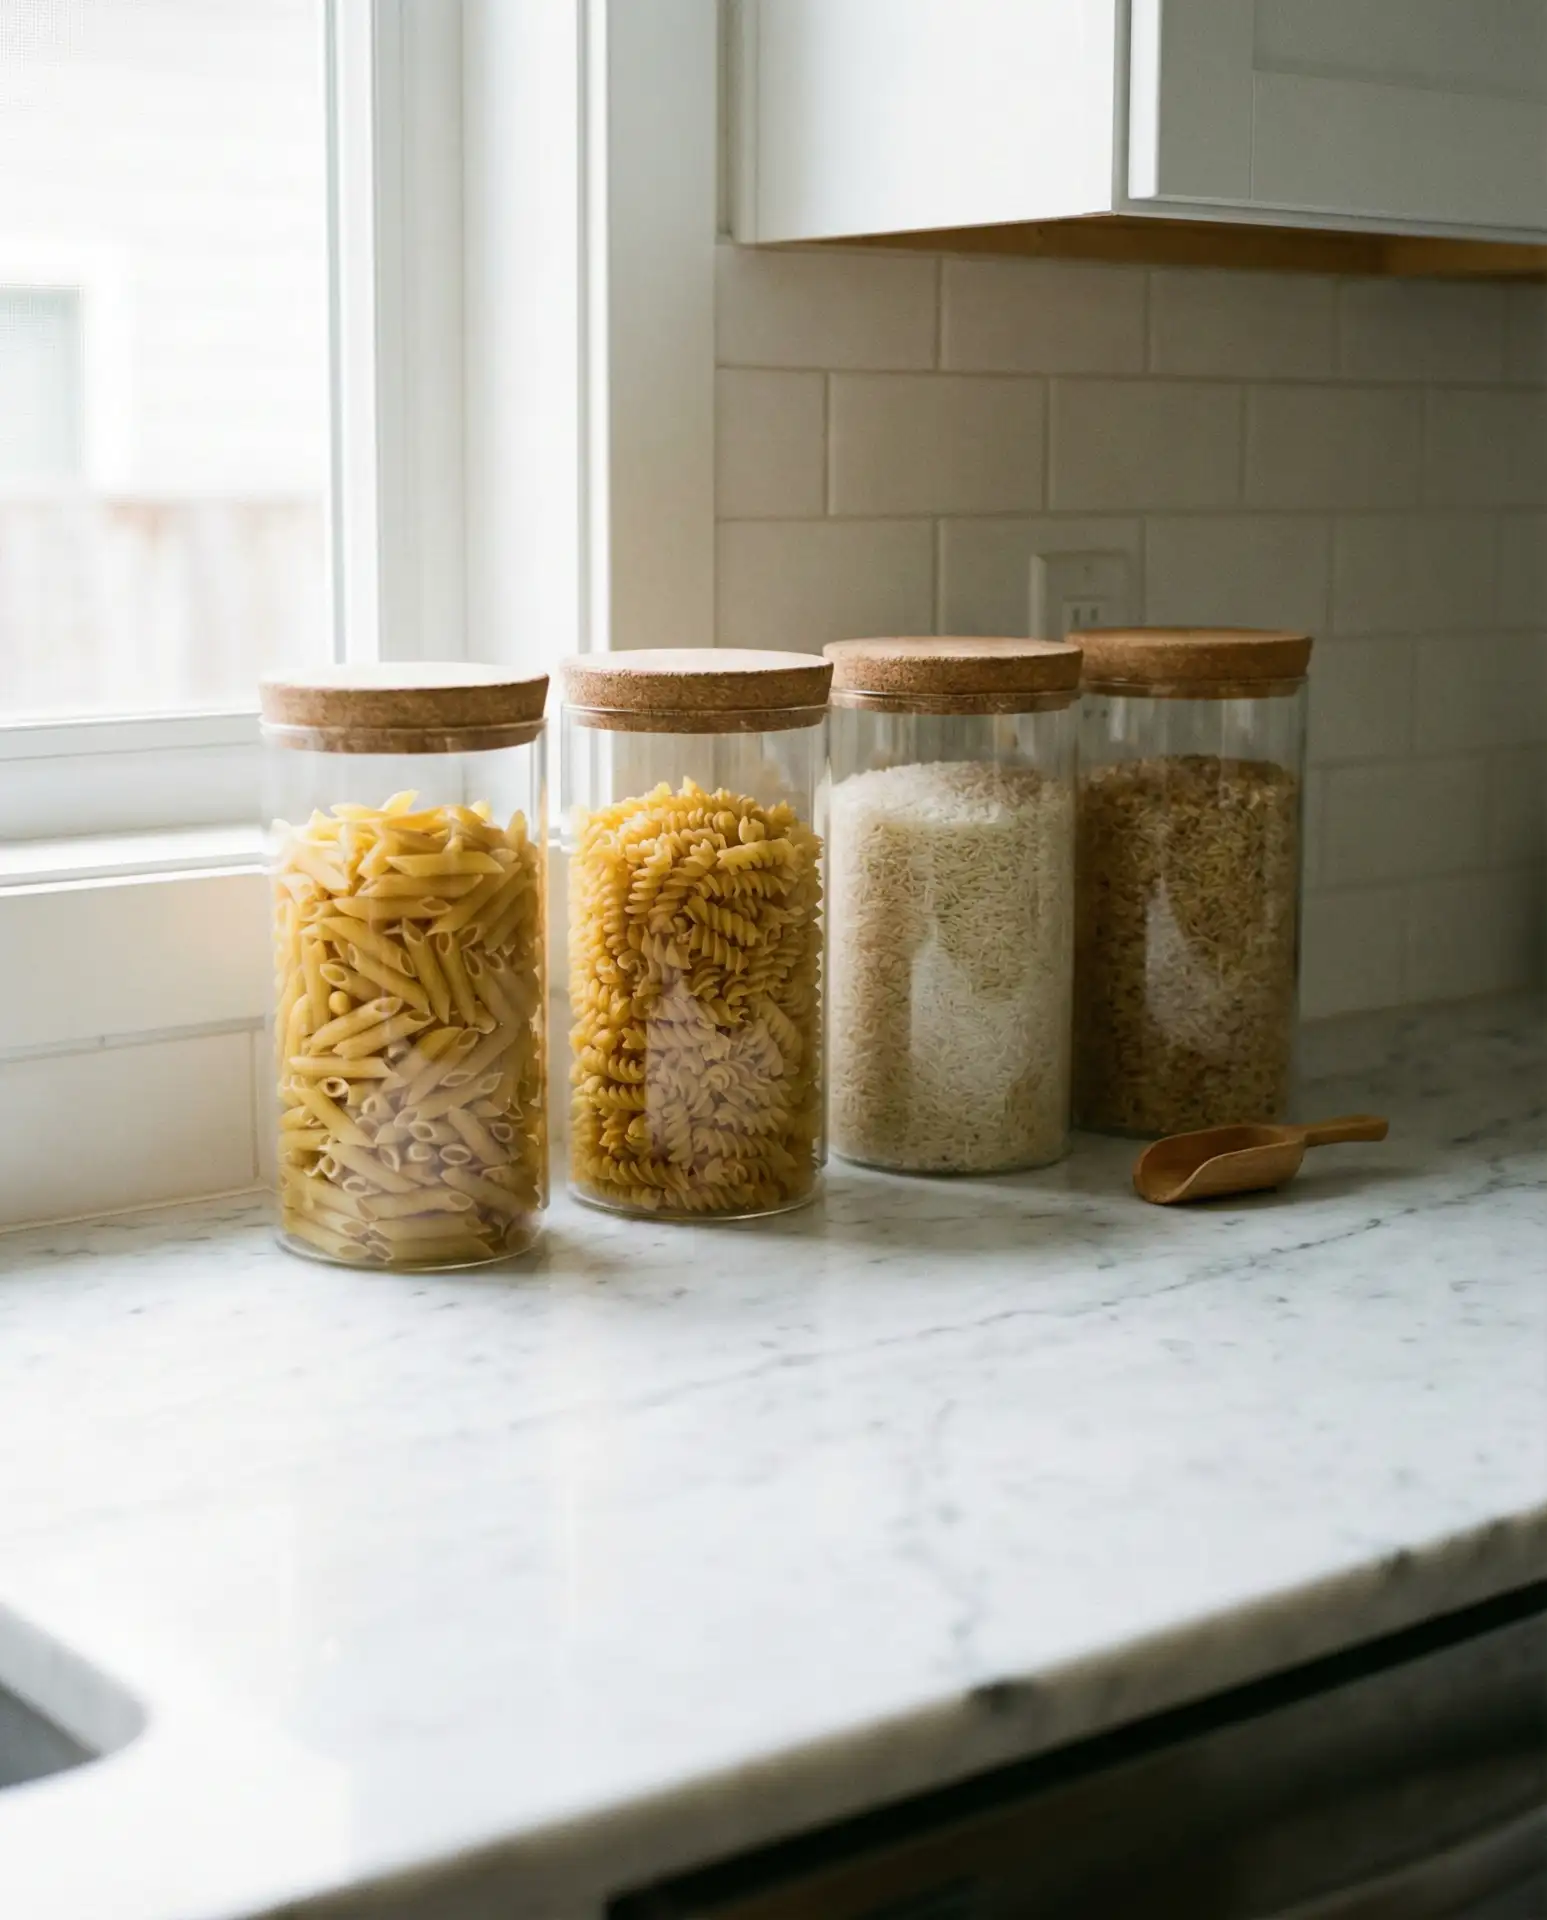
4. Aesthetic Countertop Canisters
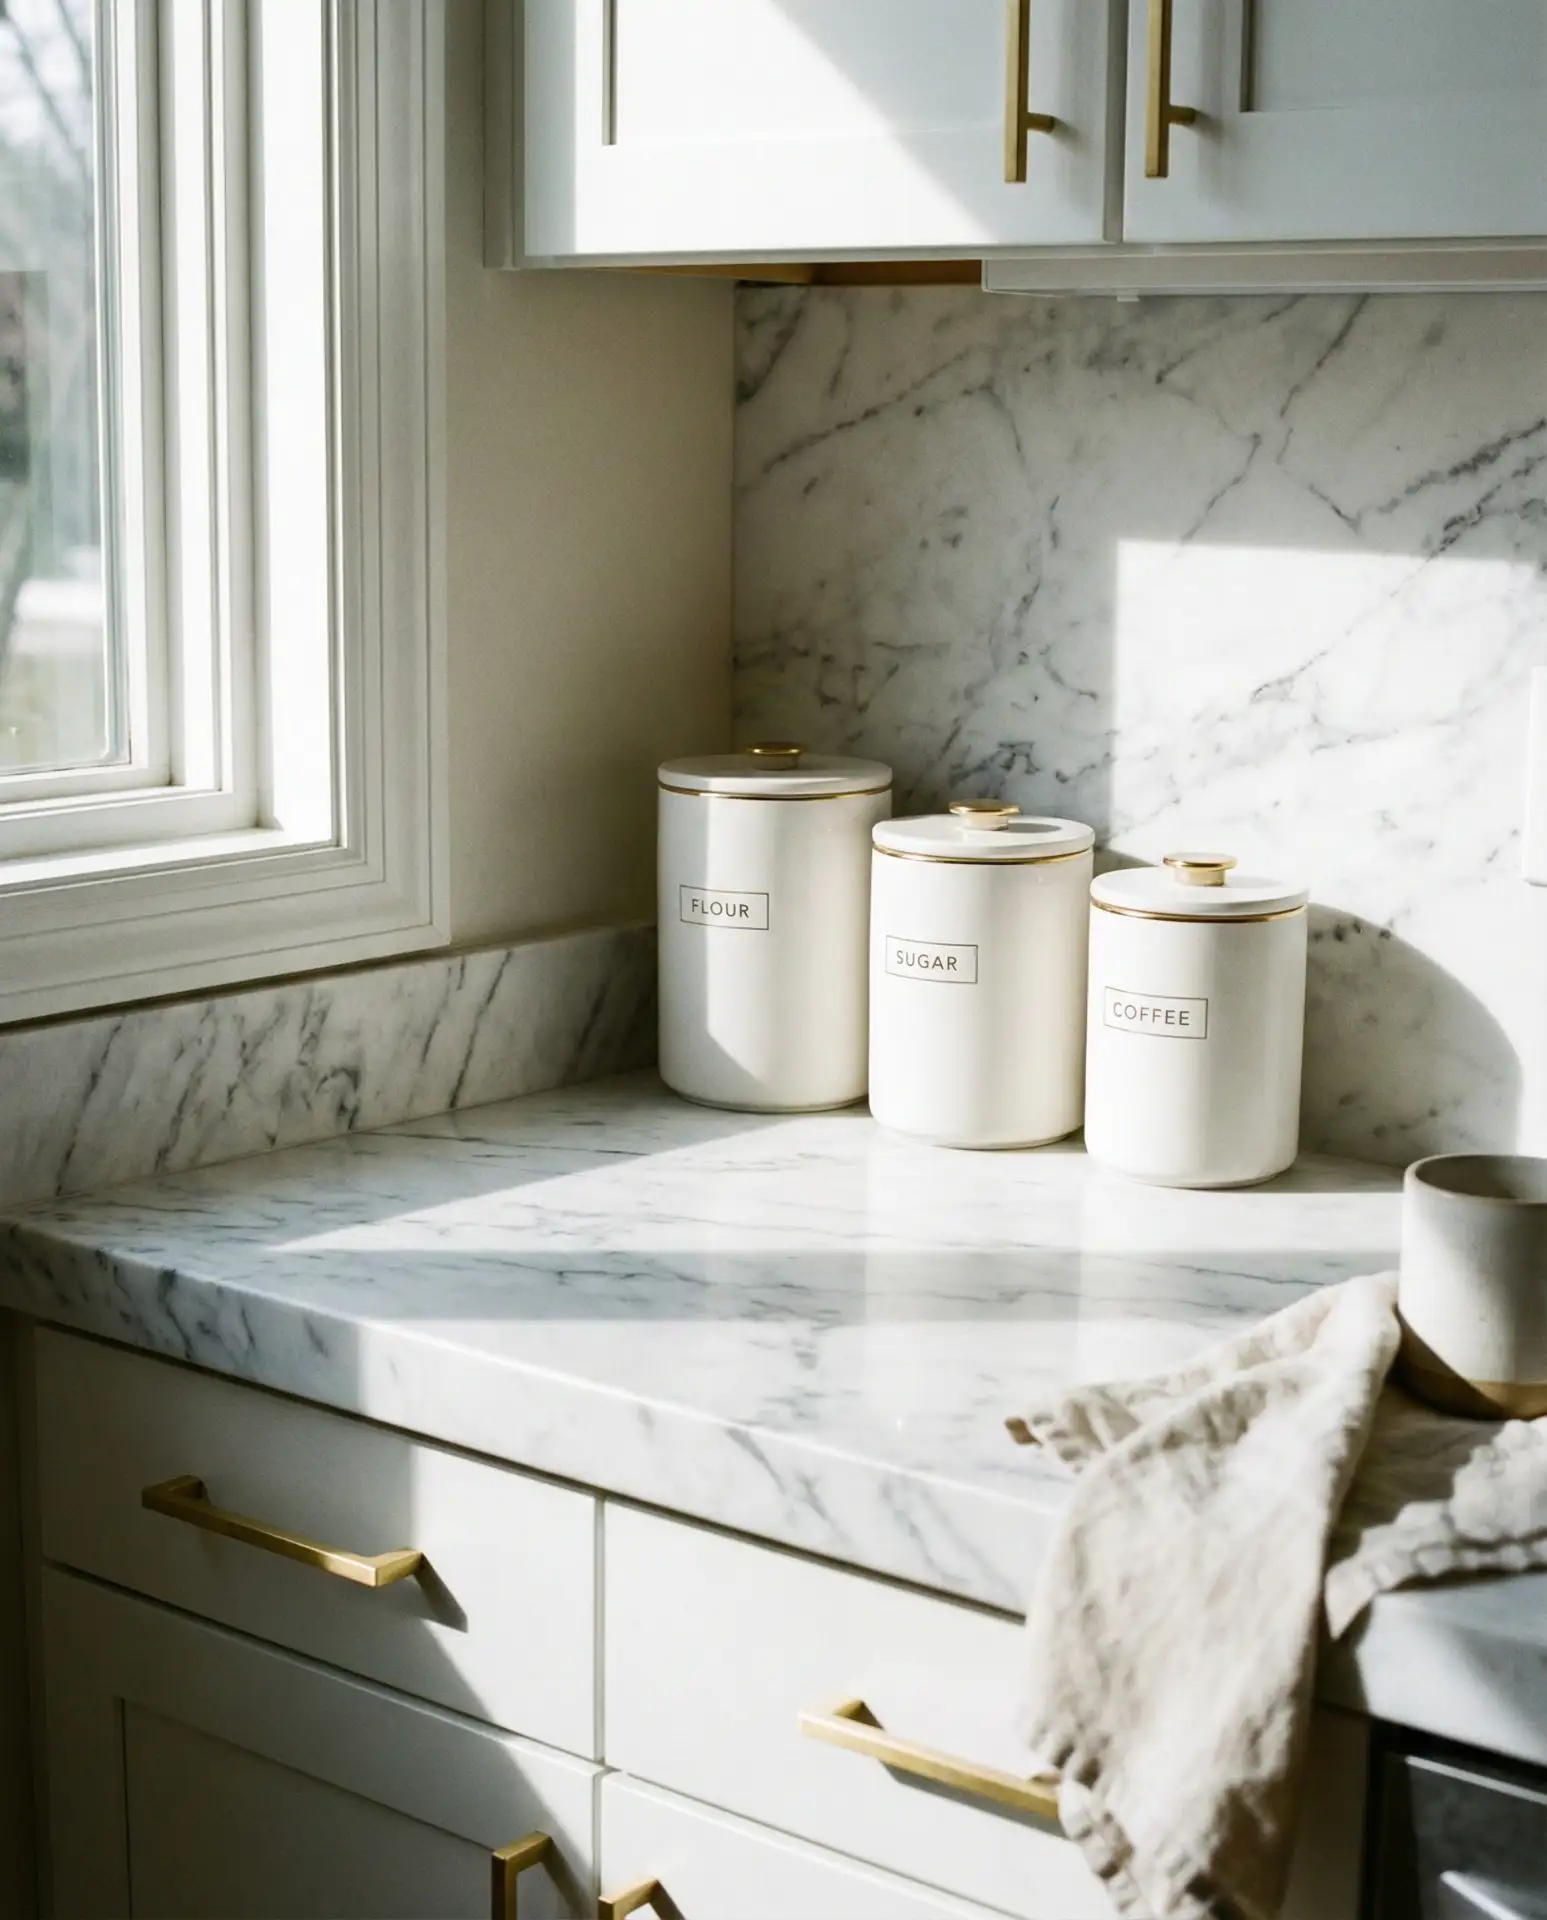
Leaving flour, sugar, and coffee in their original packaging creates visual clutter that makes countertops feel chaotic. Transferring dry goods into matching aesthetic canisters—glass, ceramic, or matte-finish metal—instantly elevates your kitchen’s look while keeping ingredients fresh. Choose containers with airtight seals to prevent pantry moths and humidity damage, and group them on a tray or small shelf to create a cohesive coffee or baking station. This works especially well in open-concept kitchens where your counters are always on display.

Real homeowners often make the mistake of buying canisters that are too small, requiring constant refills from backup bags hidden in the pantry. Opt for larger one-gallon sizes for staples you use weekly, and reserve smaller decorative jars for specialty items like chia seeds or cocoa powder. The goal is functional beauty, not just Instagram appeal.
5. Under-Sink Drawer Retrofit
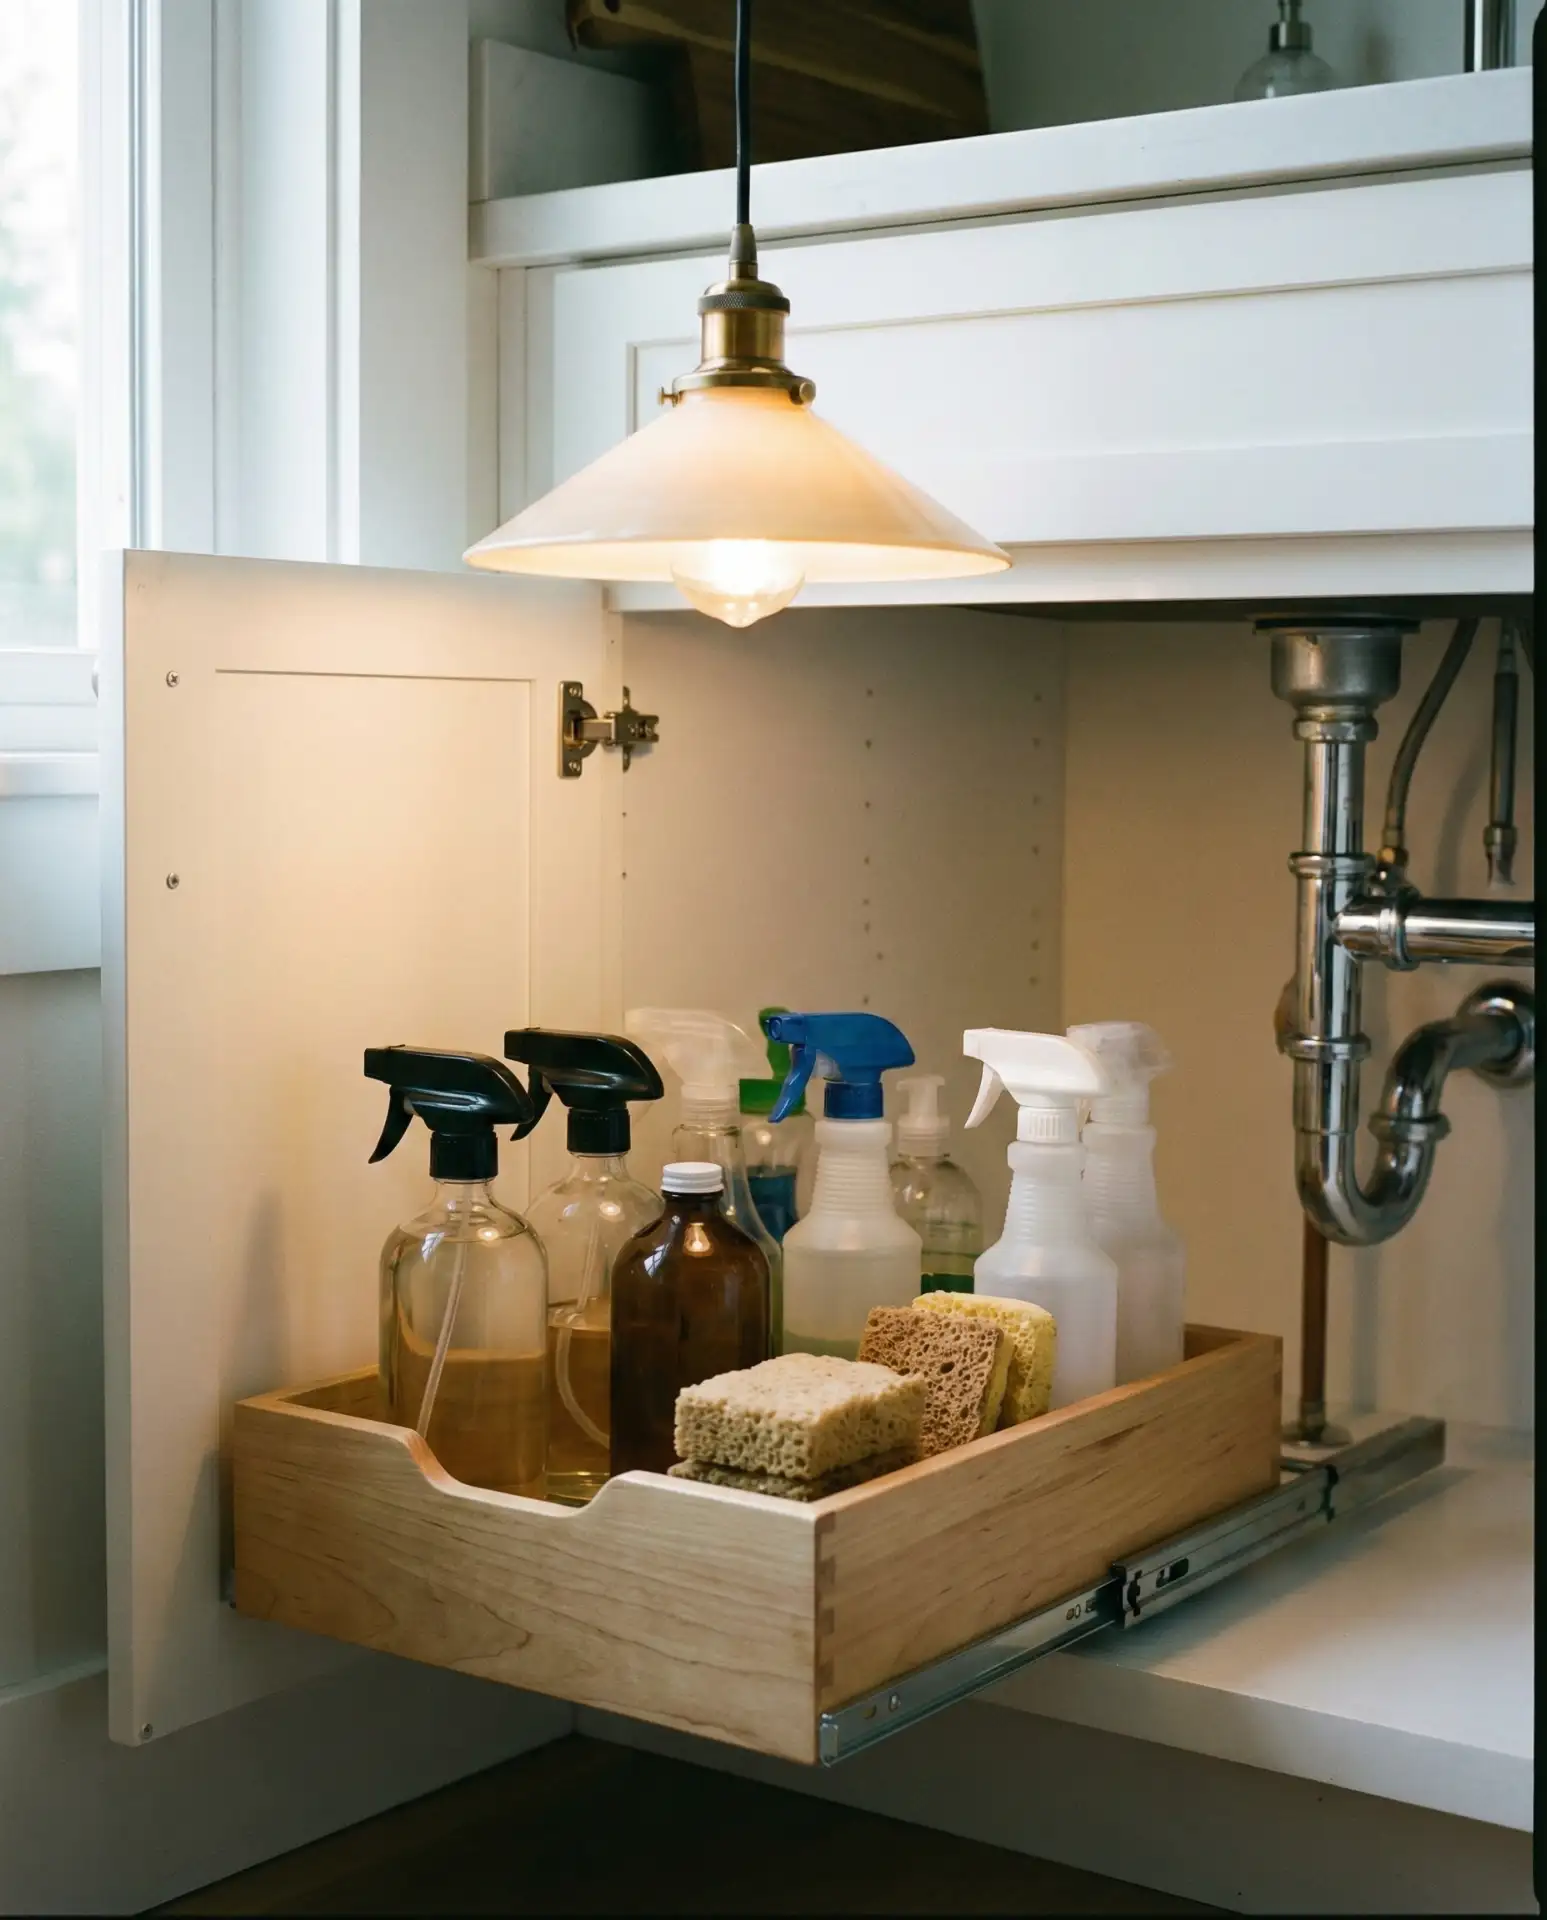
The space beneath your sink is typically a cabinet with doors, which means you’re bending down and reaching blindly for dish soap or trash bags. Installing a sliding drawer system specifically designed for undersink areas turns that awkward crouch into an easy pull-out motion. These retrofit kits work around plumbing pipes and usually cost between forty and eighty dollars on Amazon, delivering professional results without hiring a carpenter. You’ll finally use that deep back corner where cleaning supplies used to vanish.
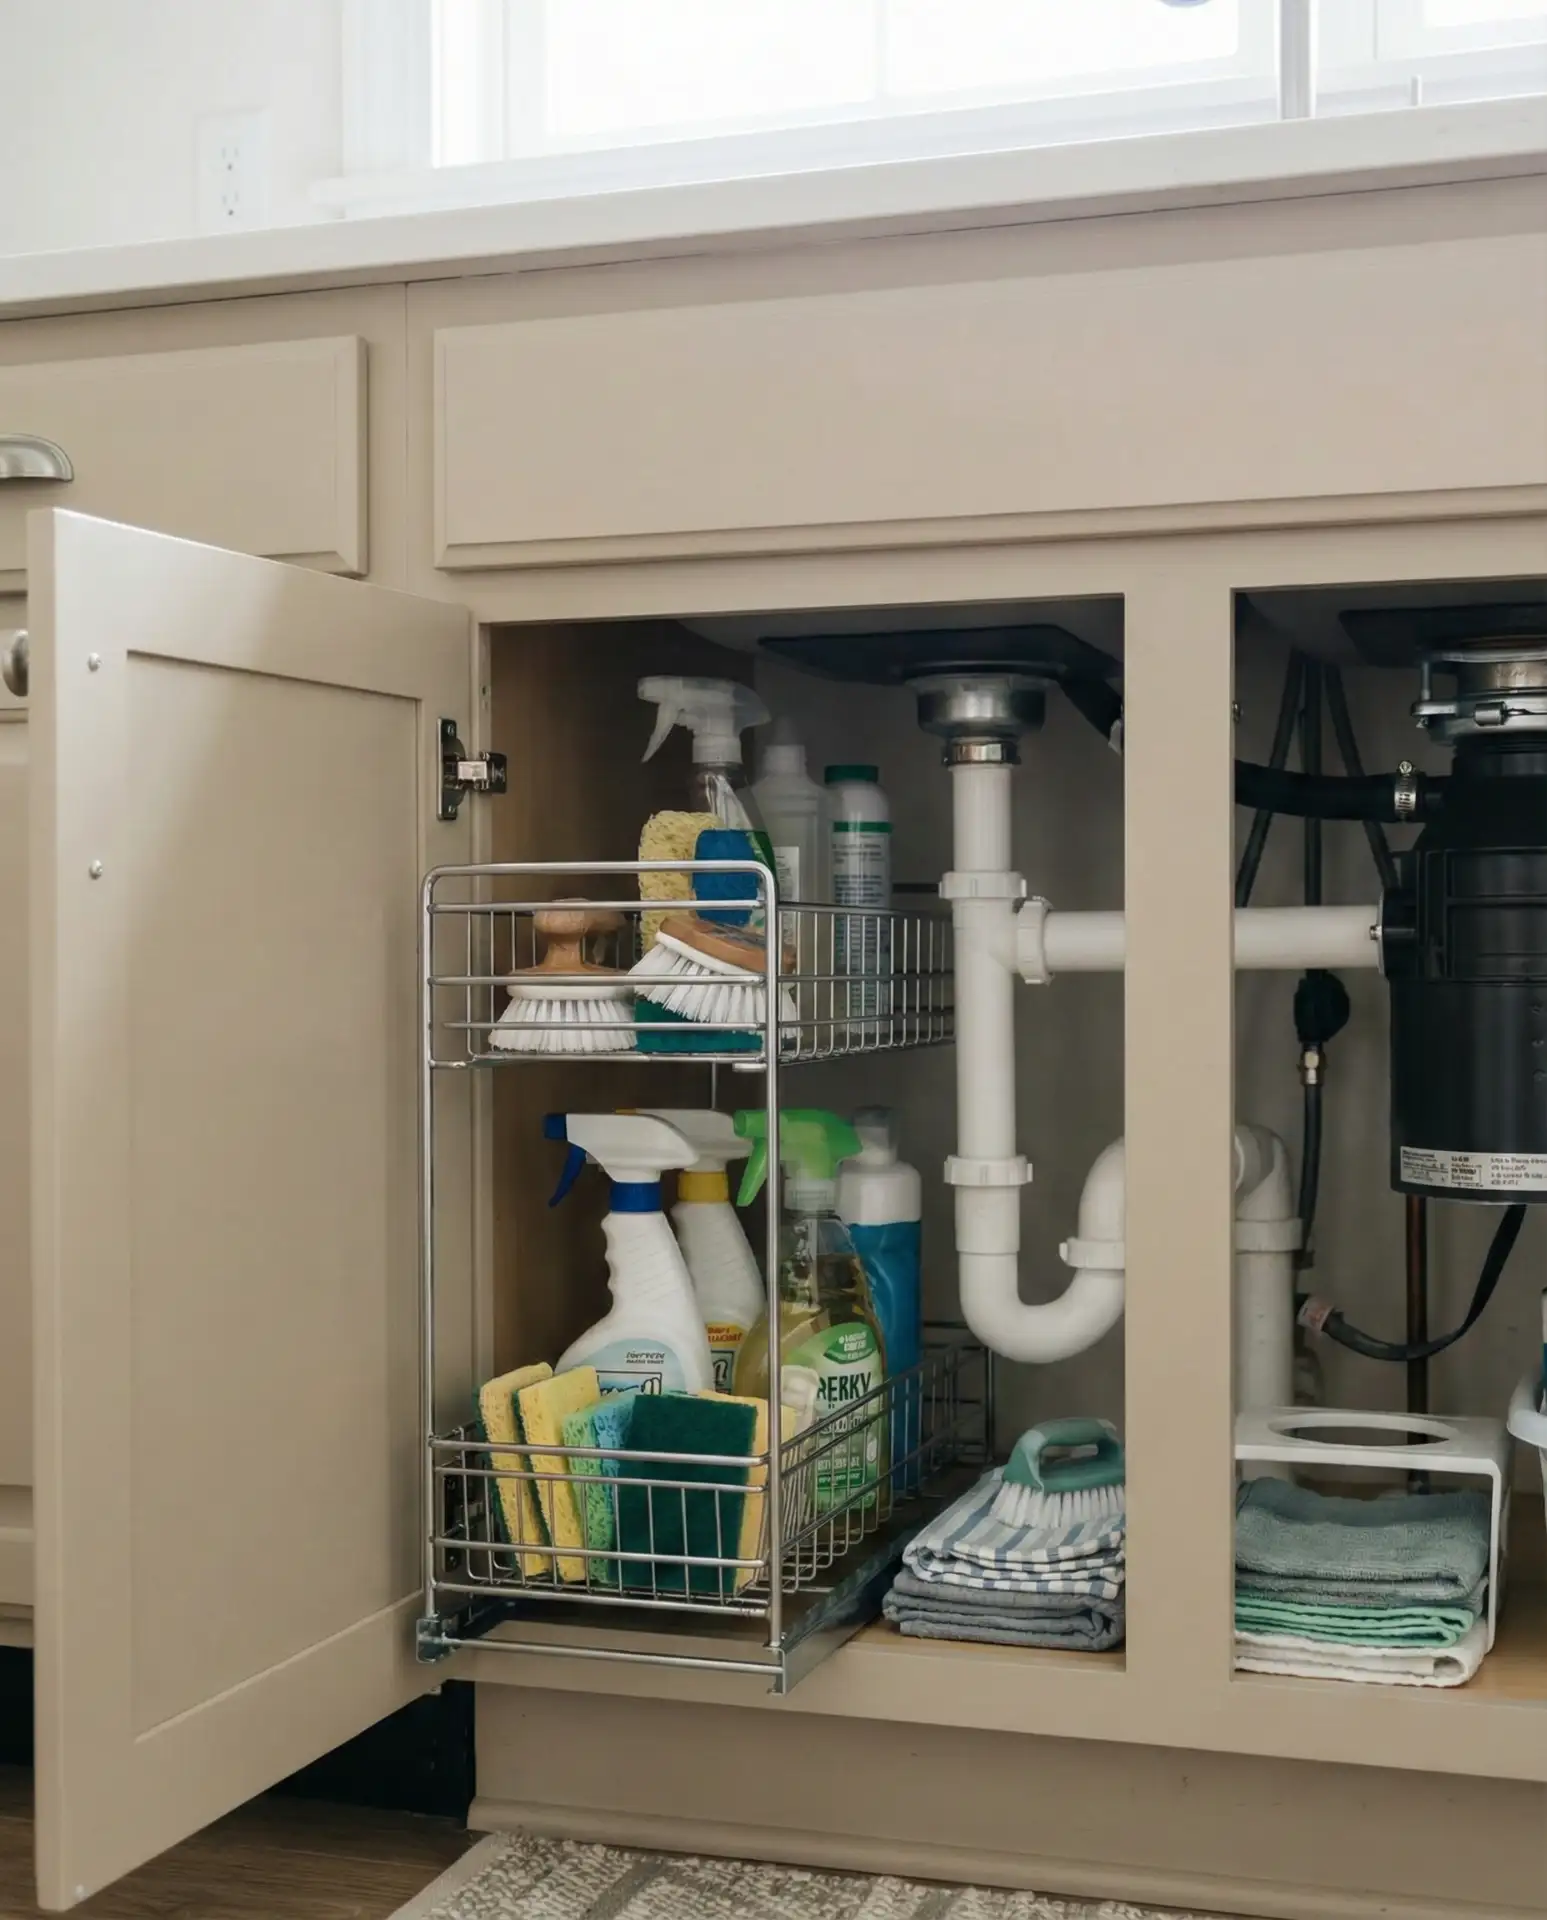
Many Americans skip this upgrade because they assume it requires professional installation, but most under-sink drawer kits are designed for DIY assembly with just a screwdriver. The transformation is immediate and dramatic, especially for older adults or anyone with mobility issues who struggles with deep cabinet bending. It’s one of those small changes that makes daily kitchen tasks noticeably easier.
6. Japanese Minimalist Knife Block Alternative
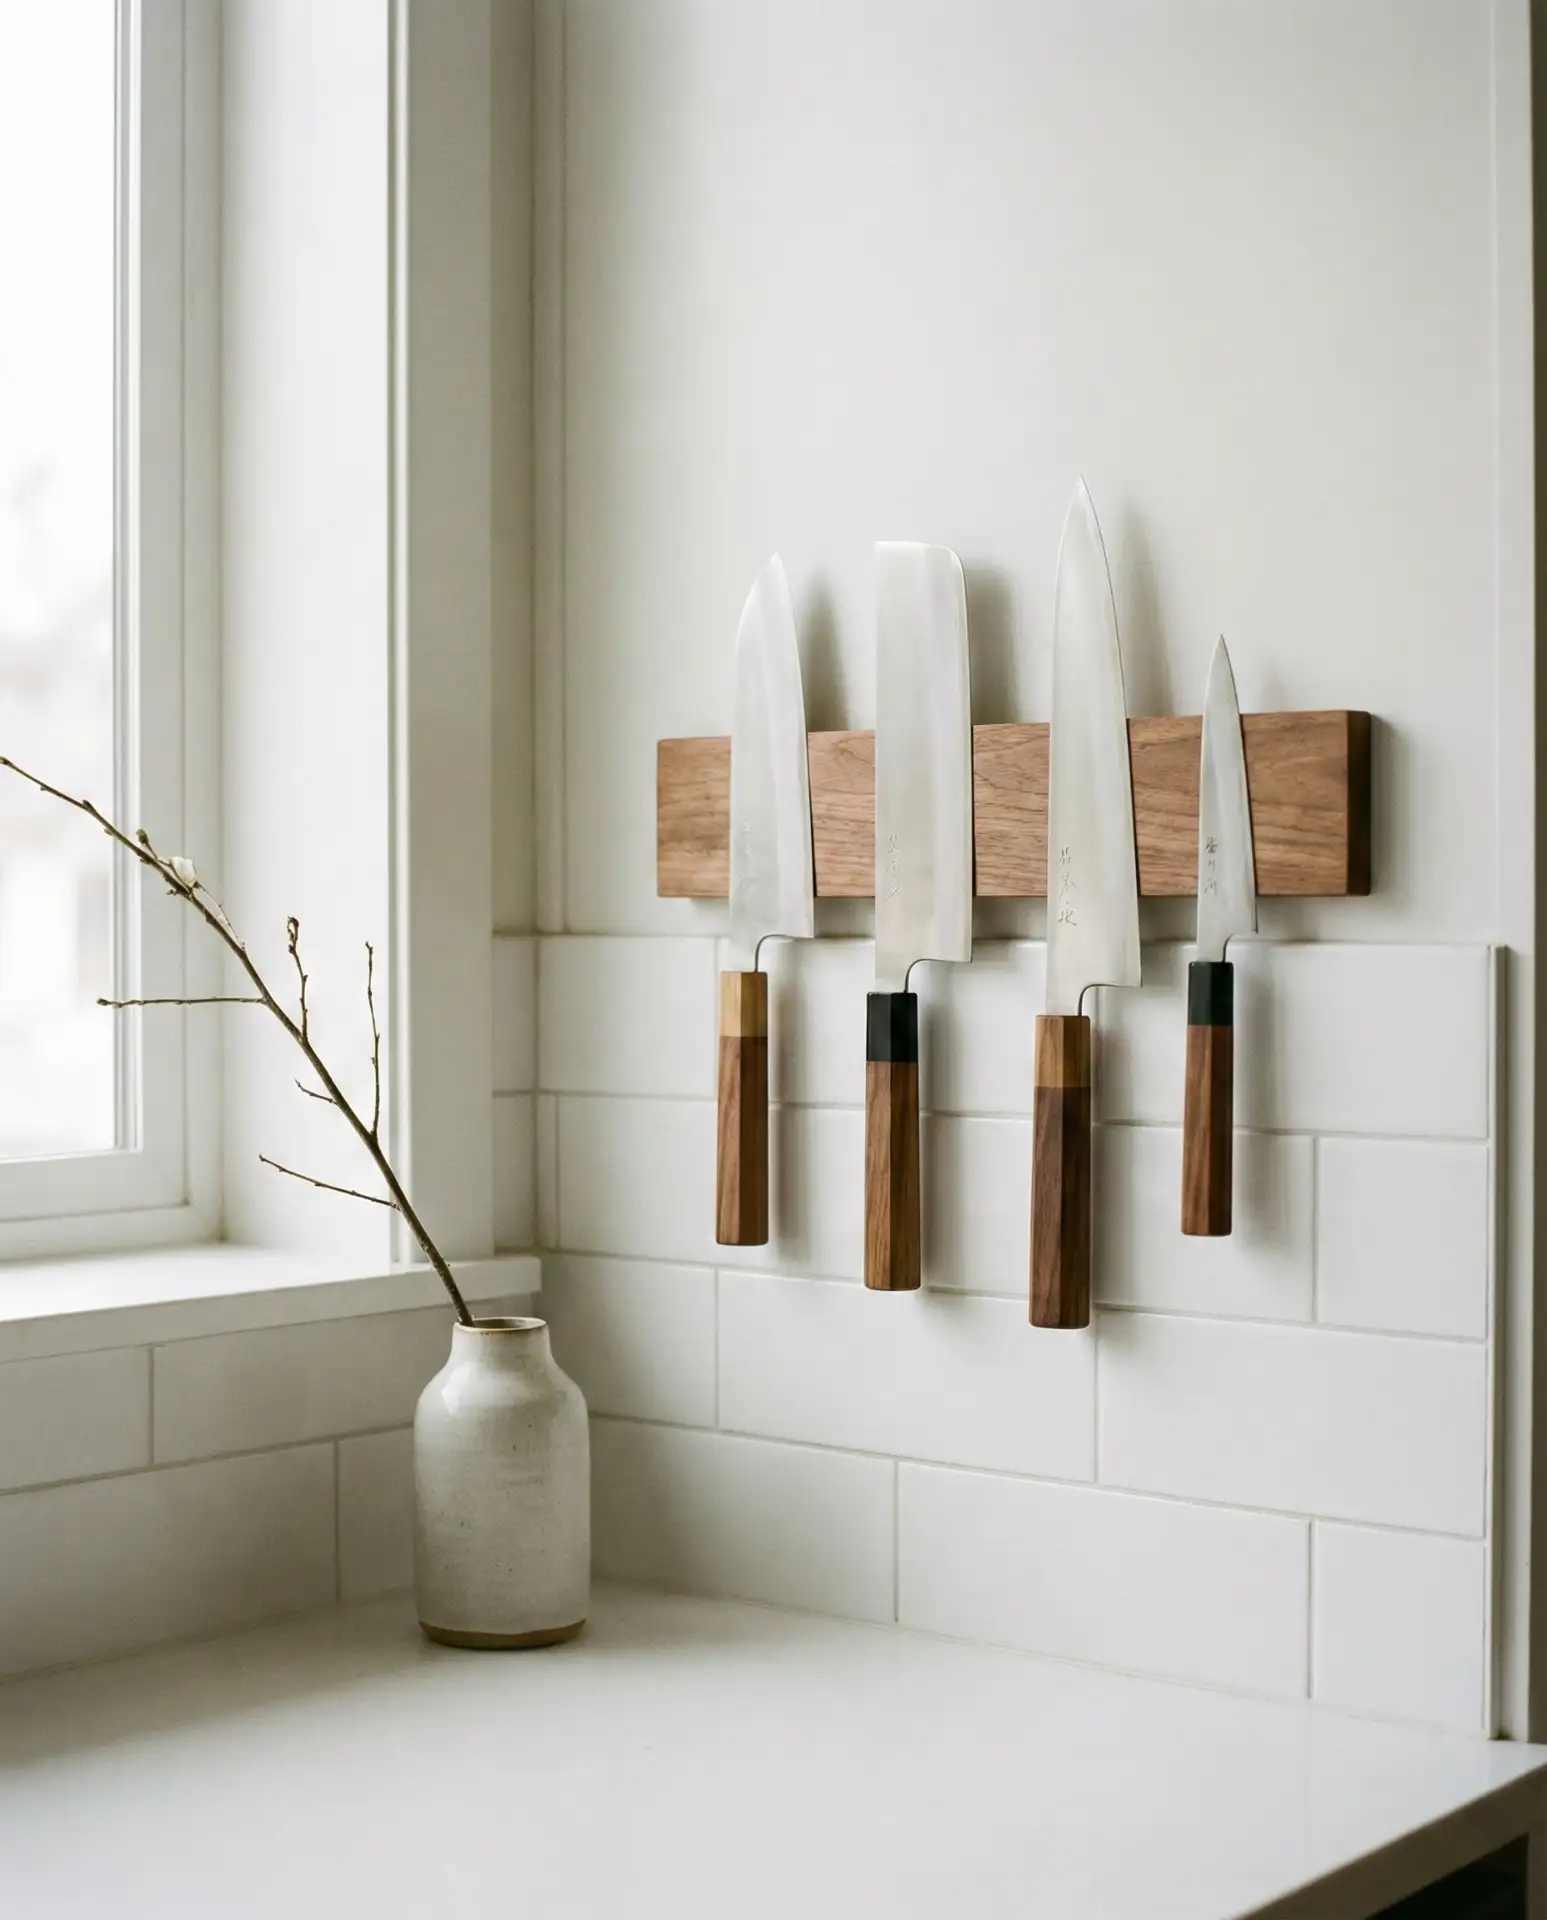
Traditional knife blocks eat up valuable counter real estate and collect dust in those slots you can’t clean. Borrowing from Japanese kitchen design, magnetic knife strips mounted on the wall or inside a cabinet door keep blades visible, accessible, and hygienic. This approach also lets you display quality knives as functional art, creating an aesthetic focal point that restaurant kitchens have used for decades. Just make sure the magnetic strip is rated for the weight of your heaviest chef’s knife.

This works best in kitchens where you have vertical wall space near your prep area, allowing you to grab knives without opening drawers or moving appliances. In small apartments or RV kitchens, magnetic strips are especially valuable because they eliminate bulky storage while keeping sharp tools safely out of the way. The installation takes ten minutes with the included screws.
7. Camping Gear Organization Station
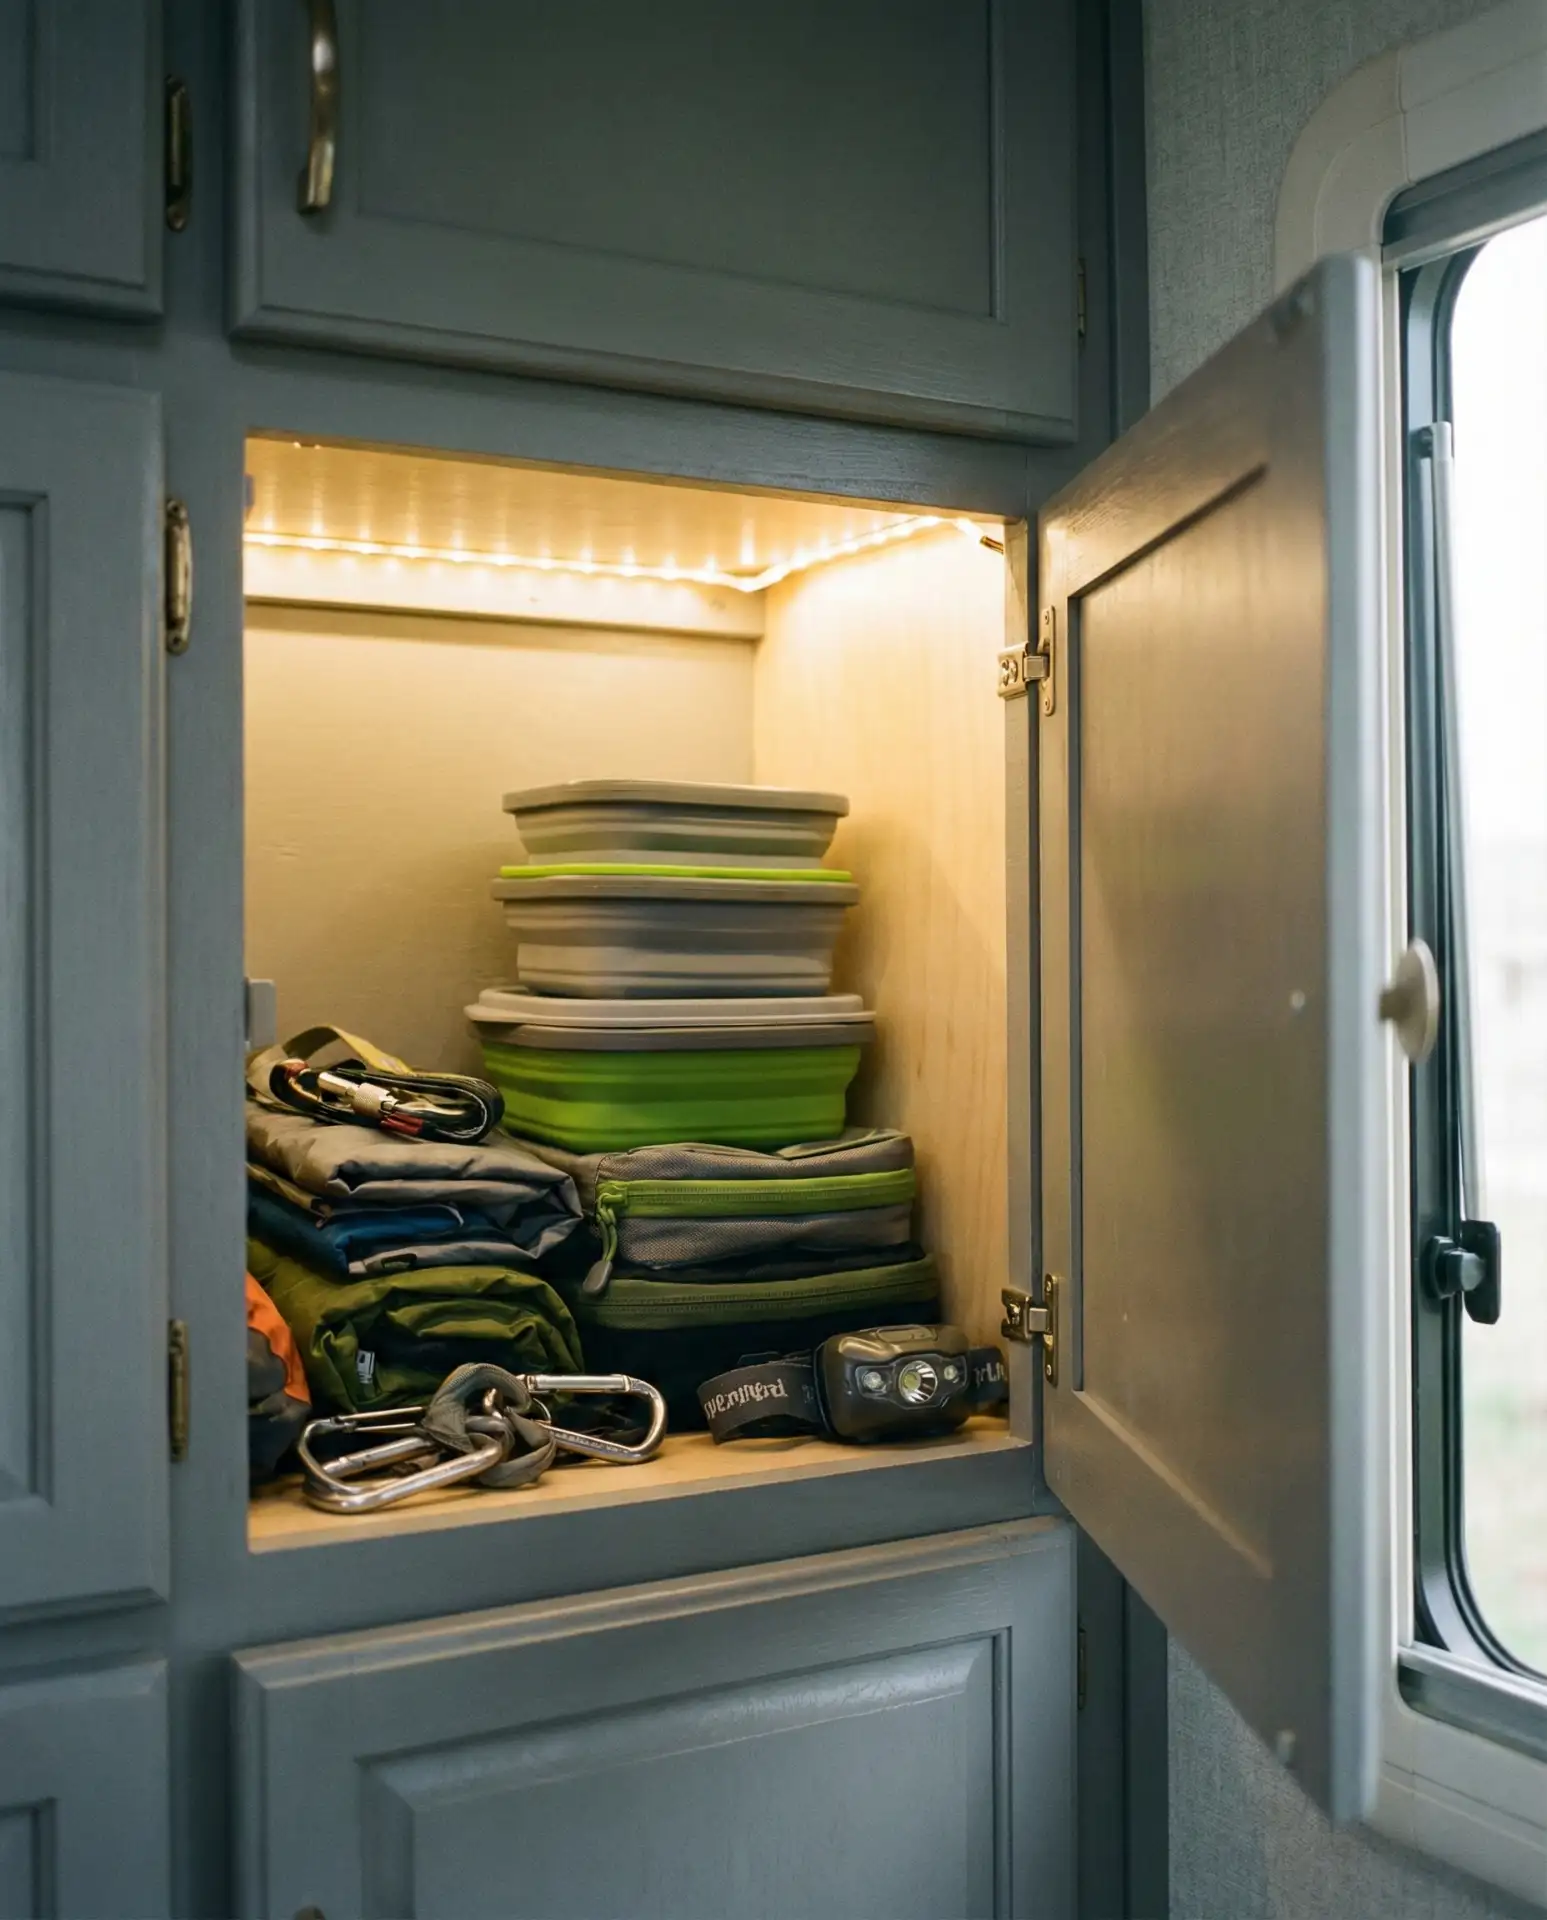
If you’re an outdoor enthusiast who stores camping cookware in your kitchen, dedicating a single cabinet or shelf to camp-specific gear prevents cross-contamination with everyday dishes. Use lightweight mesh bags or collapsible bins to keep portable stoves, mess kits, and utensils together, so you can grab everything for a weekend trip without hunting through multiple drawers. Label containers clearly and stack them by trip type—car camping versus backpacking—to streamline packing. This system also works brilliantly in RV kitchens where space is ultra-tight.
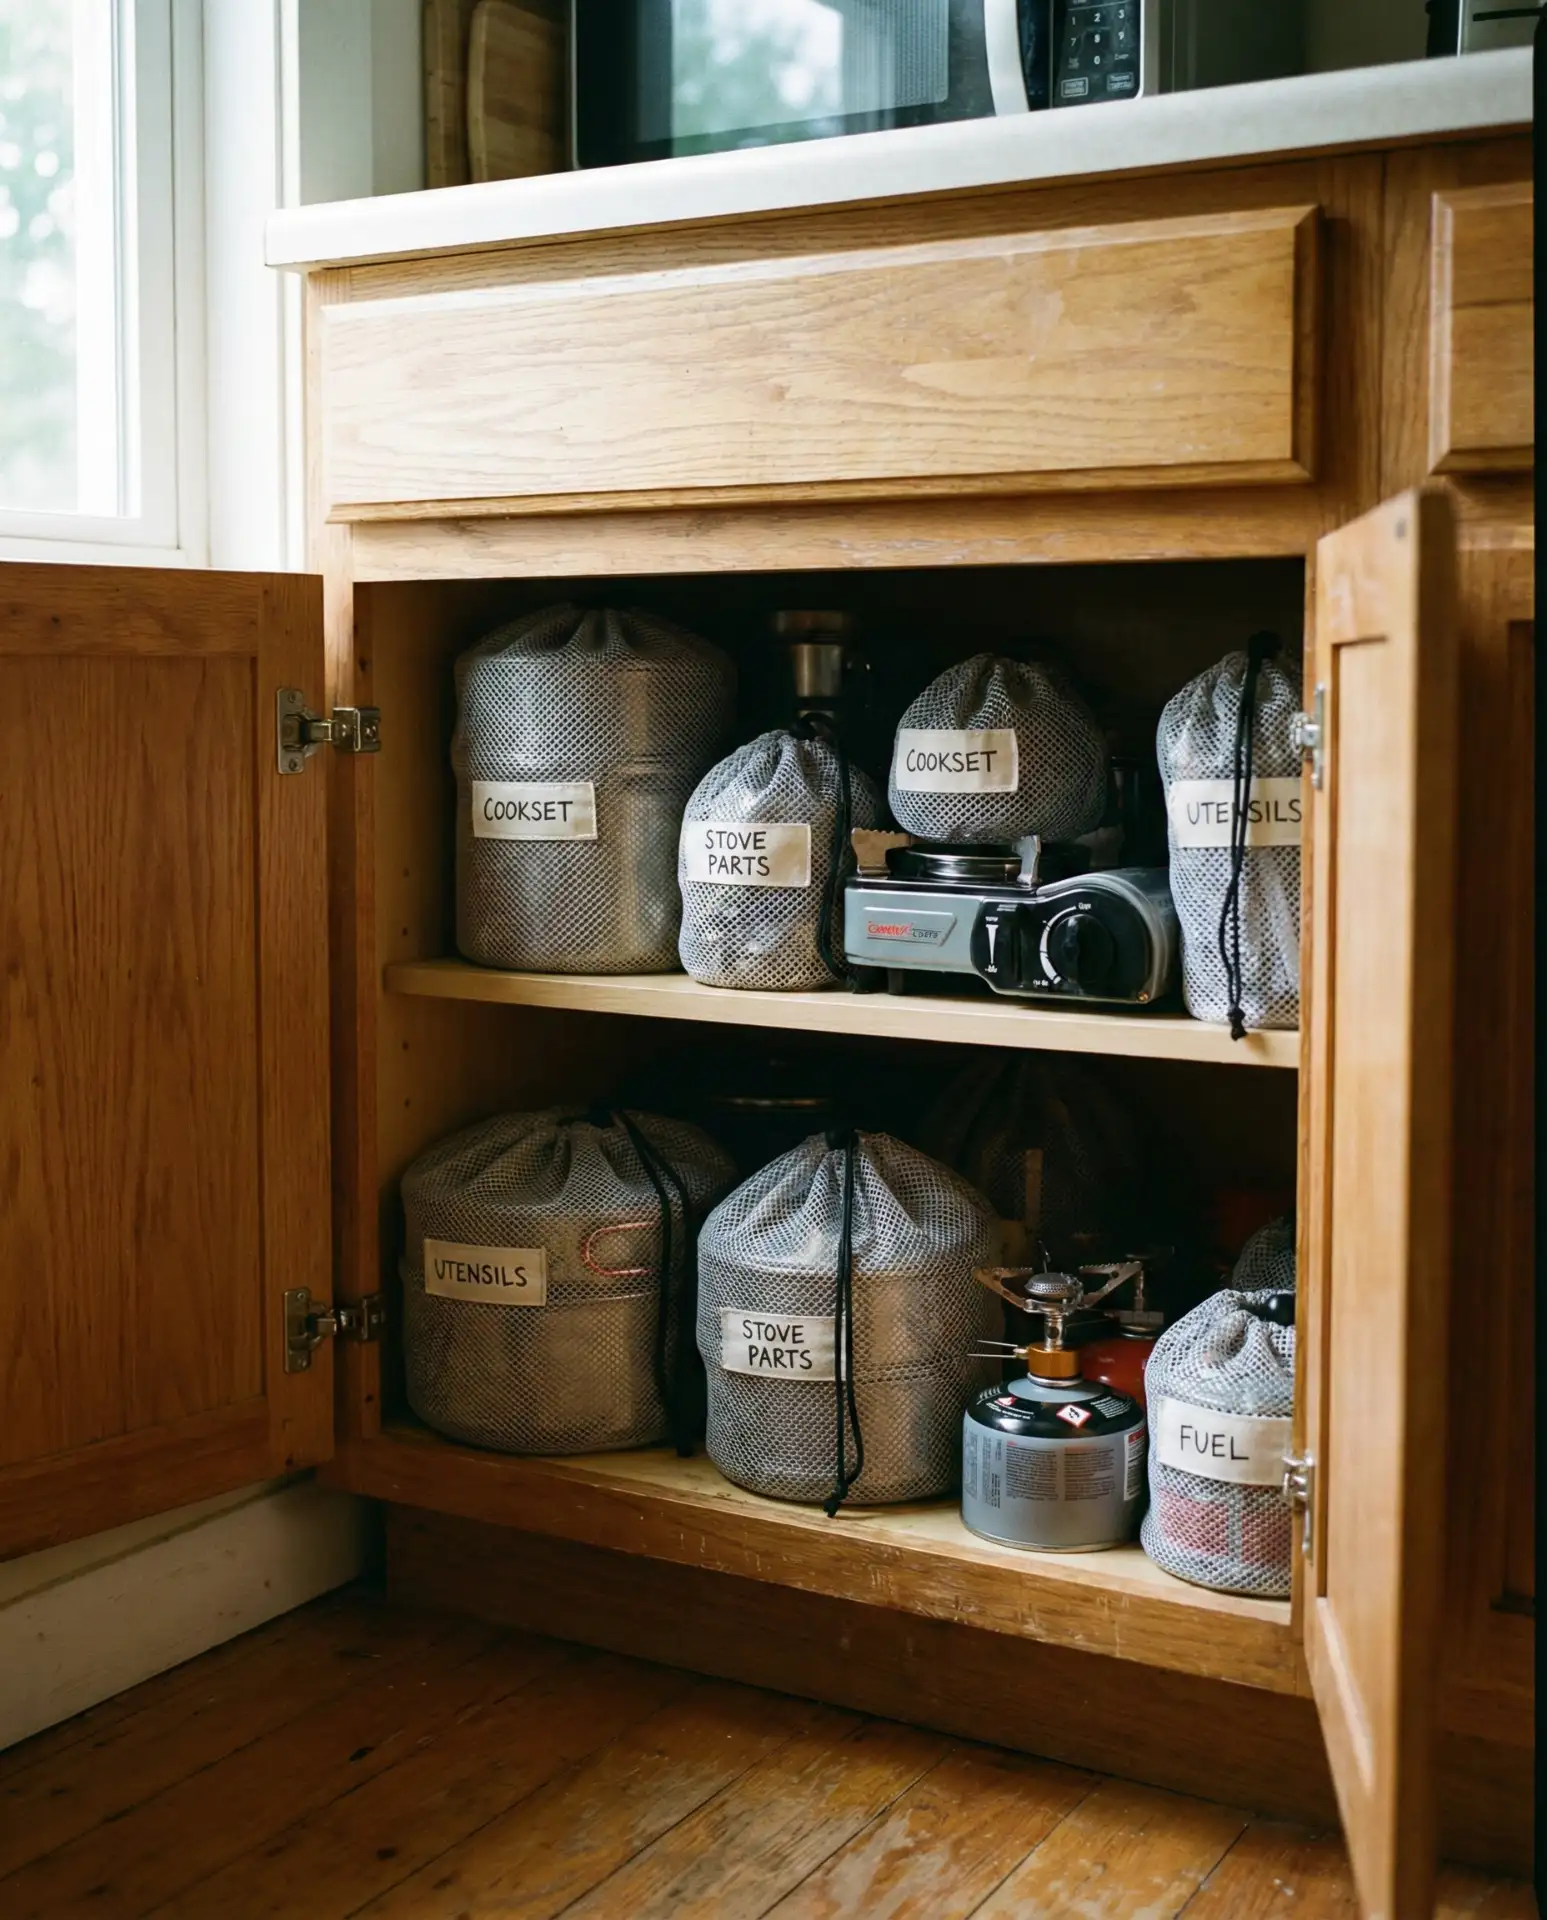
Expert organizers recommend keeping a running checklist taped inside this cabinet door so you never forget fuel canisters or can openers when you’re rushing out the door. This micro-zone approach prevents outdoor gear from spreading throughout your kitchen, garage, and basement, which is the real reason camping prep feels so chaotic. Consolidate and label, and you’ll cut packing time in half.
8. Commercial Stainless Steel Shelving
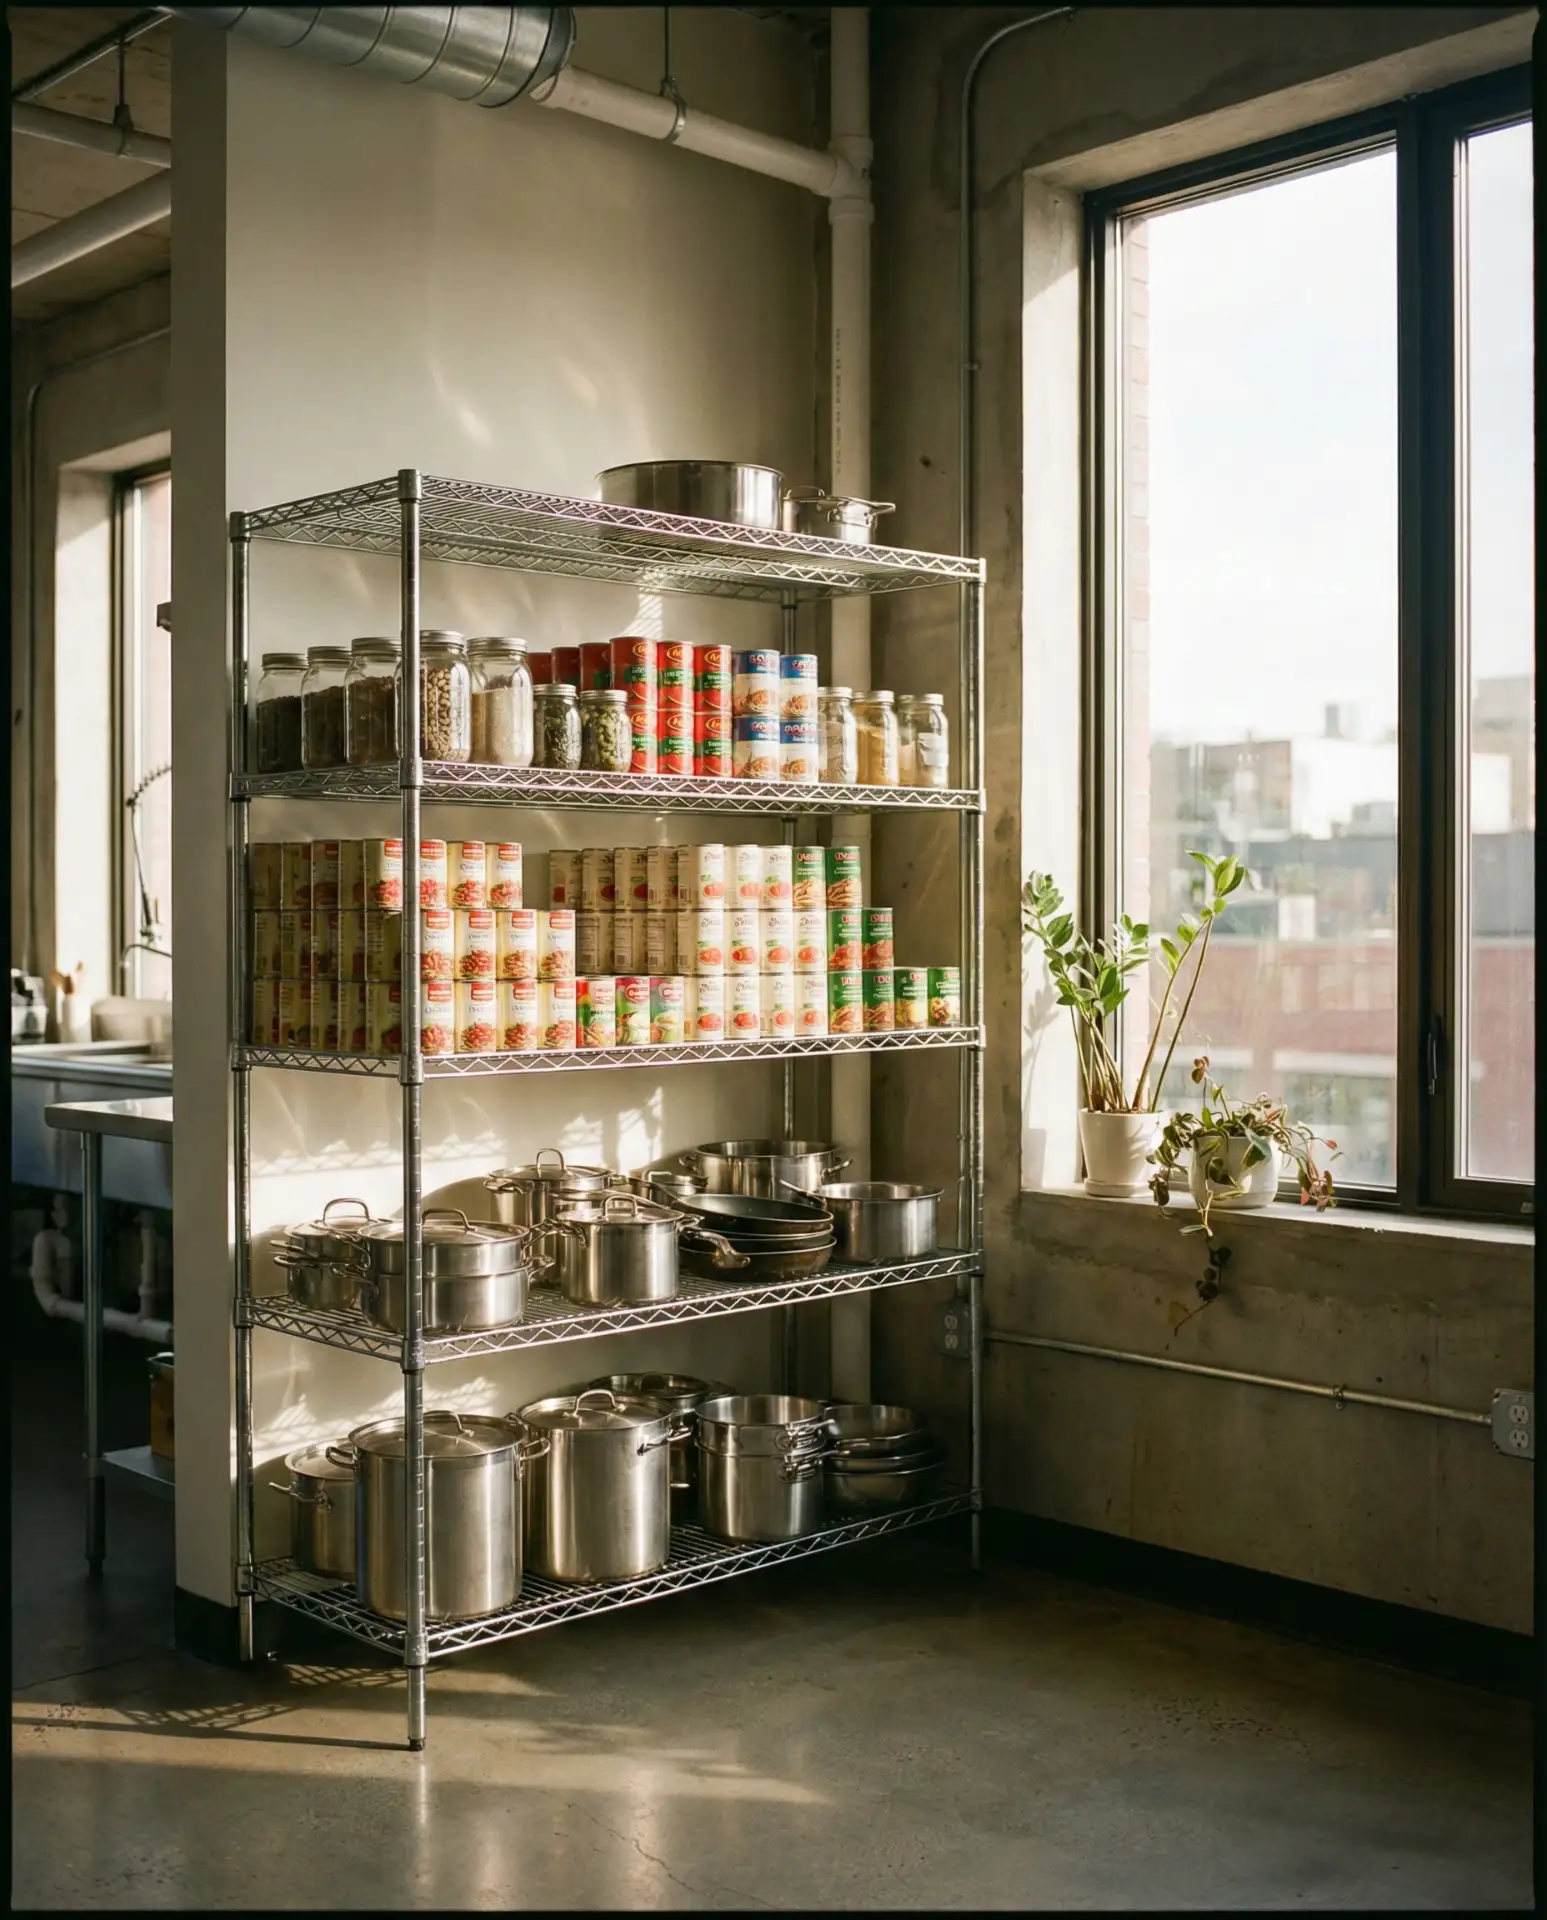
Borrowing from commercial kitchens, freestanding stainless steel wire shelving gives you industrial-strength storage that looks intentional rather than makeshift. These units can hold heavy appliances, bulk pantry items, or dish collections without sagging, and because they’re not built-in, you can reconfigure or move them as your needs change. The open design prevents the musty smell that sometimes develops in closed cabinets, and the metallic finish complements both modern and rustic kitchen styles. You’ll find options at restaurant supply stores or Amazon for less than you’d expect.
This solution works best in kitchens with limited built-in storage or in rental situations where you can’t install permanent shelving. The price point is remarkably accessible—a sturdy five-shelf unit typically runs between sixty and one hundred twenty dollars—making it a budget-friendly alternative to custom cabinetry. Just measure your ceiling height carefully, as some models are adjustable while others come in fixed heights.
9. DIY Pegboard Tool Wall
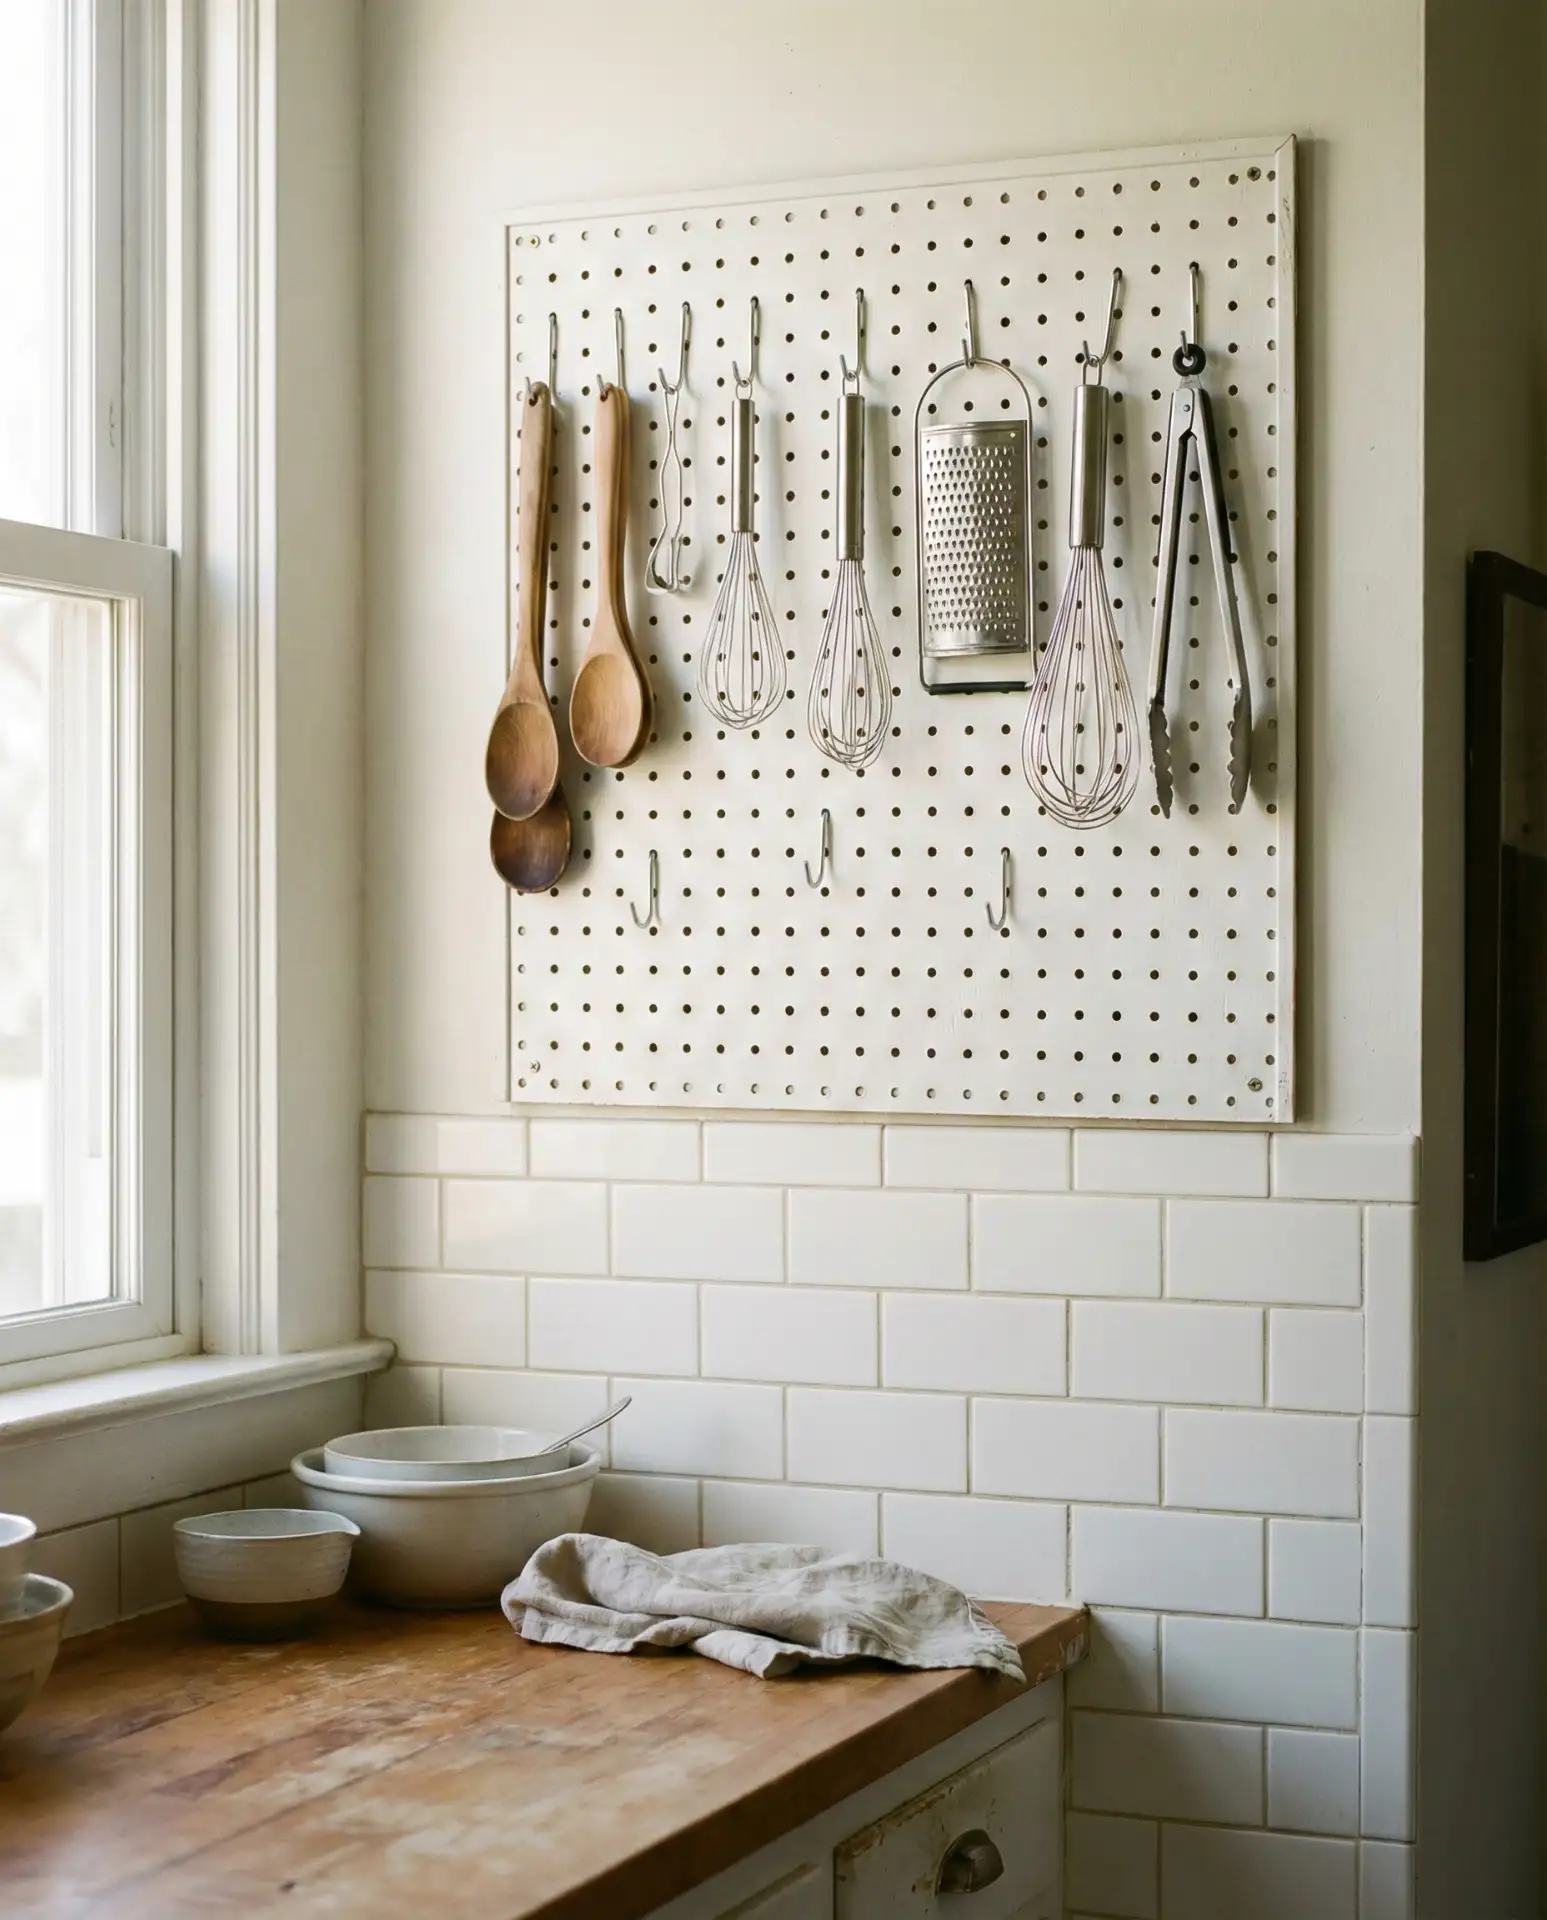
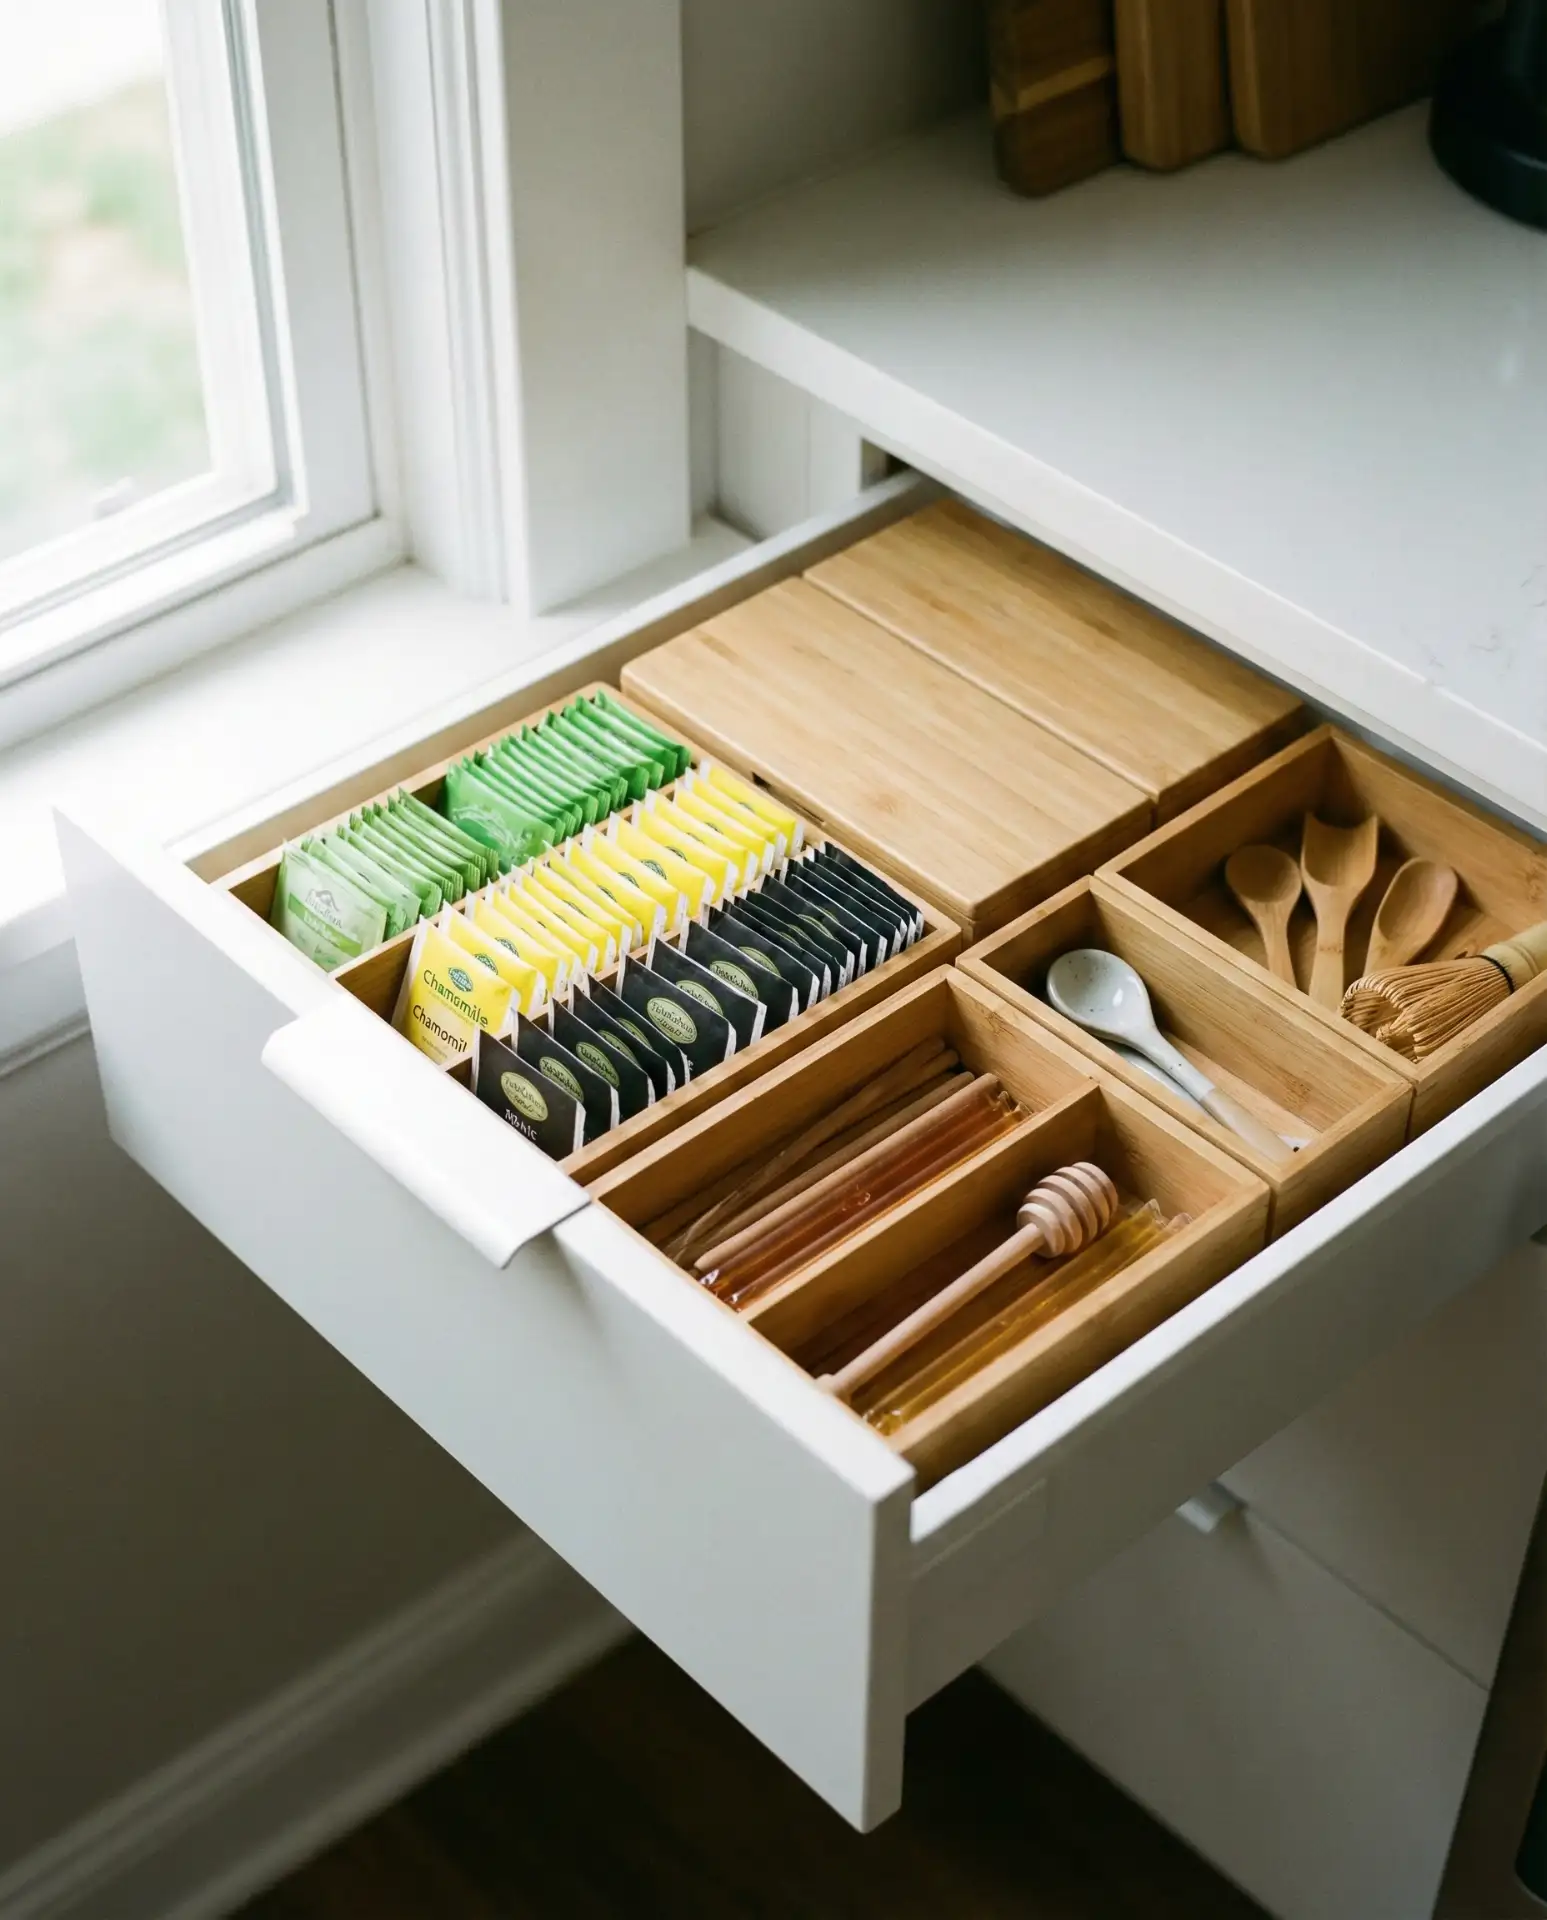
A DIY pegboard mounted on an empty wall section transforms cooking tools from drawer clutter into an organized display. Use hooks, baskets, and small shelves to hang measuring cups, spatulas, pot holders, and even small pots, keeping everything visible and within arm’s reach while you cook. Paint the pegboard to match your kitchen color scheme, or leave it natural wood for a craftsman vibe. This is one of those hacks that costs under thirty dollars but delivers custom kitchen functionality.
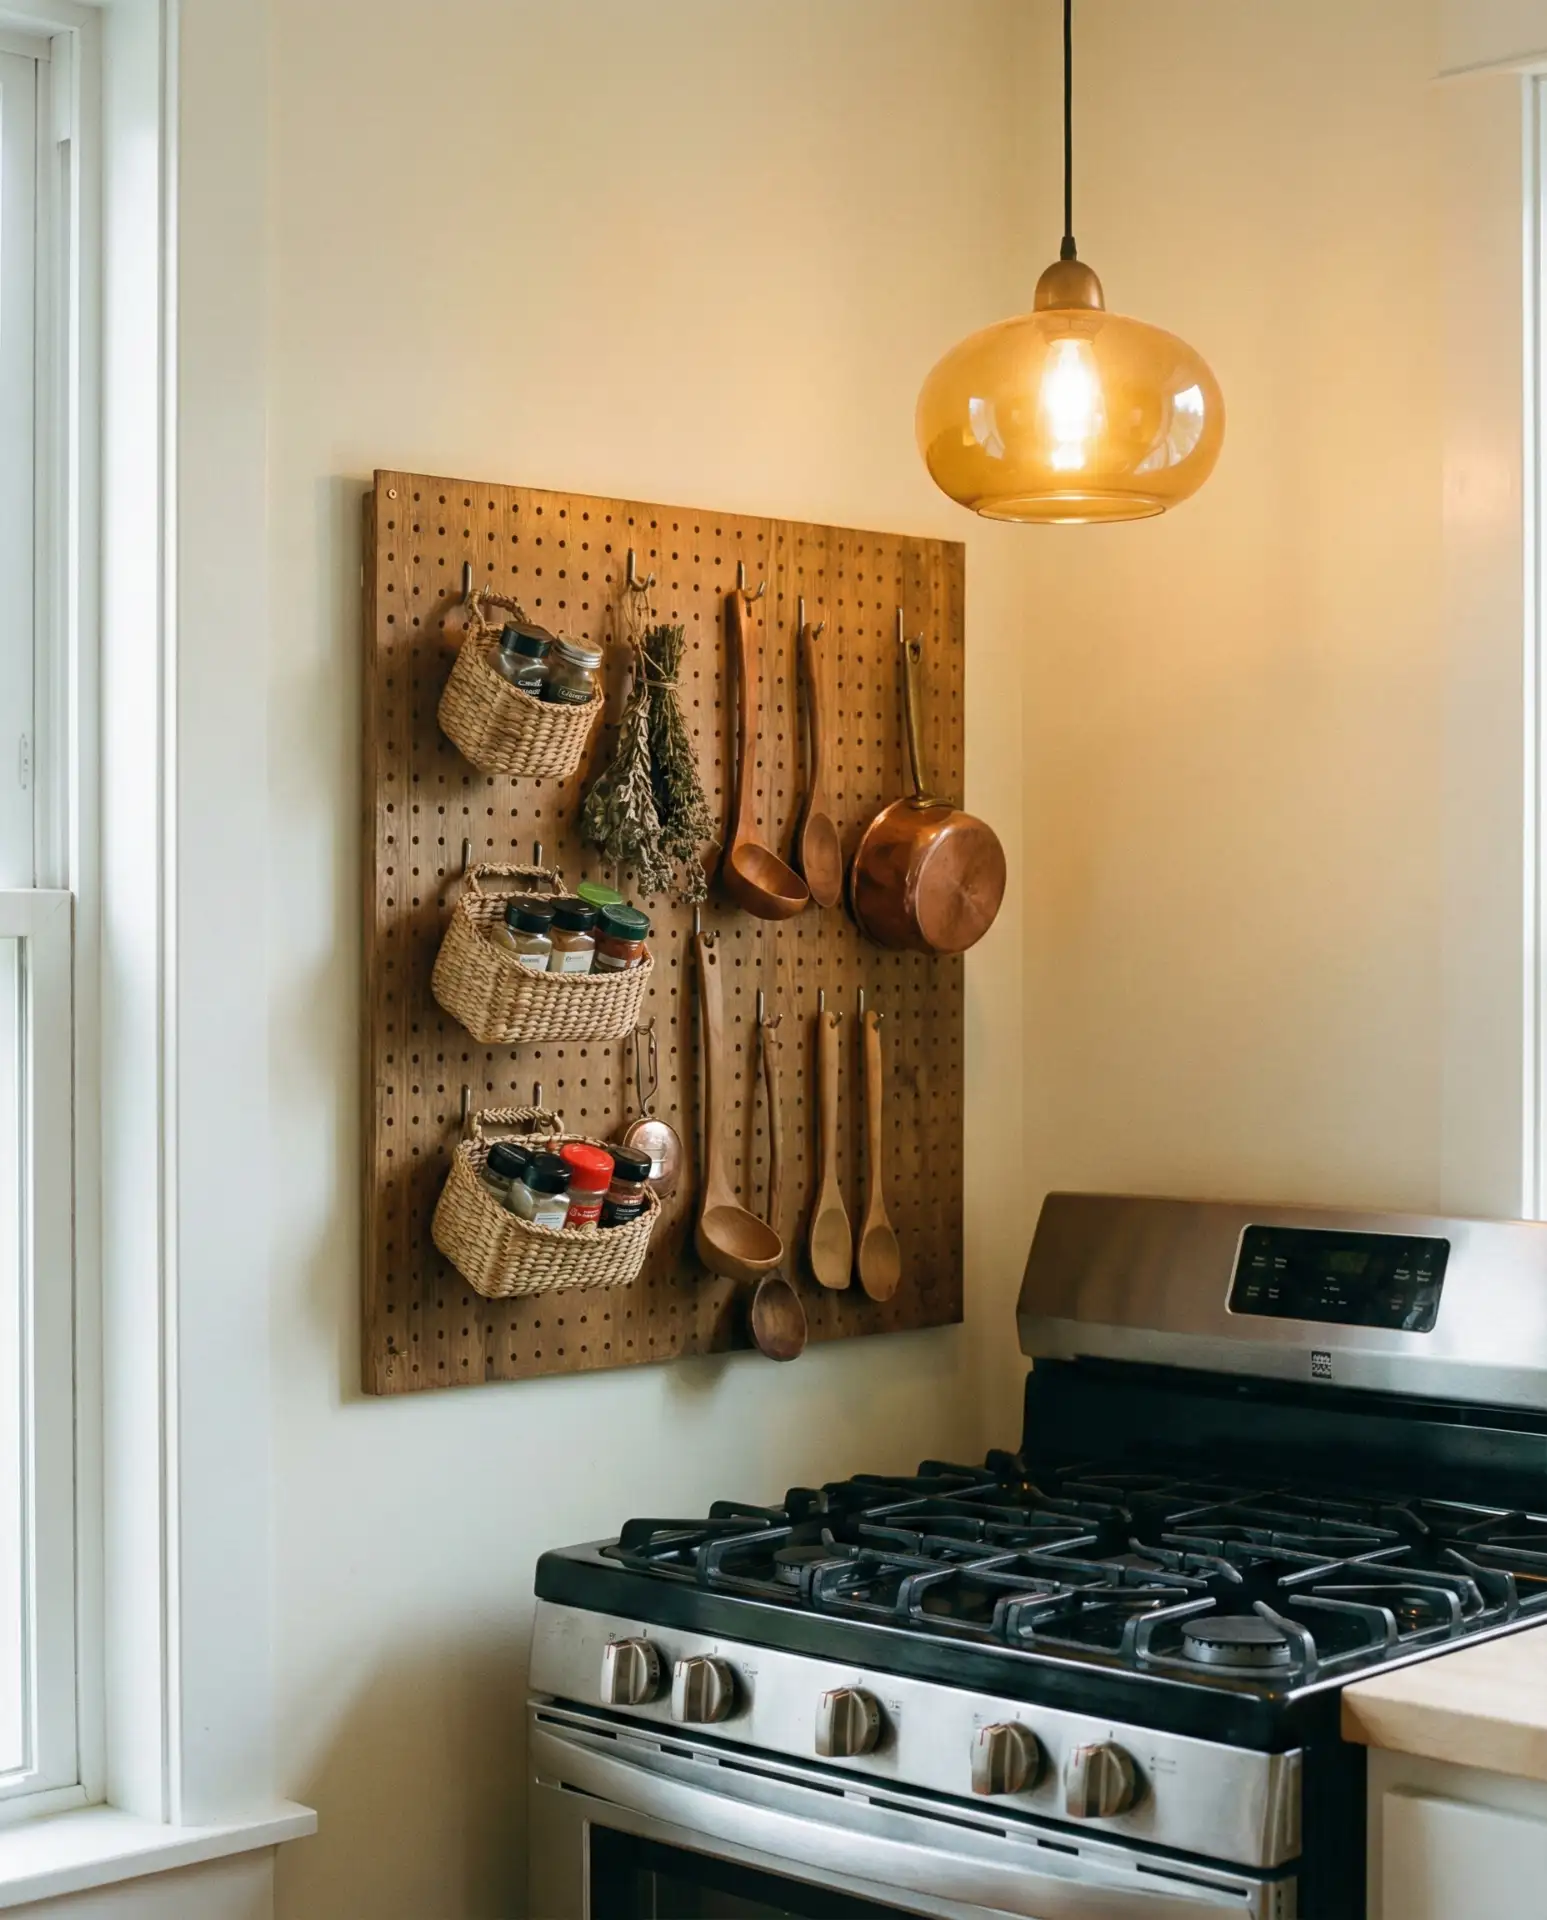
A neighbor of mine installed one of these in her rental apartment and was amazed at how much drawer space it freed up for less-frequently-used items. She customized it with small labeled baskets for tea bags and coffee pods, turning a blank wall into a functional coffee bar. The best part is that the pegboard configuration changes as your needs evolve—just move the hooks around without any new drilling.
10. Ideas for Small Apartments: Fold-Down Counter Extension
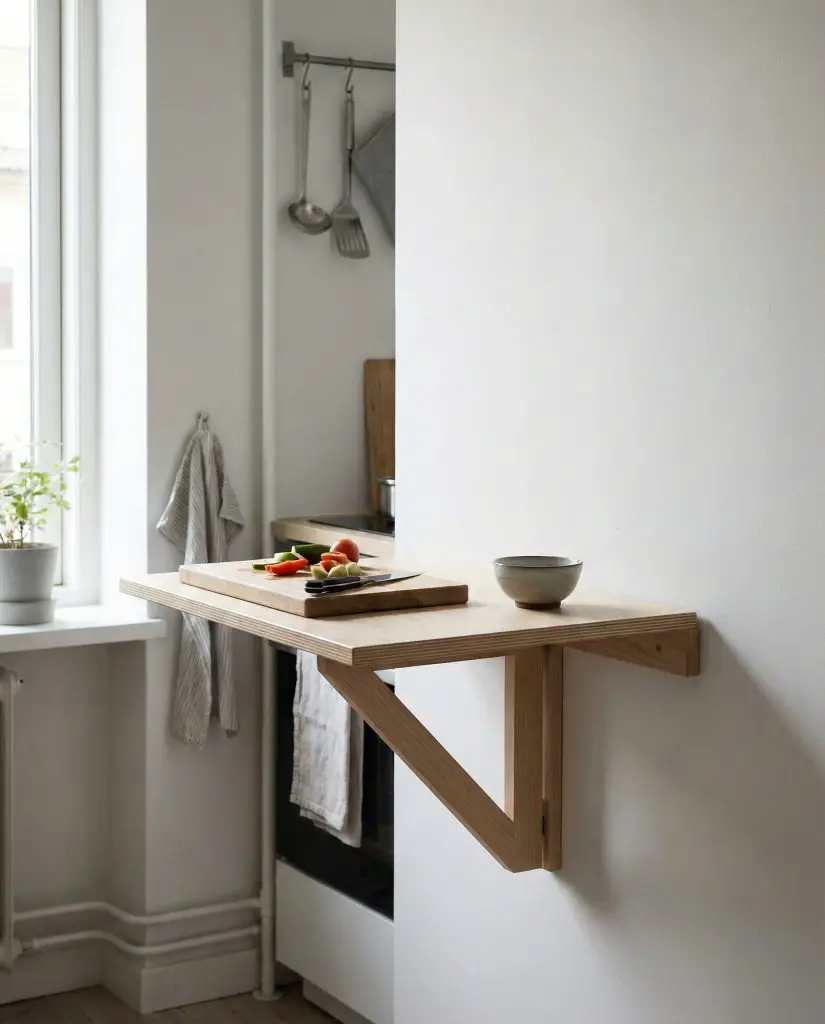
When you’re working with ideas for small apartments, counter space disappears fast. A fold-down shelf attached to a wall or the side of a cabinet gives you extra prep area when you need it, then tucks away flush when you’re done. These hinged extensions work beautifully as temporary landing zones for groceries, cutting boards, or laptop work-from-home sessions in open kitchens. Hardware stores sell the brackets for around fifteen dollars, and installation takes about twenty minutes with a drill. This is especially popular in studio apartments where every square foot counts.
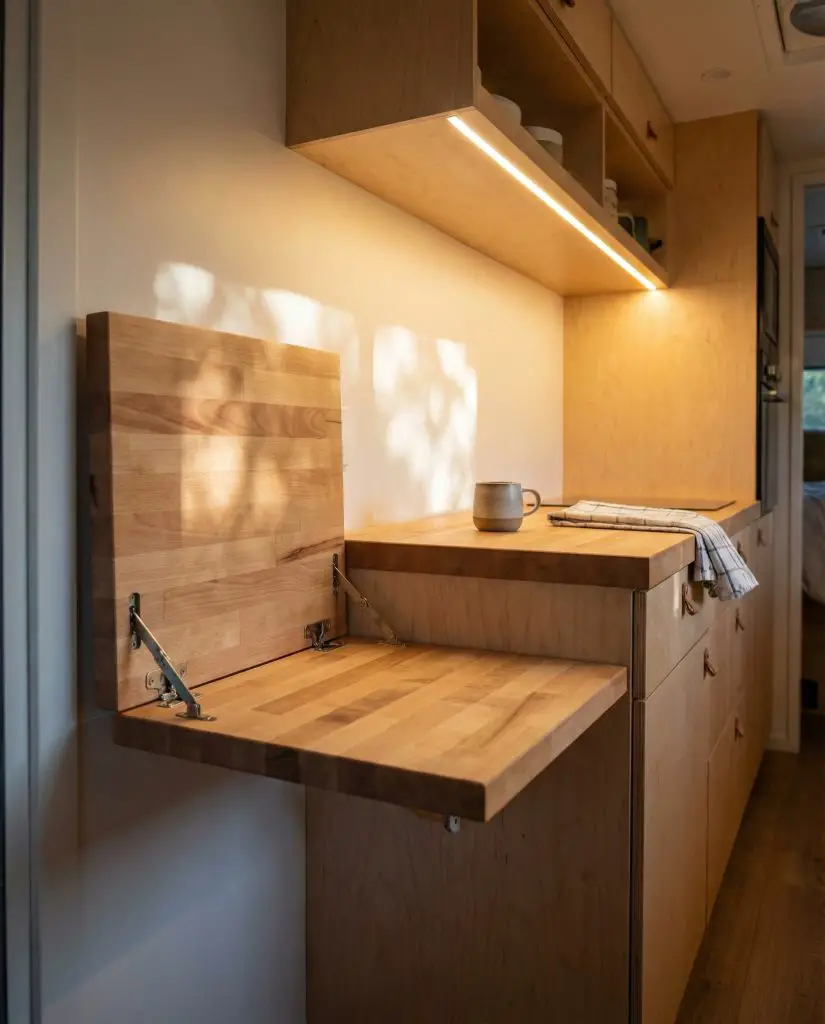
In coastal cities where apartment kitchens are notoriously cramped, fold-down extensions have become almost standard in newer renovations. They provide the flexibility to cook elaborate meals without permanently sacrificing walking space, which matters when you’re living in four hundred square feet. Make sure to mount them to wall studs for stability, especially if you plan to use them for chopping or kneading dough.
11. Camper Kitchen Magnetic Spice Jars
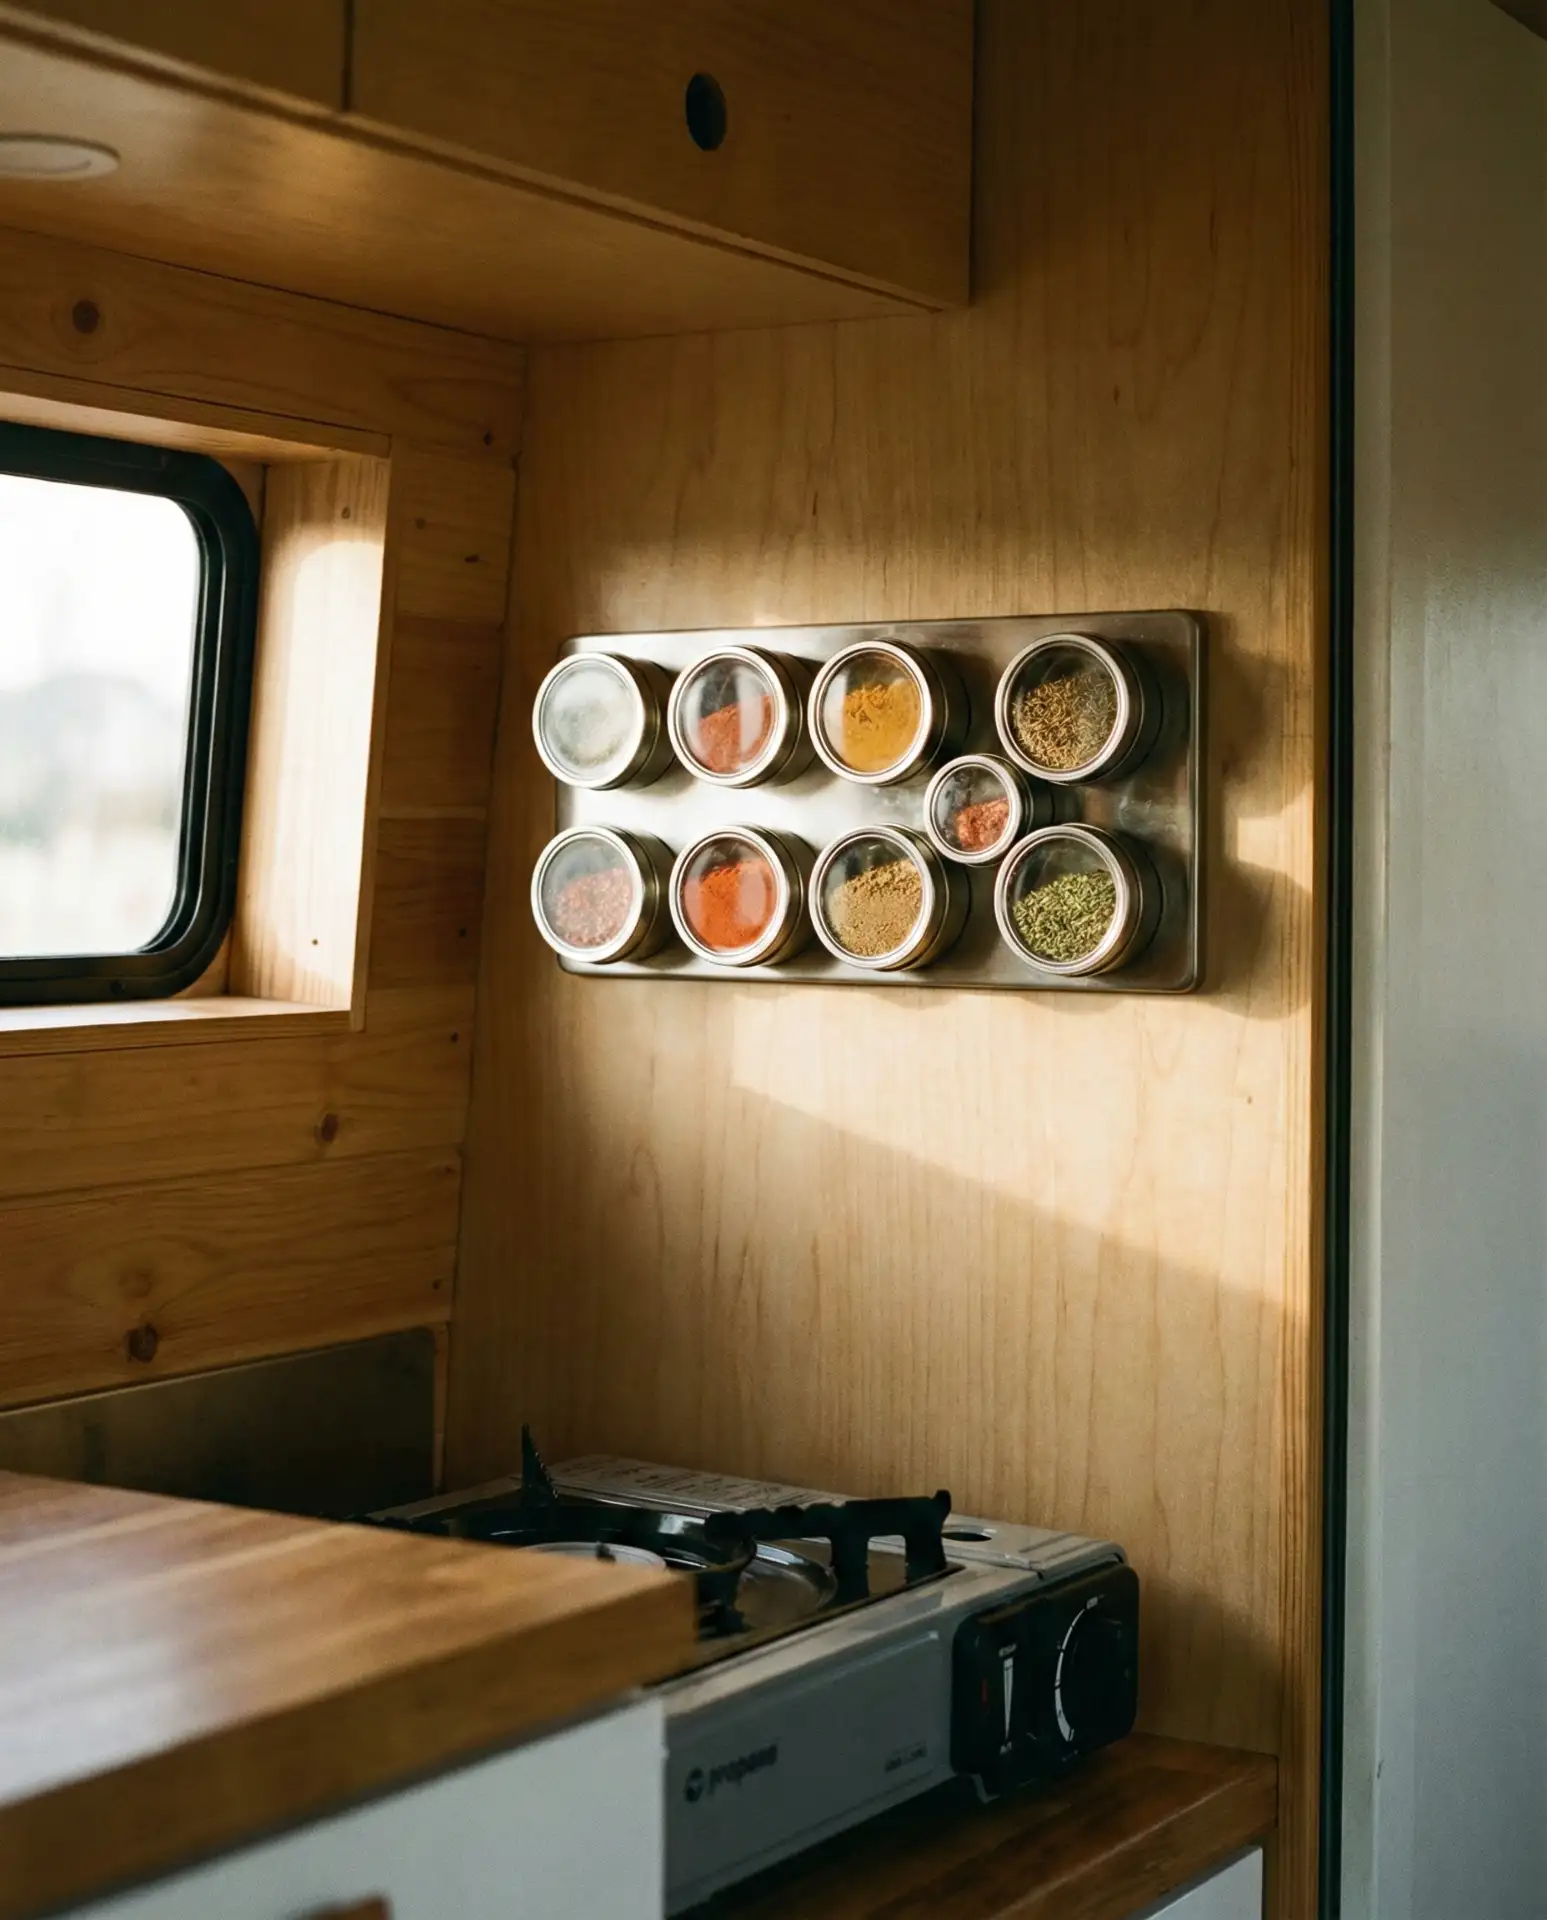
Life in a camper or RV means rethinking every storage assumption, and magnetic spice jars stuck to a metal surface save precious cabinet space. Buy small tins with clear lids, fill them with your most-used seasonings, and attach them to the side of your fridge, range hood, or a metal strip you’ve mounted on the wall. This keeps spices visible and prevents the jumbled mess that happens when jars roll around in drawers during travel. The whole setup weighs almost nothing and costs under twenty dollars for a dozen jars.
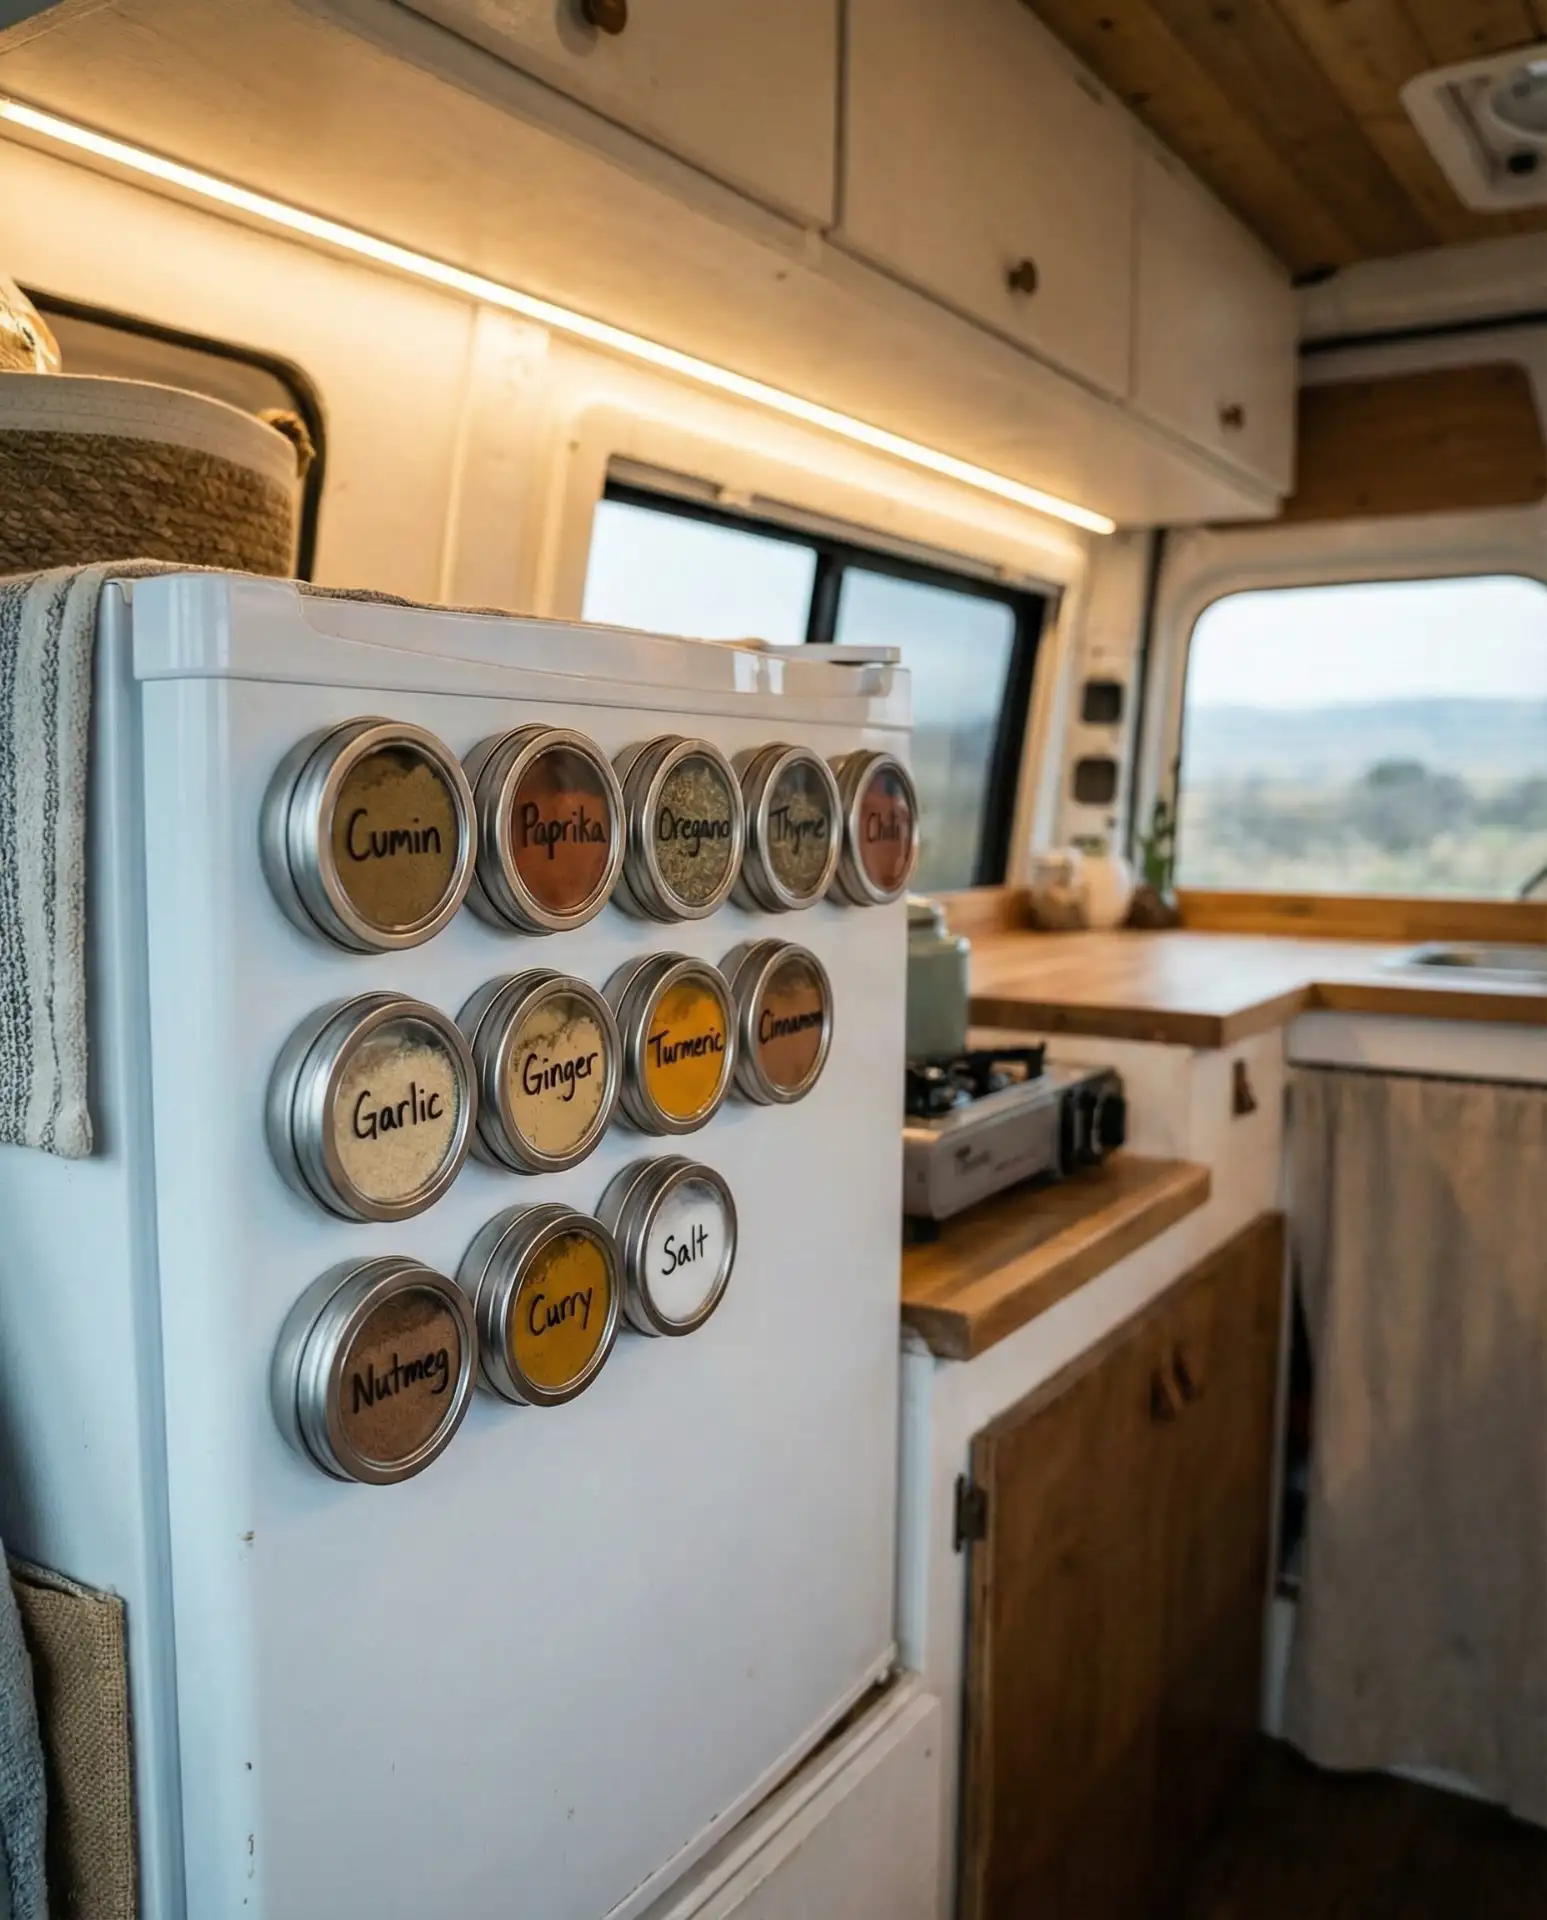
RV enthusiasts swear by this hack because it eliminates the rattle and breakage that comes from storing glass spice bottles in traditional racks. The magnetic hold is strong enough to stay put on rough roads, and because the jars are shallow, they don’t protrude much from the surface. It’s a simple example of how constraints—limited space, constant motion—can inspire genuinely clever solutions.
12. Restaurant-Style Prep Station

Professional restaurant kitchens organize ingredients by task, and you can replicate that efficiency at home with a dedicated prep station. Set up a small cart or section of counter with cutting boards, knife storage, a compost bowl, and containers of frequently used ingredients like garlic, onions, and oils. This centralized workspace means you’re not walking back and forth across the kitchen mid-recipe, which is especially helpful during busy weeknight cooking. Rolling carts work best because you can move them closer to the stove or sink as needed.
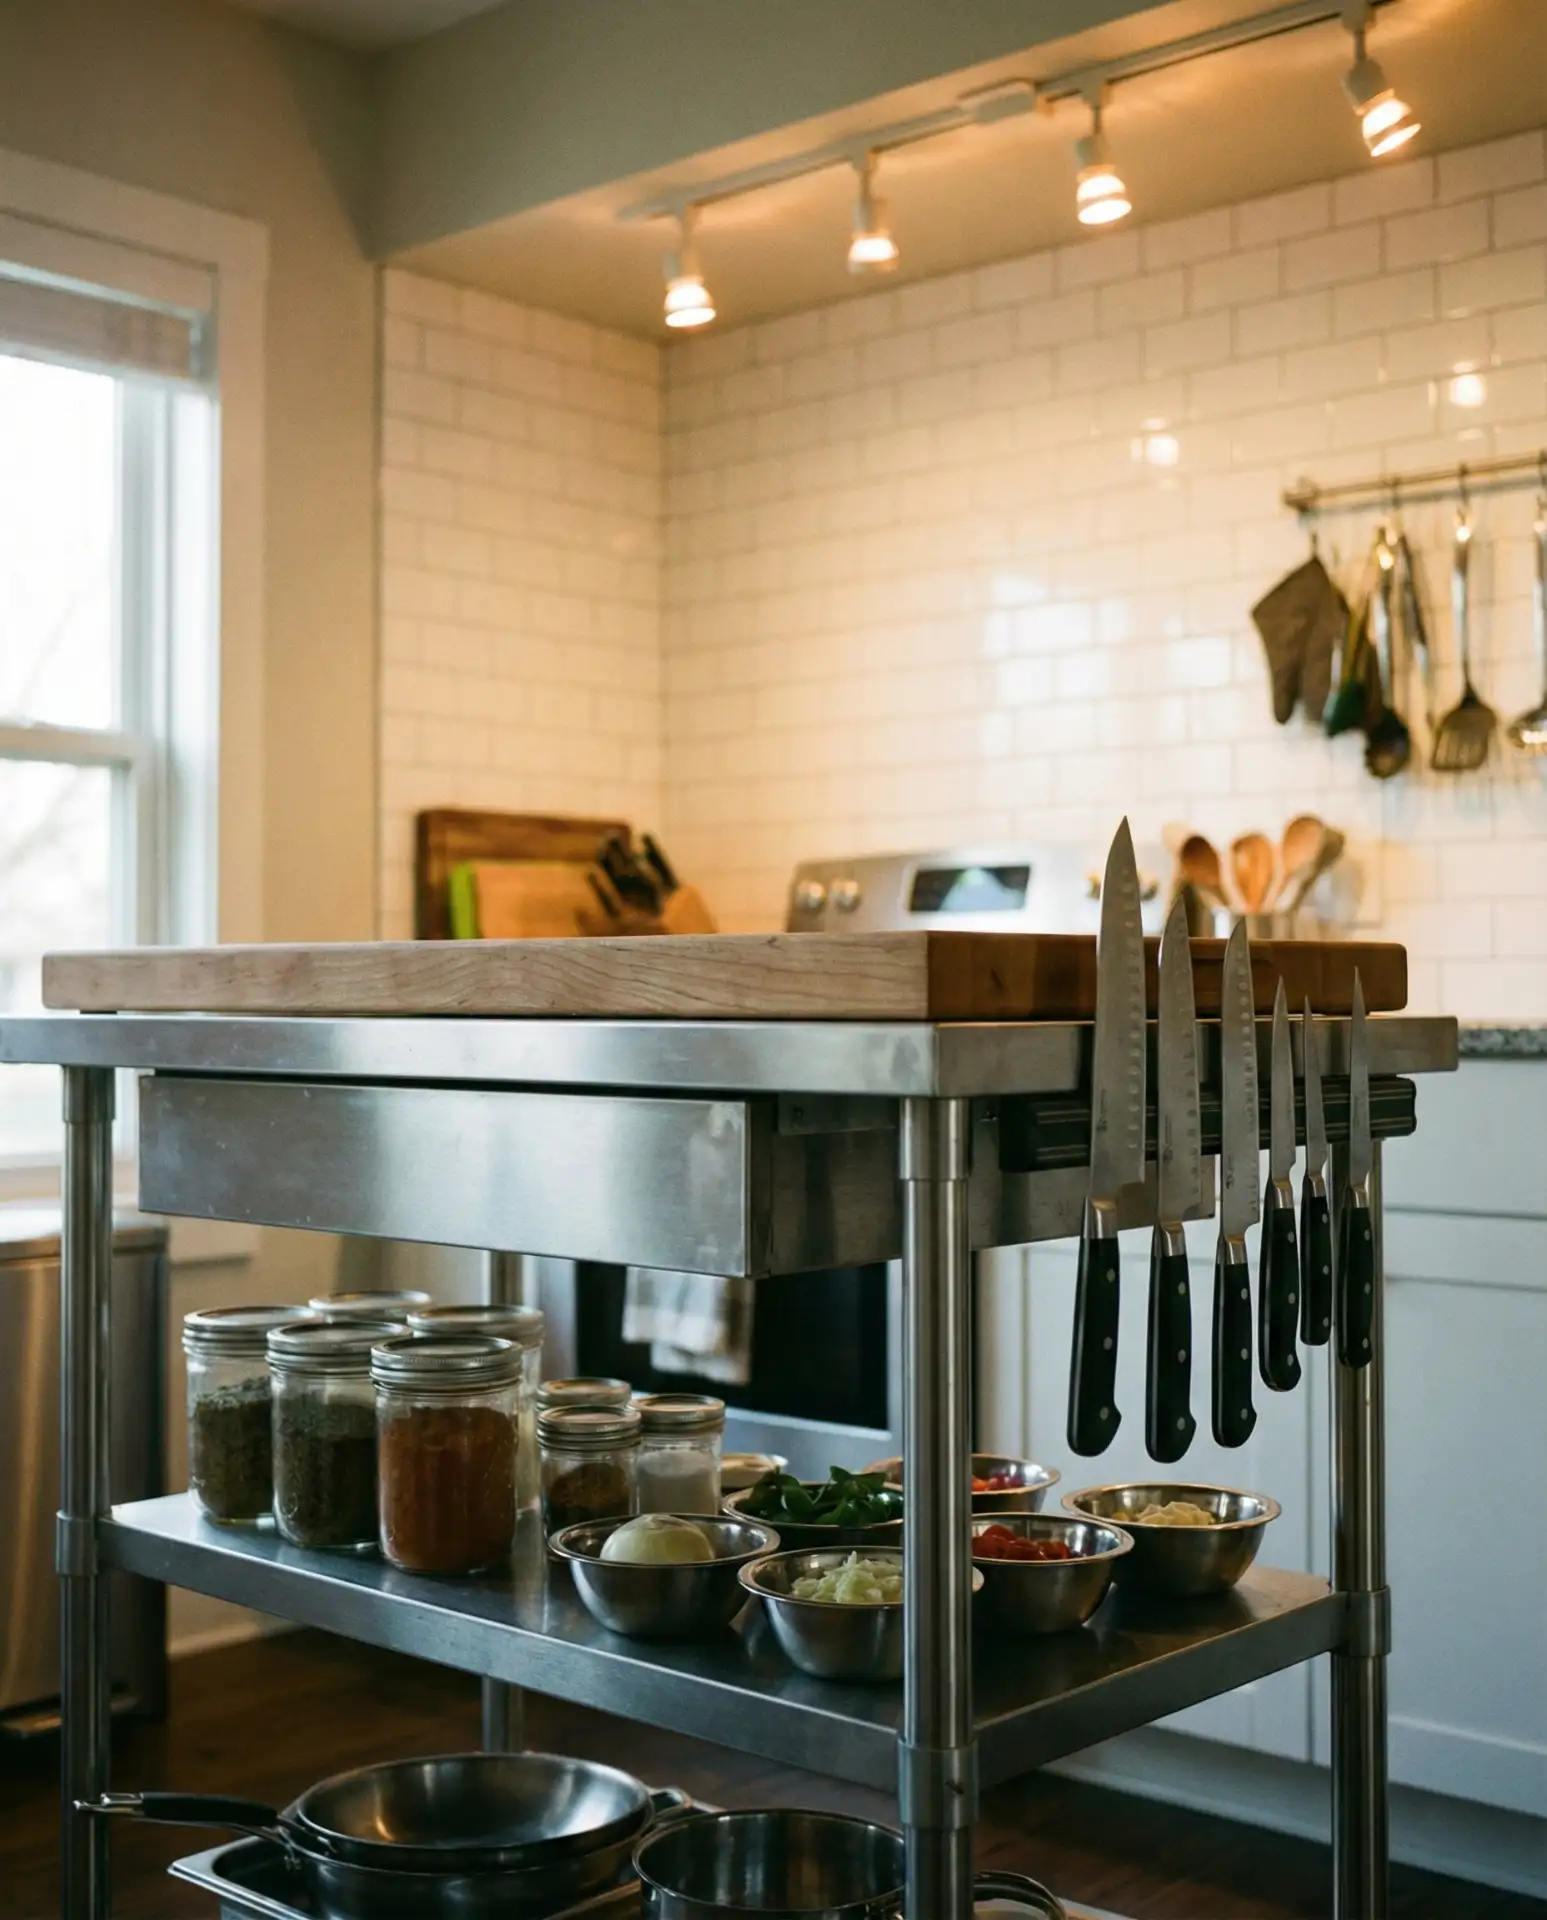
Home cooks who adopt this method report cutting meal prep time by fifteen to twenty minutes because everything needed for chopping, seasoning, and mise en place lives in one zone. It also keeps raw ingredient mess contained to a single area, making cleanup faster. The investment is minimal—a basic rolling cart runs thirty to fifty dollars—but the workflow improvement feels professional.
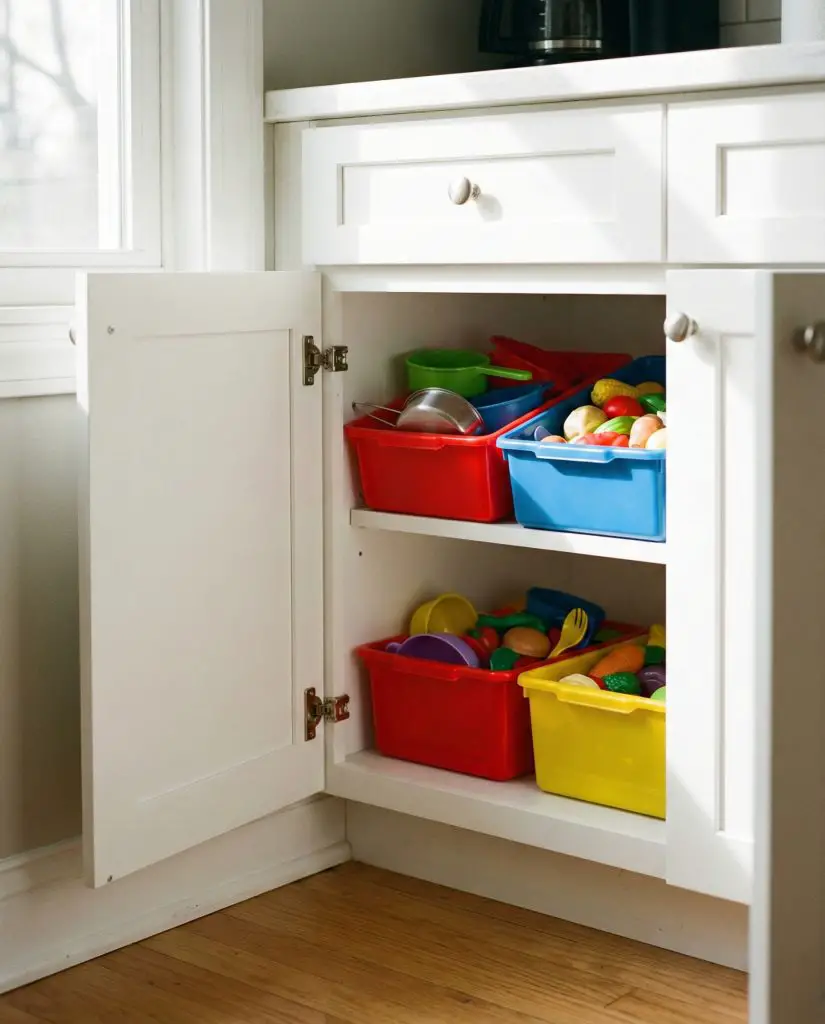
13. Toy Kitchen Organization Bins
If you have kids, their toy kitchen items—plastic food, play dishes, pretend utensils—inevitably migrate into your real kitchen drawers. Designate a low cabinet or bin specifically for play kitchen gear, using colorful baskets or a small rolling cart that toddlers can access independently. This teaches organization habits early while keeping your actual cooking tools separate from Fisher-Price spatulas. Label bins with pictures for pre-readers, and involve kids in the cleanup routine so they understand where things belong.
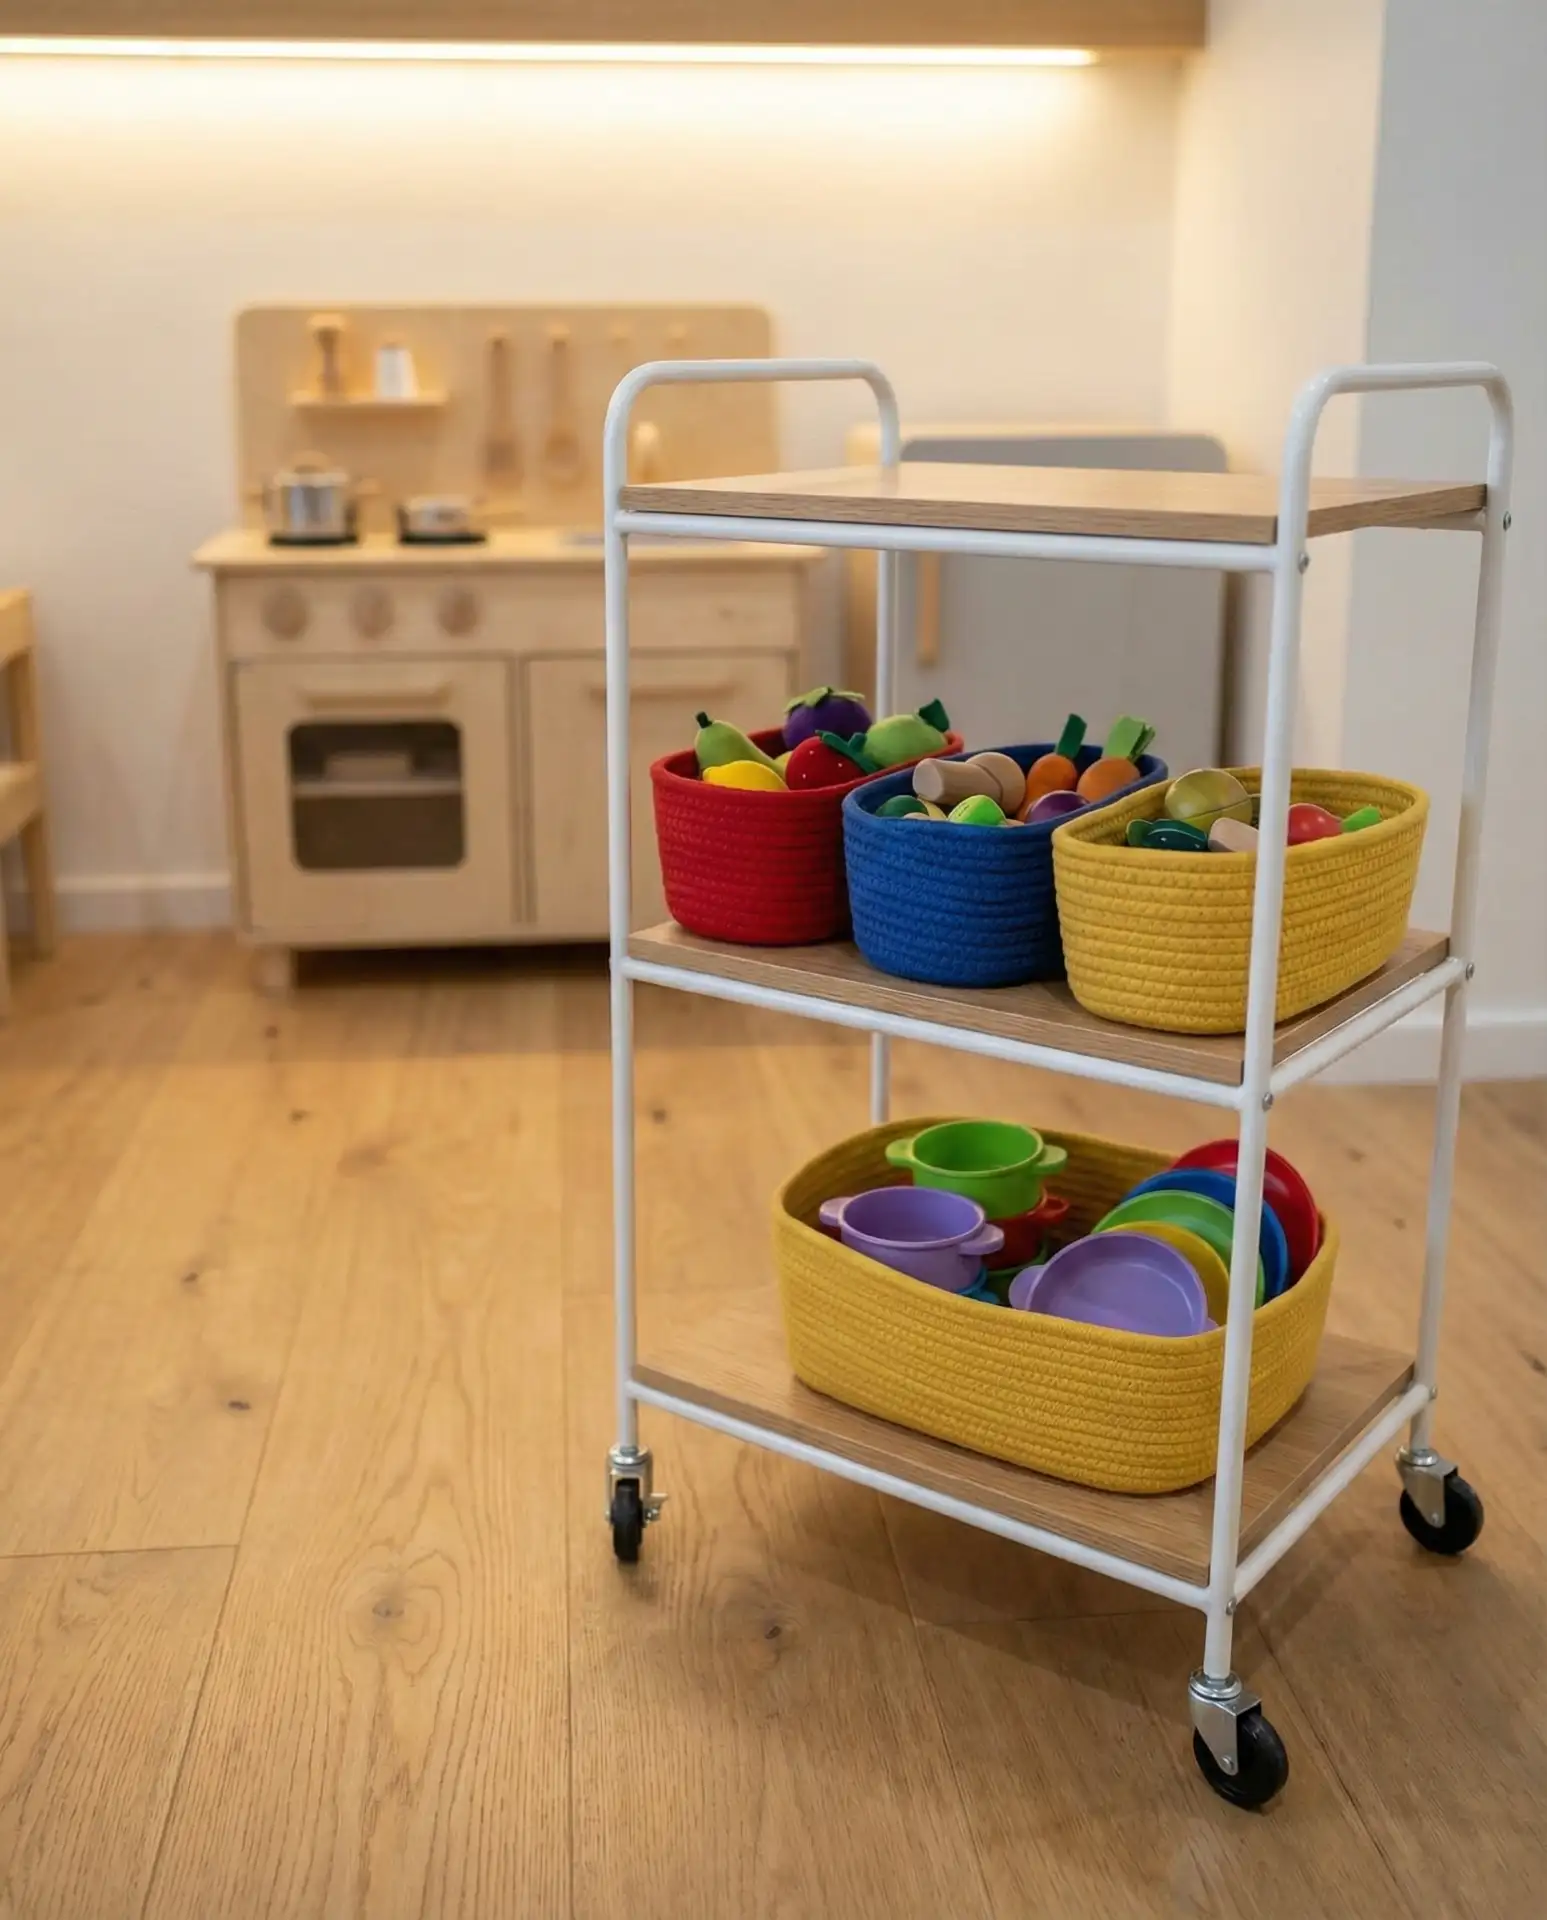
A common mistake is storing toy kitchen items in the family room or playroom, which means kids constantly drag them to the kitchen anyway during pretend cooking sessions. Keeping a dedicated spot in the actual kitchen acknowledges how kids play and prevents the daily toy migration. It also makes cleanup a quick one-step process rather than a house-wide treasure hunt.
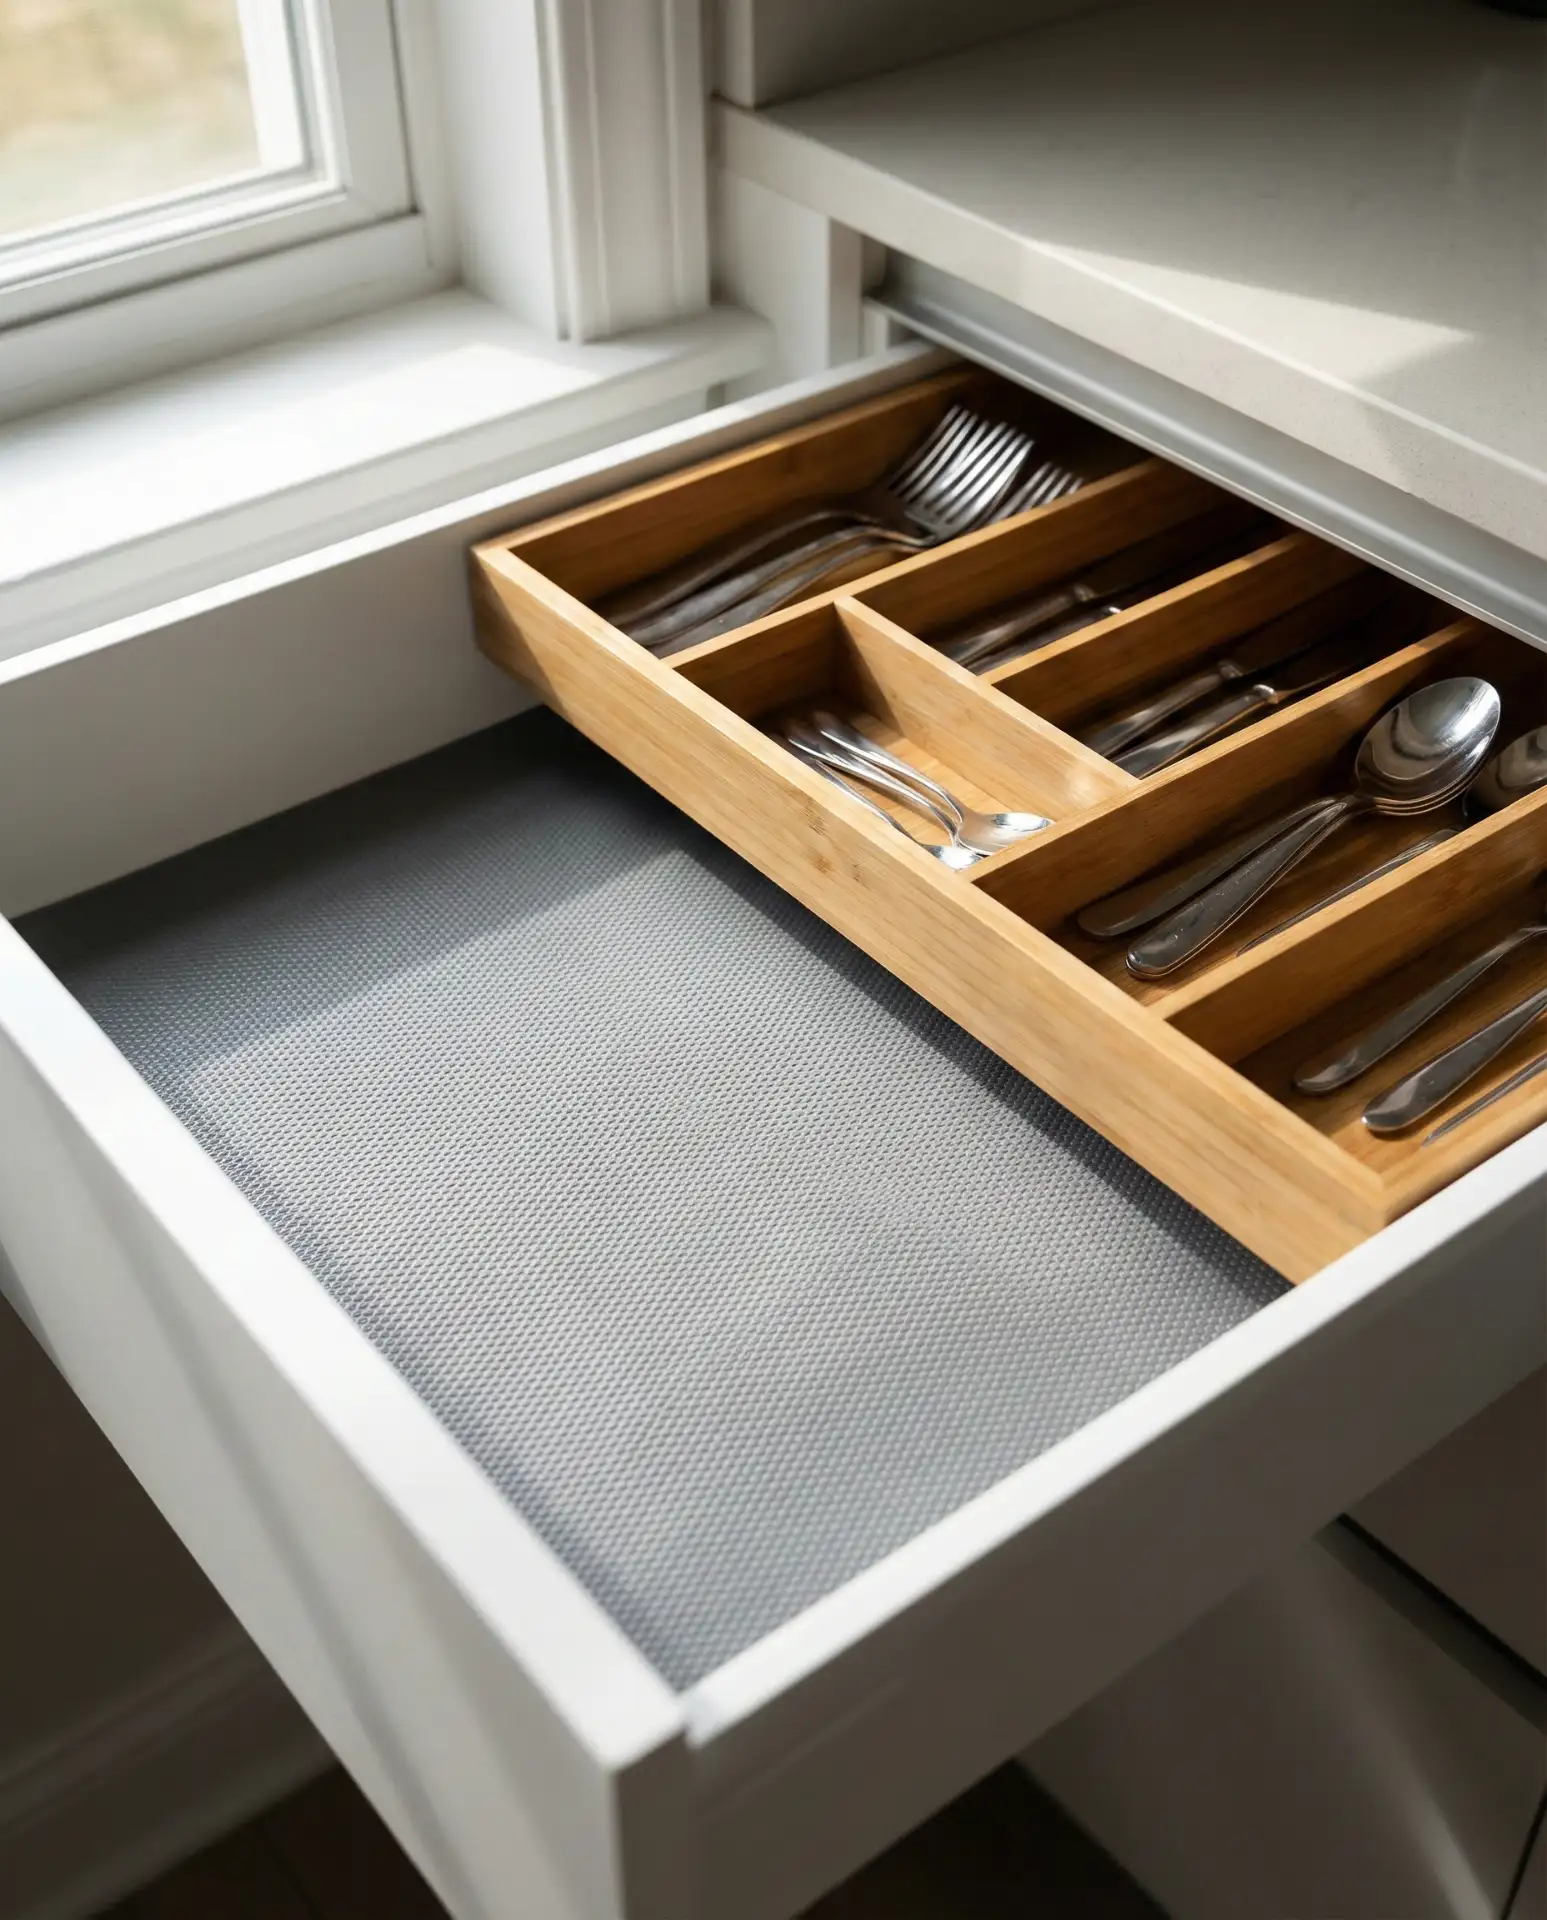
14. Tips and Tricks: Drawer Liners That Actually Stay
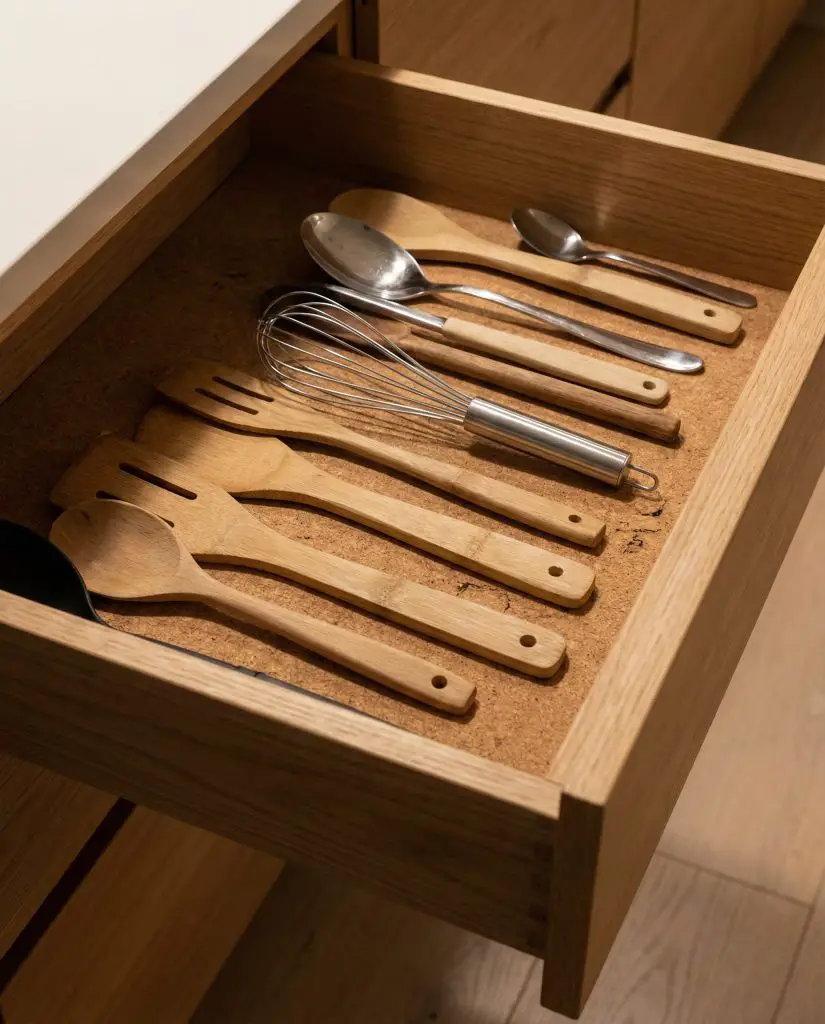
One of the most overlooked tips and tricks for kitchen organization involves choosing the right drawer liners. Those flimsy paper liners shift every time you open a drawer, creating wrinkles and bunching that defeats the purpose. Instead, opt for non-adhesive rubber or cork liners that grip naturally without sticky residue, or go with custom-cut shelf liners that you can wash and reuse. Properly fitted liners protect drawer bottoms from spills and scratches while keeping utensils from sliding around. Measure each drawer before buying to avoid waste and frustration.
Budget-conscious organizers sometimes skip liners entirely, thinking they’re decorative rather than functional. In reality, good liners extend the life of your drawers by preventing moisture damage and scratches from metal utensils, and they make cleaning up spills vastly easier. Spend the extra ten minutes getting the fit right, and you’ll never have to adjust them again.
15. Ideas for Small Spaces: Ceiling Pot Rack
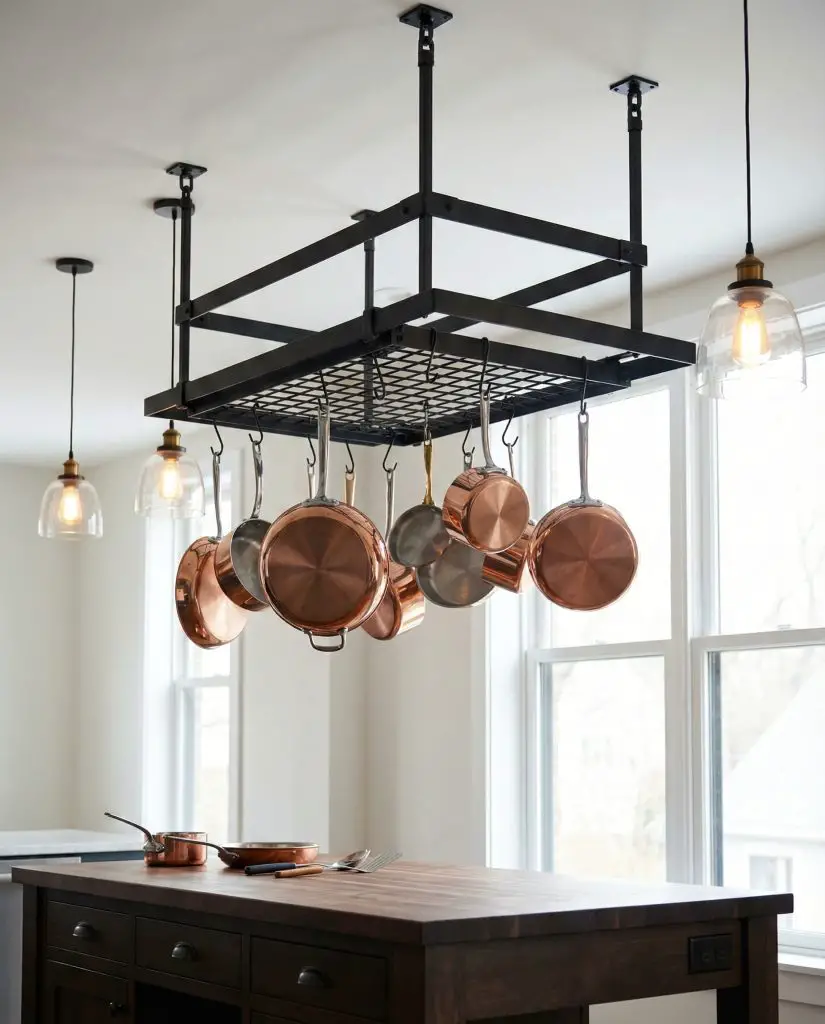
When floor and counter space are scarce, look up. Ideas for small spaces: often overlook ceiling-mounted pot racks, which free up entire cabinets by hanging your cookware overhead. Install a sturdy rack above your island, peninsula, or even in a corner near the stove, and hang pots, pans, and utensils from S-hooks. This creates a professional kitchen vibe while making your most-used tools instantly accessible. Make sure the rack is anchored into ceiling joists for safety, especially if you’re hanging heavy cast iron.
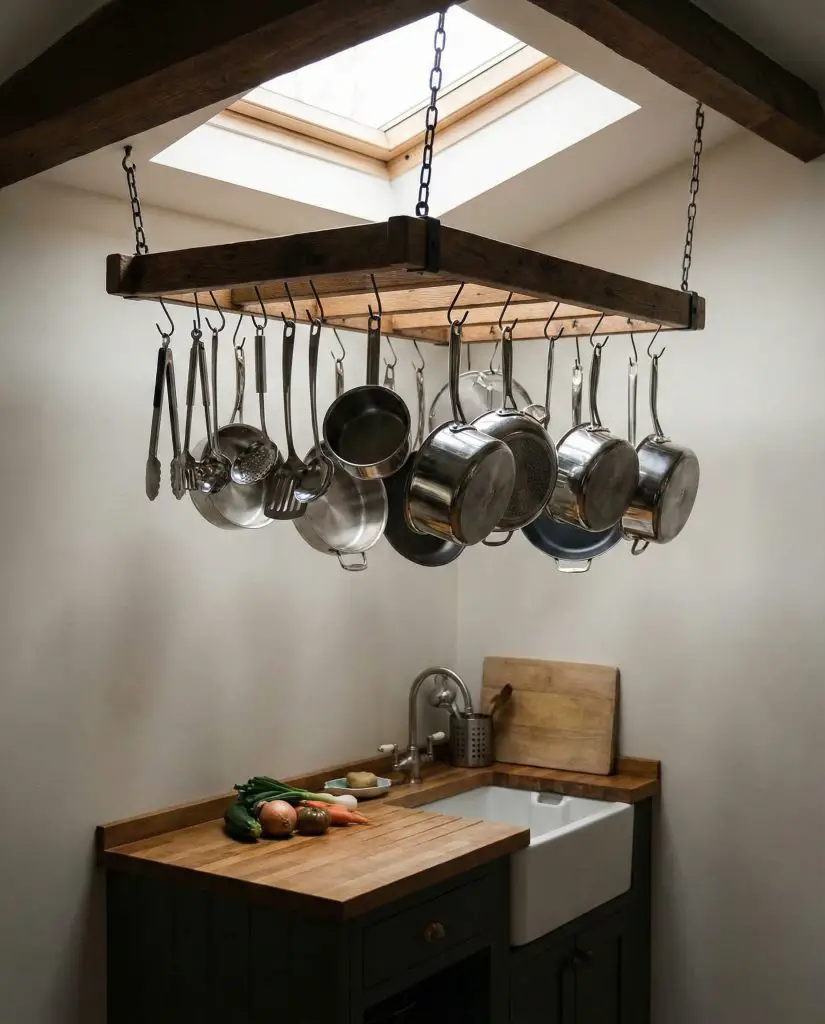
This works best in kitchens with standard eight-foot ceilings where you have clearance to walk beneath without hitting your head on dangling pans. In loft-style apartments or homes with exposed beams, ceiling racks add architectural interest while solving storage problems. The installation is more involved than a simple shelf, but the payoff in reclaimed cabinet space is enormous.
16. Amazon Pull-Out Trash System
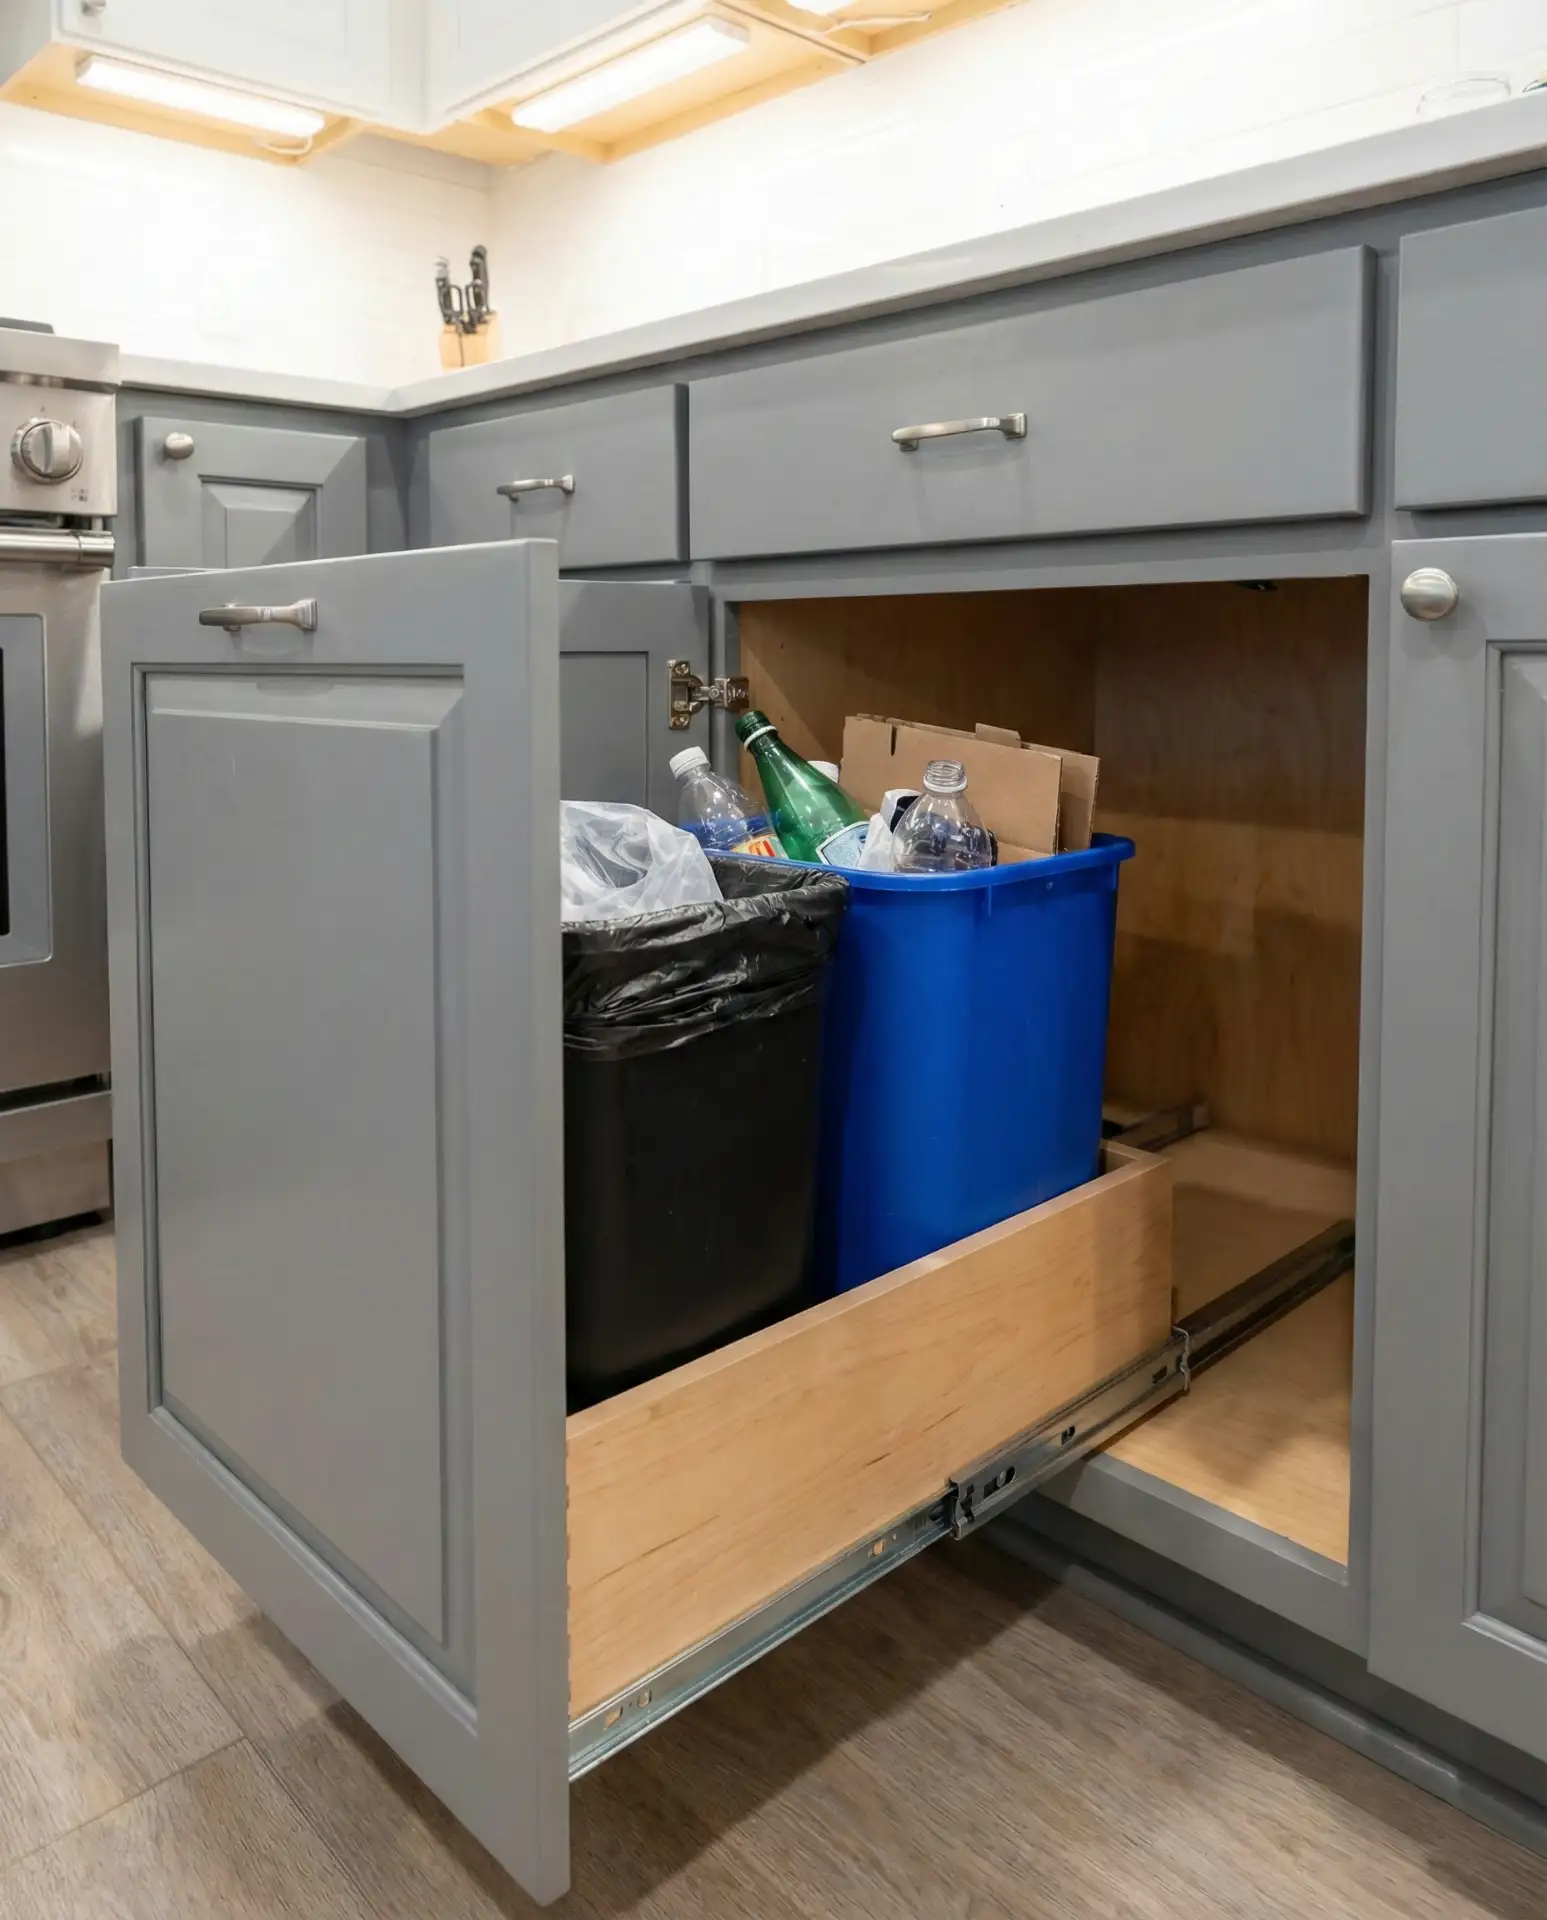
Visible trash cans are an eyesore, but constantly bending to lift cabinet doors to access them is annoying. A pull-out trash system from Amazon mounts inside a base cabinet and glides out smoothly when you need it, hiding waste bins completely when closed. Many models include dual compartments for trash and recycling, and soft-close mechanisms prevent slamming. Installation typically requires just a screwdriver and about thirty minutes, transforming a standard cabinet into a sleek waste management station. This upgrade feels custom but costs a fraction of built-in cabinetry.
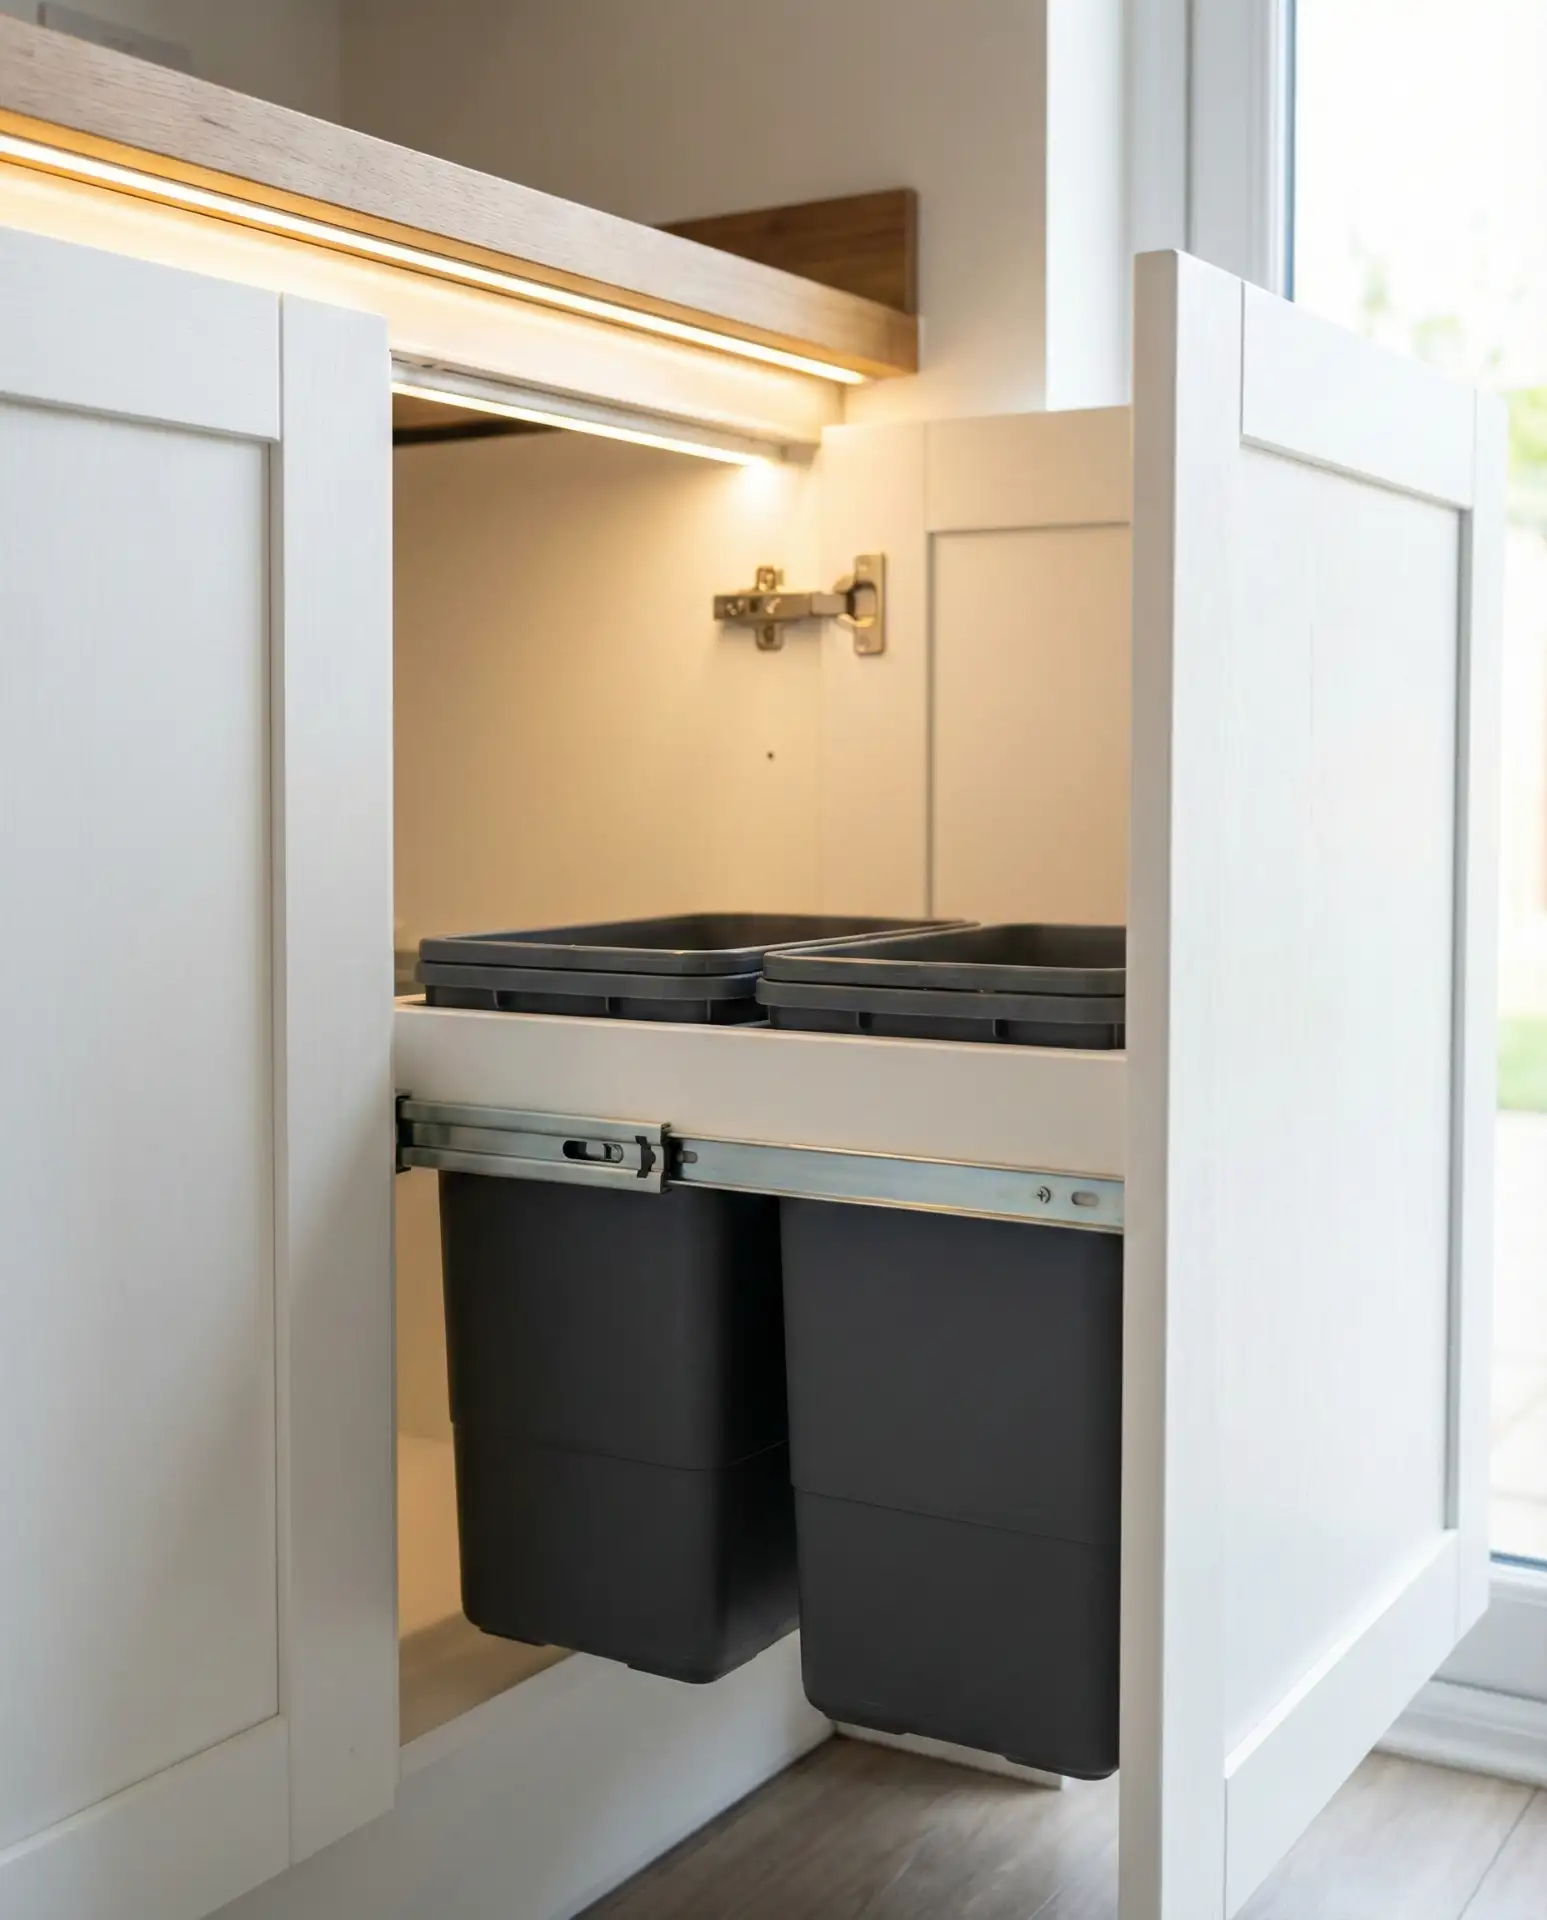
In suburban homes where kitchens often open to living areas, hiding trash bins is both aesthetic and practical, preventing odors from spreading into entertaining spaces. The soft-close feature is worth seeking out because it eliminates the harsh bang of cabinet doors, which is especially appreciated in households with early risers or light sleepers. Prices range from fifty to one hundred fifty dollars depending on size and quality.
17. Hacks: Tension Rod Dividers

This is one of those brilliant hacks that costs about five dollars and solves multiple problems. Install spring-loaded tension rods vertically in deep cabinets to create dividers for baking sheets, cutting boards, and serving platters. No drilling, no permanent changes—just adjustable organization that keeps flat items upright and easy to grab. The same trick works horizontally under sinks to hang spray bottles or in pantries to corral lids and pot covers. You can find these rods at any Dollar Tree or hardware store.
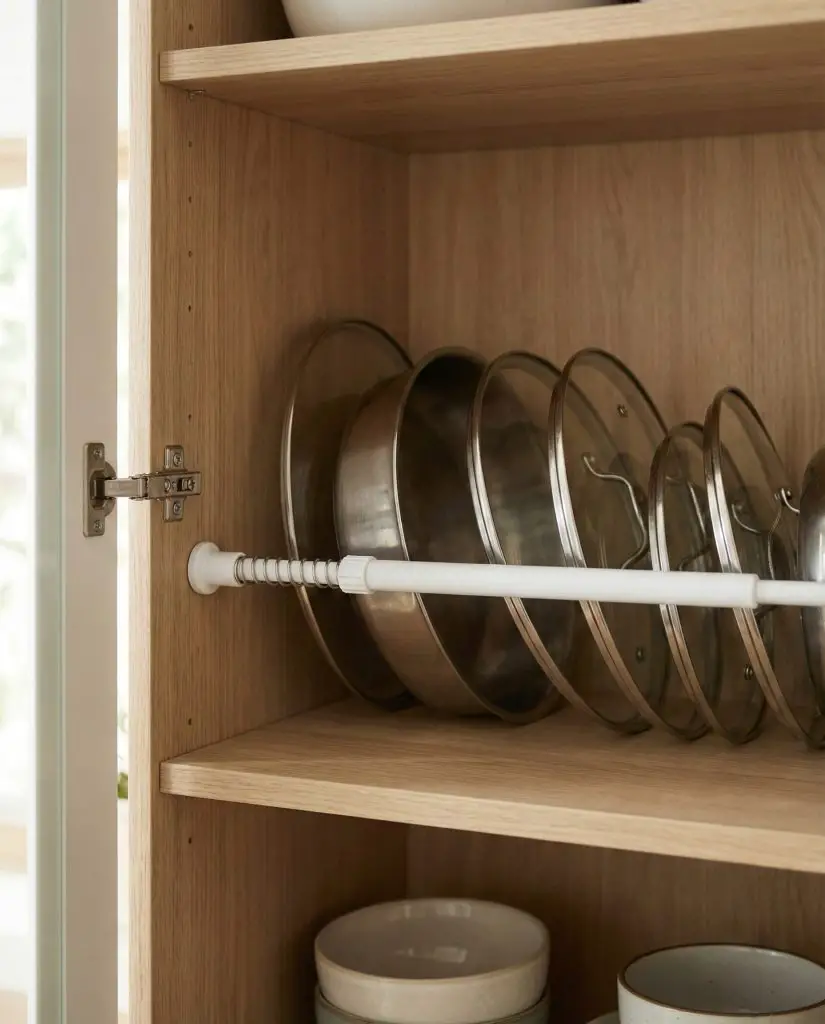
Renters especially love this solution because it’s completely reversible and leaves no damage when you move out. The rods adjust to fit different cabinet widths, so they work in almost any kitchen configuration. Just make sure to measure your cabinet depth before buying to ensure the rods will fit securely without slipping.
18. Commercial Kitchen Tool Hooks

Walk into any serious restaurant kitchen and you’ll see heavy-duty S-hooks dangling from overhead racks or wall-mounted rails. Bring that efficiency home by installing a simple rail system or grid panel where you can hang frequently used tools—ladles, tongs, colanders, and whisks. This keeps them off the counter but immediately accessible, and the open-air storage prevents the musty smell that develops in closed drawers. Commercial-grade hooks are inexpensive and usually sold in packs at restaurant supply stores or online for under fifteen dollars.
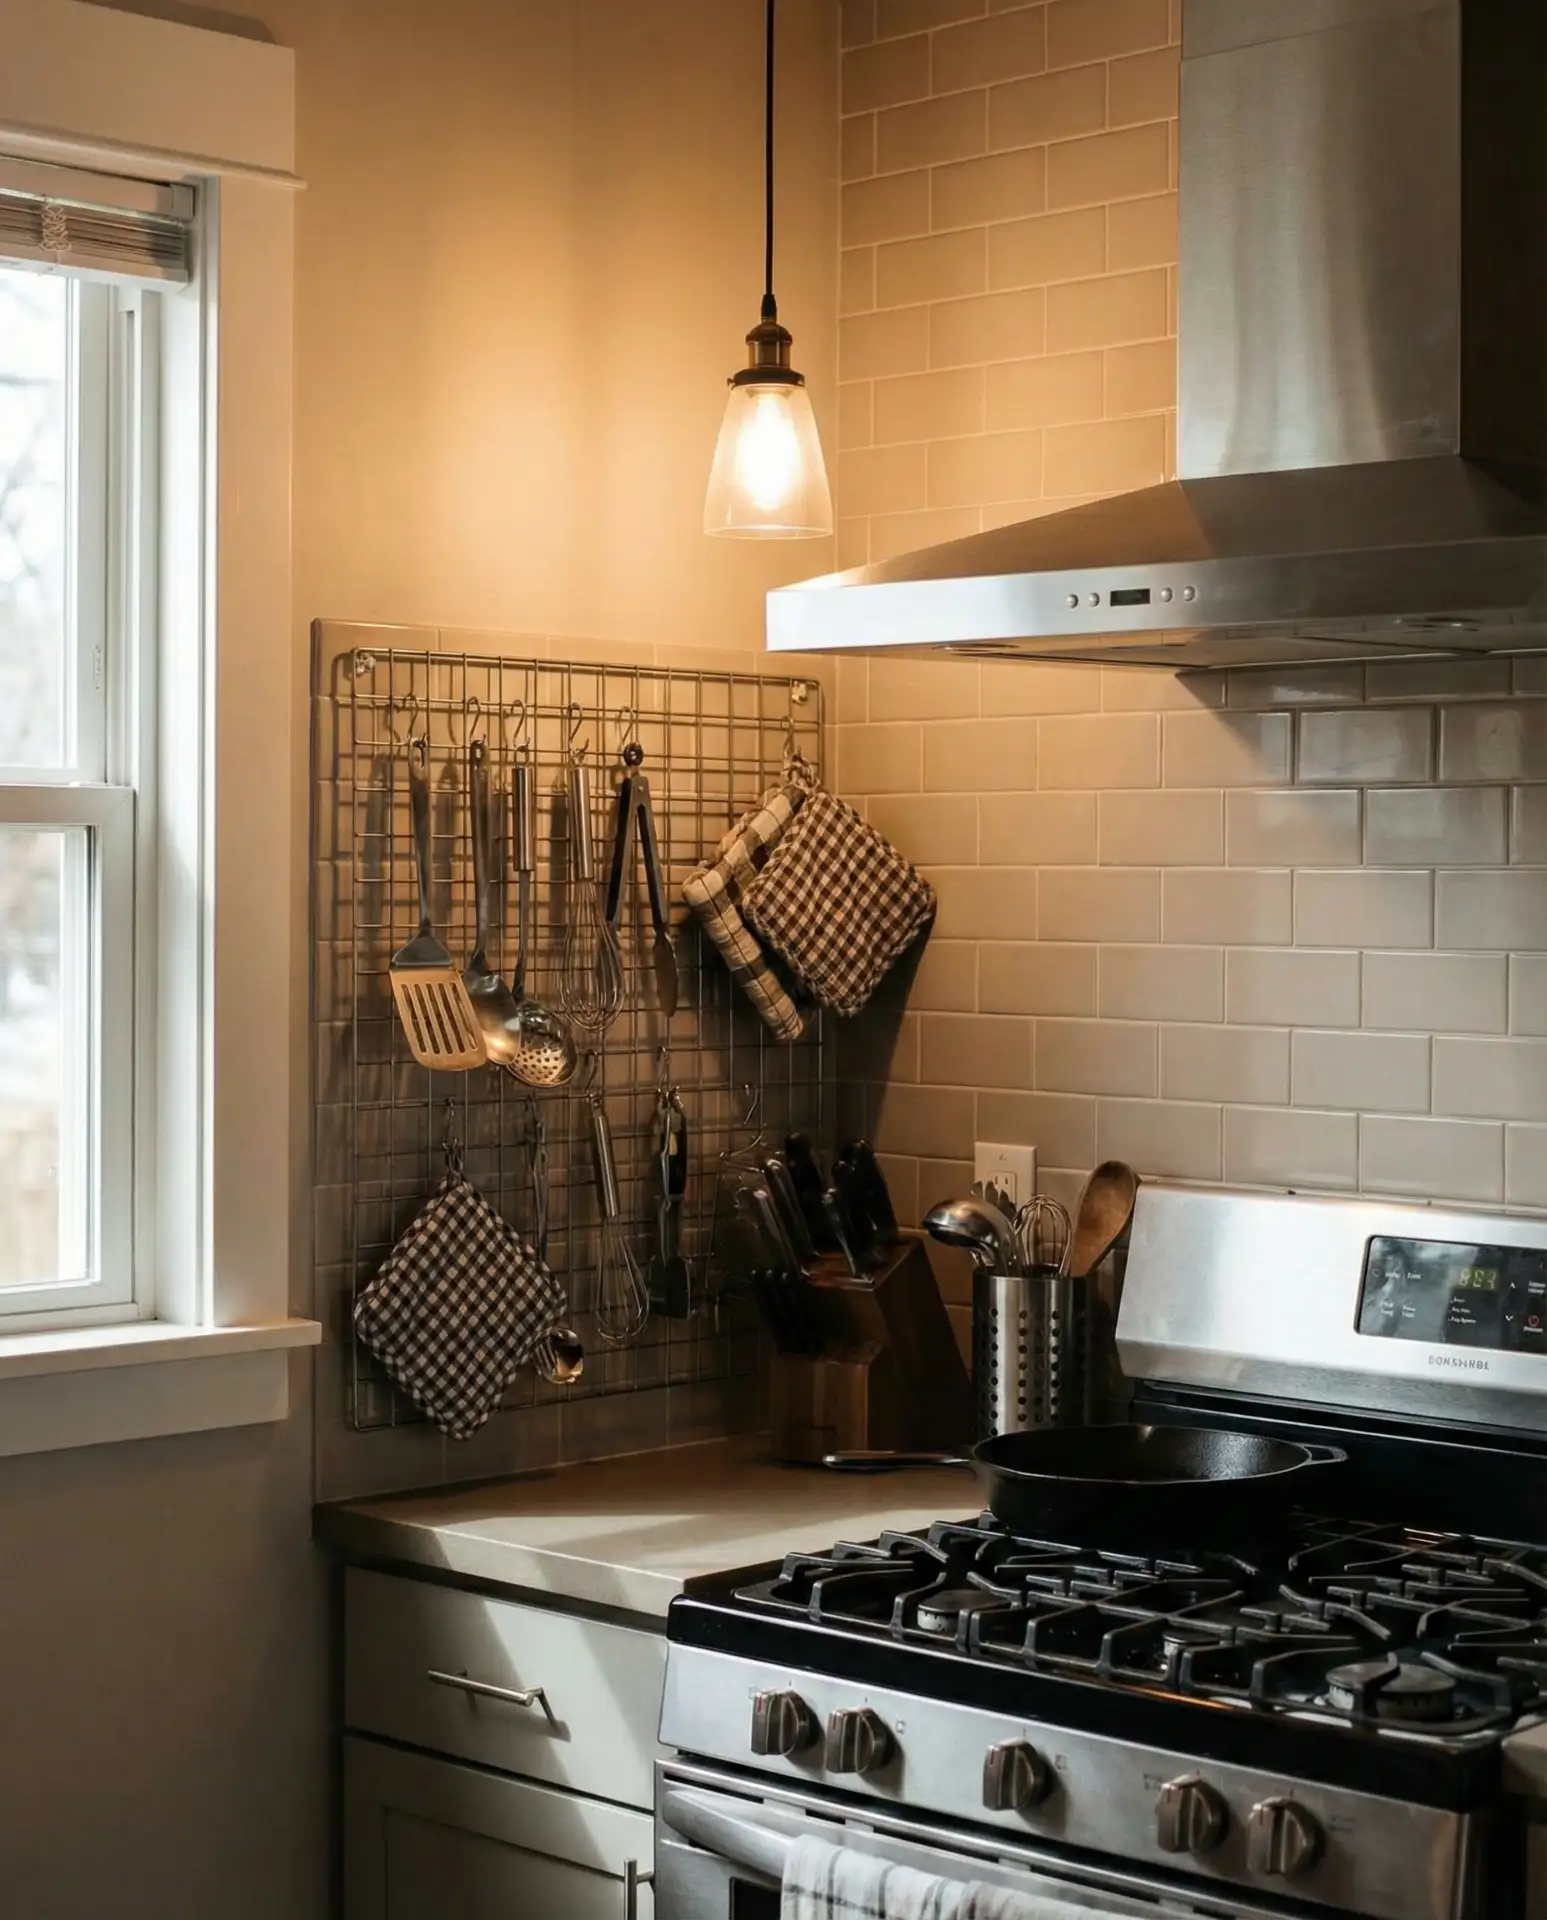
Across the Southwest, where open-concept kitchens are common, this approach lets you display attractive copper or enamel cookware as decor while keeping everyday stainless steel tools functional. The visual effect is honest and unpretentious, celebrating the tools you use rather than hiding them. Installation is straightforward—most rail systems come with mounting hardware and take about fifteen minutes to secure.
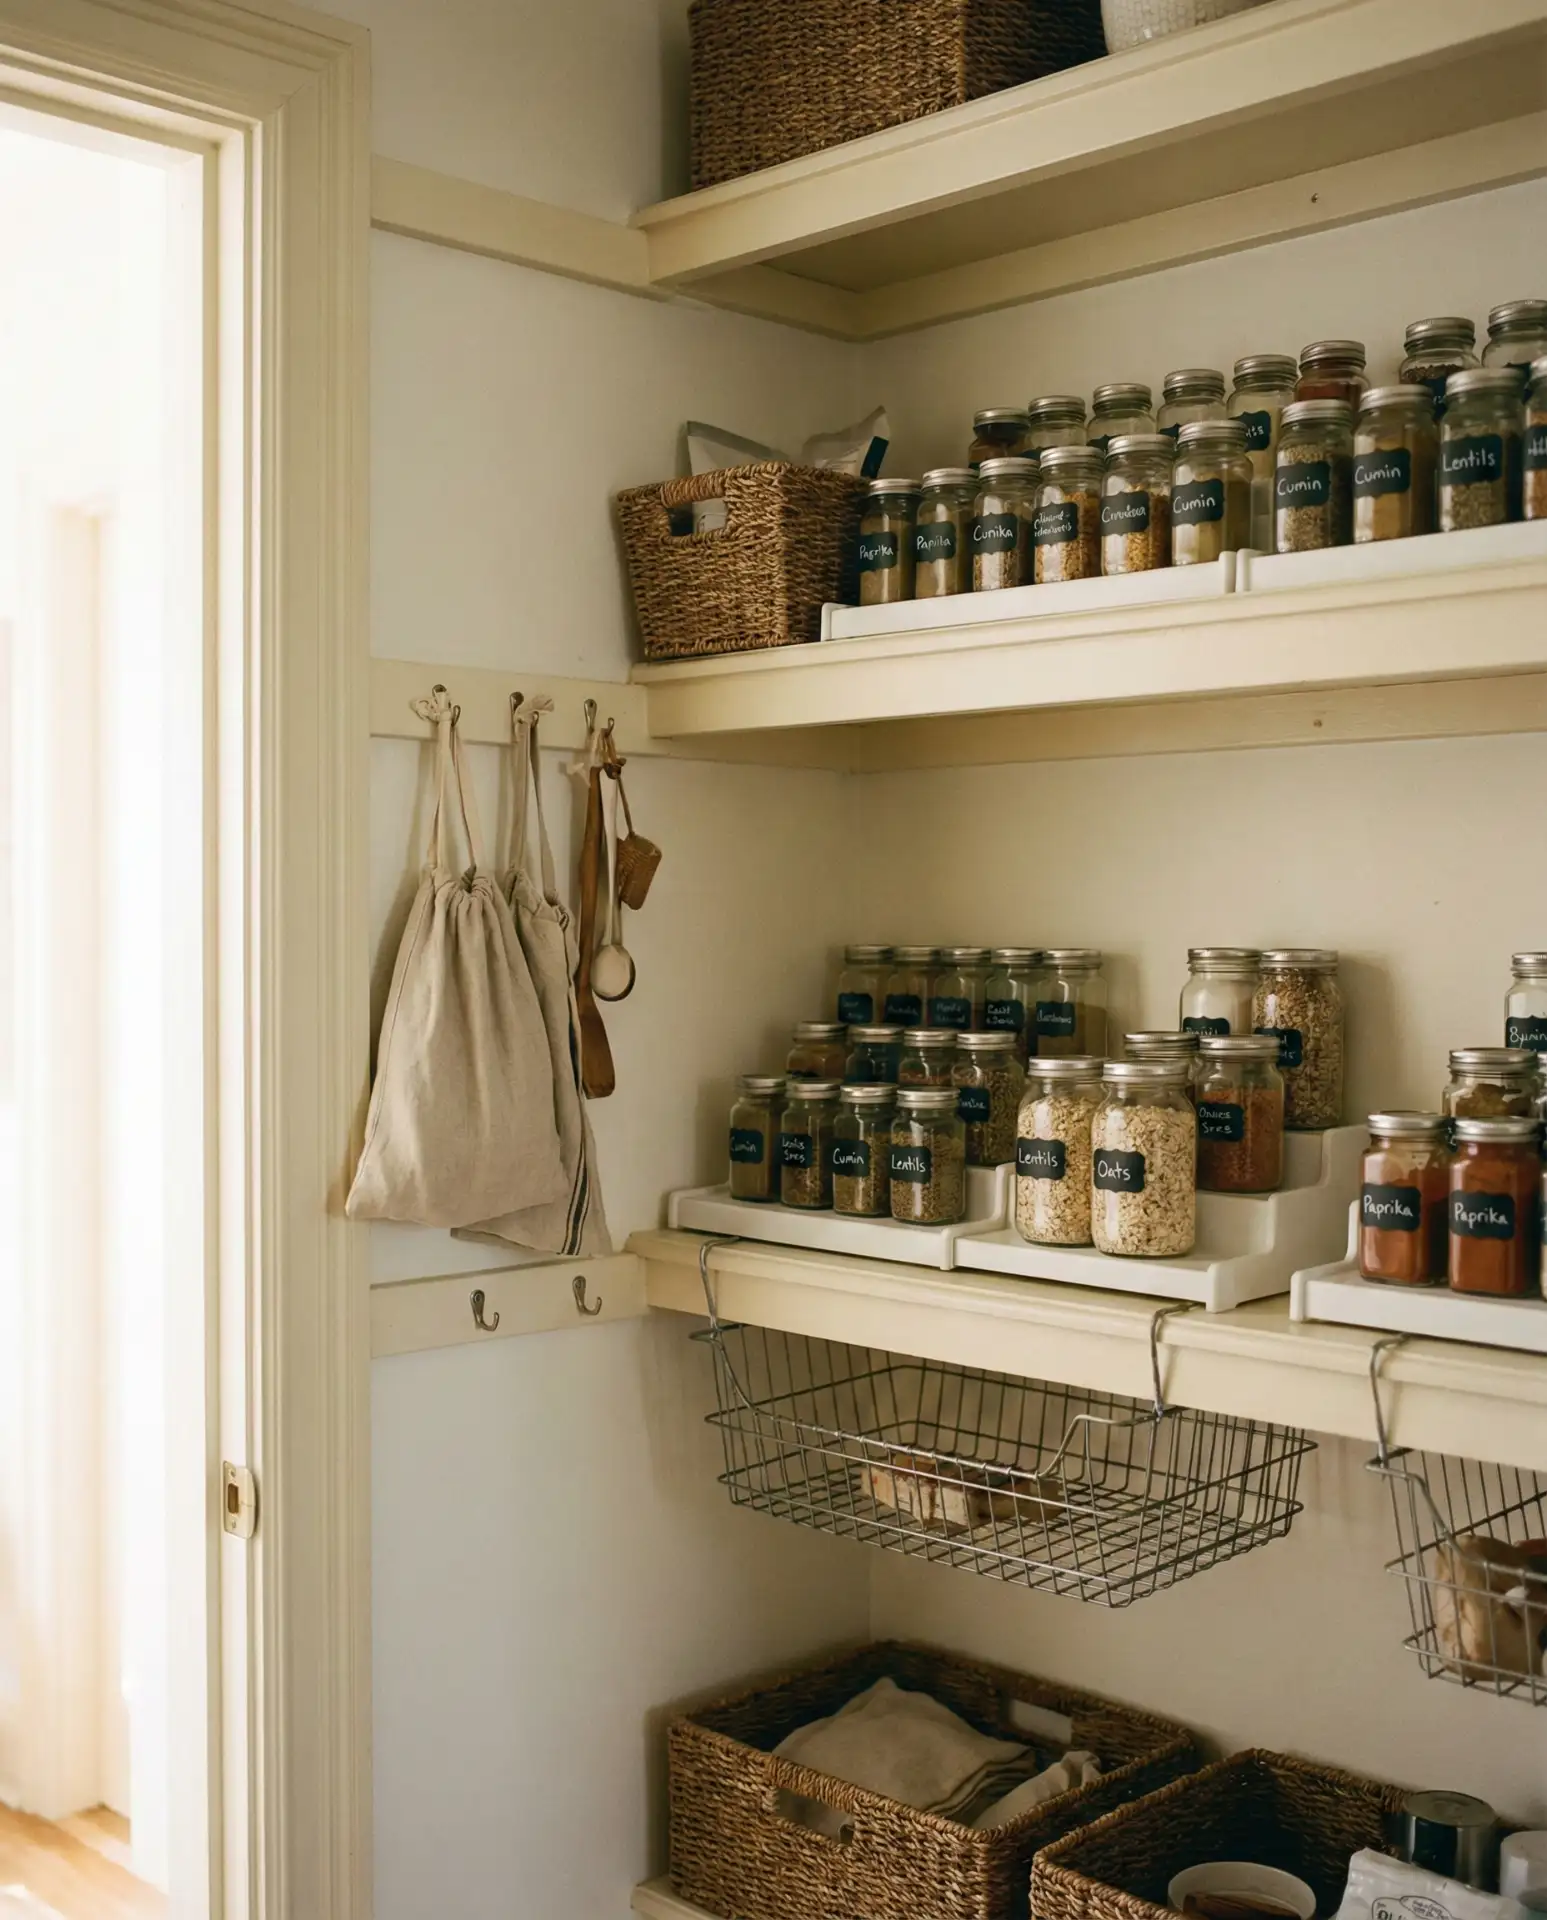
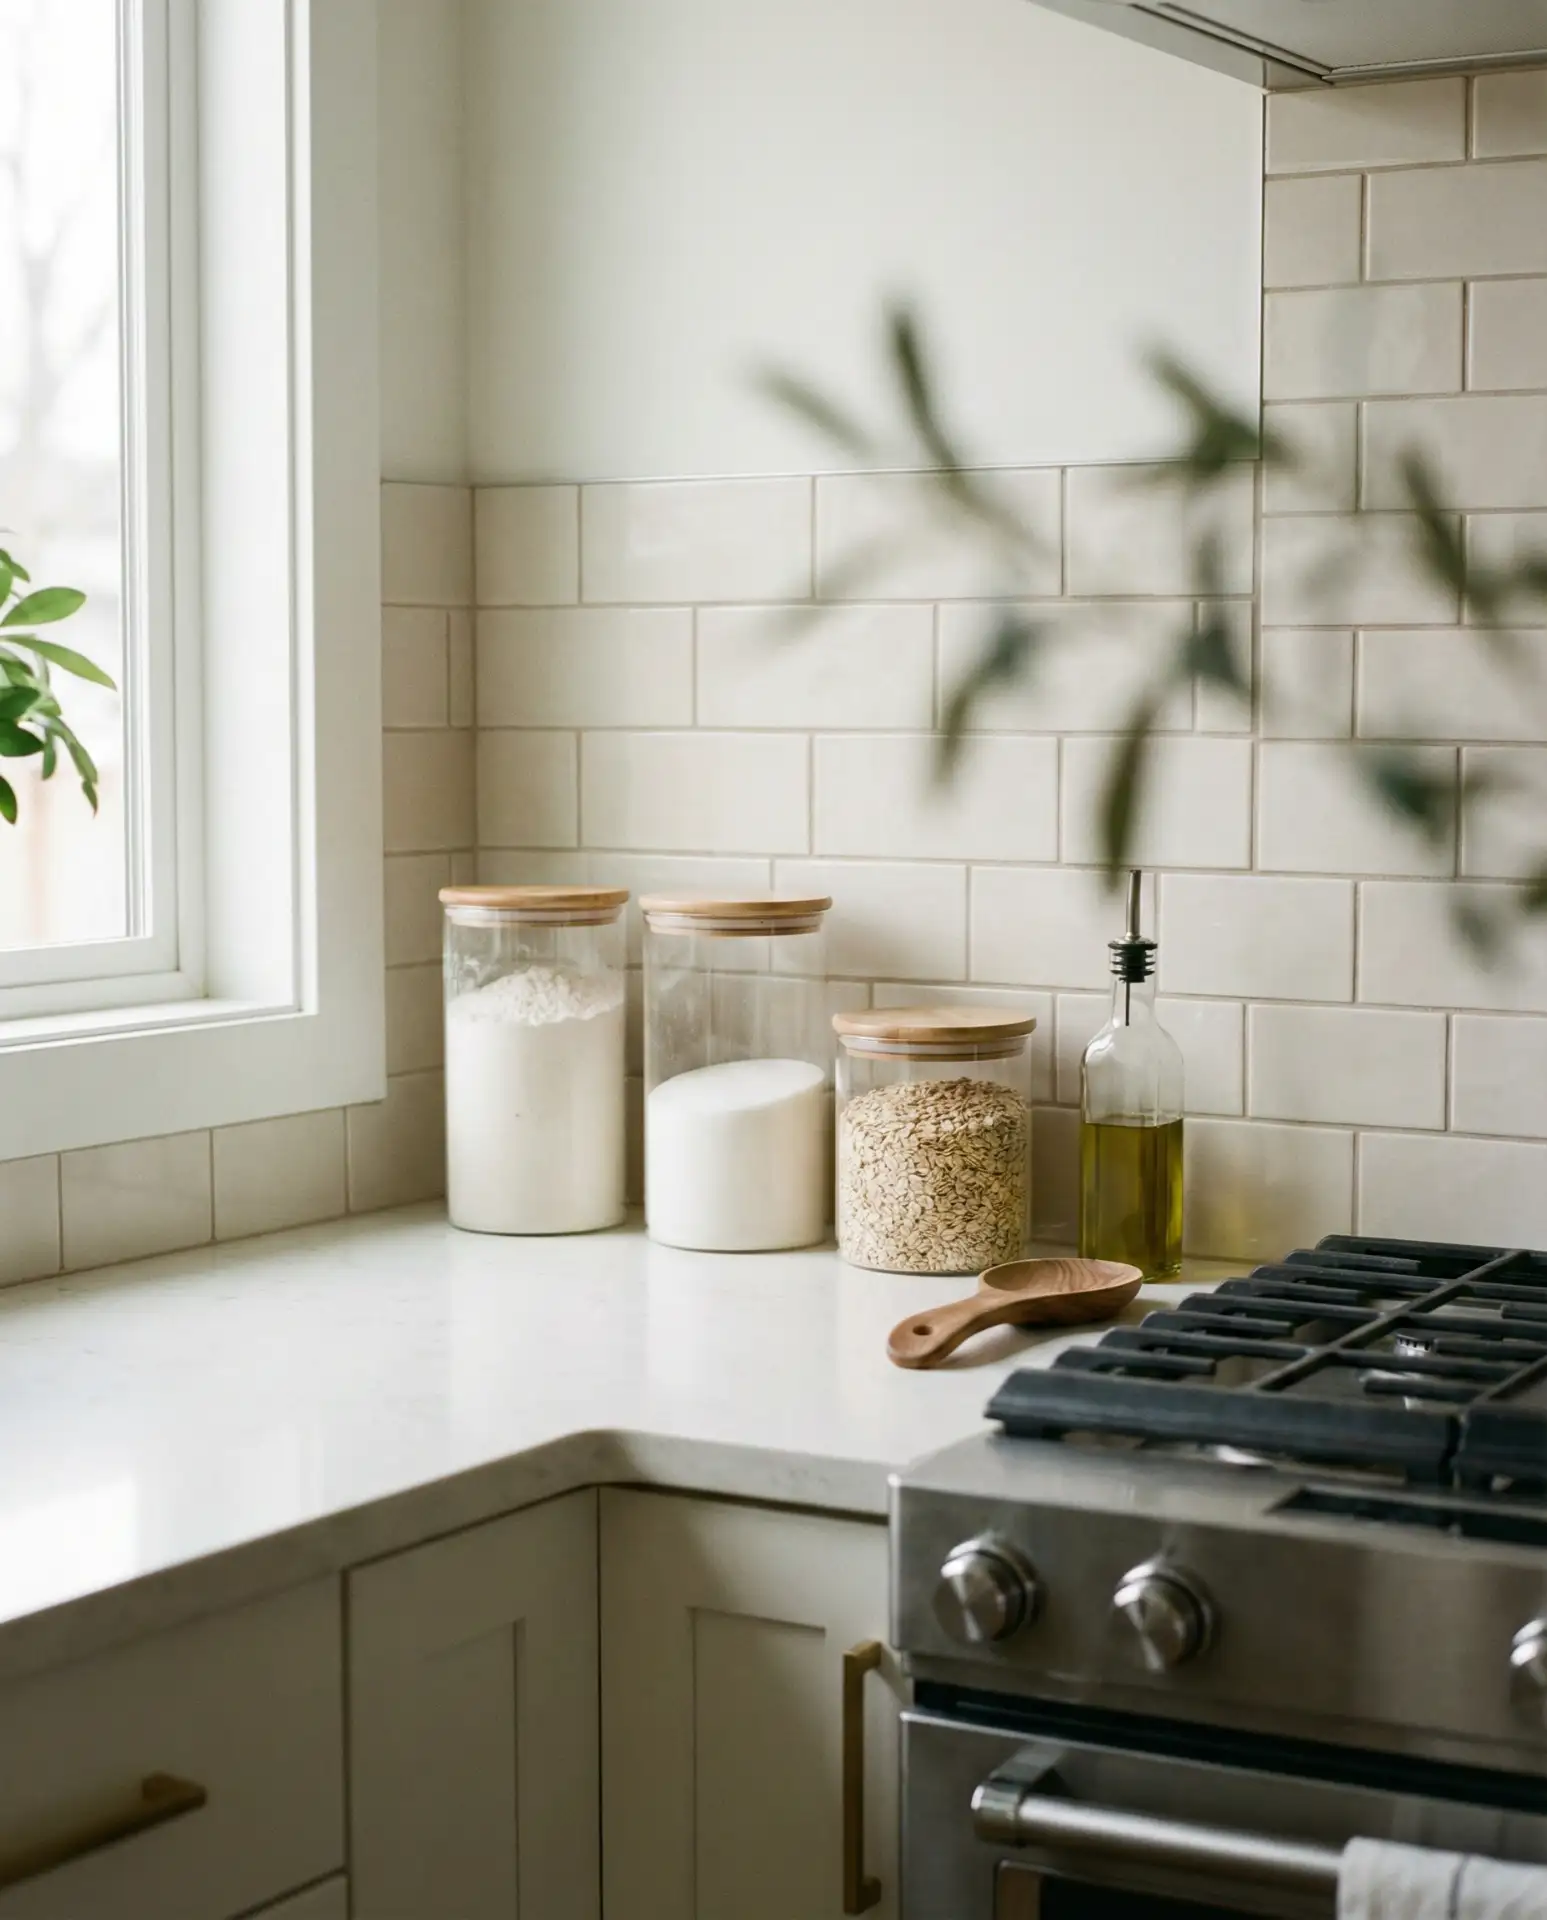
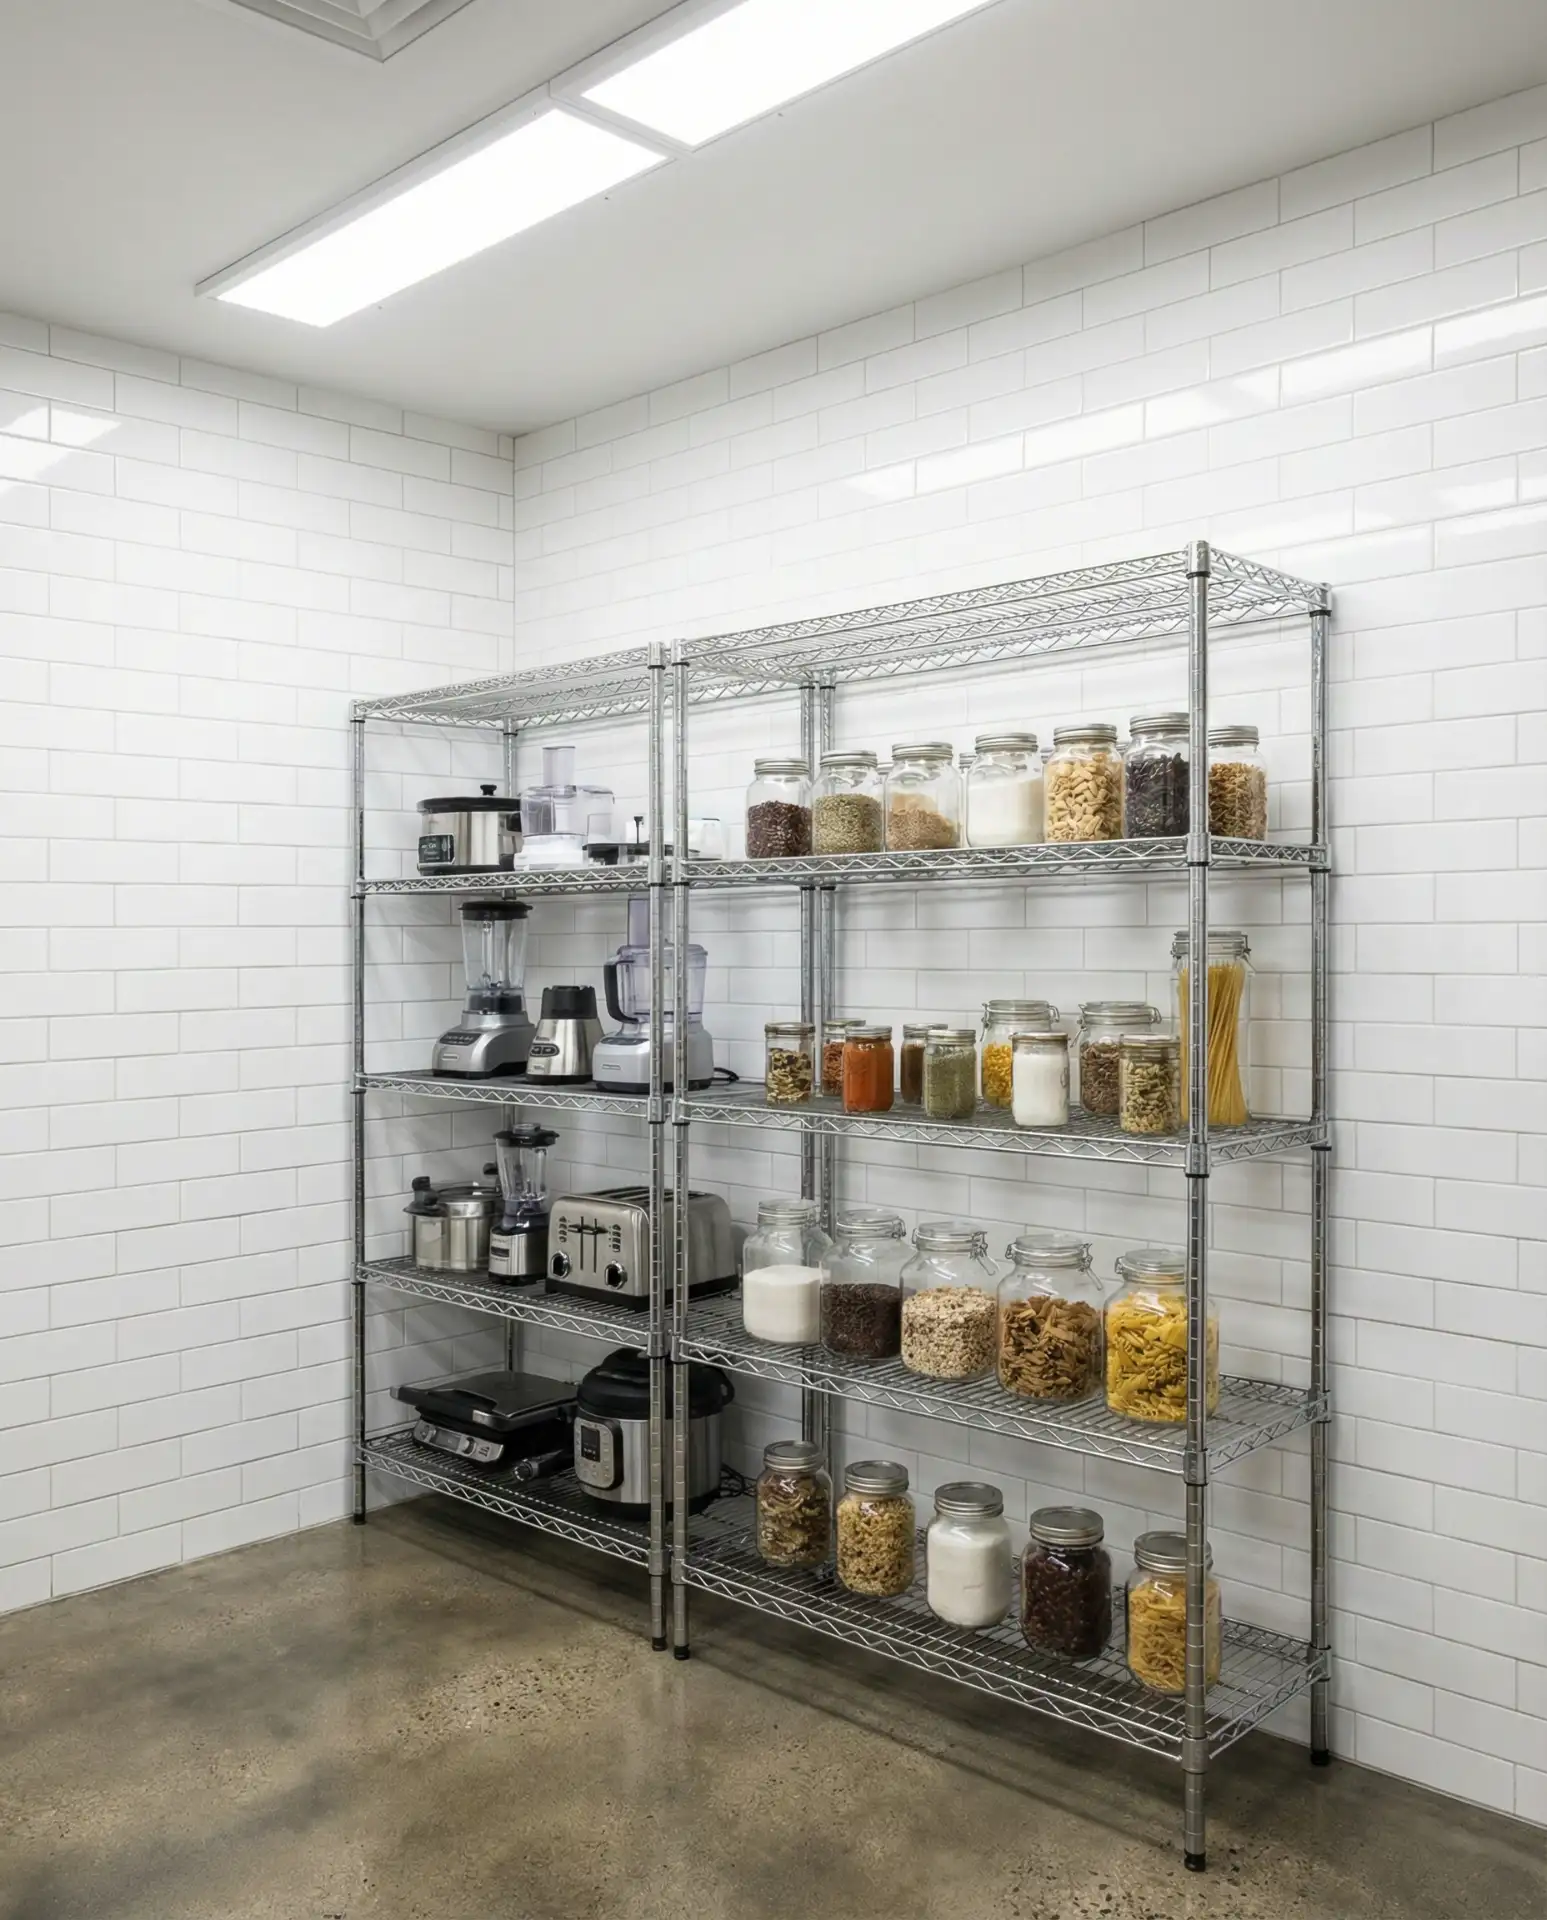
19. Aesthetic Glass Jar Refill Station
Creating an aesthetic pantry refill station with uniform glass jars makes bulk buying practical instead of chaotic. Line up matching jars—with or without labels—and fill them with pasta, rice, nuts, beans, and other staples you buy in large quantities. This not only looks beautiful but also helps you see at a glance when supplies are running low. Group jars by category and add a small scoop to each for easy portioning. The uniformity creates visual calm in what’s often the most cluttered kitchen zone.
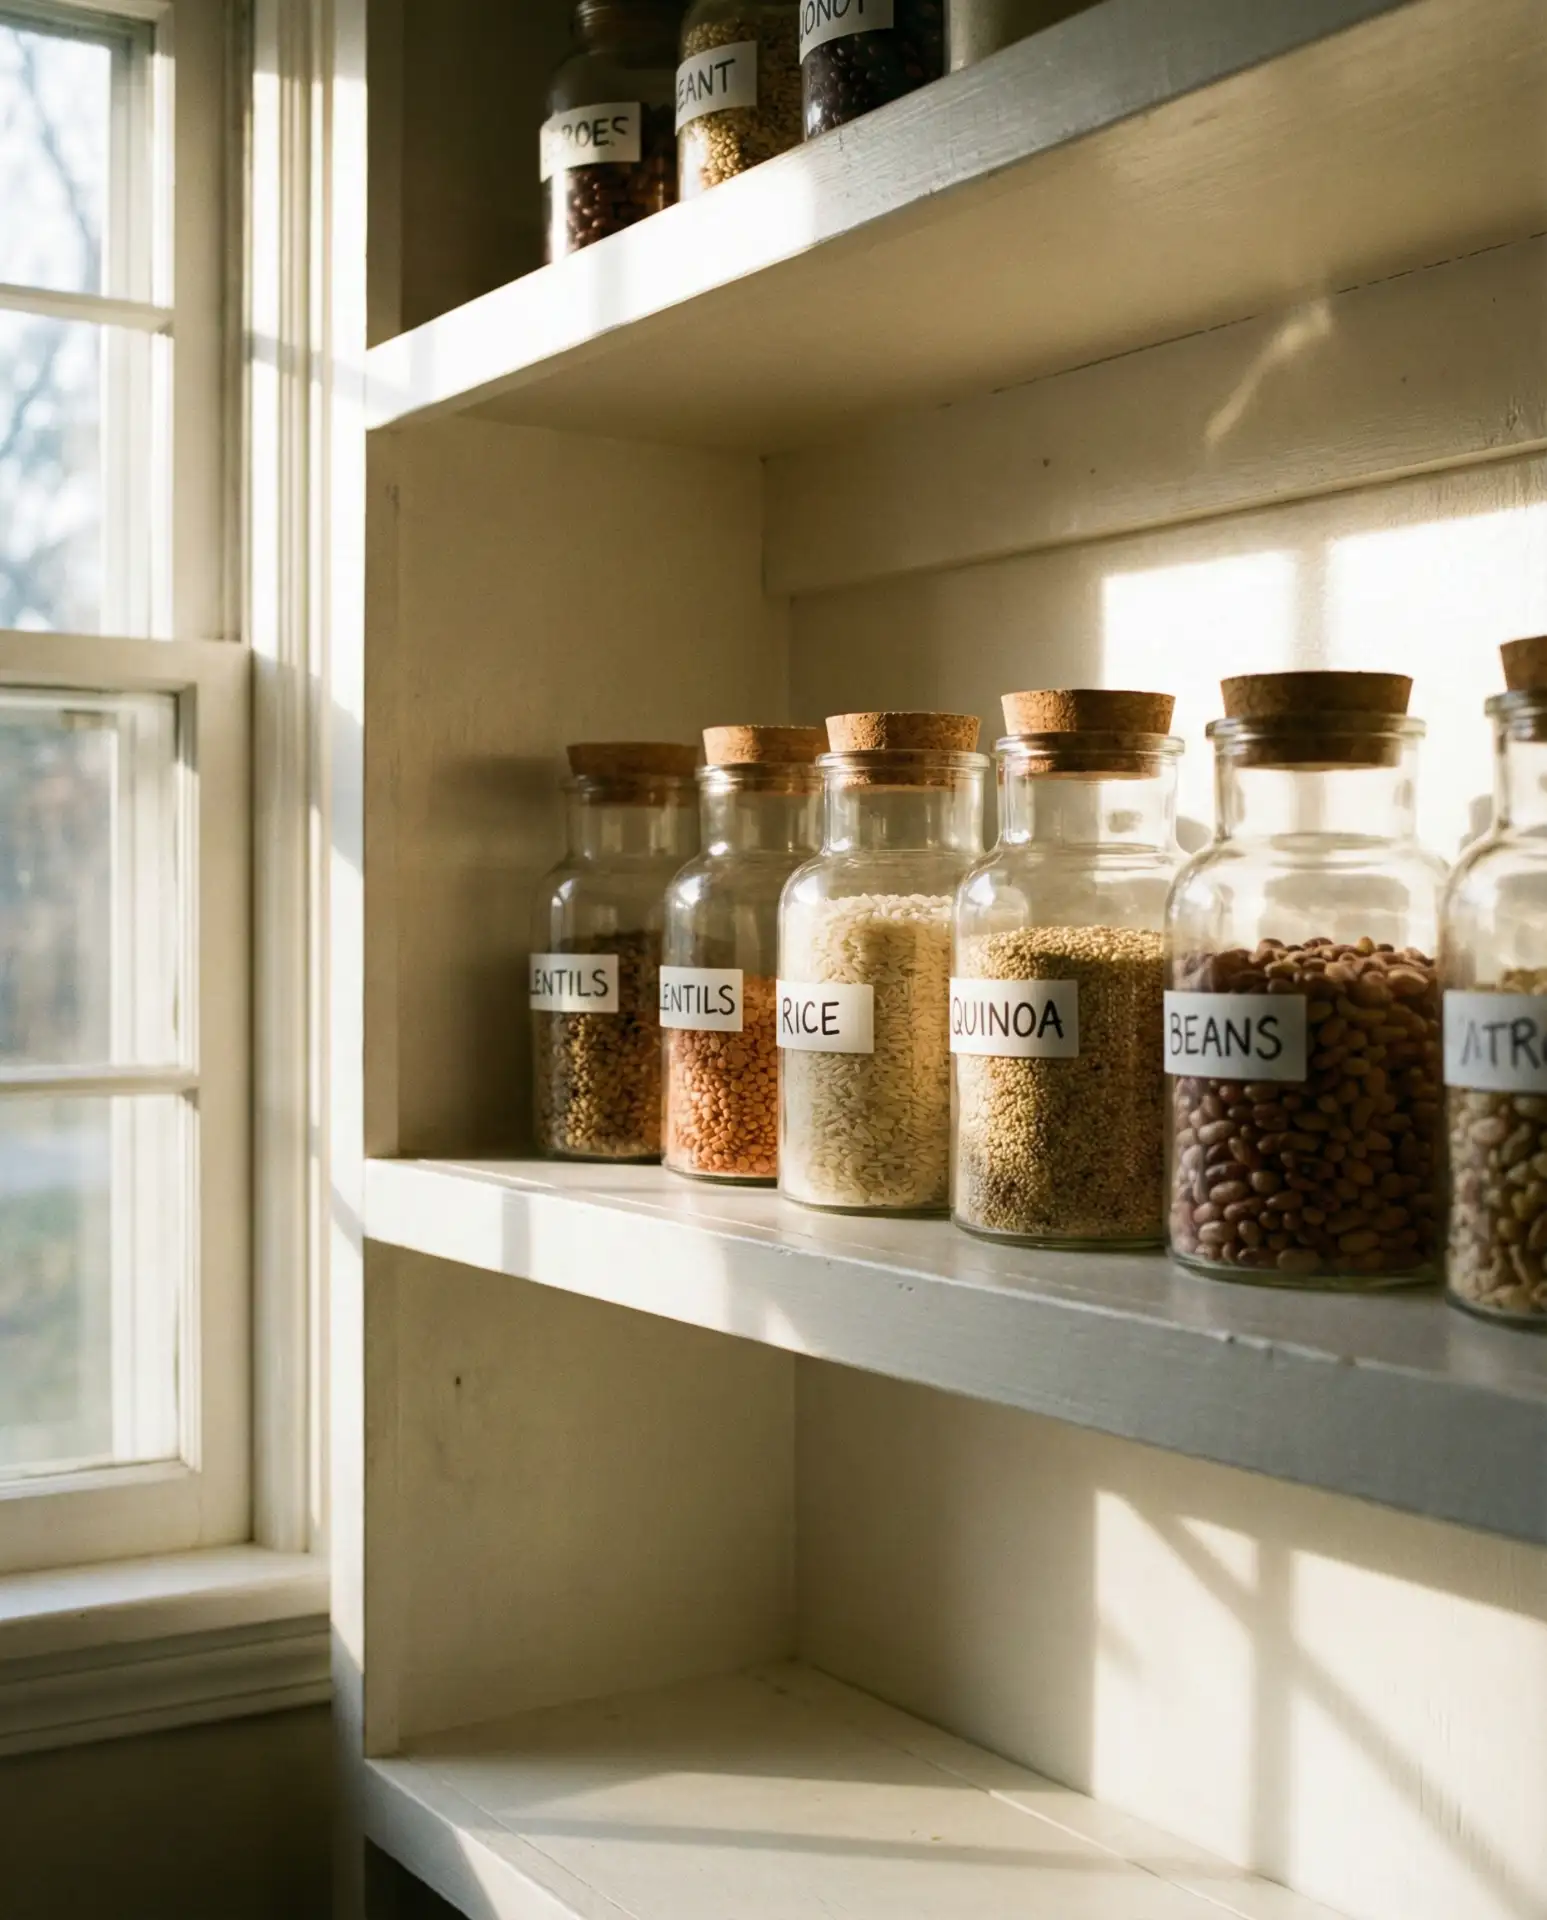
Real homeowners sometimes buy jars that are too decorative with difficult-to-clean shapes, which becomes tedious when you’re refilling them weekly. Stick with straight-sided cylinders or simple square jars that stack efficiently and wash easily in the dishwasher. The goal is functional beauty that you’ll actually maintain, not Instagram perfection that falls apart after two weeks.
20. Tips: Label Everything
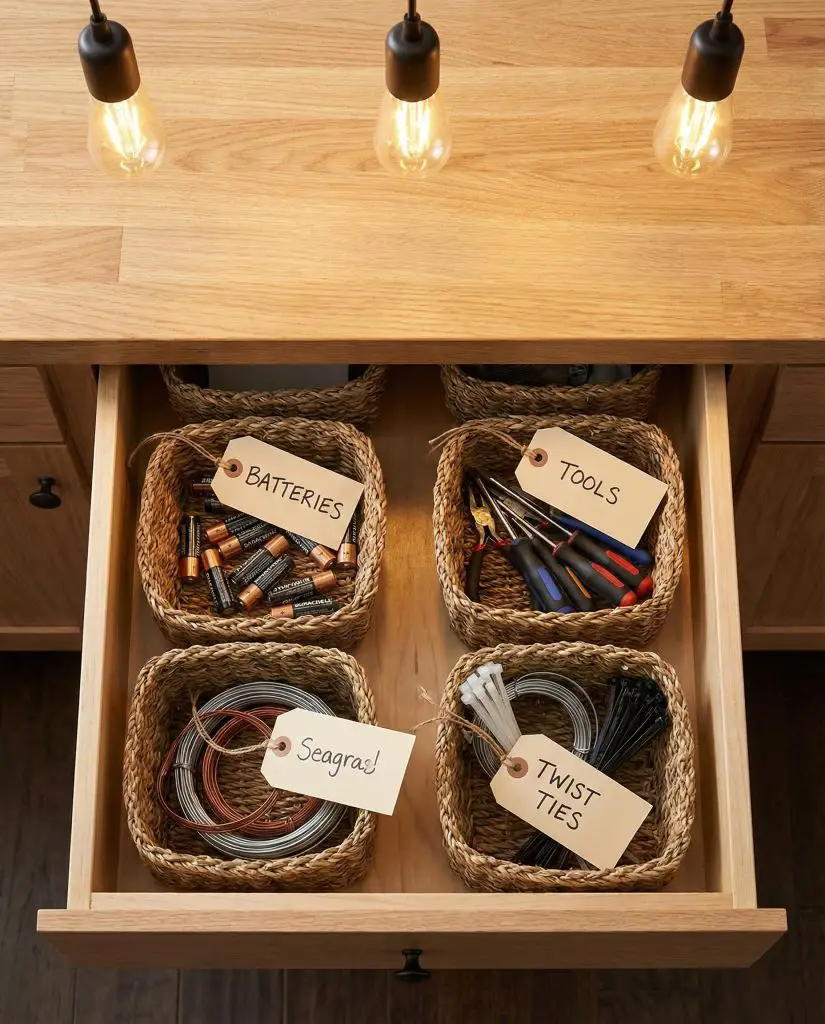
Among the most effective tips for maintaining any organizational system is simple labeling. Use a label maker, chalkboard labels, or even painter’s tape with handwritten names to mark bins, jars, drawers, and shelves. This eliminates the guesswork for other household members and makes putting things away as easy as taking them out. Labels also force you to commit to categories, preventing the “miscellaneous junk” drawer from forming. Invest fifteen minutes in labeling your newly organized spaces, and you’ll find the system stays intact far longer.
Families with kids benefit enormously from labels because they teach independence—even a five-year-old can return snacks to the bin marked “granola bars.” The psychological effect is real too; labeled systems feel more official and intentional, which makes people more likely to respect and maintain them. This tiny habit change makes the biggest difference in long-term kitchen organization success.
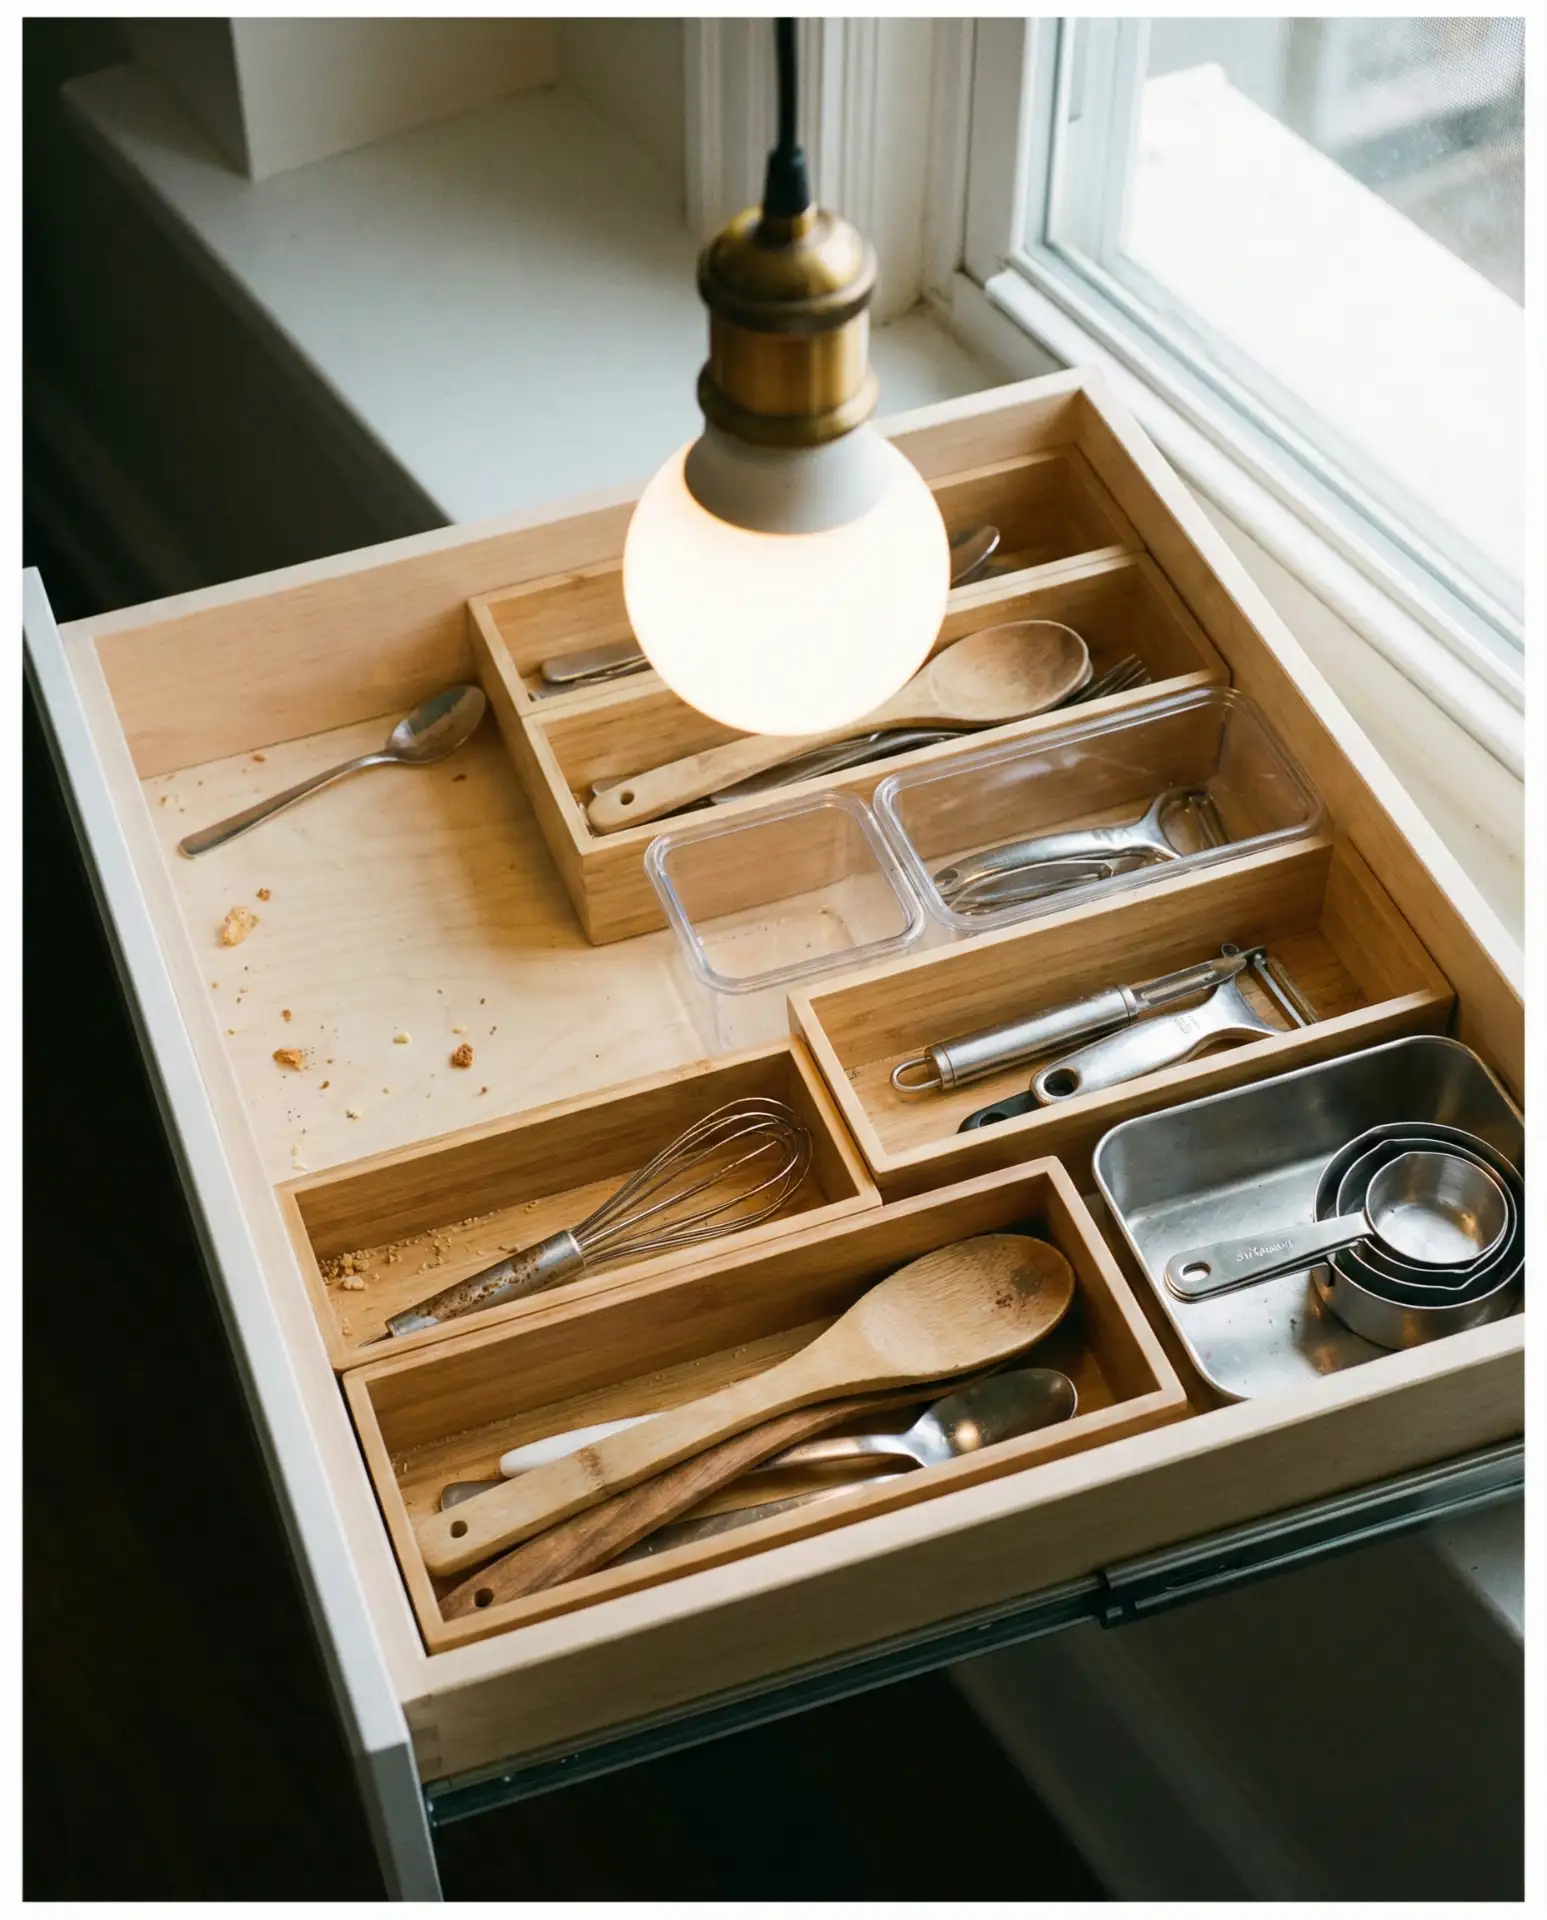
21. Japanese Drawer Organization Boxes
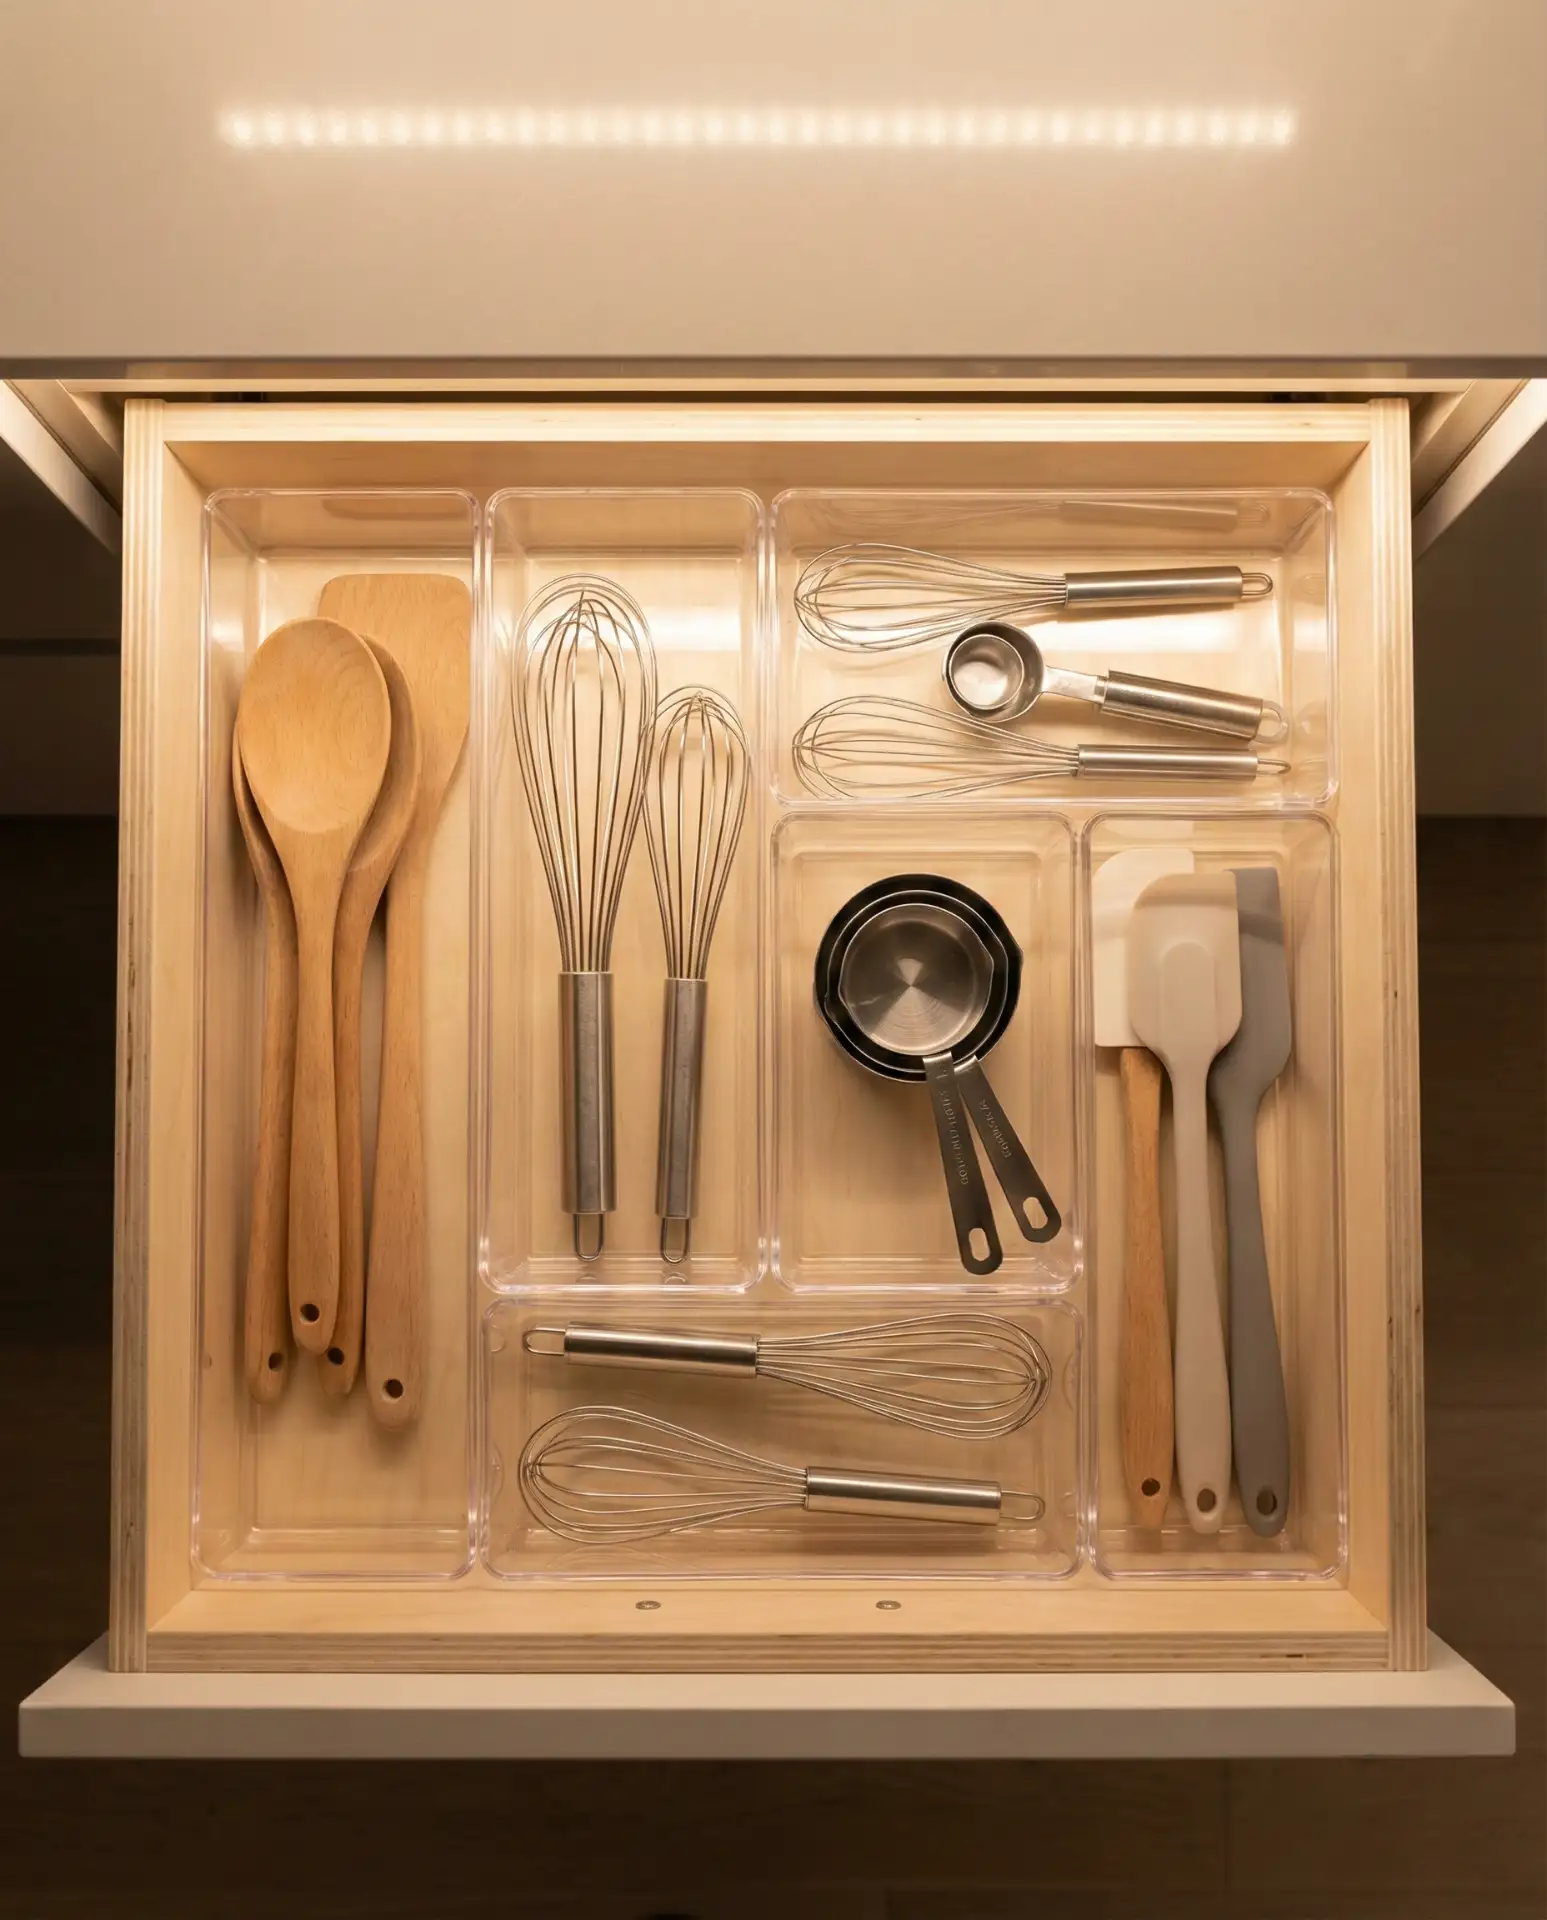
Inspired by Japanese KonMari and minimalist traditions, modular drawer boxes let you customize compartments for utensils, gadgets, and tools with precision. Unlike fixed drawer inserts, these boxes can be rearranged as your needs change, and their clean lines create a sense of order even in mixed collections of items. Look for bamboo, acrylic, or molded plastic versions that fit your drawer dimensions and stack or nestle together. This approach works especially well for idea cabinets where you store baking tools, coffee accessories, or craft supplies alongside kitchen items.
Where this approach really shines is in preventing the “everything mixed together” effect that makes drawers frustrating to use. By giving each category of item its own defined space, you eliminate the time wasted digging for a garlic press or measuring spoon. The boxes also protect delicate items from being scratched by heavier tools shifting around during normal drawer use.
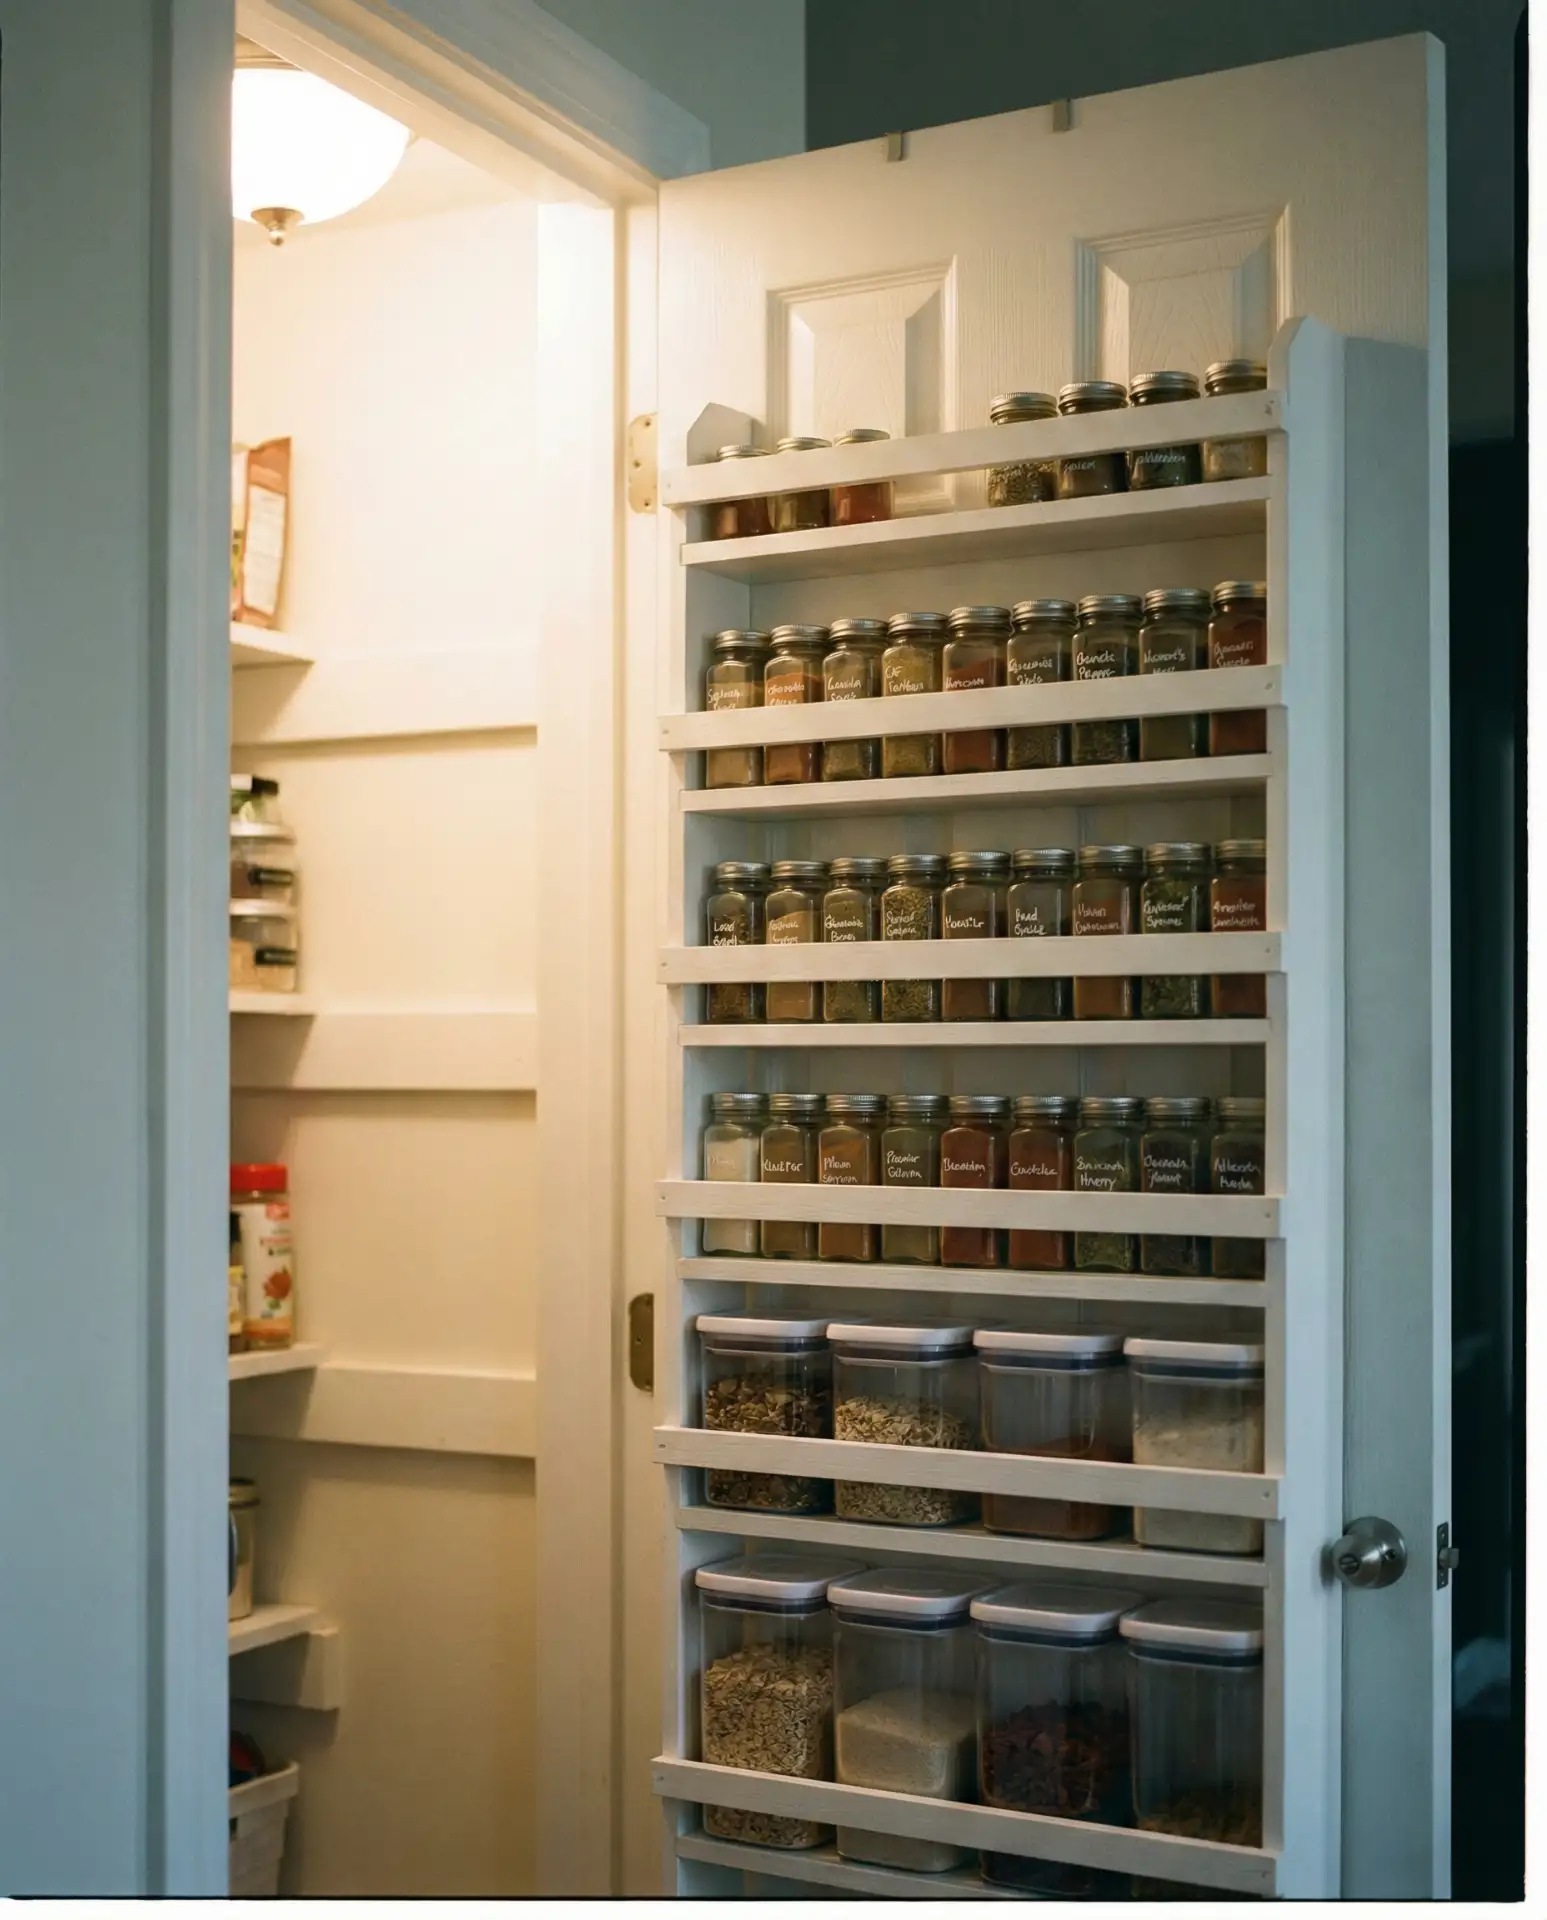
22. Pantry Door Spice Rack
The back of your pantry door is prime real estate that most people waste. Install an over-the-door rack or mount narrow shelves directly to the door, creating storage for spices, small jars, or packets that would get lost on deep pantry shelves. This keeps frequently used items at eye level and easily accessible while freeing up shelf space for bulkier goods. Make sure the rack doesn’t interfere with door closing, and use adjustable models that accommodate different jar heights. This works equally well on cabinet doors in small apartments where every surface needs to multitask.
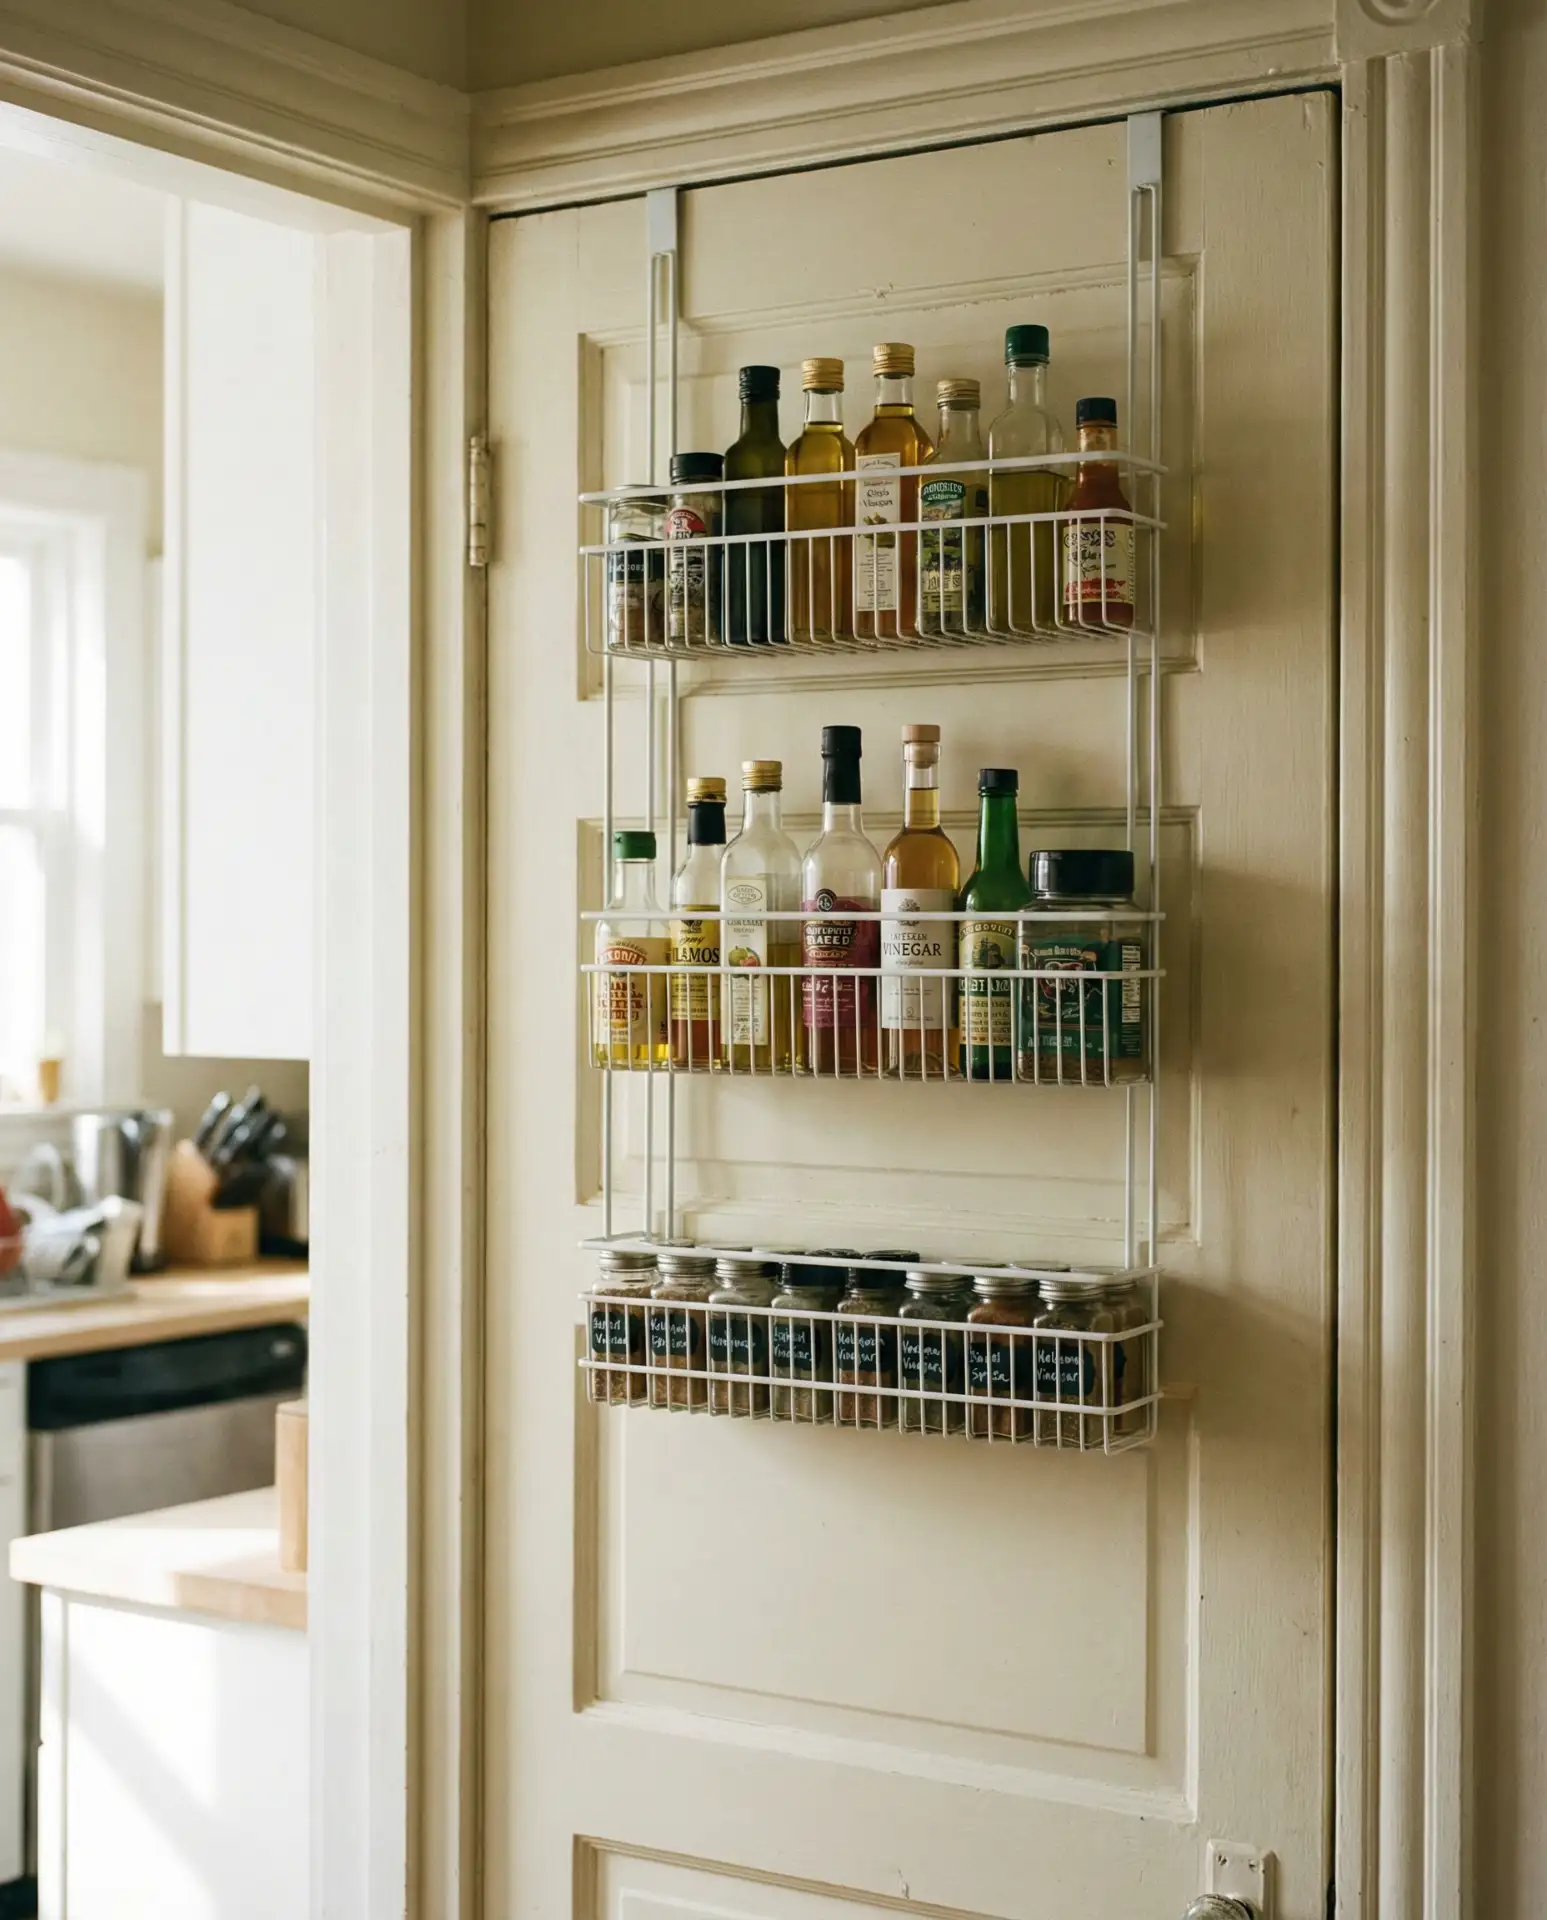
Expert organizers caution against overloading door racks because the added weight can strain hinges over time, especially on older cabinets. Stick to lightweight items like spices and seasoning packets rather than heavy bottles or canned goods. This small boundary prevents damage while still maximizing an overlooked storage zone.
23. Rolling Cart Beverage Station
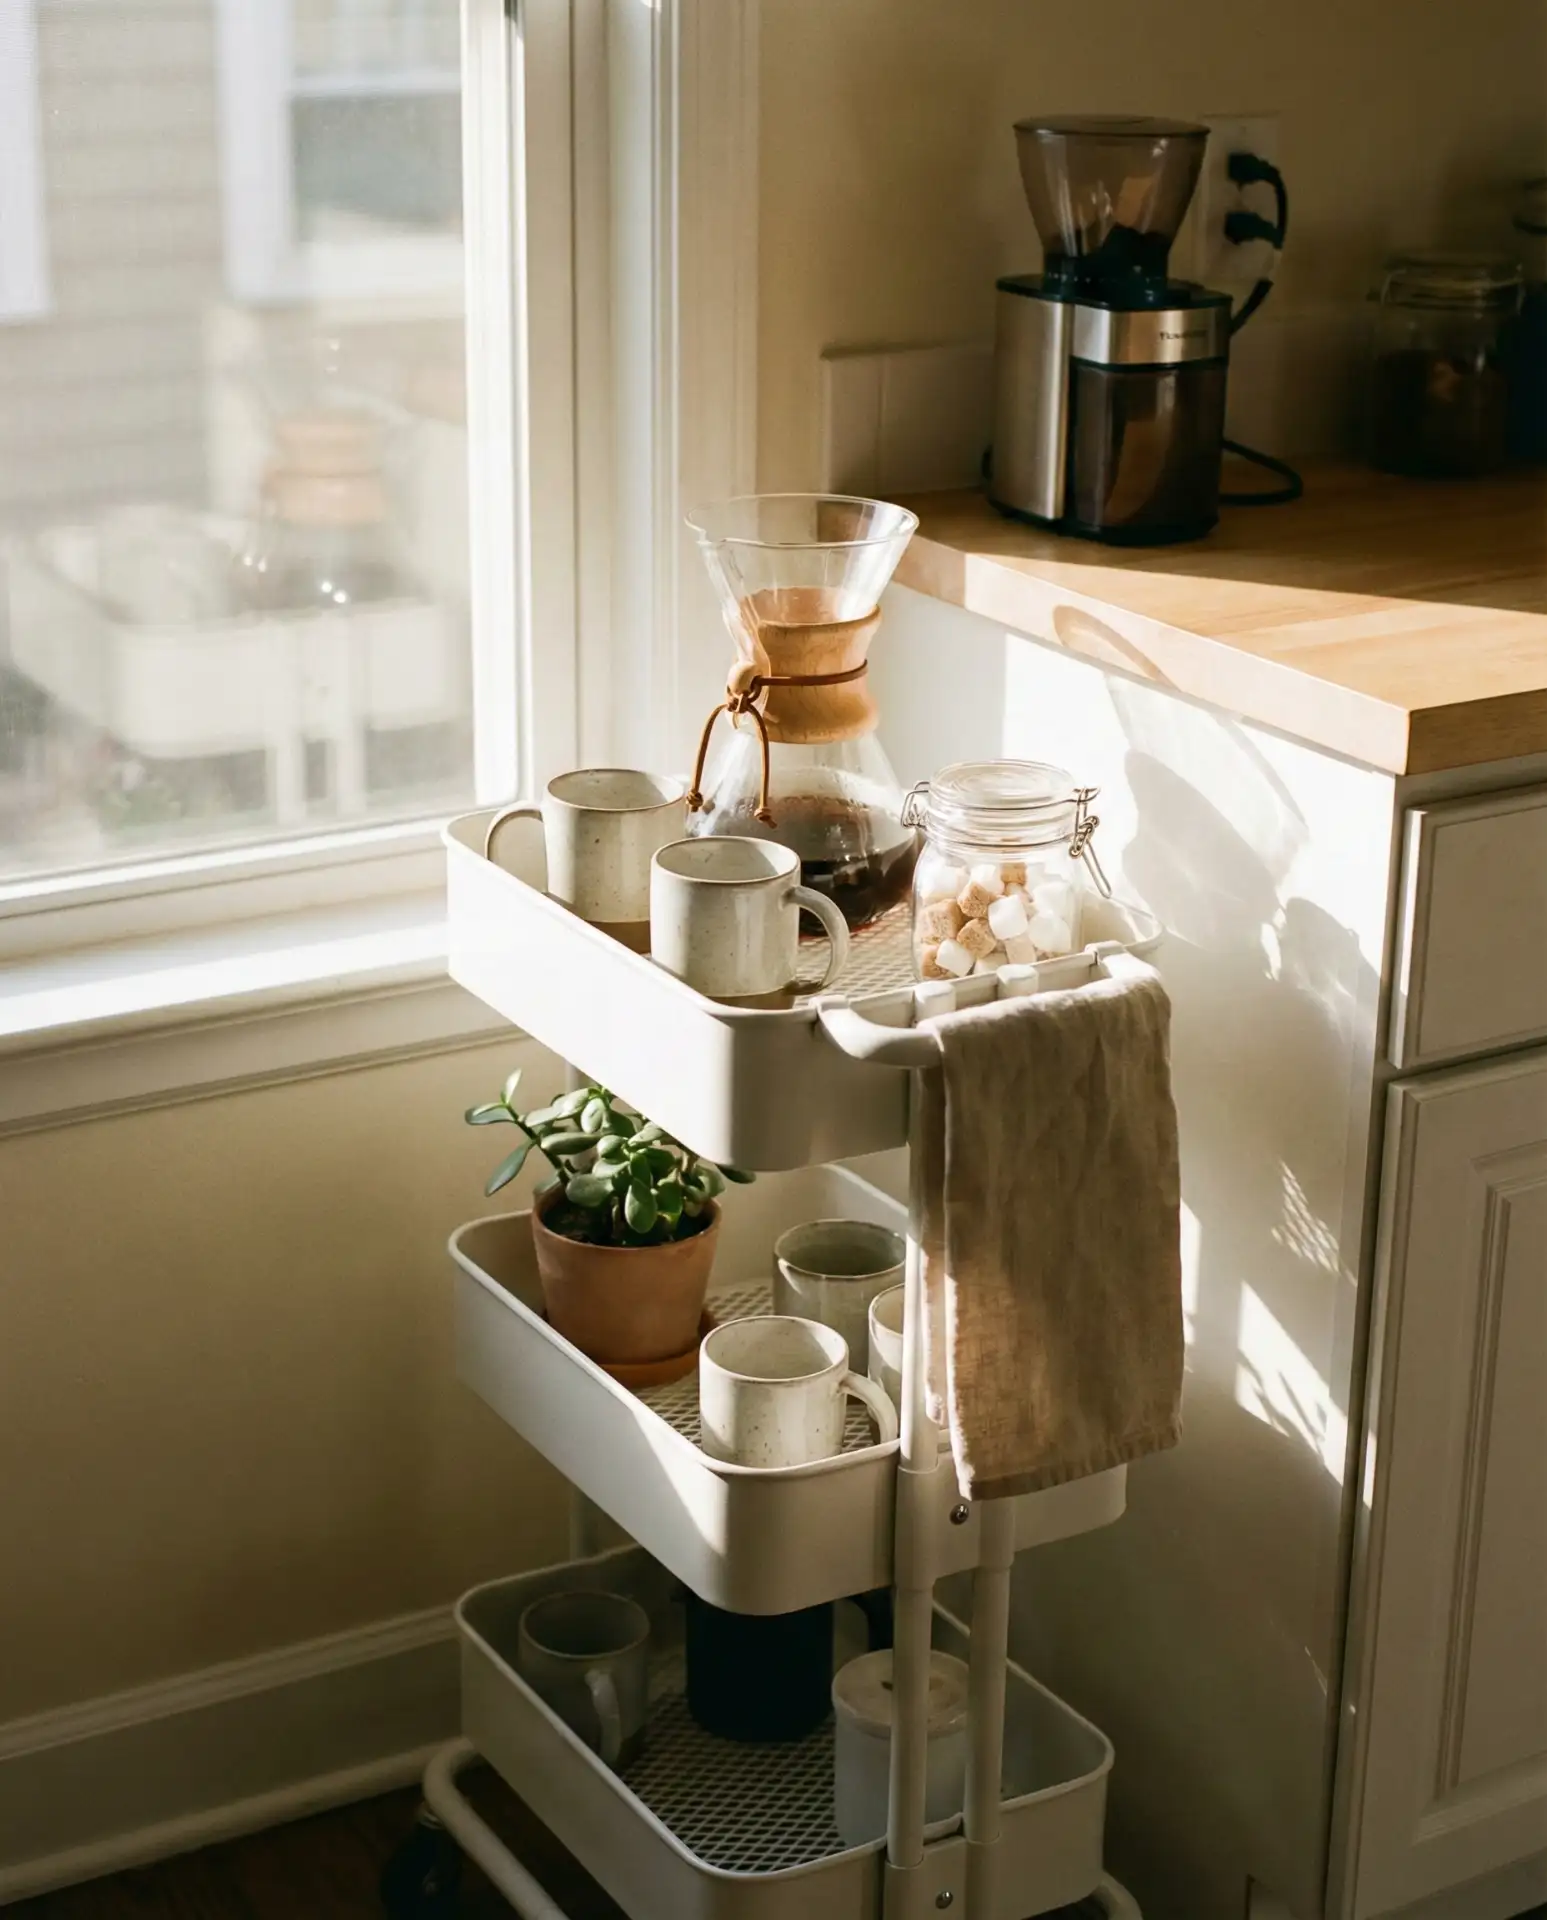
A three-tiered rolling cart dedicated to coffee, tea, or a home bar consolidates all your beverage supplies in one mobile unit. Load it with mugs, coffee pods, filters, sugars, and syrups so your morning routine doesn’t scatter across multiple cabinets. The wheels let you roll it closer to the sink for filling water or to the table when entertaining. This is particularly useful in ideas for small apartments where fixed cabinetry is limited, giving you flexible storage that adapts to different activities. You can find sturdy carts at IKEA, Amazon, or home stores for thirty to seventy dollars.
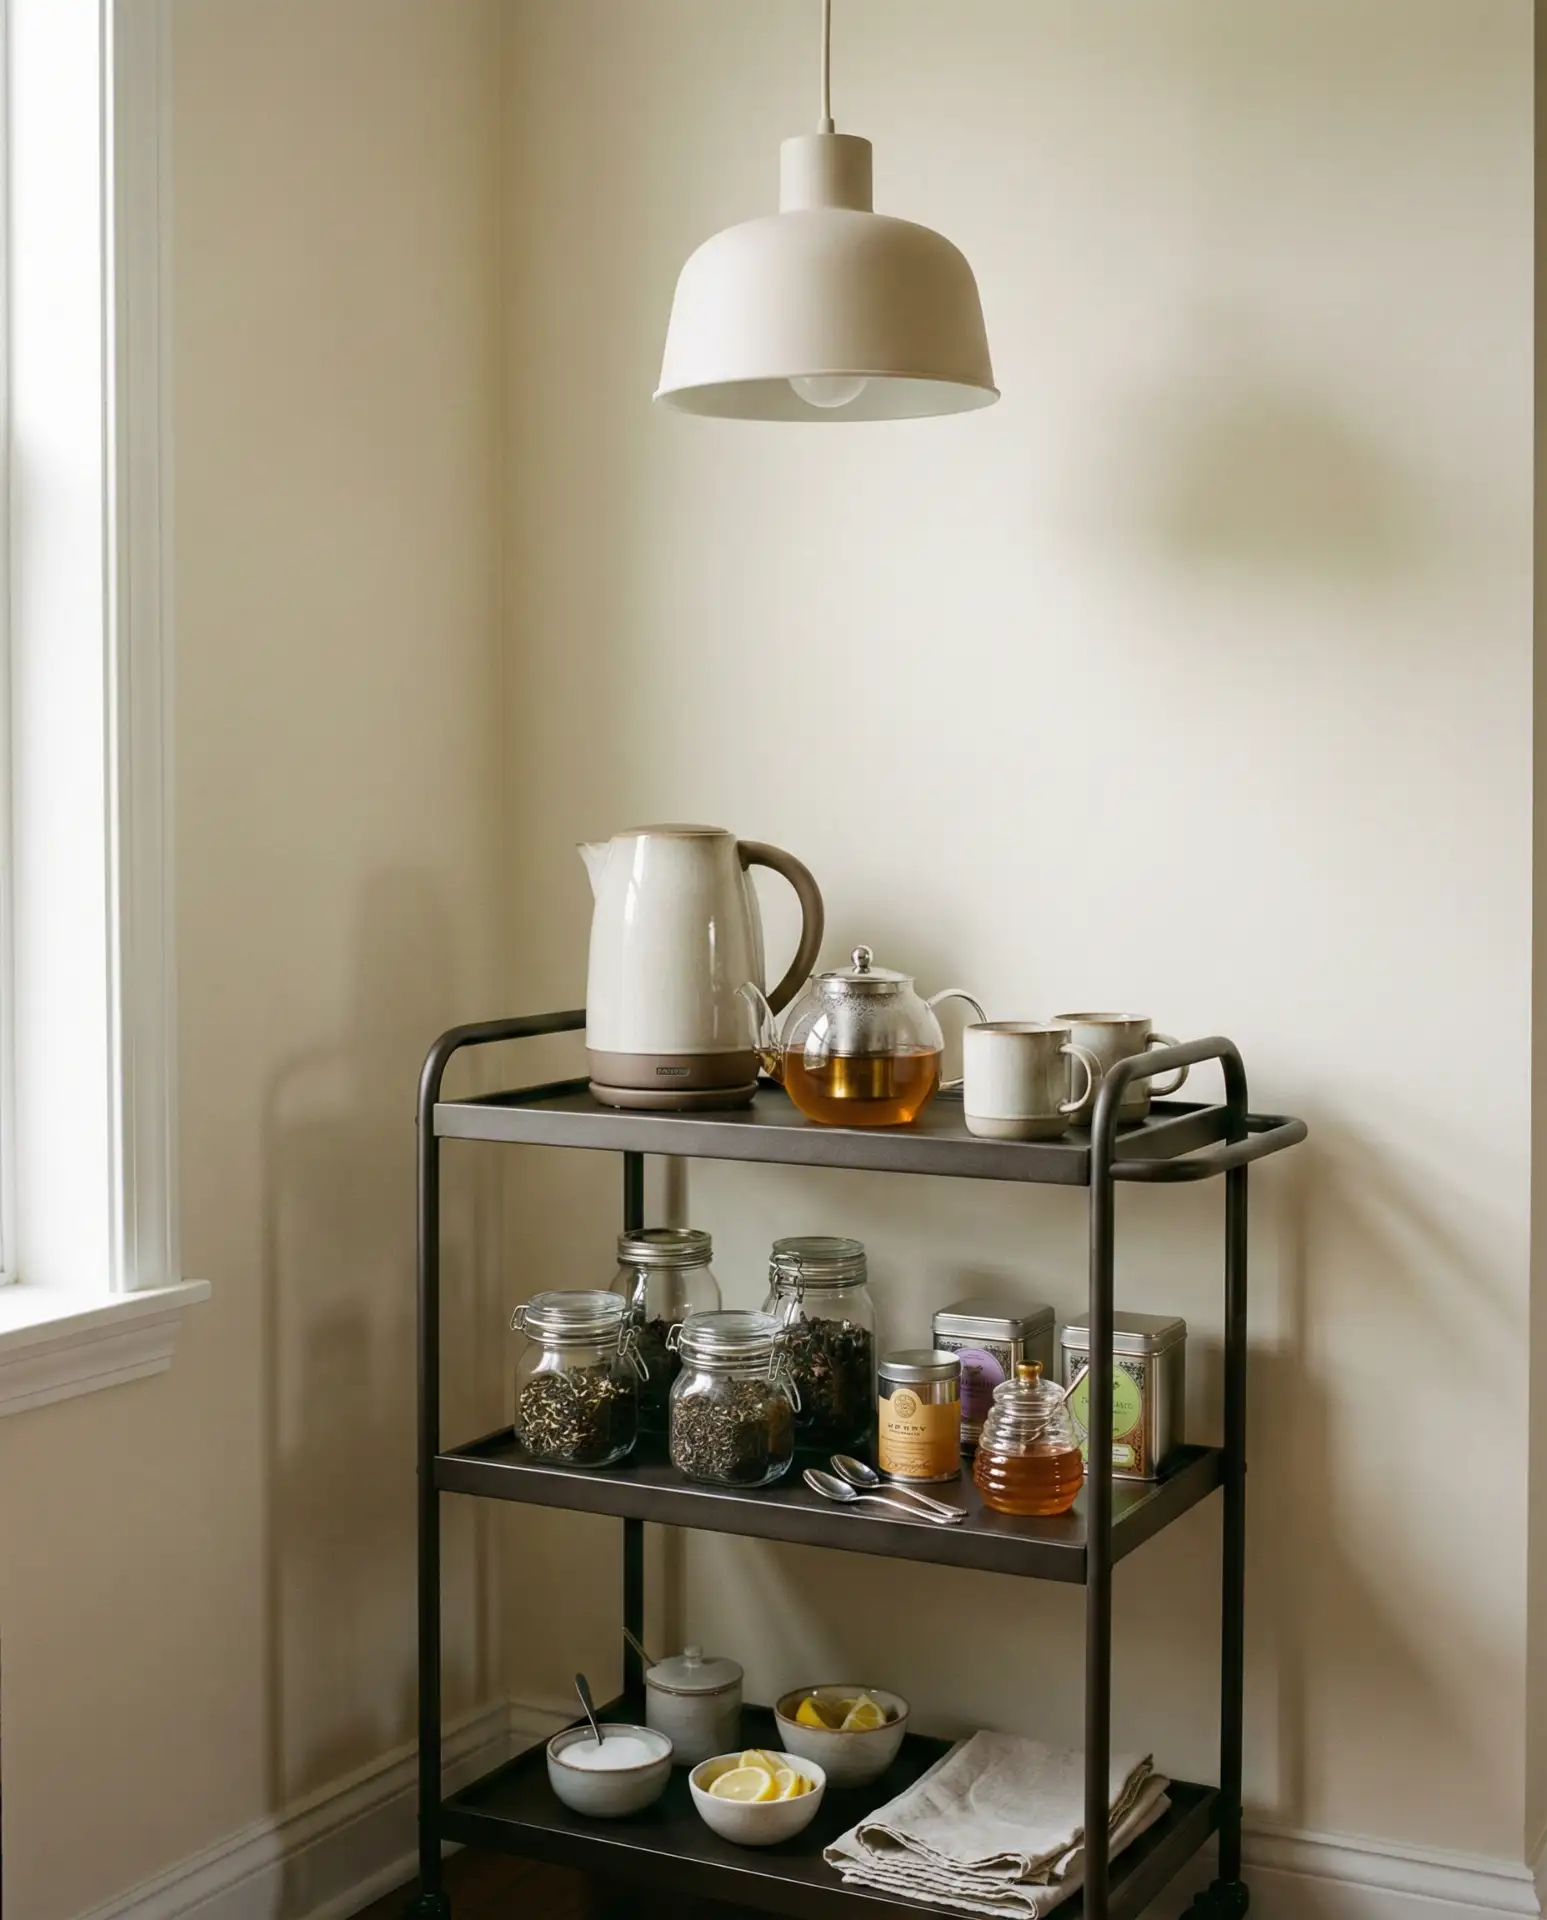
In open floor plans common across newer American homes, these carts also serve as subtle room dividers that define the kitchen zone without blocking sightlines. The mobility is genuinely useful—wheel it to the dining area for brunch service, then tuck it back into a corner when not in use. It’s one of those versatile purchases that earns its keep daily rather than gathering dust.
Conclusion
Now that you’ve seen these kitchen organization strategies in action, the next step is choosing which ones fit your space, budget, and daily habits. Start with the areas that frustrate you most—whether that’s a chaotic pantry, overflowing drawers, or cluttered countertops—and tackle one zone at a time rather than attempting a full kitchen overhaul overnight. Share your favorite organizing hacks or the challenges you’re still facing in the comments below, and let’s keep the conversation going about making kitchens work better for real life.