
Here’s the thing nobody tells you about a cardboard Christmas tree: it doesn’t read as a compromise. It reads as a decision — the kind made by someone who’d rather have something clever than something enormous. That’s exactly why paper and cardboard trees have quietly taken over so many saved Pinterest boards this winter.
We spent a few evenings trawling Etsy, Target, Amazon, and Michaels to find the ones actually worth your time, and the range runs from about $4 in cardstock to $210 for a fully styled display. Inside: 24 ideas spanning accordion and honeycomb paper, flat-packed cardboard cutouts, folded book pages, and laser-cut wood — with budget swaps sitting right next to the pricier versions so you can pick your number.
2026 is the year flat-pack holiday decor went from clever hack to genuine design choice, and the strongest versions are the ones you can pull off in an evening. And stay until the end — we break down the most common mistakes that can ruin these looks.
📌 Save this to Pinterest for later — you’ll want to revisit these ideas.
1. Layered Dark Green Accordion Tree With Plaid Gifts
What sells this arrangement is restraint in color and chaos in texture. The accordion folds create deep vertical shadows that read as volume from across the room, while the dark green sits somewhere between forest and charcoal — rich enough to feel traditional, moody enough to look grown-up against a beige wall. Then the wrapping does the talking: plaid, holly, three different papers all in the same green-and-cream family. The wooden nutcracker and the little white ceramic tree anchor the base so the paper tower never floats.
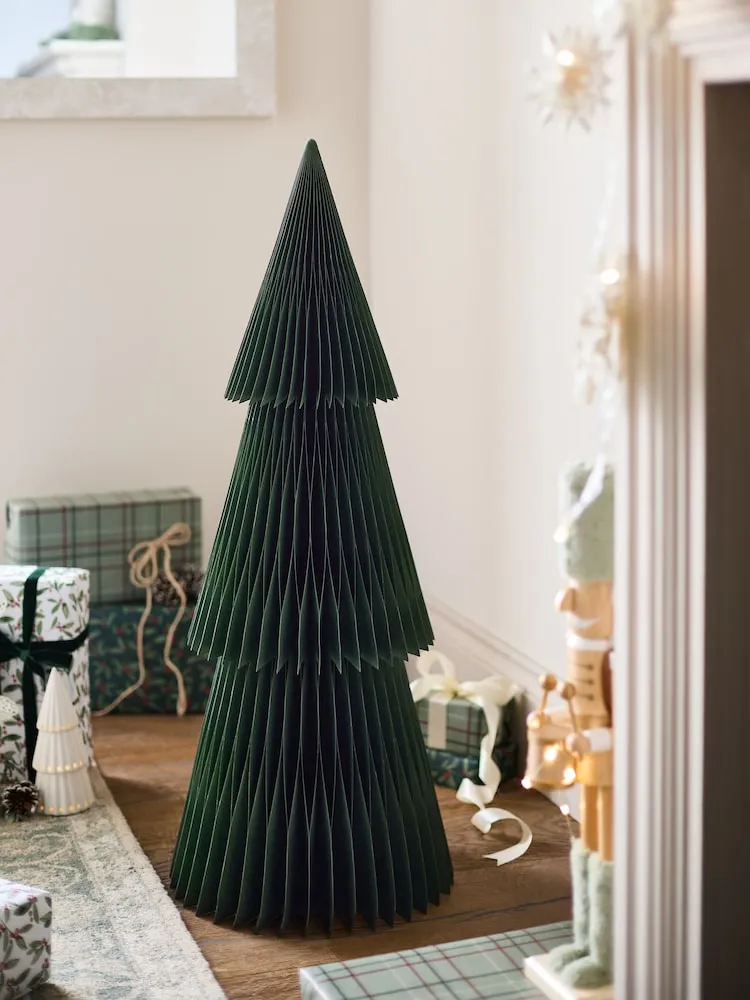
- Accordion or honeycomb paper tree, 24–36 in: $18–$45
- Wrapping paper, 3 rolls plus ribbon: $15–$30
- Nutcracker and ceramic tree accents: $12–$35
- Pinecones and small filler decor: $6–$12
- Rug or tree skirt, if you need one: $40–$90
- Total: roughly $90–$210
Budget alternative: skip the rug, wrap empty boxes you already own, and buy the tree flat-packed — closer to $45 all in.
2. Wooden Slat Tree Lit Warm White Against Stone
Here’s the number that matters: wrap your lights every 4 to 6 inches of slat, not every 12. On a slat tree the wood is the only thing catching light, so density is everything. Use 2700K warm white LEDs on a green wire if you can find them — the green disappears into the shadow — and run the cord down the back-center slat, taping it every 8 inches so it never sags into view. Two 33-foot strands handle a five-foot tree comfortably.
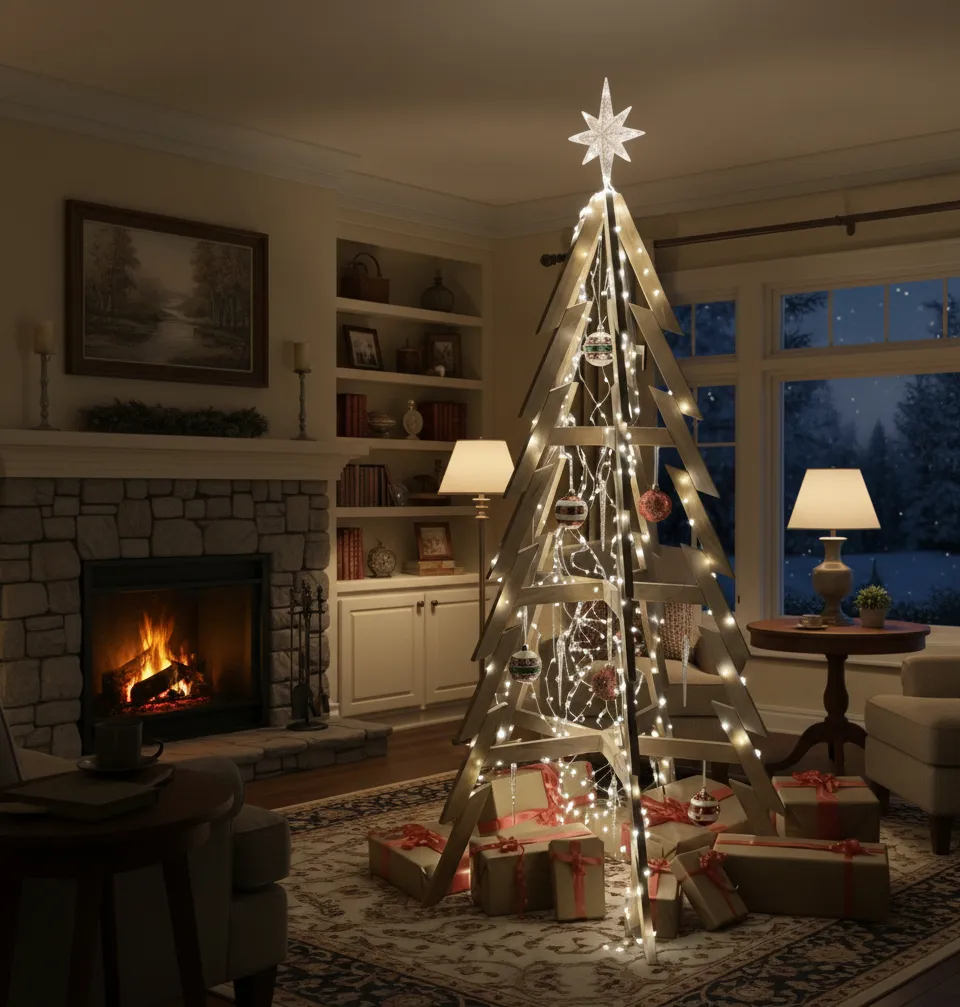
The formula here is about 60% pale wood, 25% warm white glow, 10% kraft-and-red gift wrap, and 5% cool stone gray from the fireplace. That last 5% is the secret — the stone keeps the wood from turning the whole room yellow. Swap the red ribbon for olive velvet and you get a quieter, more Scandinavian version; swap the kraft paper for matte black and the tree suddenly reads modern.
3. Sage Green Pleated Paper Tree on a Wood Block Pedestal
The pedestal is the whole idea. That stack of chunky wood blocks lifts the pleated tree off the floor and puts it at window height, where natural light rakes across every fold and turns a paper decoration into an architectural object. Without it you’d have a pretty green cone on the floor. With it, you have a display. If you don’t own wood blocks, two large hardcover books stacked spine-in do the same job for free.
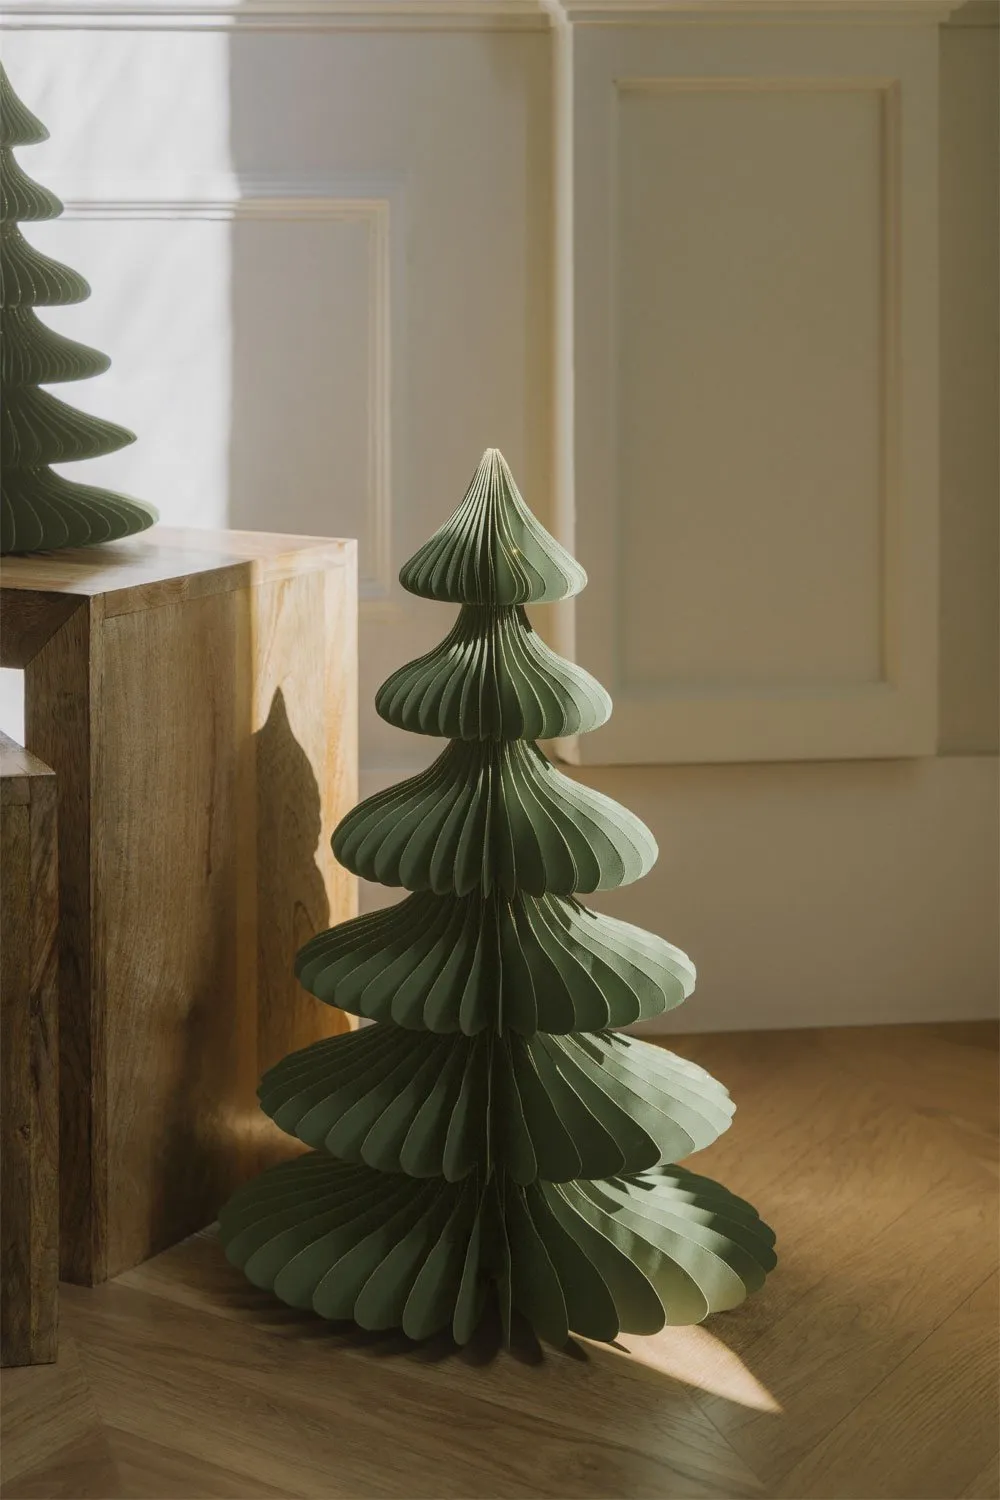
This one wants a corner with about 4 by 5 feet of open floor and a wall you’re willing to leave mostly empty — the shadow play is the decoration. Ceilings of 8 feet and up are ideal; below that, drop to a 30-inch tree so the pleats stay in proportion. For a narrower spot, the recessed niche version in Idea #6 solves the same problem in 14 inches of depth.
4. Bright Red Accordion Cone Against Wood Paneling
Roughly 70% pale wood paneling, 25% saturated red, 5% dark gray floor tile. That’s it. The wood does the warming, the red does the shouting, the dark floor stops it from floating. Because the palette is so tight, you can swap the red for cobalt blue or acid yellow and the room still works — the proportions carry it, not the color. Just keep the object count at one. A second red thing on that paneling and the whole thing collapses.
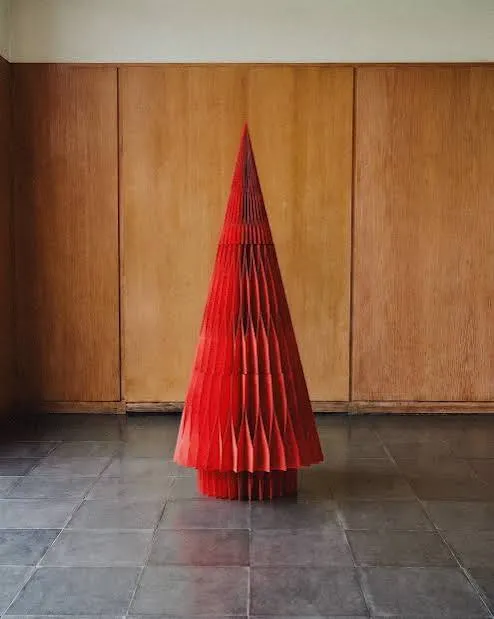
bright red dyed paper is the first thing to fade, and a south-facing window will bleach the sunward side of that cone by February. Rotate it every couple of weeks, or place it on a north or east wall. Also, it’s a floor-level cone with a wide footprint, which means toddlers will treat it as a tunnel and dogs as a scratching post. Put it somewhere with a natural barrier, like the dead end of a hallway.
5. Honeycomb Paper Tree on a Clear Acrylic Tiered Stand
The acrylic stand is doing the heavy lifting, and you don’t need a designer piece to get it. Clear acrylic risers run $16–$28 at Target or on Amazon, and a green honeycomb tree is $12–$20 most places online. Add a $5 star garland and a spool of gold ribbon and you’re at about $45 for the whole vignette. Compare with Idea #3 — same paper-tree logic, completely different mood.
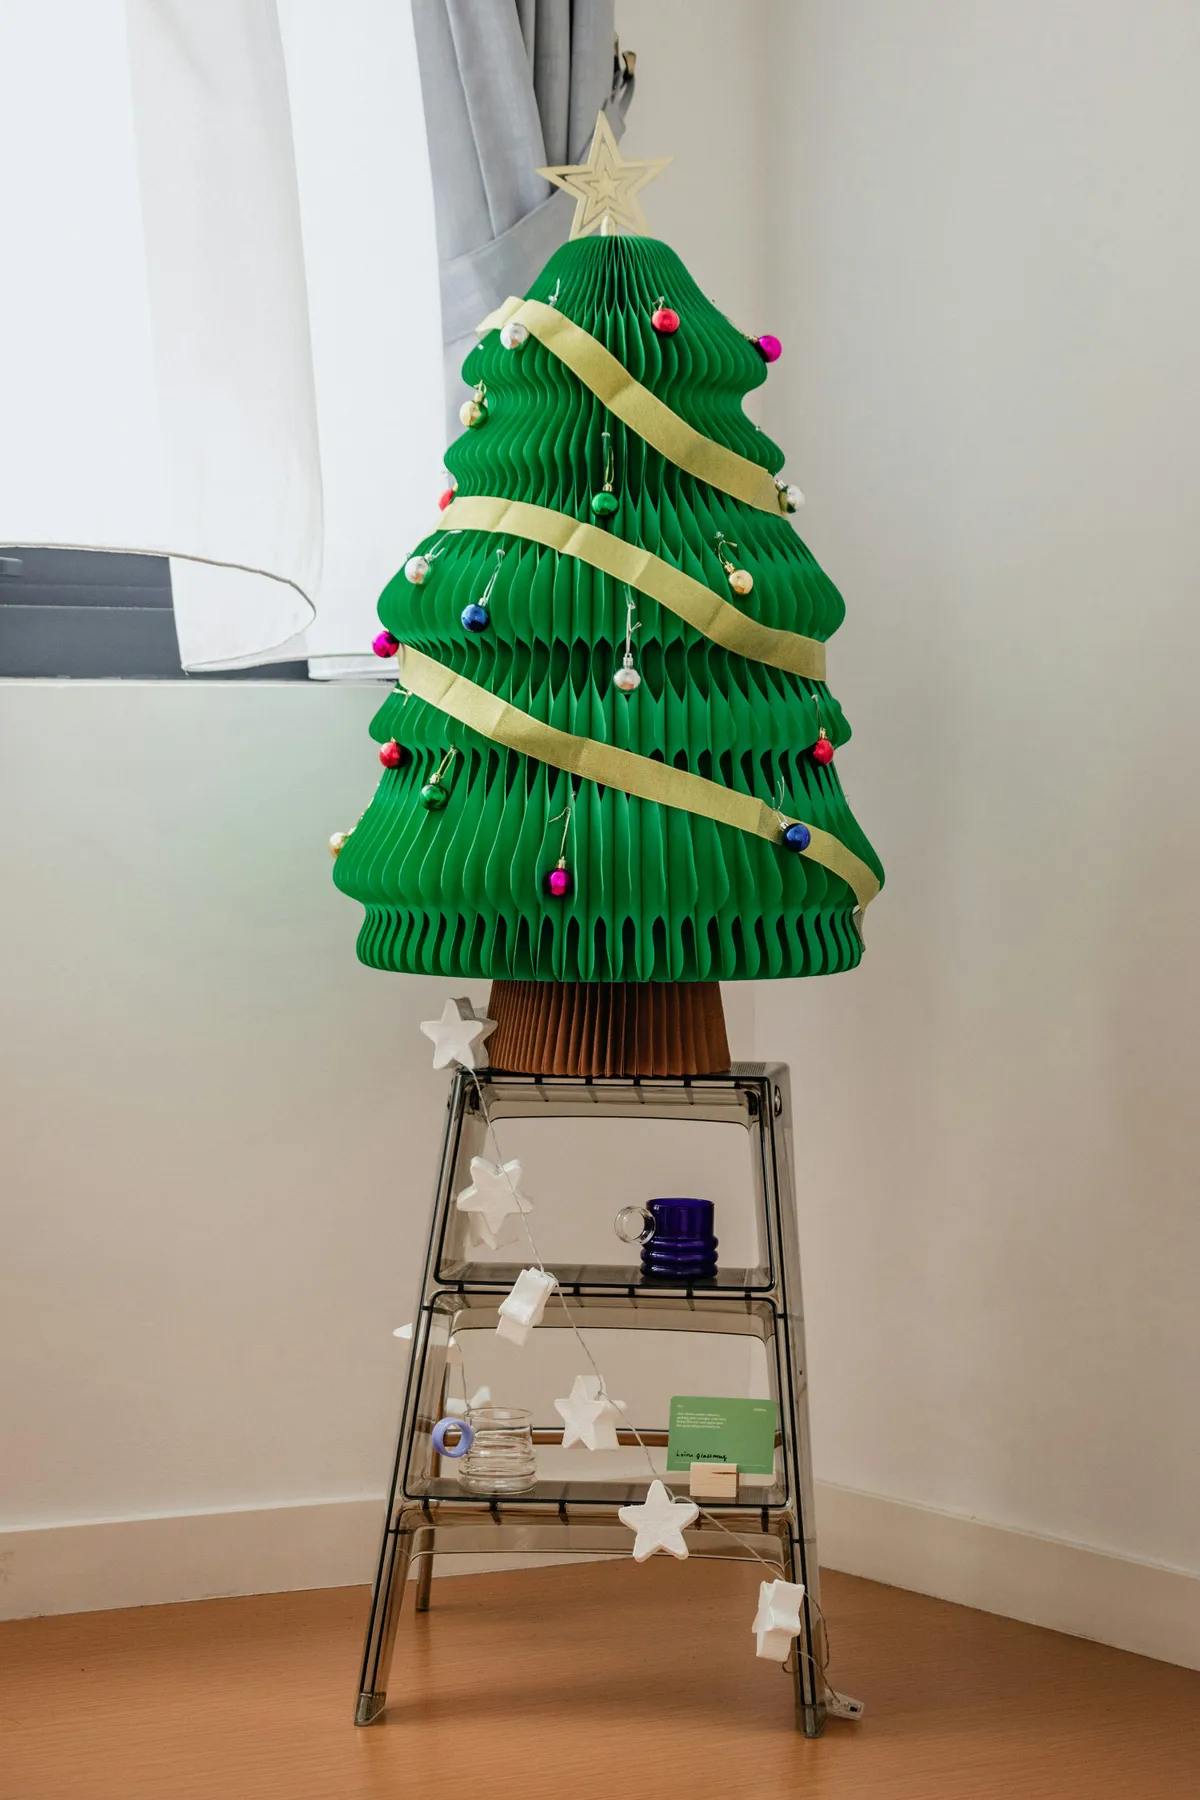
Take away the transparent stand and this becomes a paper tree on the floor. Keep it and the tree appears to hover, with the little baubles and star garland visible through the acrylic underneath. That see-through layer is what turns a $15 decoration into a display. Can’t find acrylic? A glass cake stand or a lucite side table does the same optical trick and bounces light back up into the honeycomb cells.
6. Olive Accordion Tree Tucked Into a Recessed Wall Niche
Niches are unforgiving, so measure before you buy. The tree should fill 60–70% of the niche height and about half its width, then sit centered rather than resting on the shelf edge. Aim for the widest point of the tree to land around 60 inches from the floor so it reads at eye level as you walk past. A tree that’s too small in a niche looks like a mistake; too large and it looks stuffed.
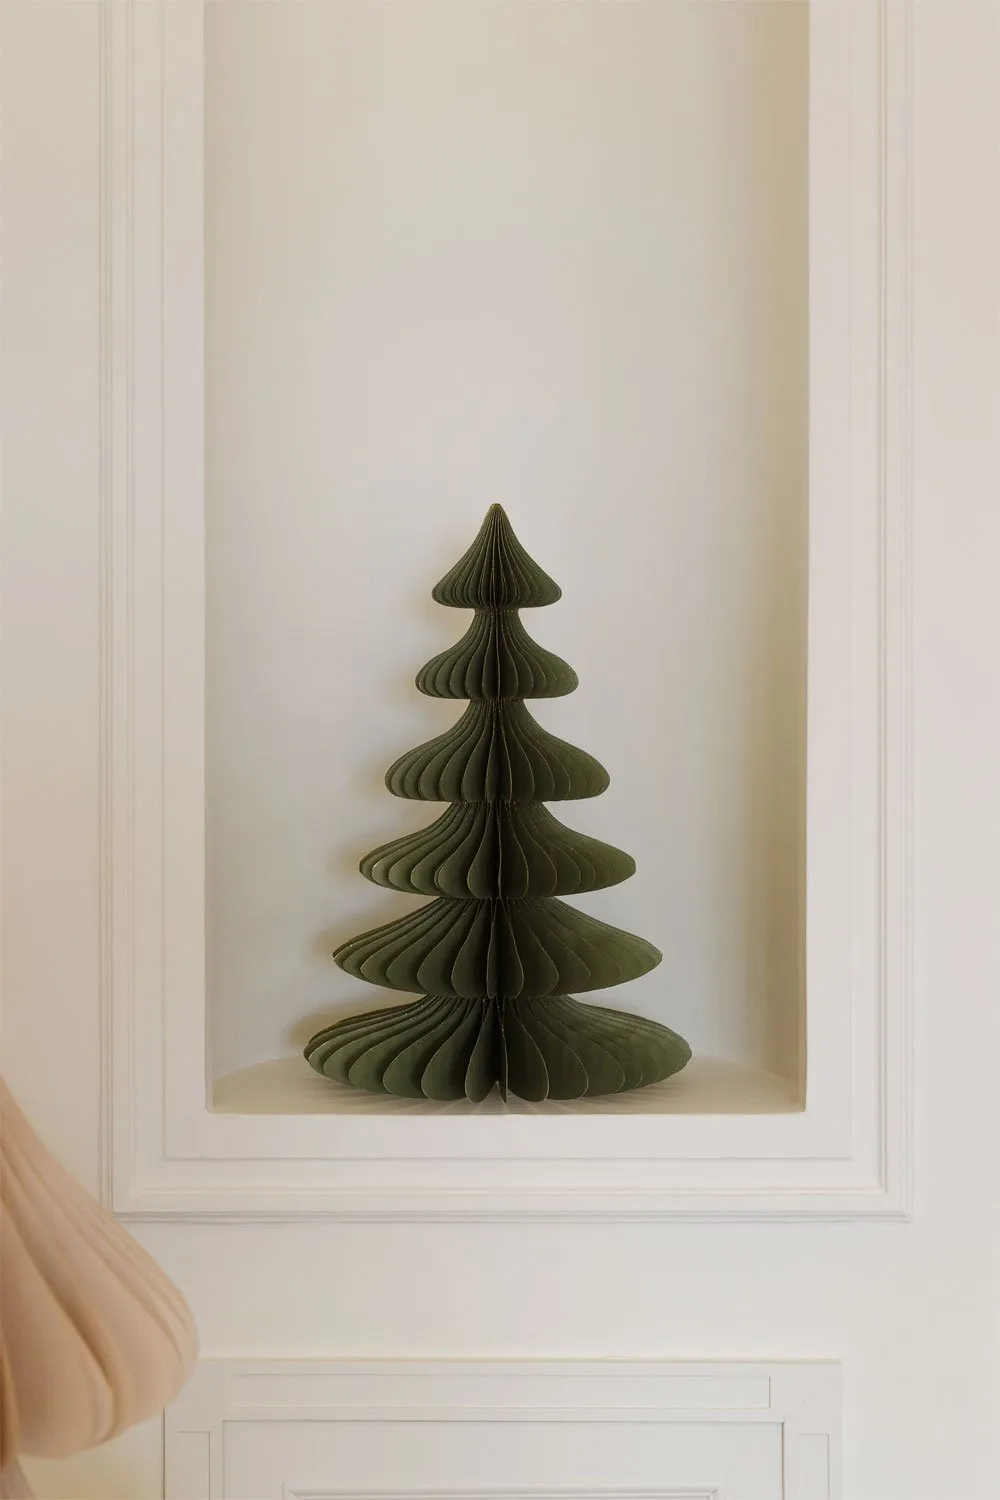
- Measure niche height, width, and depth — depth is the one people forget.
- Check the light: does the niche get direct sun or stay shaded all day?
- Confirm the paper is colorfast, or keep it out of sun entirely.
- Decide whether you need a riser to center the tree vertically.
- Budget $40 or more for a tree substantial enough to hold the space.
7. Layered Wood Slice Trees Against a Charcoal Wall
Wood slice trees are forgiving in almost every way except one: dust settles into every gap between those overlapping pieces and a cloth just pushes it deeper. Plan on a monthly pass with compressed air or a hairdryer on cool, plus a soft brush for the faces. Keep them out of humid rooms — a bathroom or a spot near a kitchen steam vent will make the slices cup and separate. No annual cost, just ten minutes a month.
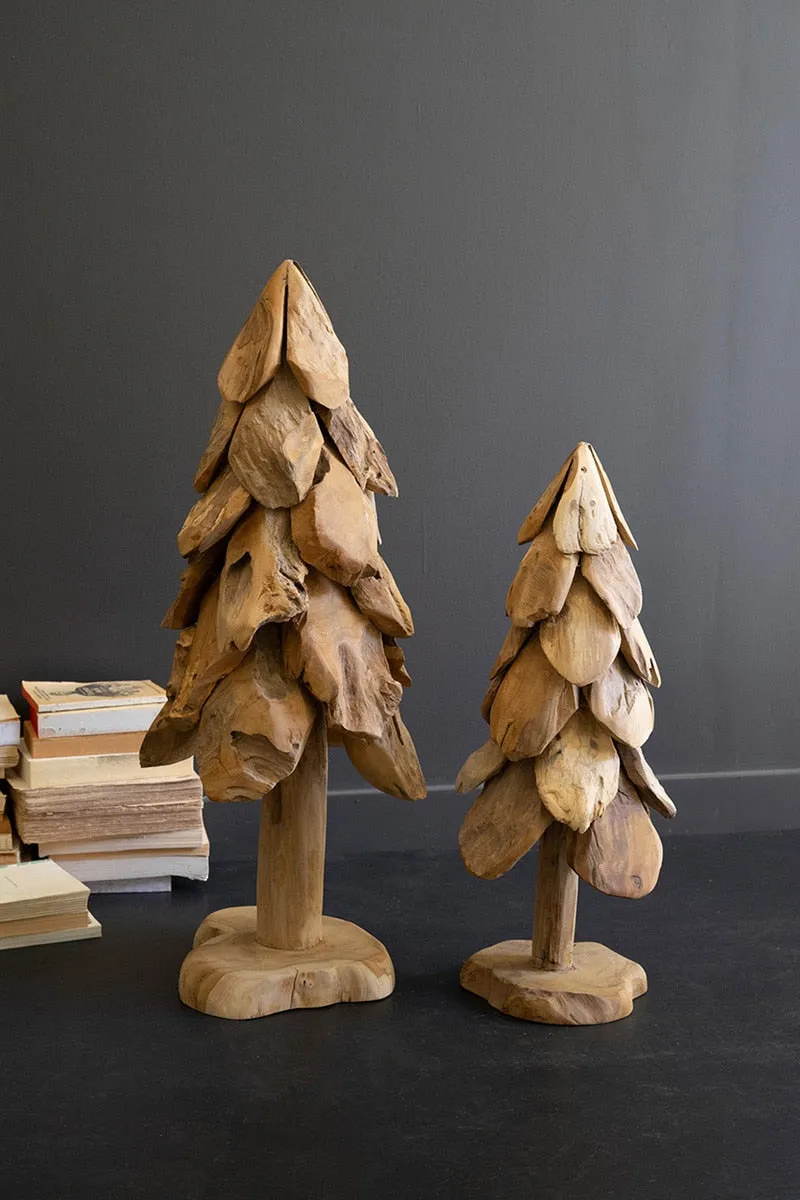
Two things are happening here. First, contrast: pale warm wood against a near-black wall gives the silhouette a crisp edge that a beige room would flatten. Second, repetition — the scale-like pattern of overlapping pieces repeats at two different heights across the pair, which the eye reads as deliberate even if you can’t name why. The stack of old books off to the left keeps the composition from feeling like a store display.
8. Three White Textured Trees on a Pale Wood Table
Textured white trees are one of the easiest things to make at home.
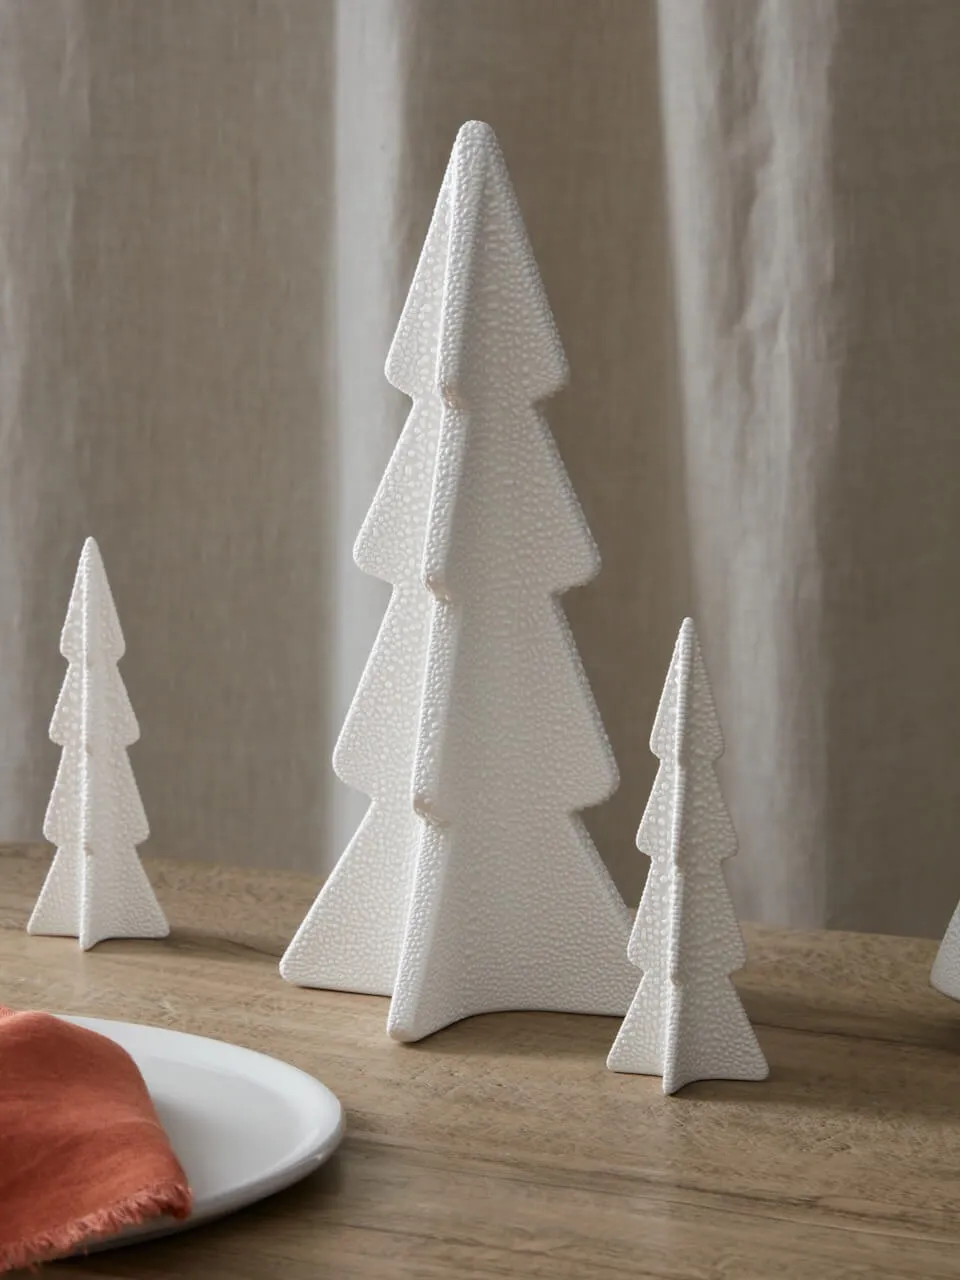
- Cut two cardboard cone profiles and tape each into a cone, roughly 14, 10, and 7 inches tall.
- Coat with a thin layer of joint compound or texture paste using a palette knife.
- Drag a fork or stiff brush through it while wet to raise the ridges.
- Dry 12 hours, sand lightly, and knock off the loose crumbs.
- Spray two light coats of matte white, letting each dry fully.
About 45 minutes of hands-on time and $18 in materials for all three.
These are tabletop pieces, so scale them to the surface: a trio of 14, 10, and 7 inches looks right on a 30-inch round dining table or a 48-inch console. Any smaller and they vanish; any bigger and they become a centerpiece you have to talk over. For the floor-standing version of the same texture idea, see Idea #13.
9. Glowing Paper House Village on a Rustic Mantel
Paper house villages have quietly replaced the ceramic-and-plastic snow village for a lot of people, and 2026 is the year it went mainstream. The appeal is obvious: they fold flat, they’re cheap to collect one at a time, and the warm internal glow photographs beautifully in a dark December room. Pinterest searches for paper village mantels have been climbing two seasons running, and unlike most micro-trends this one has staying power because it’s a craft tradition, not a color story.
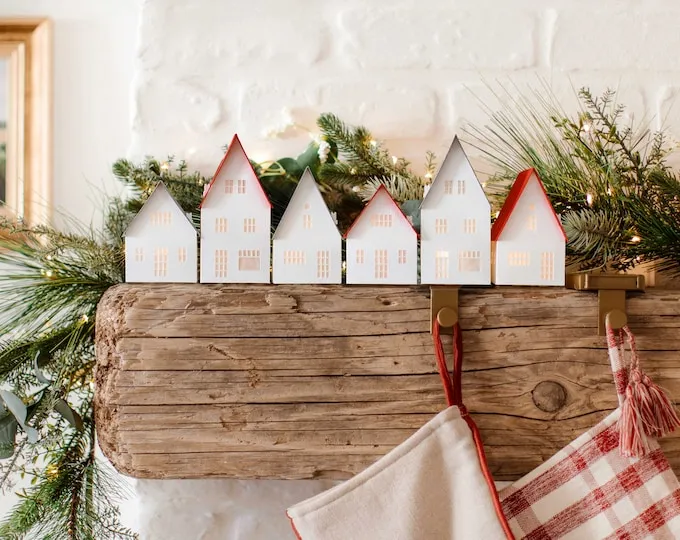
- Illuminated paper houses, 4–6 pieces: $30–$90
- Faux pine and eucalyptus garland: $25–$60
- Warm white string lights: $12–$20
- Stockings and brass holders: $30–$80
- Total: roughly $100–$250
Budget alternative: plain white craft-store houses at $3 each, lit from behind with a single strand of fairy lights — about $45 total.
10. Red Accordion Ornament With Gold Glitter Edges
A mini accordion ornament takes about 20 minutes.

- Cut a 4-by-10-inch strip of red cardstock and score it every half inch.
- Accordion-fold along the scores, fan it into a cone, and glue the ends.
- Run a thin bead of glue around the bottom edge and dip it in gold glitter.
- Poke a hole in the top, thread floral wire through, and twist a loop.
- Hang it and fluff the pleats so the folds open evenly.
Under $6 in supplies per ornament, and a stack of cardstock makes about eight.
Seal the glitter or you’ll be vacuuming it until March. One coat of matte Mod Podge over the glittered edge locks it in without dulling the shine. Mind the weight, too: paper and glitter should stay under about 2 ounces, or the ornament drags a branch tip down and rotates sideways. Thread floral wire instead of a metal hook so you can bend it to balance.
11. Deep Green Honeycomb Tree Backlit by String Lights
Honeycomb paper is basically a stack of air pockets, which makes it a genuinely bad neighbor to a hot bulb. Use LEDs only, and keep any bulb at least six inches from the paper — a strand of vintage incandescents draped right against the cells is how decorations become fire hazards. Honeycomb also doesn’t recover from a crush. Store it flat, not folded into a bin, or you’ll spend next December coaxing the pleats back open.
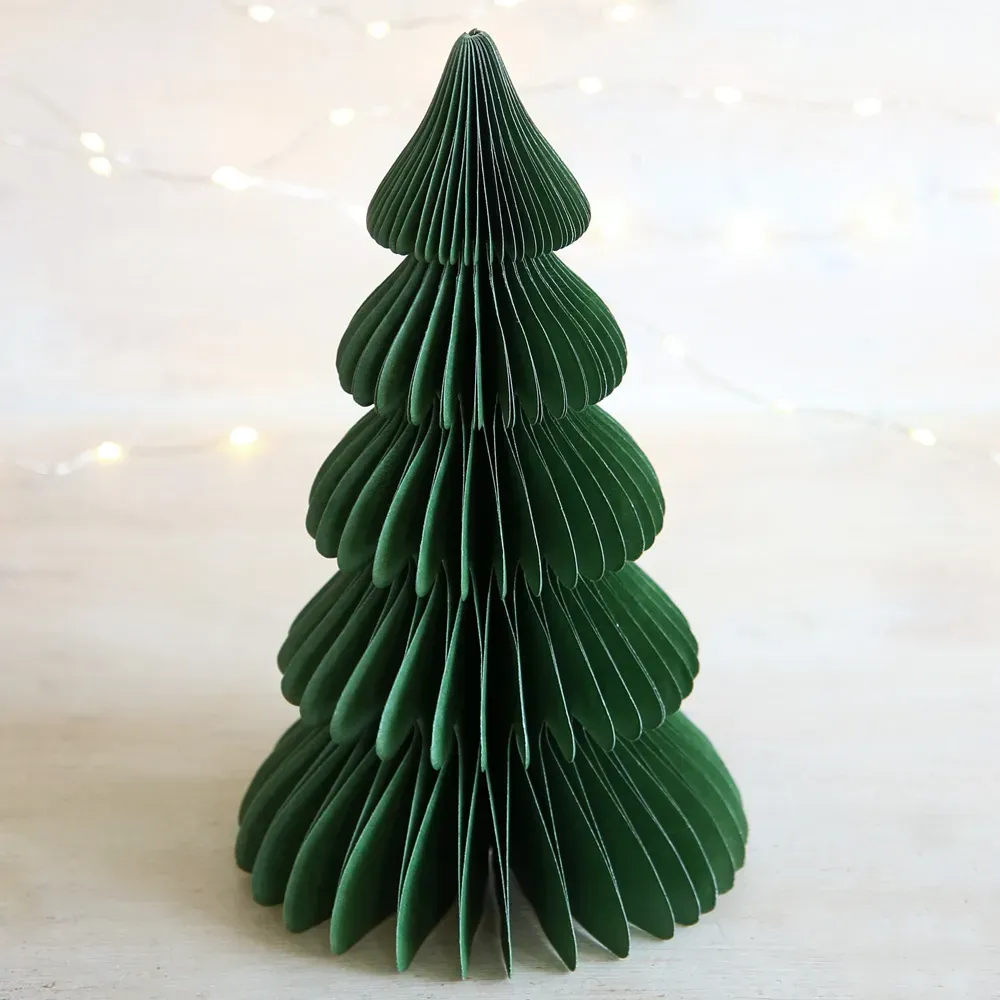
The mix here is about 60% deep green, 25% warm white glow, 10% pale surface, and 5% nothing-at-all — the empty space is doing real work. Because the tree has no ornaments, the background lights have to supply all the sparkle, so resist the urge to add baubles. Swap the pale surface for dark wood and the whole thing turns moodier; swap the string lights for a single clip lamp and it becomes a sculpture instead of a decoration.
12. Folded Book Page Tree With the Text Still Legible
You need one paperback and about an hour.

- Remove the cover and set the book spine-down with the pages fanned slightly.
- Fold the top corner of each page down toward the spine at a consistent angle.
- Work through the whole book, keeping the folds tight and even.
- Stand it up, spread the folds into a cone, and glue the first and last pages together.
- Optional: a light dusting of snow spray on the tips.
Roughly $4 in materials if the book comes from a thrift bin.
It’s the text. A folded book tree with blank pages is a craft project; one where you can still read the type is a small piece of sculpture. Choose a book with a good typeface — older paperbacks with dense, even print work best — and fold so the lines stay legible on the outer surface. Some people use a favorite novel. That detail is what makes guests pick it up and turn it around.
13. Cardboard Cutout Trees Wrapped in Lights and Faux Fur
This whole scene costs less than one nice ornament set:
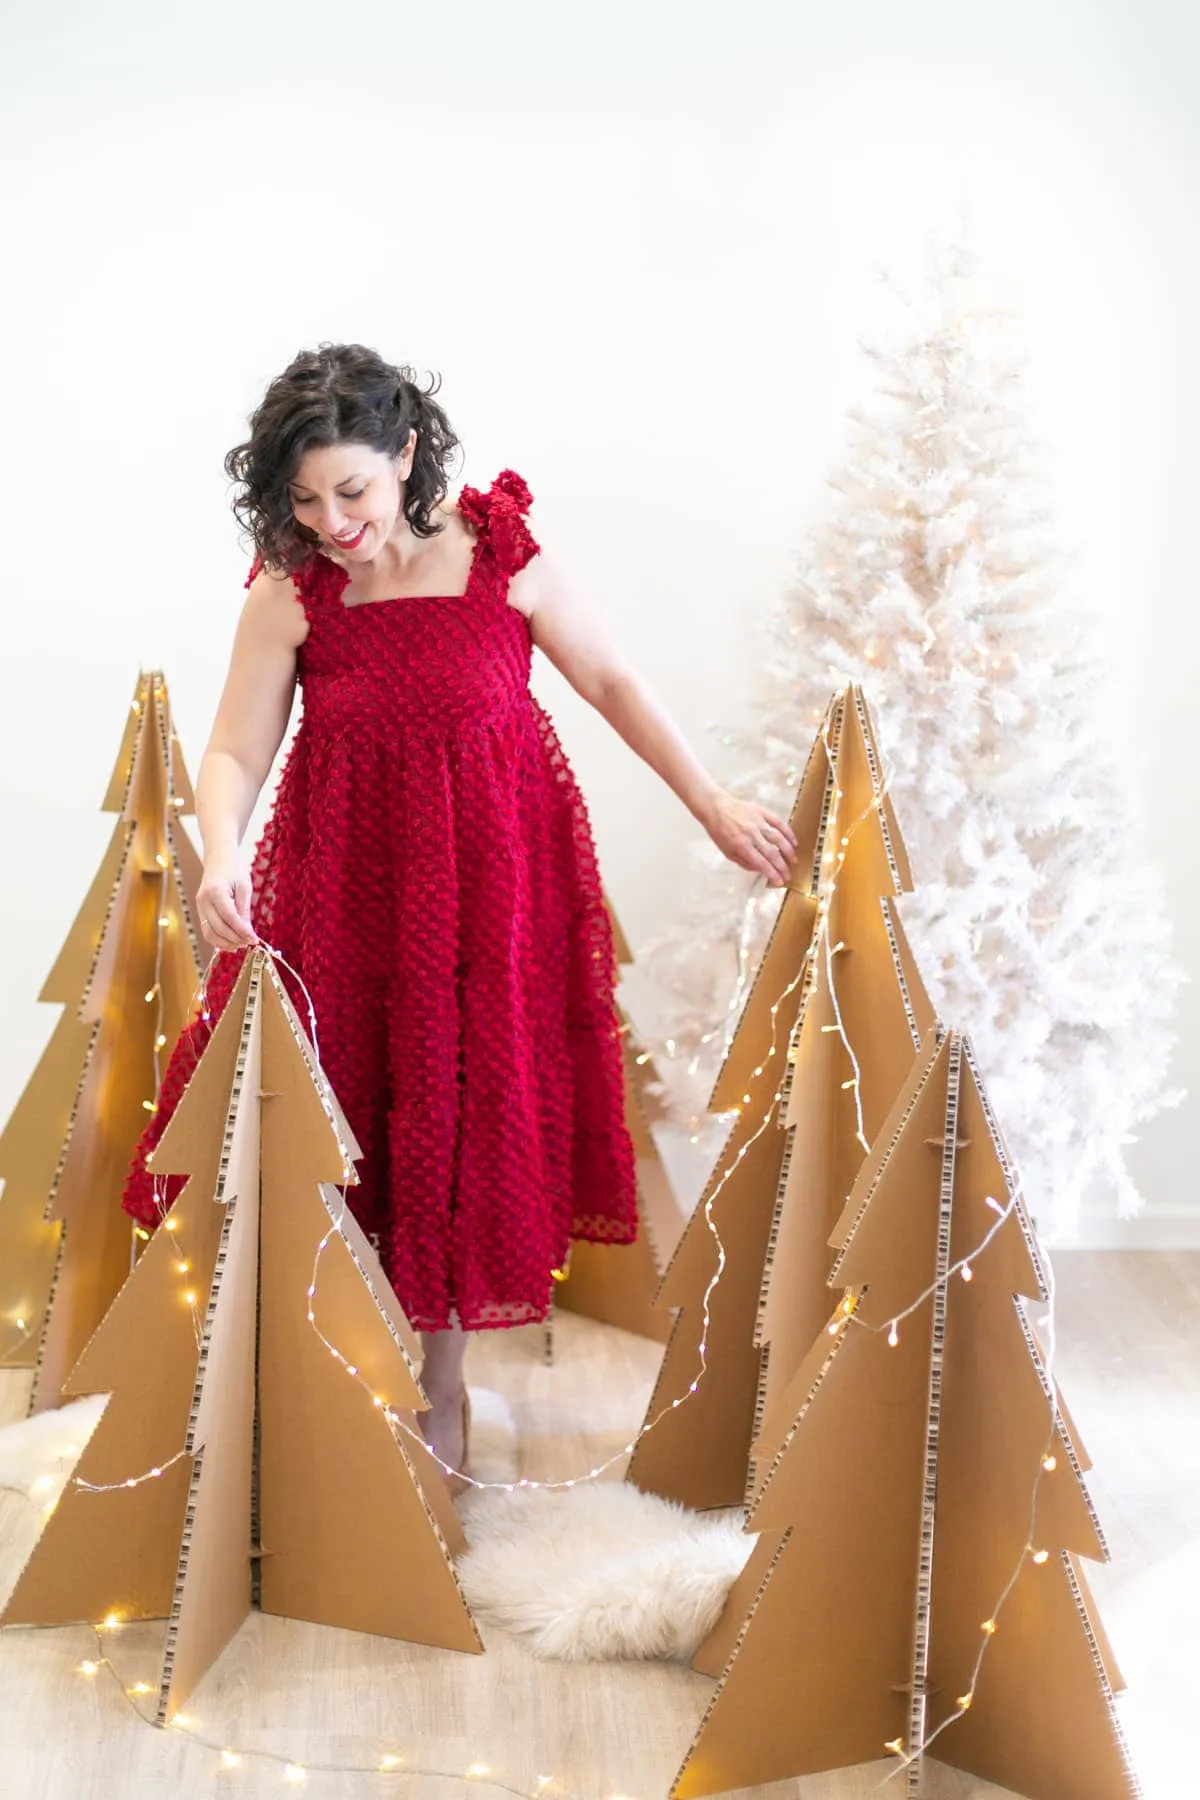
- Corrugated cardboard sheets, 3–4: $10–$20
- Warm white string lights, 2 strands: $16–$30
- Small faux fur rugs or a throw: $25–$60
- Utility knife, glue, and edge paint: $12–$20
- Total: roughly $65–$130
Budget alternative: ask a furniture or appliance store for their free moving boxes and you’re down to the cost of lights — under $30.
Cut so the corrugated flutes run vertically through the tree, not horizontally across it. Vertical flutes give you strength along the height and a clean striped cut edge that looks intentional; horizontal flutes make the whole thing floppy and the edges crumble. For anything over three feet, laminate two layers with the flutes crossed at 90 degrees — same trick cardboard furniture uses, and it’ll hold a strand of lights without sagging.
14. Slot-Together Cardboard Tree With a Bare Geometric Silhouette
There’s no ornament, no light, no color — and it still reads instantly as a Christmas tree because the silhouette does all the work. The slot-together construction creates real depth from two flat planes, and the negative space between the stylized branches keeps it from looking like a solid cutout. It also happens to be the most renter-friendly thing on this list: it folds flat, weighs almost nothing, and doesn’t mind living behind a couch for eleven months.
You can buy a laser-cut version on Etsy for $45–$90, or make this for about $8 with two sheets of corrugated board and a sharp utility knife. The trick is drawing one half-tree profile on folded paper, cutting it out, and using that as a template for both pieces — that guarantees the slots line up. Facebook Marketplace also turns up laser-cut trees in January for almost nothing.
15. A Kids’ Craft Table of Tiny Green Trees and Santa Hats
- Cover the table with kraft paper — green acrylic does not come out of white laminate.
- Choose washable, non-toxic paint and white glue over hot glue for small hands.
- Pre-cut the tree shapes so kids are decorating, not sawing.
- Set out one tray per child to avoid the everything-gets-mixed pile.
- Keep a damp cloth and a drying rack within arm’s reach.

The gap between the photo and reality is usually glitter. Loose glitter travels — it’ll be in the rug, on the dog, and in the butter by New Year’s. Chunky glitter glue or white paint dots give you the same snowy look with far less migration. Also plan for the paint to still be wet fifteen minutes after they lose interest; a hairdryer on cool saves the afternoon, and a shallow box lid makes a decent drying rack.
16. Interlocking Cardboard Branches Balanced in One Hand
This is a two-cut project, which is the whole charm.
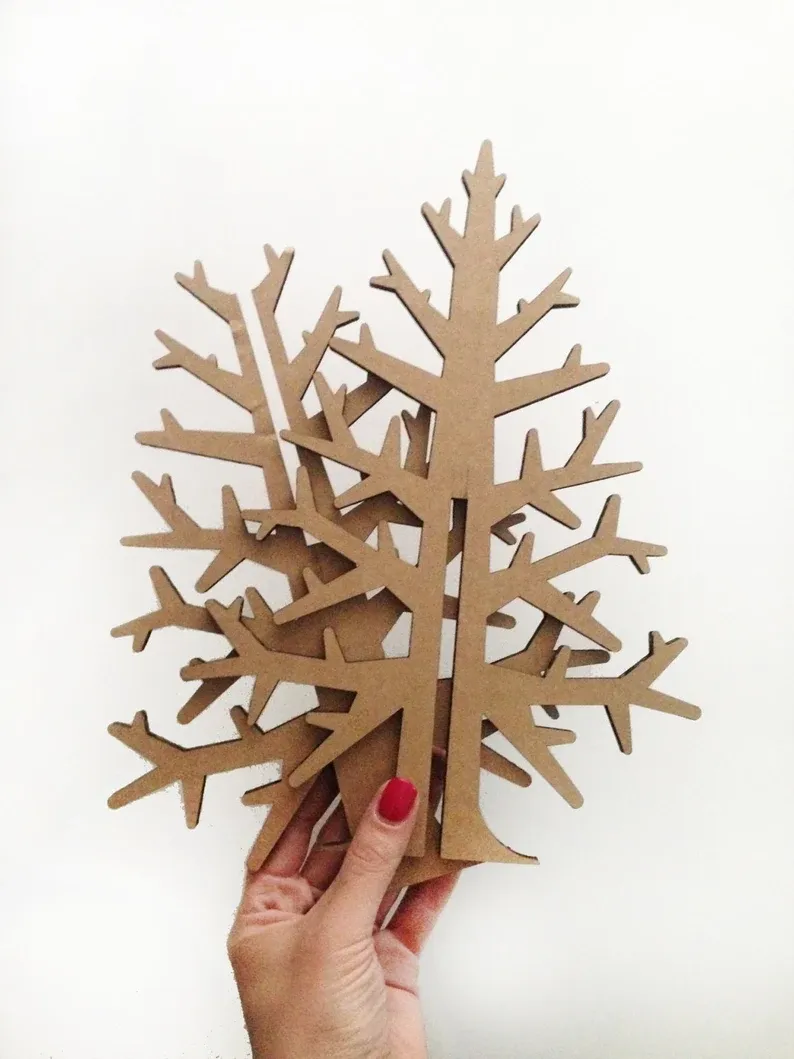
- Draw a bare-branched tree profile on paper and cut it out as a template.
- Trace it twice onto light cardstock or thin corrugated board.
- Cut a slot halfway up from the bottom of one and halfway down from the top of the other, the same width as your material.
- Slide them together at right angles and adjust until the base sits level.
- Trim any wobble at the bottom with a craft knife.
About 40 minutes and $5 in materials, no glue required.
The crossing point is everything. Two flat pieces locked at 90 degrees create a three-dimensional object without a single drop of adhesive, and the silhouette changes completely as you walk around it — dense from the side, skeletal from the front. Remove the interlock and you’re back to a flat cutout. It’s also why the thing packs flat, which is the quiet genius of it.
17. Book Page Tree Styled Small on Soft Textured Fabric
This tree runs roughly 8 to 10 inches tall, which puts it firmly in styling-object territory rather than floor decor. It wants a nightstand, a bookshelf with at least 12 inches of clear height, or a console corner — anywhere the top of the tree lands between 40 and 60 inches from the floor so you can actually see the page folds. On a deep mantel it’ll disappear. For bigger surfaces, Idea #13 is the floor-standing version of the same spirit.
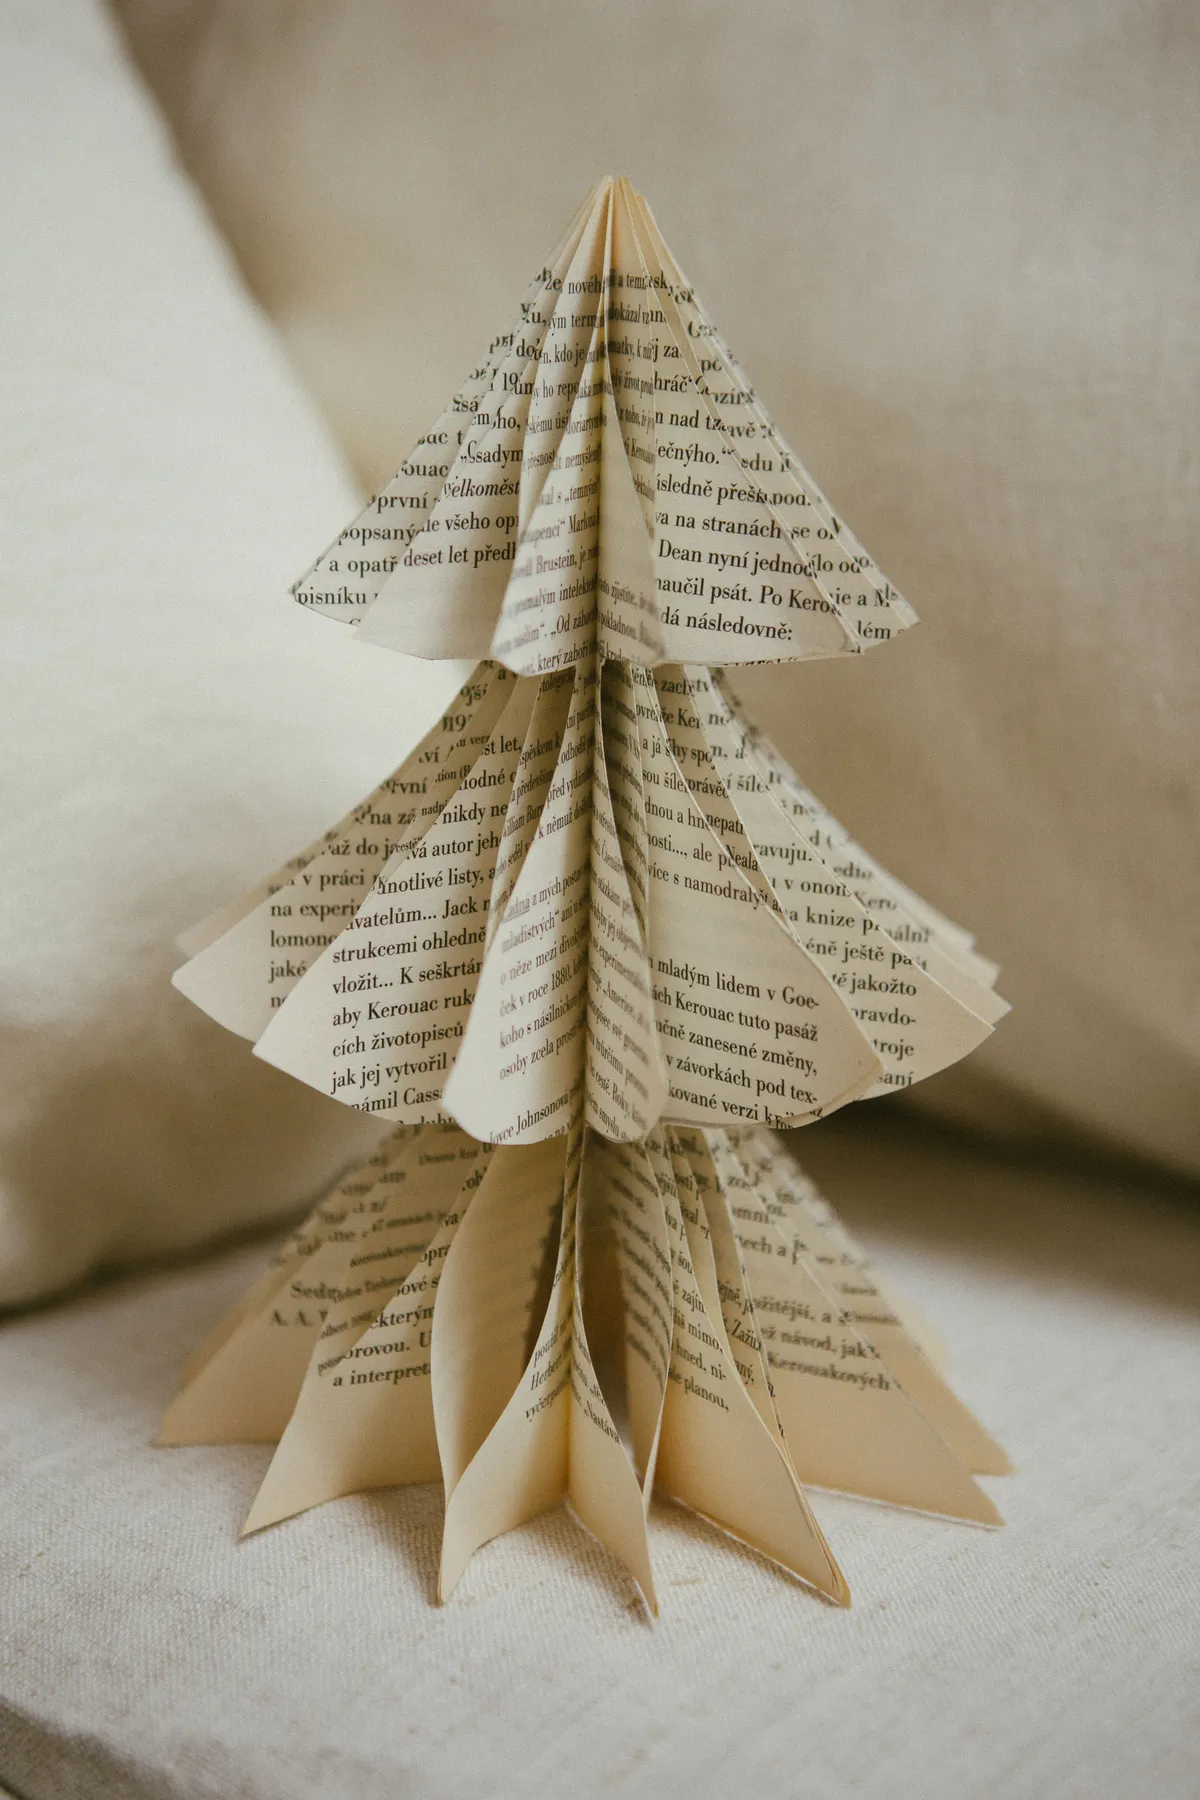
Paper and moisture are not friends. Put a folded book tree on a windowsill where condensation collects and the pages will ripple within a week; set it near a candle and you’re one gust away from an incident. Old book paper also yellows unevenly in direct sun, which reads as dingy rather than vintage. Keep it dry and shaded and it’ll look the same in five years.
18. Oyster Shell Tree Topped With a Three-Dimensional Gold Star
Work bottom-up around a foam cone, and overlap each shell about 50% over the one below — that’s what hides the core completely. Start with your largest, flattest shells at the base and save the small cupped ones for the top where the curve tightens. Hot glue sets fast enough that you can hold each shell for five seconds and move on. A 12-inch cone takes roughly 90 to 120 shells, so collect more than you think you need.
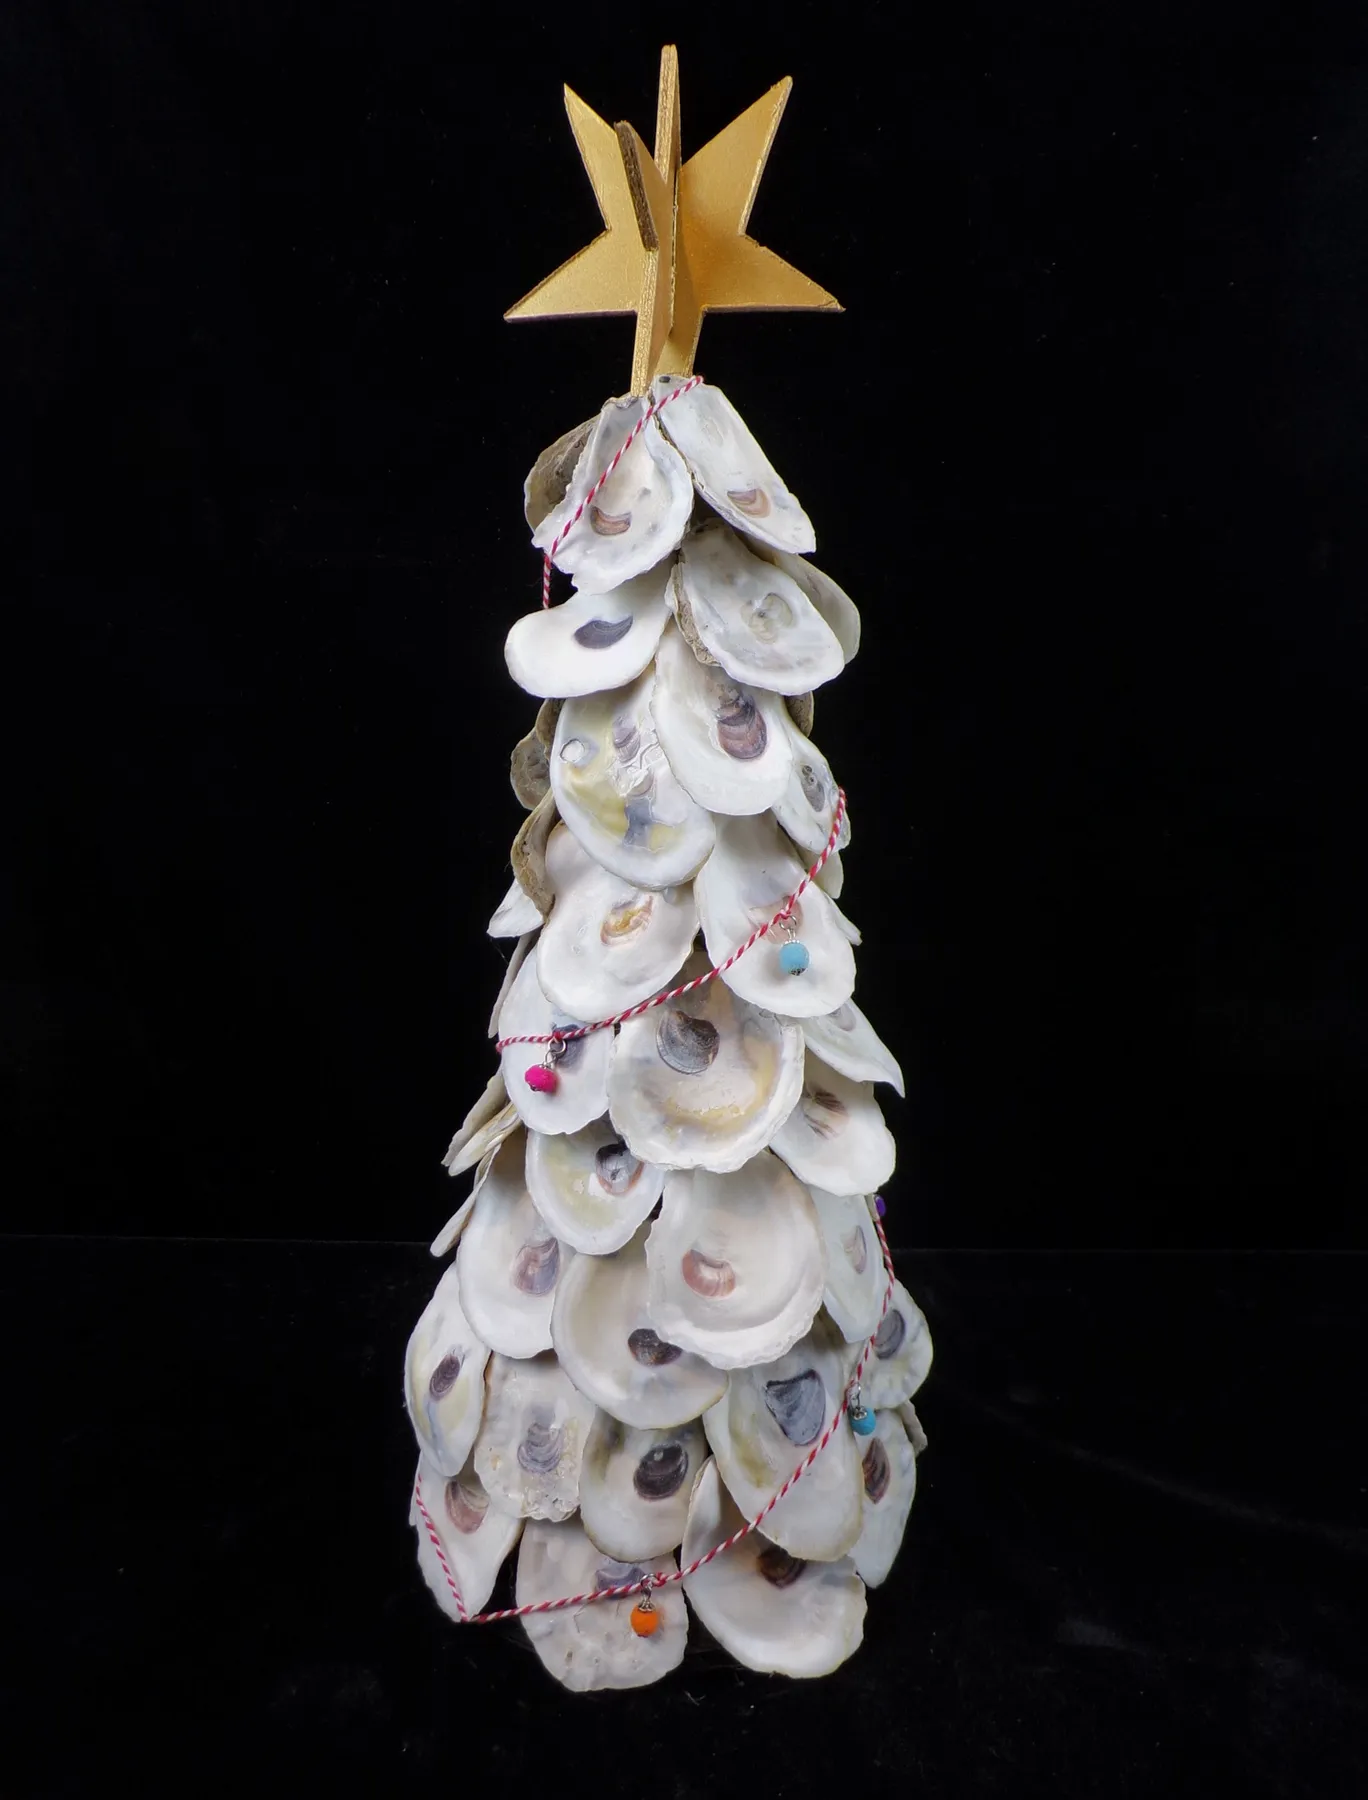
Oyster shells are free if you ask nicely at a seafood counter — most will bag up a few dozen for you. Otherwise a craft bag runs $12–$18 online, a foam cone is $6, and a gold star topper is $4. The whole thing lands under $30, and the striped string with fuzzy beads is the kind of thing you find in a sewing drawer. The coastal-in-December look is unusual enough that guests always ask where you bought it.
19. Red-and-White Paper Star Topper on Dark Wood
A folded paper star topper takes about half an hour.
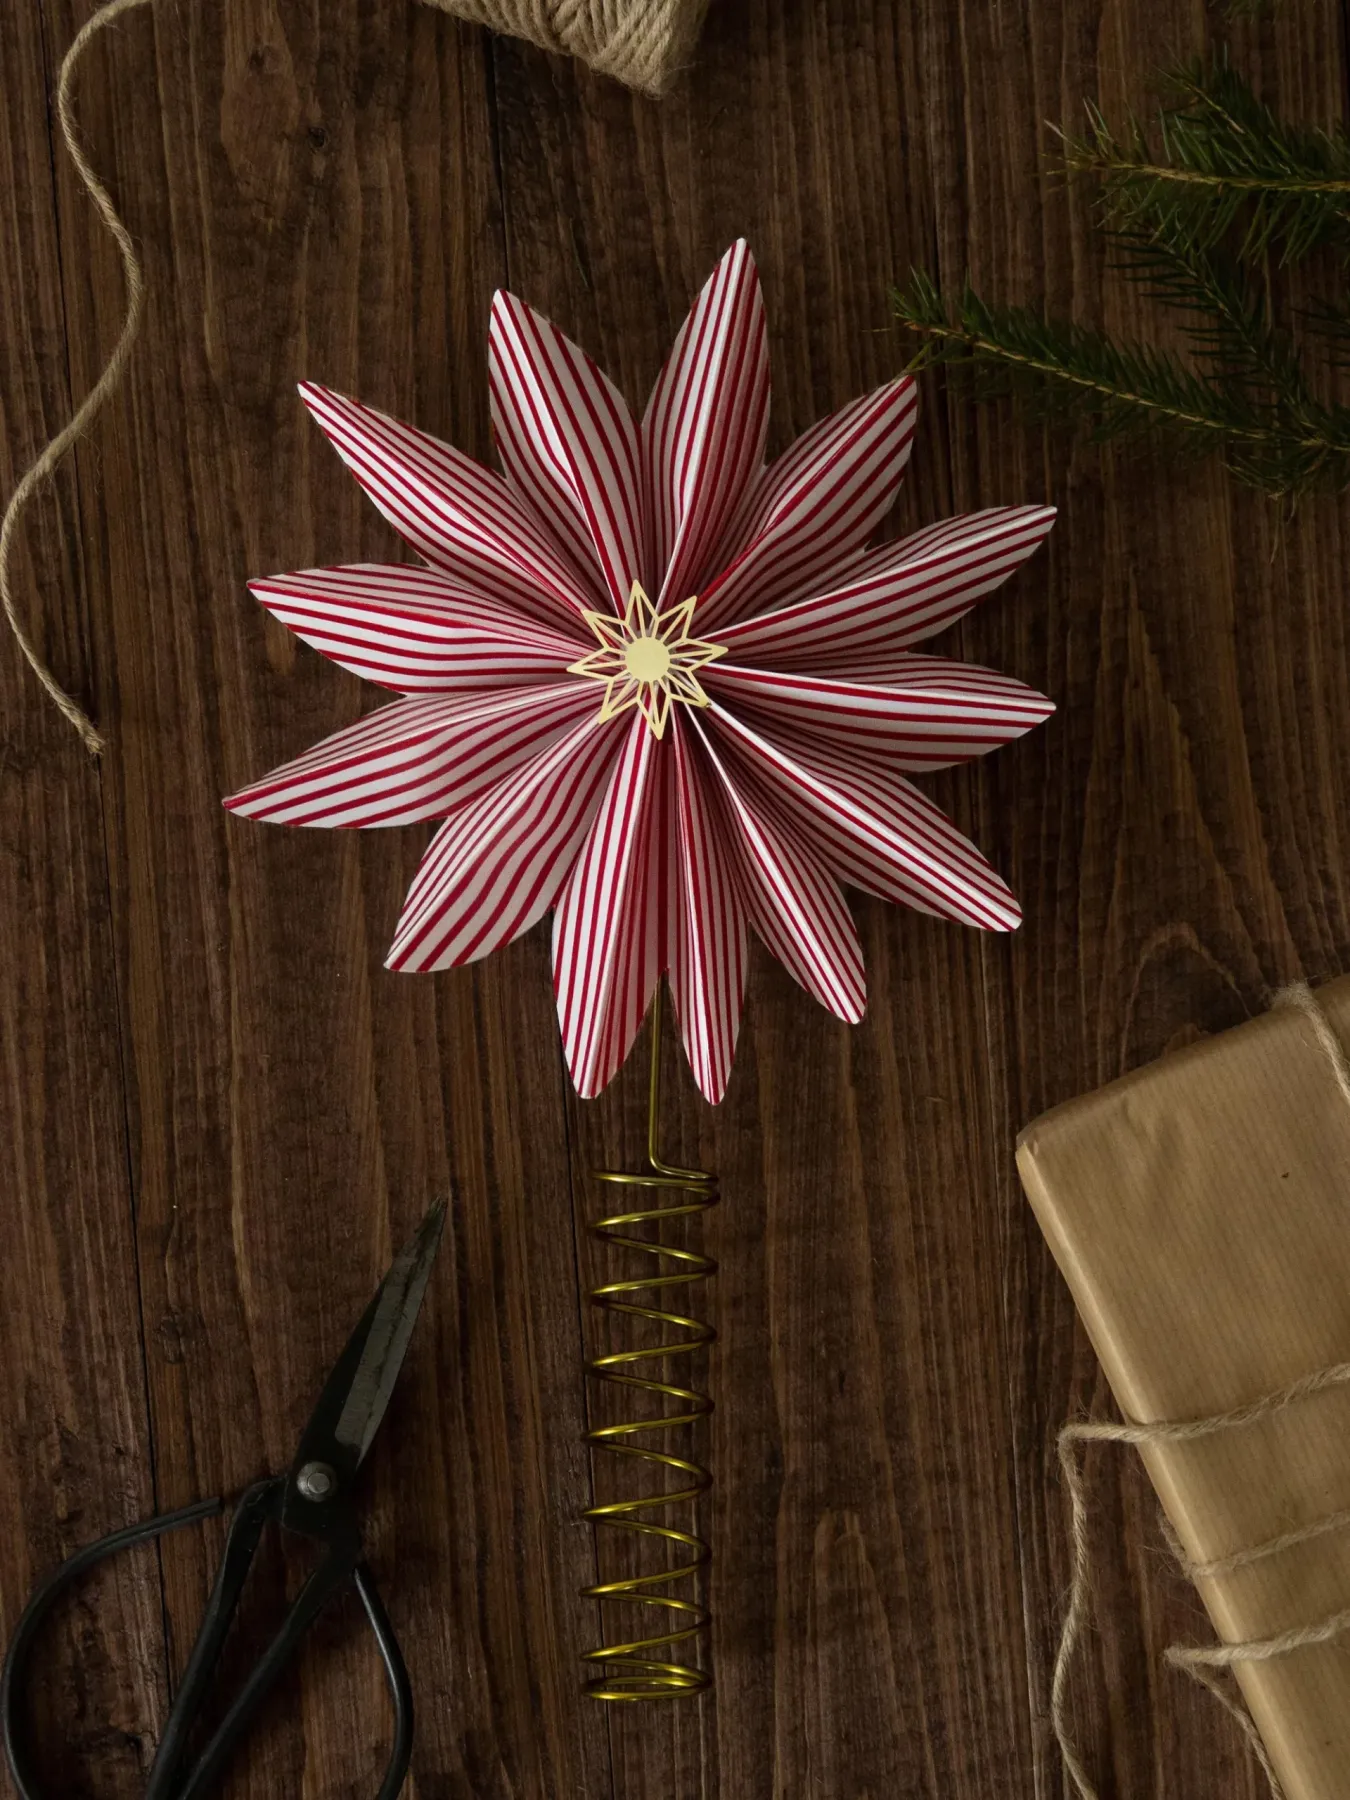
- Cut five 4-by-4-inch squares of red-and-white striped paper.
- Fold each square corner to corner and crease hard.
- Lay the triangles side by side, then fan them into a star, gluing each to the next.
- Glue a small gold star or button in the center to hide the joins.
- Attach a spiral wire base so it sits over the treetop.
Under $5, and one sheet of striped paper makes several.
Paper star toppers are part of a bigger 2026 shift: people are decorating less with plastic and more with folded, cut, and glued things they can finish in an evening. The candy-stripe version specifically nods to vintage Christmas shop windows. It’s a trend with real staying power because the materials are cheap and the look doesn’t date. Pine branches, twine, and a paper-wrapped box complete the scene.
20. Tiered Fan-Fold Paper Trees Against Dark Wood Paneling
Count on 55% warm brown paper, 20% dark paneled wall, 15% light gray upholstery, and 10% gold ribbon. The brown-on-brown is what makes this feel expensive — the trees sit in the same color family as the wall behind them and read as texture rather than objects. Swap the gold ribbon for matte black and you get a sharper, more graphic version; swap the gray chair for cream and the whole corner goes softer and more Scandinavian.
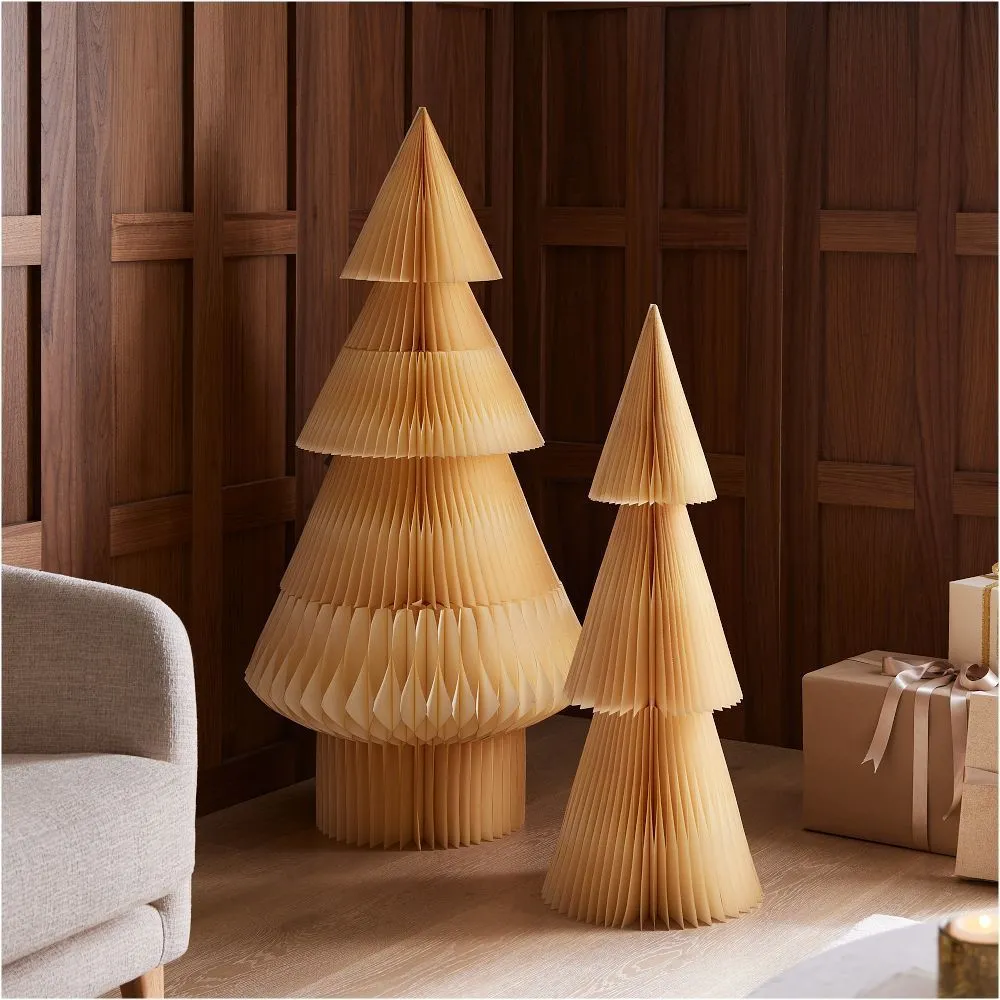
- Tiered fan-fold paper trees, 24–36 in: $30–$70
- Kraft wrapping paper and ribbon: $12–$25
- Faux greenery or filler: $10–$20
- Total for the decor alone: roughly $55–$115
Budget alternative: make both trees from kraft paper and cardstock — about $15 total.
Fan-fold paper has one enemy and it’s gravity. Over a season the folds relax and the tiers lean, especially near a heating vent or in a room that swings between dry and humid. Expect to re-crease and re-stack each December, and store it flat and unstacked.
21. Small Cardboard Tree Strung With Miniature Pompoms
The tree itself is the budget version — a small cardboard cutout, maybe $6 in materials, studded with miniature pompoms that cost a few dollars for a hundred. Total spend is under $20 and it’s the kind of thing you can finish on a weeknight. Compare with Idea #22, where the same material gets a full miniature train set — same cardboard, ten times the ambition.
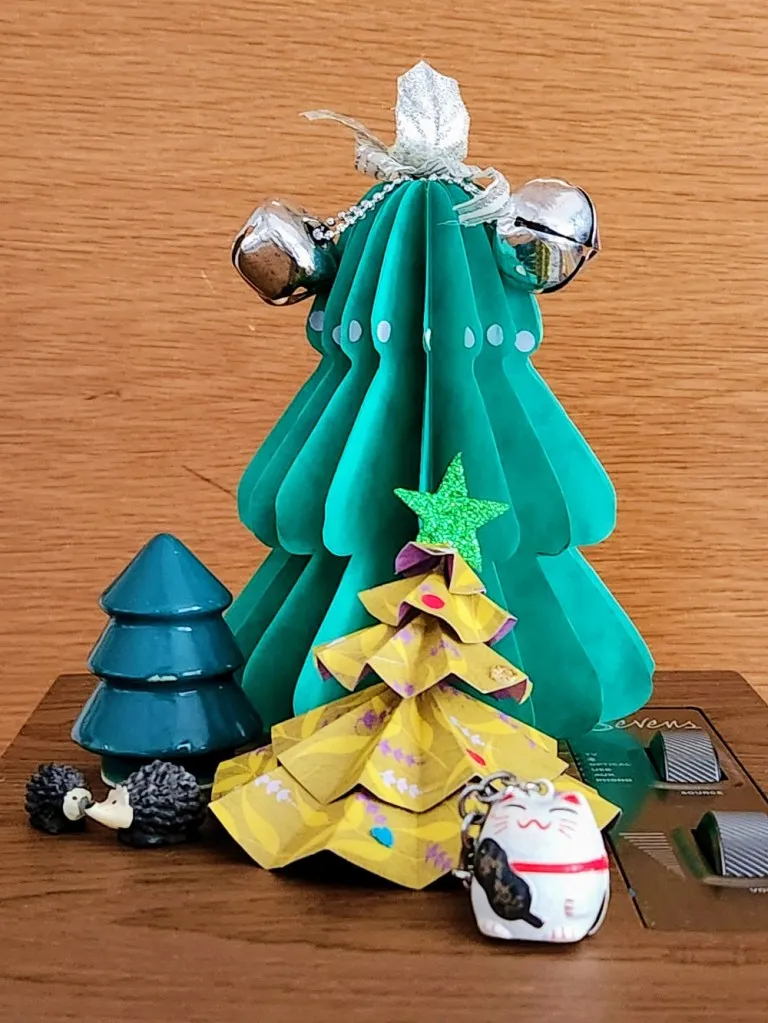
Small scale plus saturated color is an underrated combination. The cardboard stays neutral and matte, which lets a scatter of tiny bright pompoms do all the festive work without any of it feeling loud. Because the tree is small, the decorations can be almost comically small too — miniature ornament logic only works when the base object is miniature as well. The little uplight at the base throws the pompoms into relief and makes it glow.
22. Tiered Cardboard Tree With a Miniature Train and Glowing Town
The train. Everything else here — the tiers, the cut-out windows, the warm lights — is lovely but familiar. The tiny cardboard train on a sloping track is what makes people crouch down and look. It turns a decoration into a little world. If you build this yourself, plan the track before you cut anything: a gentle slope winding once around the cone, wide enough for the engine plus one car, is enough to sell the whole illusion.
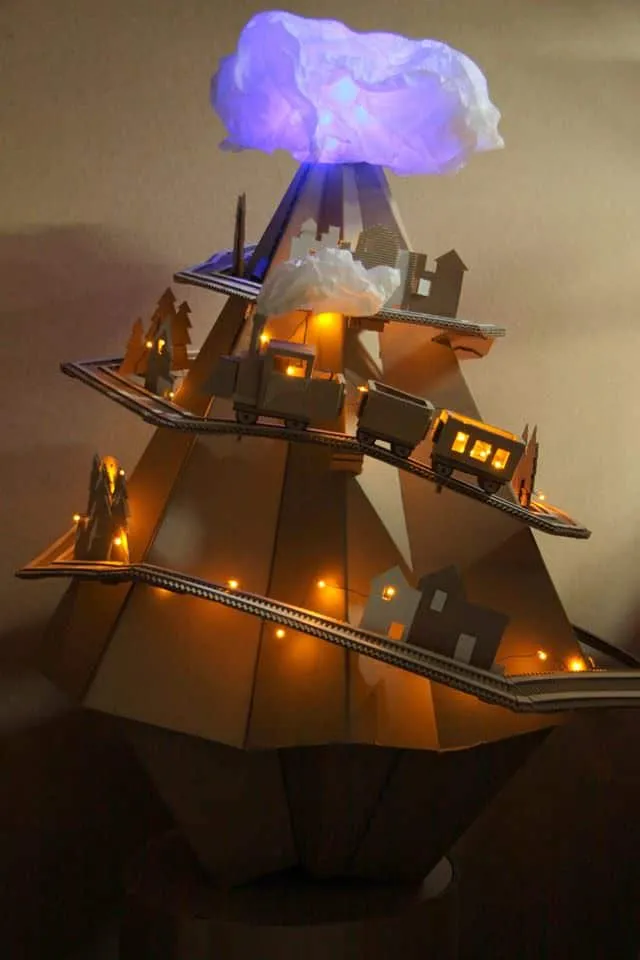
Miniature worlds are having a moment. Between the dollhouse revival and the popularity of paper villages, 2026 has clearly decided holiday decor should be something you can peer into. Cardboard is the natural material for it — cheap, cuttable, forgiving of a first attempt — and the tiered-cone-with-scenes format is genuinely new. The blue-lit tissue paper cloud at the apex is the detail that pushes it from craft project into keepsake.
23. Glitter-Tipped Painted Cones on Distressed Wood
- Styrofoam or papier-mâché cones, set of 4: $8–$16
- Acrylic craft paint in 2–3 greens plus one accent: $10–$18
- Gold glitter and glue: $6–$10
- Wreath with poinsettia and berries: $25–$55
- Distressed wood tray or board: $0–$25
- Total: roughly $50–$125
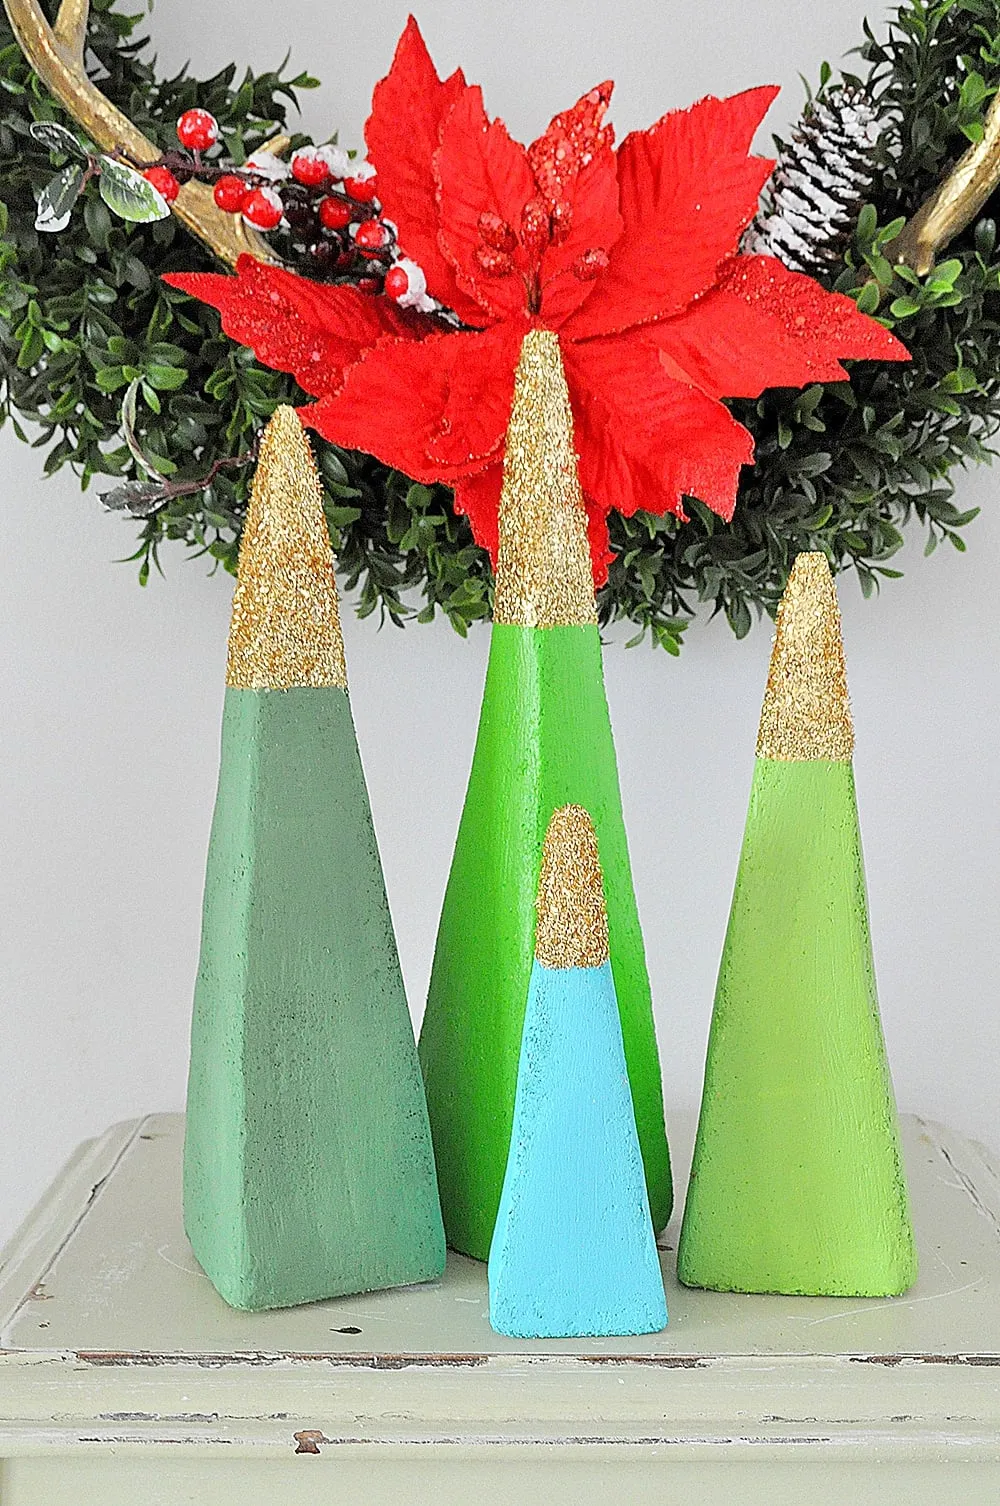
Budget alternative: cones rolled from cardstock cost about $3 total and paint up just as well.
Paint the cones in graduated shades and put the lightest one in the middle — it stops the grouping from looking like a color swatch fan. Dip each tip in glitter while the last coat of paint is still tacky rather than gluing afterward; it bonds better and gives you a soft fade instead of a hard line. Weigh the base of the tallest cone with a coin or museum putty, because a top-heavy cone on a slippery wood tray will tip.
24. White Paper Houses With Red Roofs and Frosted Evergreen
The red roofs are the entire engine. White paper houses alone are tasteful but a bit cool; the bright red points give the eye three places to land and tie straight to the berries and the warm interior glow. Three houses, three roof heights, one material — that’s the whole composition. The frosted evergreen branches behind them fill empty air without competing, and the rough-hewn wooden surface keeps it from looking like a store window.
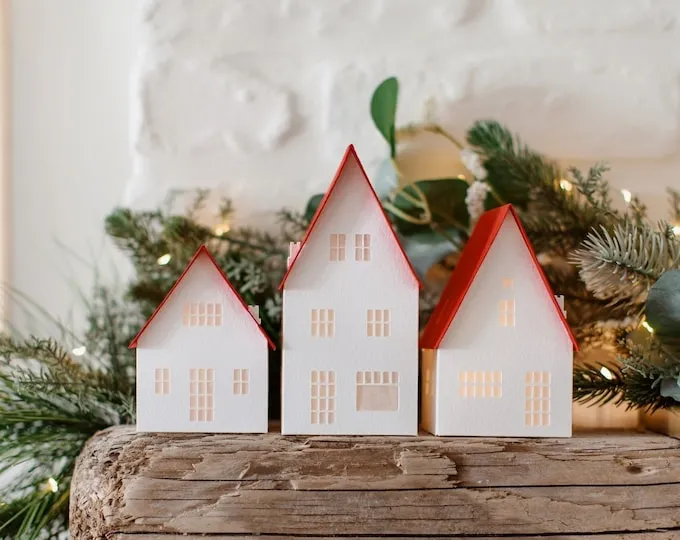
Three houses at roughly 6 to 9 inches tall want a mantel or sideboard at least 40 inches long, with about 10 inches of depth so you aren’t crowding the branches. On a narrow shelf, drop to two houses and one sprig of greenery. For the wall-niche version of this same restraint, look at Idea #6.
Twenty-Four Paper Trees and One Very Merry December
None of these need a truck, a storage unit, or a fight with a tangled light strand — that’s the quiet joy of a tree made from paper, cardboard, or a book you already own. Pick one, give yourself an evening, and let it be a little imperfect. 📌 Pin your favorite idea now so it’s waiting for you when the decorations come out of the closet.