
You know that feeling when you’ve saved forty blue Christmas trees to a Pinterest board and still can’t tell which one you actually want? Same. Here’s what the pretty photos never mention: the difference between a tree that looks expensive and one that looks like a leftover box of ornaments almost never comes down to the tree itself — it’s the ribbon, the light temperature, and how many colors you allow in.
We spent serious time browsing Etsy, Wayfair, Amazon, and Nordstrom to bring you only what’s worth your attention this year, from $6 keepsake ornaments to a $450 flocked statement tree. Across 20 curated ideas you’ll find frosted and flocked trees, coastal blue-and-rattan corners, ombre showstoppers, and quiet blue-and-silver classics — with budget and luxury versions compared side by side.
Blue is everywhere this season because the palette finally caught up with how people actually decorate: collected, personal, a little nostalgic. And stay until the end — we break down the most common mistakes that can ruin these looks. 📌 Save this to Pinterest for later — you’ll want to revisit these ideas.
1. Flocked Tree with Light Blue Ribbon and Gold Berries
Flocked trees do most of the heavy lifting here — the light blue ribbon and the gold berry garlands are supporting cast, which is why this looks richer than it costs.
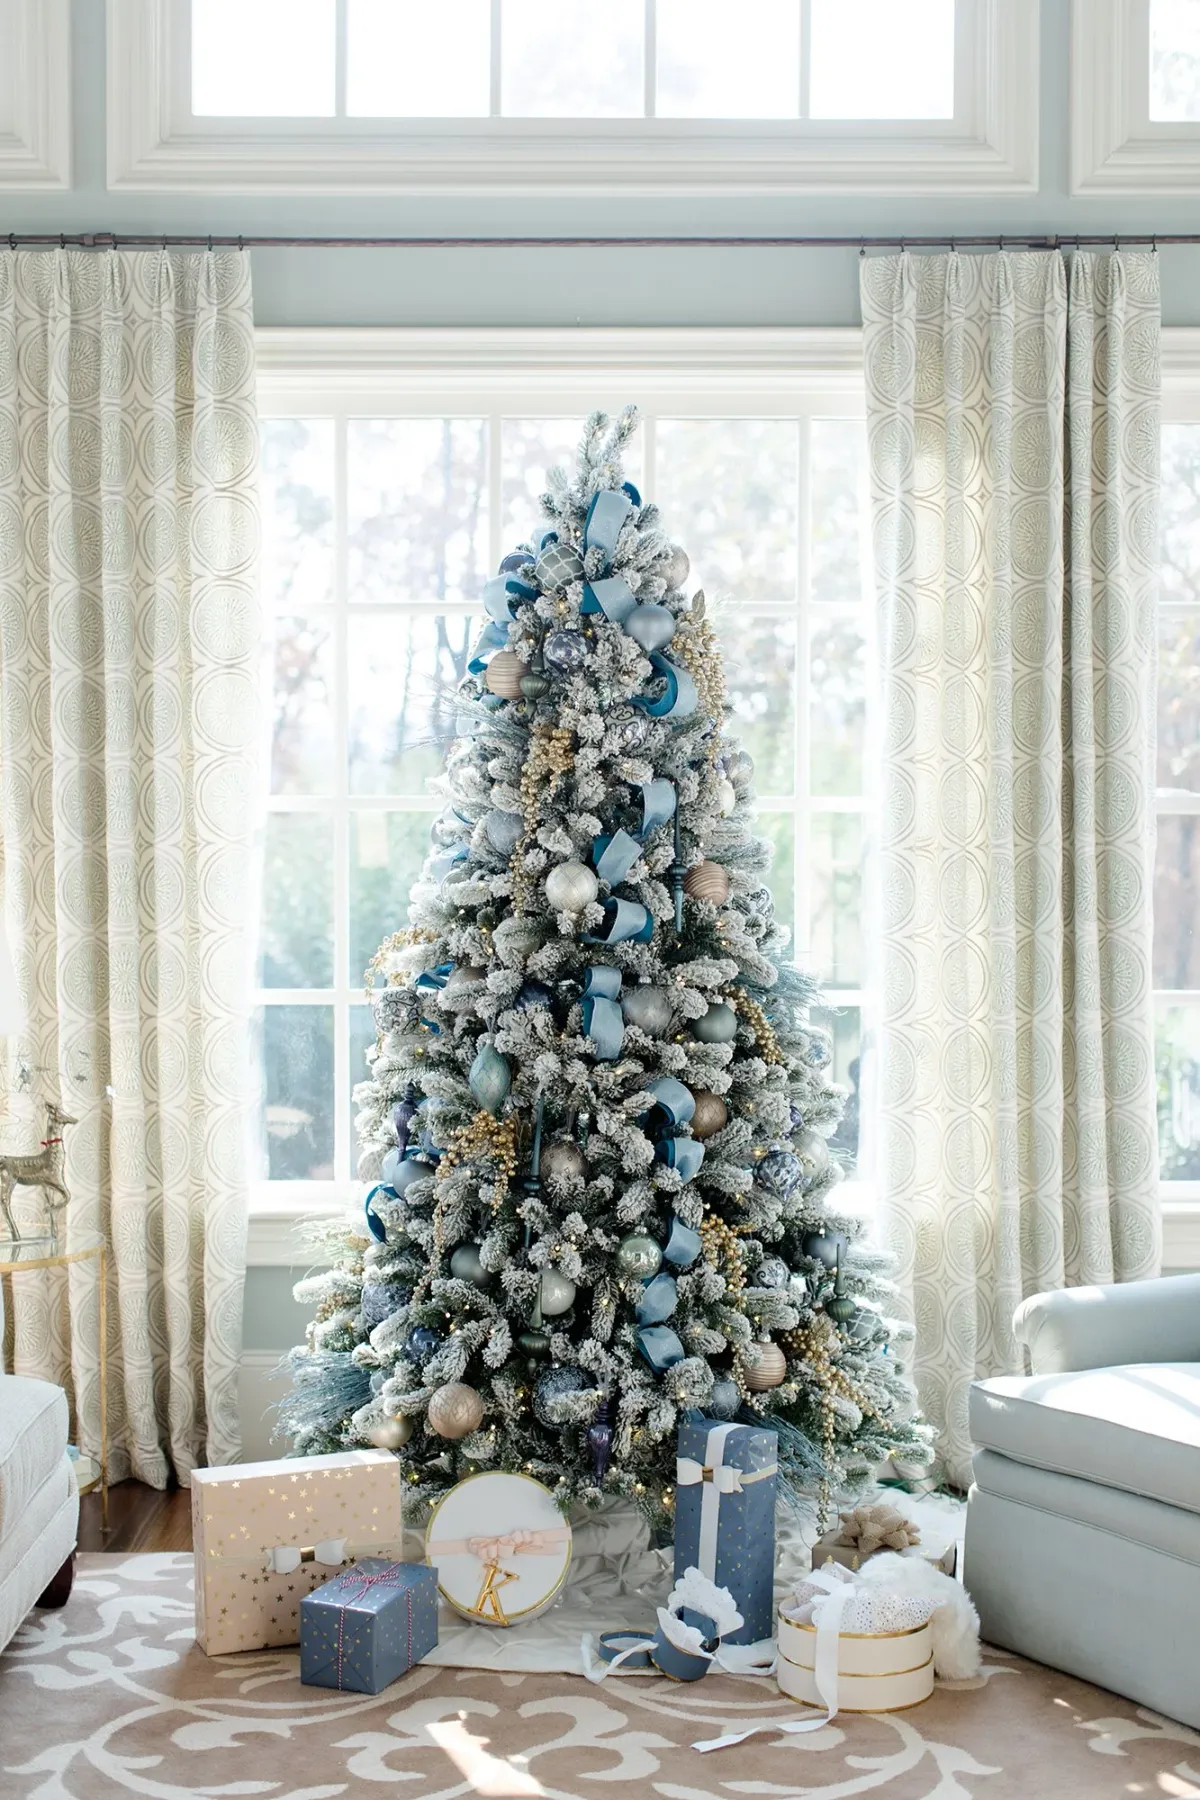
- 7.5 ft flocked tree: $180–$450
- 60-piece mixed blue and gold ornament set: $90–$220
- Three rolls of wired ribbon: $30–$60
- Gold berry garland picks (12): $25–$50
- Wrapping paper and gifts: $40–$120
Total: $365–$900. Budget alternative: a 6.5 ft unlit flocked tree from Walmart ($79) plus two Amazon ornament sets in navy and champagne gets you about 70% of the look for under $200.
The formula is simple: 60% frosted white (tree, curtain light, tree base), 25% blue in two values — pale powder and a deeper denim — and 15% gold. Nothing else.
Swap the powder blue for blush and this same math gives you a soft Valentine look. Swap gold for antique brass and it turns moodier. Keep the ratio and you can change colors with the season while the tree still reads as one intentional scheme instead of a pile of ornaments.
2. Mercury Glass Blue Ornament with Raised Leaf Texture
Statement ornaments like this one only look expensive when they have room to breathe. Hang them 8 to 10 inches apart on the outer third of the branch — never buried near the trunk — and keep them at or below eye level, roughly 5 to 5.5 feet up on a 7.5 ft tree. A textured mercury glass finish needs side light to show off, so position it just above a light strand rather than directly in front of one.
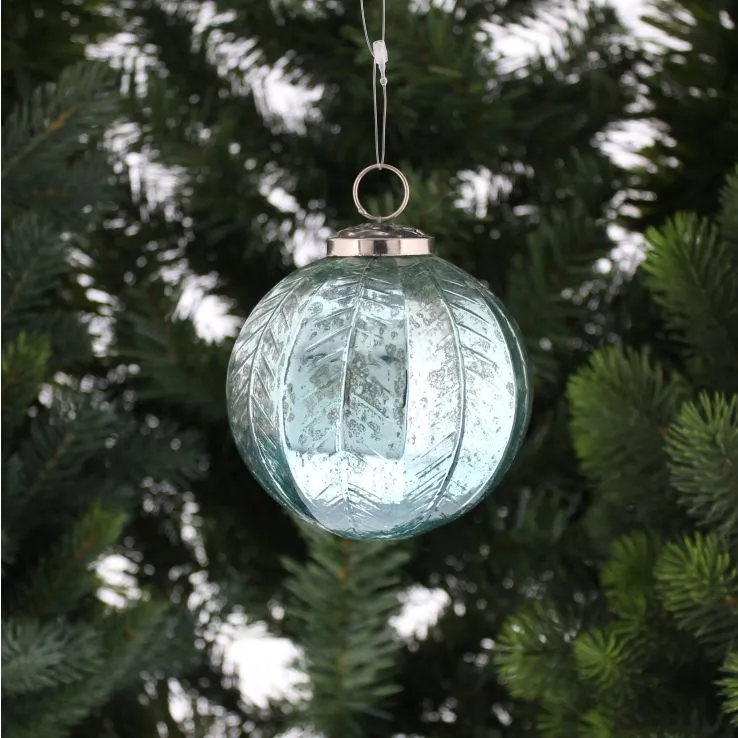
It’s the distressed finish that carries this piece. A perfectly mirrored blue bauble at this size would read as plastic; the cloudy, slightly worn surface is what makes the raised leaf pattern legible. Take that away and you have a plain blue ball — pleasant, forgettable.
If you buy one ornament set this year, buy it in a finish that looks a little imperfect. That’s the whole trick.
3. Ombre Blue Tree Tucked Into a Coastal Rattan Corner
Three things are doing the work. First, the ombre gradient means the tree decorates itself — light blue at the top, near-navy at the bottom — so your eye travels without a single ornament straining for attention. Second, the woven blue collar grounds it; bare metal legs would break the coastal spell instantly. Third, the rattan armchair and white sofa give you warm texture against all that cool blue. Put this same tree against gray walls and chrome and it would feel cold and slightly clinical.
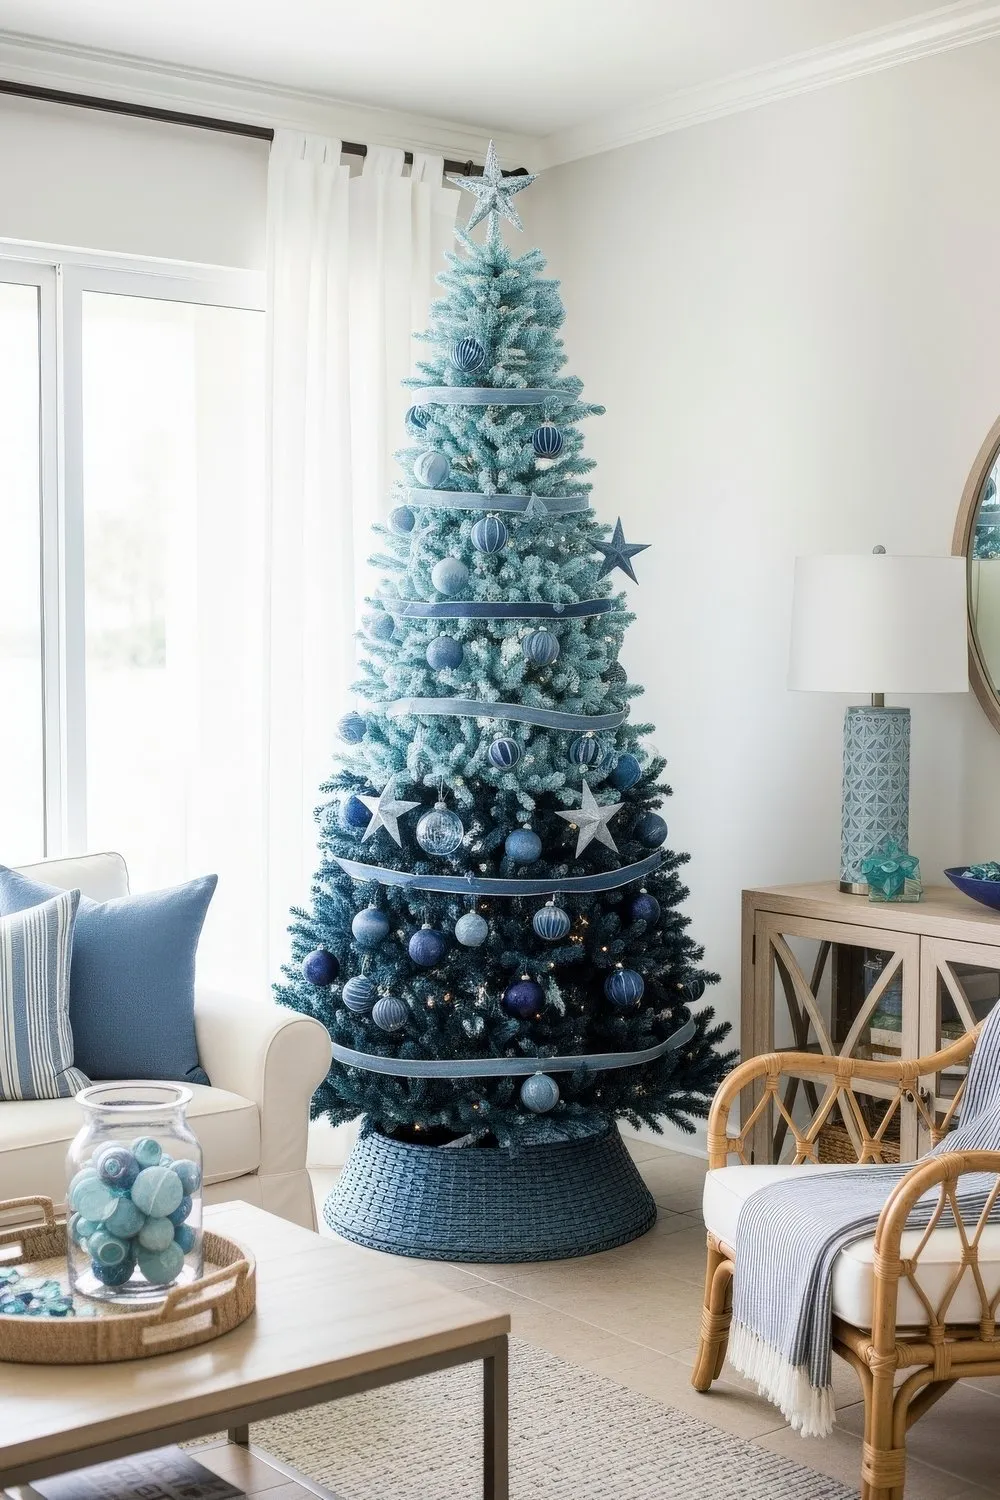
A blue ombre tree is a splurge, but you can fake the gradient. Start with a white or lightly flocked artificial tree from Facebook Marketplace ($40–$80), then mist the bottom third with light blue spray paint made for fabric and florals, working upward in passes. Taper to nothing by the top third. Target’s blue star ornaments and a woven basket collar get you the rest for under $250 total. If you want this palette without the gradient, see Idea #1.
4. Glitter Mitten Ornaments With Polka-Dot Charm
Mitten ornaments in blue glitter with a white cuff are shockingly easy to make, and a set of twelve costs less than two store-bought versions.
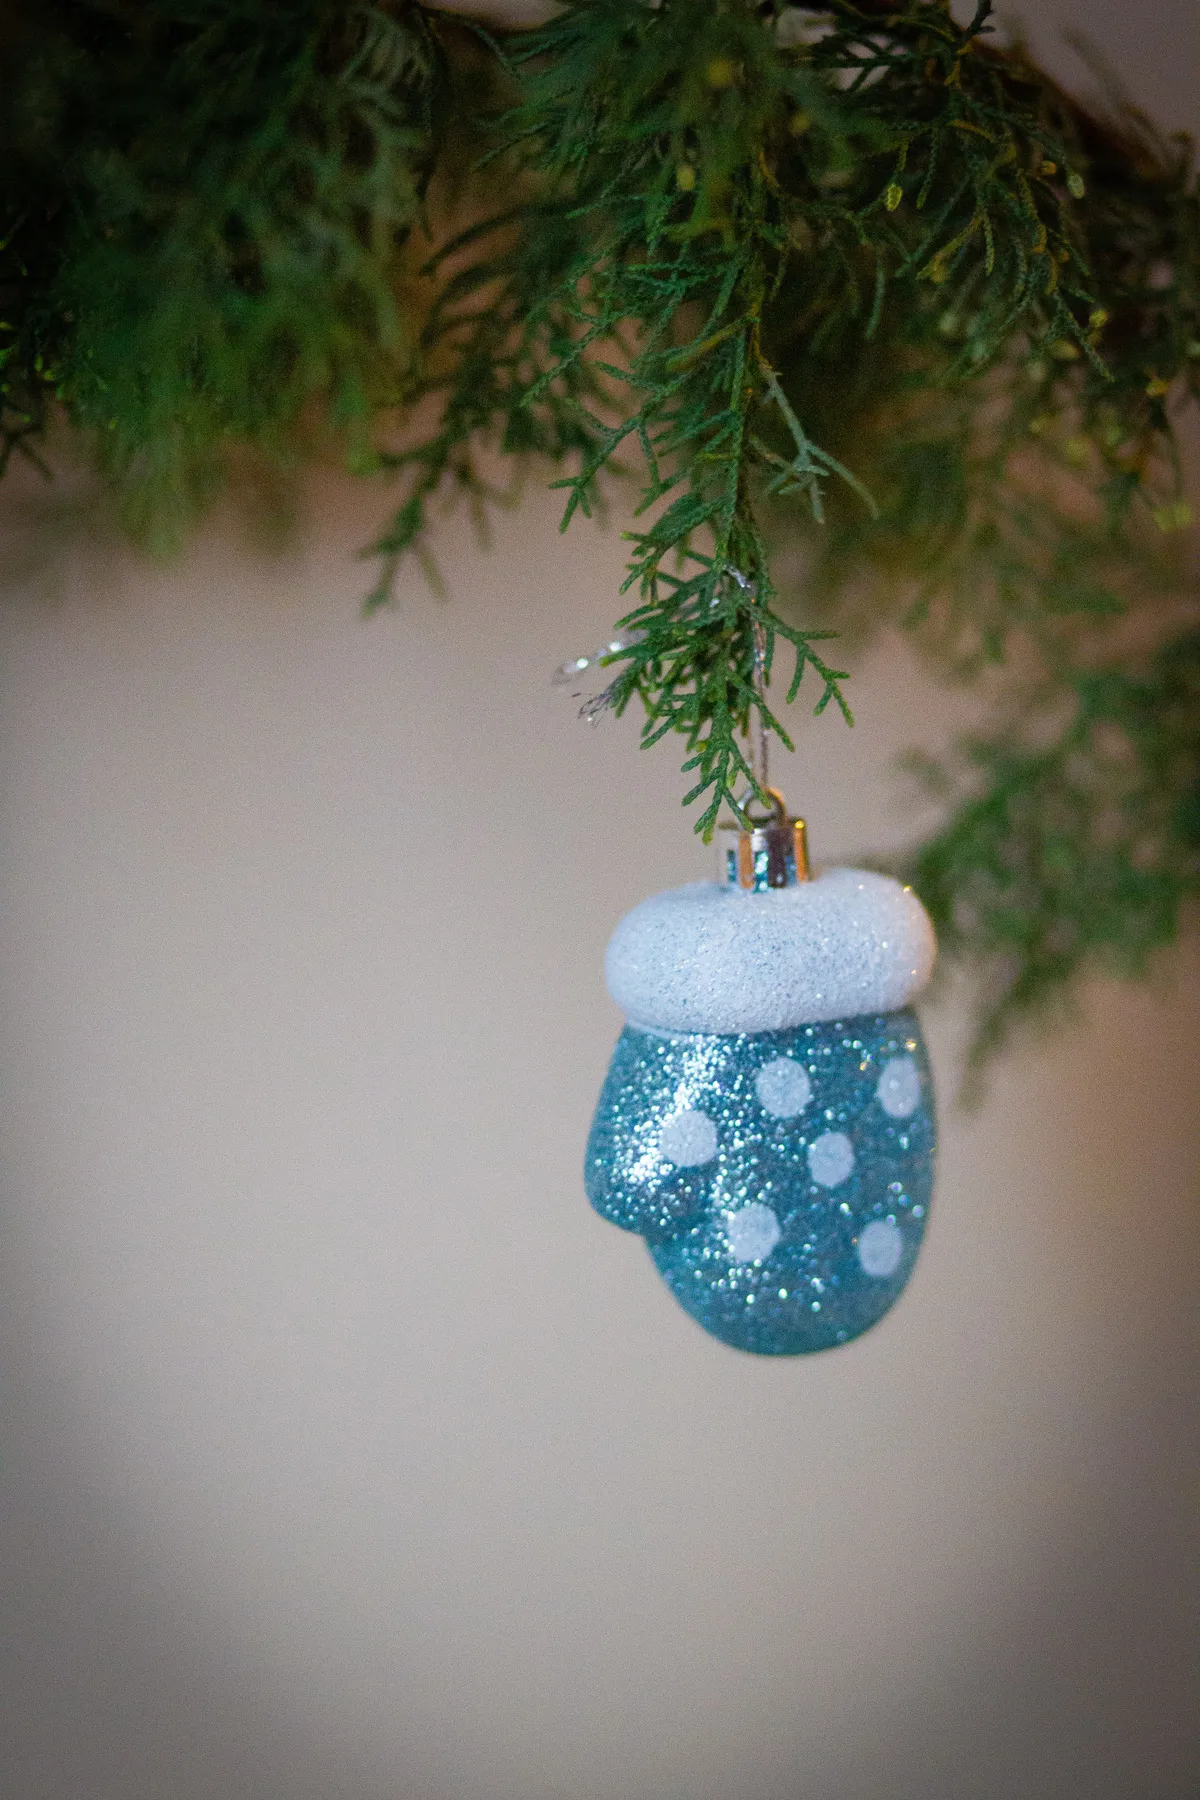
- Buy 12 flat wooden mitten blanks, about $8 online.
- Paint two coats of teal acrylic, letting each dry fully.
- Dot white paint with a pencil eraser for the polka dots.
- Brush on Mod Podge and shake fine white glitter over the cuff area only.
- Thread silver twine through the drilled hole and tie a loop.
Time: roughly two hours for the whole set. Materials: about $25.
Character and keepsake ornaments have been climbing for three seasons now. The shift started with the grandmillennial love of vintage glass reproductions and picked up speed as people began buying one meaningful ornament a year instead of a new themed set. The upside is that these pieces age well and get photographed endlessly. The catch: they’re sentimental, not architectural. Use them as accents inside a bigger scheme, never as the scheme itself.
5. Royal Blue and Silver Balls on a Classic Green Tree
This is the most forgiving Christmas formula there is: roughly 55% green tree, 30% blue plus silver plus white ornaments split almost evenly, about 10% warm white light, and 5% metallic in the silver star topper. Blue and silver sit close in value, so the white balls are doing quiet structural work — they give your eye somewhere to rest. To change the mood without breaking the math, trade royal blue for slate blue, or silver for pewter. Same proportions, completely different room.
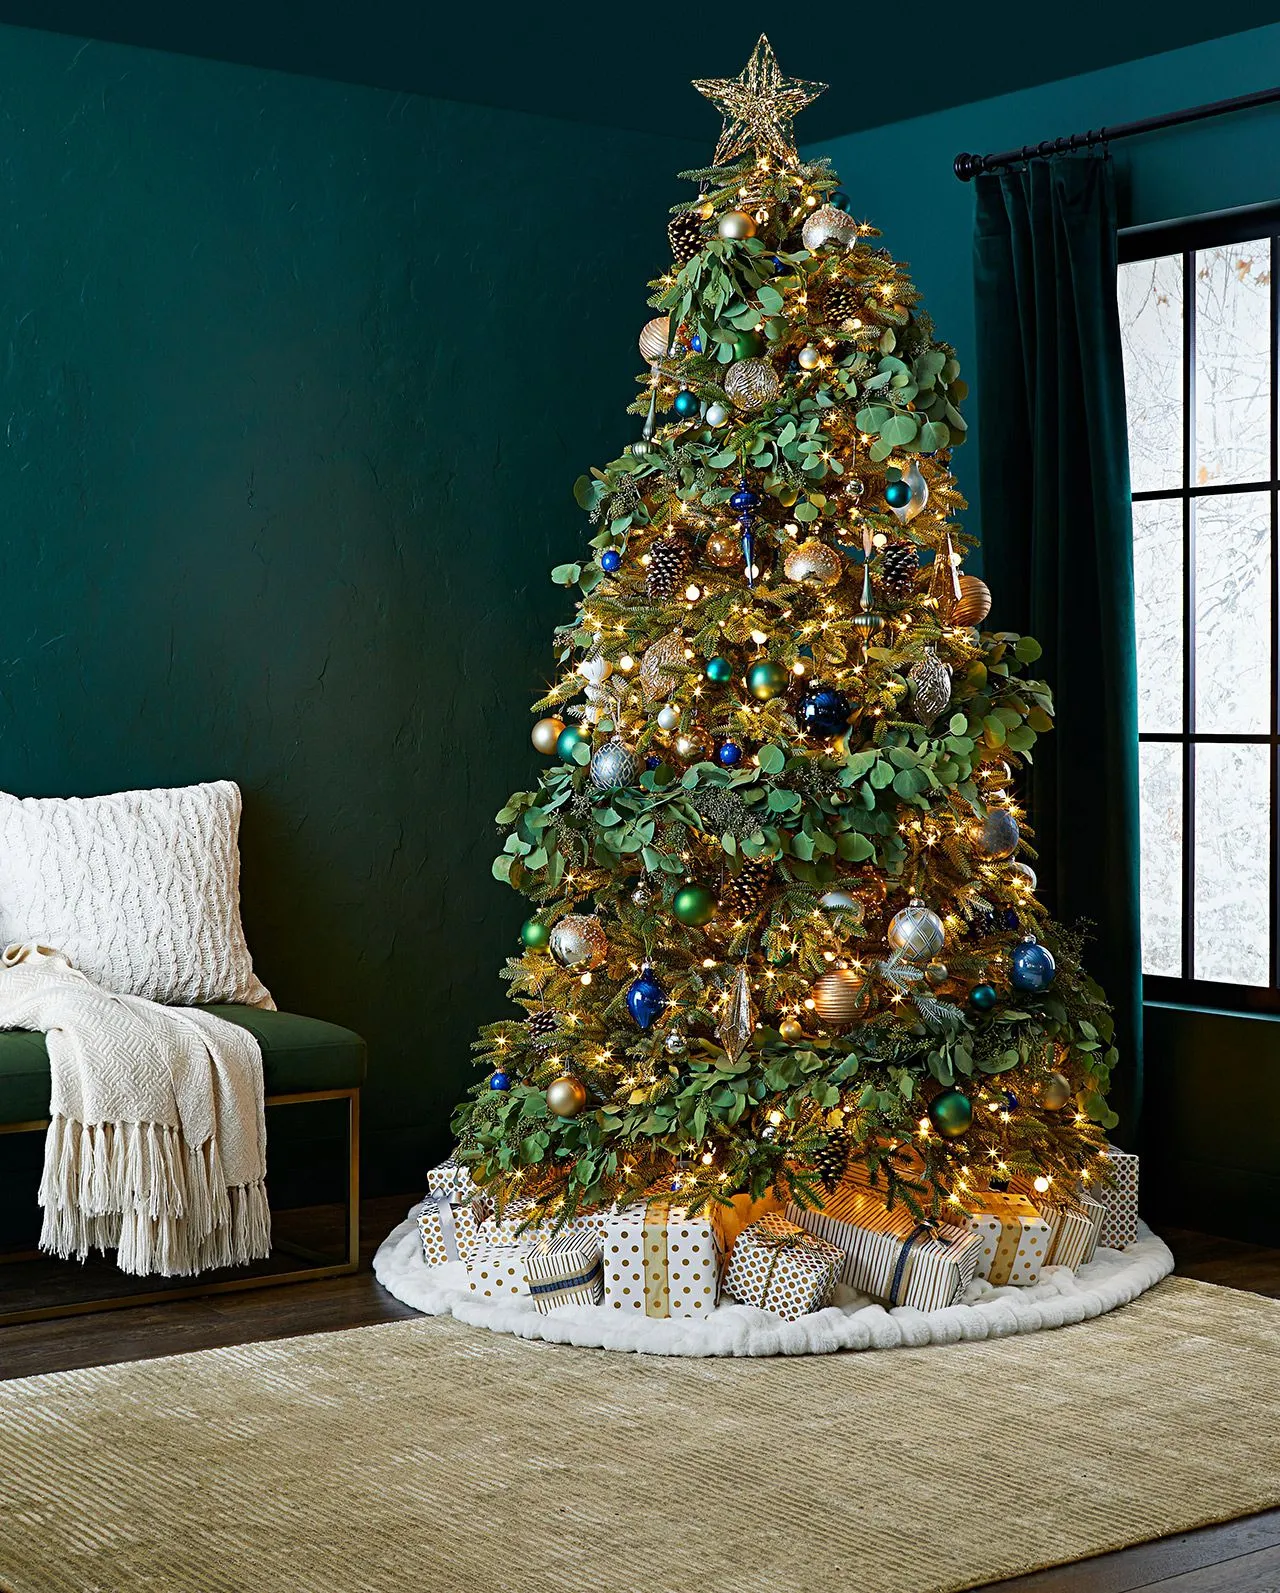
Blue ornaments under cool white LED lights go flat and slightly gray — the exact opposite of what you paid for. If your blue leans navy or royal, run 2700K warm white bulbs and nothing else; mixing warm and cool strings on one tree is the single most common mistake we see, and it shows up in photos immediately. Budget on 100 lights per vertical foot of tree, so a 7.5 ft tree wants about 750. Compare with Idea #9 — same blue-and-silver palette, totally different energy.
6. Blue and Teal Baubles Spilling Onto a Draped Table
The real hero here isn’t the tree, it’s the table in front of it. When you pile ornaments on a draped surface, cluster them in three groups of odd numbers rather than spacing them evenly, and vary height by resting a few on small stacks of books. Keep the tallest object under 18 inches so it doesn’t compete with the tree. And reuse the exact ornaments that are on the tree — that repetition is what makes it read as styled instead of cluttered.
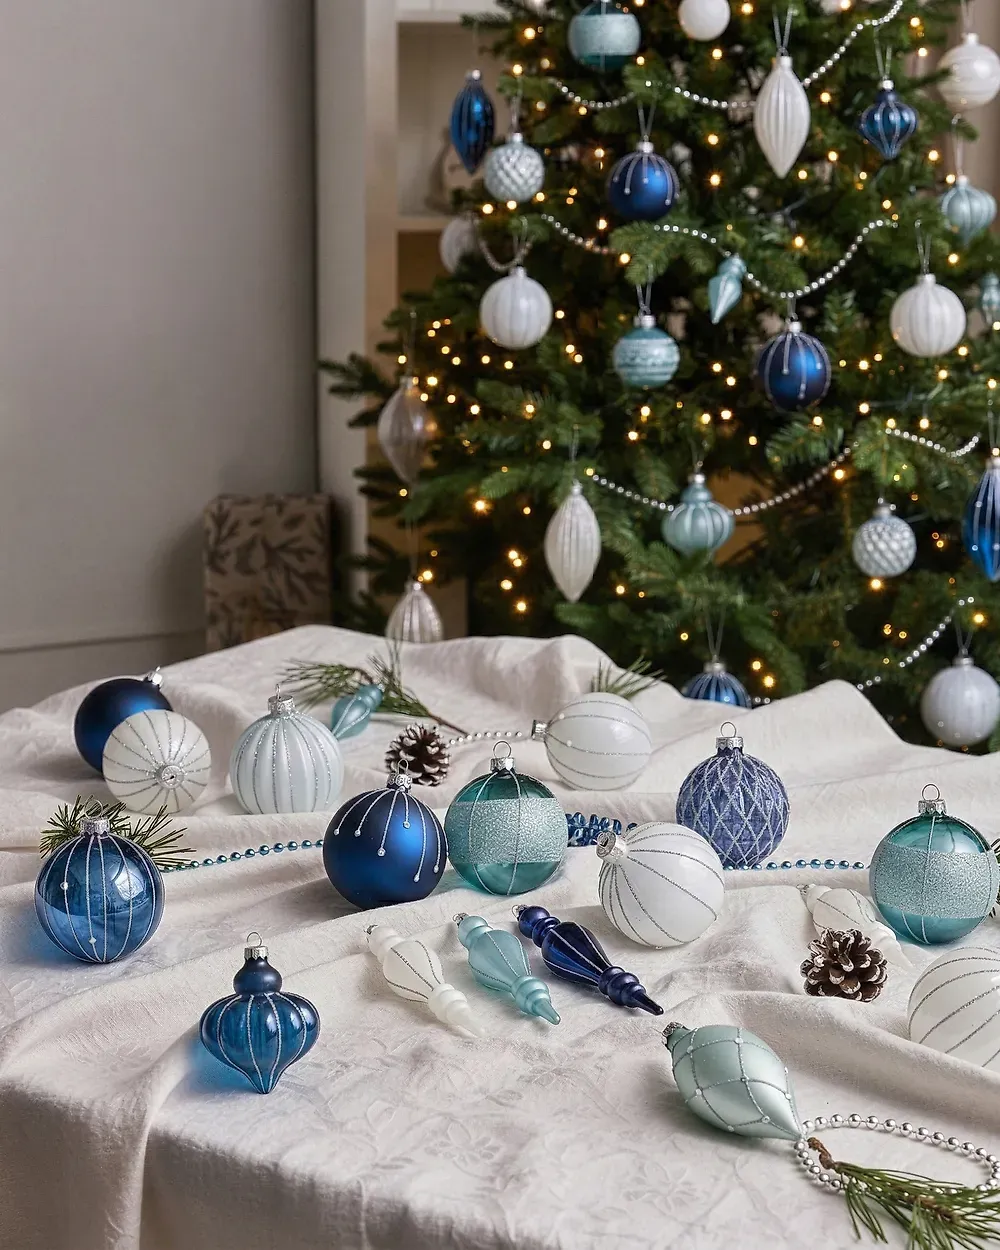
Silver beaded garland tangles if you look at it wrong, so store each strand looped over a cardboard tube rather than in a bag. If the tree is flocked, expect a light dusting of fake snow on that white tablecloth every time someone brushes past — vacuum it with a brush attachment, never a wet cloth. Pinecones drop tiny flakes all season long. This is a display that looks effortless and takes about 15 minutes a week to keep that way.
7. Three Ribbons, One Frosted Tree: Velvet, Satin, Silver
Ribbon does more for a Christmas tree than ornaments do, and this one proves it. Three ribbons — wide royal blue velvet, medium light blue fabric, and a narrow textured silver — give you depth without adding a single new color. Velvet absorbs light, silver bounces it, and the matte fabric sits between them. That contrast is why the tree looks luxurious from across the room and still interesting when you walk up close.
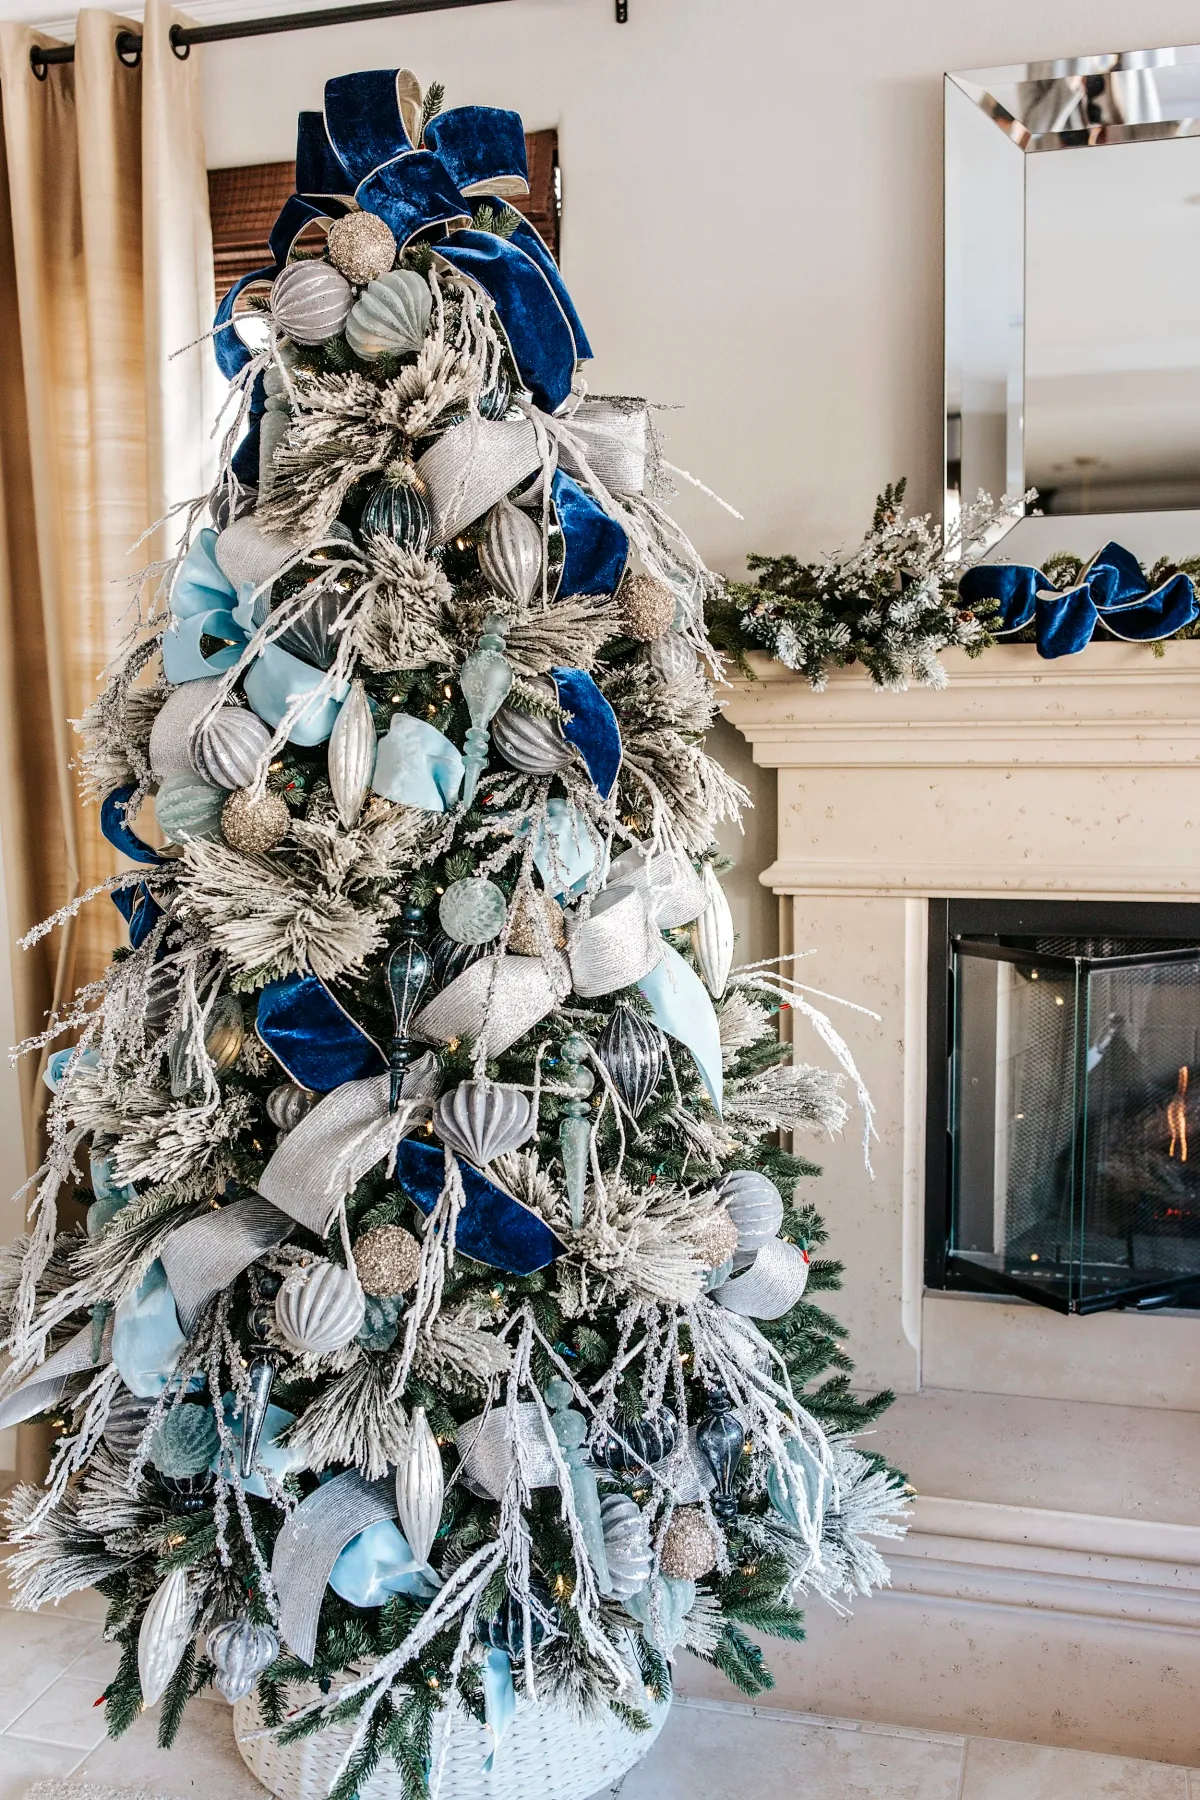
Ribbon is where this look hides its cost. The good news: one roll of velvet goes far when you cut 24-inch tails instead of wrapping the entire tree.
- 6 ft flocked tree: $150–$400
- Two rolls wide velvet ribbon: $40–$80
- Two rolls light blue fabric ribbon: $20–$40
- Silver textured ribbon: $12–$25
- Mixed ornaments and frosted picks: $120–$260
Total: $340–$805. Skip the champagne gold glitter pieces and swap in Dollar Tree silver balls — you’ll save $60 and nobody will notice.
8. A Blue-Rimmed Box of Matte, Glossy and Glittered Baubles
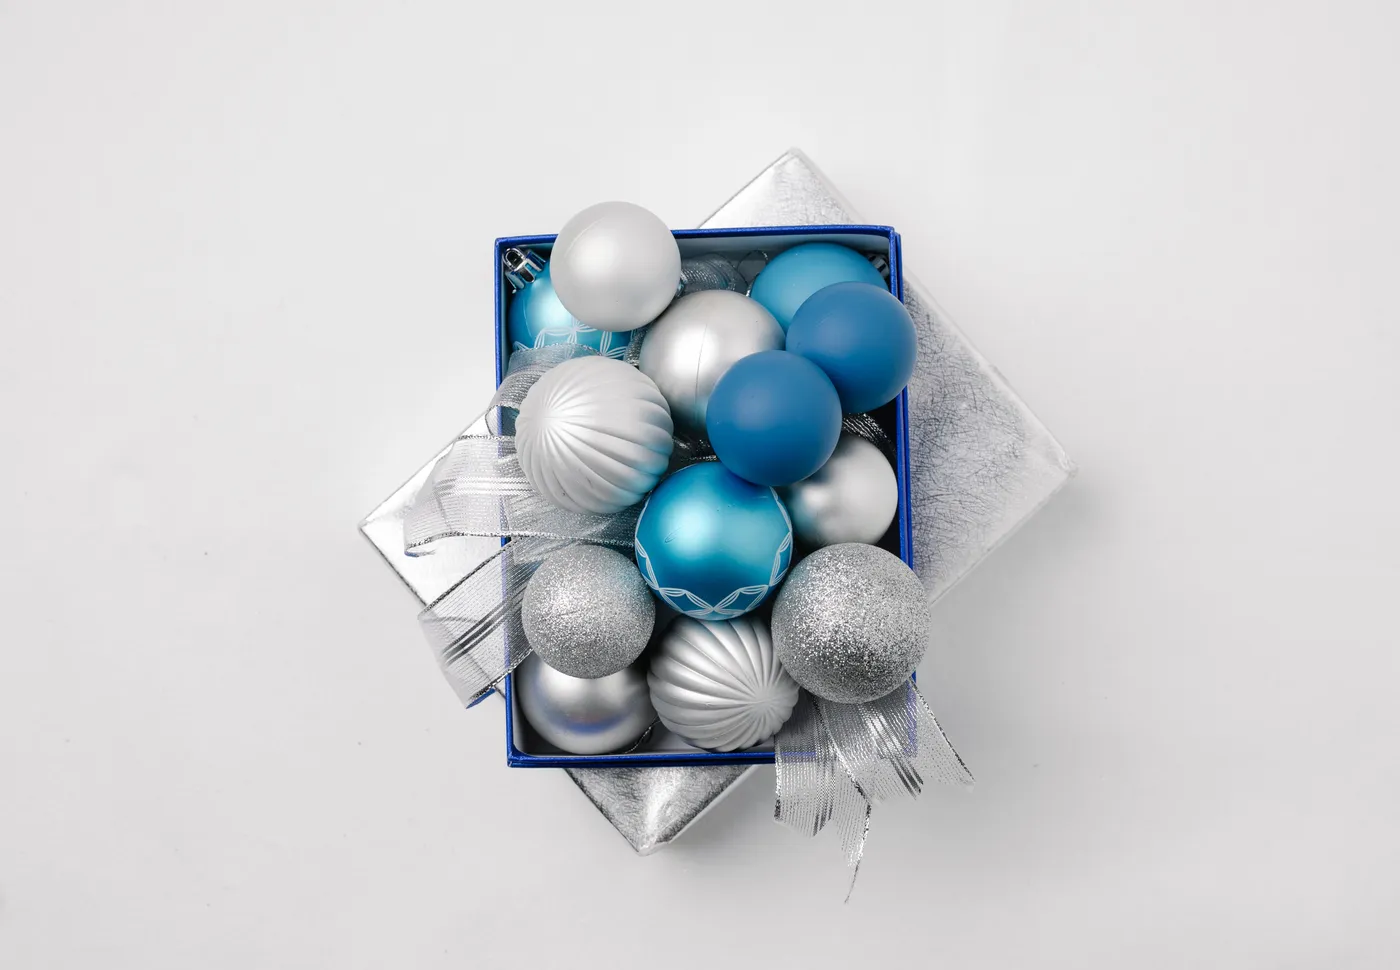
You don’t need a designer ornament set to get this mixed-finish look. Buy finishes, not collections:
- Dollar Tree shatterproof spheres, six per pack: $1.25
- Target Threshold mixed-finish sets, twelve pieces: about $15
- Facebook Marketplace lots of vintage glass: $20–$40 for 30+ pieces
- One roll of silver mesh ribbon: $8
Mix matte, glossy, glittered, and ribbed in roughly equal parts. A blue-rimmed box from a craft store finishes the whole thing for under $5.
Packing ornaments this way is storage and styling at once, a trick worth stealing.
- Line a square box with tissue in a color that matches your palette.
- Set the largest ornaments in the corners first; they anchor everything.
- Fill the center with mid-size baubles, letting a few sit above the rim.
- Weave silver mesh ribbon through the gaps in loose loops.
- Keep the lid nearby so you can close it up in January.
Twenty minutes, about $12 in materials, and it doubles as a centerpiece. It’s the storage-friendly cousin of Idea #6‘s table display.
9. Blue and Silver Tree Anchored by a Green Velvet Skirt
This setup needs room to breathe. Plan on a living room of at least 150 square feet with 8 ft ceilings, and leave 36 inches between the tree and a working fireplace — closer than that and you’ll bake the branches. A 7.5 ft tree reads best in a room 12 to 16 feet wide. If your space is tighter, the ombre coastal tree in Idea #3 uses a similar palette with a much lighter footprint.
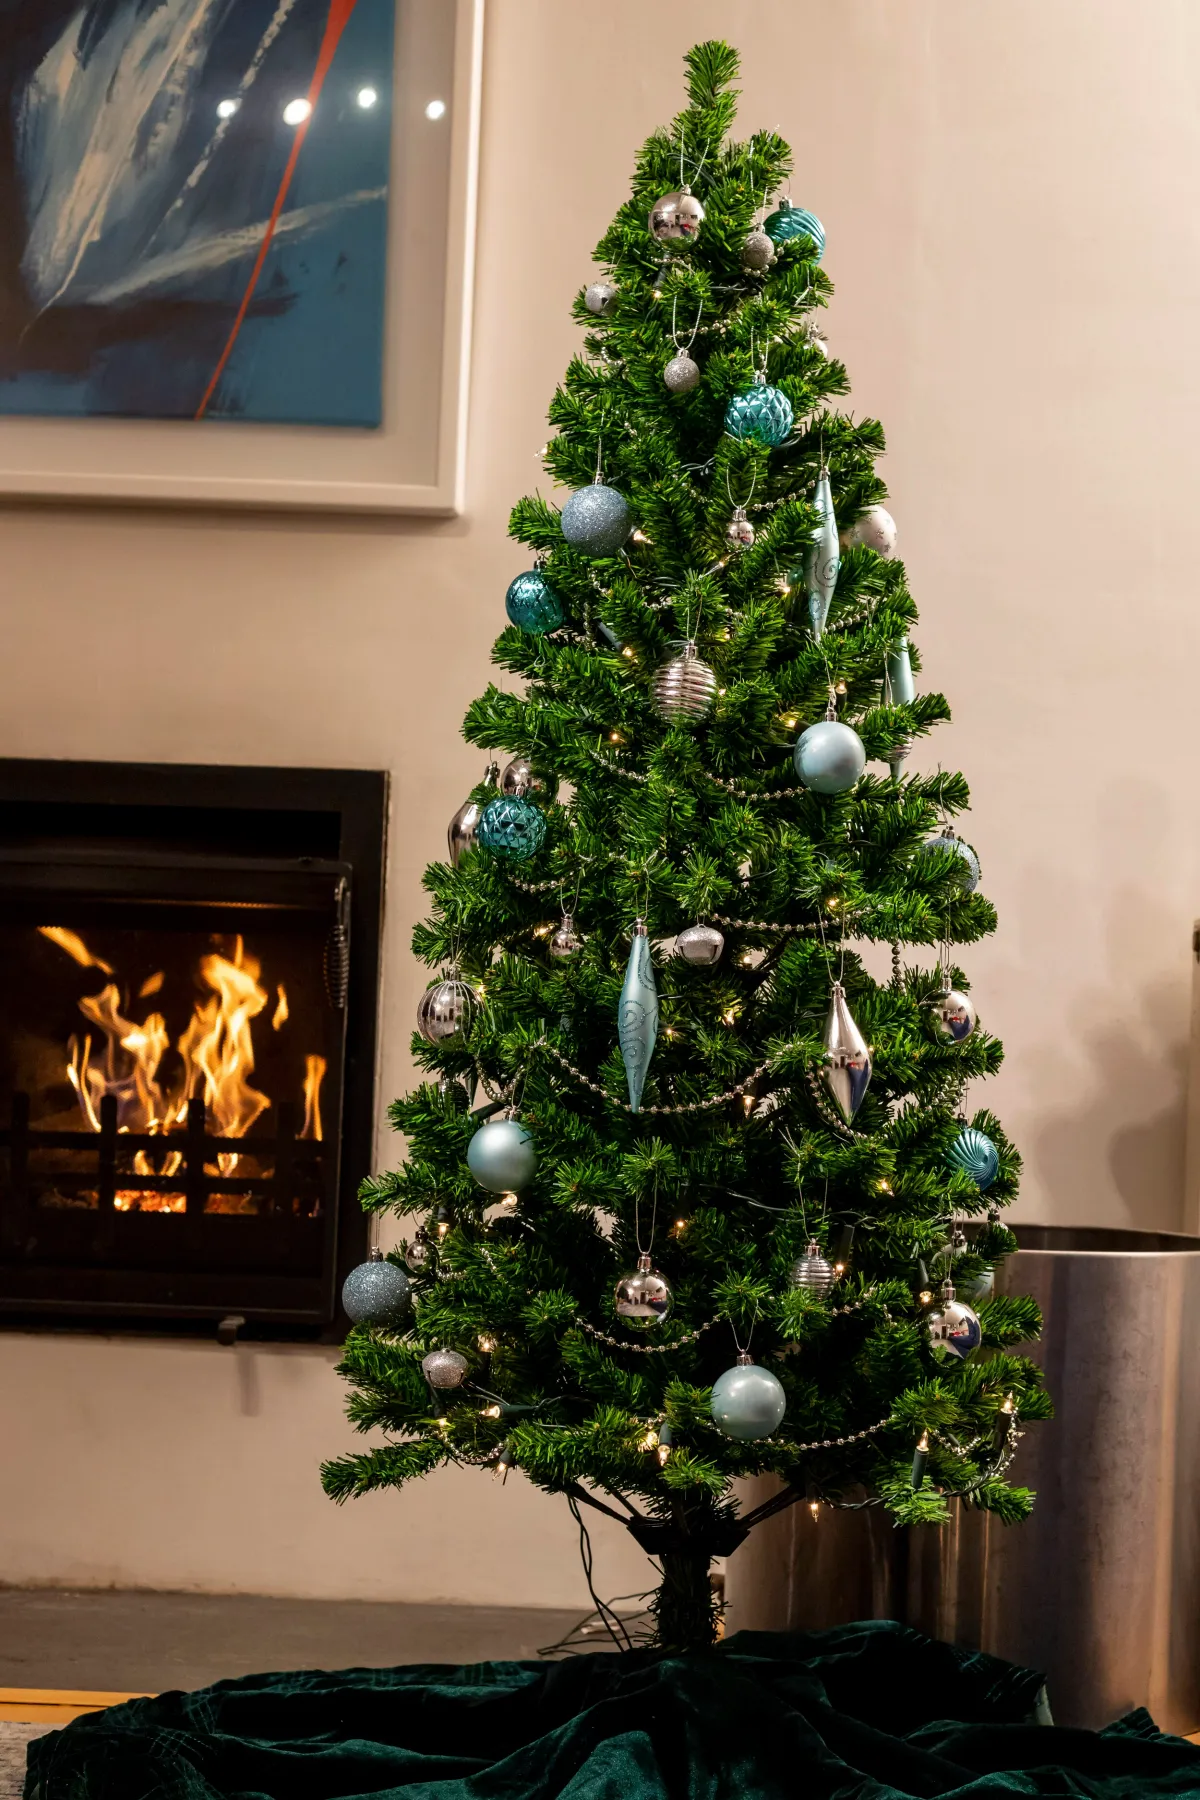
It’s the dark green velvet tree skirt that holds this together. Without it, the tree floats and the blue ornaments have nothing to sit against. The skirt repeats the green of the needles, which lets the blue read as pure accent instead of competing with the tree itself. Take it away and you’d have a perfectly nice tree that looks accidentally unfinished — the most frustrating kind of almost-right.
10. A Blue Ice Cream Cone Ornament in the Branches
Novelty ornaments are delightful and also a trap. One blue ice cream cone is charming; eight of them turn a considered tree into a toy store. Cap novelty pieces at roughly 10% of your total — five on a 60-ornament tree — and keep everything else strict. If kids are helping, give them a dedicated 12-inch section on the back side of the tree and let them go wild there. Everybody wins, and nobody’s Pinterest photo suffers.
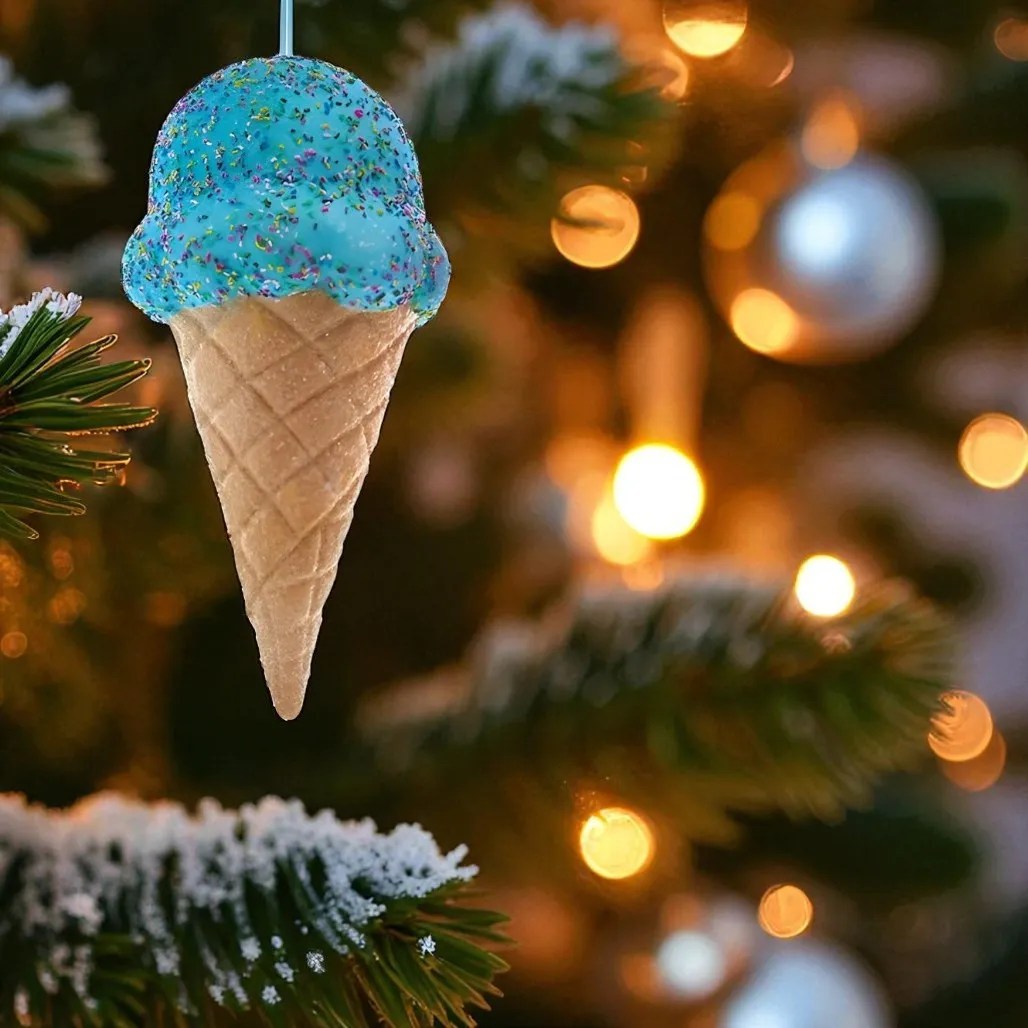
The blue on this ornament pops only because it sits against warm yellow light. Do the same thing on your tree: hang novelty and pastel pieces within a few inches of a warm white bulb and they’ll glow instead of disappearing. Hang them on the side facing the main seating, at about 5 feet — high enough to be admired, low enough for kids to point at. Frosted branches behind them make the color read even brighter.
11. Flocked White Tree with Teal Gift Box Ornaments
White flocked trees are the cheapest way to fake an expensive tree.
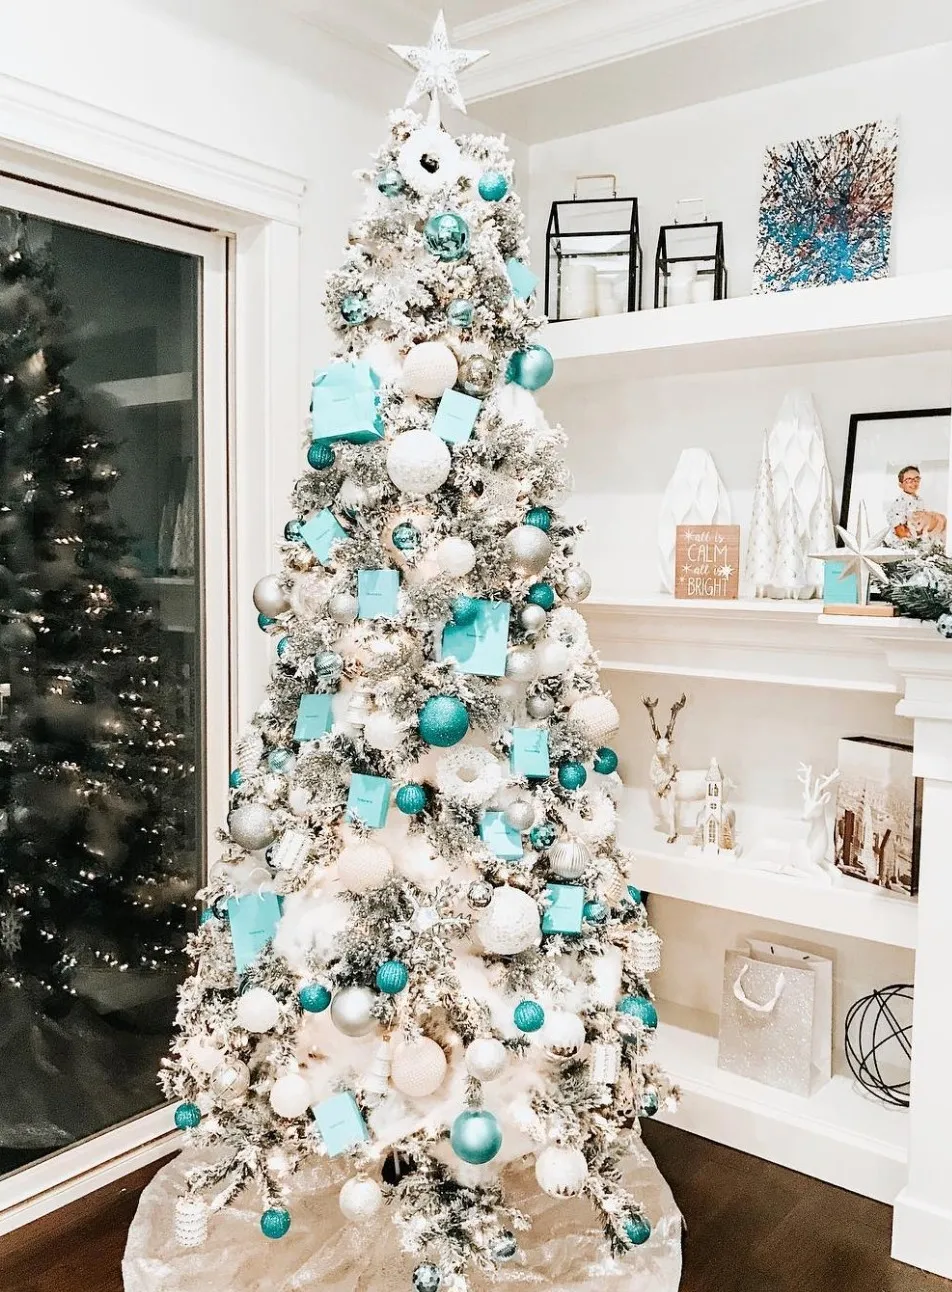
- 7.5 ft flocked white tree: $170–$400
- Teal, silver and white ornaments, 70+ pieces: $110–$240
- Mini teal gift box ornaments (12): $18–$35
- White plush tree skirt: $25–$60
- Warm white string lights: $20–$40
Total: $343–$775. A 6 ft unlit white tree from Walmart ($65) with Target teal ornaments in two finishes gets you 80% of the effect for under $180 — the flocking is what you’re paying for, so buy the fluffiest tree you can afford and go cheaper on everything else.
What makes this read so clean is subtraction. There’s no red, no gold, no green — just white, teal, and silver, with white built-in shelving behind repeating the palette and giving the eye somewhere to land. Teal does all the color work, and because it shows up in three textures — glossy spheres, matte gift boxes, and glitter — the eye never gets bored. Add a fourth color and the whole thing falls apart.
12. White Striped Ball Meets Deep Blue Glitter
This is a finish formula more than a color one: roughly 40% matte, 40% glitter and shiny, and 20% pattern — here that’s the big white striped ball and the blue icicle. The white piece is deliberately larger and brighter than everything around it. Keep contrast pieces to about one per square foot of tree and let the deep blue glitter do depth work in the background. Swap the white striped ball for pale silver and the tree goes quieter; swap it for saturated turquoise and it goes louder. Same math either way.

A blue-tinted tree is a spray-paint project, not a purchase, and it’s easier than it sounds.
- Work outdoors or in a garage with the door open.
- Mist the tree in light passes from 10 inches away, starting at the bottom.
- Use matte white first, then a light dusting of pale blue.
- Leave about 20% of the original green showing so it still looks alive.
- Let it cure a full 24 hours before bringing it inside.
Time: three hours. Cost: about $25 in spray paint. If you’re not ready to tint a whole tree, borrow the palette from Idea #20 instead.
13. Illustrated Blue Ornaments with Storybook Figures
Illustrated ornaments are usually the priciest thing in the box, often $16 to $28 each. The play is to buy three and build around them. Fill the rest of the tree with plain pale blue spheres from Target, about $6 for a set of six, and let the illustrated pieces be the reward your eye keeps finding.
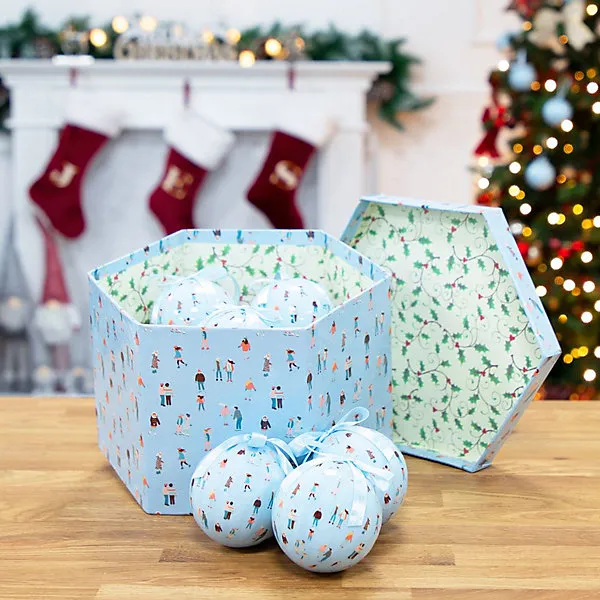
If you want the whole set, watch for post-holiday sales — the same box drops 50 to 70 percent in the first week of January. Thrift stores in older suburbs are goldmines for painted wooden ornaments in exactly this style, usually under a dollar apiece.
Storybook ornaments with tiny painted figures are having a moment because the mood has shifted away from matched sets and toward collected objects. The red stockings on the mantel behind this display reveal the trick that makes blue work at Christmas: one warm accent. Blue doesn’t have to feel cold, but it does need a counterweight — give it red, ochre, or warm wood somewhere in the frame.
14. A Skater in a Blue Dress, Front and Center
It’s the single figural ornament, and its placement is everything. One detailed figure hung near the trunk disappears into the branches. Hung at about 5 to 5.5 feet on an outward-facing branch, it becomes the thing people lean in to look at. Remove it and this is a standard green tree with warm lights and a gold ball. That’s the difference one small ornament makes when it’s positioned like it matters.
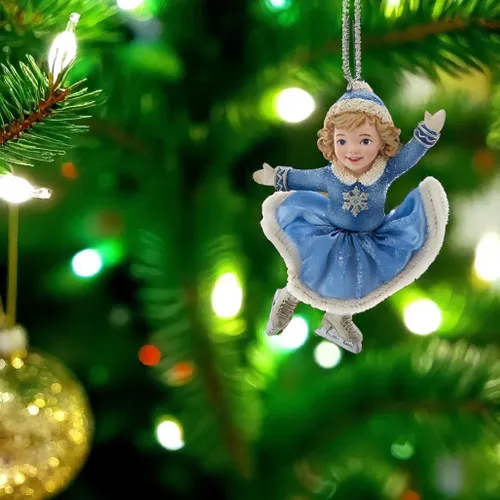
Give any figural ornament at least 3 inches of clear space on all sides — no beads, no ribbon, no neighboring balls crowding it. Use a small wire hook rather than the ornament’s own loop so you can angle the figure slightly toward the room; face-forward ornaments photograph badly from the side. And keep at least a foot between two figurative ornaments so they aren’t competing for the same glance.
15. Gold and Silver Baubles Wired With Cool Blue LEDs
Dense metallic coverage is a big-tree move. A tree packed like this needs to be at least 7.5 ft tall and set in a room with 9 ft ceilings, or it becomes a wall of gold at eye level. Leave 24 to 30 inches of floor clearance on every side you walk past. In a smaller apartment, use the same gold-and-silver mix on a tabletop tree and run the cool LEDs as a garland instead.
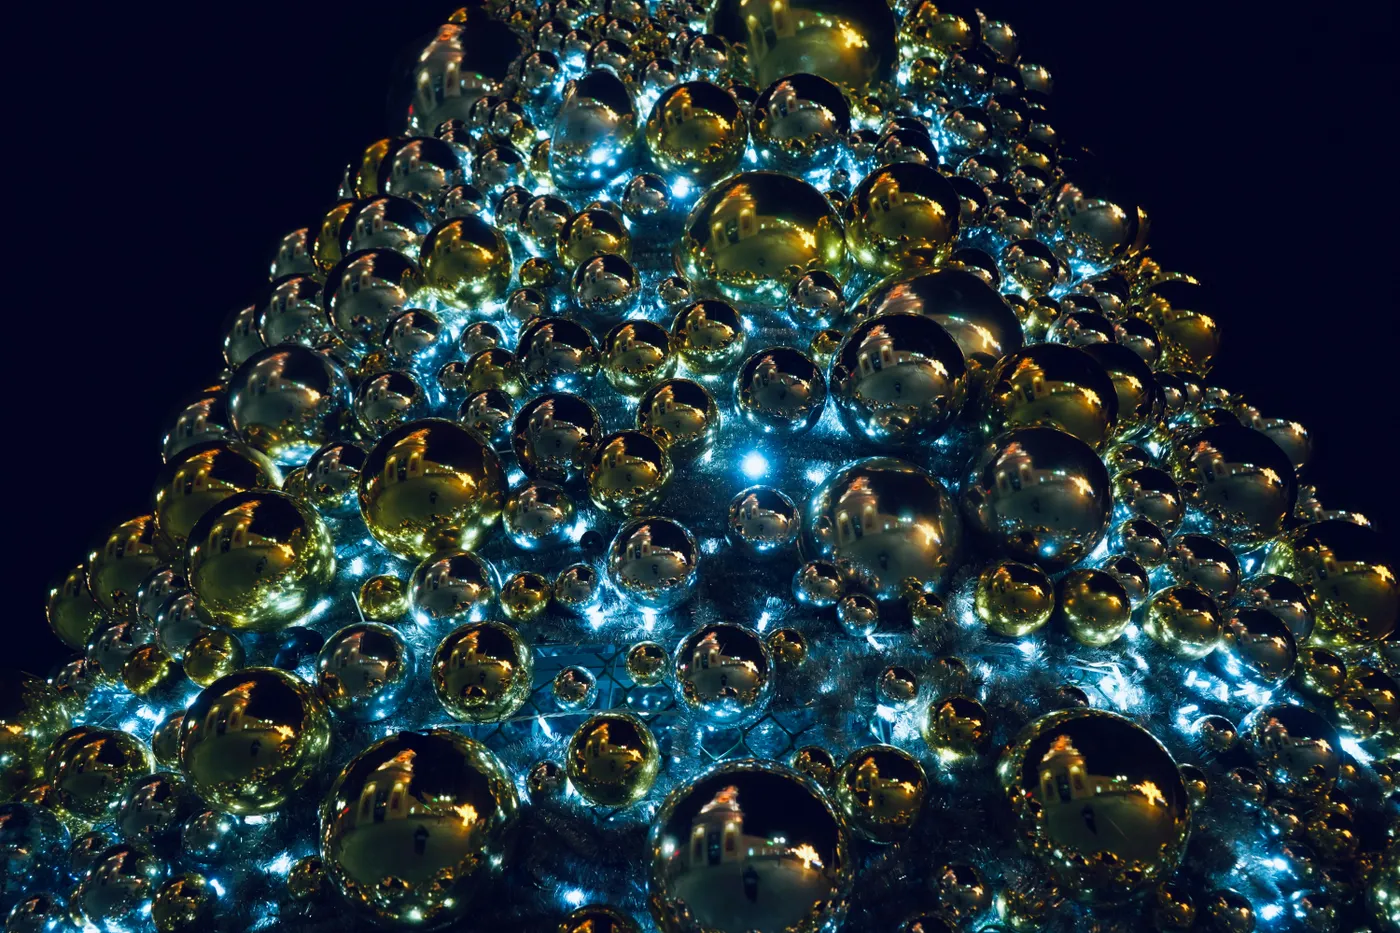
Metallic ornaments are the one place where cheap is genuinely indistinguishable from expensive. Shatterproof gold and silver balls from Dollar Tree run about $1.25 a pack and reflect light almost as well as glass. Buy 100 pieces for under $40, mix three sizes, and nobody will guess. Cool blue LED strands are around $12 each on Amazon — grab two. Total for this look: roughly $65 and one Saturday afternoon.
16. A Teal Tinsel Tree Against a Dark Blue Wall
Before you buy a tinsel tree, check these off:
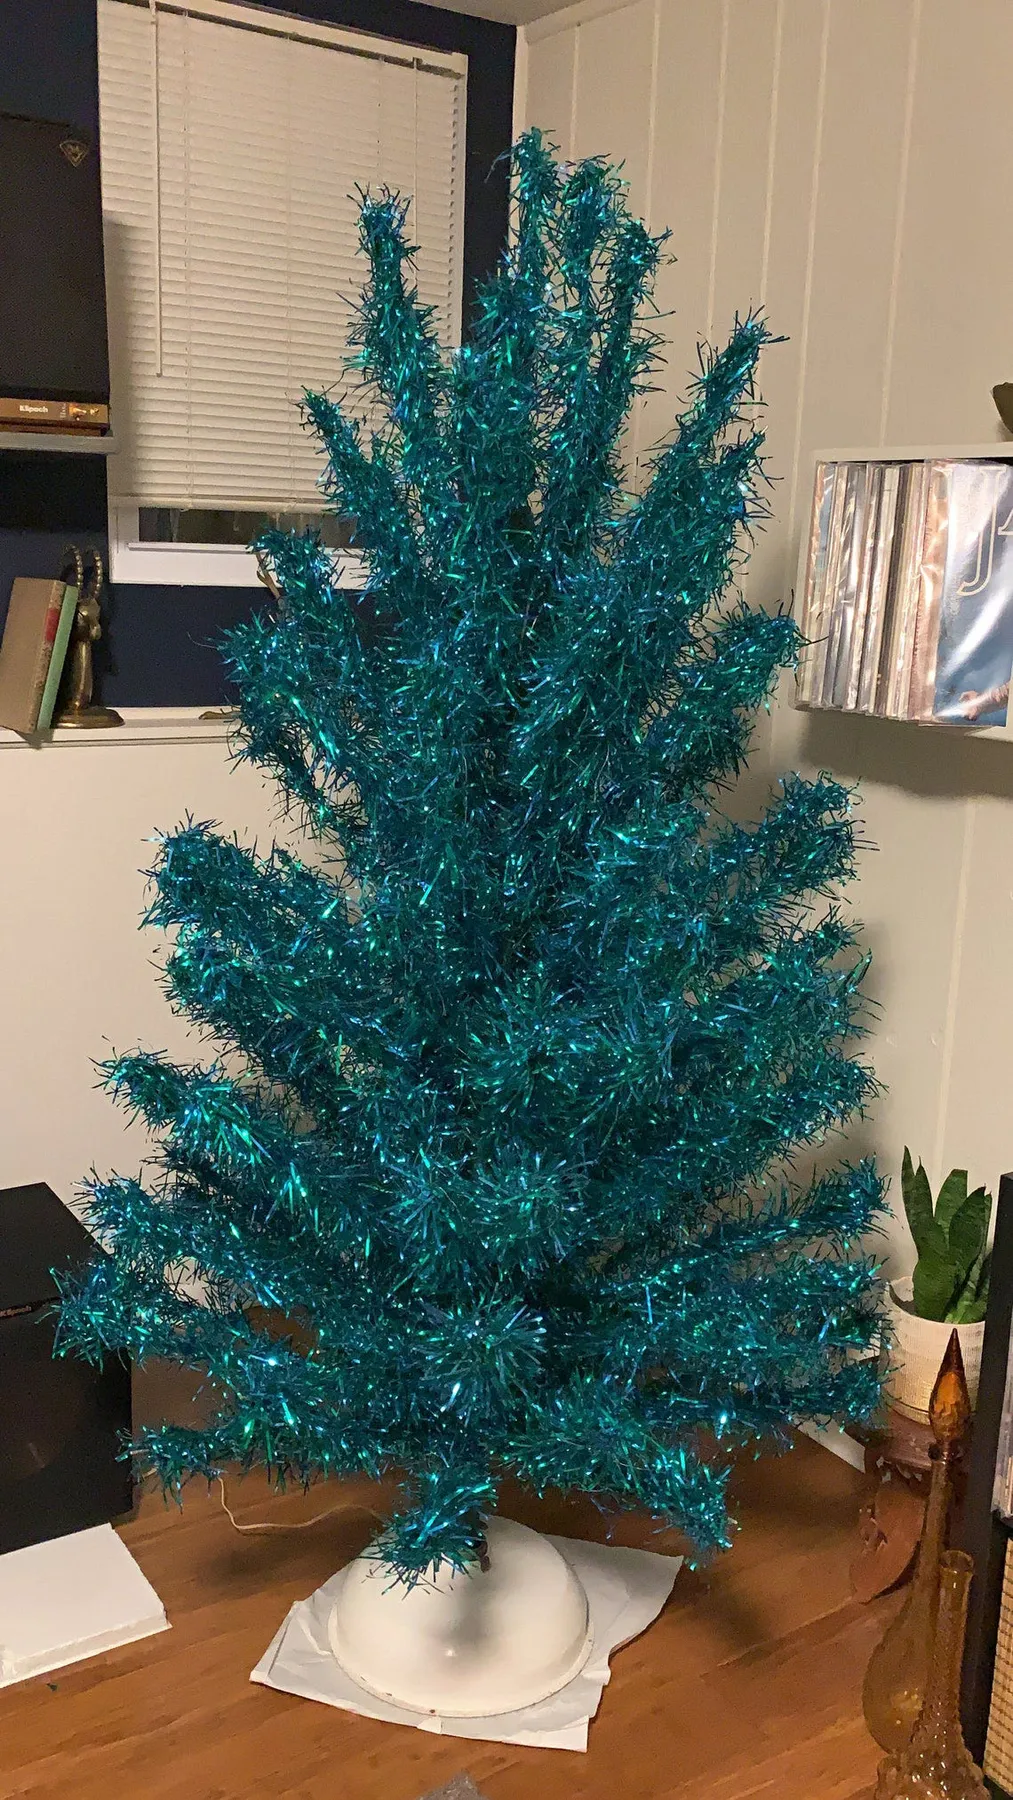
- Is there a wall dark enough behind it to make teal read as color rather than noise?
- Do you have at least 18 inches of clearance on all sides — tinsel sheds and hates being bumped?
- Can your floor handle a white dome base without looking unfinished? Wood and tile, yes; dark carpet, maybe not.
- Is there a sheet or mat under the base? Tinsel static-clings to everything.
- Have you budgeted under $100? That’s genuinely all this costs.
The white dome base is the decision that makes this work. A tinsel tree on bare metal legs looks like a dorm-room purchase; on a clean white base it reads as a deliberate design object. It also keeps the tinsel off the floor, which is the fastest way to make one look tired. Everything else here — the records, the snake plant, the vertical paneled wall — is context. For a bigger room, see Idea #11.
17. Matte Blue and Purple Glitter Under Colored Lights
Colored lights and saturated blue ornaments are a risky pairing. Purple glitter and matte blue can turn muddy under a strong red or green bulb, and the tree starts looking like a carnival. If you love multicolor lights, keep ornaments neutral — clear, silver, warm white — and let the bulbs be the color. If you love colored ornaments, run warm white lights. Pick one, not both — running colored bulbs and saturated ornaments together almost never works.
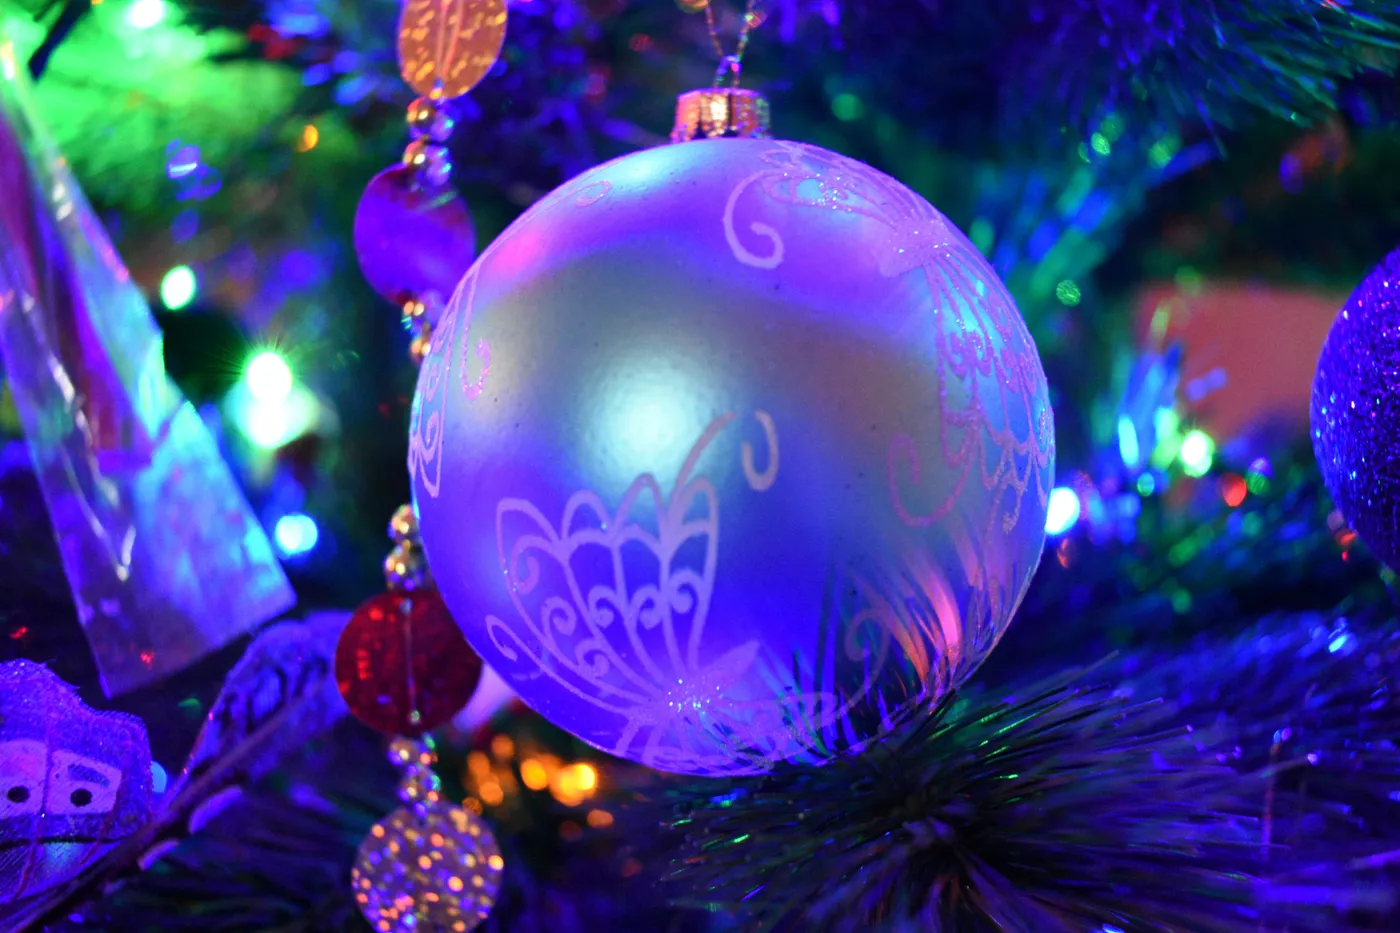
The formula here is roughly 70% green branches, 20% blue and purple, and 10% metallic, with a beaded garland running the length of the tree to tie it all together. Blue and purple sit next to each other on the color wheel, so they blend rather than fight, which is why this tree feels vibrant instead of chaotic. To tone it down, swap purple for silver. To go bolder, swap it for magenta. The garland stays either way — it’s the seam holding everything together.
18. Faceted Teal Ornament with a Gold Glitter Net
Faceted ornaments with gold glitter patterns run $8 to $16 apiece, and a tree needs 50 to 70 ornaments, so the math adds up fast.
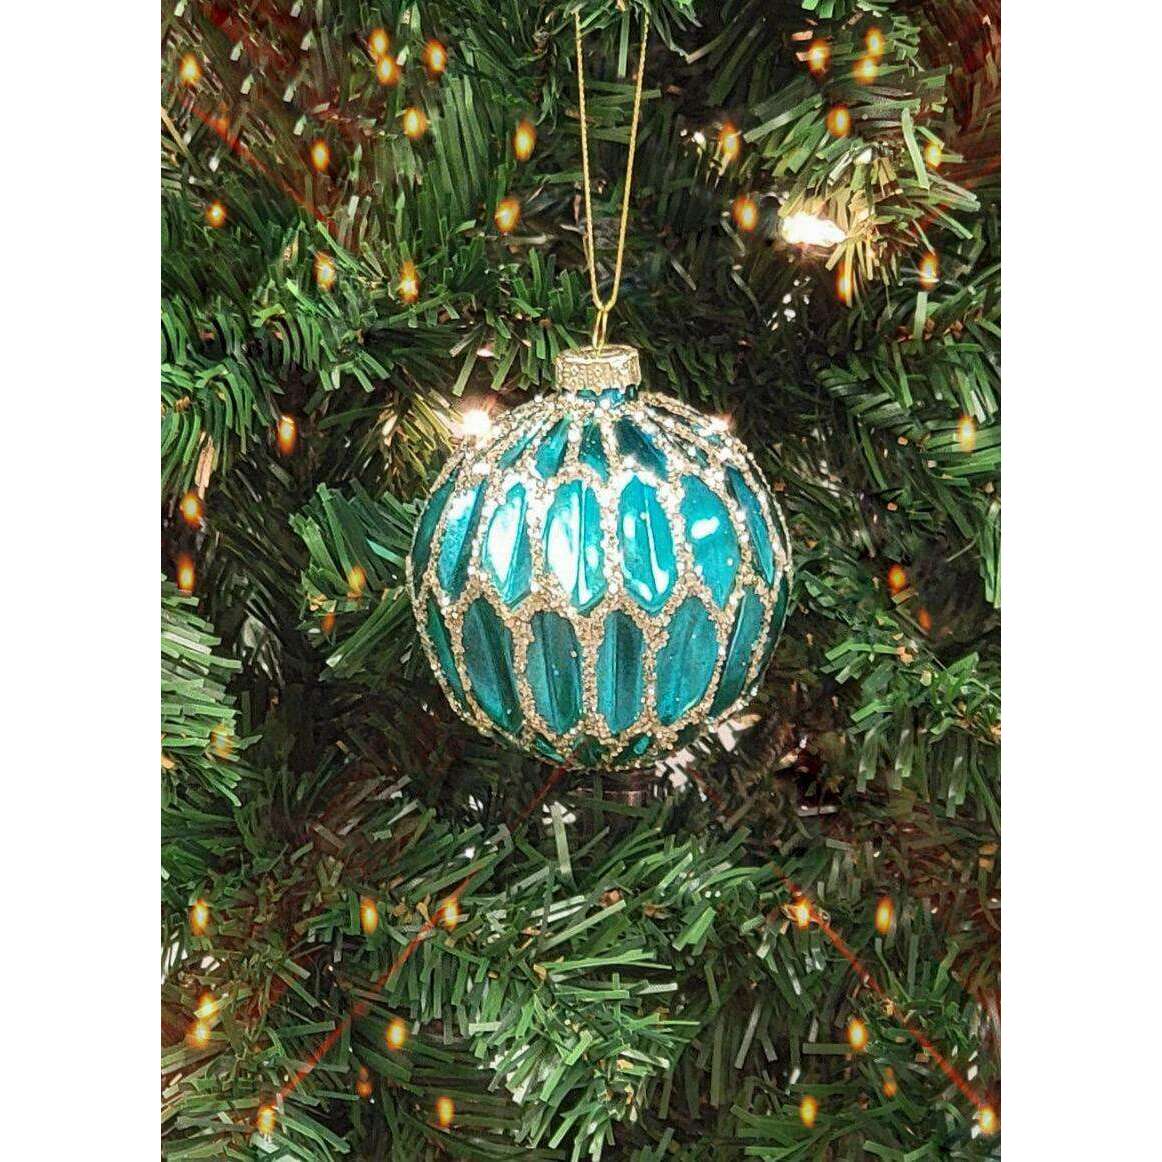
- 7 ft green tree: $120–$300
- 12 faceted teal and gold ornaments: $96–$190
- 50 filler balls in matte green and teal: $40–$80
- Warm fairy lights, three strands: $30–$55
- Gold hanging string and hooks: $8–$15
Total: $294–$640. Buy six faceted pieces instead of twelve and double the fillers — the eye reads pattern, not quantity, and nobody counts your ornaments.
Treat patterned ornaments as punctuation. The ratio that works is one faceted or patterned piece for every three plain balls, with no two patterned pieces closer than 12 inches apart. Hang the patterned ones slightly deeper into the branch than the plain ones; that extra bit of shadow makes the gold glitter catch light in a way it won’t sitting out on the tips. Warm fairy lights scattered behind will keep it sparkling all evening.
19. Shell-Covered Cone Trees Topped with Starfish
Shell cone trees are a ninety-minute project and they’re basically foolproof.
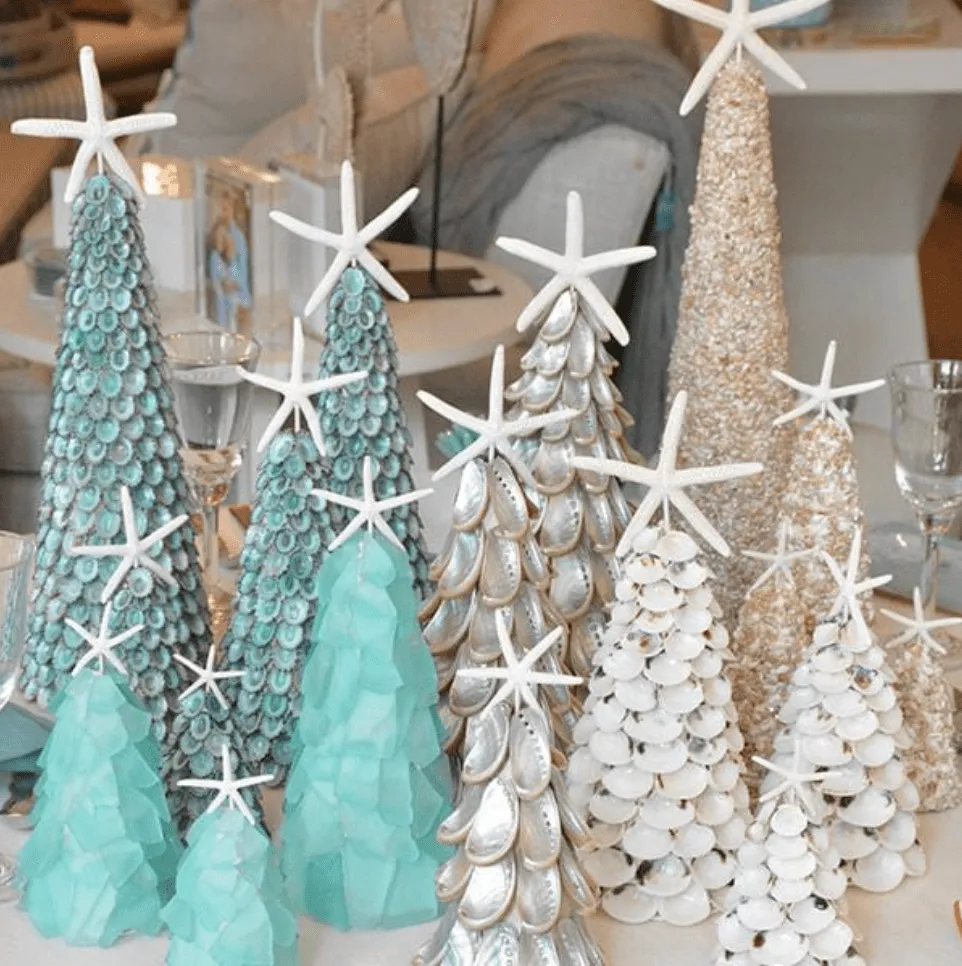
- Buy foam cones in three heights — 8, 12, and 18 inches.
- Start at the bottom and hot glue shells in overlapping rows.
- Fill gaps with abalone and iridescent pieces for shine.
- Top each cone with a small white starfish.
- Mist lightly with pearl spray and let dry.
Time: about 90 minutes for all three. Cost: roughly $30, less if you use shells collected on your own beach walks.
These are tabletop pieces, full stop. An 18-inch cone is the ceiling — go bigger and the shells start looking like barnacles. They work on a console, a mantel, or a dining table, and each one needs about 24 inches of width to itself so the shells read as texture rather than a pile. Pair them with a coastal tree if you have the room, or let them carry the whole corner on their own in a small apartment.
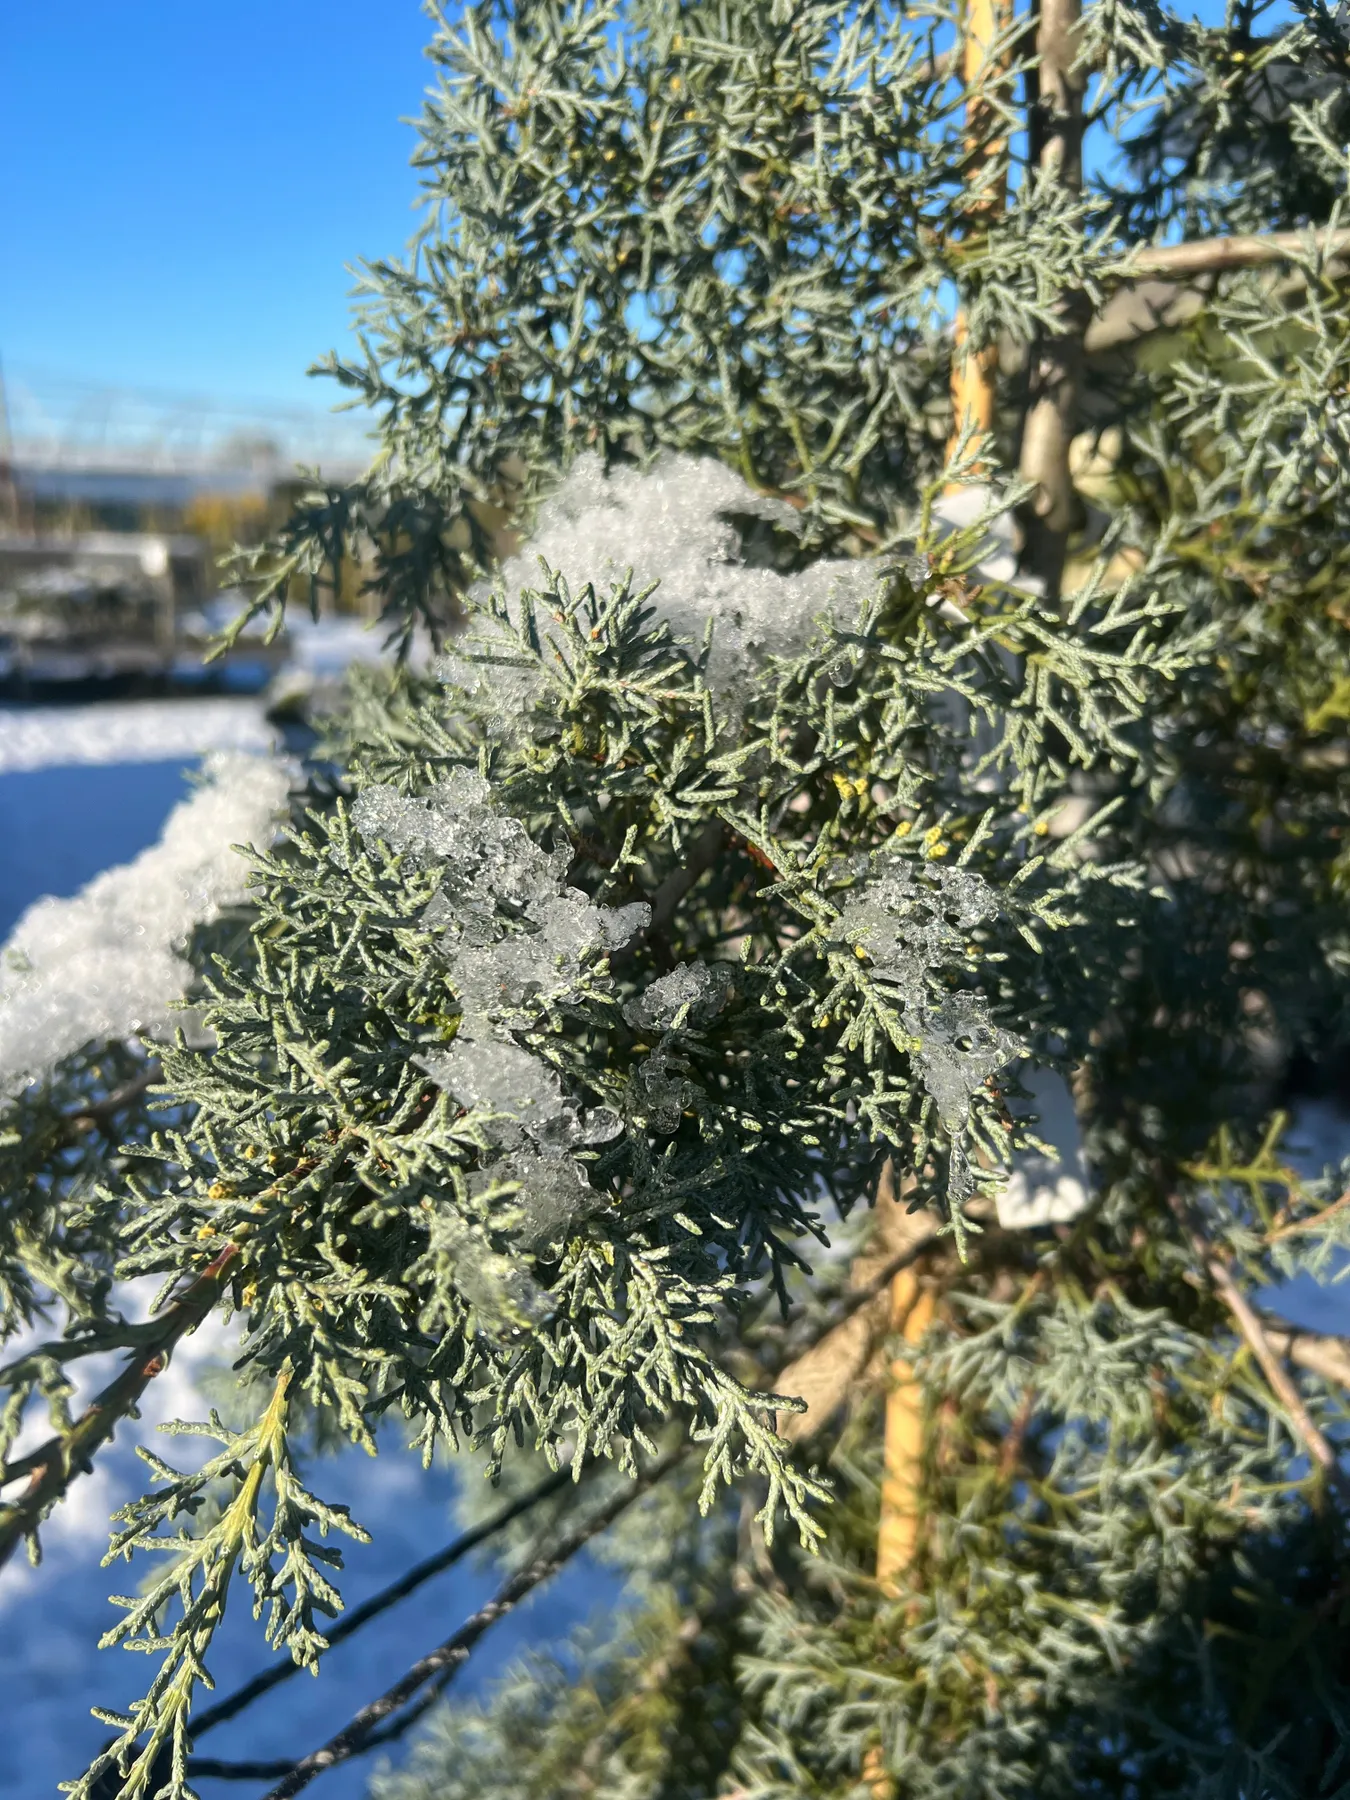
20. Blue-Green Conifer Branches, Bottled for Indoors
That icy blue-green palette is gorgeous and genuinely hard to maintain indoors. Flocking sheds every time the tree is touched, spray snow yellows within two seasons if it sits in direct sun, and faux frost on branches attracts dust like nothing else. Vacuum with a brush attachment monthly, store the tree in a sealed bag rather than a cardboard box, and expect to replace the spray snow every other year. It’s about $20 to redo, so not painful — just plan for it.
A quick checklist before you commit to the frosted look:
- Will the tree sit out of direct sunlight? South-facing windows yellow the flocking.
- Do you have a vacuum with a brush attachment and somewhere to store a 7.5 ft tree?
- Are pets or toddlers going to brush against it daily? Flocking and small hands don’t mix.
- Is your room warm or cool? Snow whites read blue in cool light and cream in warm light.
Pick Your Blue, Then Commit to It
Blue trees reward a little restraint: choose your shade, decide on one metallic to support it, and let the lights and the room handle the rest. Start with the idea that fits the space you actually have, then build outward from there — and check the mistakes section once more before you plug anything in.
📌 Pin your favorite version to your Christmas board now. Future you, standing in a store in November, will be extremely grateful.