
Still scrolling past red, white, and gold Christmas trees that look effortless and wondering why yours never lands quite the same way?
Same. So we went shopping — through HomeGoods, Etsy, Target, and Michaels — and pulled apart what actually makes those saves work. Everything here is real and reachable, from a $6 box of baubles to a $1,200 pre-lit centerpiece, so you can build the look at whatever number your December budget allows.
Inside you’ll find 24 curated ideas spanning traditional red-and-gold, gingham ribbon, jeweled maximalism, and all-gold monochrome — with budget and luxury versions compared side by side. And stay until the end — we break down the most common mistakes that can ruin these looks.
In 2026 the shift is warm: 2700K bulbs instead of cool white, velvet ribbon over plastic tinsel, and ornaments treated as a collection you add to rather than a matched set you buy once.
📌 Save this to Pinterest for later — you’ll want to revisit these ideas.
1. A Red-and-White Tree Anchored by a Brick Hearth
The tree is lovely, but the brick hearth is what makes the whole corner work. That matching wreath, the knitted stocking, the antique crock sitting on the brick — they repeat the tree’s red-and-white story at a lower, calmer volume, so your eye travels between the two instead of stopping dead at the needles. Take the hearth styling away and you have a nice tree next to a fireplace. Keep it, and the room reads as one deliberate scene, tied together by red-and-white striped ribbon and a simple bead garland.
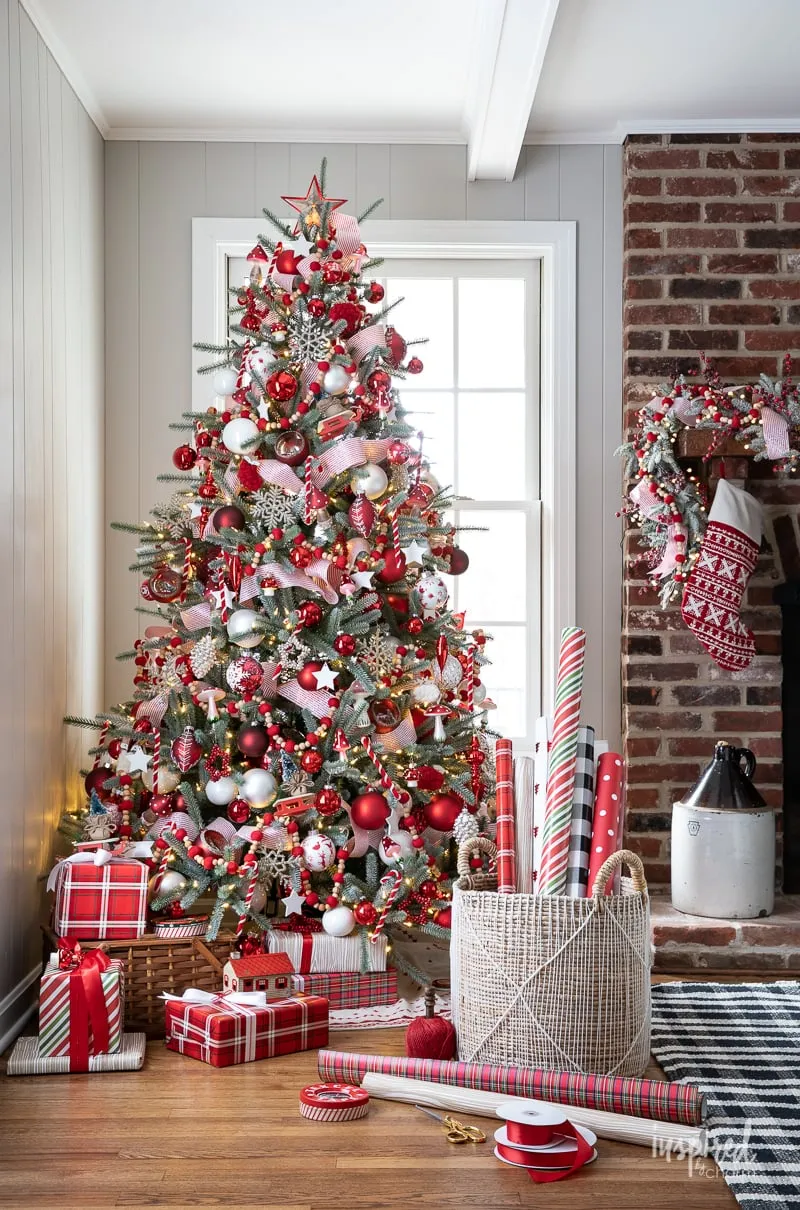
Here’s what the photo doesn’t tell you: a tree parked beside a window and a working fireplace is standing in the two worst spots in the house for needle life. Real trees dry out fast within three feet of a hearth, and sunlight through glass fades fabric ribbon by February. If you go real, keep a two-foot buffer from the firebox and check the water daily, because it will drink a quart on day one. Prefer zero upkeep? So does everyone with a busy December.
2. Gingham Bows and Vertical Ribbon on a Classic Tree
Three things are doing the heavy lifting here. First, the vertical ribbon: those long red runs pull the eye upward and make a standard-width tree look taller without buying a bigger one. Second, finish contrast — deep red velvet spheres sit right beside shiny gold and champagne balls, so the tree keeps catching light from every angle. Third, pattern discipline. The red-and-white gingham bows are the only print in the whole scheme, which is exactly why it reads traditional instead of busy.
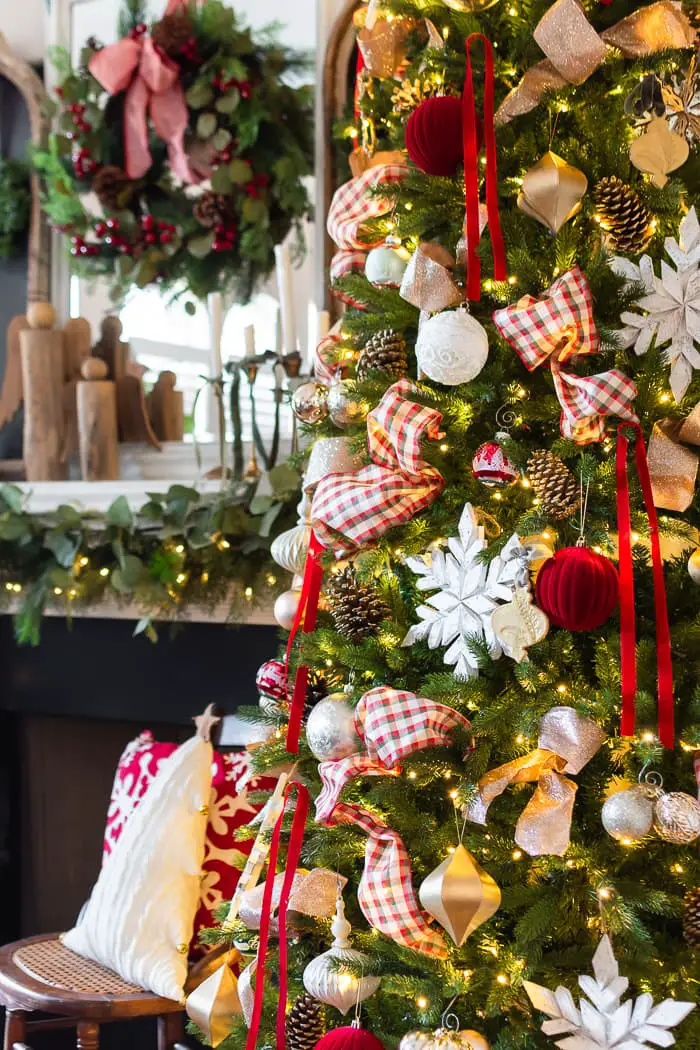
Buy wired ribbon, not the flat craft kind — 2.5 to 3 inches wide is the sweet spot for a 7.5-foot tree. Cut tails 10 to 12 inches long, work in six to eight vertical runs spaced evenly around the trunk, then clip bows at roughly one-third and two-thirds height rather than in a tidy line. Wire the tails so they curve outward past the needle tips instead of lying flat. One $12 roll covers a full tree. That’s the entire difference between decorated and styled.
3. A Jeweled Red-and-Gold Holiday Table Display
- Miniature jeweled trees, set of 3 to 5: $12 to $25 each
- Jeweled golden deer figurines, pair: $30 to $70
- Embellished red tablecloth or runner: $25 to $60
- Loose jewels and scatter gems: $8 to $15
- Small lit trees for the background layer: $20 to $40 each
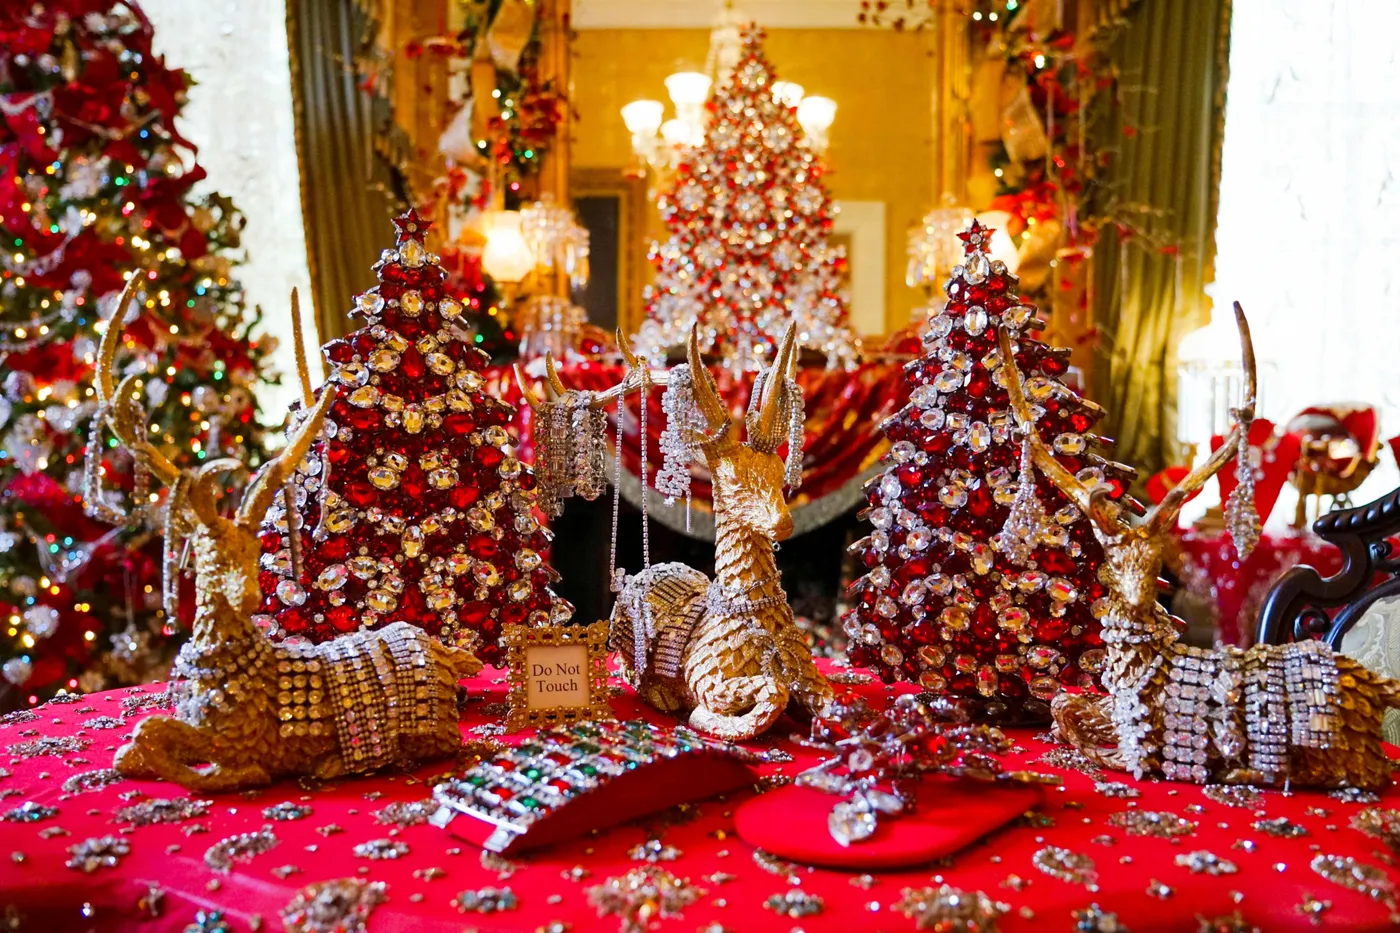
Total: roughly $150 to $350 for the full table. Skip the figurines and use two thrifted brass deer sprayed gold — about $15 for the pair, and no one will ask where they came from.
Tablescaping went full maximalist again, and this is what it looks like at home: jeweled mini trees, deer with rhinestone collars, and a little Do Not Touch sign that is half joke, half genuine warning. The trend is really a reaction to years of pared-back holiday decor — people got tired of beige and started treating the dining table like a display case. The jeweled version will date. The underlying move, one loud focal table with everything else quiet, will not.
4. Ribbed Ceramic Star Lanterns in Red and Cream
Styling a pair of lit ceramic lanterns takes about 20 minutes and costs nothing beyond the ornaments themselves.
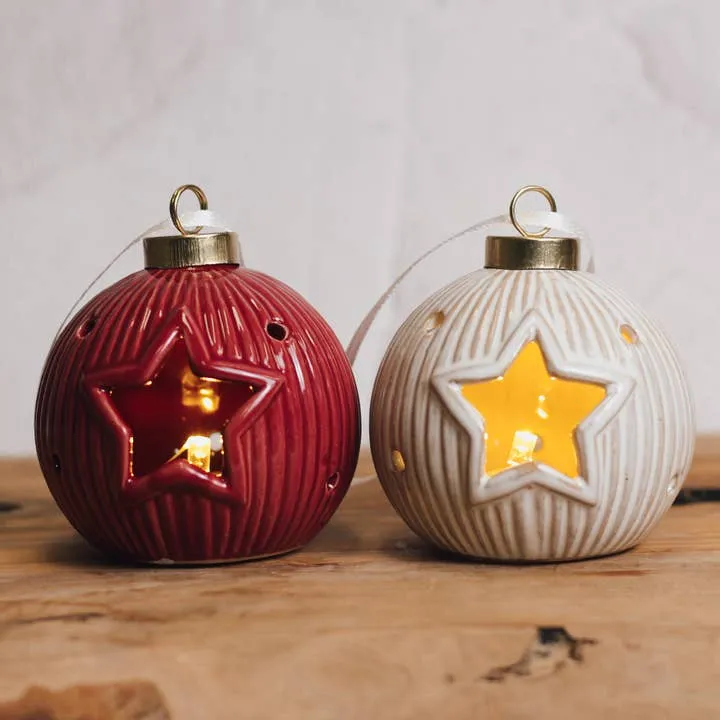
- Choose two — one deep red, one off-white — in the same finish so they read as a set rather than a mismatch.
- Drop a warm LED tealight or a small fairy-light bundle inside. The star cutout glows best when a bulb sits directly behind it.
- Thread a thin white ribbon through the gold cap, not twine, so the hanging hardware stays invisible against the ribbed texture.
- Hang at two-thirds height, roughly 10 inches apart, so both star cutouts line up at the same level.
- Leave bare wood or linen underneath. Anything patterned fights those vertical ribs.
Time: 20 minutes. Cost: $14 to $28 for the pair.
You don’t need the boutique version. Target and Walmart both carry ribbed ceramic-look lantern ornaments for $6 to $9 each in November, and from three feet away they photograph identically. If you want the real texture and can wait, air-dry clay plus a star cookie cutter gets you there for about $12 total: press the star into a rolled ball, poke a hole for the cap, cure 24 hours, then paint one red and one cream. The restraint in Idea #12 is what makes a pair like this work.
5. The Matte-Shiny-Glitter Rule in Red and Gold
This tree is running a simple formula: roughly 50% red, 30% gold, and 20% green and natural. Inside those numbers lives a second split that matters more — about 40% matte, 40% shiny, 20% glitter. Swap the red for burgundy and the gold for champagne and the same ratio still holds. Swap matte out for more glitter and it goes cheap fast. The dark green holly leaves are quiet filler that keeps red and gold from touching each other too often.
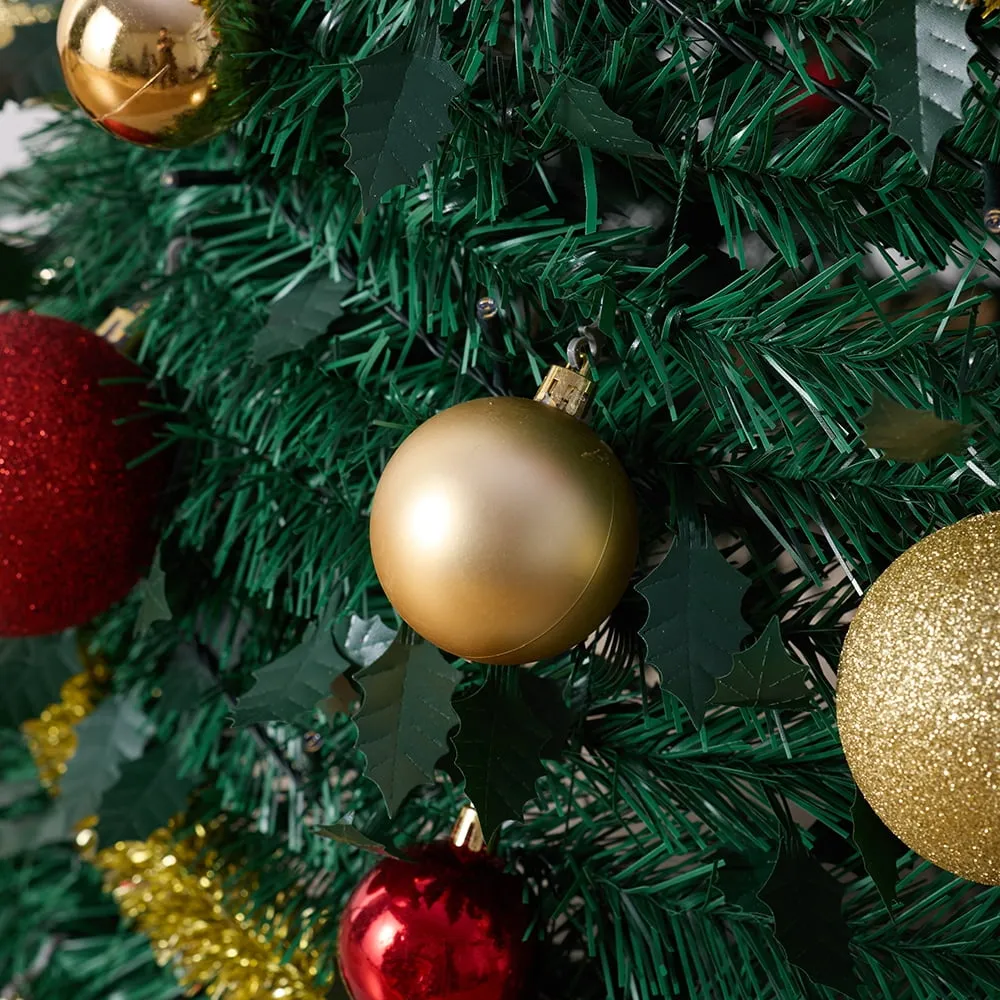
Glitter is the tradeoff. Metallic ornaments shed for the first two seasons — expect a fine dusting on the tree skirt and the floor beneath, so don’t hang them directly above a fabric sofa or a felt stocking. Gold tinsel catches dust and pet hair, and a quick pass with a dryer sheet in January does more than a vacuum ever will. Store glitter ornaments in individual tissue wraps rather than one bin, or you’ll be picking gold flecks off matte red baubles next December.
6. Warm White Lights, Red Pattern, White Mantel
Four things are worth checking before anything comes out of the storage bin:
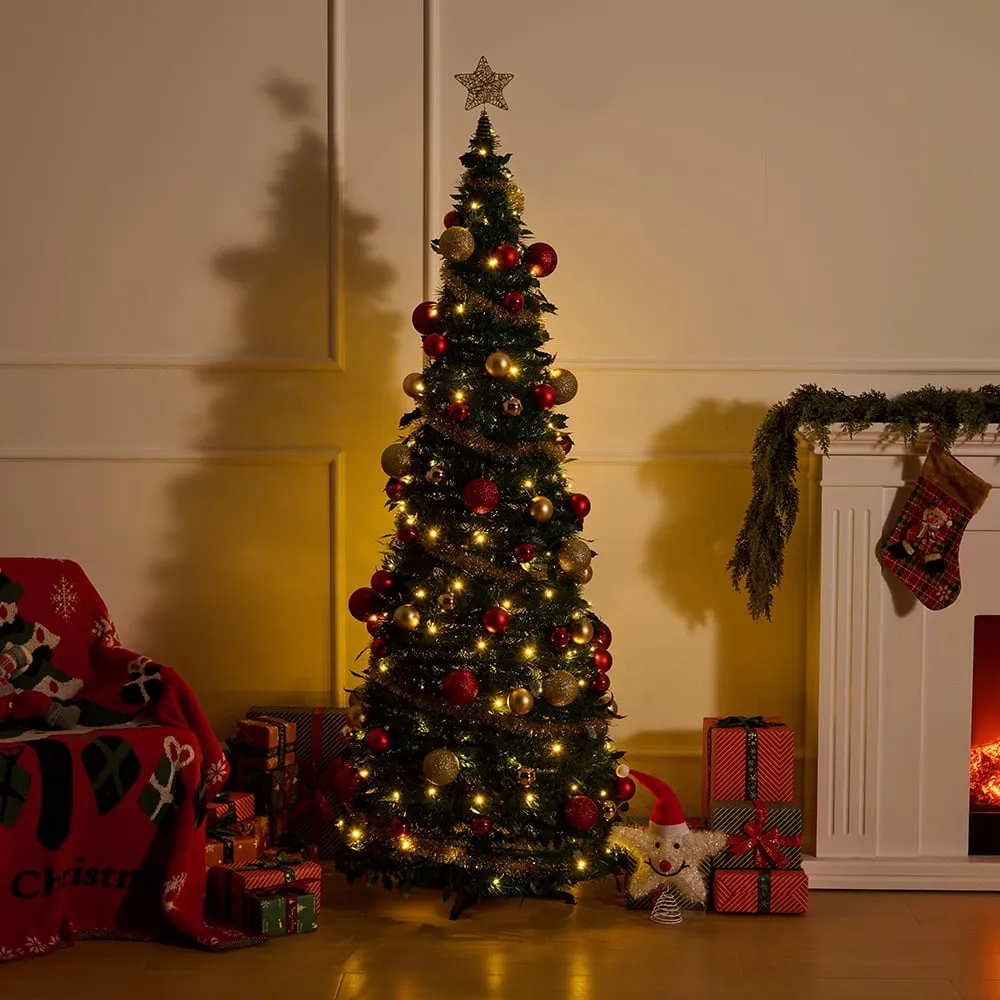
- Measure ceiling height minus the tree topper — you want 6 inches of clear air above the star.
- Find the nearest outlet. A pre-lit tree needs one, and a lighted mantel garland needs its own.
- Check mantel depth. A green garland plus a plaid stocking needs at least 8 inches of ledge.
- Choose the throw blanket color before you buy ornaments — the red patterned textile here is doing a surprising amount of the work.
This setup wants space. A 7.5- to 9-foot tree in front of a fireplace reads right in rooms of 200 square feet or more with 9-foot ceilings; anything tighter and the throw, the gifts, and the garland start colliding with furniture. In a smaller living room, borrow the warm-white lights and the red patterned textile and drop the mantel garland completely. Compare with Idea #21 — same warm palette, but it climbs a staircase instead of spreading across the floor.
7. Red Glass with Gold Filigree and Green Beading
Hang your most ornate ornaments in the 48-to-66-inch band — that’s true eye level when you’re standing in the room, and it’s where filigree and beading actually read. Above and below that window, use simpler shapes. Use 24-gauge floral wire instead of metal hooks on heavy glass; it holds a 4-inch ornament securely and won’t scratch the cap. Finally, push your light strand behind each ornate piece so the bulb backlights the gold glitter instead of flattening it into a silhouette.
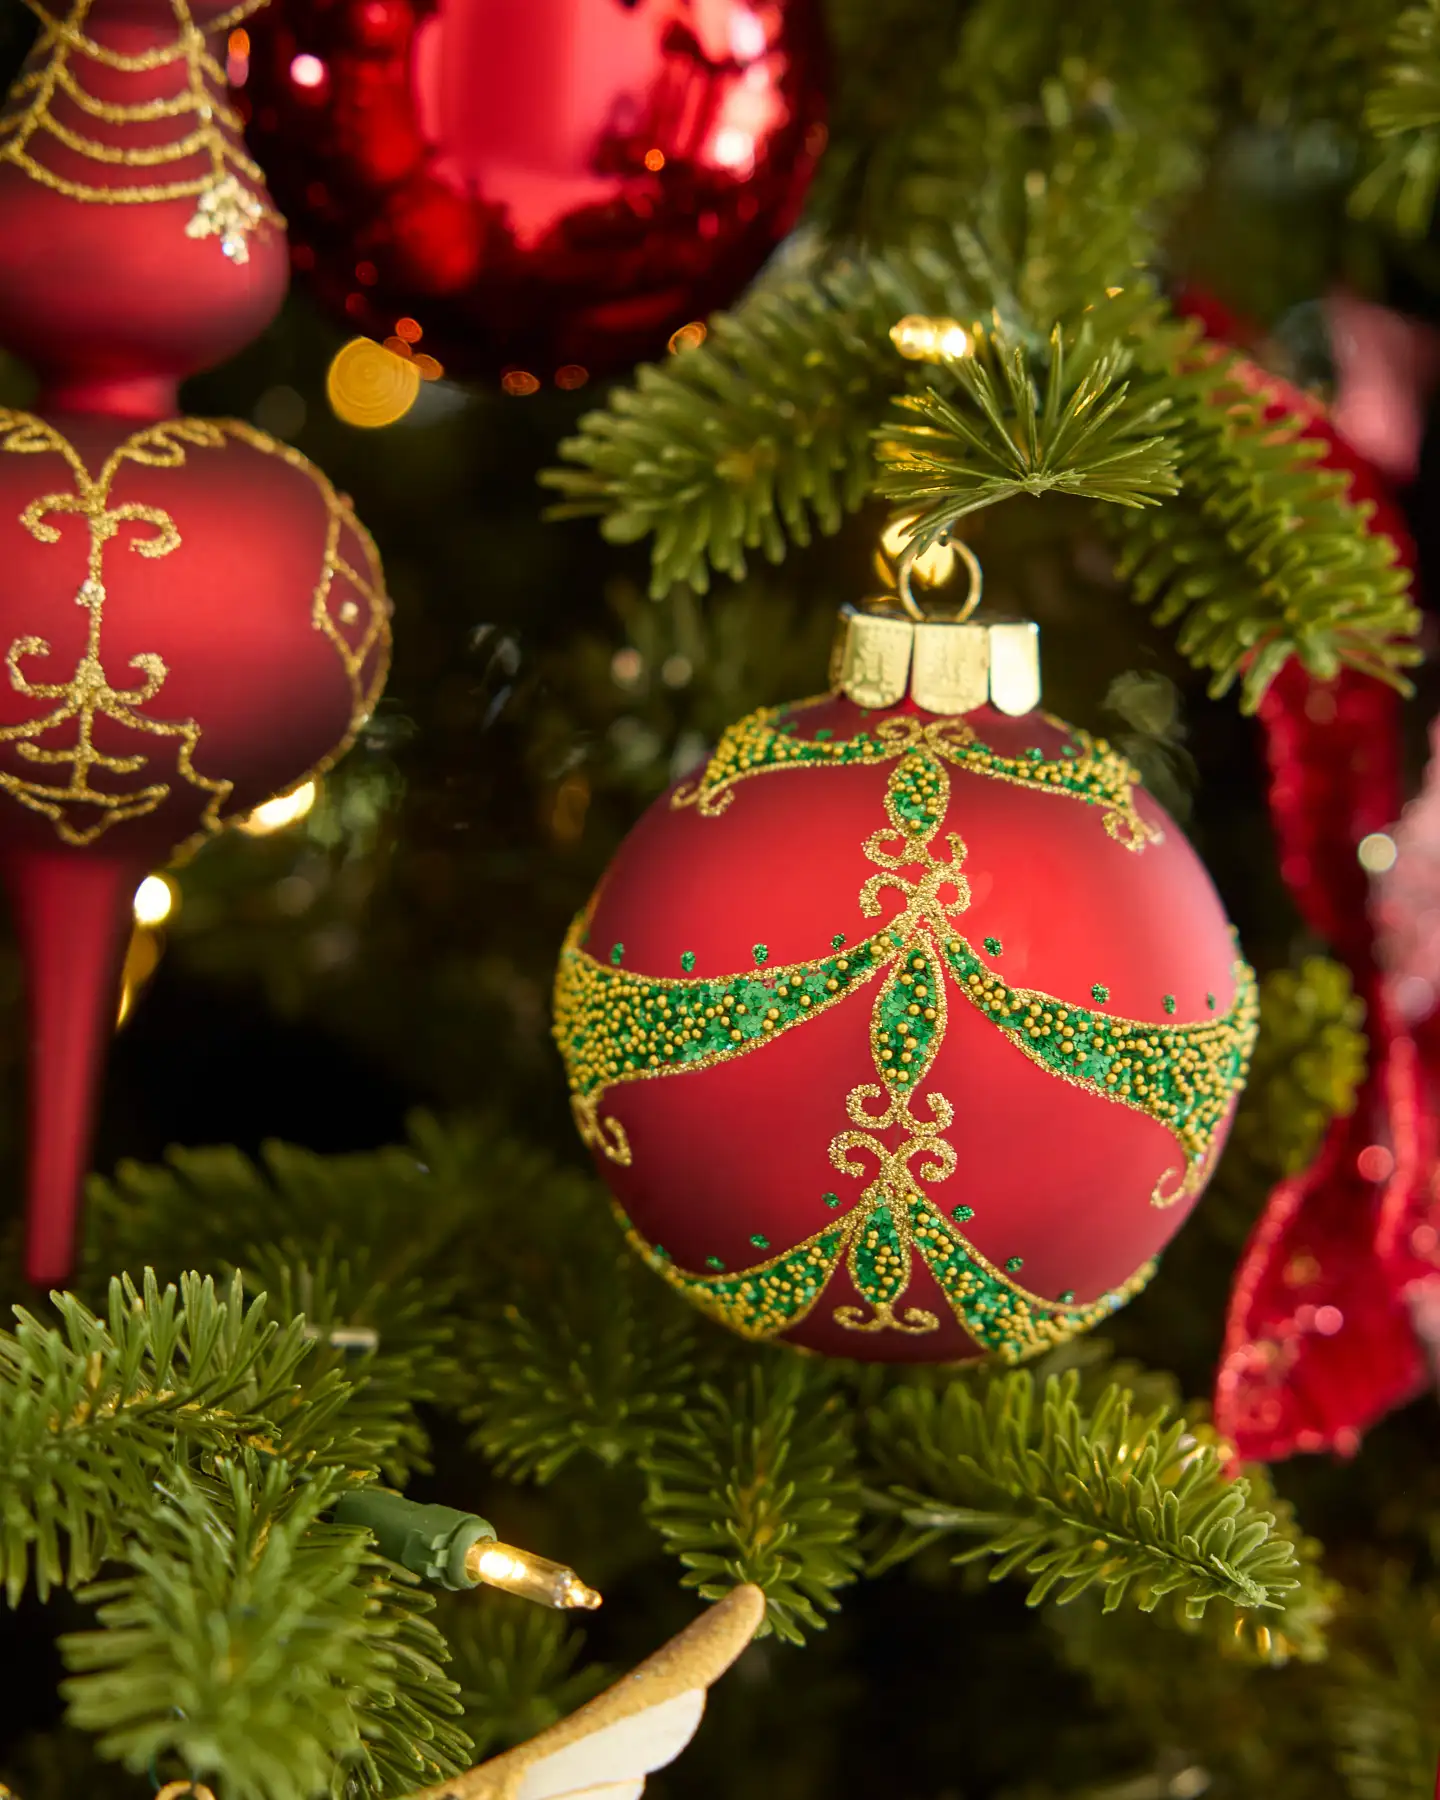
The green beading is the detail that saves this from being a two-note tree. Deep red and gold alone can turn heavy and slightly theatrical, but tiny emerald beads worked into the gold filigree give your eye a cool note to rest on and quietly tie the ornaments back to the actual pine. Remove it and the tree still looks expensive — just less interesting. A few dollars of beading on a single ornament, doing the work of a whole second color story.
8. Matte Red Baubles with Gold Glitter Snowflakes
The matte red base is the reason the gold snowflake pattern reads at all. Glitter needs a dull surface underneath it — put that same snowflake on a glossy ball and the two finishes compete for the same light. The second move is scale repetition: one oversized glitter snowflake placed among small patterned baubles gives the branch a hierarchy instead of a flat field of identical ornaments. The shiny gold balls nearby supply the sparkle, so the red doesn’t have to try.
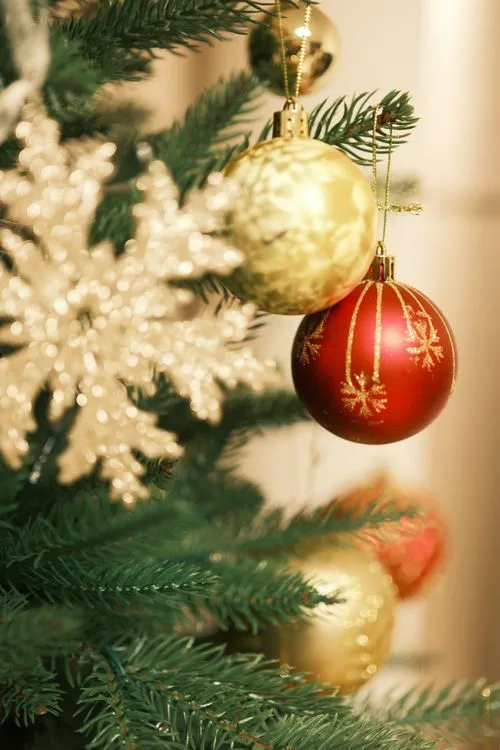
Two honest caveats. Large glitter snowflakes shed, and they shed downward, so keep them off branches that hang above a fabric chair or a stocking. Matte red also shows dust and fingerprints in a way gloss never does; a microfiber cloth in January brings them right back. With toddlers in the house, hang the big snowflakes in the top third and go unbreakable below. Same look, less sweeping.
9. Checkerboard Accents and Red Bead Garland
The formula here is 60% red, 30% gold, 10% pattern. That last slice is the checkered ornament, and it’s carrying all the personality — a buffalo-check or gingham ball reads as texture from across the room and as pattern up close. Red bead garland follows the same logic: it’s red, but it isn’t another sphere. If you’d rather go cooler, trade the gold for silver and keep the percentages identical. The rule is simple and worth repeating: never let pattern exceed a fifth of the tree.
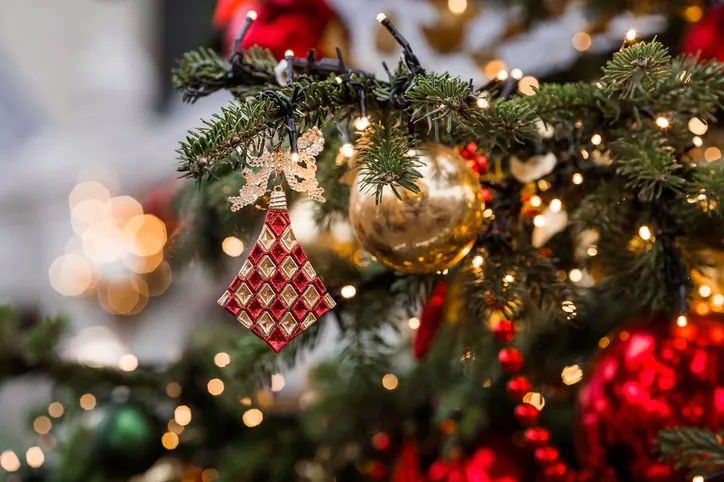
A five-dollar bag of red plastic bead garland from a dollar store looks nearly identical to the $25 version once it’s draped in small loops instead of long swoops. For the checkered ornaments, buy plain matte balls and hand-paint a grid with a $3 craft brush — about 10 minutes for four ornaments. The whole look lands under $35. Put your budget into the warm-white string lights instead, because at night they matter more than anything hanging on the branches.
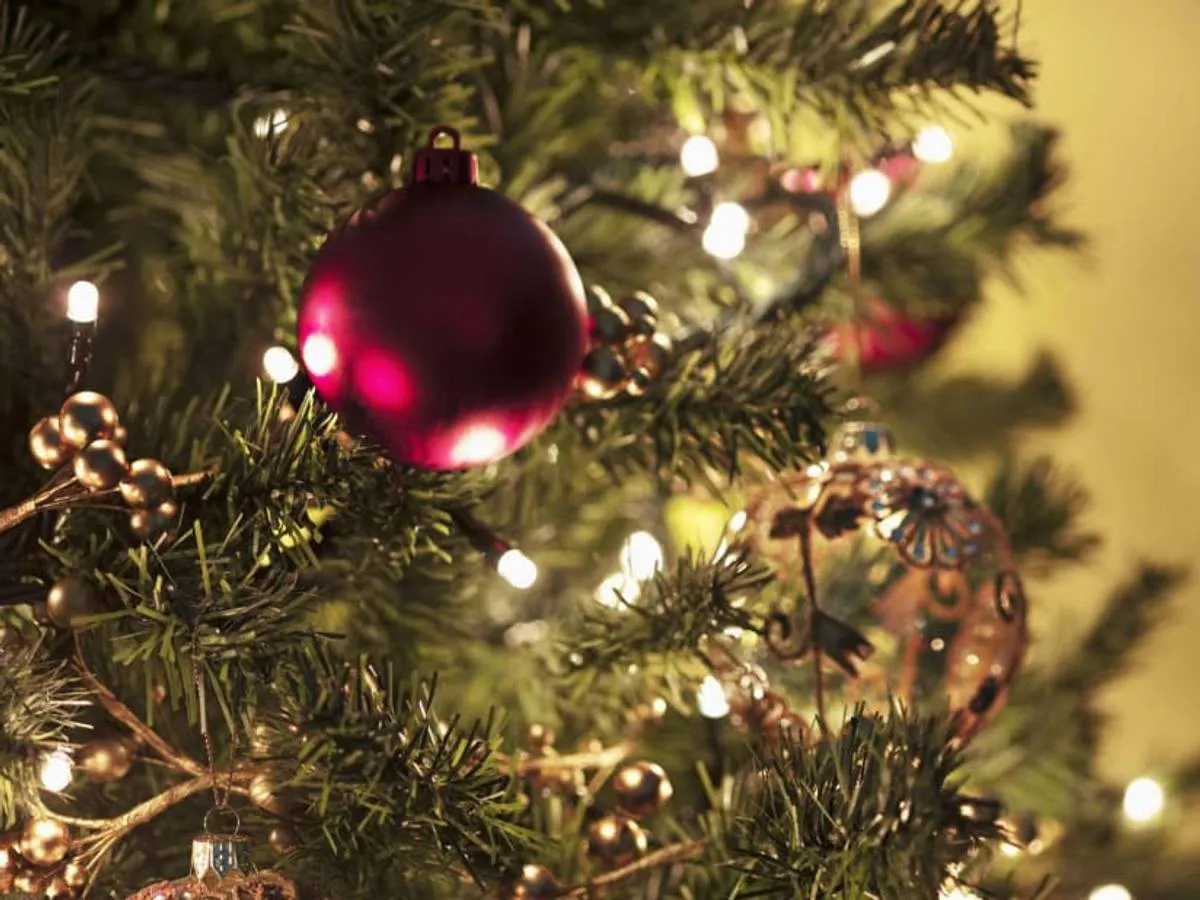
10. Gold Berry Sprigs and One Blue-Tinged Bauble
Tucking berry sprigs is the fastest way to make a tree look professionally styled.
- Buy floral picks with wire stems rather than loose sprays — they hold their angle.
- Plan 12 to 18 picks for a 7.5-foot tree. More than that and it turns into a tangle.
- Insert each pick at a 45-degree angle so the berries sit 2 to 3 inches past the needle tips.
- Cluster them in threes near the top third, where the tree thins out and needs visual weight.
- Step back eight feet and check — if the wire is visible, push it deeper.
Time: 30 to 45 minutes. Cost: $1.50 to $4 per pick.
The single blue-accented ornament in a red-and-gold tree isn’t a mistake — it’s a hinge. One cool piece gives your eye a break and makes every surrounding red look warmer by comparison. Keep it to one or two, place them at eye level rather than scattering them, and choose a blue that leans teal or slate instead of true cobalt. A single green glass ball pulls off the same trick if blue feels risky in your room.
11. Antique Gold Bells with Pinecones and Berries
Bell-and-pinecone picks are the current face of quiet maximalism — full and layered, but built from natural materials instead of glitter. Two things pushed this forward: the vintage ornament revival, where people hunt antique malls and Etsy for single pieces rather than buying matched sets, and general fatigue with plastic-heavy holiday decor. Rustic picks age well because there’s no trend embedded in them. They look right in 2026 and they’ll look right in 2036.
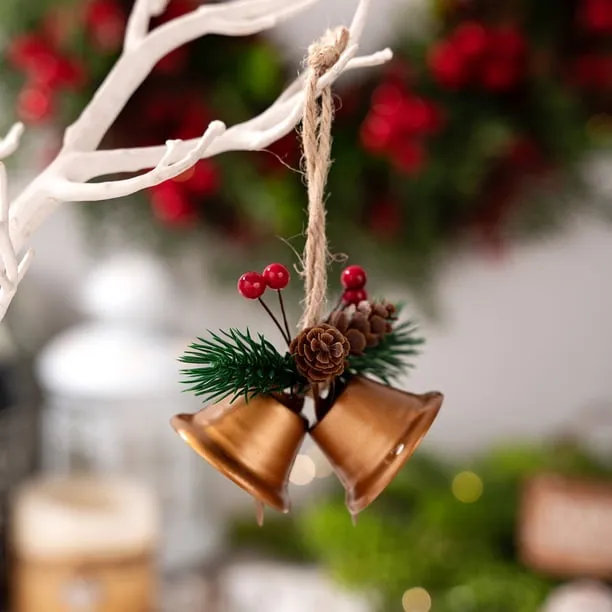
Natural materials do come with housekeeping. Real pinecones drop tiny seeds and sap for the first week, so bake them at 200 degrees for 30 minutes before they go on the tree — it also kills anything living in them. Twine and dried berries fade in direct sun, which matters if you hang this near a window. If any of that sounds like too much, painted faux pinecones and coated berries give you the same look with a damp-cloth cleanup at the end of the season.
12. One Red Glass Ball, One Gold Cap, Zero Clutter
Everything here is white space — literally. A single glossy red ornament with a decorative gold cap, one pine branch, and a soft blurred background. What you’d lose by adding more is the entire point: the restraint is the design. Portrait-style styling works because the eye has nowhere else to go, so that one red sphere reads as an intentional object rather than one of forty. For a small apartment or a mantel shelf, this is the highest impact per dollar in the whole article.
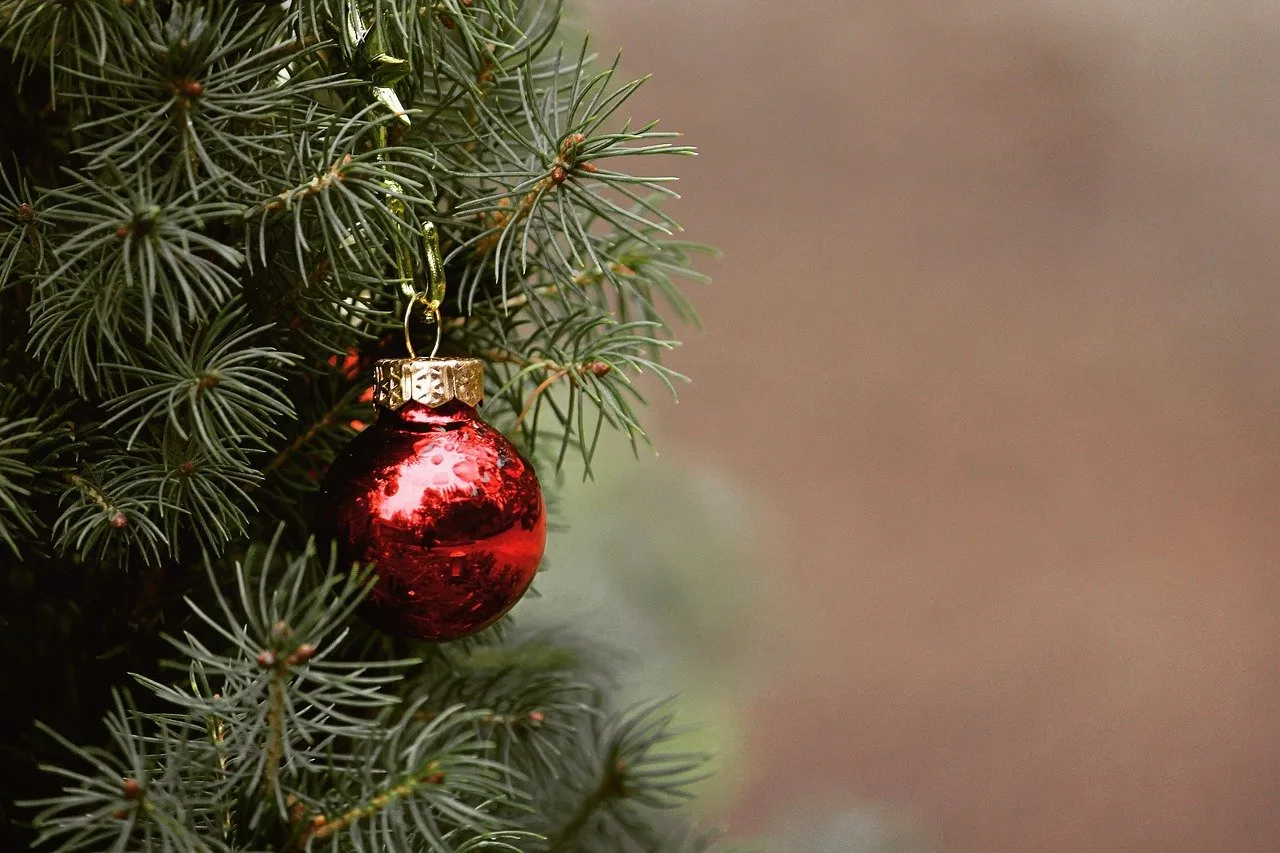
Single-ornament styling is a small-space solution and it needs almost nothing: a 12- to 18-inch branch in a vase on a narrow console, a mantel ledge, a floating shelf, a nightstand. It fails on a large empty wall, where one object looks lost instead of curated. This reads well in rooms up to about 120 square feet; past that, group three branches at staggered heights. Compare with Idea #23 for the opposite approach — a dense floral tree on a small round table.
13. A Red Sleigh Planter with Roses and Candy Canes
Fresh flowers in a sleigh container look incredible for about five days and then start negotiating with you. Plan on re-watering every other day — floral foam dries out faster than you’d expect and won’t show it until the roses droop. Petals drop onto whatever sits below, which means daily tidying if this lands on a table people actually eat at. Candy canes go sticky in a warm room, and the miniature Santa figure has a way of migrating. Faux stems give you this exact look with zero upkeep.
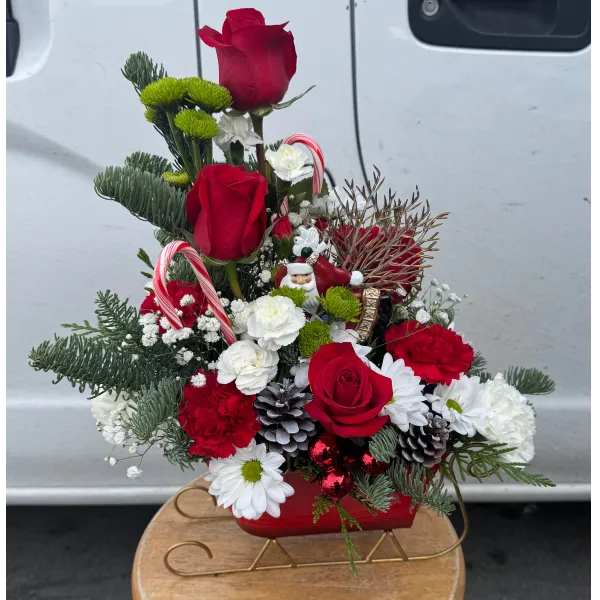
- Red sleigh container with gold runners: $4 to $10 thrifted, $25 to $45 new
- Faux roses and carnations, one dozen stems: $15 to $30
- White daisies and white carnations: $8 to $18
- Pinecones, pine sprigs, and candy canes: $6 to $12
- Gold spray paint for the runners: $7 to $12
Total: about $40 to $80 for the faux version, or $120 and up fresh. Wet floral foam is only $2 if you’re going fresh, and it holds stems far better than the loose kind.
14. Deep Red Gloss and Glowing Bokeh
Glossy ornaments are reflectors first and colors second. Place them within about 12 inches of a bulb and they’ll throw warm glints across the branches, which is what creates that soft glow behind the tree. Pair them roughly one-to-one with matte ornaments so you get shine without a plastic look. Under 2700K warm white bulbs, deep red gloss reads rich and slightly burgundy; under 4000K cool white, the identical ball goes flat and dull. Same ornament, two completely different trees.
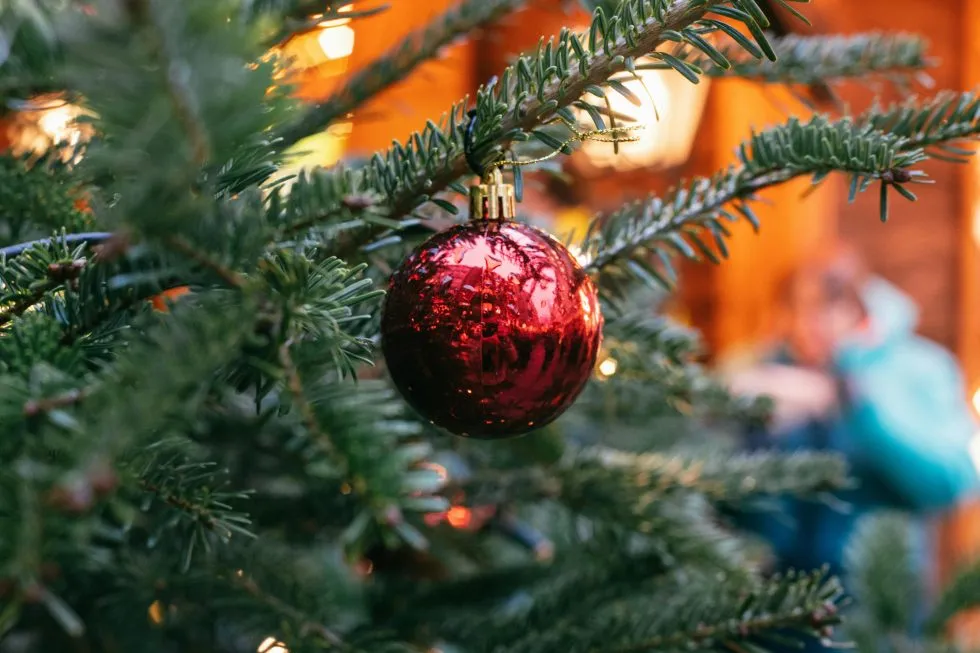
Here’s the part that ruins more holiday trees than bad taste: bulb temperature. Cool white LEDs, which most people already own, turn red ornaments muddy brown and gold ornaments faintly green. Before you buy a single bauble, turn on your tree lights at night and hold one red ornament under them. If it looks dead, spend $20 on a warm-white strand before you spend $200 on decorations. It’s the highest-return purchase in holiday decorating, and it takes ten minutes.
15. Gold Glitter Swirls on a Glossy Red Sphere
The swirl pattern is directional, and that’s the trick. Curving gold lines move your eye around the sphere instead of letting it bounce off a flat color, and the scattered silver teardrop accents break up what would otherwise be a very traditional red-and-gold combination. Silver is the wild card — a small fraction of the surface area that changes the entire temperature of the ornament and gives it a cool edge. That’s why it reads modern sitting on a classic tree.

Formula: roughly 70% glossy red, 20% gold glitter, 10% silver. If you’re building a tree this way, keep the red glossy and the gold on the matte side so metallics stay accents rather than the main event. Swap silver for rose gold and that same 10% goes warmer and older-feeling. Swap it for pearl white and the tree turns soft and vintage. Full silver across the whole tree would tip it into a different holiday entirely — which is exactly why it stays at a tenth.
16. Red and Gold Branches Above a Beige Rug
Tree scale is a math problem before it’s a taste problem. A 7.5-foot tree needs a 9-foot ceiling once you add a topper, and it wants a footprint of about 5 feet across once the branches relax — which means 30 inches of clearance on every side in a room people walk through. The stand itself reads as roughly 20 inches wide. On a light beige textured rug, that black plastic base becomes the loudest object in the frame, so budget for a collar or a skirt before you buy anything else.
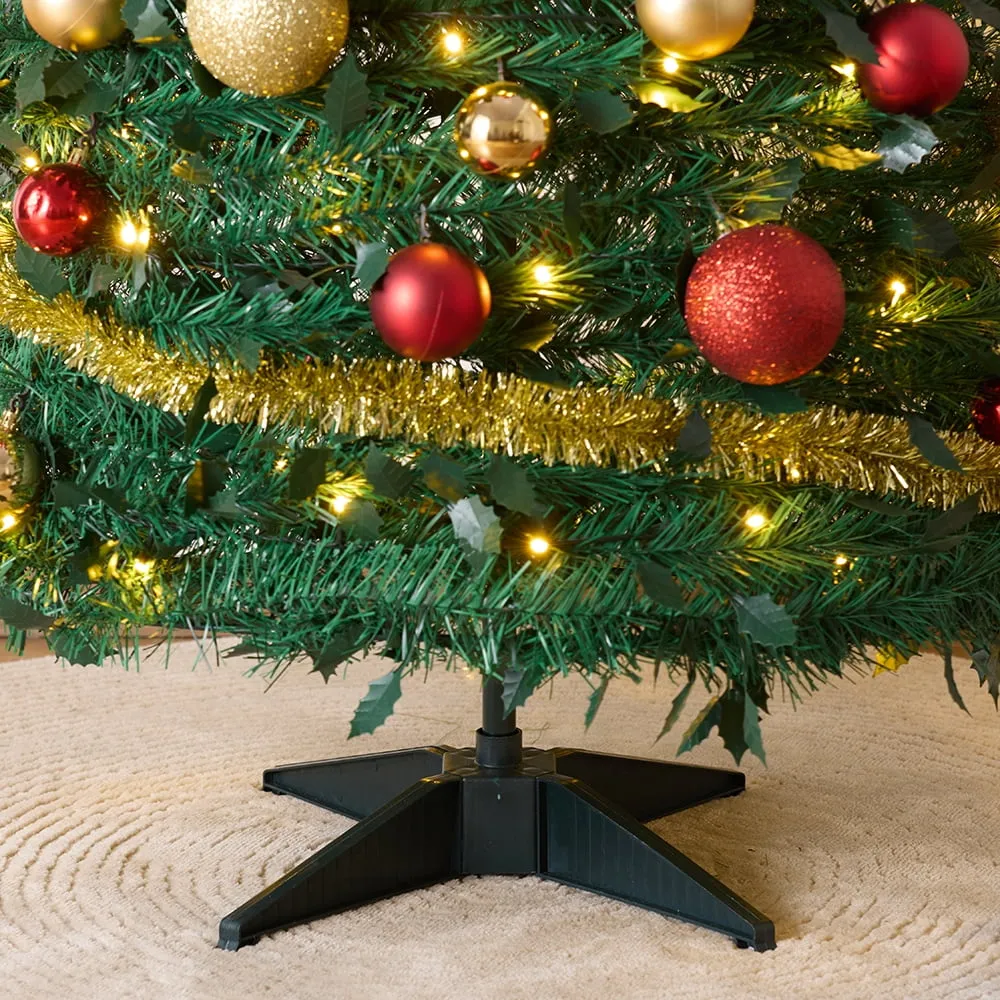
Nobody warns you about the stand, and then it’s the first thing guests see. A woven basket or a three-inch fabric skirt solves it in about two minutes and costs under $25. If you go the collar route, measure the stand before ordering — they’re sold by inches and a half-inch miss is visible from across the room. And if your floor is light and your stand is dark, consider flipping it: a matte black base on a dark rug disappears entirely.
17. Glittered Glass Ornaments with Indented Centers
The indentation is the whole point. A concave center catches light from every direction and throws it back out through the opening, and that’s the little glow that makes old-fashioned glass ornaments feel alive. Smooth balls reflect one bulb; indented ones collect an entire strand. If you’ve been skipping these because they look dated in the box, hang three at eye level next to your matte red baubles and watch what that extra depth does for the branch.
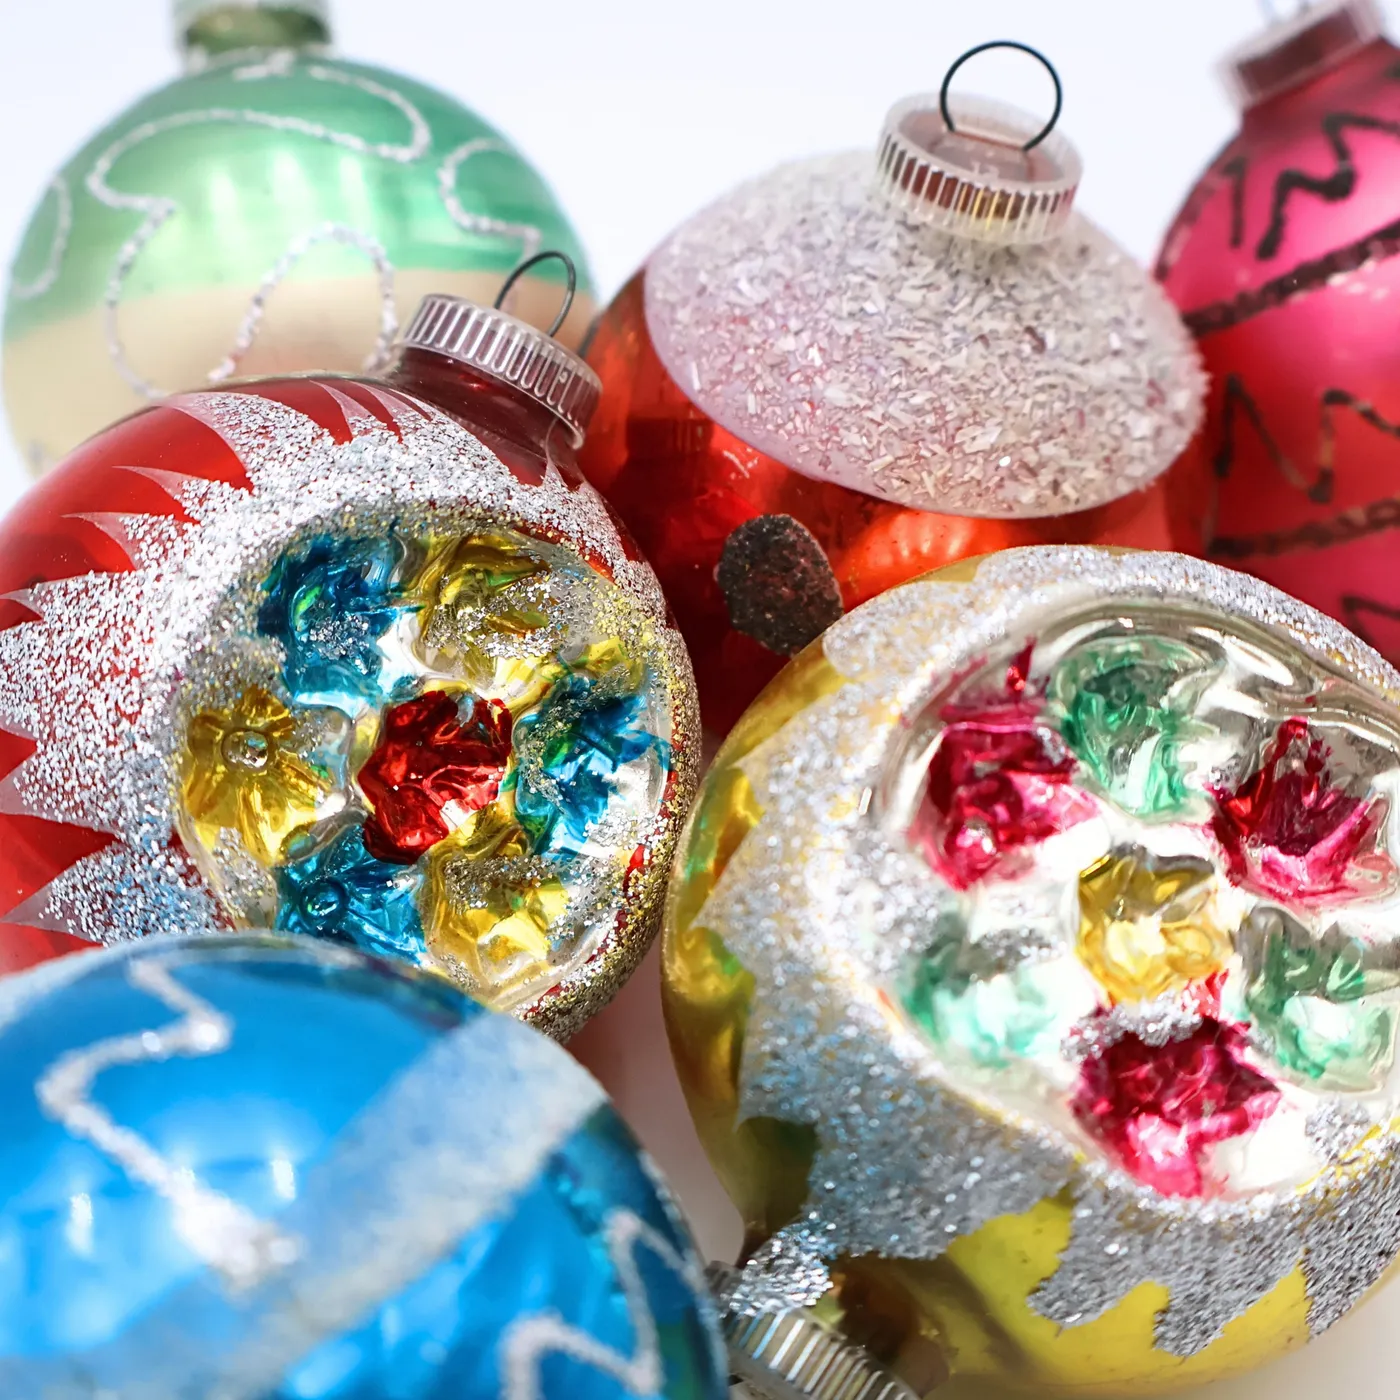
Collectible glass needs different handling than plastic. Use ribbon loops instead of metal hooks on anything thin-walled, because a hook’s pressure point is where old glass cracks. Group them in threes rather than scattering them so the pattern becomes deliberate instead of accidental. And when you pack up, wrap each one in acid-free tissue with the cap facing up — never nested inside another. A $4 box of tissue protects a $12 ornament for another twenty Decembers.
18. Red Berries, White Fluff, and Silver Tinsel
Pure red-and-gold trees get heavy fast, and the fix here is texture instead of color. Fluffy white baubles act like visual breathing room — they’re still ornaments, but they don’t add another saturated hue. Meanwhile the red berry clusters deliver red in a non-spherical shape, so it reads as natural foliage rather than decoration. The silver tinsel does the last bit: it reflects the warm bulbs so the tree glows instead of merely sparkling. Compare with Idea #5, where the same three-way balance happens with holly leaves and gold.
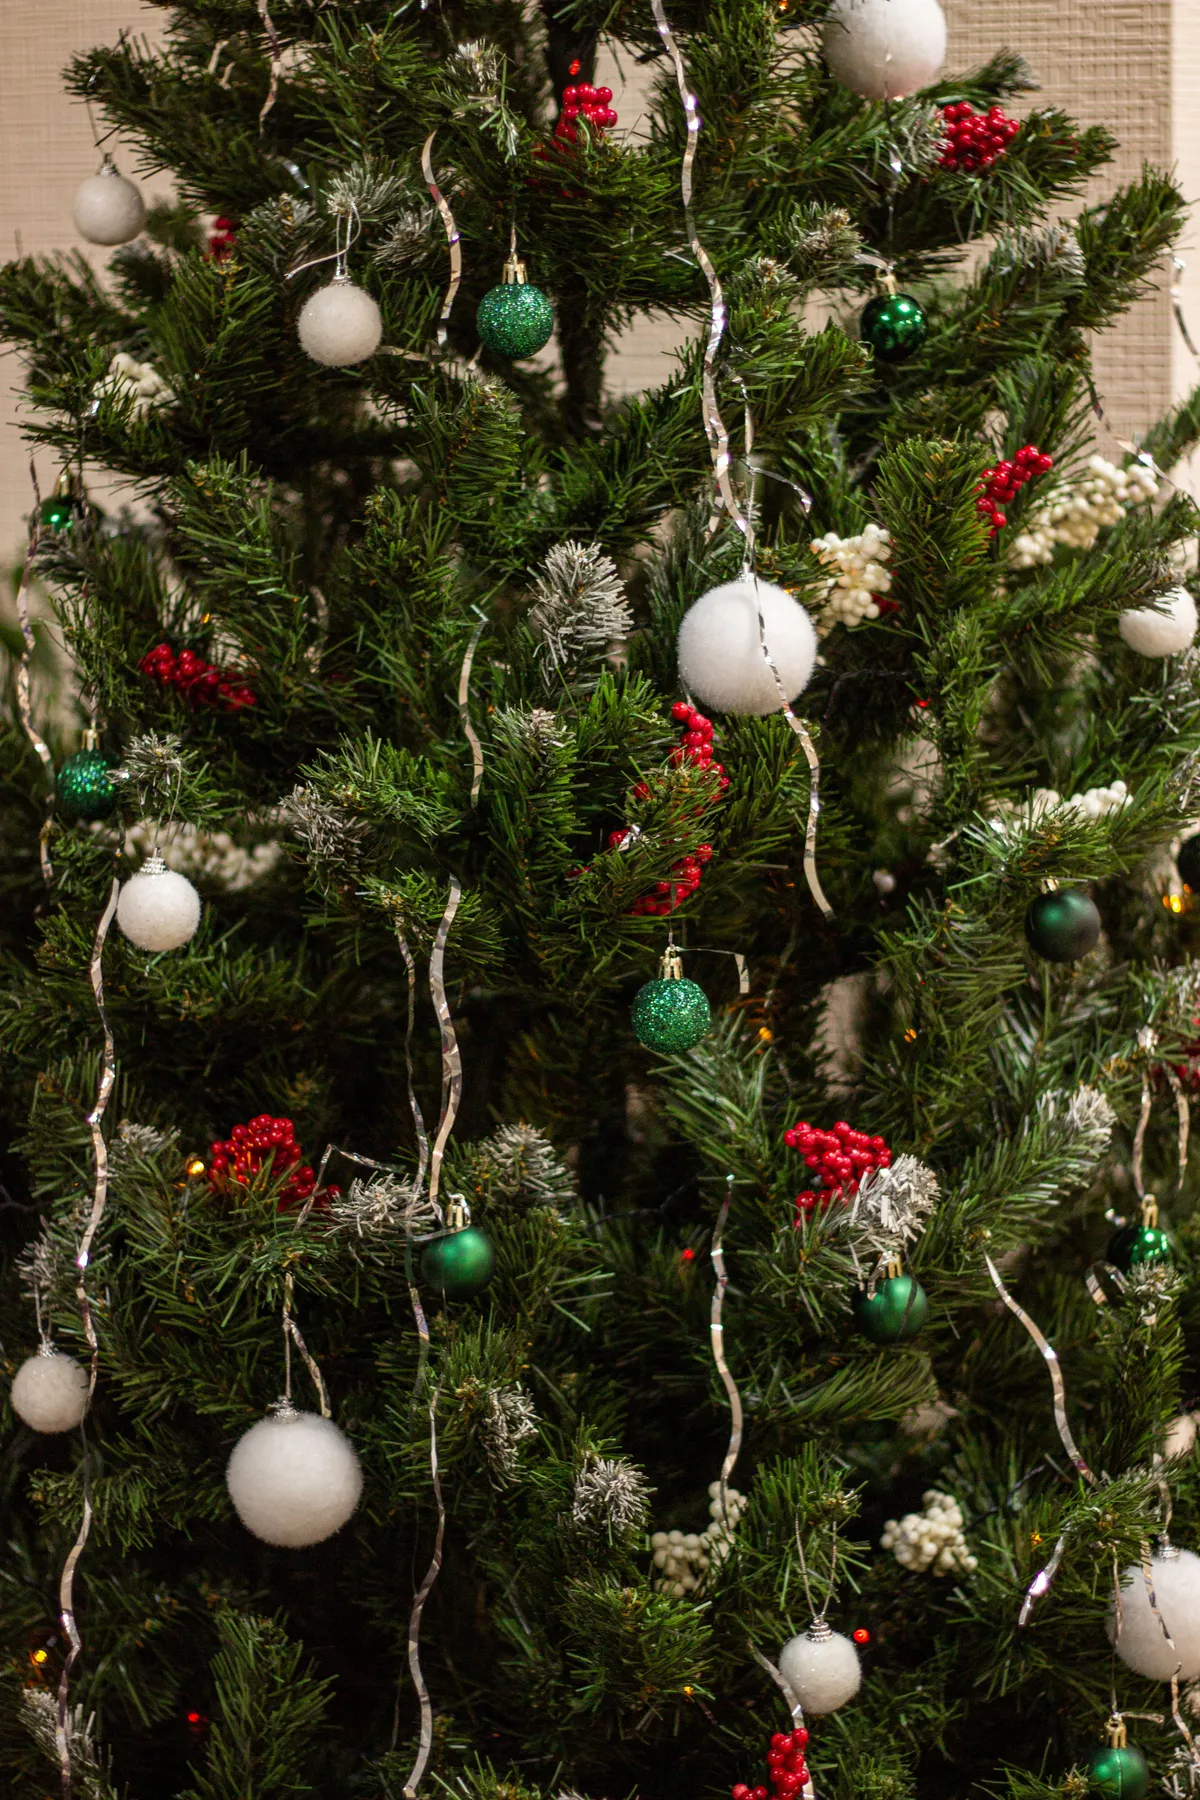
This is the direction holiday trees have been moving since the all-white farmhouse phase cooled off: saturated color, but with natural texture layered in to keep it from feeling plastic. Pinterest searches for berry-and-bough trees have been climbing for three seasons straight, and the appeal makes sense — it’s bold at ten feet and detailed at two feet, which is exactly what people want for photos. The silver tinsel is the one trend-sensitive piece, so keep it light.
19. An All-Gold Tree with a Disco Ball Moment
Gold finishes are the flakiest thing in your ornament bin. Sprayed plastic and metallic-coated glass chip right at the cap where the hanger rubs, so store them caps-up and never stacked. Mirrored ornaments scratch if you wipe them with a dry cloth — a damp microfiber is the only safe option. Thin tinsel strands tangle into knots you genuinely cannot untangle; coil them around a piece of cardboard at the end of the season and you’ll get three more years out of the same strand instead of buying new.
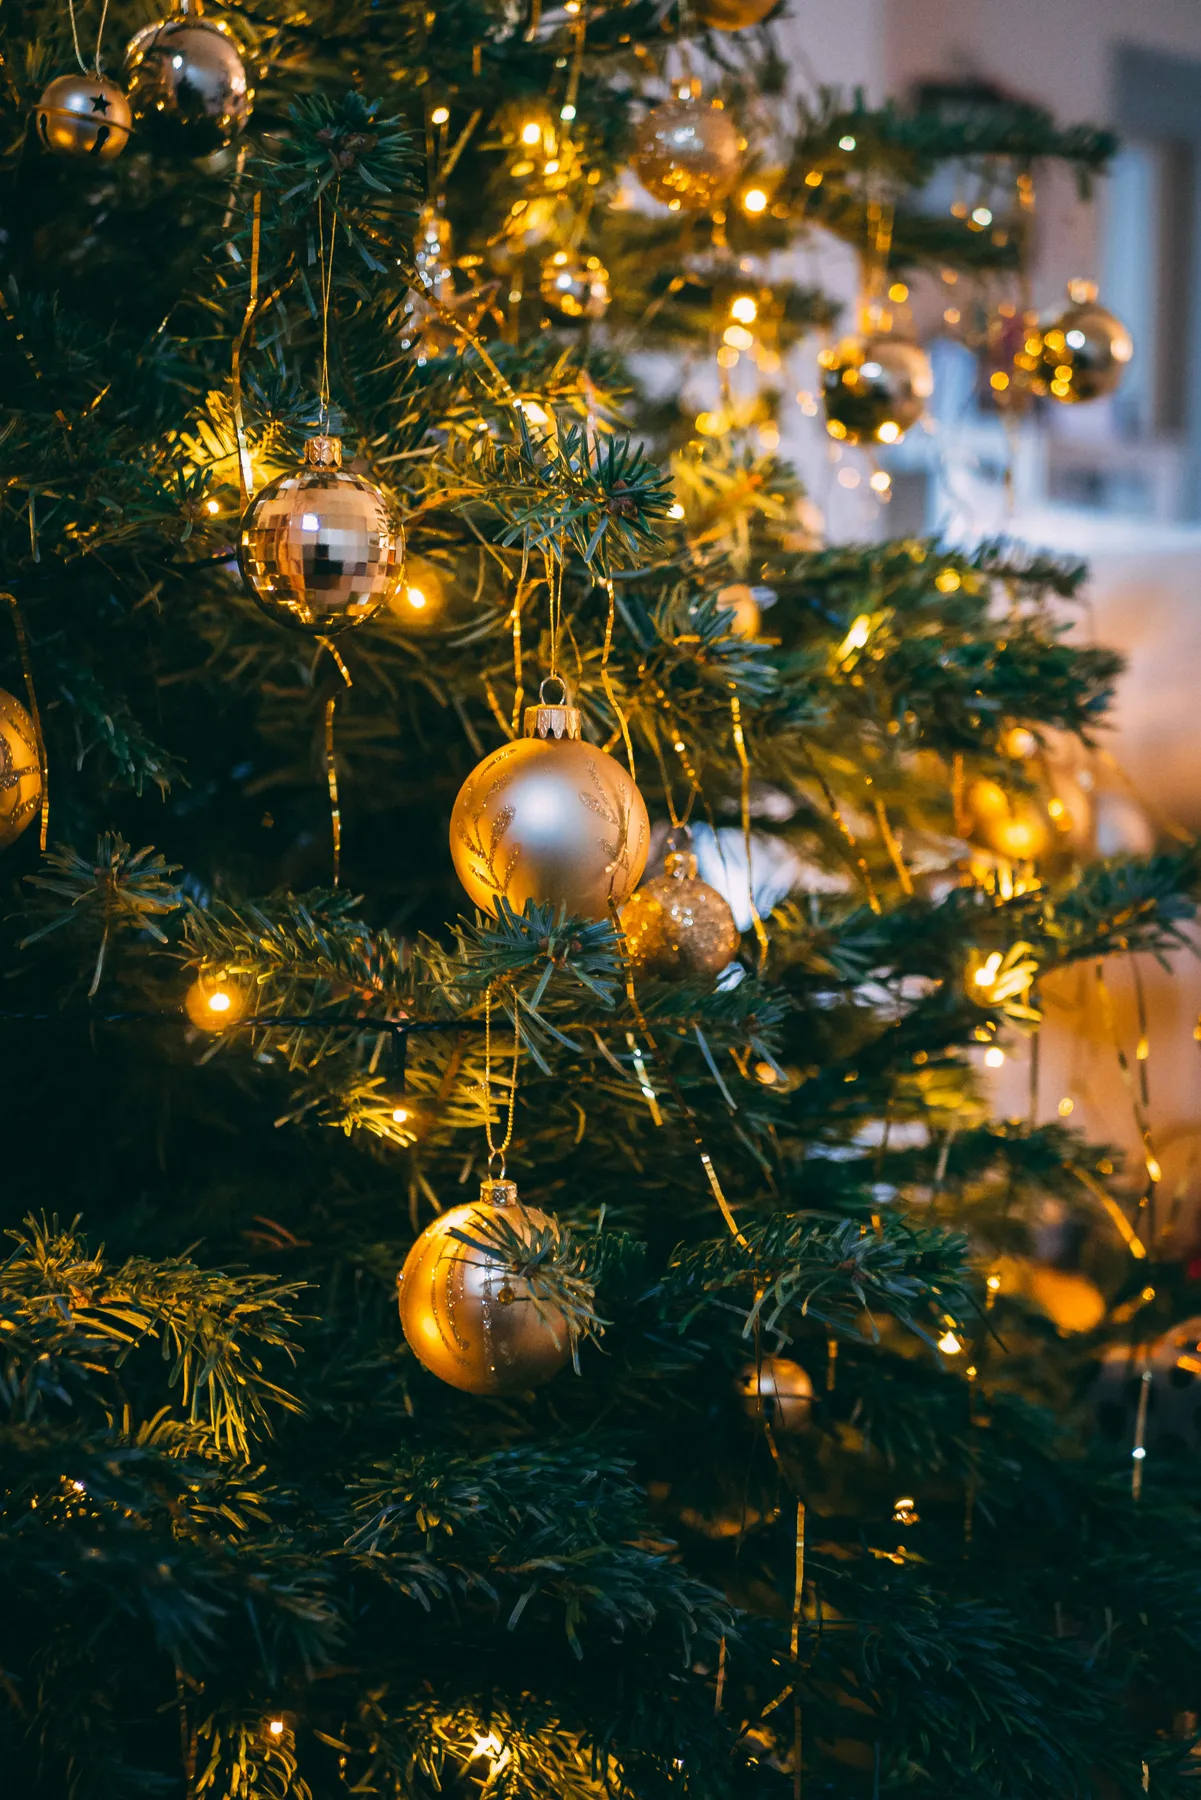
The formula is about as simple as it gets: 85% gold, 15% shiny. Within the gold, split it roughly half matte and half glitter or metallic, or the whole tree turns into a single glare. The mirrored disco ball ornament is the 15% exception and it works precisely because there’s only one. If you wanted to warm it up, swap a third of the gold for bronze and the tree gets a candlelit, slightly antique feel. Two colors is the maximum here — a third hue breaks the effect immediately.
20. Red Velvet Ribbon and a Metallic Tree Collar
The metallic collar is what turns this from a decorated tree into a designed room. A gold collar gathers the base into a clean cylinder, hides the stand entirely, and gives all that red velvet ribbon a hard, reflective surface to play against — which is why the tree reads formal rather than cozy. Swap in a basket or a fabric skirt and the exact same ornaments suddenly look casual. It’s the one upgrade worth doing before anything else, and it costs less than a single strand of good garland.
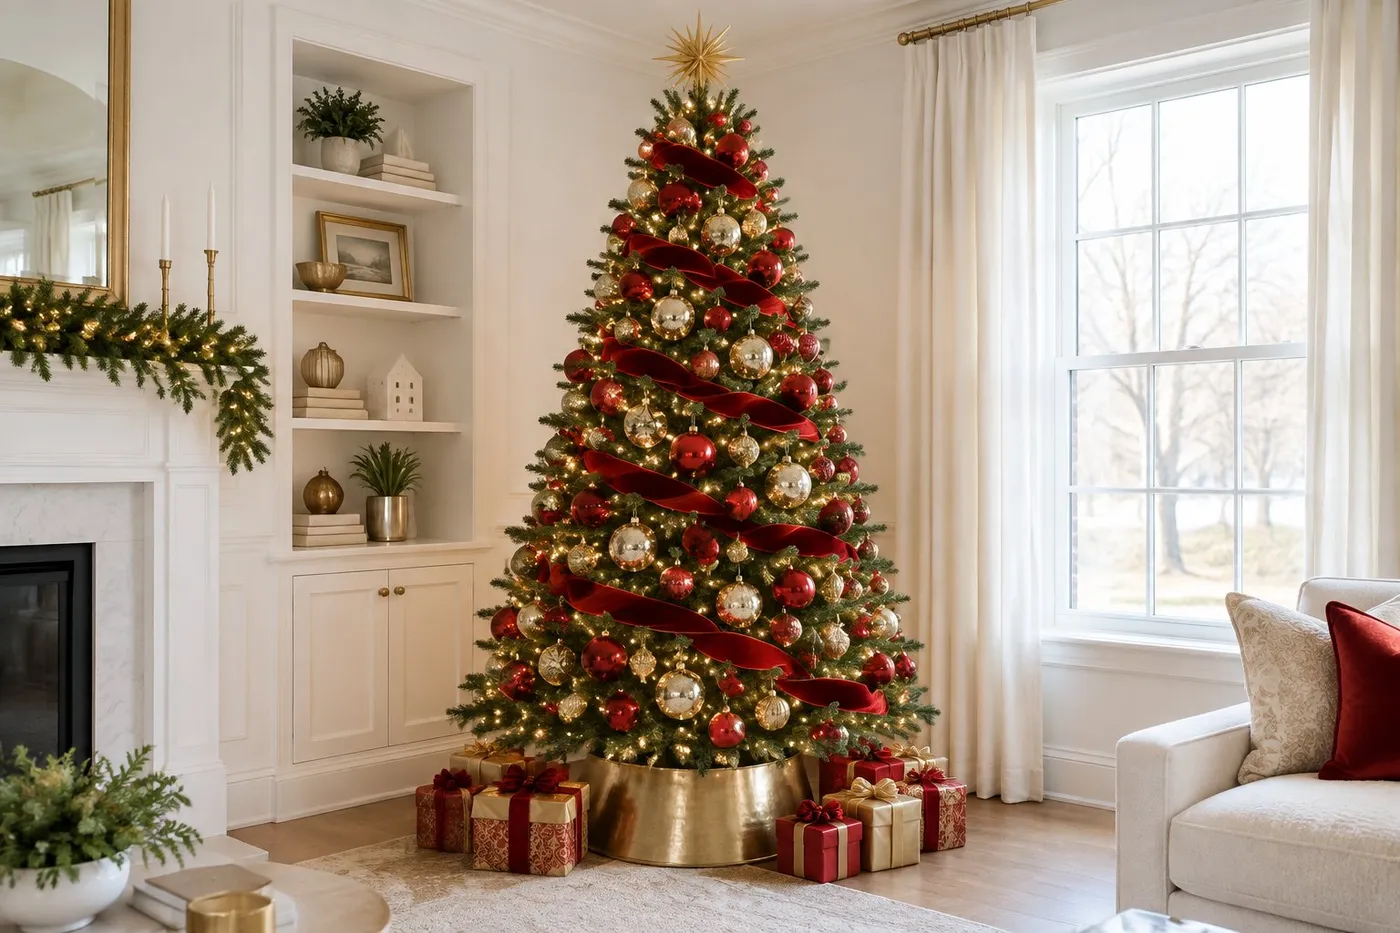
This look wants a wall, and the built-ins are part of the composition rather than the backdrop. Plan on at least 250 square feet with 9-foot ceilings; under 8-foot ceilings, a star topper starts fighting the ceiling and the whole thing feels cramped. In a smaller living room, keep the velvet ribbon and the collar but drop your ornament count to about 60 pieces on a 6-foot tree — that still reads full. See Idea #6 for the mantel-garland version of this same palette.
21. A Golden Entryway Tree and a Lighted Stair Rail
Running a lighted garland up a staircase is a 45-minute job if you do it in the right order.
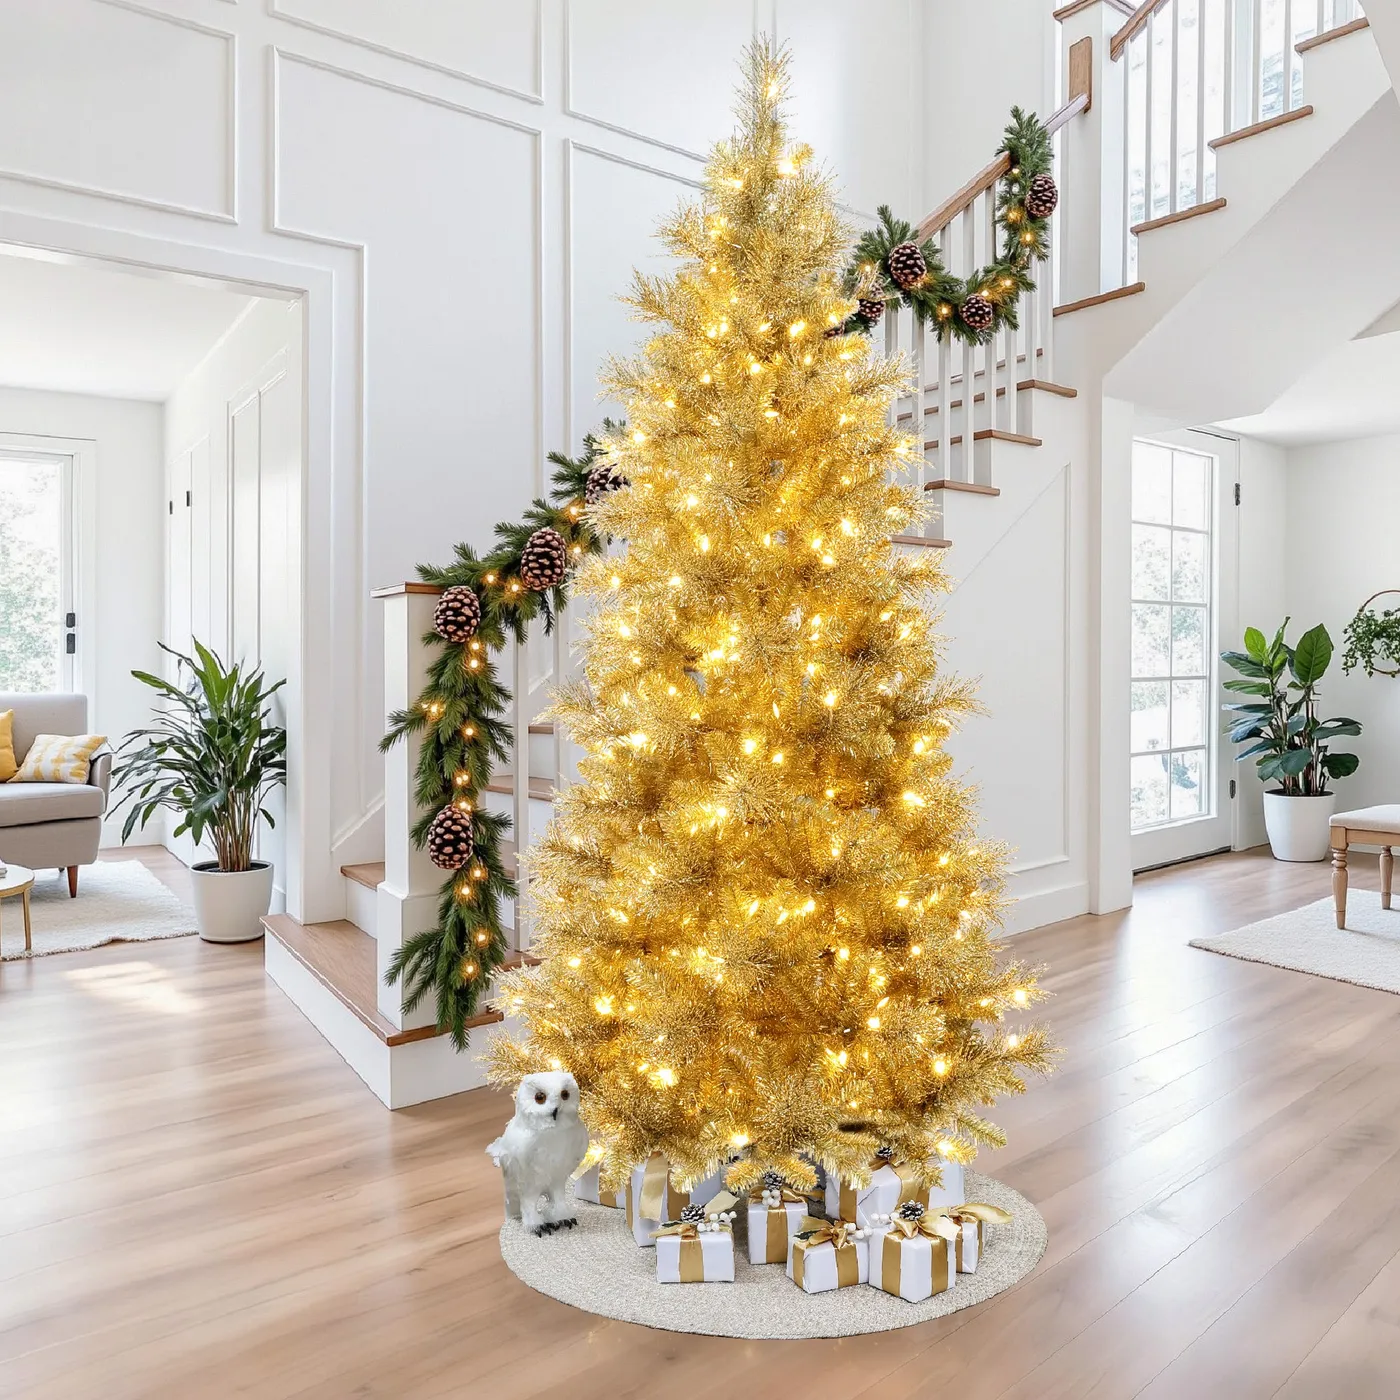
- Start at the bottom newel post and work upward — never the reverse, or the drapes fight each other.
- Attach with clear zip ties or thin green floral wire, one every 12 to 18 inches.
- Wrap the garland once around the handrail, then let it drape; a tight spiral looks like rope.
- Weave the light strand separately so a dead section can be replaced without unwinding the greenery.
- Check the hand grip at the end — you should still be able to run your palm down the rail without hitting pinecones.
Time: 45 minutes. Cost: $35 to $90 for a 9-foot pre-lit garland.
Entryway trees have two real problems: outlets and traffic. Most stair landings have no outlet within reach, so plan on a slim extension cord inside a cord cover rather than a taped-down white cord you’ll trip over in the dark. Second, gift boxes under a tree in a walkway get kicked — keep them light and empty, or use fabric-wrapped decoys. And a pre-lit tree that loses a section in year three is a $300 paperweight unless you’re comfortable restringing it yourself.
22. Gold Pinecones and a Clear Glass Filler
Roughly 50% red, 35% gold, and 15% clear and natural. That last slice is what keeps this close-up from feeling like every other red-and-gold tree: gold-painted pinecones, a clear glass ornament filled with a small pinecone and greenery, and bare white string lights. Trade the clear portion for more red and the tree gets denser and heavier. Trade it for more gold and it turns formal and slightly stiff. That 15% is your pressure valve — spend it on pinecones, wood beads, or twine. Check Idea #11 if you’d like the rustic twine version of the same move.
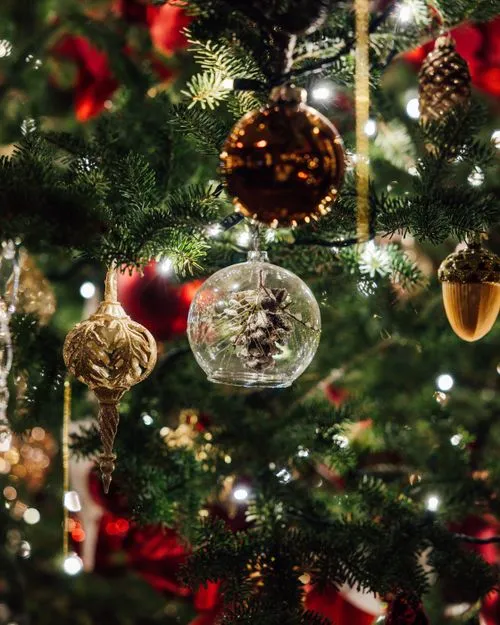
Gold pinecones run $8 to $15 for a set of six, which is a lot for something you can make. A $5 bag of pinecones from a craft store plus a $7 can of metallic gold spray paint gets you about 20 — less than the set, with leftovers for the mantel. Walmart sells empty fillable glass and plastic ornaments for around $2 each; stuff them with snippets trimmed from your own tree. A dozen custom pieces lands around $30 total.
23. A Floral Red-and-Gold Tree in a Dark Urn
The urn is what separates this from a decorated tree. That dark gray base makes the whole arrangement behave like a piece of furniture — it grounds the tree, gives the deep reds something heavier to sit against, and turns an ordinary corner into a still life. Remove it and the same floral tree looks like a craft project balanced on a table. If you’re building this look, spend your money here first. A weighted urn also solves the tipping problem on a small round table, which is the real reason it’s there.
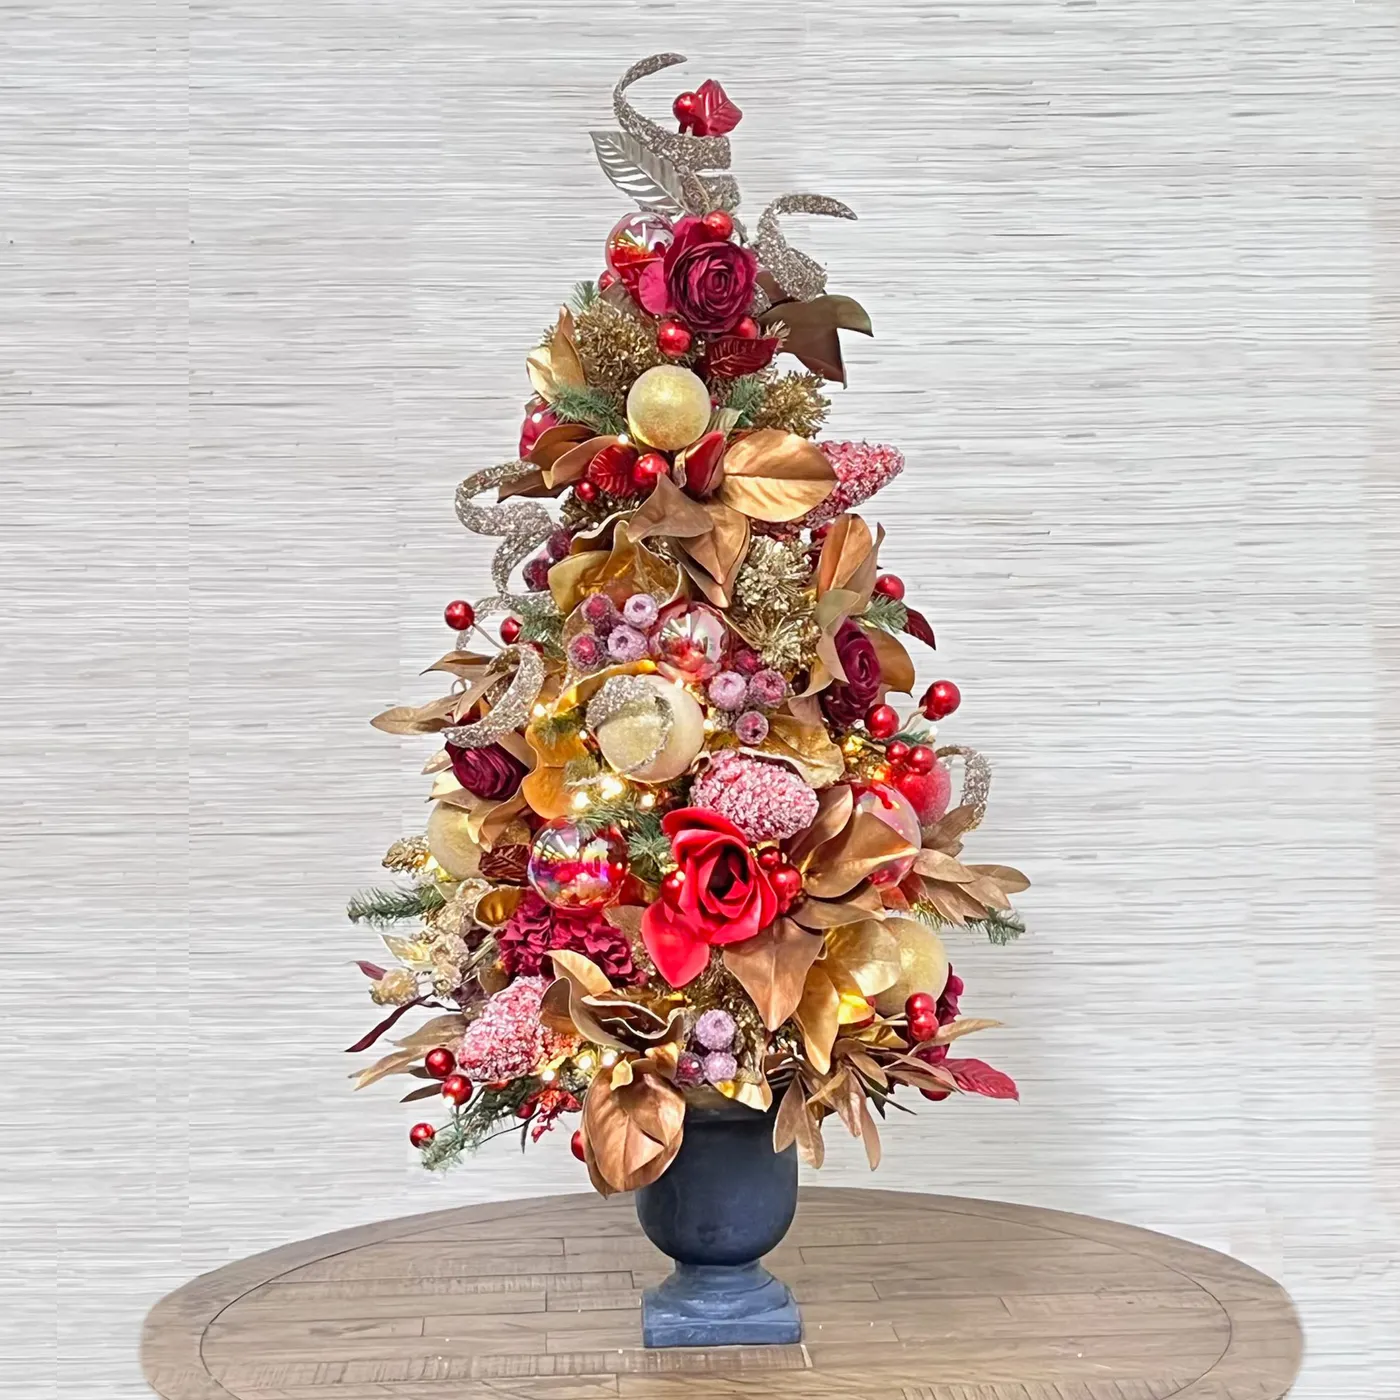
Faux florals need wire, not hope. Use about 12 to 18 stems per 7.5-foot tree, cut each stem down to 6 or 8 inches, and bend every gold magnolia leaf so it curves past the needles instead of lying flat against them. Cluster roses in odd numbers and push the deepest red closest to the trunk so the color reads from inside the branches. Skip the glittery fruit unless you’re going fully maximalist — the sparkle fights the matte gold leaves, and the matte is the better half.
24. Matte Red, Shiny Gold, One White Wooden Star
Two-color trees are the easiest to get right and the easiest to make boring. Matte red and shiny gold work because the finishes handle the contrast — but matte red goes flat and slightly rusty under cool white bulbs, which is the exact problem we cover in the mistakes section at the end of this article. Keep your lights warm, keep gold above a third of the ornaments, and hang the white wooden star where it isn’t fighting a topper. If you already own cool LEDs, a $20 warm strand is far cheaper than replacing ornaments.
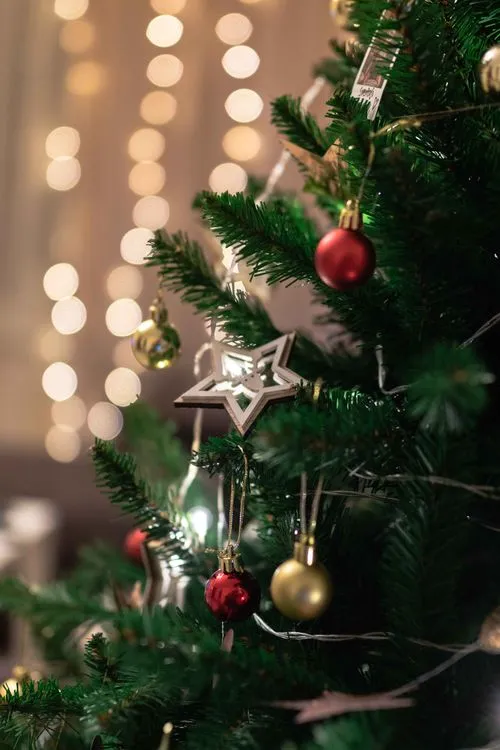
The entire design is one contrast repeated: matte against shiny, warm against cool, red against gold. Repetition is what makes a simple tree feel finished — the same two finishes at every scale, from a 4-inch ball up to the star. And that white wooden star matters more than it looks. It’s the only matte, non-red element on the tree, and it gives your eye a neutral place to land at the very top. One object, but it’s the reason the composition resolves.
Trim the Tree, Skip the Overthinking
Red, white, and gold is the most forgiving palette in holiday decorating — it works on a $40 thrifted tree and a $1,200 pre-lit centerpiece, and it looks just as good in a 120-square-foot apartment as it does in a living room with built-ins. Pick your undertone, get the lights warm, and let the ribbon do the rest. The tree doesn’t have to be perfect on December 1st; it just has to feel like yours by December 24th.
📌 Save this to Pinterest so you can find it again when you’re standing in the ornament aisle, phone in hand, trying to remember which red you decided on.