
You know the scroll. Three minutes into Pinterest, you’ve saved eleven photos of tiny trees and you still can’t decide between glittery glam and quiet woodland. We get it.
So we did the digging. After filtering through hundreds of options across Etsy, Target, Anthropologie, Michaels, and Amazon, we narrowed it down to 30 ideas that actually deliver — from four-dollar dollar-store finds to a one-hundred-eighty-dollar statement piece. Inside you’ll find 30 curated ideas spanning vintage nostalgic, muted earthy, pastel whimsical, and full-on glitter glam, with budget and luxury versions compared side by side. Bottle brush trees are having a real moment in 2026 because the slow-Christmas shift finally went mainstream: people want decorations they can restyle, repair, and hand down to somebody. And stay until the end — we break down the most common mistakes that can ruin these looks. 📌 Save this to Pinterest for later — you’ll want to revisit these ideas.
1. Candlelight, Old Books, and a Bottle Brush Forest
What you’re looking at is really a study in repetition and restraint. Every tree shares the same conical silhouette, so your eye reads the group as one shape instead of five separate objects, and the palette stays inside a tight loop — forest green, antique gold, cream — which is exactly why it feels calm rather than cluttered.
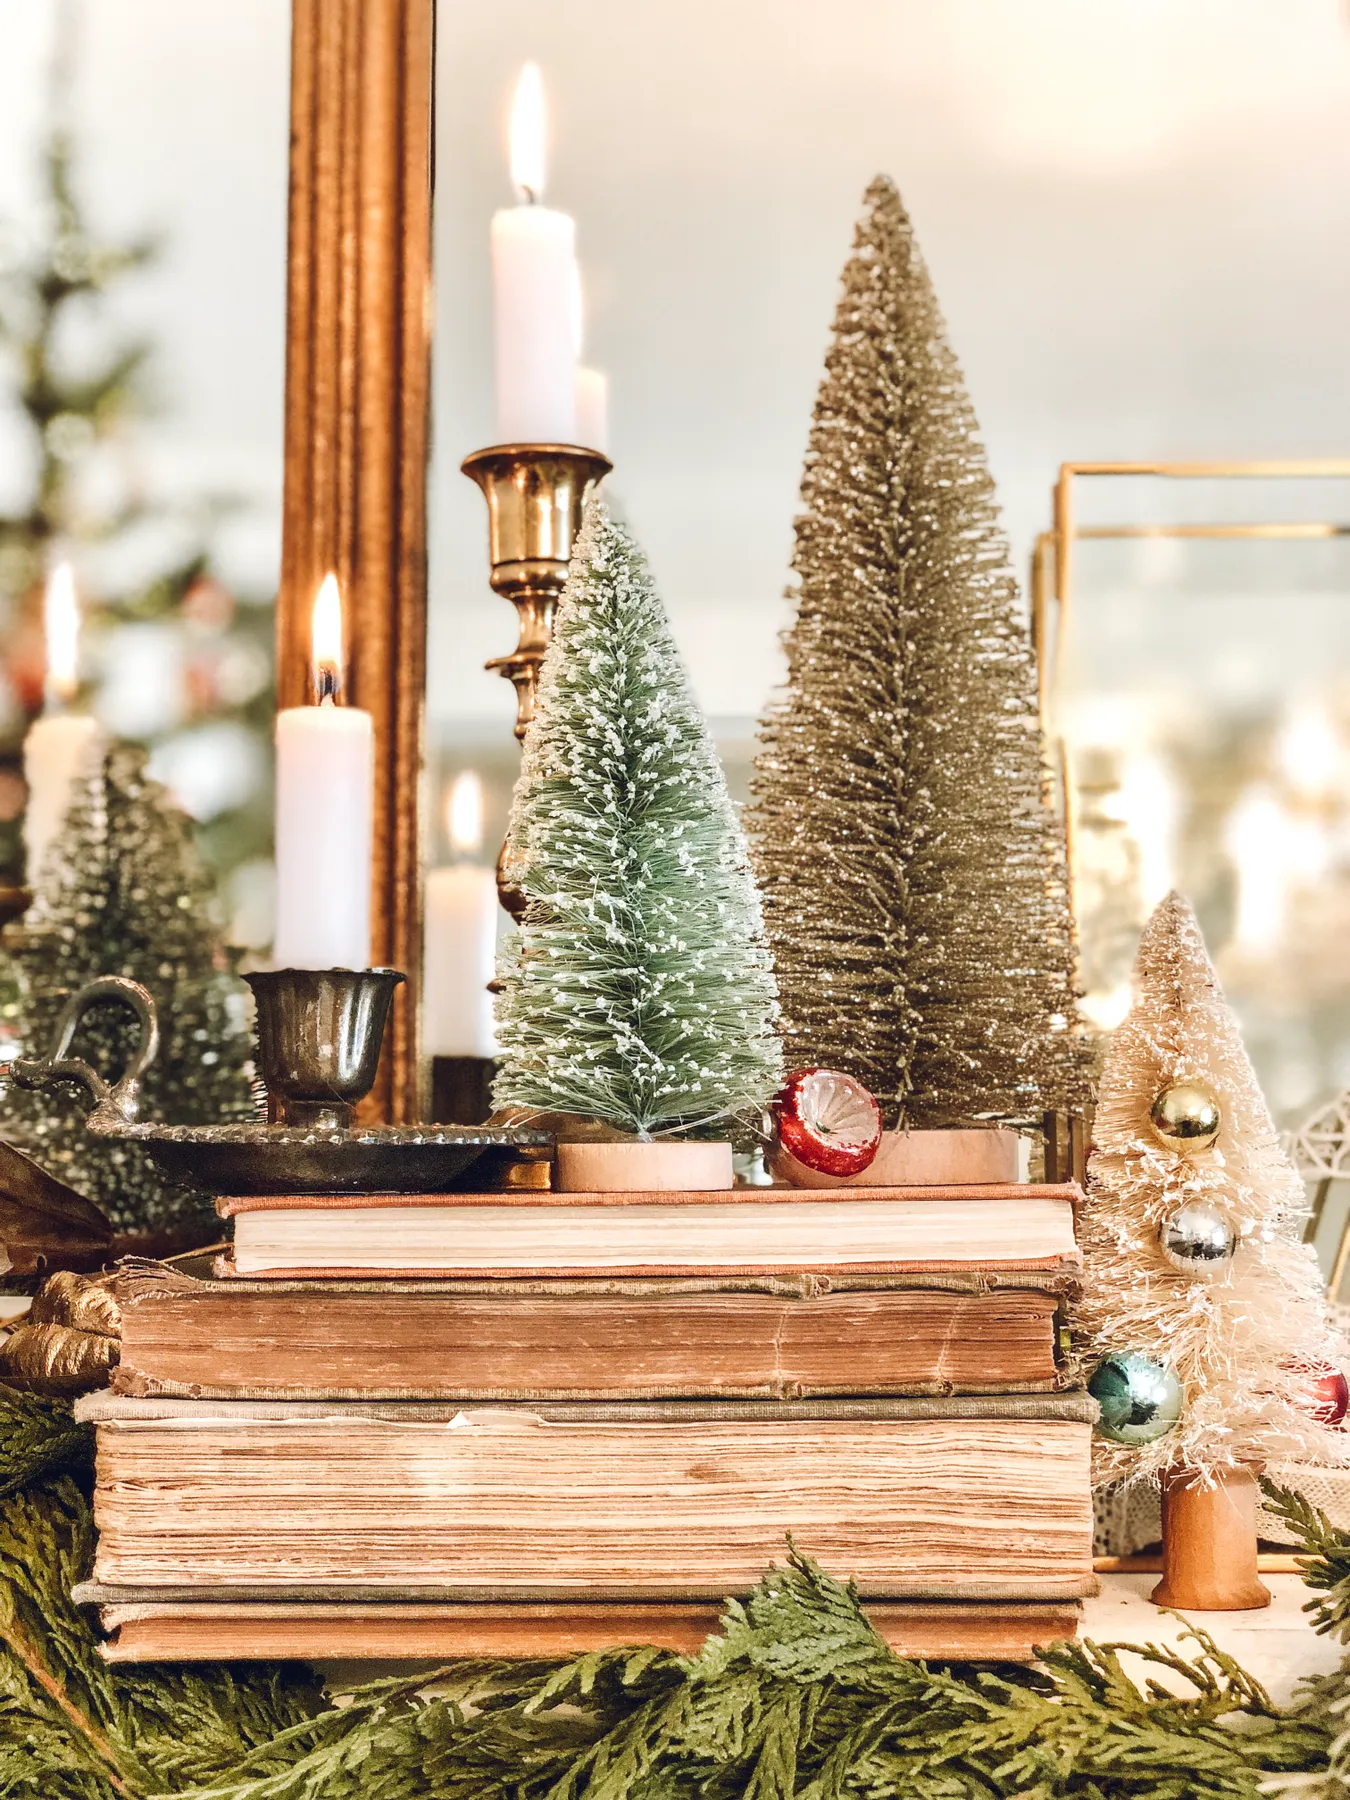
The stacked antique books matter more than you’d guess. They lift the gold tree above the candle line, so the vignette has a peak, a middle, and a low edge. Take them out and everything collapses into one flat row of stuff.
Keep your tapers at least four inches taller than the tallest tree, and set them behind the arrangement instead of between the trees. Candlelight runs around 1,800K — far warmer than the evergreen — so a flame placed behind the bristles turns each tree into a soft silhouette rather than a bright spot competing for attention.
Buy unwrapped tapers with a snug cup, trim the wick to a quarter inch before every burn, and never let them go past two hours at a stretch.
2. Dusty Rose and Mustard Trees on a Vintage Map Mantel
Here’s the formula: about 60 percent neutral base — the cream mantel, the aged map paper, the brown wood tones — plus 30 percent muted color in the trees themselves, split between dusty rose, mustard, and blue-gray, then roughly 10 percent silver from the reindeer stocking holders.
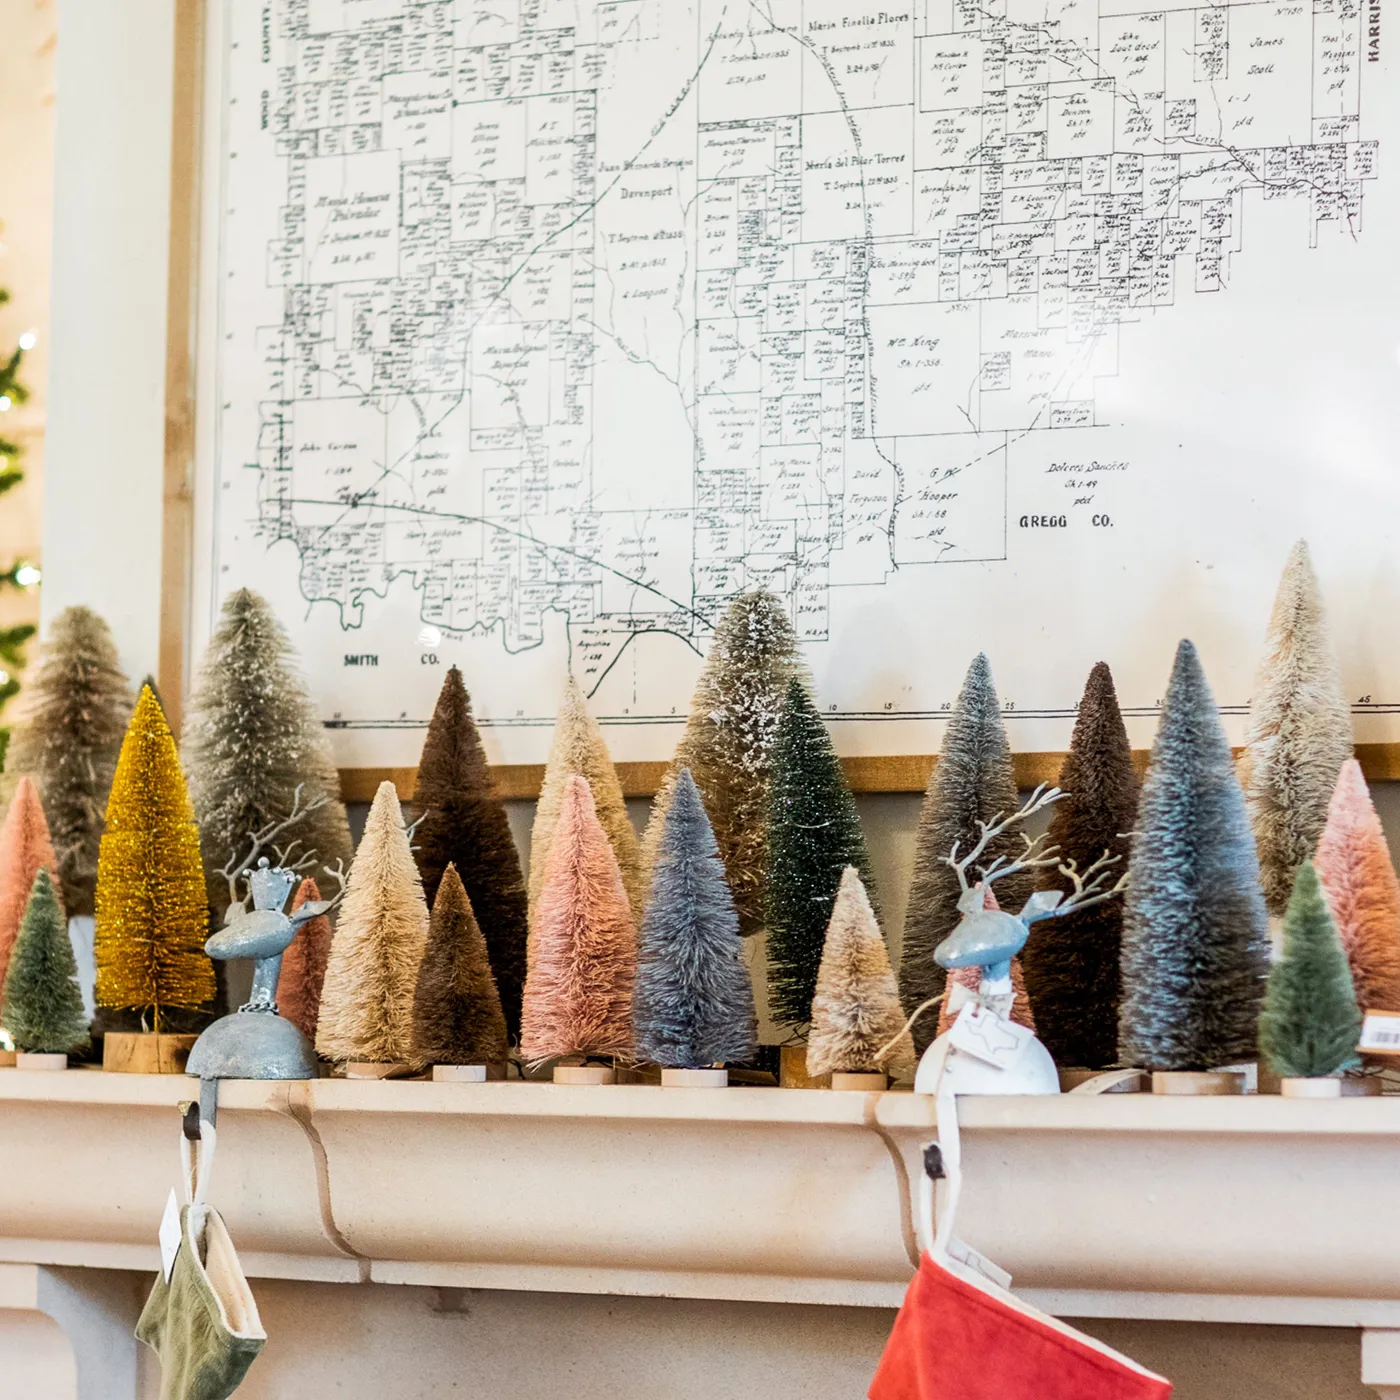
You can swap that trio freely as long as saturation stays low. Trade rose for sage, mustard for clay, blue-gray for plum — the balance holds. What breaks it is adding a primary red or a stark white. Those two jump straight to the front and the map disappears.
The vintage framed map is the thing you’d miss most. Without it, that mantel is a row of small trees with nowhere to sit and a muted palette with nothing to lean against. The map supplies a mid-tone backdrop with real texture, so pastel trees read as intentional instead of washed out.
It also sets the stocking line. Anything hung below it stays secondary. No vintage map? A sepia-toned print or an old botanical poster does the same job for far less.
3. Six Muted Trees Lined Up on a Cane-Front Cabinet
You don’t need six matching heirloom trees to get here. Scout Facebook Marketplace and estate sales in November for singles in mismatched greens, pinks, and browns — usually $2 to $8 each — then unify them with matching light wood bases you can buy in bulk or cut yourself from a dowel.
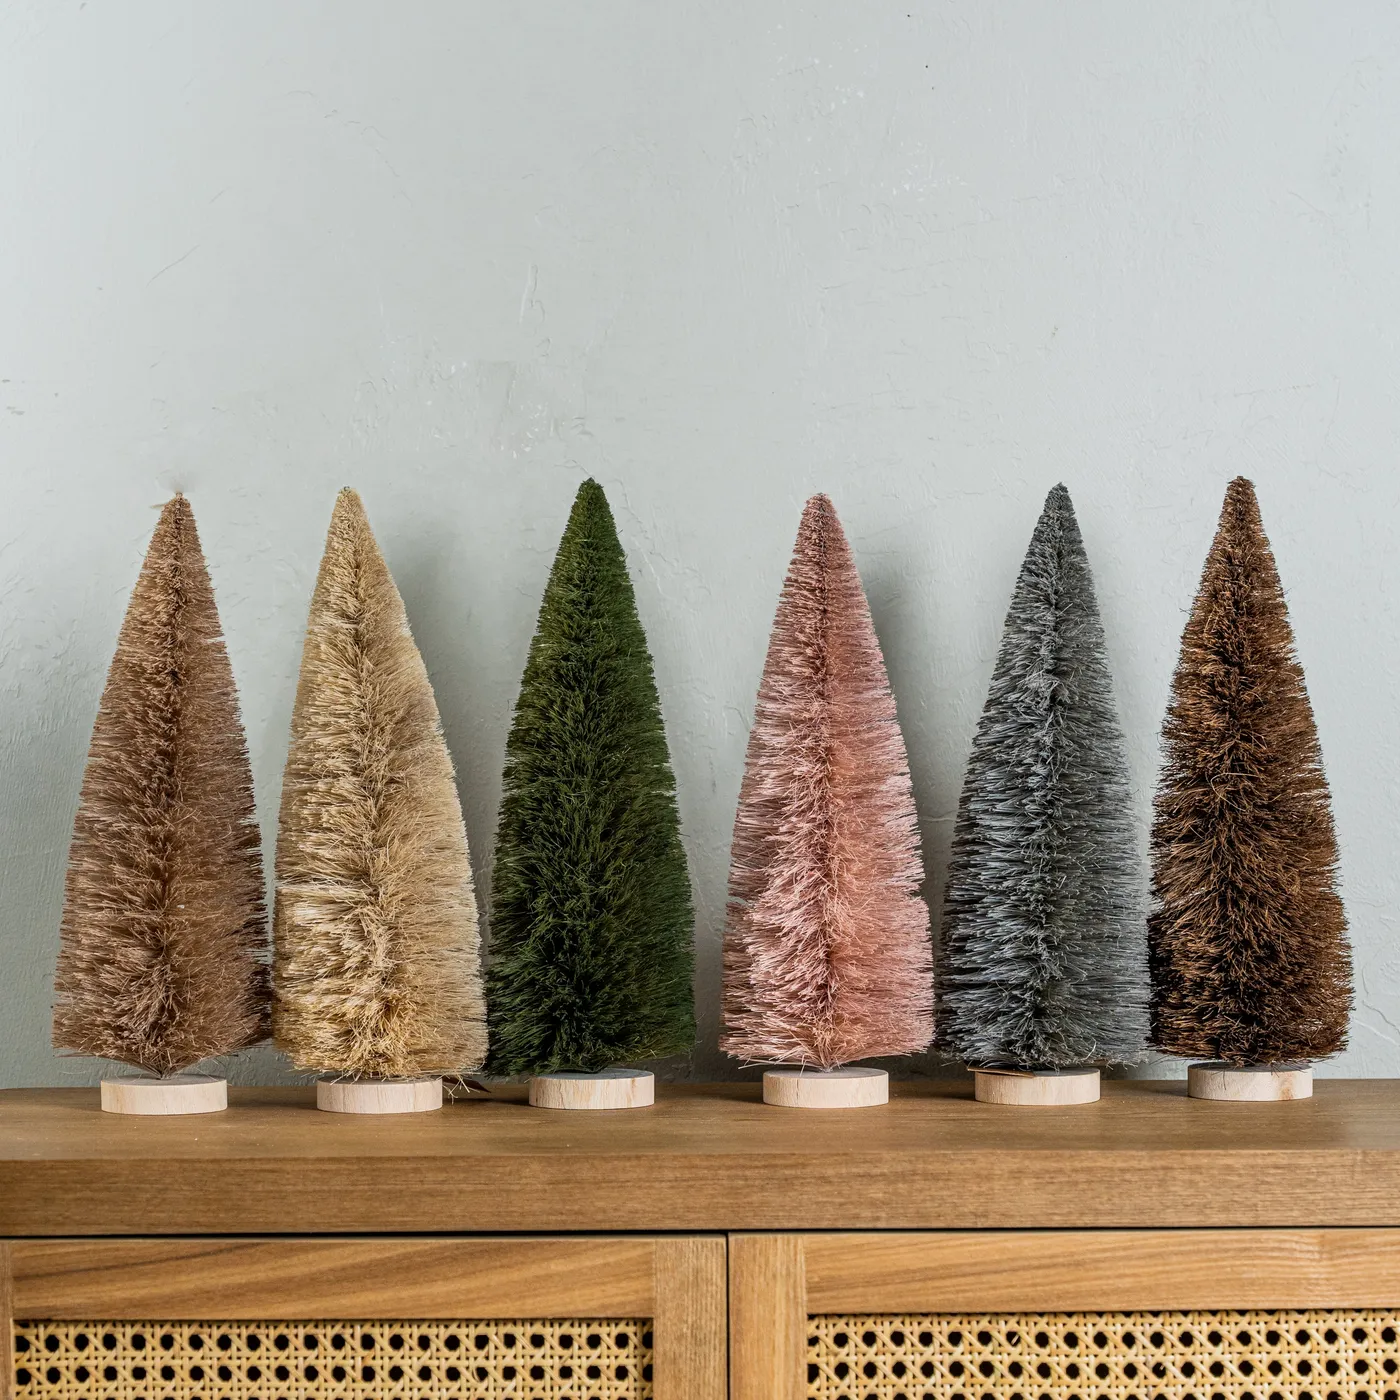
The cabinet is the bigger expense, but cane webbing sells by the roll for around $25 to $40, and a plain secondhand sideboard plus a staple gun gets you most of the way. Patient shoppers land this whole look under $150.
Line the trees up with three to four inches of breathing room, and put the tallest one slightly off-center — roughly one third in from the left edge. A row of six works because it’s a line, not a cluster, so it doesn’t need the usual odd-number rule.
Keep every base the same material and finish. Consistent bases are what make a mismatched color story look curated instead of accidental.
4. A Nostalgic Tangle of Trees, Ornaments, and String Lights
Start with the white crochet doily. Lay it over a rustic board or tray, then set two galvanized containers at the back corners — they become your height anchors.
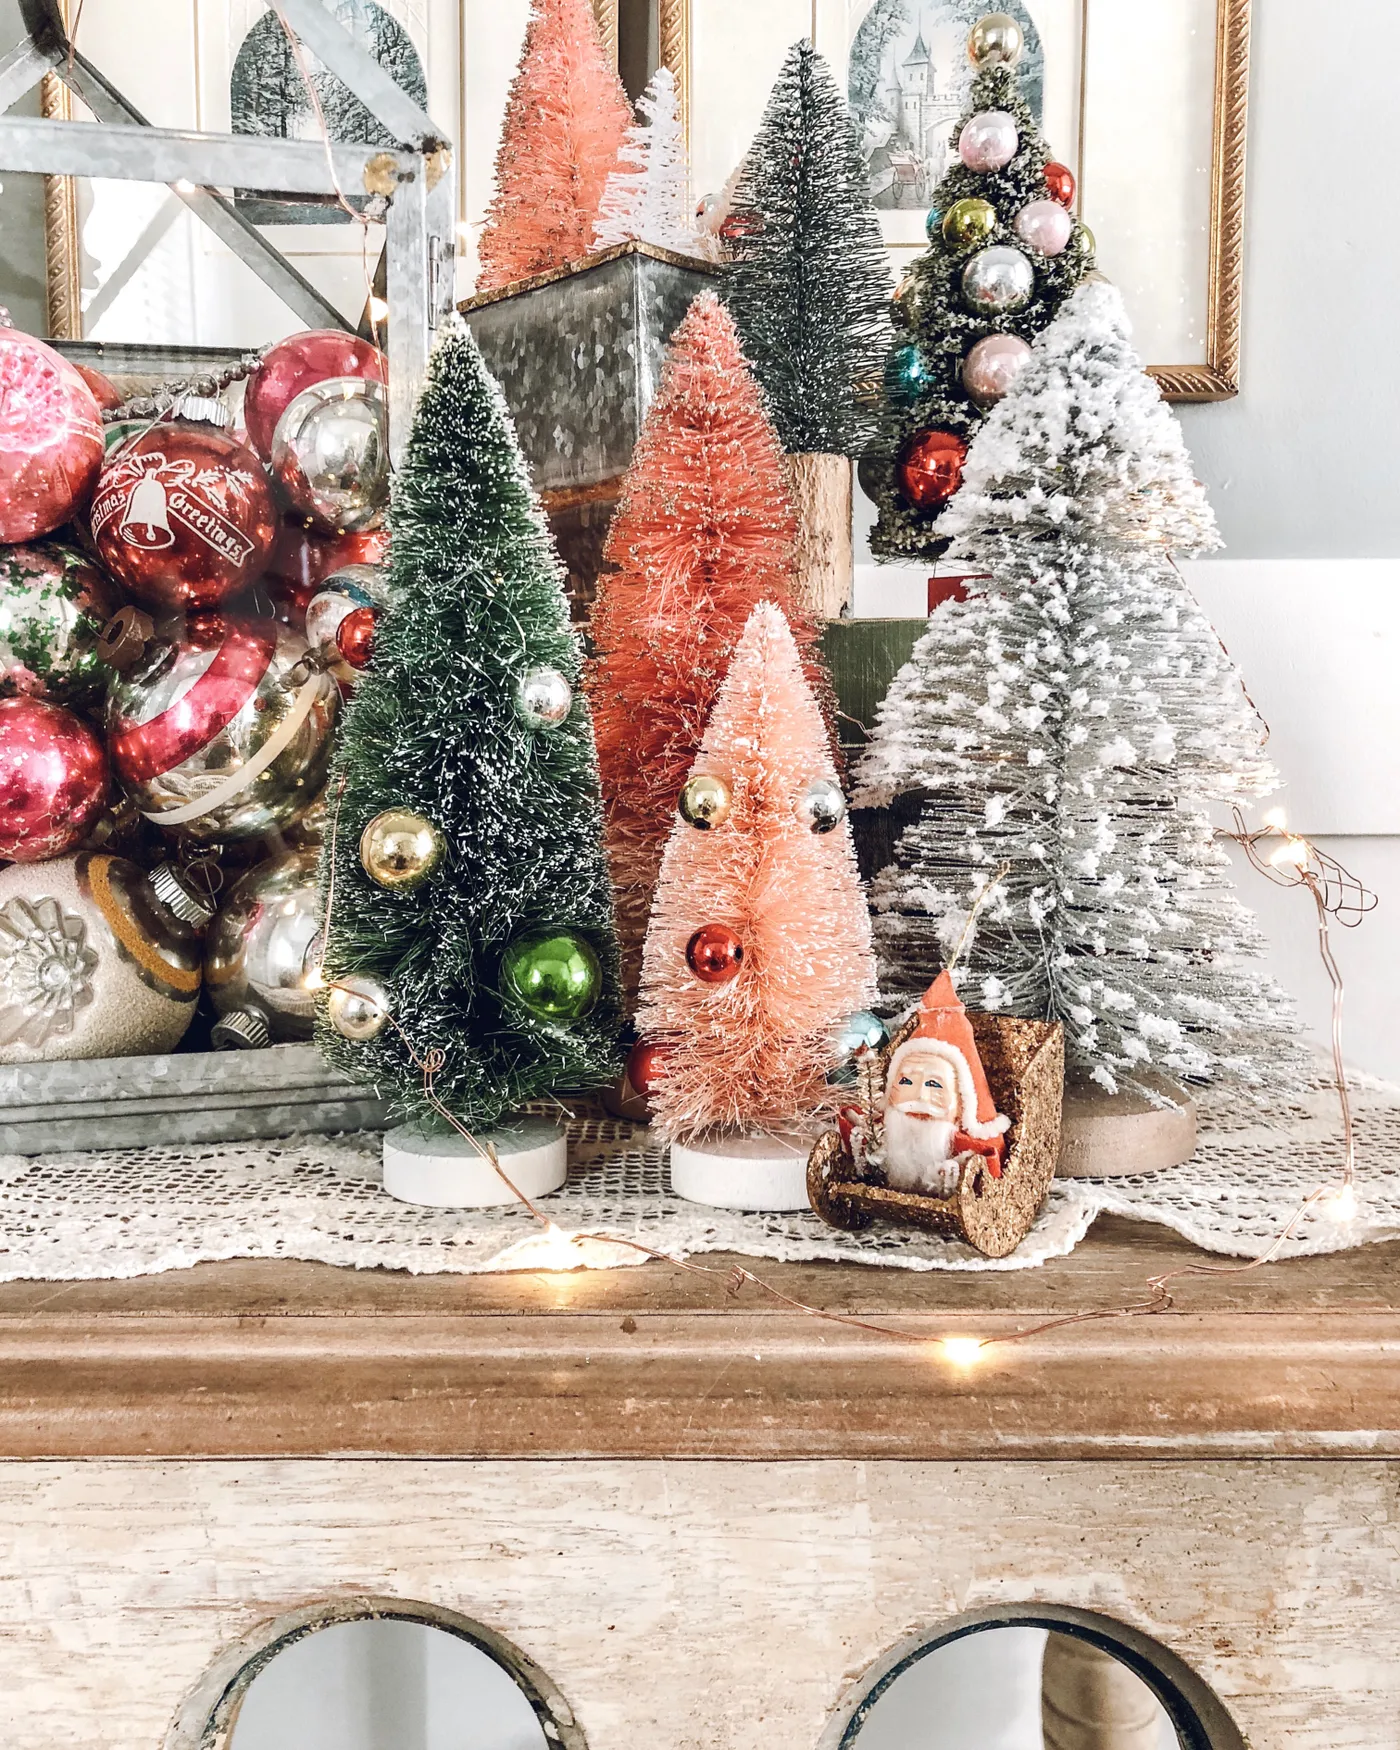
- Pile the tallest flocked tree into the left container and a second tree into the right one.
- Fill the space between them with mid-size trees, clustering in threes, never in pairs.
- Nestle vintage glass ornaments into the front gaps, letting them overlap the doily edge.
- Weave the string lights through the middle, not across the top, so the glow comes from inside the group.
- Finish with the little Santa sleigh off to one side, then step back — if any tree disappears, raise it on a book.
About 30 minutes once everything’s gathered.
Two honest warnings. Vintage glass ornaments chip — keep them where nobody walks, not on a coffee table kids race past. And galvanized metal plus a doily plus lights means a lot of small surfaces to dust, plus a cord that has to go somewhere.
Use a battery pack with a timer instead of a plug and tuck it behind the container. Heat isn’t the concern here; tangling is. Coil the strand loosely around your hand before it goes in the bin.
5. One Gold Glitter Tree on a Stacked Brown Base
Glitter sheds. That’s the deal. A tree this densely coated drops fine gold dust every time it moves, so handle it once, place it once, and then leave it alone. Expect to wipe the surface underneath after setup and again when it comes down.
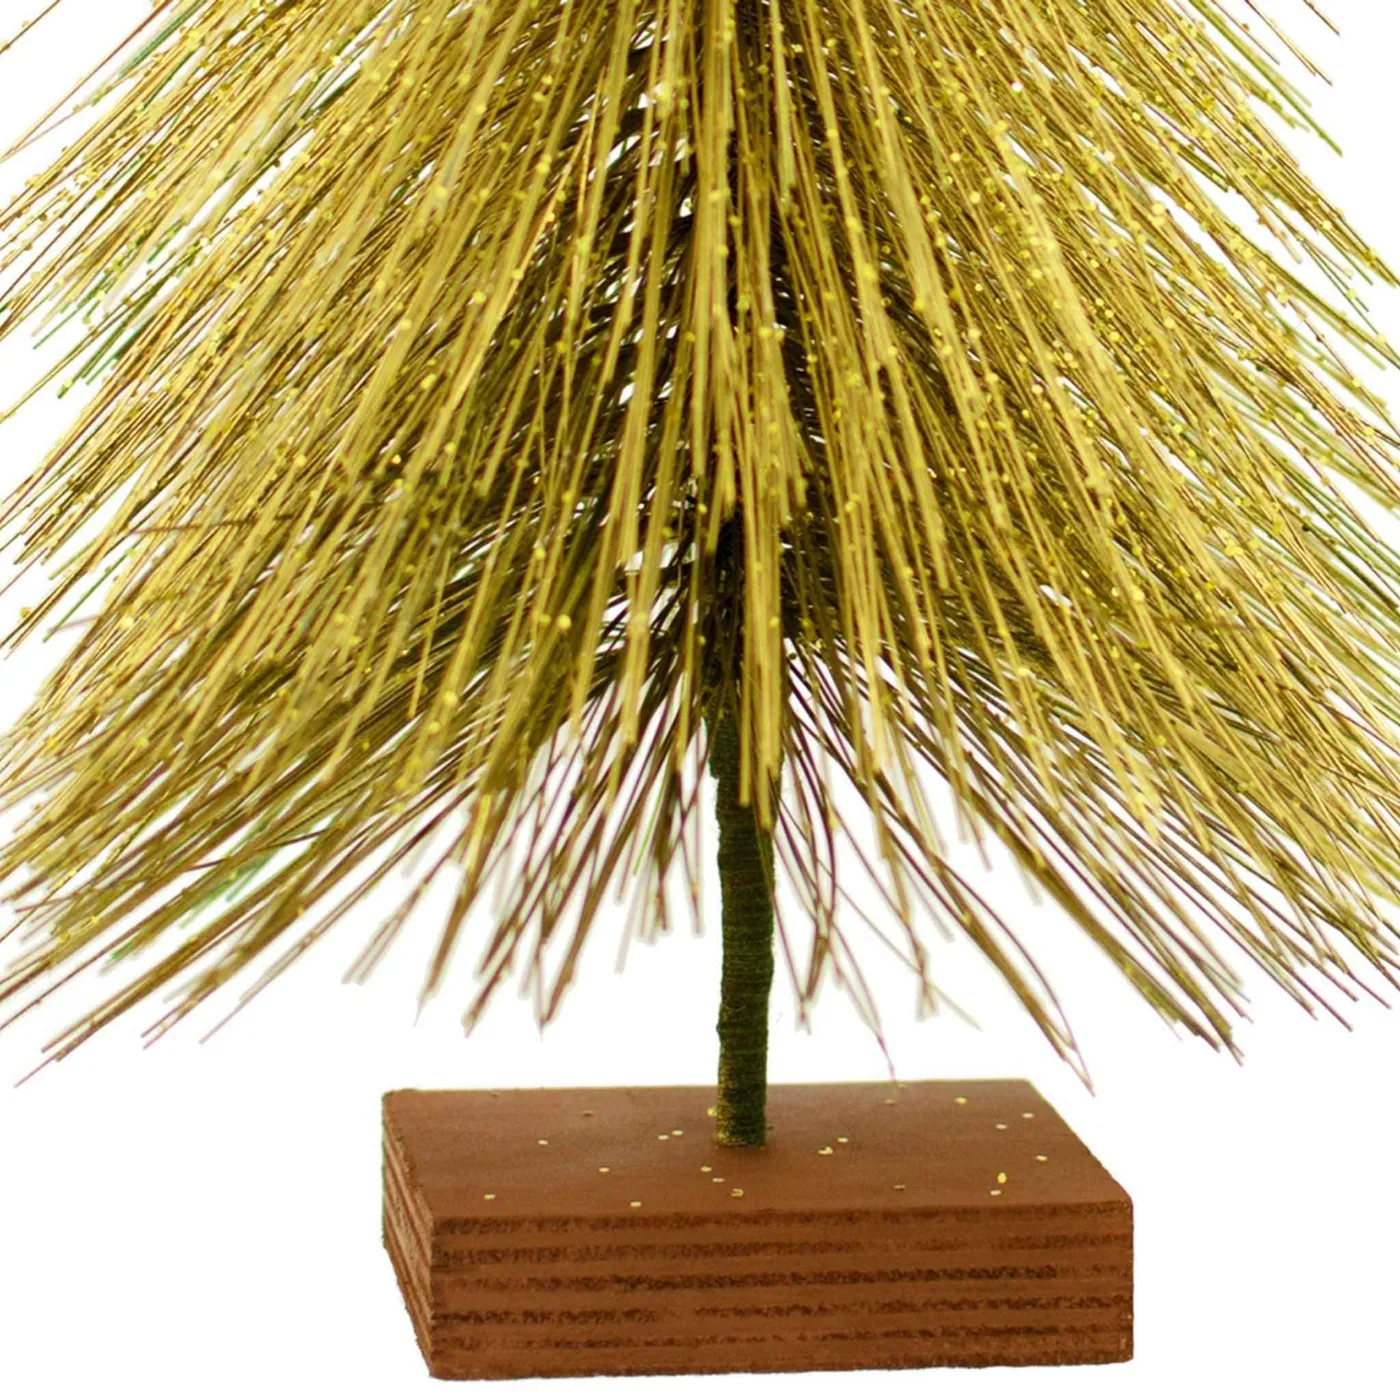
A light mist of matte clear craft sealer locks in most of the loose particles without dulling the shine — do it in a garage, two thin coats, thirty minutes apart. Store the tree upright in a zip bag with a paper cone over it, never crushed into a bin.
The layered rectangular brown base is doing all the heavy lifting. Swap it for a plain wood disc and this becomes a pretty but very ordinary mini tree. The stepped, stacked base gives it weight and a small architectural shrug — it looks designed rather than purchased.
If you’re recreating this, spend your effort on the base before the tree. Two or three rectangles of balsa or MDF, stacked slightly offset, painted a warm brown.
6. Rose Gold Trees and Votives on a Botanical Runner
The ratio here is roughly 60 percent dark, 25 percent metal, 15 percent pale. The dark polished table and the light blue-gray wall hold the base, rose gold trees and gold votives supply the shine, and the white runner with its faint botanical print keeps the whole thing from going full disco.
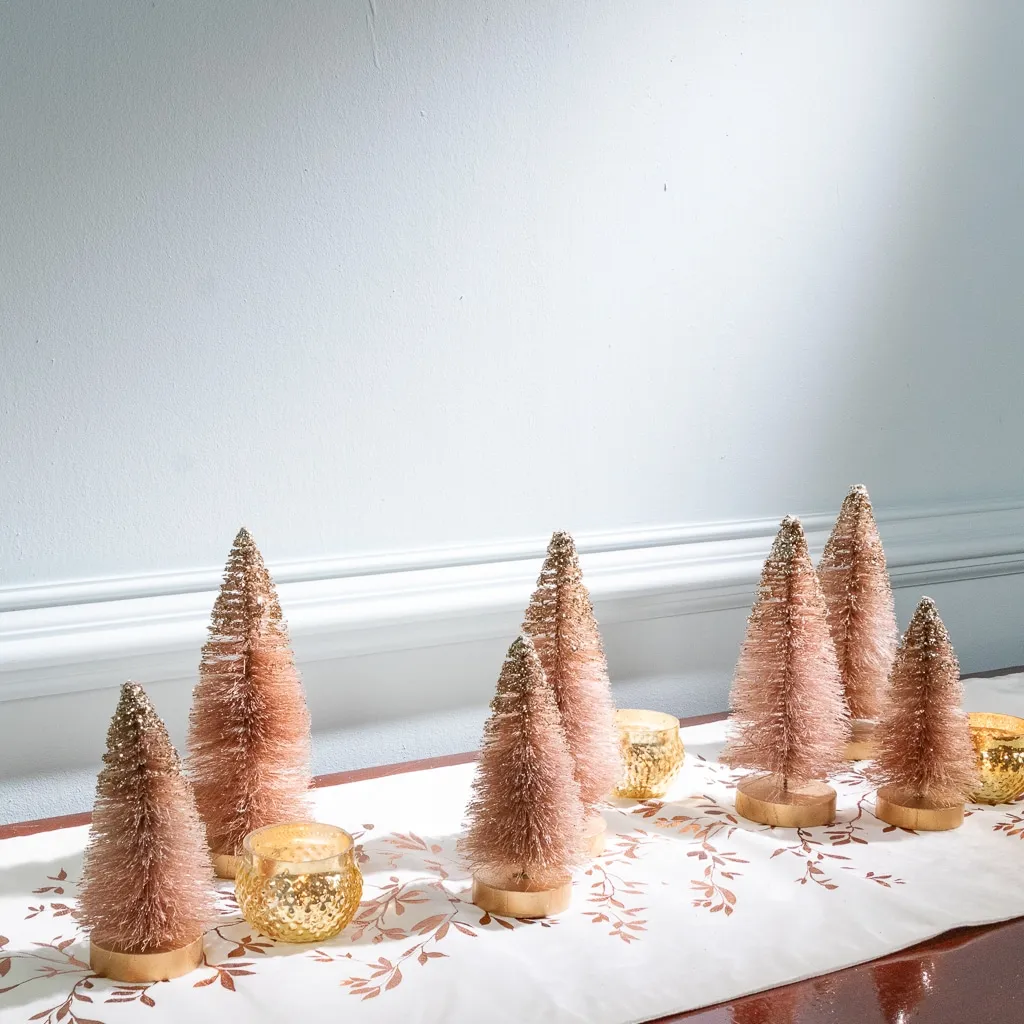
Swap rose gold for brushed brass and the effect cools off. Swap it for copper and it warms up. This is the same logic as Idea #3 — muted color plus one consistent metallic — just executed at a higher shine.
- Main furniture: dark polished side table or console, $60–$250
- Lighting: set of four small gold votives, $12–$40
- Textiles: white botanical table runner, $15–$45
- Decor: rose gold bottle brush trees, $8–$16 each
- Wall treatment: light blue-gray paint, $30–$60 for a gallon
Total: $115–$400 depending on what you already own.
Budget alternative: skip the new table, use a dark wood tray on whatever surface you have, and buy cream trees plus a can of rose gold spray — about 55 percent less.
7. Rainbow Fringed Paper Trees in a Snowdrift
This one is a genuine afternoon craft, and it costs almost nothing.
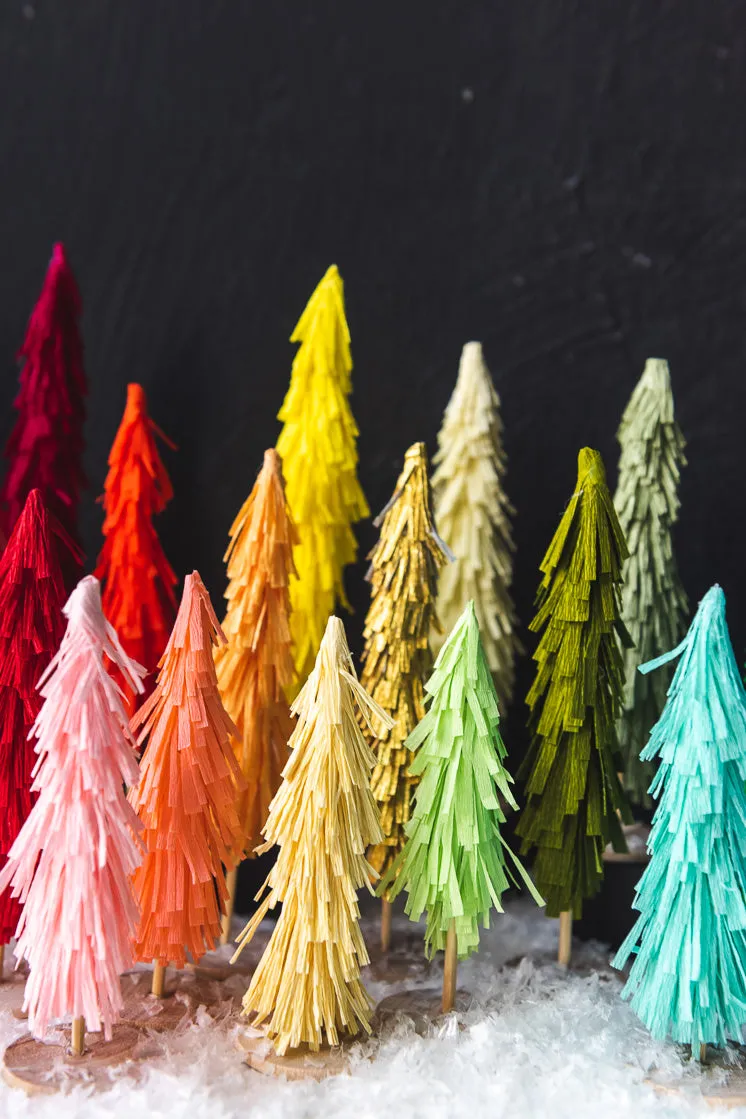
- Cut crepe or tissue paper into strips about an inch and a half wide and six to eight inches long.
- Fold each strip in half lengthwise and snip fringe two-thirds of the way through, every quarter inch.
- Starting at the bottom of a cardboard cone, wrap each strip around and secure with a dot of glue, overlapping as you spiral upward.
- Use slightly shorter strips as you near the top so the fringe tapers.
- Glue the finished tree to a small wooden disc and fluff the fringe with your fingers.
About 45 minutes per tree, roughly $1.50 in materials.
The supplies live at the dollar store: crepe paper streamers, cardboard cones from the craft aisle, a glue stick. Wood discs come in a bag of 25 for around $6 online, and a bag of artificial snow runs $3 to $8 — enough to fill a tray.
One nice touch: pick your palette from a single paint chip rather than eyeballing it. Grab a strip with red, orange, and yellow, then buy paper in exactly those shades. Instant cohesion, and you stop second-guessing yourself in aisle four.
8. A Tiny Clustered Forest with Baubles and Glitter
Anything under six inches tall needs company. These miniatures work on a shelf or ledge at least ten inches deep and three feet wide, where eight to twelve can spread out without touching the edge. They also shine on a windowsill or a bathroom counter — small stages where a full-size display would feel like a takeover.
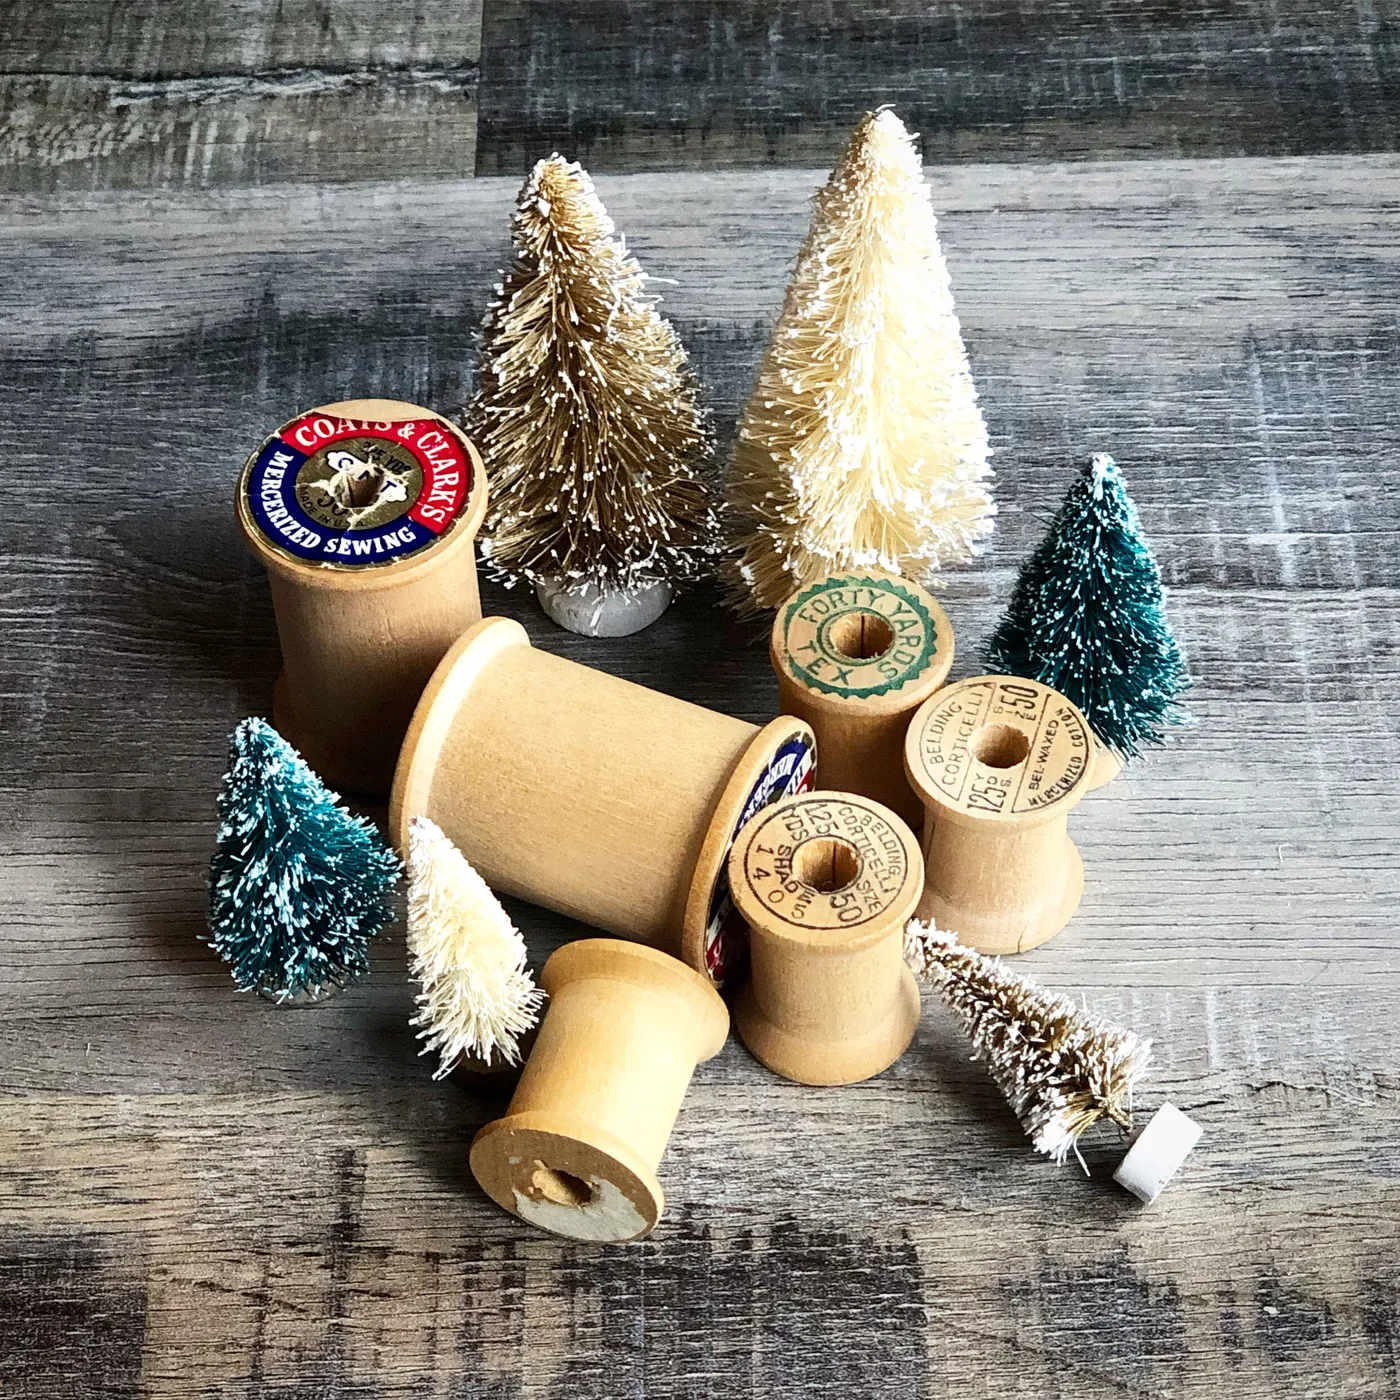
If your surface is deeper than a foot but you only own a handful of minis, group them on a raised tray so the eye still registers one mass.
Rule of thumb for minis: one ornament type per three trees, maximum. If two trees are wearing little gold balls, the third stays plain, and only one in the group carries glitter. That single restriction keeps a cluster of tiny trees from looking like a craft bin exploded.
Put the tallest tree in the back third of the cluster and hide the smallest at the front edge — the eye wants a slope, not a wall.
9. Flocked Minis, Pinecones, and a Red Gift Box
Three things are working here. First, the wood slice bases give every tree the same rustic footing, so the flocking reads as snow instead of a mismatched finish. Second, the pinecones echo the wood, and the red gift box supplies the only saturated color in the frame — it earns that job by being the smallest object present.

Third, and this is the sneaky one: the warm bokeh behind everything. Blurred golden lights make the background feel like an actual room instead of a backdrop.
Flocked bottle brush trees have quietly overtaken plain green ones in search over the past two seasons, and the reason is photographic — white-tipped bristles catch warm bulb light and read as snow in a way flat green never does. Compare with Idea #19, which pushes the same idea all the way into a full snowy scene.
This one has staying power because flocking is a finish, not a shape. The trees are still classic; only the surface changed.
10. Frosted Green Trees Beside Plaid Wrapped Gifts
Match your gift wrap to the trees, not to the room. Those pale frosted trees and the dark green plaid share a hue family, which is why the wrapped boxes look like part of the vignette rather than clutter. One roll of plaid paper and a spool of jute twine will do it — the rustic twine bow is what keeps the boxes from looking too polished.
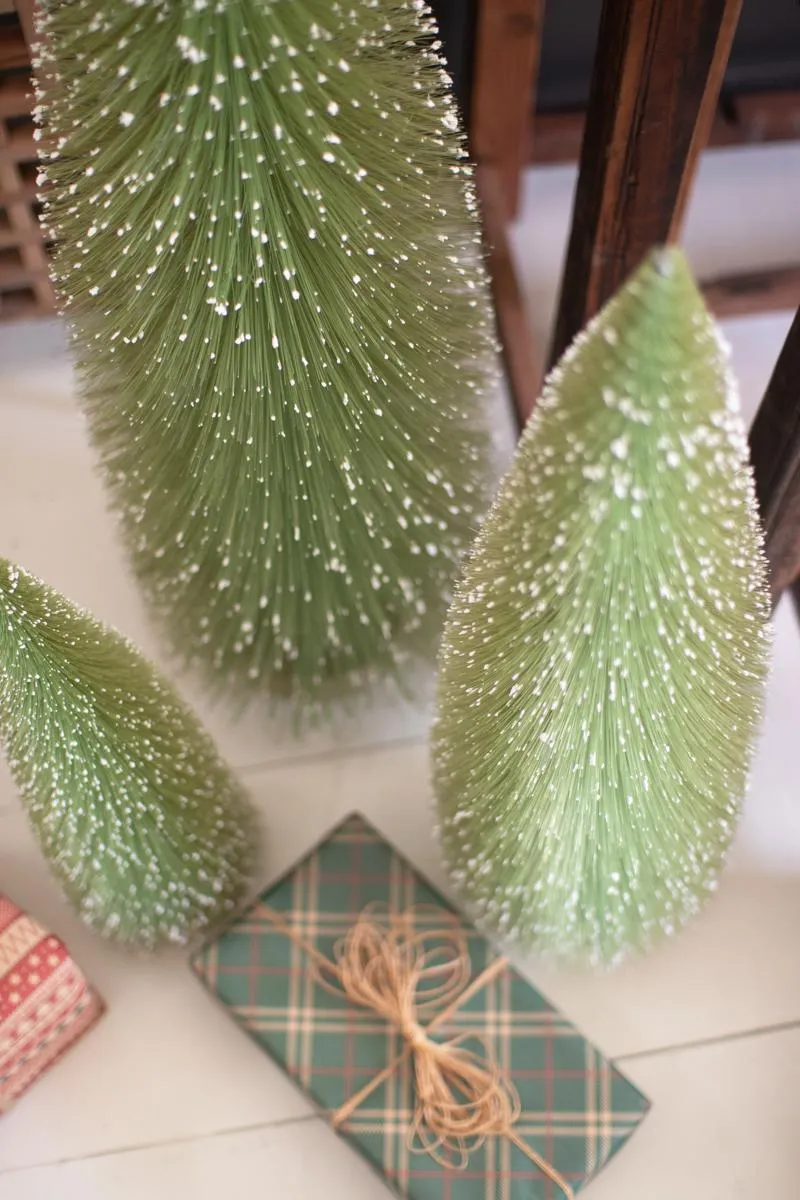
Wrap at least two boxes in the same paper at different sizes. Repetition in wrapping reads as deliberate.
- Measure your surface first — three trees plus two boxes need about 24 inches of width.
- Check the light: frosted trees go flat under cool overhead light and glow under warm lamps.
- Compare wrap colors against the trees in daylight, not under kitchen LEDs.
- Choose your box sizes before buying paper — one large and one small beats two mediums.
11. Pale Pink Trees in Dark Green Turned Bases
The dark green bases. That’s the whole thing. Pink trees on wood discs are cute; pink trees sunk into deep green turned wood are a composition decision. The green grounds the pink, gives the group a shadow line, and lets that red-and-white twine bow read as a deliberate accent rather than a scrap of leftover string.
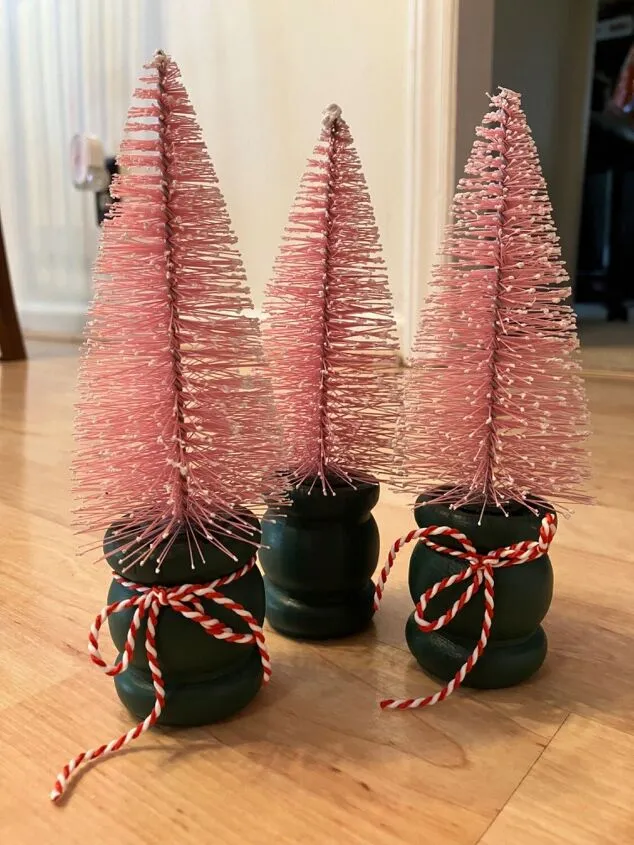
Lose the bases and you have three candy-colored cones on a floor. The base is the personality.
Recreate it with thrifted wooden candlestick holders or small turned finials.
- Wipe the wood clean and lightly sand off any shine.
- Prime with a bonding primer — skip this and the paint scratches off in storage.
- Brush on two thin coats of deep forest green, drying fully between.
- Drill a small pilot hole in the top to seat the tree’s wire stem.
- Once cured, tie a baker’s twine bow around the collar of two of the bases.
About an hour of hands-on time plus drying, roughly $4 per base.
12. Berry and Champagne Glitter Trees on Aged Paper
Roughly 70 percent off-white, 20 percent deep berry, 10 percent champagne shimmer. The textured off-white surface and the aged paper carry the neutral load, berry and red trees punch in, and the champagne glitter is the shimmer that keeps the whole thing from reading as a Valentine’s display.
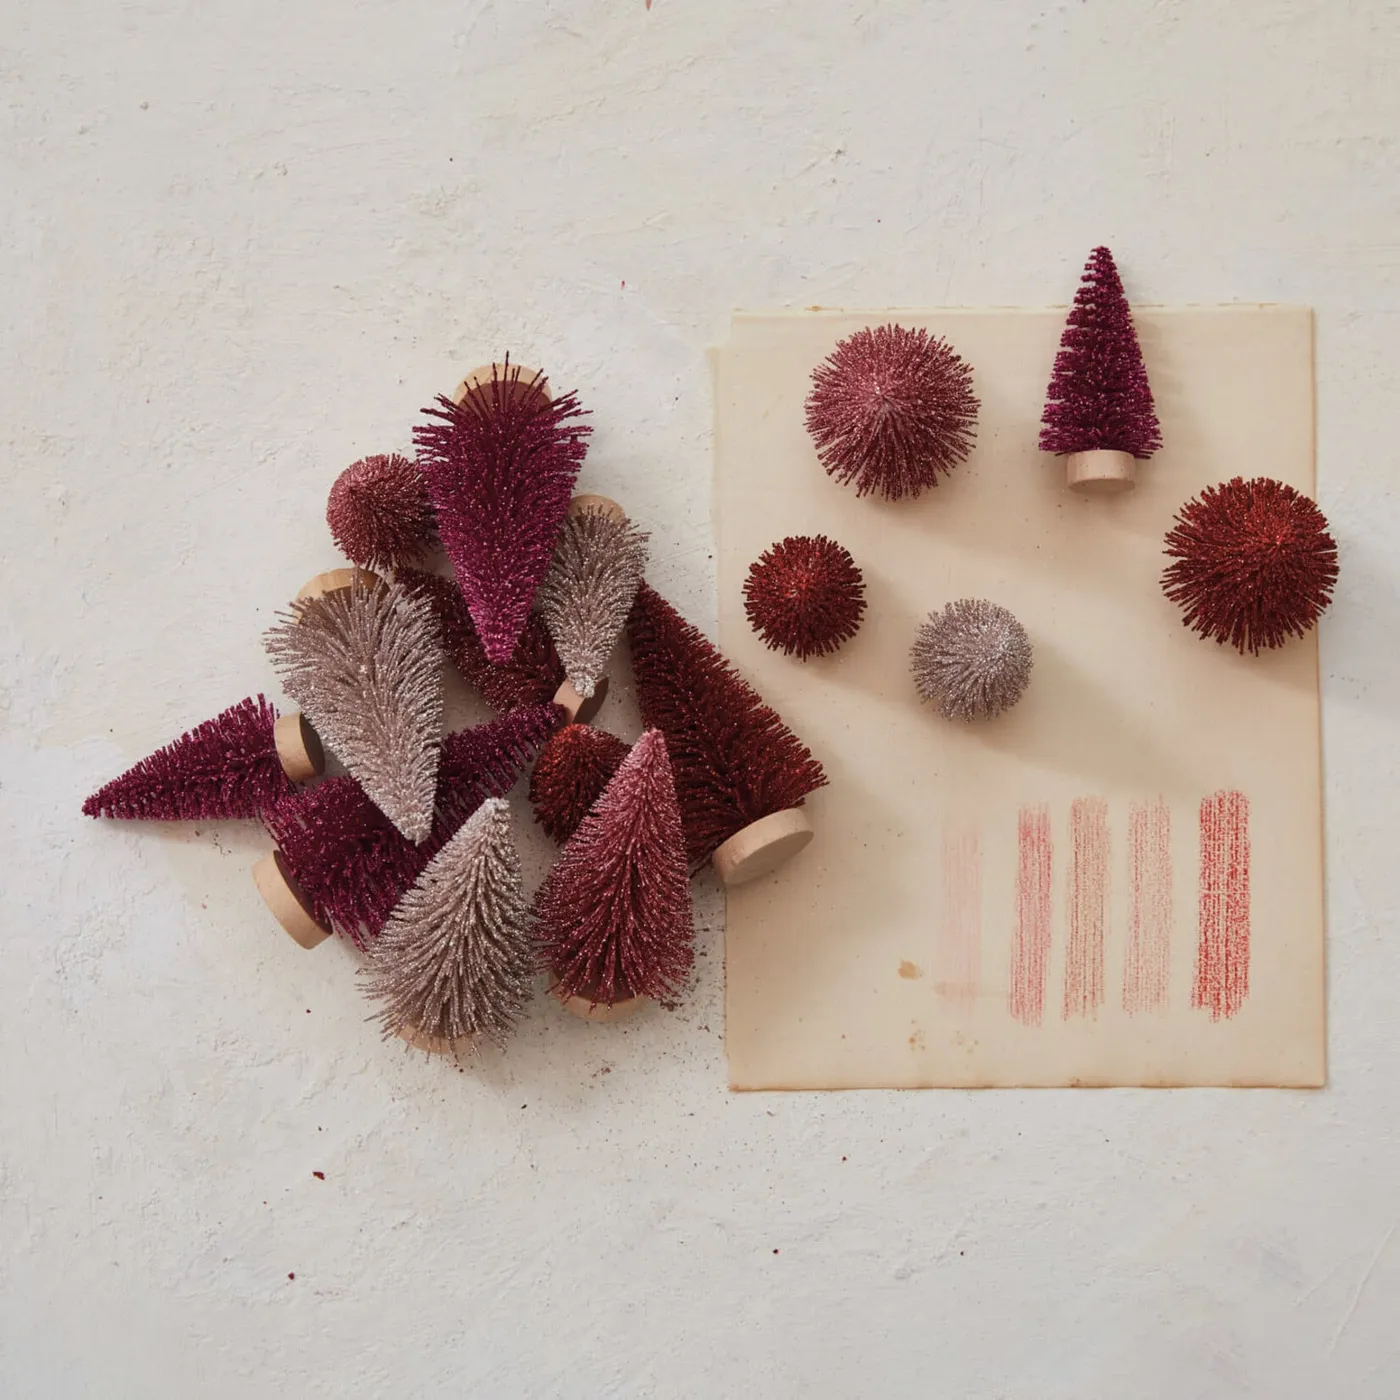
The detail that makes this styled instead of staged: a piece of aged paper with loose red crayon swatches laid beside the trees. It reads as process, like someone was mid-decision. Fake it with a torn brown paper bag and a red pastel.
- Decor: glitter bottle brush trees, $6–$14 each
- Bases: small wooden discs, $6–$12 for a pack of 25
- Surface: textured linen table square, $18–$40
- Craft materials: dye or paint plus aged paper, $10–$25
- Loose glitter and sealer, $8–$18
Total: $48–$120 for a full cluster.
Budget alternative: dollar store trees, tips coated with glue and craft glitter. About 50 percent cheaper and you control the exact berry shade.
13. The Glowing White Tree with Silver Glitter
An internally lit tree is its own little lamp, so placement is everything. Set it against something dark — a walnut console, a deep green wall, a stack of dark books — and the glow reads as a halo. Put it on a white surface against a white wall and you’ve spent twenty dollars to make a smudge.
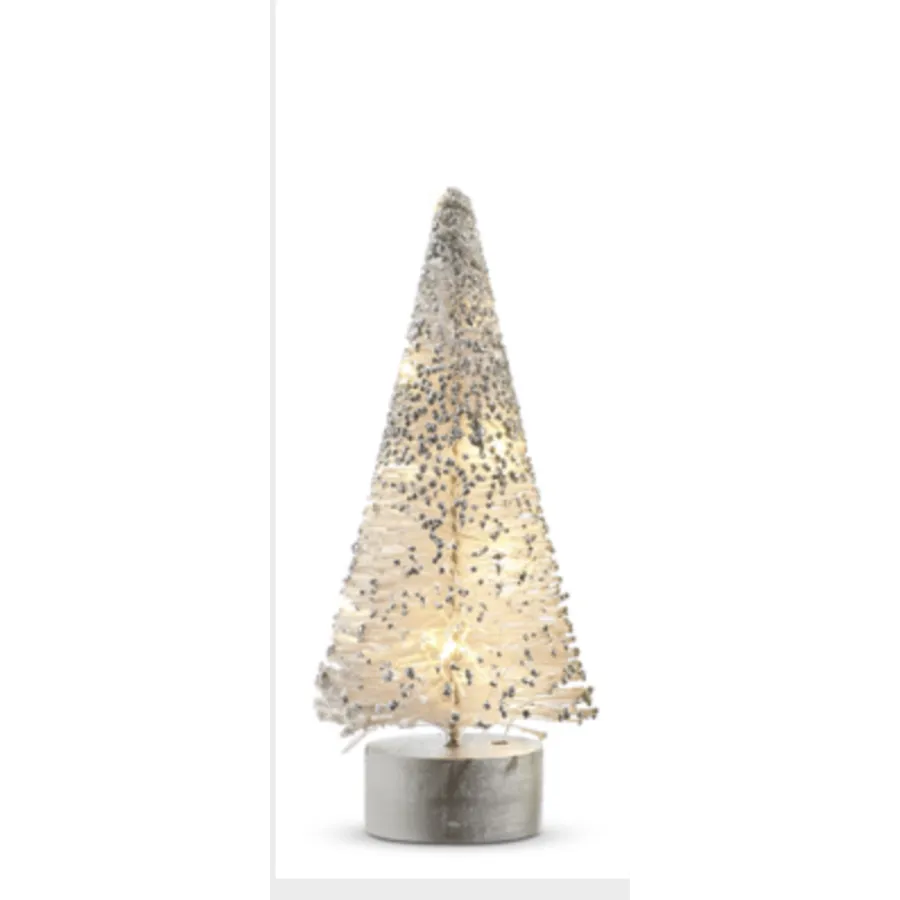
Keep it at least a foot off the wall so light spills behind rather than flattening, and use a warm white bulb. Cool white turns the silver glitter gray.
These run on batteries more often than not, and those little packs are the real maintenance. Budget for a battery change mid-season and one more next year. The LEDs usually outlast several seasons; the glitter coating ages first.
Silver glitter dulls from fingerprints and dust, so hit it with a soft brush or canned air before storing. Never wipe it with a damp cloth — you’ll smear the coating and pull fibers loose.
14. Three Natural Brown Trees on Cube Bases
Zero color competition. Because the trees are undyed brown and the bases are pale wood, the entire arrangement is carried by texture — fine bristle against soft fabric underneath, with cube bases adding a crisp geometric edge the brush surface doesn’t have.
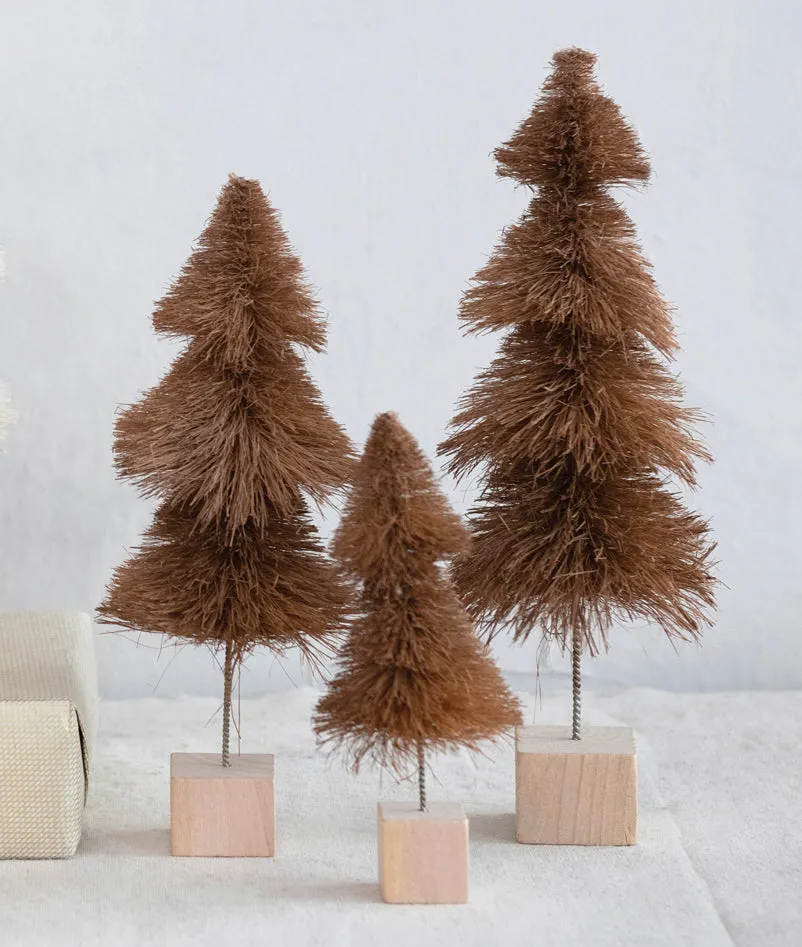
The thin wire stems do quiet work too. They let you bend each tree a degree or two off vertical, which is why the trio looks relaxed instead of lined up like soldiers.
This is the cheapest look in the whole article if you’re willing to make it. Jute or coir twine wrapped around a cardboard cone gets you that raw brown bristle texture for about $3 a tree. Push a length of floral wire up through the center and bend it at the bottom.
Cube bases come from one scrap of 2×2 cut into one-inch blocks and sanded. For a softer palette in the same spirit, look at the tan and muted pink set in Idea #20.
15. A Snow-Dusted Tree Perched on a Tiny White House
Making the snow-dusted tree is a fifteen-minute job.
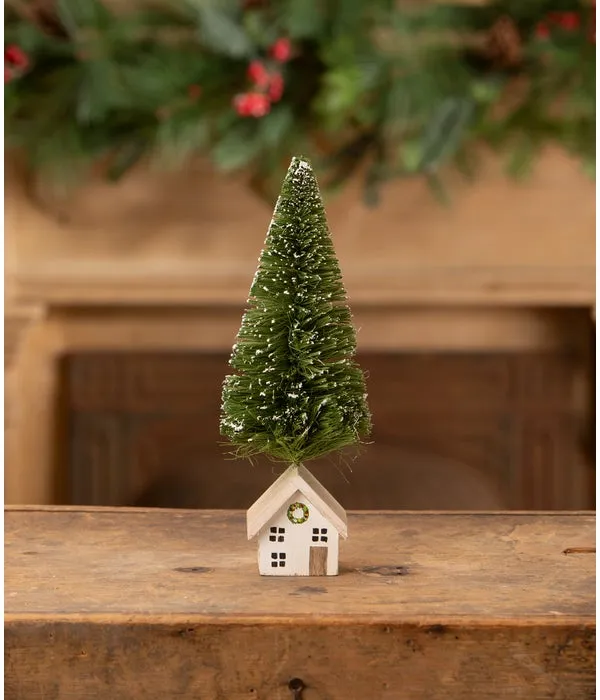
- Stand the tree in a box to contain the mess.
- Mist the upper two-thirds with spray adhesive, holding the can twelve inches back.
- Dust fine fake snow through a strainer so it falls from above.
- Let it dry twenty minutes, then tap the base gently to shake loose the excess.
- Set it on the little house and glue a tiny wreath above the door.
Materials run about $12, and the tree itself is reusable for years.
This piece is small — six to eight inches tall — so it wants a narrow stage. A shelf or mantel edge eight inches deep minimum, and it looks lovely on a stack of books or a windowsill.
Because it’s a single object rather than a group, it also solves the my-mantel-is-enormous-and-I-own-three-tiny-trees problem. Give it a tray to itself and let the empty space do the framing.
16. A Layered Green Tree with Real Bark at the Base
The horizontal layering. Look closely and the bristles are set in distinct tiers rather than one continuous cone, which gives the tree a stepped edge and a distinctly mid-century feel. That structure is the entire reason a single small tree can hold a whole surface on its own.
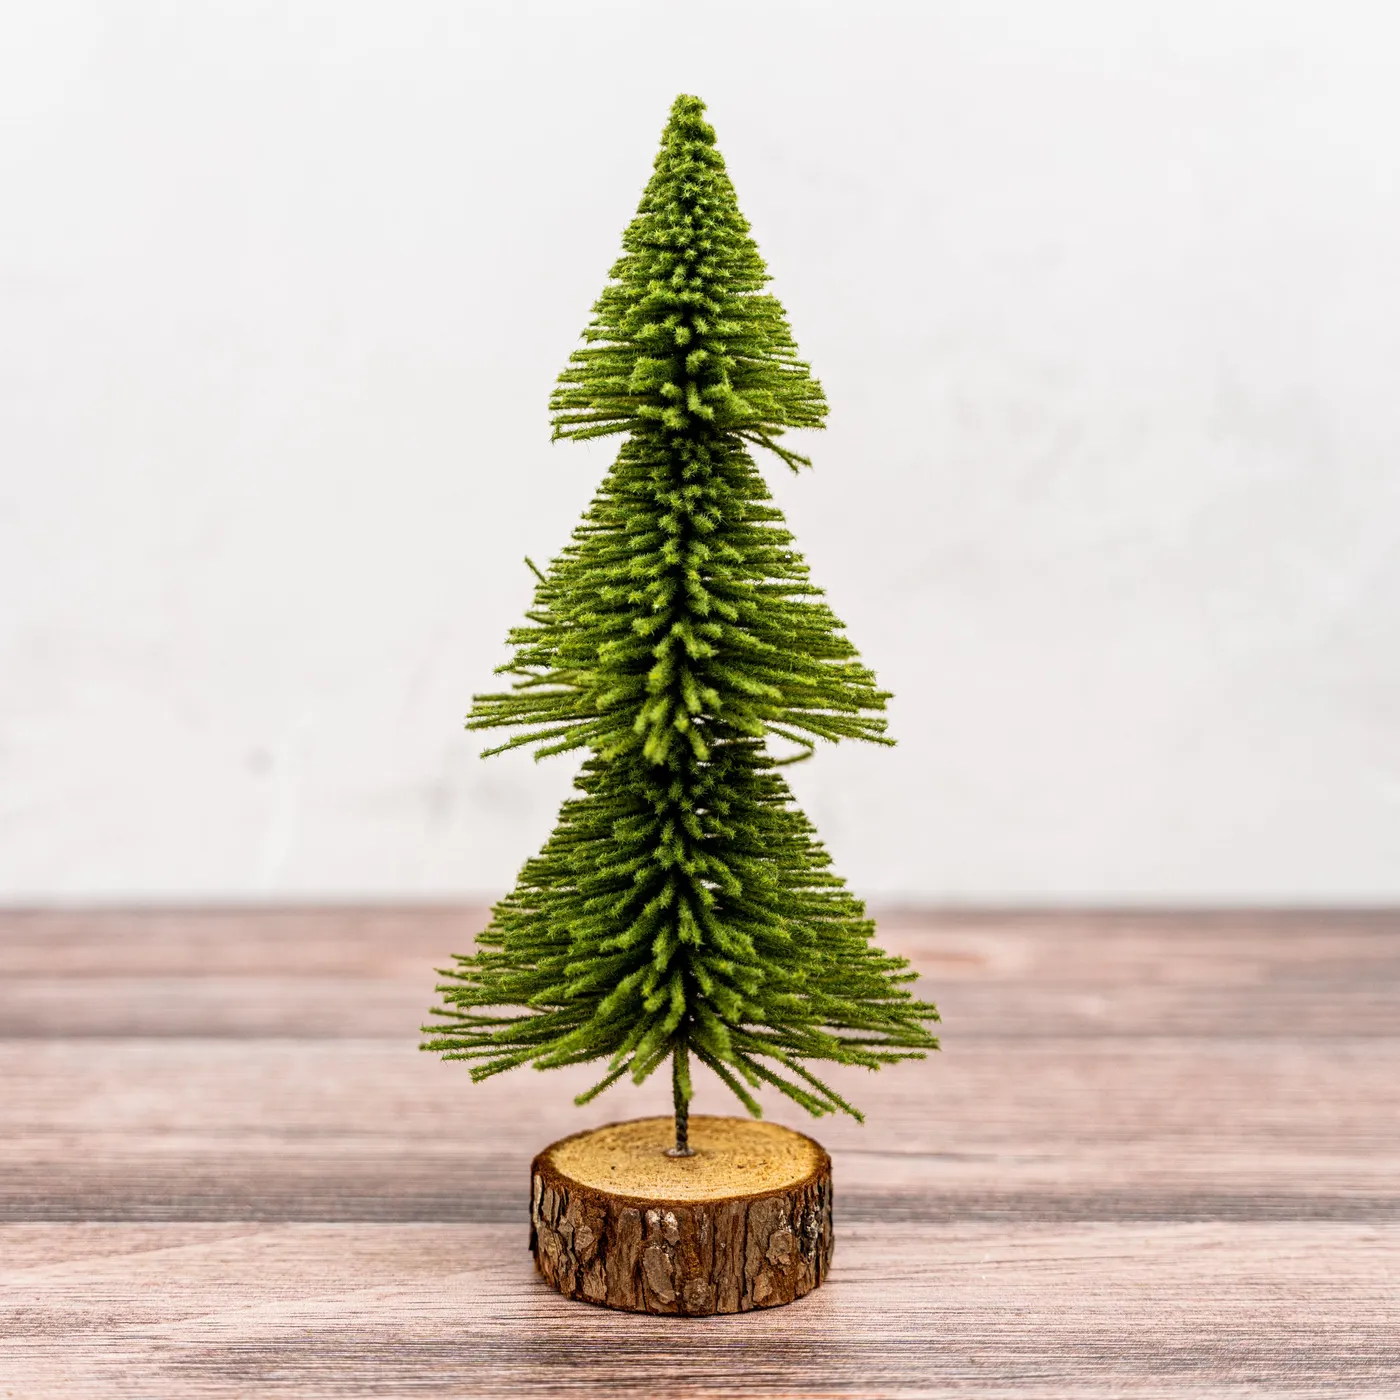
Remove the wood slice base with its bark edge and it becomes a generic mini. The base is the difference between decoration and object.
The natural-wood direction has been building for a couple of seasons — wood slice coasters, mushroom ornaments, raw-edge everything. Bottle brush trees slot right in because the bristle material already looks like something from a forest floor rather than a factory.
It’s also the safest trend in this article. Nothing about a brown tree on a bark-edged base is going to look dated in five years, and it survives being packed into a bin without damage.
17. A Quiet Beige Tree Beside a Gold Mirror and Books
Angle the mirror so it catches a window and it earns its keep twice — once as a backdrop, once as a light source. A round gold-framed mirror hung eight to ten inches above the shelf bounces daylight onto the tree all afternoon, which is why beige bristles still look warm instead of muddy.
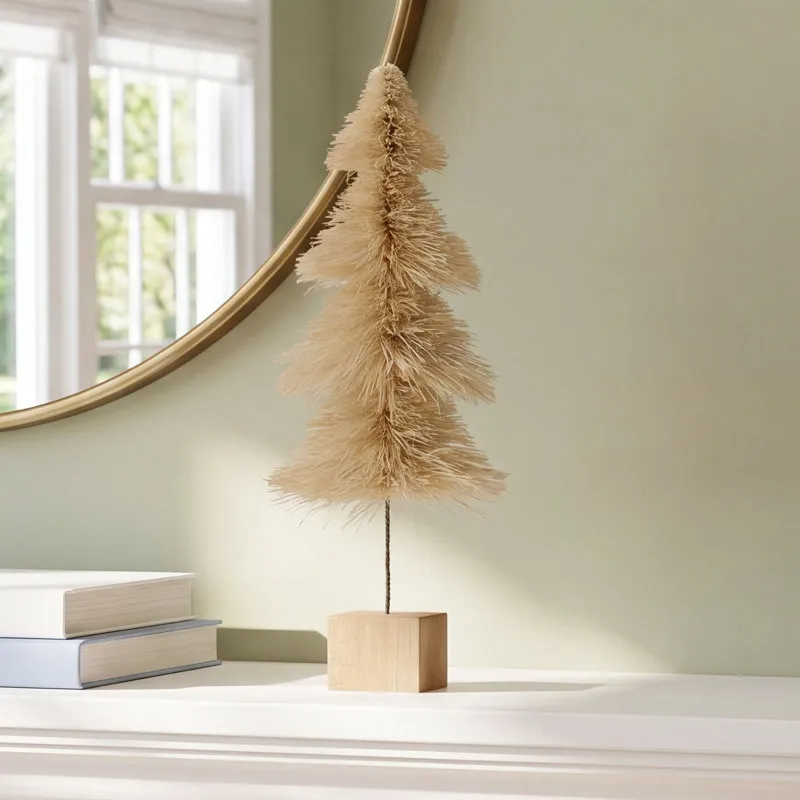
Keep the mirror small relative to the shelf. If it spans the full width, it stops being an accent and starts being a wall.
Here’s the trap with this palette: light beige tree, white shelf, sage green wall — three closely related light values, and a display with no dark anchor will fade into the wall both in photos and in person.
Fix it with one object that has weight. A stack of white and pale blue books, a dark wood tray, a black metal candleholder. Something has to say this is a display from across the room.
18. A Simple Trio of Tabletop Trees
- Decor: three bottle brush trees, $5–$18 each
- Bases: wood discs or small risers, $6–$15
- Surface: tray or table runner, $12–$35
- Lighting: one small accent lamp nearby, $20–$60
- Accessories: a book stack or single candle, $0–$25
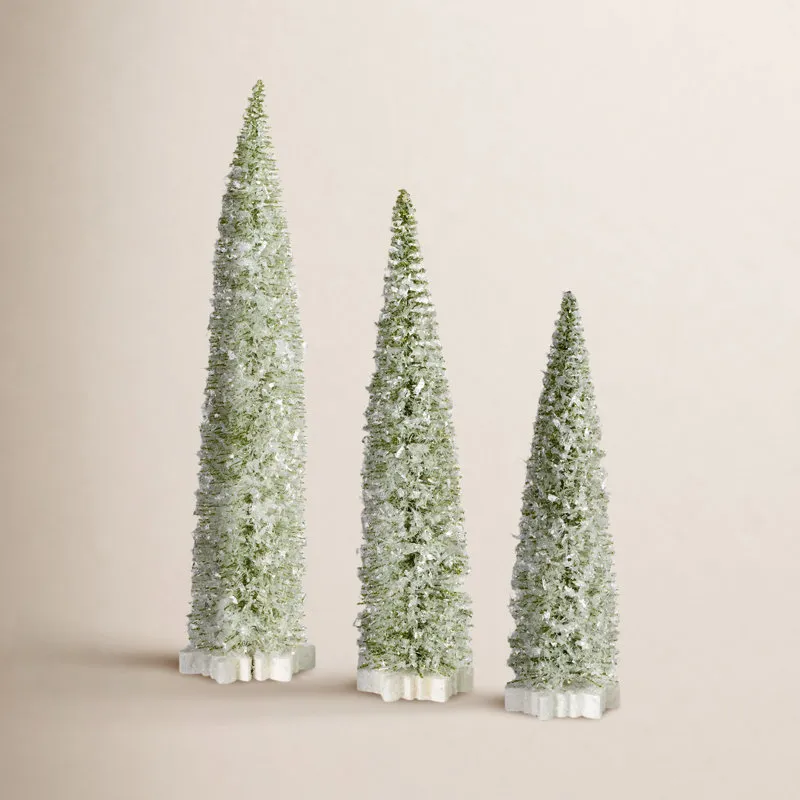
Total: $53–$189 for the whole tabletop.
Budget alternative: dollar store trees plus bases cut from a scrap of pine. Under $20 for the trio, and nobody at the table will know the difference.
- Measure the table before buying — three trees need about 18 inches of free length.
- Check where guests sit; trees should never block a sight line across the table.
- Decide between candlelight or lamplight, not both.
- Confirm the trees sit flat and can’t be knocked over by a passing sleeve.
19. A Snowy Mini Forest with Pillar Candles and Bells
About 60 percent white — the surface, the faux snow, the pillar candles — 30 percent teal green from the trees and frosted berries, and 10 percent warm gold and deep red in the bells. It’s a winter palette more than a Christmas palette, which is why the lit candles feel calm instead of loud.
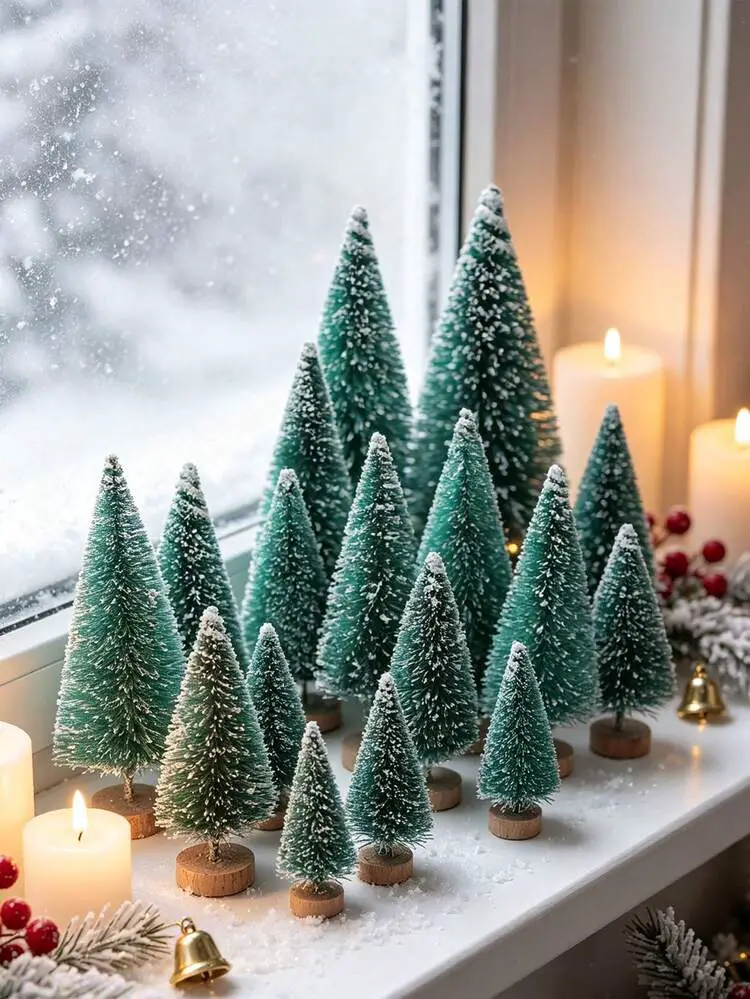
Want it warmer? Trade teal for olive and white for cream. The structure holds.
Candle heights are matched to tree heights on purpose — the tallest pillar sits behind the tallest tree, the short one nestles at the front. That keeps the skyline varied without letting any flame hide behind bristles.
The faux snow is the second trick. It hides every base, so a dozen mismatched wooden discs become one continuous drift. If your trees live on different bases, this is the fastest way to unify them.
20. Seven Neutral and Blush Trees Against Bare White
Seven is enough to arrange properly. Order by height first — tallest at the rear left, stepping down toward the front right. Then sort by color separately: light tan at the back, muted pink in the middle, dark brown at the front. Height and value both descending in the same direction is what makes a loose cluster look composed.
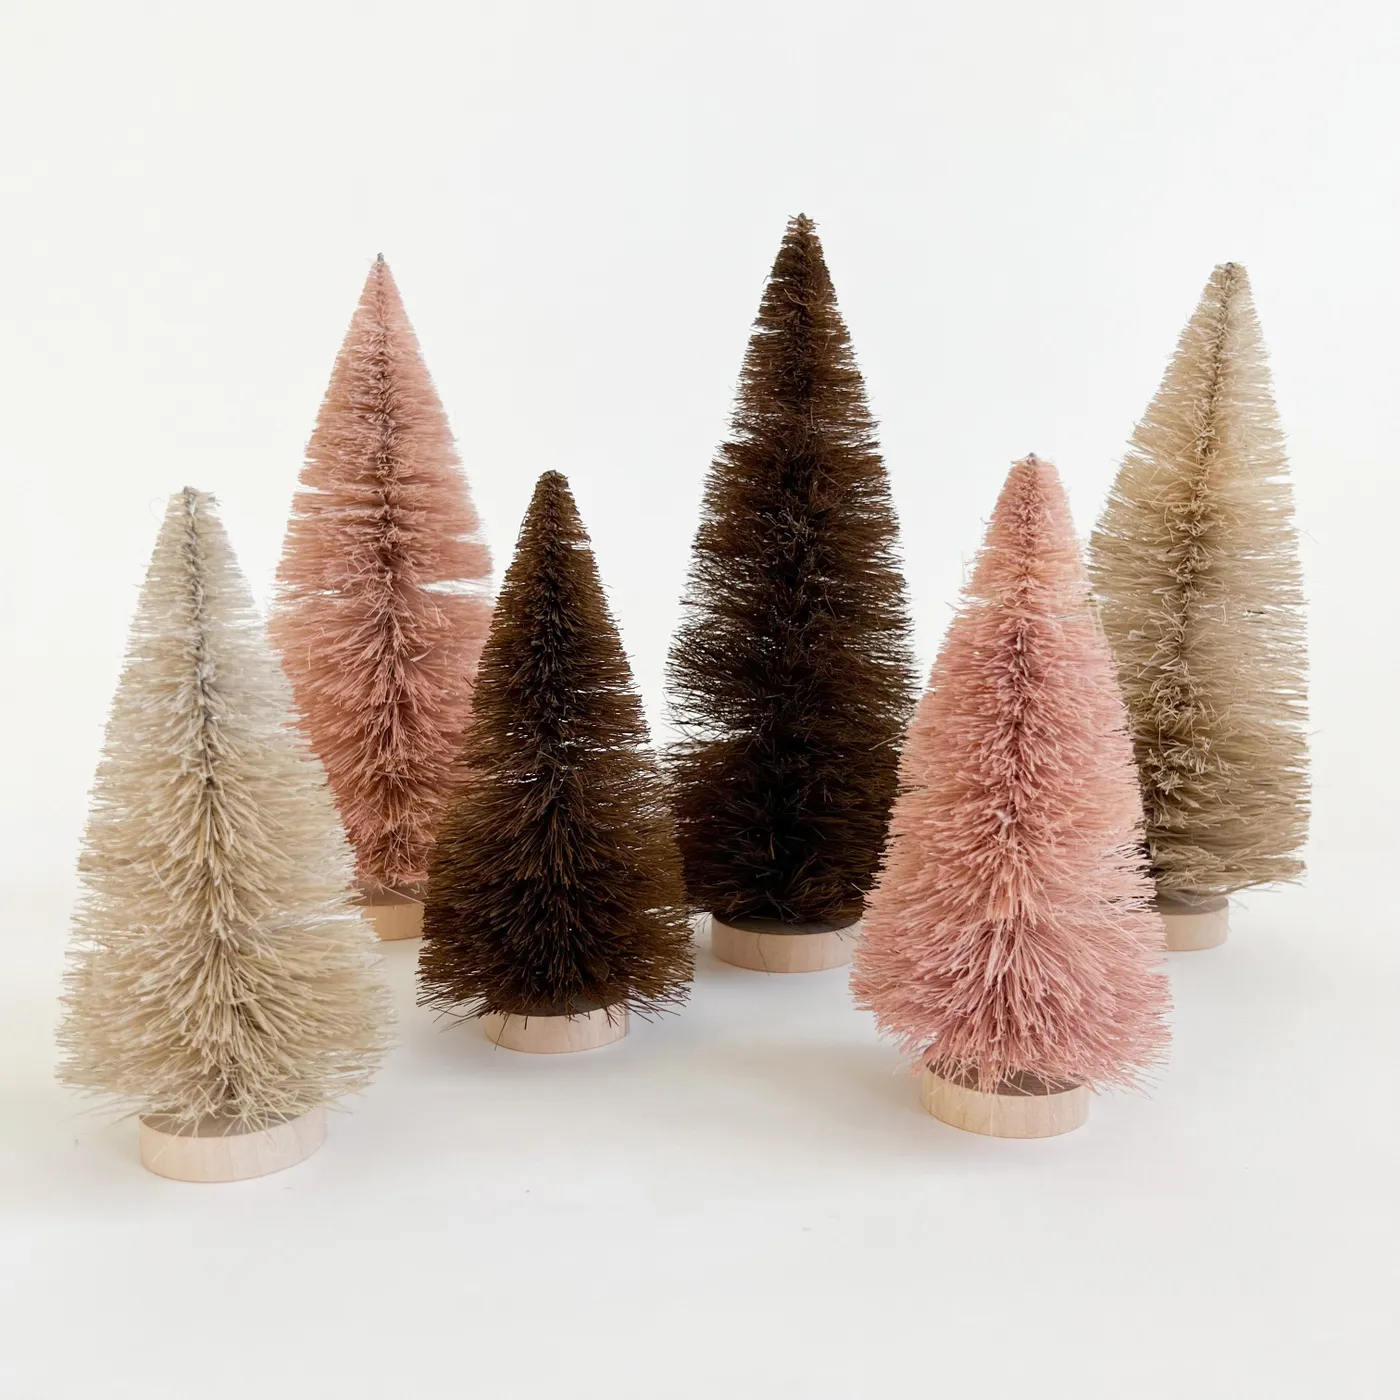
Keep about an inch and a half between trees. Touching bristles read as a pile rather than a collection.
Thrift store trees are almost always faded green or red, and a five-dollar box of Rit dye turns them all into this palette. Hot water, one teaspoon of dye per cup, dip thirty seconds for palest tan and longer for the deep brown.
Round wooden discs come in bulk online for pennies each. Seven trees, dyed and based, for around $25 total — and that muted pink blend is something you can’t buy off a shelf.
21. Two Hot Pink Trees on a Pink-on-Pink Set
Two trees need a small footprint — a ten-by-ten-inch surface is plenty, which makes this one of the few displays here that works on a nightstand, a bathroom shelf, or a fireplace ledge too narrow for anything else. No room-size minimum, no ceiling-height issue.
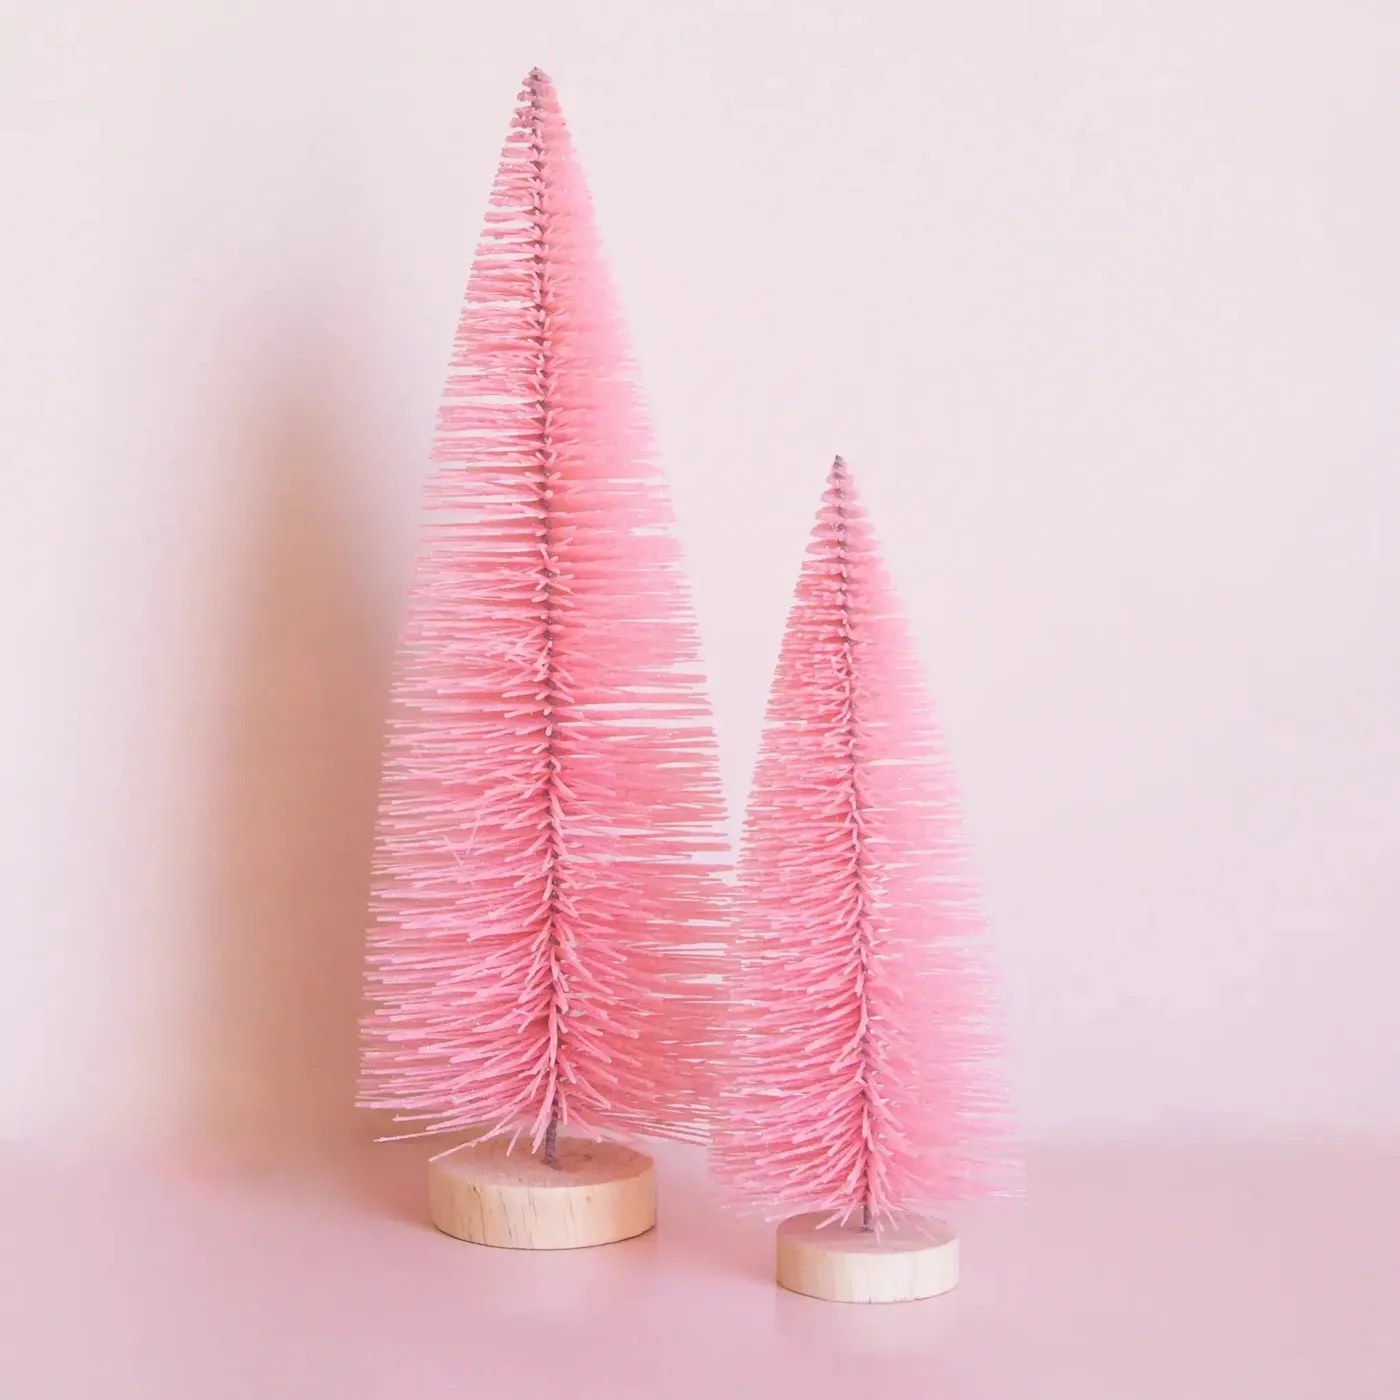
Because there are only two objects, the surface itself becomes part of the composition. That’s why matching the background matters here in a way it doesn’t when you have eight trees doing the talking.
The monochrome is everything. Vivid pink trees on a vivid pink surface against a slightly lighter pink wall — color-on-color repetition is carrying the entire piece. Move these same two trees onto a white shelf and they turn generic. The commitment is the design.
For the opposite approach, Idea #11 bolts pink trees into dark green bases so the color has something to push against. Both work. Pick based on whether you want sweet or sharp.
22. Mint and Frosted Silver-Beige Trees in a Row
DIY flocking, if you want to match this exactly.
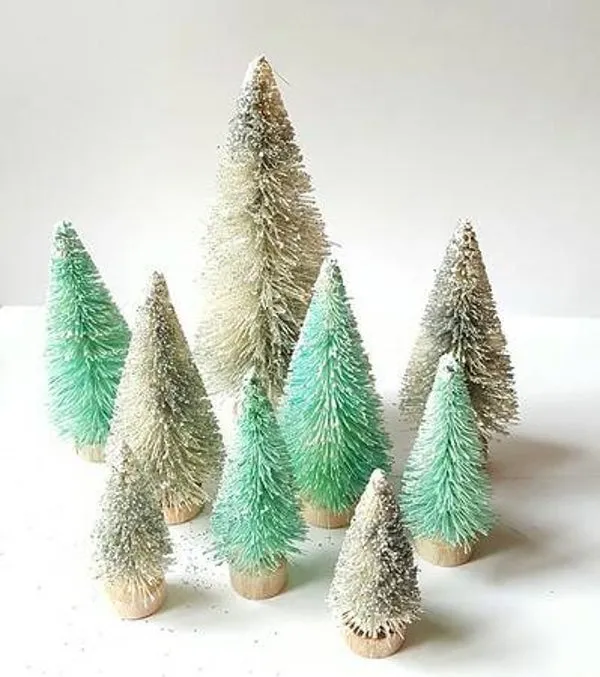
- Mix equal parts Mod Podge and water in a shallow dish.
- Dip the bristles a third of the way in, rotating so the coating stays uneven — even coverage looks fake.
- Sprinkle fine white craft snow or clear glitter from above while the mixture is still tacky.
- Stand the tree upright on its base and cure overnight.
- Tap off the loose material and mist lightly with matte sealer to reduce shedding.
Roughly 20 minutes per tree and about $10 in supplies for a whole batch.
Flocking changes how a tree ages. The coating yellows slightly over several seasons, especially stored somewhere warm or in direct sun, and it attracts dust in a way plain bristles don’t.
Store flocked trees individually in tissue, never stacked loose in a bin, and give them a soft brush each December before they go out. If you hate maintenance, buy pre-flocked and simply accept the shedding.
23. Green Trees Clustered Against a Wood Plank Wall
Wood plank walls are gorgeous and they collect dust in every seam. Plan on a vacuum brush attachment pass every few weeks during the season, and don’t skip it — dust plus warm indoor air makes those gaps visible fast.
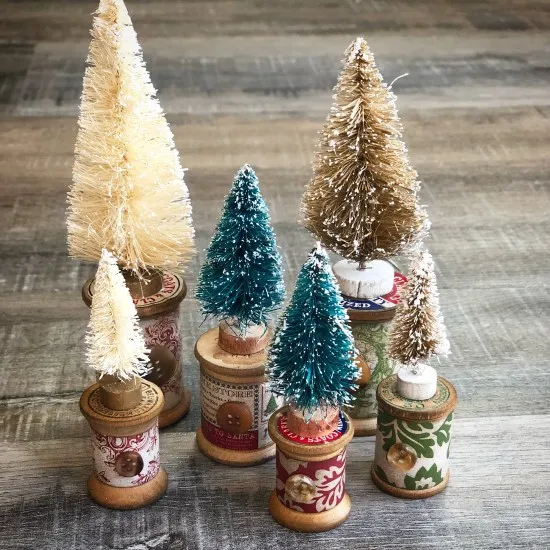
The trees themselves are low-maintenance. Cream berry accents are usually foam and crumble after a few years, so check them each season and toss the ones that shed.
Keep the ratio simple: about 80 percent green across all the trees, 15 percent white from the surface and the berry accents, 5 percent wood from the wall and bases. No metallic, no red.
Because the greens vary from pale sage to deep forest, the eye stays interested without any color change. Want to shift the mood? Warm everything toward olive and oak, or cool it toward spruce and pale ash.
24. The Craft in Progress: Pink Trees in Fluffy Snow
The process shot has become its own aesthetic — cork bases, fluffy snow, hands mid-arrangement, finger cots and all. Craft content is one of the fastest-growing categories on Pinterest right now, and bottle brush trees have become the unofficial mascot of it because they’re cheap, quick, and photograph beautifully at every stage.
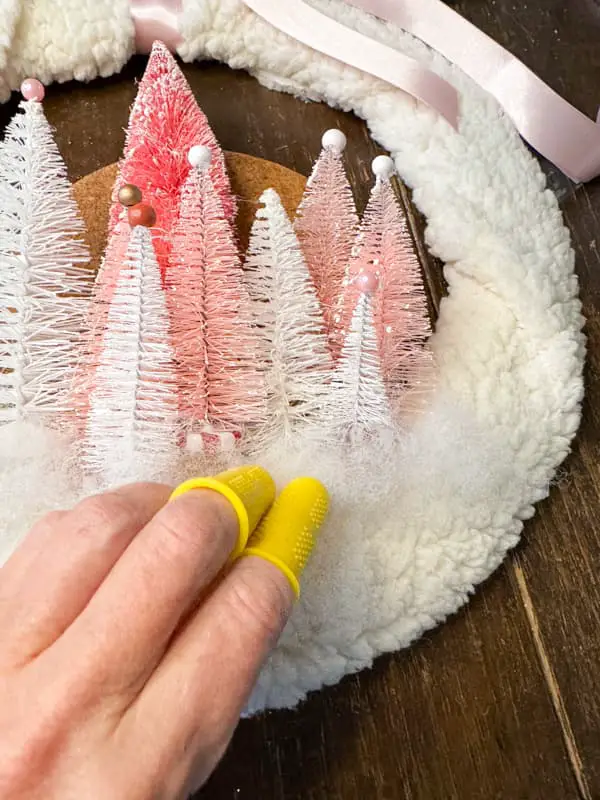
It’s a good trend, not a hollow one. These are objects people actually make, keep, and hand down.
To build a scene like this, work from the base up.
- Start with a cork or foam base cut to fit your tray.
- Hot glue each tree in place, tallest at the back, holding ten seconds each.
- Pack fluffy fake snow around the bases in small handfuls, building to about an inch.
- Tuck small pink and gold baubles into the snow at the front edges.
- Thread a narrow pink ribbon through the cluster and tie off behind the tallest tree.
An hour of work, roughly $20 in materials.
25. Cream Trees Dipped in Rose Gold, Gold, and Silver Glitter
- Decor: three cream bottle brush trees, $6–$14 each
- Metallic bases: round gold bases, $8–$20 for the set
- Craft materials: three glitters plus adhesive, $15–$30
- Lighting: warm string lights for the bokeh effect, $10–$25
- Surface: light wood tray or board, $12–$30
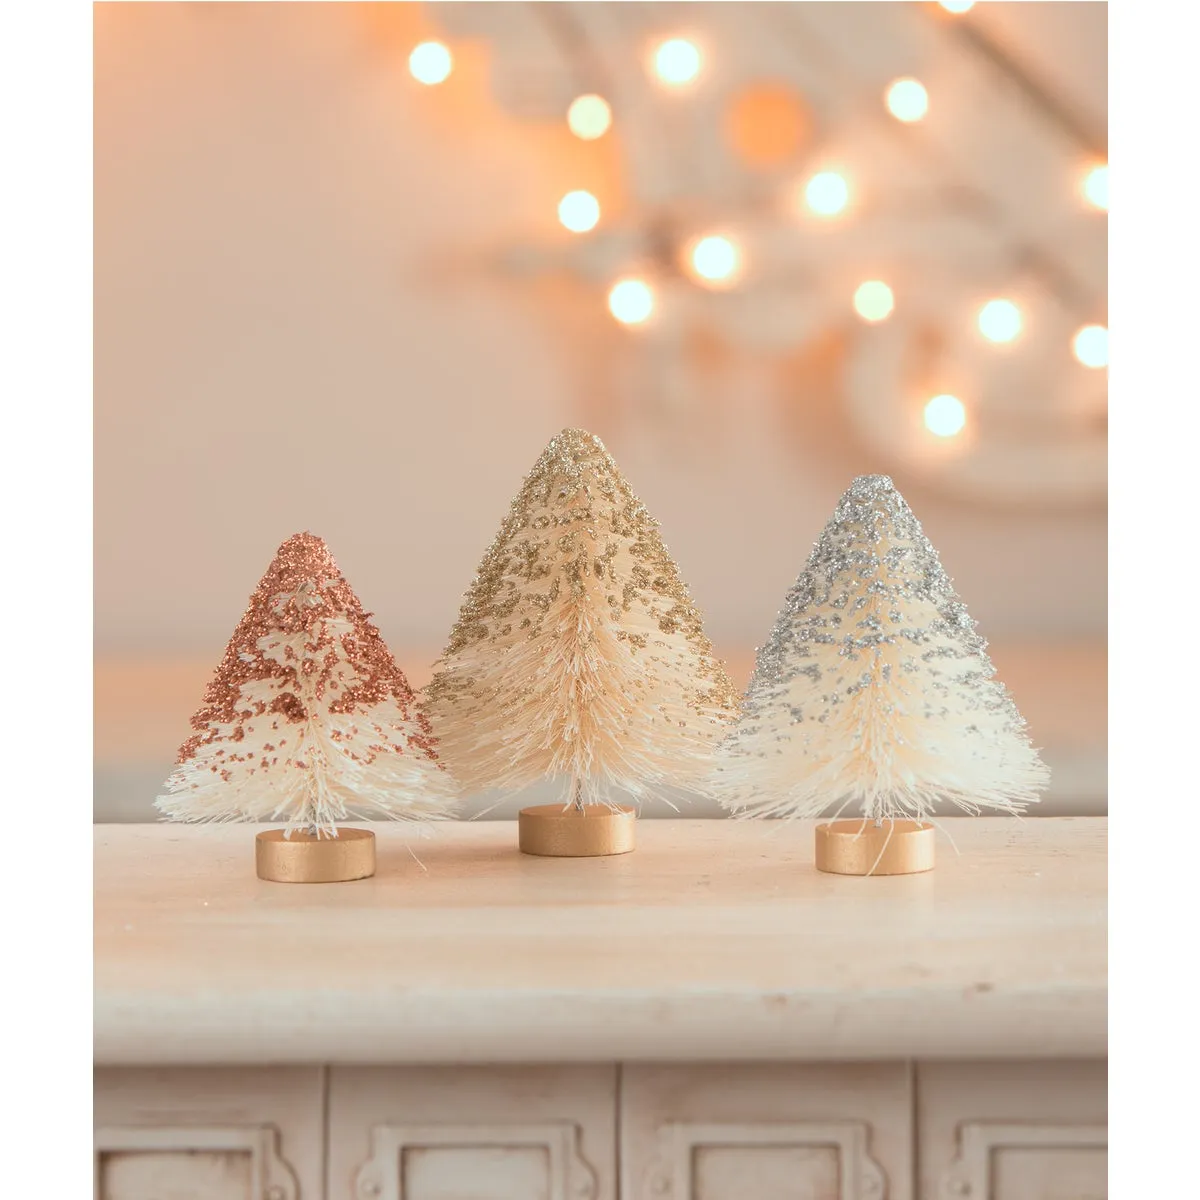
Total: $63–$163 for the trio.
Budget alternative: buy one mixed metallic glitter set instead of three separate jars, and skip the string lights — a warm lamp placed behind the display gives the same glow for free.
Dip only the top half, and mask the lower half with painter’s tape before you start. Trees glittered all the way down lose their shape; the clean bristle beneath the shimmer is what defines the cone.
Work over a sheet of paper so you can funnel overspill back into the jar. Three jars will handle a dozen trees if you’re careful. For a warmer version of the same metallic idea, the rose gold and votive setup in Idea #6 leans further in that direction.
26. Snow and Tinsel on a Single Green Tree
It’s the contrast between matte green bristle, bright white snow, and fine silver tinsel. Three textures in one object, but only one color story — green, white, silver. That restraint is why a single small tree can sit on a dark polished console and hold the whole surface.
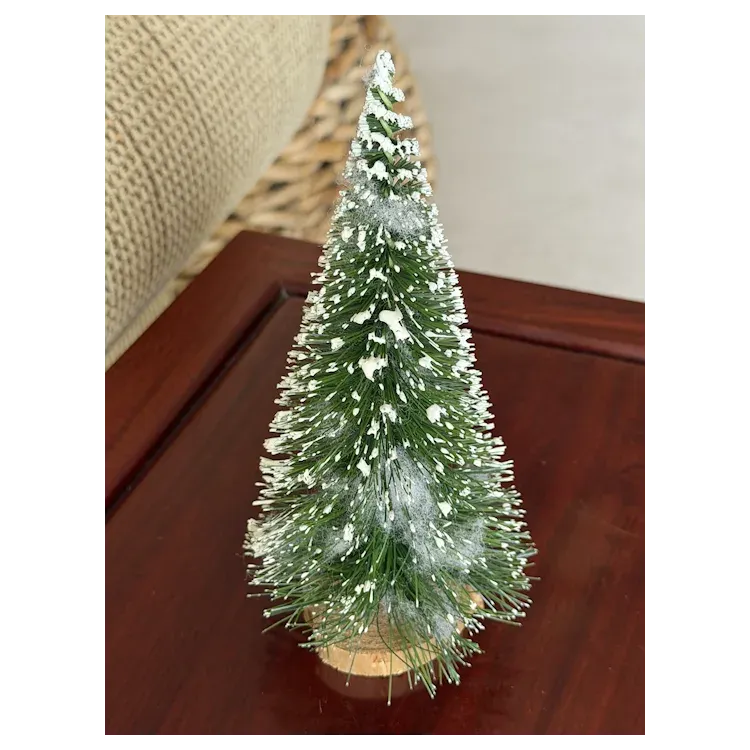
The dark surface isn’t incidental. Green on dark wood looks deeper than green on white, and the white snow pops harder against it.
One small tree means you can go tiny. A six-inch-deep shelf works, and so does a stack of two books, a windowsill, or the narrow space beside a lamp on an end table. Room size is irrelevant here.
What matters is contrast underneath. Light wood under a green tree washes it out; dark wood or a dark tray makes it read. If you want more visual volume in the same palette, cluster five or six of these along a tray instead of using just one.
27. Miniature Bright Trees on a Scalloped Cake Stand
- Check the cake stand’s weight — a scalloped pedestal tips easily with a full load.
- Confirm the top plate is at least nine inches across for six small trees.
- Test placement at eye level, not just looking down from above.
- Make sure the gold wire stems seat fully so no tree leans.
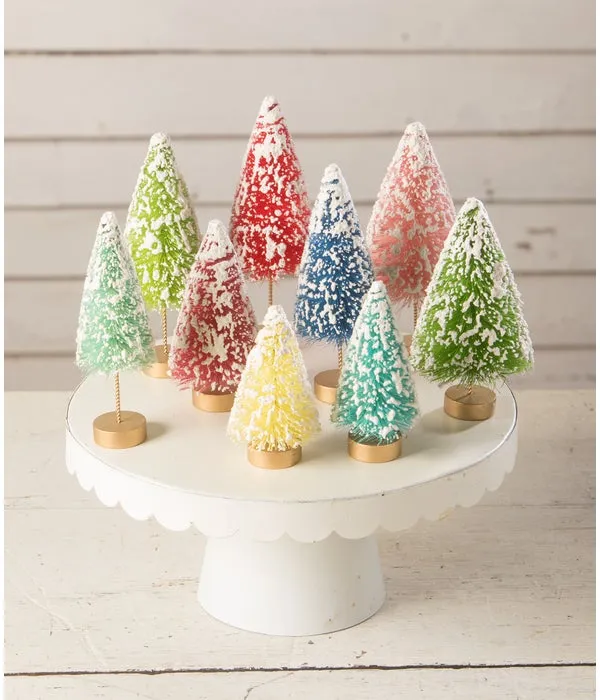
Cake stands are one of the most common thrift finds — scalloped white ceramic turns up constantly for $3 to $8. Can’t find one? An inverted bowl on a plate works fine and nobody will look closely.
Miniature trees in bright colors sell in holiday multipacks; a set of twelve usually runs $12 to $20. If the wire stems come plain, spray them gold yourself. The whole display lands under $30.
28. White Trees, Gold Confetti, and Bowls of Dye
If you’re dyeing your own, measure properly: one teaspoon of liquid dye per cup of hot — not boiling — water. Dip twenty seconds for a pastel, ninety seconds for a saturated tone, and stir constantly so the color takes evenly. A splash of white vinegar helps set it.
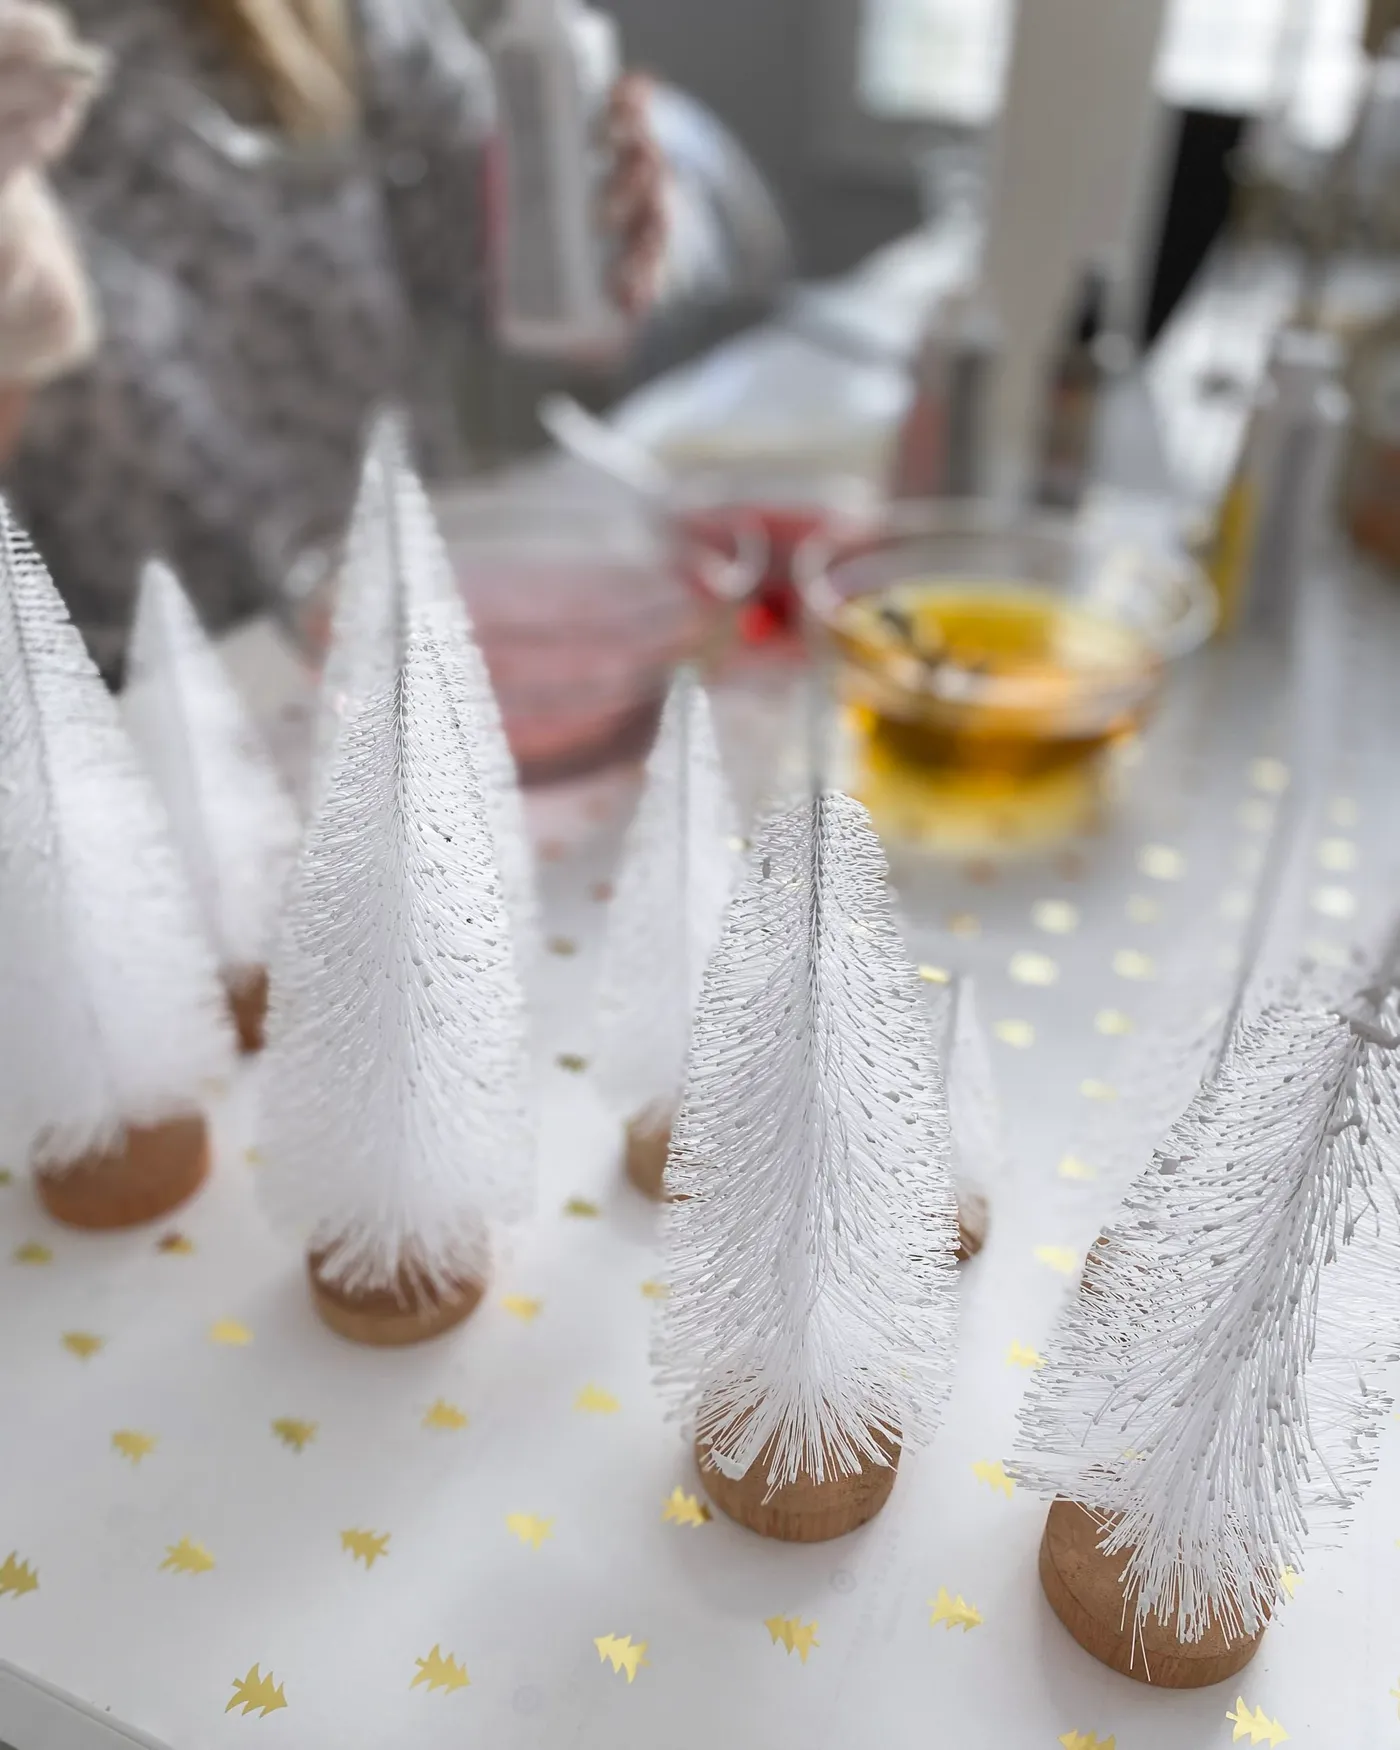
Test on one tree before committing the batch. Different bristle materials absorb at wildly different rates, and there’s no undoing an over-dip.
Dyed trees can bleed. Not always, not dramatically, but a humid room plus a dark dye equals a faint ring on a white surface eventually. Set dyed trees on a small square of wax paper or a wood disc for the first season, and keep them off light upholstery and white linen.
Expect the color to soften over a few years in sunlight too. Store them away from windows and they’ll hold much longer.
29. Pastel Pink and Mint Trees in Artificial Snow
The snow bed. Without it, you have a handful of pastel mini trees on a table. With it, you have a scene — the artificial snow buries every base, softens the bottom edge of each tree, and gives the pastels something clean to sit on.
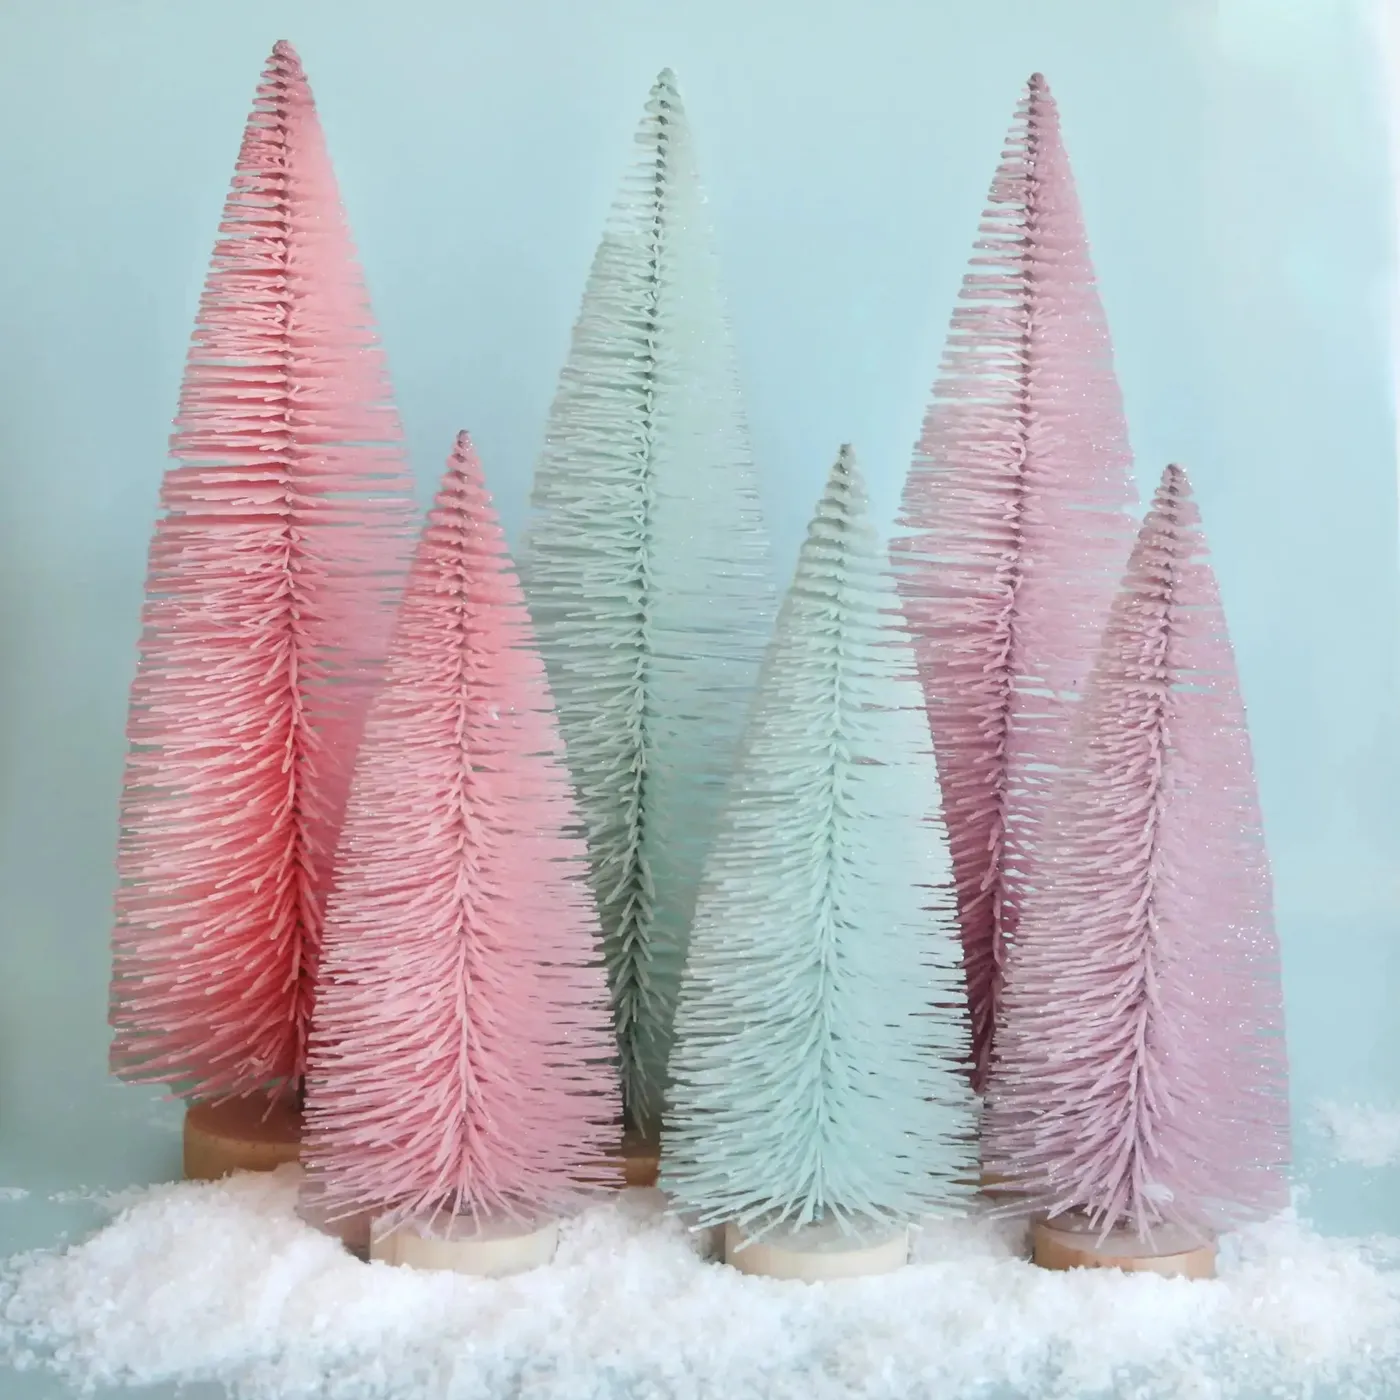
It solves a practical problem too: mismatched bases stop mattering when you can’t see them.
Roughly 40 percent pastel pink, 40 percent light mint, 20 percent white from the snow and bases. Two pastels plus white is the safest color formula there is — it’s nearly impossible to make it look wrong.
Swap mint for pale blue and you get something cooler and more wintry. Swap it for butter yellow and the whole thing goes candy shop. Either way, keep the white constant.
30. Muted Green and Terracotta Trees Under a Rattan Mirror
Sunlight is lovely and sunlight is a fade risk. If that window throws direct light onto the mantel for hours a day, expect dyed or painted trees there to soften within a season or two. Rotate the arrangement or shift the group a foot to the side during the brightest months.
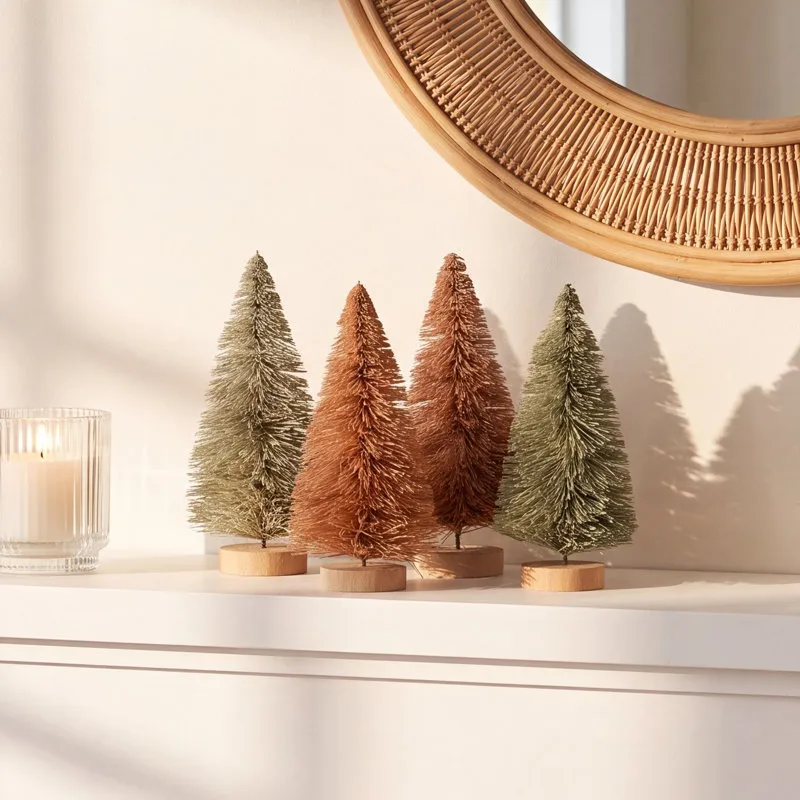
Candles on a mantel also mean soot risk for anything pale sitting directly above them, and the fluted glass holder needs to sit level on the shelf edge. Never leave a lit taper in a busy hallway.
Terracotta creeping into holiday decor is the quiet story of the last two seasons — the same earthy shift that had people painting kitchens clay and trim warm white. Rattan and cane framing rode in on that same wave. Compare with Idea #17, which does the same soft, quiet thing with a sage wall and a gold mirror.
Because these colors aren’t Christmas-specific, this arrangement can stay up from November through February without looking odd. That’s the real reason it’s catching on.
Your Bottle Brush Tree Era Starts Now
Start with one tree, one base, and one surface you already own — that’s genuinely enough to see whether the idea works in your light and your room. Then add a second height and a second texture, and let the rest of the collection build itself over a season or two.
Pin the ideas that made you stop scrolling. Next December you’ll be glad you did.