
You know that feeling when you save forty craft photos in one scroll session and then never actually make a single one? Same. The good news: this year’s Christmas crafts are genuinely faster than the ones you saved back in 2021 — less glitter, more natural materials, and almost nothing that requires a Cricut.
We spent serious time browsing Target, Walmart, and Michaels — plus plenty of thrift store and Facebook Marketplace hunting — to bring you only what’s worth your attention. Everything here lands between $1.25 and about $400, and most of it stays well under $50.
Inside you’ll find 35 curated ideas spanning rustic natural, cottagecore, handmade Scandinavian, and vintage farmhouse styles. Budget and luxury versions are compared side by side in every cost breakdown. And stay until the end — we break down the most common mistakes that can ruin these looks.
Handmade holiday decor is peaking in 2026: Pinterest searches for natural pinecone projects keep climbing, and the imperfect, gathered-over-time look has officially replaced the polished matchy-matchy tree.
Save this post now — you’ll want it when you’re ready to shop. 📌 Save this to Pinterest for later — you’ll want to revisit these ideas.
1. Miniature Wooden House With Snow, Berries, and a Pine Cone
Strip everything else away and the thing that makes this little house sing is the artificial snow — not because it’s white, but because it’s applied unevenly. Snow piled on one slope of the roof and skipped entirely on the other is what turns a plain wooden blank into something that looks weathered in the best way. The miniature red berries and the single pine cone glued to one side wall are the supporting cast. Lose the snow and you have a toy. Keep it and you have a scene.
Grab a plain wooden house blank — craft stores sell them for about $3 — plus a bag of faux snow and a glue gun. Work in this order:
- Paint the wood, or leave it bare for a more Scandinavian look.
- Dab faux snow along the ridge and one slope only, using a small palette knife.
- Press three or four tiny red berries into the snow while it’s still tacky.
- Glue a single pine cone to one side wall — never centered.
- Tuck two or three tiny green leaves near the base.
About 20 minutes per house, and under $12 in materials for a set of three.
2. Melted Crayon Ornaments in Bright Neon on a Pink Base
Here’s the trick that keeps melted crayon ornaments from turning into brown mud: sort your crayons by color family before you shave them, and never mix more than three hues in a single ornament. A light pink base with red, yellow, and blue shavings stays bright because those colors sit close to each other on the wheel. Add green and orange and you get a muddy swirl. Bake at 250°F for 8 to 10 minutes and pull it while the wax is still glossy, not fully liquid.
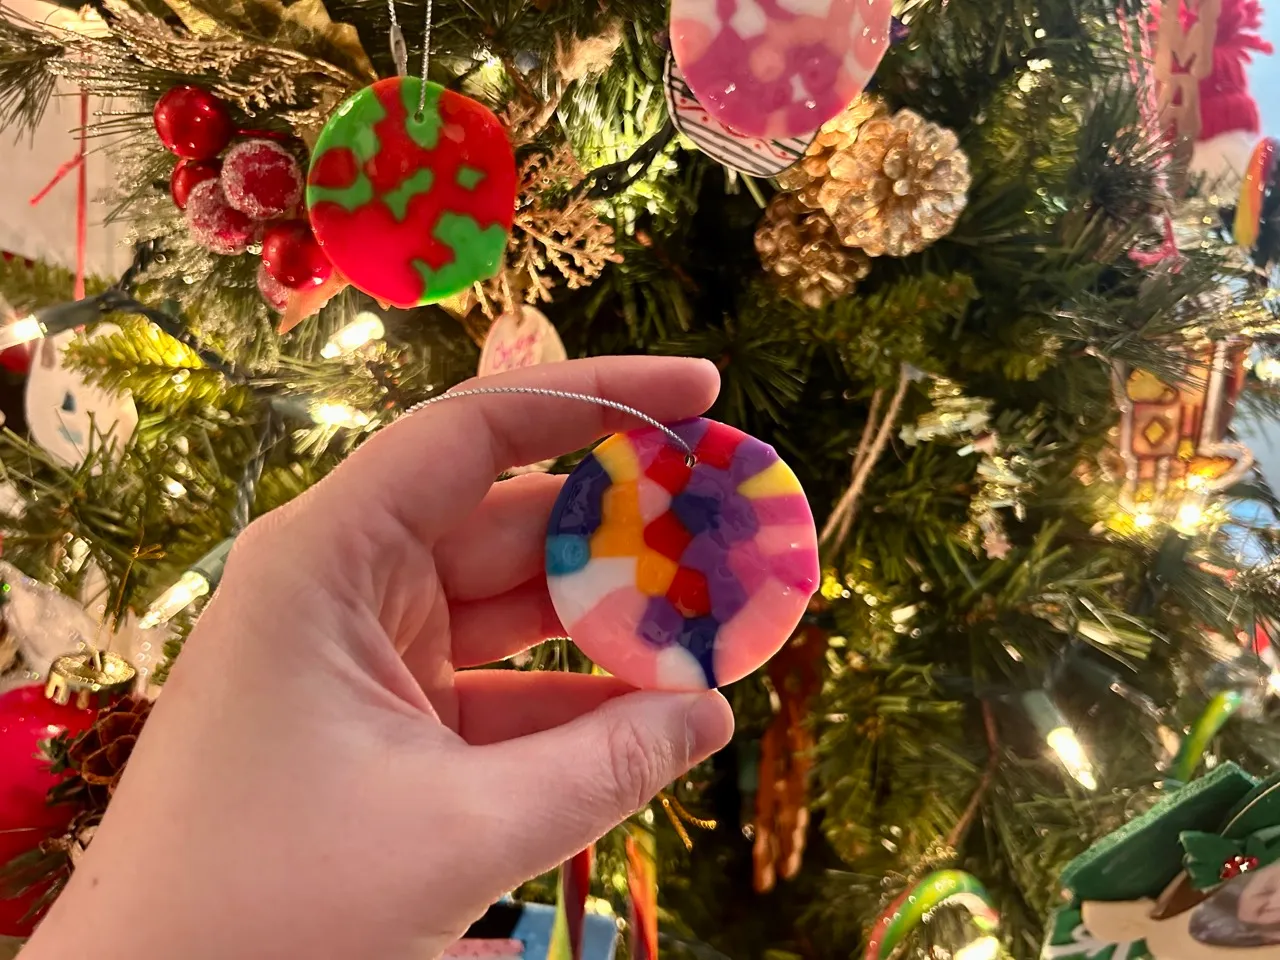
The formula is 60% light base, 30% bright shavings, 10% sparkle. The pink disc does the heavy lifting, the crayon shavings supply the color pop, and the silver hanger plus a dusting of glitter handles the shine. Swap the pink base for white and you get a cleaner, more modern ornament. Swap it for black and the same shavings suddenly read like stained glass. Keep the ratios and one blank can change the entire mood.
3. Cottagecore Pinecone Wreath That Bridges Fall and Winter
What makes a natural pinecone wreath read as cottagecore rather than craft-fair comes down to restraint. There’s no glitter, no spray paint, no plastic picks — just the raw spiral texture of the cones doing the work. The muted brown and green palette is what lets it survive past December, sliding from fall mantel decor straight into winter without ever looking out of season. That season-straddling quality is the whole reason this style keeps resurfacing year after year.
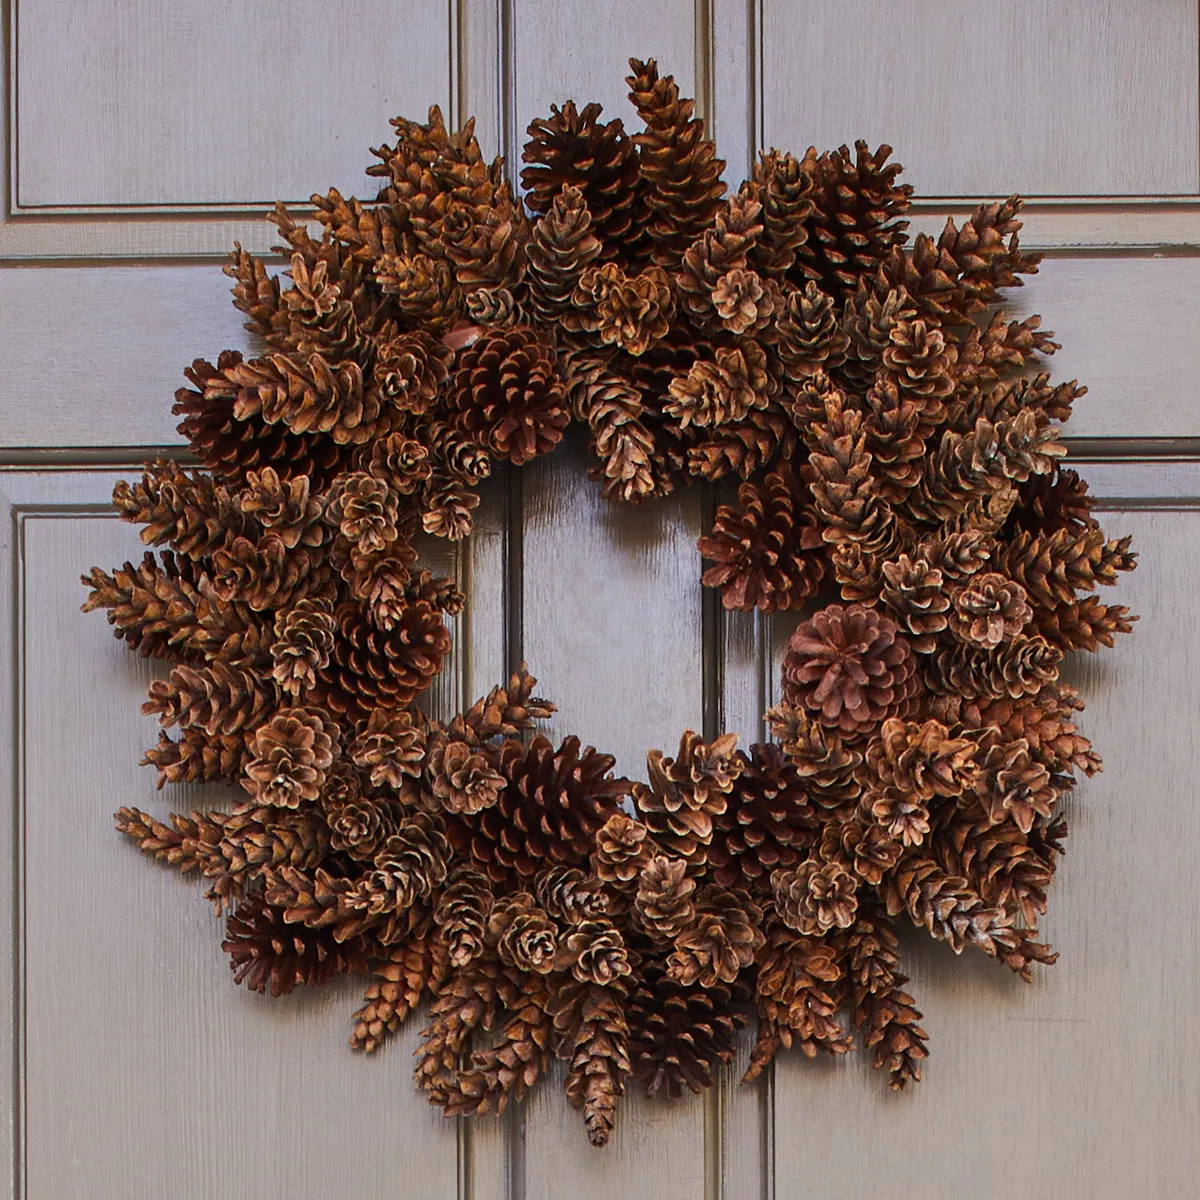
Building one yourself:
- Pinecone mix, 30-40 cones: $10-$18
- Grapevine or wire wreath base: $6-$14
- Floral wire and hot glue: $5-$8
- Preserved greenery sprigs: $8-$16
- Twine or ribbon for hanging: $3-$6
Total: $32-$62, versus $85-$150 for a comparable pre-made wreath at a boutique. Budget alternative: collect cones on a fall walk for free and bend a thrifted wire hanger into a circle.
4. Miniature Wooden Sleigh Filled With Candy Canes and Berries
You don’t need a $60 boutique sleigh. Target and IKEA both carry small unfinished wood sleighs in the $8-$15 range through the holidays, and craft stores mark theirs down to about $5 after Thanksgiving. Fill one with a $4 bag of faux snow, a $3 bundle of mini candy canes, and a few snips of frosted greenery cut from a $6 garland you already own. Facebook Marketplace is also full of vintage wooden sleighs every January for under $10.
Fair warning: mini candy canes are a pet magnet and a toddler magnet. If either lives with you, swap the real ones for plastic or wooden versions — they photograph identically and won’t leave a sticky puddle on your console. Skip this on a high-traffic surface unless you’re willing to re-fluff the faux snow weekly. A tray with a raised lip keeps everything contained and makes the whole arrangement liftable in one motion when you need the surface back.
5. Red Horse Cutouts With Gold Beads on Crimson Thread
These pendants are small — the cutouts run about 4 to 5 inches tall — so they need a tree with breathing room or a window with real square footage. They work best on a full-size tree, 6 feet and up, hung in clusters of three at staggered heights, or across a window at least 24 inches wide. On a tiny 4-foot tabletop tree, scale them down or string them in a row on one red thread as a garland instead. Compare with Idea #8, where a single large snowflake does the opposite job.
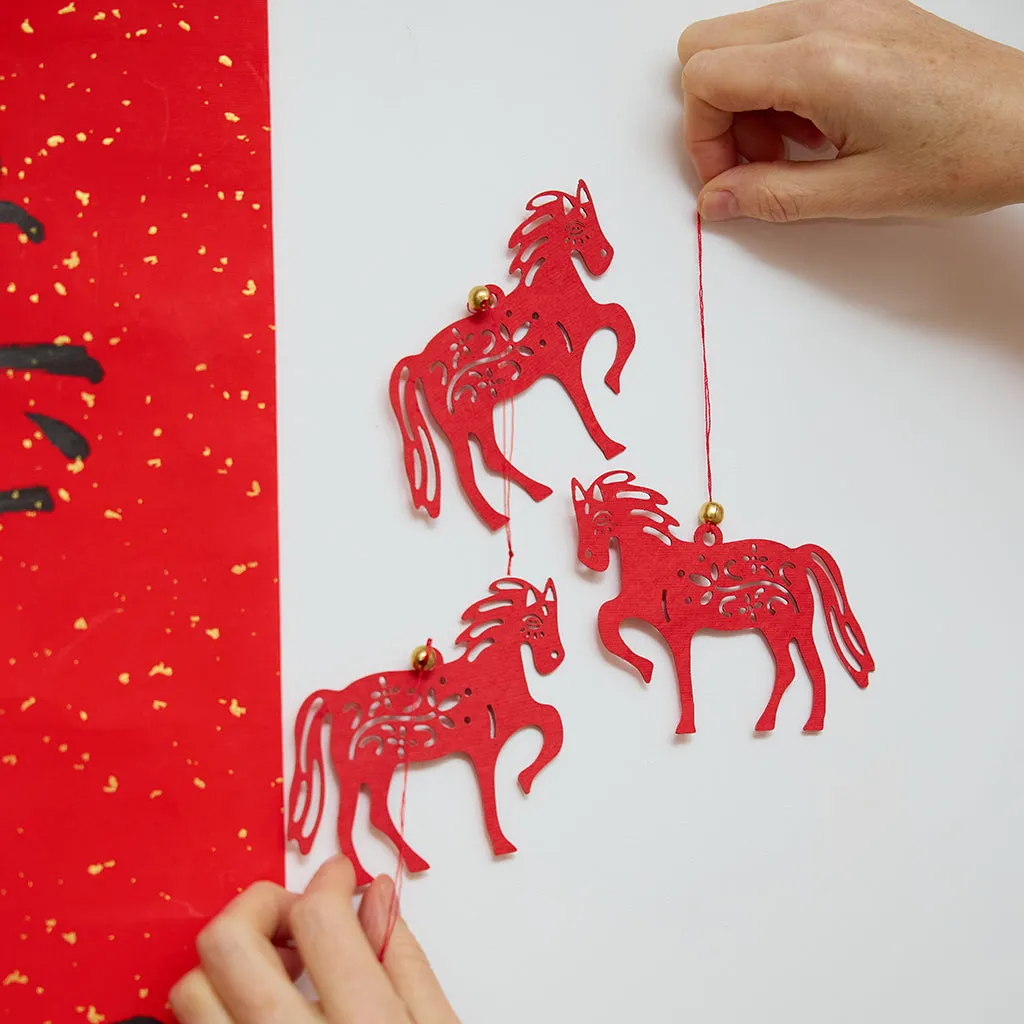
Paper and cardstock cutouts are the cheapest craft on this list and also the least forgiving. Sun through a window fades red dye within a season, and humidity makes flat paper curl at the corners. Spray both sides with a matte clear acrylic sealer before hanging — one $8 can covers roughly 40 cutouts. Store them flat between sheets of tissue in a rigid box, never in a bag where they can bend. With that care, they’ll come out for five or six Decembers instead of one.
6. Pinecone Wreath With Faux Apples and Cinnamon Sticks
Before you commit to a heavy natural wreath, check these:
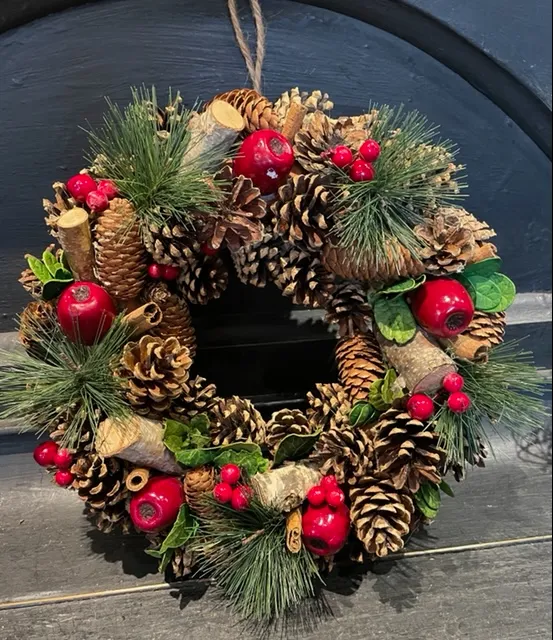
- Door clearance — a densely packed cone wreath can weigh 4 to 6 lbs, enough to dent a hollow-core door.
- Sun exposure — direct afternoon light bleaches cones and dries berries within weeks.
- Scent expectations — cinnamon sticks smell wonderful for about 10 days, then stop. Add cinnamon oil monthly if you want it to last.
- Storage — plan for a 20-inch rigid box, not a bag.
Natural-material wreaths have been climbing on Pinterest every November, and 2026 is the year they fully replaced the tinsel-and-glitter look. The shift tracks with a broader move toward biophilic decorating — people want their holiday decor to look like it came from outside rather than from a box. Good news for longevity: this isn’t a trend with an expiration date. Natural wreaths have hung on front doors since the Victorian era. The faux apples and cinnamon are just this decade’s accent.
7. Conical Santa Figures With Glitter Beards and Pom-Pom Hats
The single detail that separates a charming cone Santa from a creepy one is the beard. That glittery white mass covering the bottom two-thirds of the face does all the emotional work — it softens the painted eyes, hides the awkward transition between head and body, and gives the figure an actual shape. Skip it and you’re left with a red triangle with a face, which is exactly as odd as it sounds. Everything else here — the blush, the pom-pom, the little red loop — is garnish on top of that one decision.

Paint the face before you attach anything else, and use a round foam pouncer rather than a brush for the blush. Two dabs of thinned pink acrylic, placed high on the cheeks about one-third down from the top of the cone. Let it dry a full 30 minutes before the beard goes on. If the beard goes first, you’ll smudge the face working around it. A 4-inch cone takes roughly 18 inches of glitter tulle, gathered and glued in three overlapping rows.
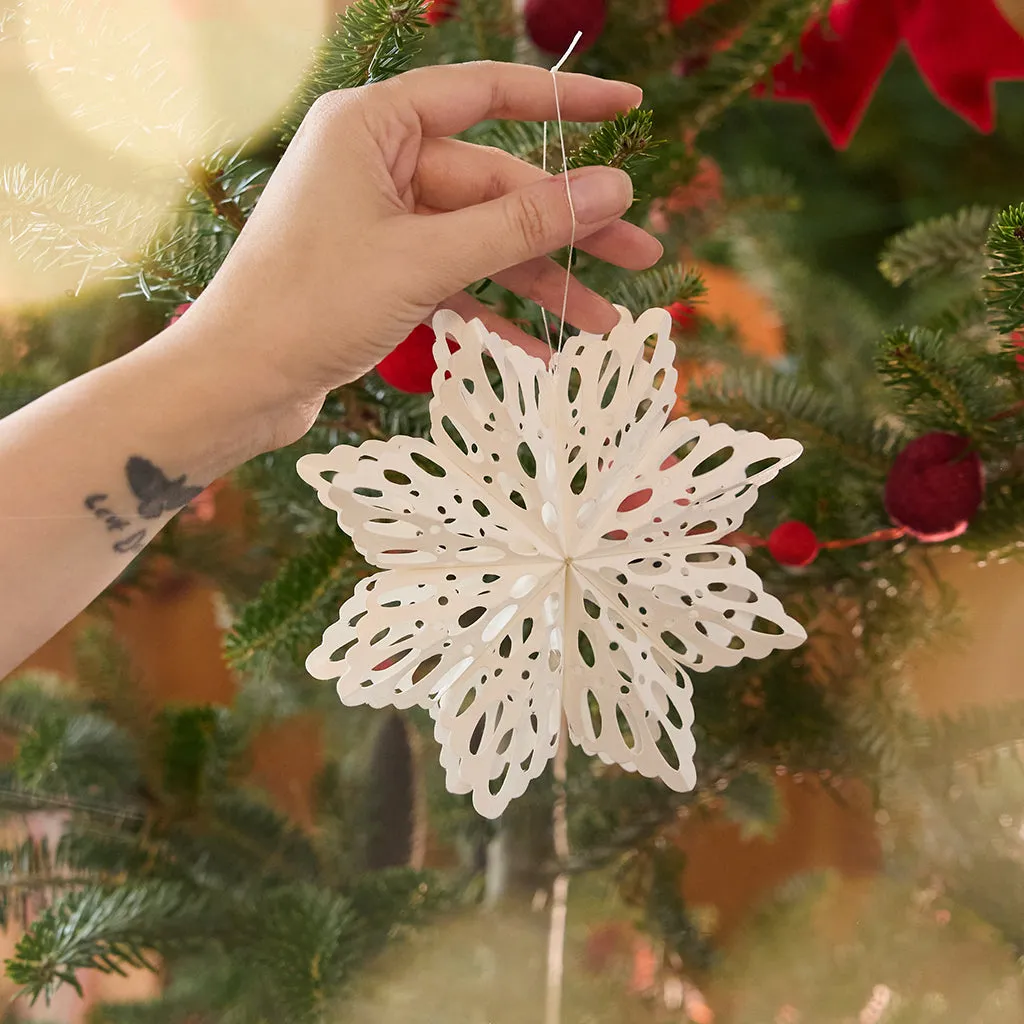
8. Paper Snowflake Ornament Framed by Red Velvet Balls
The formula here is almost brutally simple: 70% white paper, 20% deep red, 10% natural green. The snowflake supplies the white, the velvet-finish balls and bows supply the red, and the tree handles the green on its own. Change the red to soft blush and the whole thing goes quiet and Scandinavian. Change it to black and you’ve got a high-contrast modern tree. Keep white as your majority color and you can rotate accent colors every single year without buying new ornaments.
What this costs to pull off:
- Cardstock and a sharp craft knife: $8-$12
- White cotton string or fishing line: $3
- Red velvet ball ornaments, 12-pack: $12-$20
- Red ribbon bows, 12-pack: $8-$14
- Pre-lit artificial tree, 7 ft: $120-$350
Total: $151-$399, and most of that is the tree you’ll keep for a decade. Budget alternative: thrift the ornaments and skip the pre-lit tree — a $40 unlit tree plus a $15 strand of warm white lights looks identical once it’s dressed.
9. Paper Plate Santa With a Cotton Ball Beard
Total supply cost for this one is under $4 if you already own glue. Dollar Tree sells red paper plates in 8-packs for $1.25, and a bag of cotton balls runs $1.25 at Walmart. Skip the specialty craft paint and use whatever washable acrylic is already in the drawer. The one thing worth spending on is a decent pair of kid-safe scissors — the grocery store ones tear paper instead of cutting it, and that’s what turns a 15-minute craft into a meltdown. Save this for the under-8 crowd; older kids want something with more bite.

What makes this craft work is the face-to-beard ratio. The white cotton covers the bottom half of the plate, leaving only a narrow band of painted skin showing — and that’s what makes it read as Santa at a glance. Kids’ crafts usually fail because the proportions get lost. Here, the plate itself sets the boundary, so even a messy paint job lands in the right place. Compare with Idea #14, where folded paper plays the same role for grown-ups.
10. White and Gold Distressed Ornament on a Fir Branch
White ornaments with gold detailing look expensive in photos and slightly sad in person if the lighting is wrong. Gold is a warm metallic, so it goes dull under cool white bulbs — use warm white only, around 2700K. Also, that distressed gold finish you paid for? It flakes. Handle these with a cloth rather than bare hands, and store them individually wrapped. If you have cats, forget it: a dangling metallic on a low branch is basically a toy on a string.
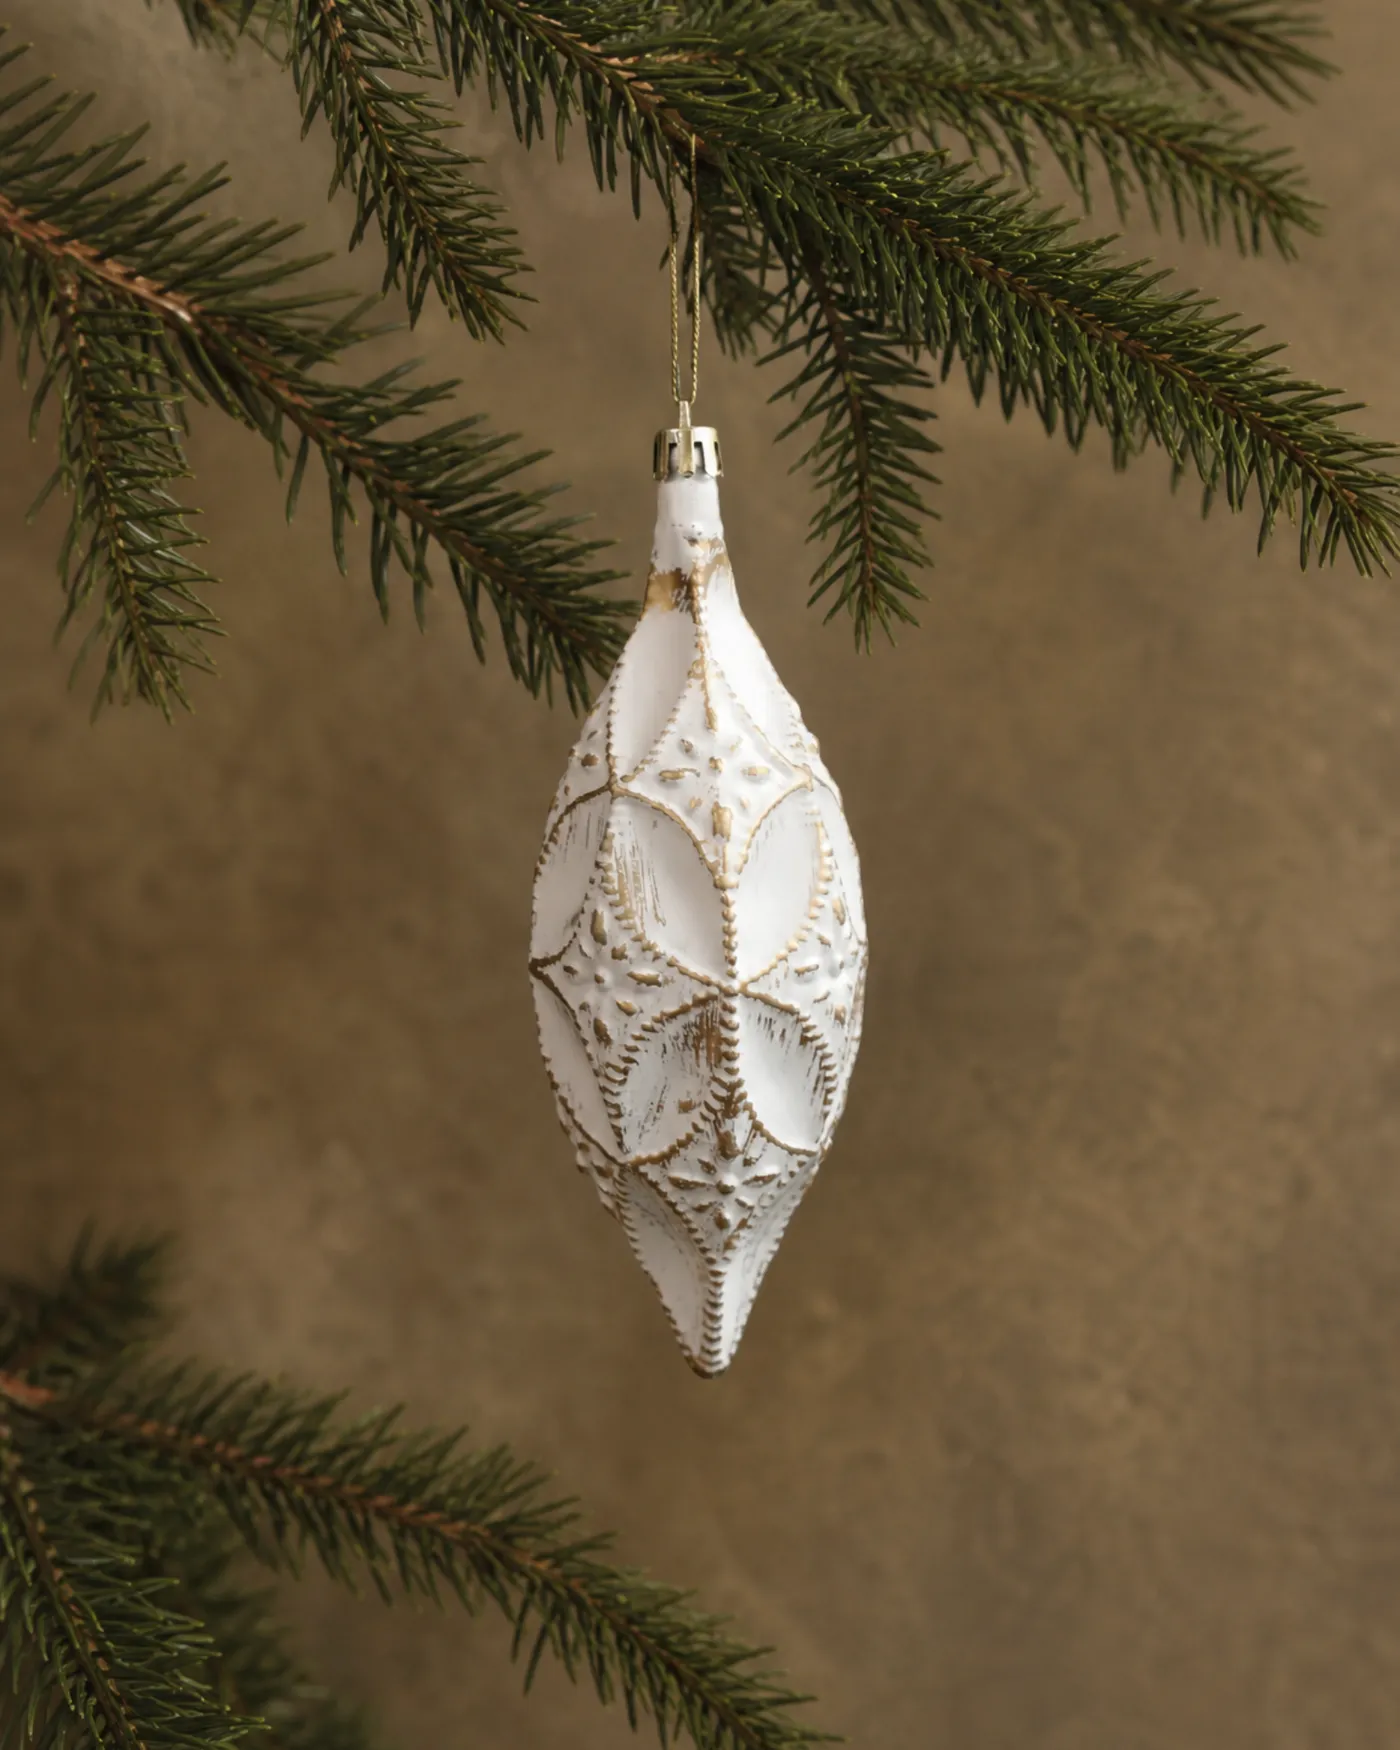
This is a paint-and-wipe project, easier than it looks:
- Base-coat a wooden or papier-mâché ornament in matte white. Dry one hour.
- Dry-brush gold acrylic over the raised areas only — almost no paint on the brush.
- Wipe the excess with a paper towel before it dries so gold settles into the grooves.
- Sand one or two high spots lightly for a worn edge.
- Seal with matte varnish and add a metallic cap.
Roughly 90 minutes for four ornaments and under $15 in materials.
11. Faux Antler and Pinecone Bundle on Peeling Shutters
This bundle is small — roughly 14 to 18 inches long — so it lives or dies by its surroundings. On a wide blank wall it disappears completely. Hang it on a narrow surface instead: a shutter panel 12 to 16 inches wide, a porch post, or the side of a bookcase, where it can visually fill the space. Ceiling height doesn’t matter here; wall width does. A solid rule of thumb is that the bundle should span at least two-thirds of the surface it’s hanging on.
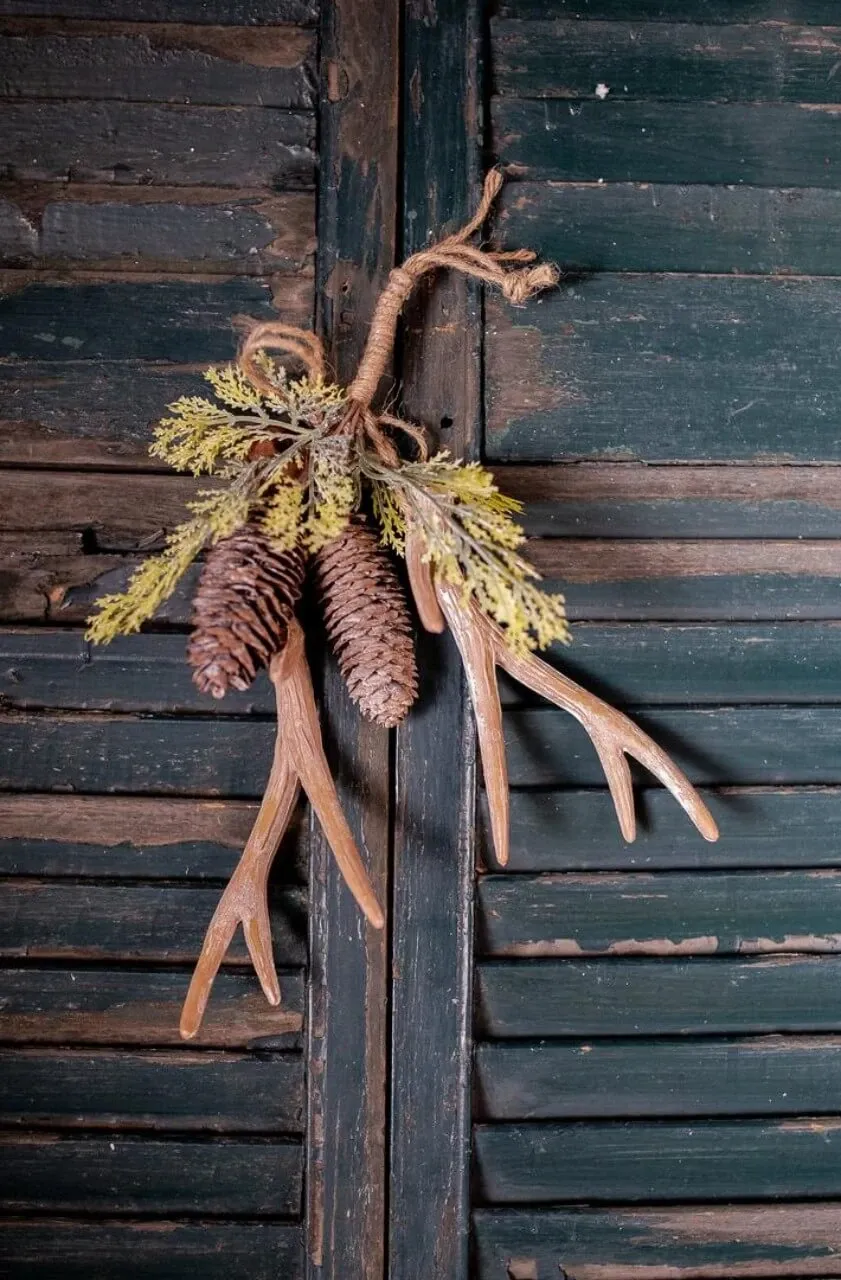
Hang this on a nail, not an adhesive strip. The twine wrap plus the antlers and cones puts the bundle around 14 ounces, and most adhesive hooks rated for two pounds fail in cold weather — which is exactly when this decor is up. Dry-fit the arrangement flat on a table before you tie anything. The faux antlers should point slightly outward and the pinecones should sit below the center line, so the eye reads a V shape instead of a blob.
12. Mini Red Truck With Bottle Brush Tree and JOY Blocks
The vintage red truck has been a holiday staple since about 2018, and by 2026 it’s less a trend than a genre. What changed is the styling — people moved away from glossy resin trucks toward matte, slightly distressed finishes paired with bottle brush trees and chunky wood letters. The farmhouse-Christmas look peaked around 2021, but this specific combination has settled in as a classic. That’s genuinely good news: you can buy pieces slowly instead of chasing a single season.
Building the display:
- Miniature red truck figurine: $12-$30
- Bottle brush trees, set of three: $8-$16
- Wooden JOY blocks: $6-$14
- Glitter reindeer figurine: $5-$12
- Faux berries, pinecones, plaid fabric: $10-$20
Total: $41-$92. Budget alternative: grab the truck at a dollar store in November, hand-letter a scrap of wood from a hardware store offcut, and pull bottle brush trees from a $5 six-pack.
13. Geometric Paper Ornaments Strung on Blue Twine
The blue string is the sneaky hero here. Every shape in this set — Santa, the bird, the star, the abstract leaf forms — is cut from the same handful of bright cardstock, so the palette alone would read as a jumble. What pulls them into a collection is that single thin blue line running through all of them. It’s the difference between a box of ornaments and a garland. Take the string away and you have six unrelated paper shapes. Leave it and you have a system.
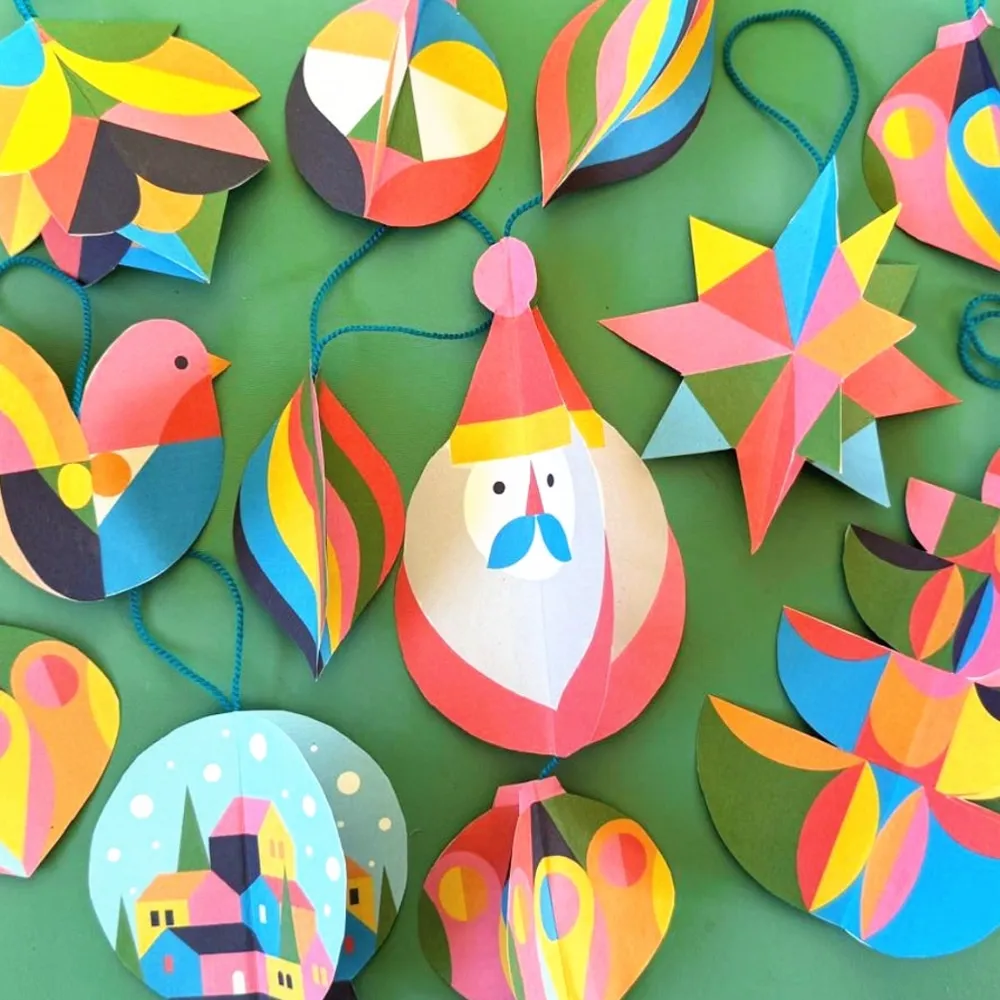
Paper ornaments are the most fragile thing on this list and the least expensive to replace, so plan accordingly. Keep them away from windows and heat vents — cardstock warps around 90°F and won’t flatten back out. Dust with a soft dry brush, never a damp cloth, because moisture raises the paper grain. Store loose in a bin and you should expect to lose one or two a year to creasing. Make extras. The whole set costs under $10 in paper.
14. Origami Gnomes and Star Ornaments in Red and Beige
Origami ornaments cost almost nothing if you skip the kits. A 100-sheet pack of double-sided paper in red and beige runs $8 at Michaels or Target, and that’s enough for roughly 60 ornaments. The folding is the labor, not the material, so a movie night gets you a whole tree’s worth for the price of one store-bought box. Thrift stores are also a goldmine for old sheet music and atlas pages, which fold beautifully and give you a free, slightly aged look nobody can buy.
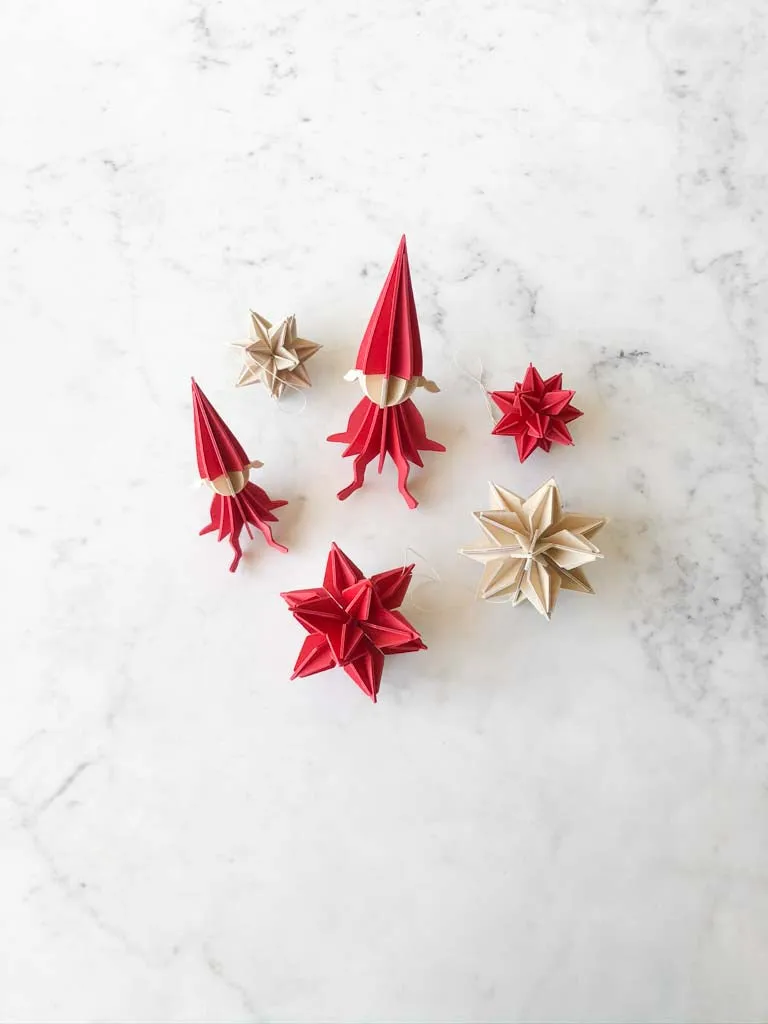
folding for real:
- Confirm you have a flat, hard surface — folding on carpet ruins crisp creases.
- Test one star in scrap paper first; some patterns need a 6-inch square, others only 4.
- Check paper weight — under 65 lb tears at the points, over 100 lb is too stiff to fold cleanly.
- Decide your hanging method now; a needle and thin white thread beats store loops.
15. Stained Glass Ornaments and Wooden Cutouts, Deliberately Mixed
This collection shouldn’t work. Stained glass style pieces with metal framing sit next to a black bear cutout, a wooden house, a photo frame gnome, and a silver leaf — five materials, five levels of shine. It holds together for one reason: every piece is a flat silhouette with a sheer ribbon hanger. Same shape language, same hanging treatment, wildly different finishes. That’s the trick to an eclectic ornament set — vary the material, keep the silhouette and the hardware consistent.
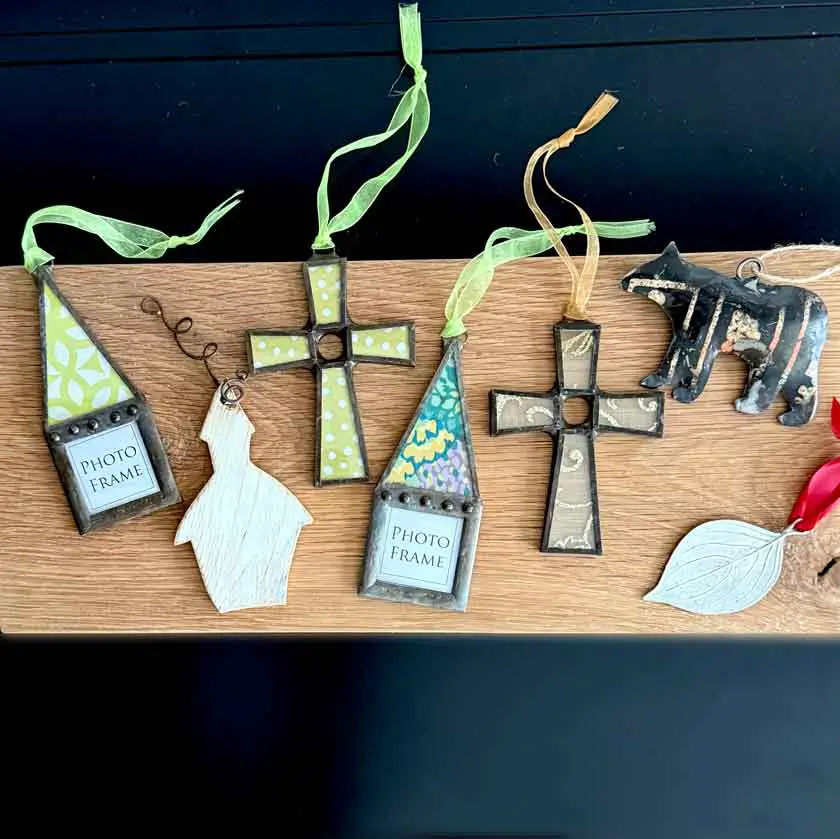
If you’re making the metal-framed pieces yourself:
- Cut a 3-inch shape from heavy cardstock or thin wood.
- Wrap the edge with 20-gauge craft wire, twisting at the top into a loop.
- Tuck a patterned paper insert behind the frame opening.
- Seal the paper with matte Mod Podge so it doesn’t buckle.
- Thread a sheer ribbon through the wire loop.
About 25 minutes per ornament and roughly $10 in supplies for a set of six.
16. Pinecone Ornaments With White-Tipped Scales and Gold Loops
The math is 50% natural brown, 40% white, 10% gold. Half the pinecones stay bare, the other half get white paint only on the outer edges of the scales, and every single one gets a thin gold loop. That last 10% is what turns a nature craft into something that looks intentional on a tree. Swap the gold for silver and it goes cooler and more modern. Swap it for copper and the whole set warms toward rustic. Keep the brown-to-white ratio and you can change the metal every year.
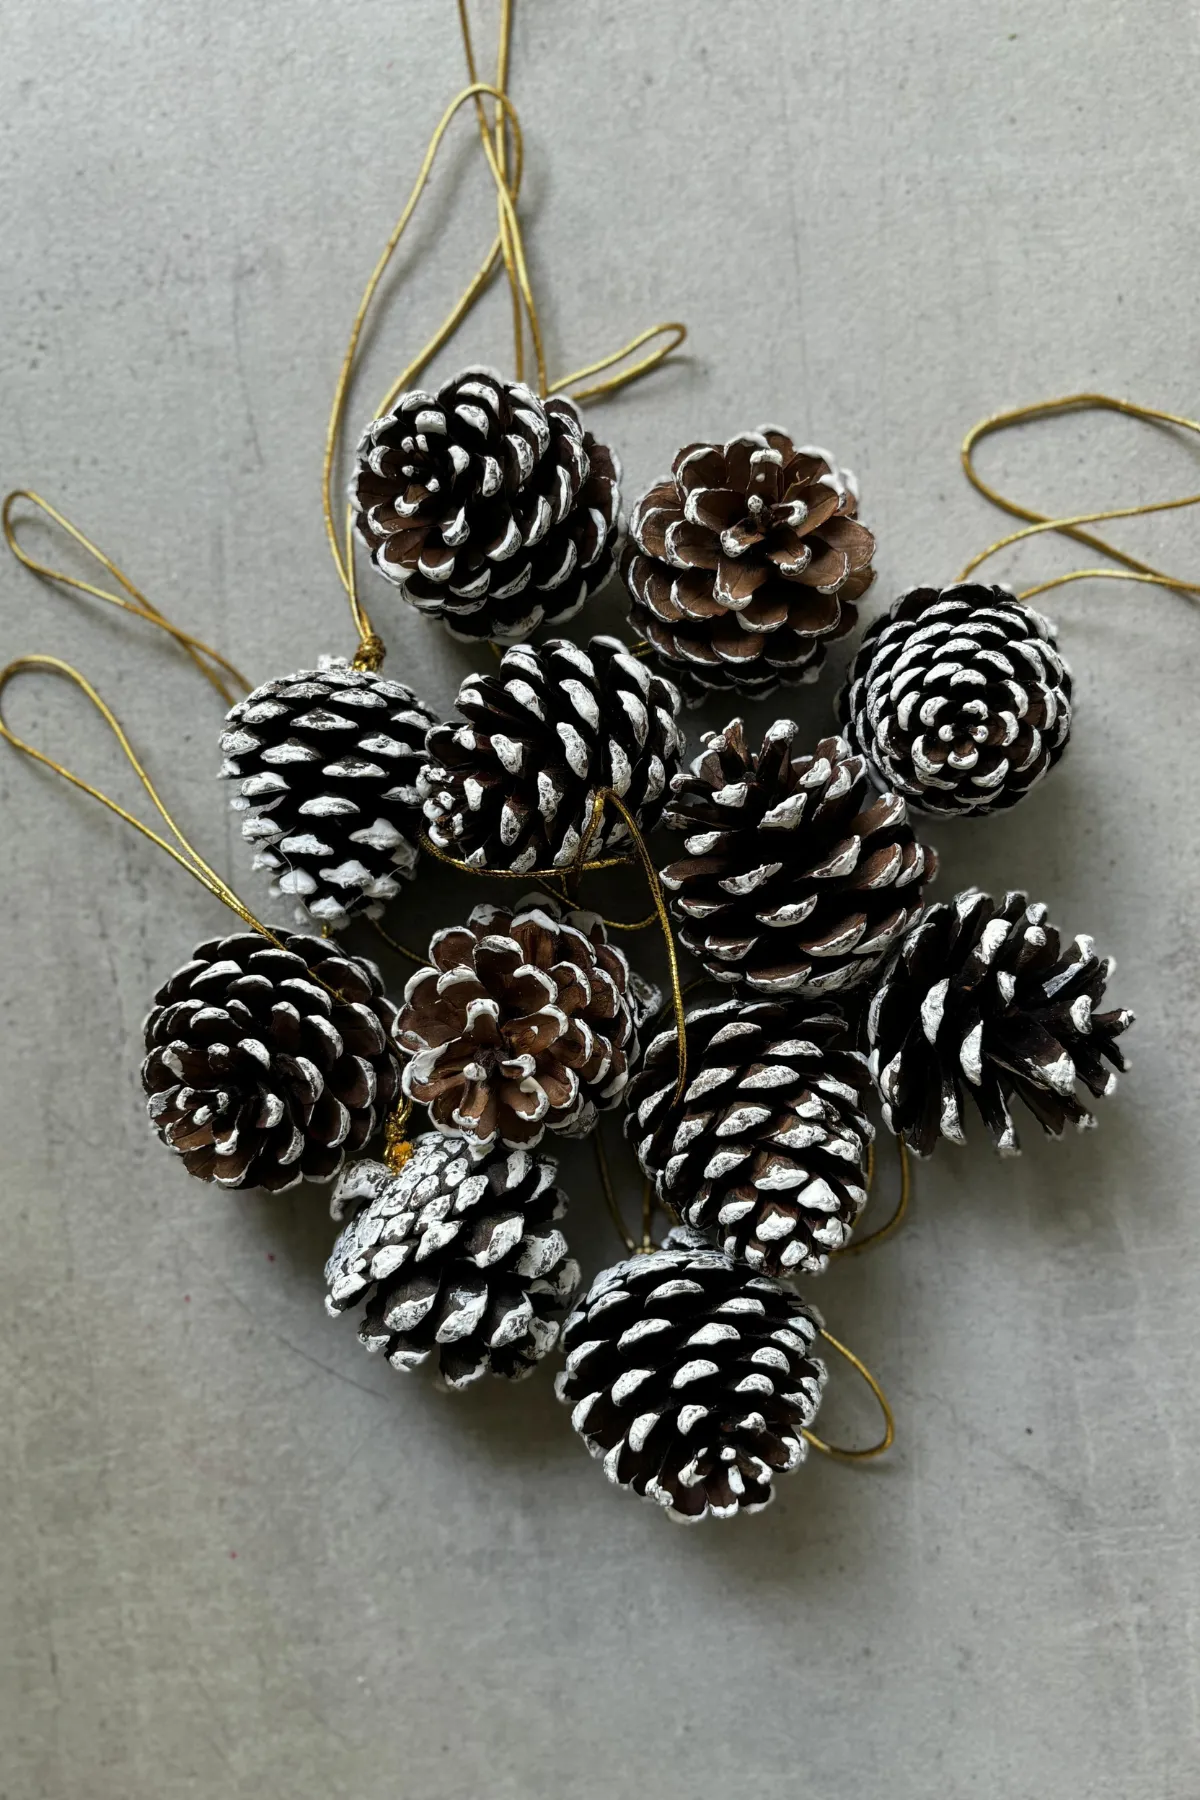
Pinecones are natural, which means they’re sometimes home to tiny insects and always full of sap. Bake them at 200°F for about an hour on a foil-lined sheet before you paint anything — it dries the sap so paint actually sticks, and it evicts anything living inside. Skip this step and you’ll find sticky spots on your branches in February. Use acrylic rather than cheap craft paint, which cracks as the scales open and close with humidity.
17. Brown Paper Snowflakes Cut From a Grocery Bag
Fold your paper bag into a wedge no thicker than eight layers. Past that, scissors start crushing the folds instead of cutting them, and your snowflake comes out with ragged edges no amount of ironing will fix. A standard grocery bag flattens into a rectangle about 12 by 17 inches, which folds down nicely into a 6-inch wedge. Cut the outer profile first, unfold, refold if you need to, then cut the interior details. Trying to cut everything at once is how you end up with a paper accordion.
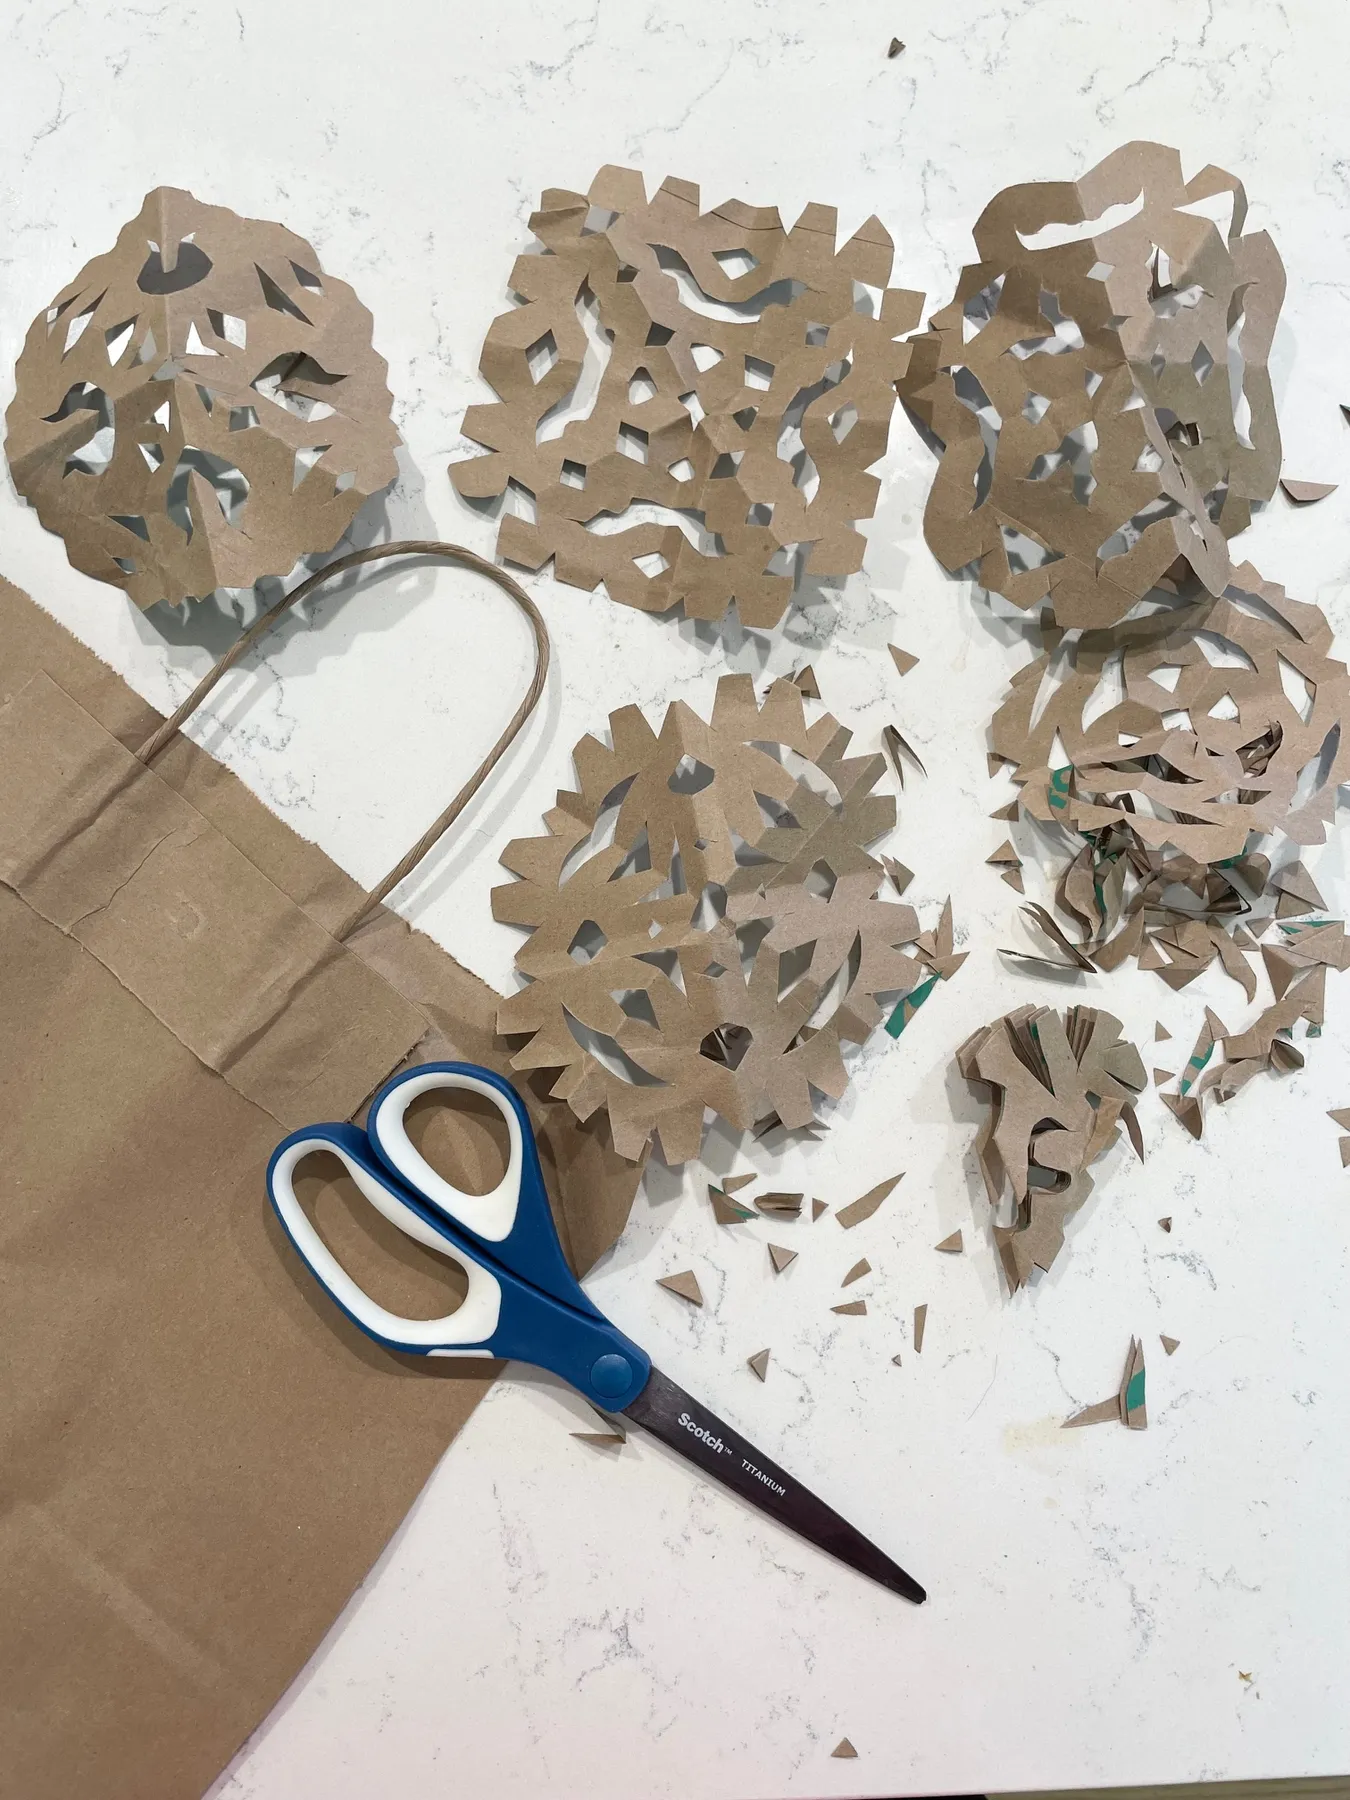
Cost for a full window’s worth:
- Brown paper grocery bags: free, or $3 for a roll of kraft paper
- Sharp scissors: $8-$15
- Bone folder or a clean spoon for creasing: $0-$6
- Cotton string and small clips: $5
- Optional metallic paint pen for edges: $5-$8
Total: $18-$37 for 20 or more snowflakes. Budget alternative: skip the bone folder and use your thumbnail, and borrow scissors from the kitchen drawer.
18. Spiral Felt Rose Ornament on a Flocked Tree
It’s the green leaf. A rolled felt spiral in brown is a nice enough ornament, but on a flocked tree it nearly disappears — brown against frost-white branches is a low-contrast pairing. That single small green felt leaf glued behind the rose is what gives the eye somewhere to land, and the green quietly echoes the tree itself. Remove it and the ornament becomes a brown circle on a white tree. It’s a two-cent fix that decides whether the piece reads as designed or accidental.
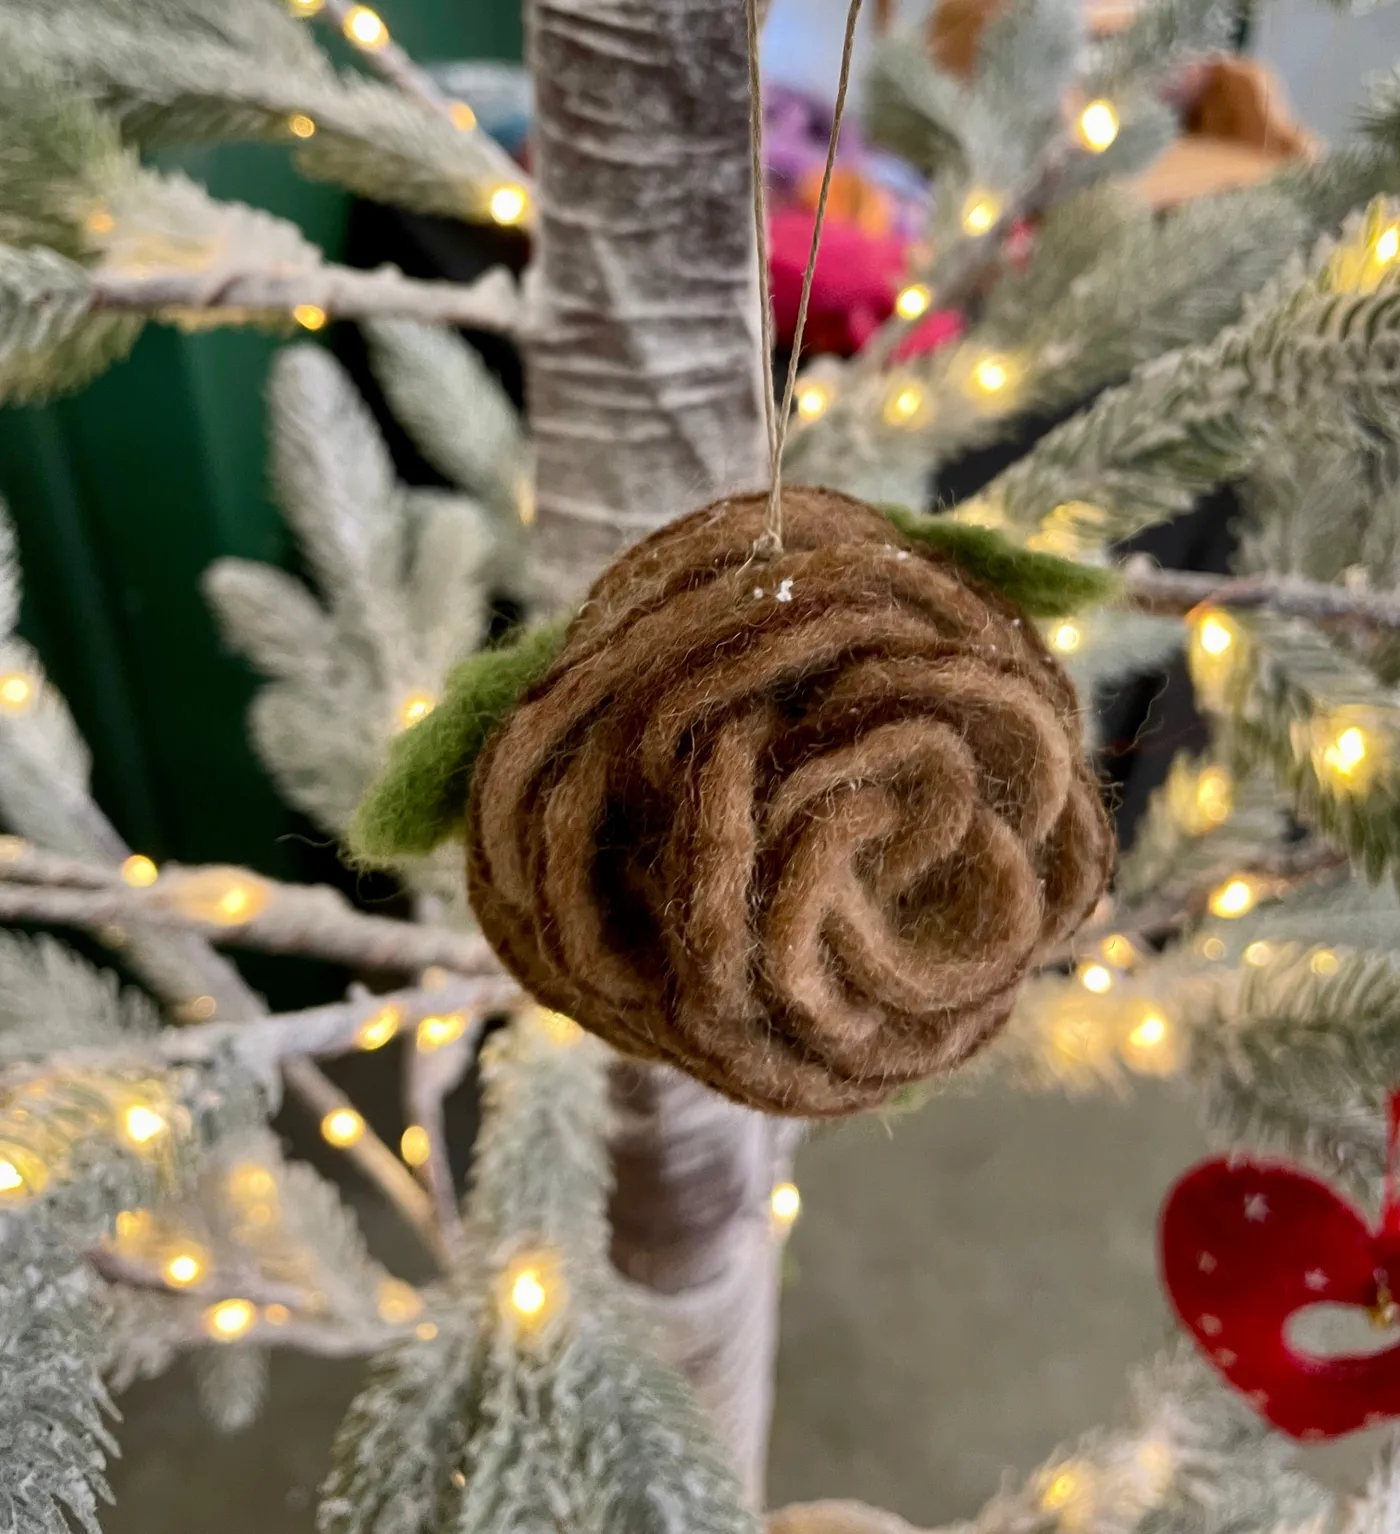
Felt ornaments are light — this one weighs under an ounce — so they scale generously. A 4-inch rose looks right on a 7-foot tree and slightly lost on a 9-foot one; bump to 6 inches if your ceiling is over 9 feet. Flocked trees also need more spacing than bare ones, so hang these 6 to 8 inches apart or the texture turns into visual noise. If your tree is under 5 feet, see Idea #20 for smaller-scale pieces that still hold their own.
19. Stone Fireplace With a Toile Bow and Nutcracker Sentries
A giant fabric bow sounds expensive until you make it yourself. Three yards of toile or any large-scale printed cotton runs $18-$30 at Joann, and that’s enough for a 30-inch bow plus tails. Add a $20 garland, a $12 bag of mixed berries, and a strand of warm white lights you already own, and the whole mantel lands around $60. The nutcrackers are the flexible piece — two 3-foot figures cost $80-$200 new, but thrift stores and estate sales turn them up for $15 each every January.
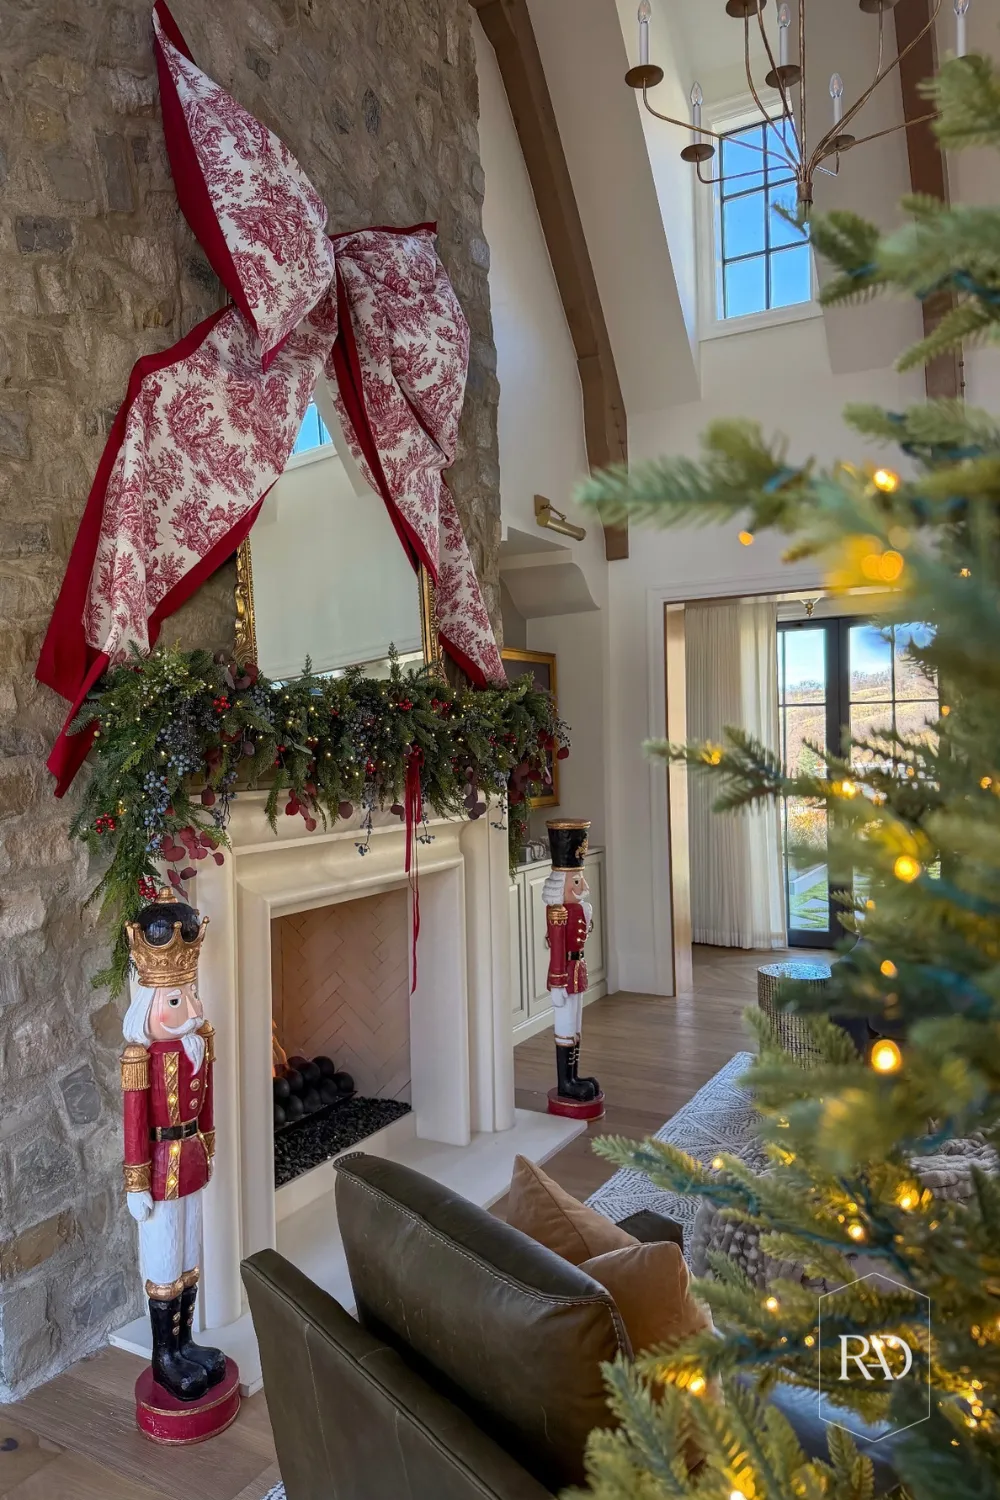
Big bows are having a moment. The oversized-fabric-bow look started in fashion and event design, moved onto gift wrapping, and by 2025 was showing up on mantels instead of wreaths. In 2026 it’s one of the most photographed mantel stylings on Pinterest, and the toile version specifically nods to a wider grandmillennial revival — chintz, blue-and-white, and traditional prints all reading as fresh again after a decade of minimalism. It sticks around because it’s essentially a classic Christmas bow, just bigger.
20. Honeycomb Paper Tree in Deep Green With Bubble Candles
Honeycomb paper is remarkably tough — it survives being flattened and reopened dozens of times — but it hates moisture. Steam from a kitchen or a humidifier will soften the folds and the tree will slowly slump. Keep it out of bathrooms and away from the kettle. The good news: it stores completely flat, which means a set of three takes up less shelf space than one ceramic figurine. Expect five to seven seasons before the fold lines start showing white.
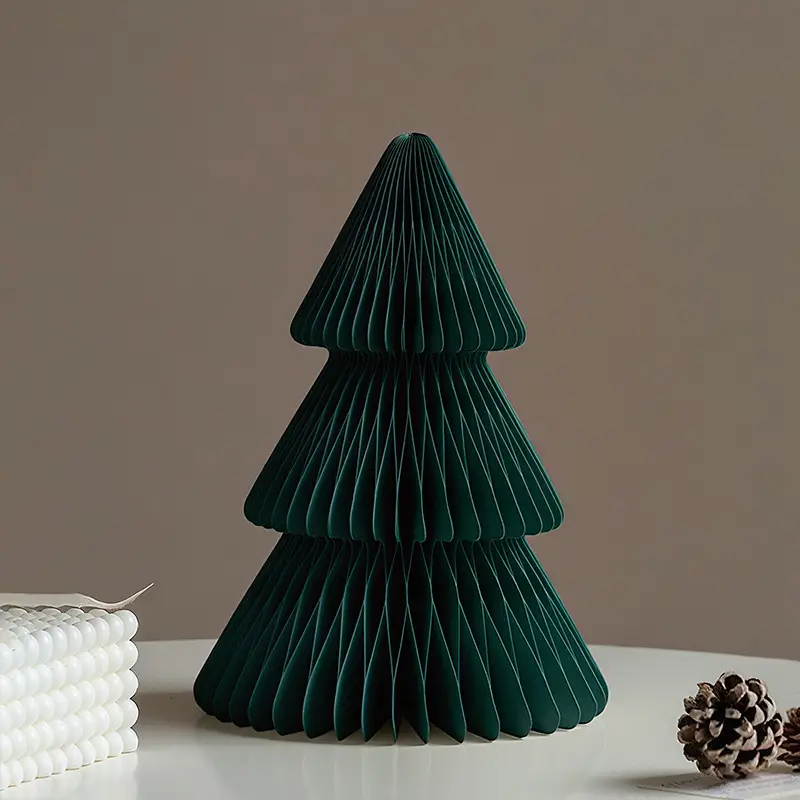
If you’re folding your own instead of buying:
- Cut two identical tree silhouettes from heavy cardstock.
- Score horizontal fold lines every 1 inch down the center of each.
- Accordion-fold both pieces along the score lines.
- Glue the two panels back to back along one outer edge only.
- Open it up, align the tiers, and clip a binder clip at the base until dry.
About 40 minutes per tree and roughly $6 in cardstock for a set of three.
21. Pinecone Flower Ornament With Felt Leaves and Twine
What makes this work is that the pinecone is disassembled and rebuilt, not just decorated. The larger, flatter scales from the outside of the cone become petals; the smaller, tighter scales from the core become the center. That’s why the finished piece reads as a flower instead of a pinecone with a bow on it. The two dark green felt leaves behind are the finishing move — they give the flower a silhouette instead of a circle, and the felt-to-cone contrast keeps the whole thing from looking like potpourri.
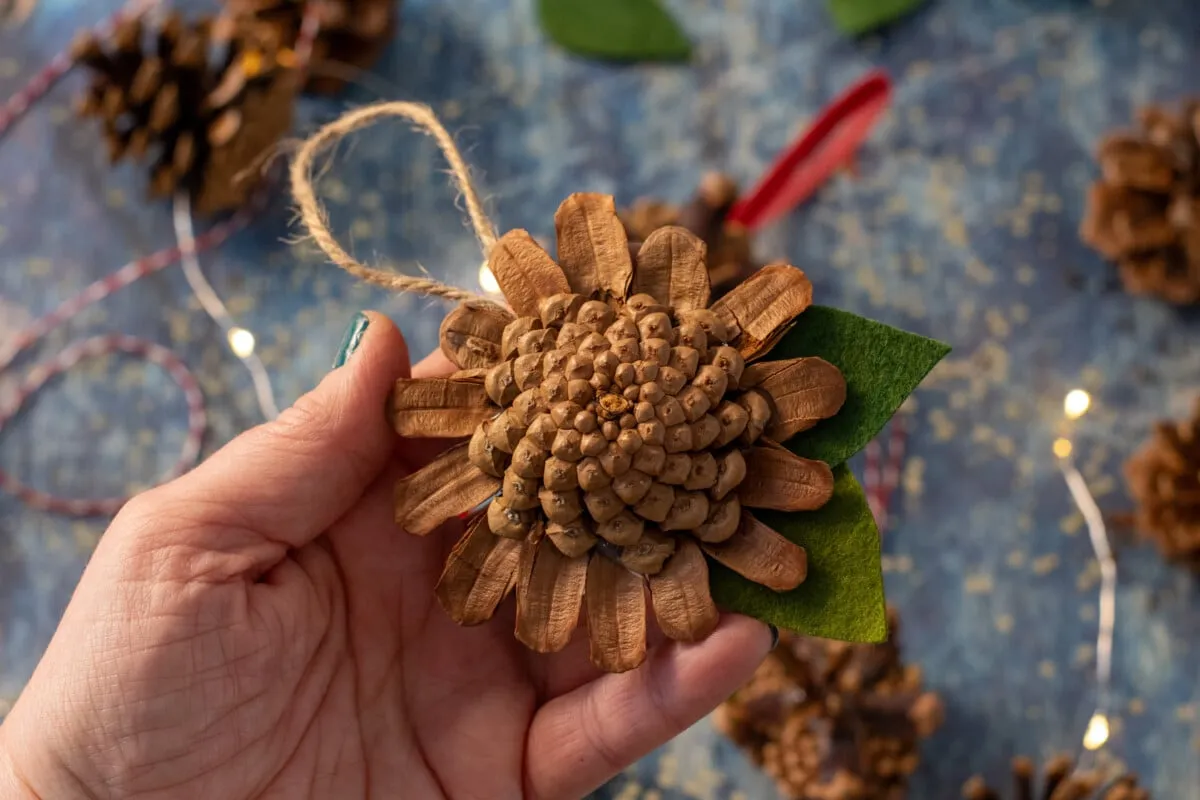
Check these before you start pulling scales:
- Use a fully dried, opened cone — a tight green one won’t separate cleanly.
- Pull scales with needle-nose pliers, not your fingers; the tips are sharp.
- Lay out your petals in a circle on the table before gluing anything down.
- Bag the smallest scales separately so the center doesn’t get lost.
- Plan on one cone per ornament plus a few spare scales for breakage.
22. Paper Orb and Felt Wreath Ornaments on a Lit Tree
The mix here is roughly 55% patterned paper, 25% felt, 15% ribbon, 5% sparkle. The paper orbs carry all the color — plaid and gingham in red, blue, and cream — which is a lot of pattern, so the green felt wreath and the small red bow are deliberately plain to give the eye somewhere to rest. Swap the paper for solid cardstock and you’ll want a patterned ribbon to keep the interest. If you love pattern, reduce it to one motif instead of three.
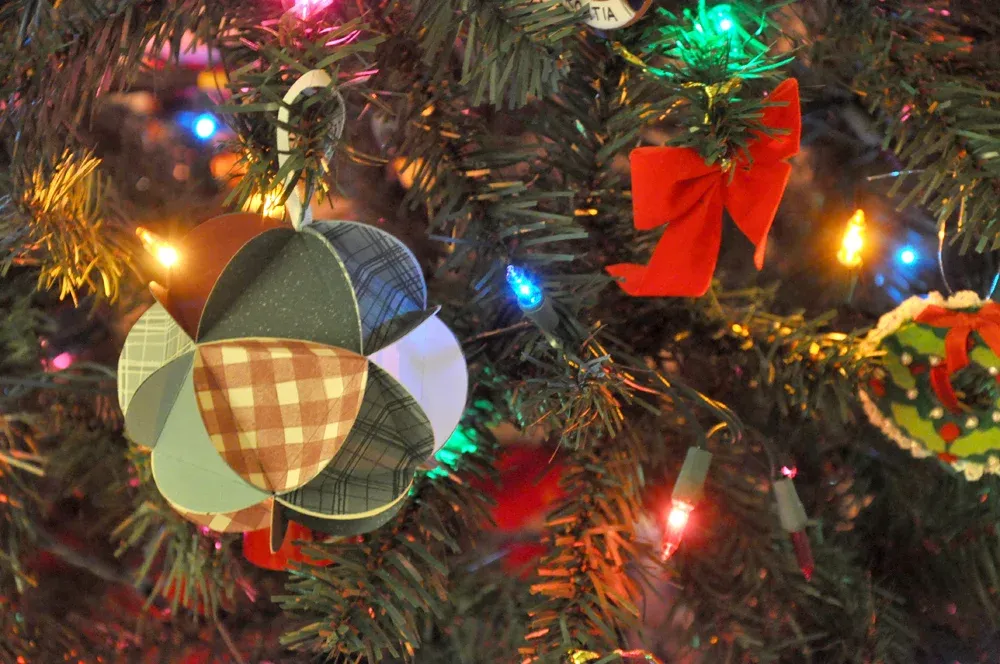
Paper orb ornaments fail for one reason: the fold lines don’t meet. Cut your cardstock strips to an exact width — 1 inch for a 3-inch ornament, 1.5 inches for a 4-inch — and use a paper trimmer rather than scissors so every strip is identical. Stack them, punch a single hole through the bundle at both ends, and thread with a brad or a length of twine. If your strips vary even a sixteenth of an inch, the orb leans and the seams wobble.
23. Pinecone Cone Tree, Wreath, and Wooden Snowman Set
Recreating this three-piece arrangement:
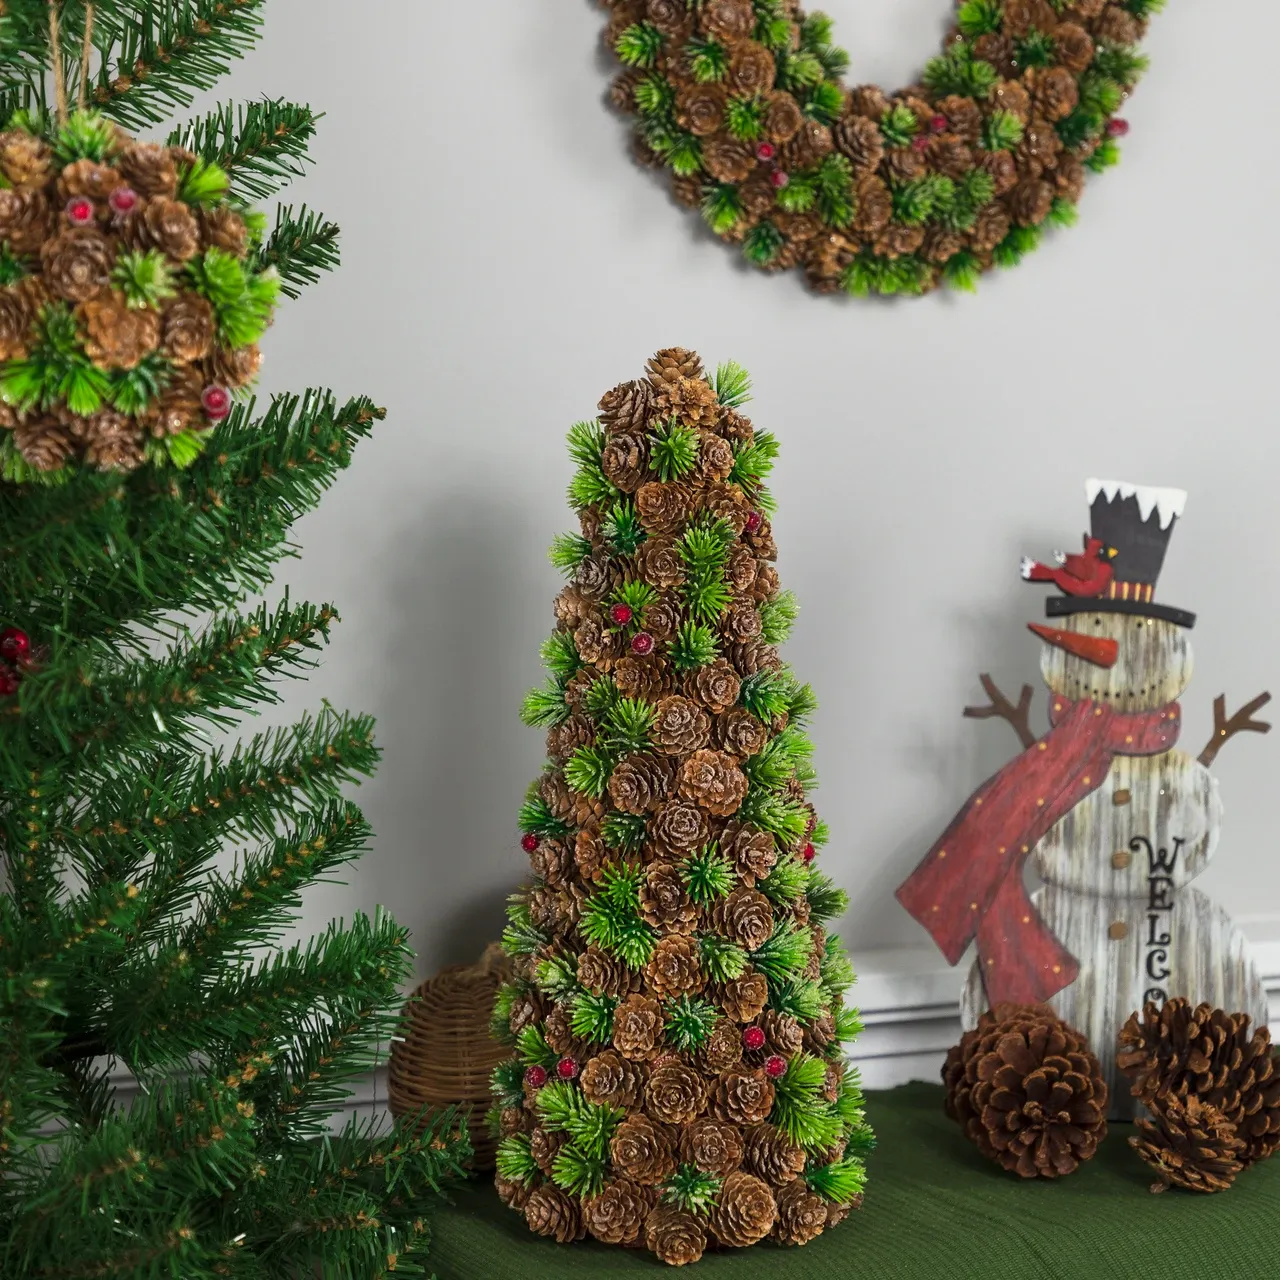
- Pinecones, 60-80 mixed sizes: $15-$30
- Styrofoam cone forms, 18 inch and 12 inch: $10-$20
- Grapevine wreath base: $6-$14
- Faux pine sprigs and red berries: $12-$22
- Wooden snowman figure or cutout supplies: $10-$25
Total: $53-$111. Budget alternative: collect pinecones on a November walk, roll a cardboard cone from a shipping box for the base, and cut the snowman from a scrap of half-inch plywood.
on pinecone trees: they shed. Between the natural scale drop and whatever the hot glue missed, expect to vacuum around the base weekly through December. Seal the whole tree with a matte clear spray once assembled — two light coats stops most of the flaking without changing the look. Also place it somewhere it won’t get bumped. A fully loaded 18-inch cone tree is top-heavy, and a shoulder brush will send it over.
24. Papier-Mâché Ornaments With Hand-Painted Holly
The texture is the point. These aren’t smooth, glossy ornaments — the papier-mâché surface is lumpy and matte, and that’s exactly what makes the hand-painted holly and stripes feel like something from a 1950s kitchen table rather than a big-box aisle. Sanding them smooth would ruin them. The gold glitter on the caps is the only concession to shine, and it’s what keeps the rustic look from tipping into shabby. Compare with Idea #10, where the shine does all the work instead.
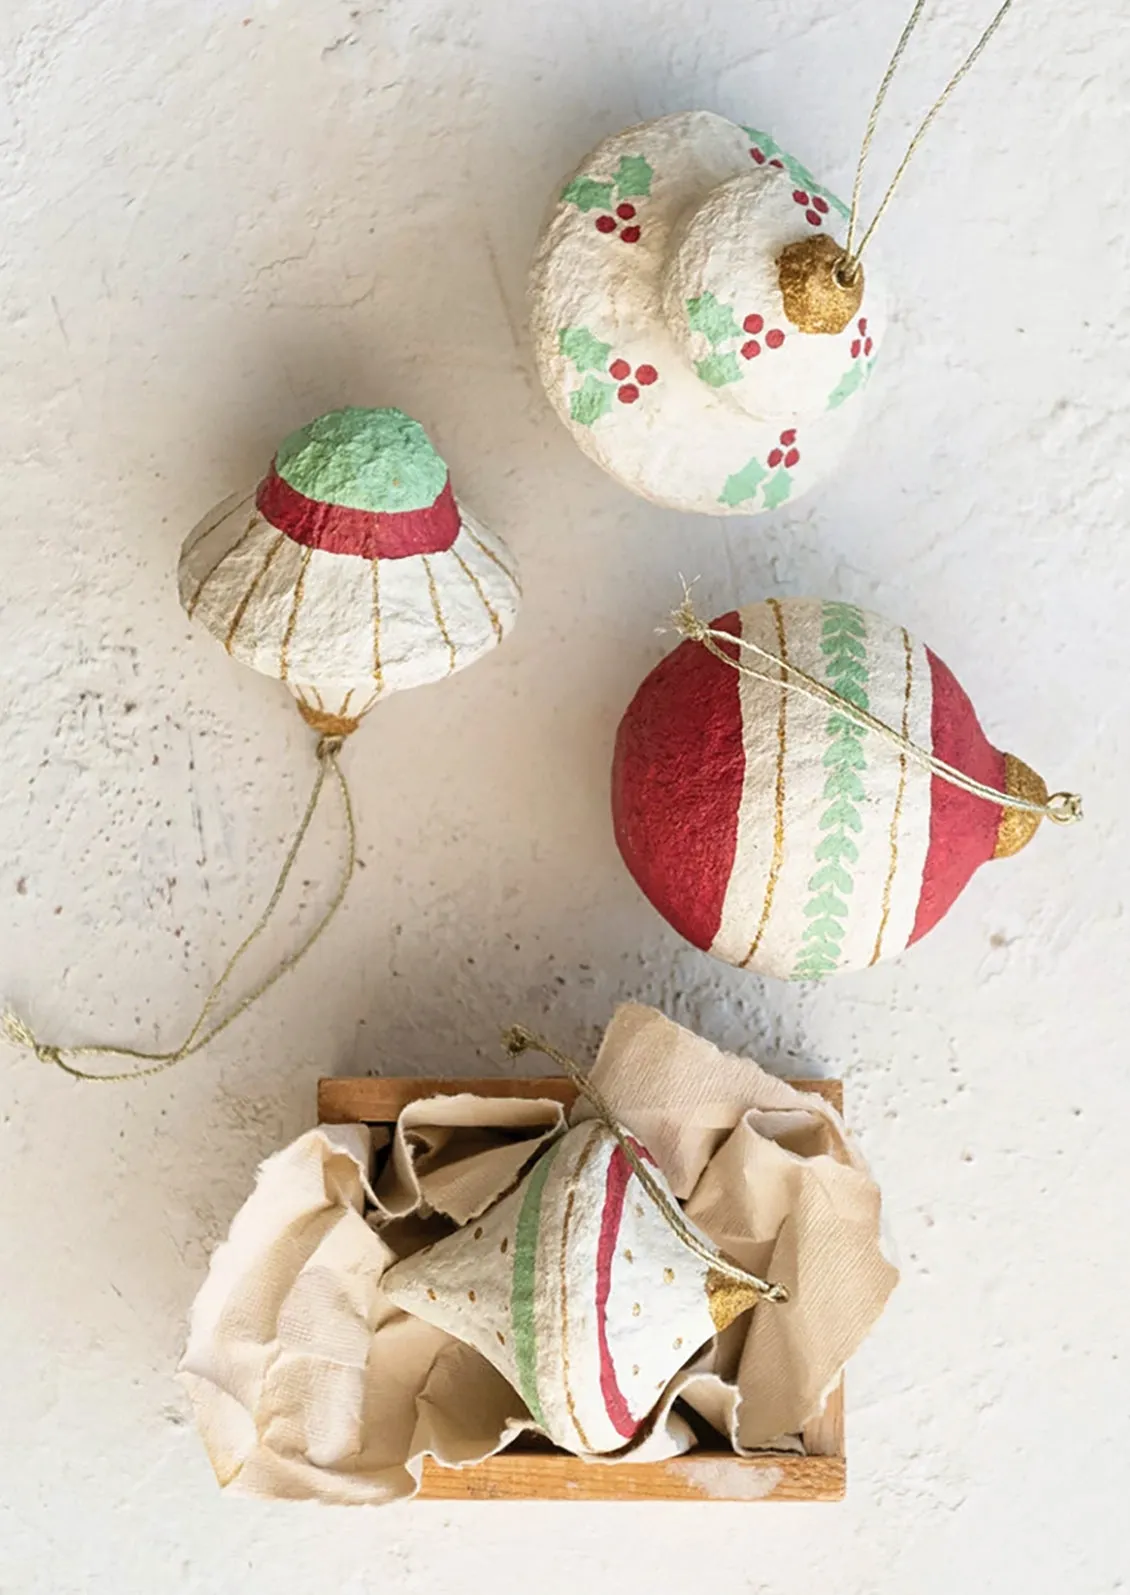
Papier-mâché blanks cost $1-$2 each at craft stores, but you can make your own from a $4 bag of flour, water, and strips of newspaper over a balloon or a plastic ornament mold. Paint with acrylics in off-white, deep red, and light green — the classic trio — and finish the caps with gold glitter and Mod Podge. Total cost for a set of six: under $12. The small wooden box and crumpled fabric in this vignette came from a thrift store for about $3.
25. Metallic Pinecone on Rustic Wood With Flocked Branches
Metallic pinecones are statement pieces, and statement pieces need room. One 4-inch cone looks right on a console or a wide shelf; three in a row starts to look like a centerpiece. They also need a darker backdrop — dark metallic brown disappears against a grey wall but pops hard against reddish-brown wood, which is why this vignette works. If your surfaces are light oak or white, add a dark tray or a runner first, and keep the cone as the only metallic object in the arrangement.
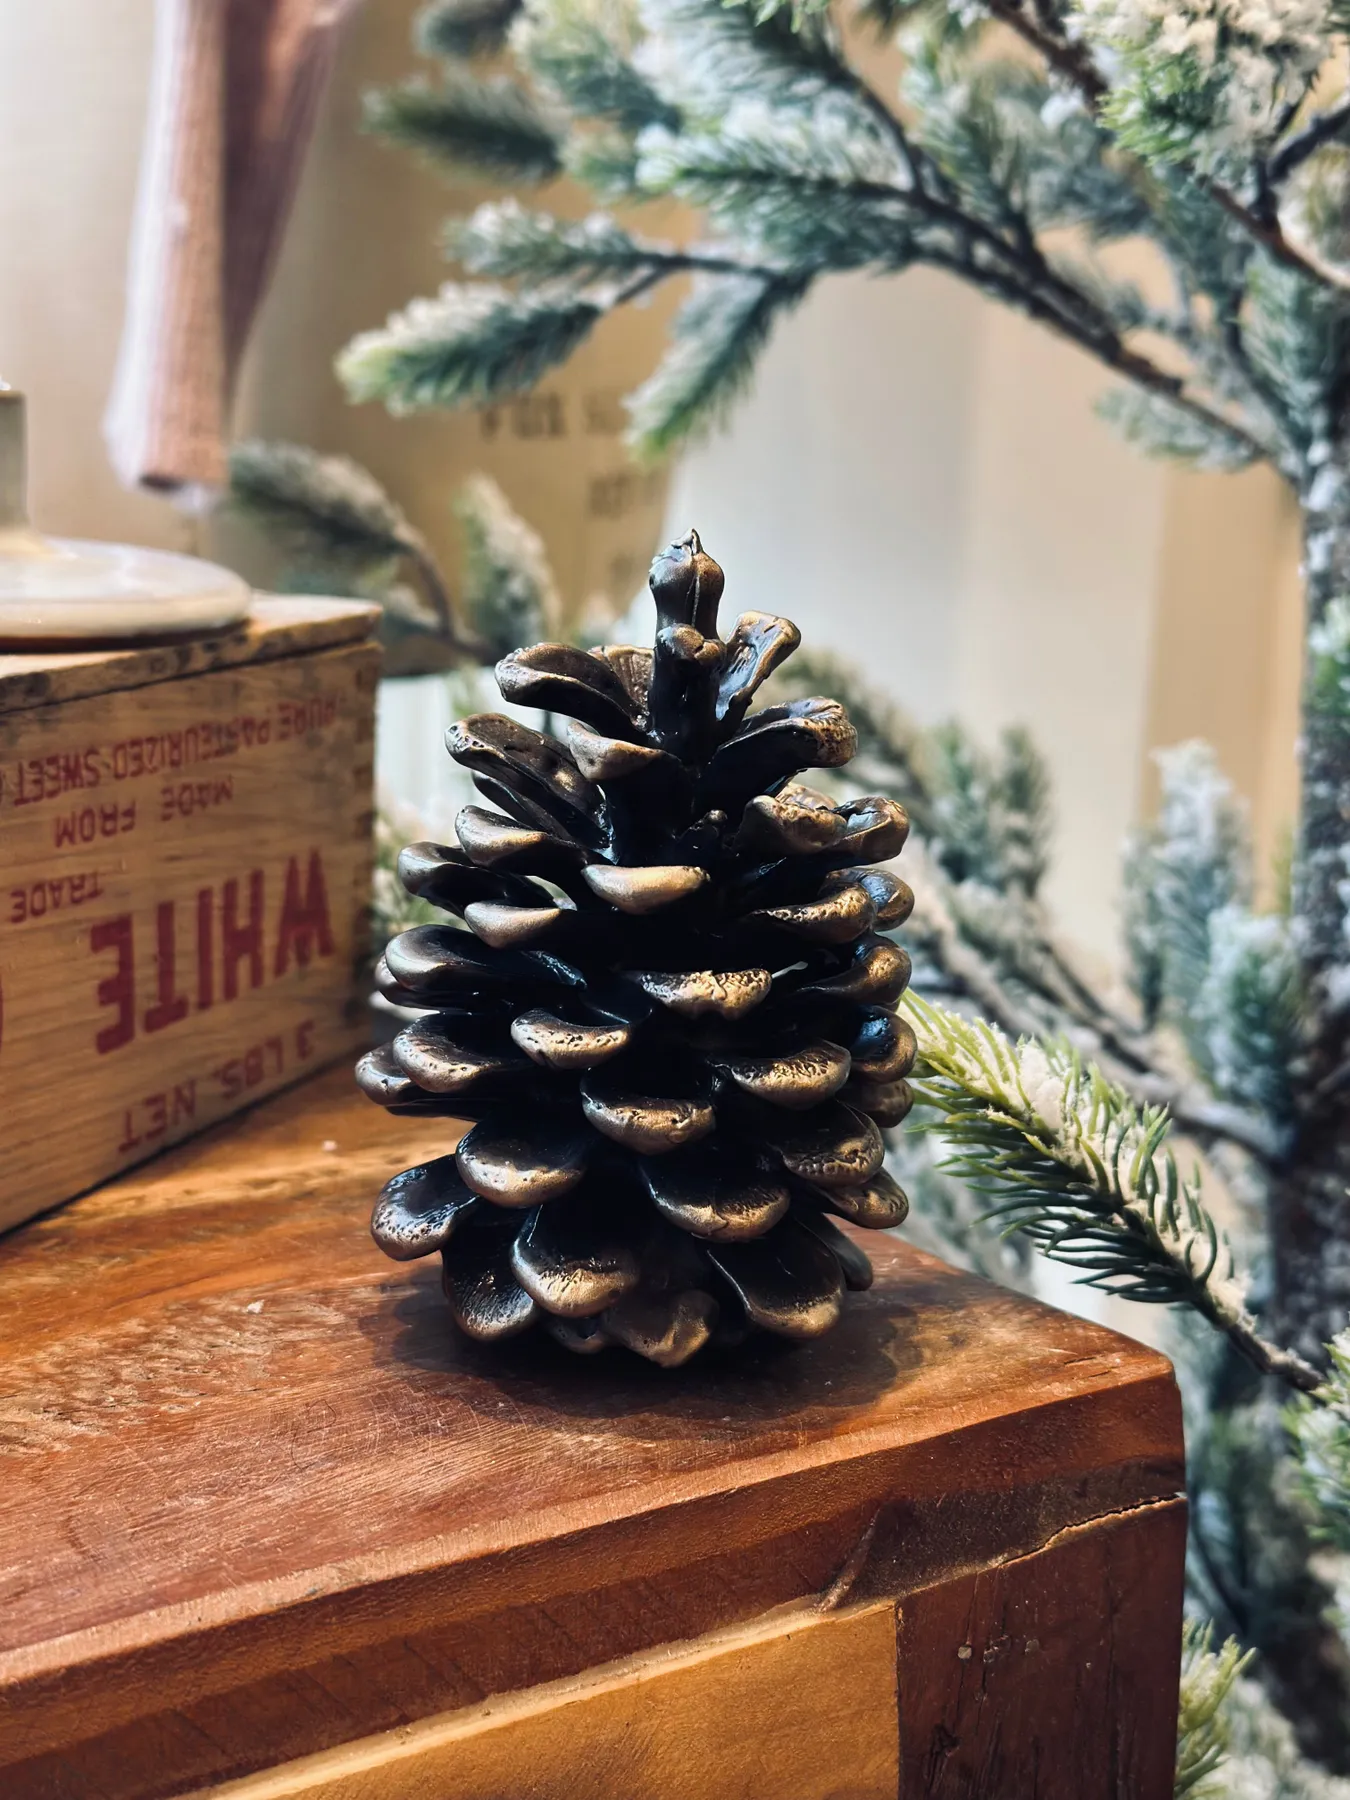
Metallic-coating a pinecone is a 30-minute job with a long drying tail:
- Bake the cone at 200°F for 45 minutes to dry the sap.
- Spray a light coat of matte brown as a grip base and let it cure overnight.
- Mist metallic spray from 10 to 12 inches, rotating the cone through three thin passes.
- Let it dry a full 24 hours before handling — metallic finishes stay tacky longer than you’d think.
About $14 for spray and one cone; a can covers roughly eight.
26. Woven Raffia Star Ornament With White Berries
There’s almost nothing to this ornament and that’s exactly why it works. A woven star, some small white beads at the tips, a clear hanger — three elements, no color, no glitter, no pattern. It reads elegant on a decorated tree specifically because everything around it is busy. Put it on a bare-branch tree and it disappears. The lesson is contrast by subtraction: when your tree is loaded, the quietest ornament is often the one guests ask about.
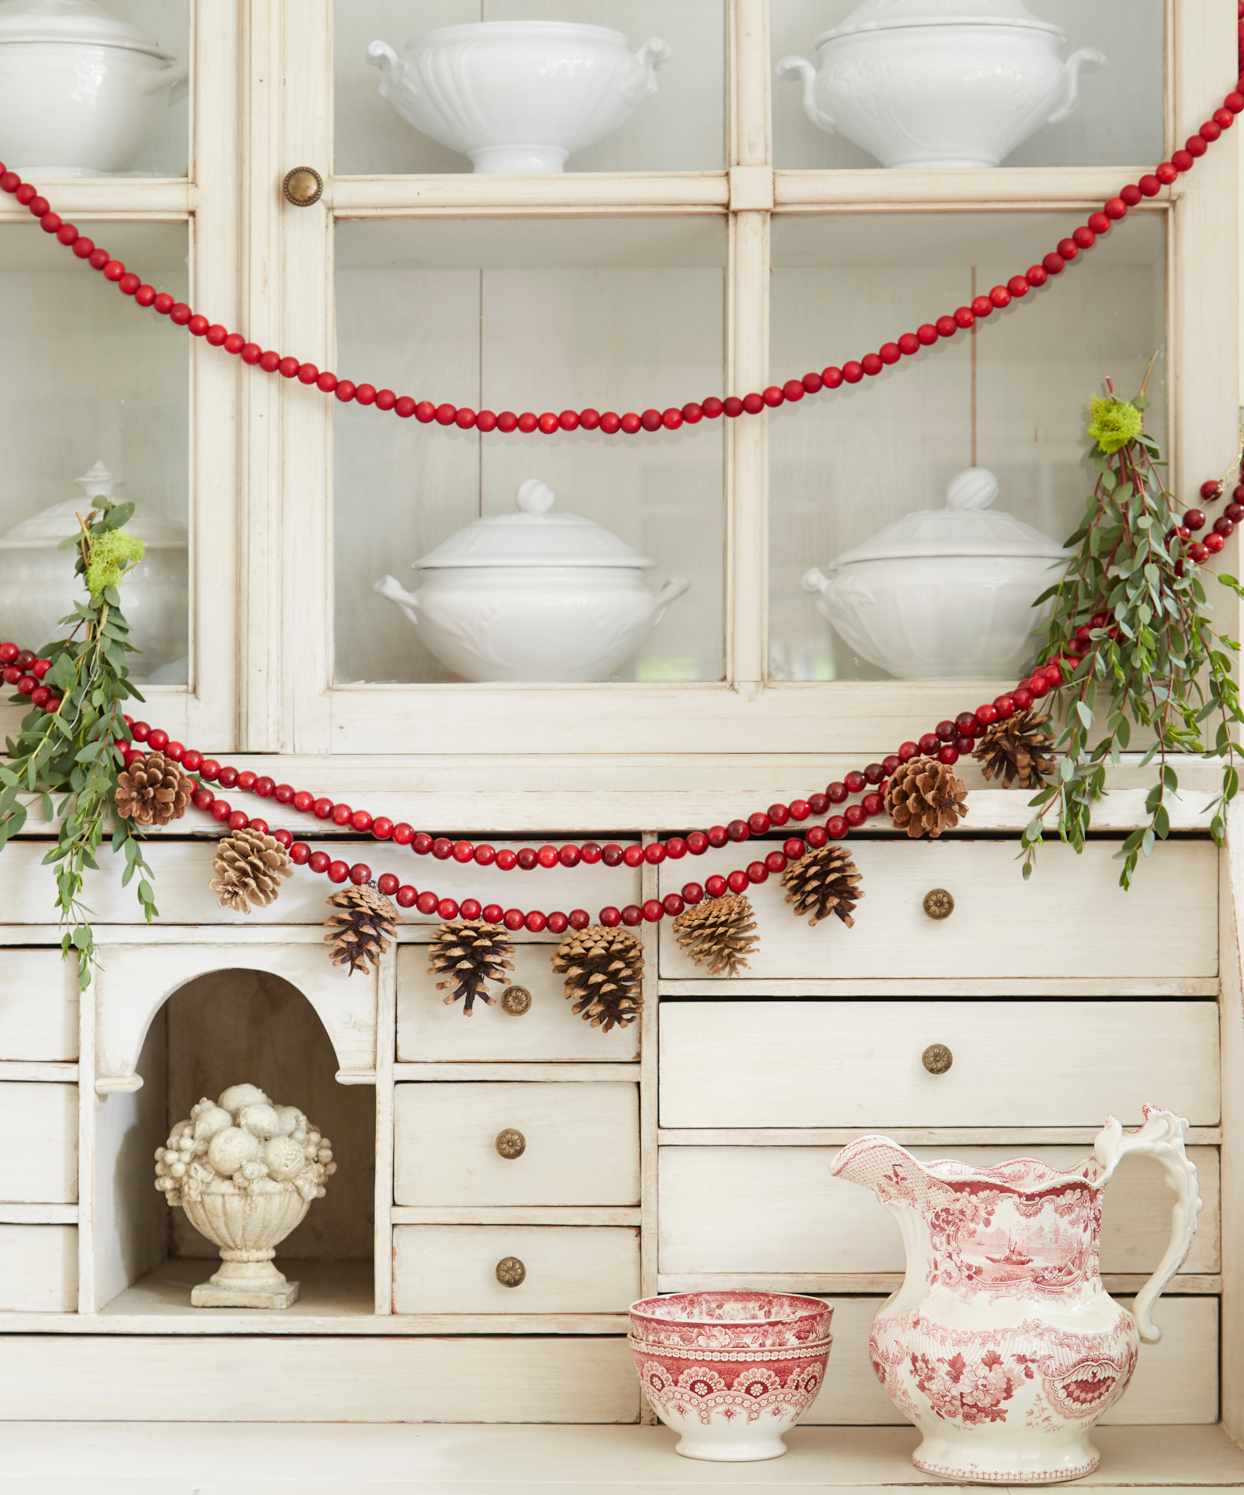
Natural fiber ornaments have a real shelf life. Raffia and straw dry out, and once they’re brittle the points snap. Keep them out of direct sun and away from heating vents — dry air kills them, not age. A light mist of water once a year, then air-drying completely before storage, keeps the fibers supple. Store in tissue, never a plastic bag, since trapped moisture causes mildew. Expect three to four seasons from a good one, which is fine at $4-$8 apiece.
27. Natural Pinecone Held in a Hand With Teal Nails
If you’re collecting pinecones this fall, pick them while they’re still slightly closed and let them finish opening indoors. A closed cone dries into a tight, sculptural shape; one that’s already fully open outside has released its seeds and often has broken scales. Bring them home in a paper bag, not plastic, and leave them in a warm dry room for a week. The ones that open unevenly are the most interesting to work with — that irregularity is the entire charm of natural material.
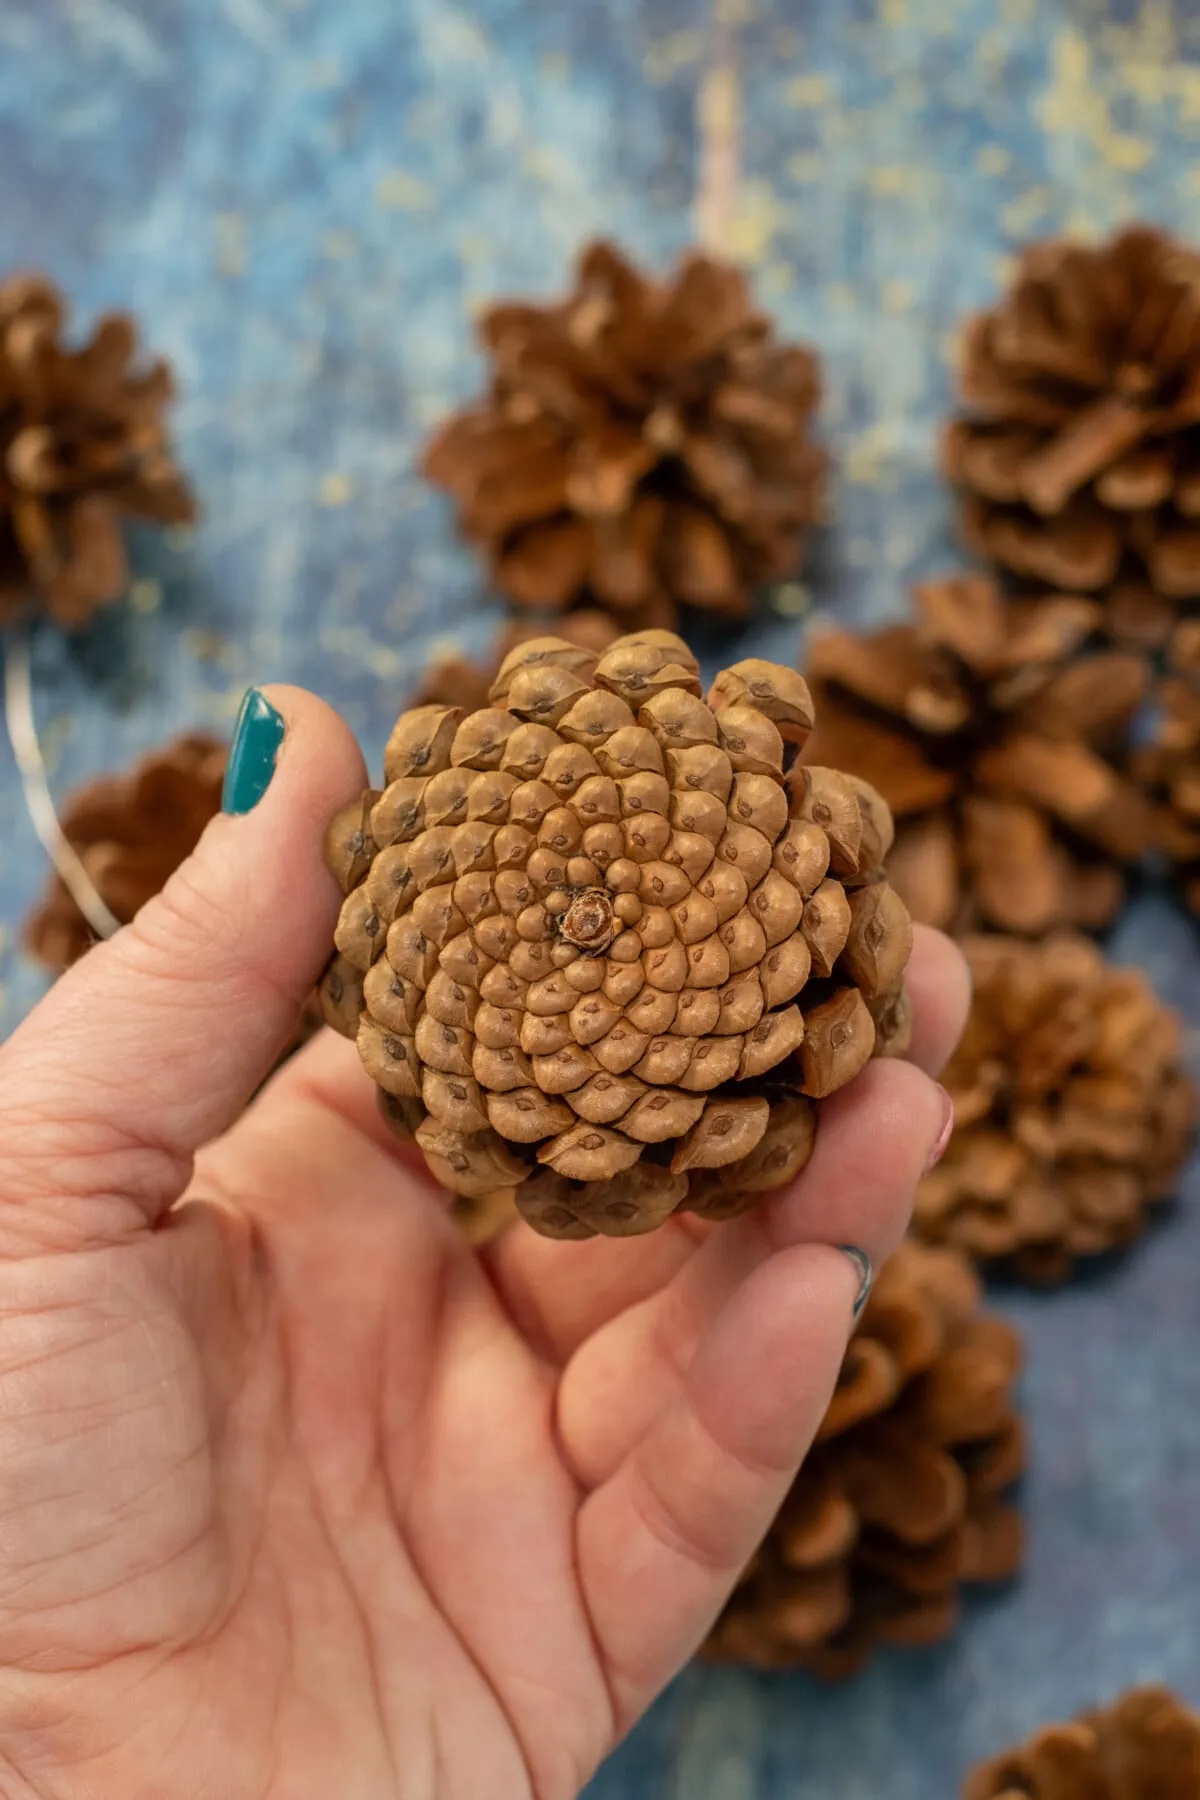
Think of a pinecone display as 80% natural brown, 15% cool accent, 5% metal. Here the brown cones dominate, the muted blue surface supplies the accent, and the thin metallic wire and teal polish add the small hit of shine and cool color. Swap the blue for charcoal and it goes moody and masculine. Swap it for cream and it turns soft and Scandinavian. The ratio stays put — only the accent changes, which is why this palette works on a shelf, a mantel, or a table.
28. Warm String Lights Over Paper Cutouts and Beads
The “craft table at night” aesthetic — warm string lights, half-finished paper trees, scattered beads — is a direct response to the five-minute-craft video era. People got tired of polished, sped-up tutorials and started sharing the messy middle instead. In 2026 that messy middle is the content. The practical upside: you don’t need a styled photo to enjoy your own table. Warm light and a little glitter do more for the mood than a clean workspace ever will.
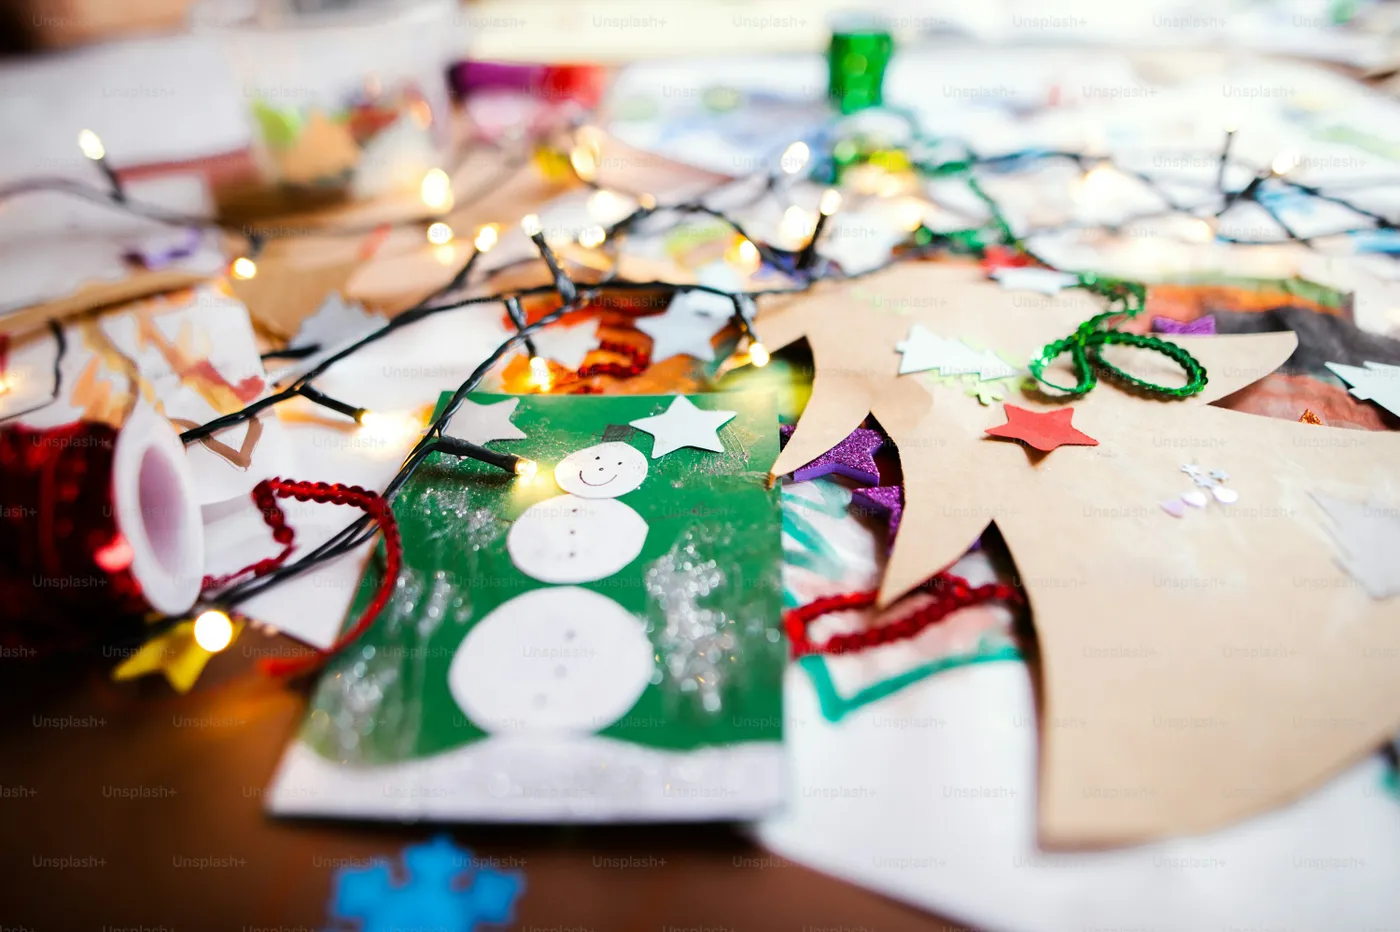
Stocking a basic Christmas craft bin:
- Warm white LED string lights: $8-$15
- Cardstock and patterned paper pack: $10-$20
- Beads and a red beaded garland: $8-$16
- Green glitter string and loose glitter: $6-$12
- Glue gun, glue sticks, and scissors: $15-$25, one time
Total: $47-$88, and most of it carries over year to year. Budget alternative: buy the paper pack after Christmas at 70% off and use twine in place of glitter string.
29. Origami Crane With a Red Tip on Brown Twine
Paper cranes look delicate but they hold up better than you’d expect — the real problem is the twine. Brown jute against a green tree absorbs light, and the crane can look like it’s floating in a void. Swap to a thinner natural cotton cord or clear filament if you want the crane to feel lighter among the branches. Also weight the bottom tip with a single tiny dot of glue so the crane doesn’t spin on the string every time somebody walks past it.

Working through this one:
- Use paper no heavier than 80 gsm — origami paper, not cardstock.
- Fold the crane completely before threading anything through it.
- Crease every fold with a fingernail; soft folds sag within a week.
- Pierce the hanging hole with a needle, not scissors.
- Choose your hanging height before you tie the knot — retying creases the back.
30. Foraged Conifer Wreath With Red Berries and Pinecones
This is the cheapest wreath in the whole article if you have access to evergreens. A wire wreath form is $4 at Walmart, floral wire is $3, and the greens are free from a Christmas tree lot’s trim pile — most lots will hand you a bag if you ask in early December. Red berries from the dollar store add $2, light pinecones are $5 a bag, and twine is already in your junk drawer. Total: about $14. Buying everything new still lands under $40.
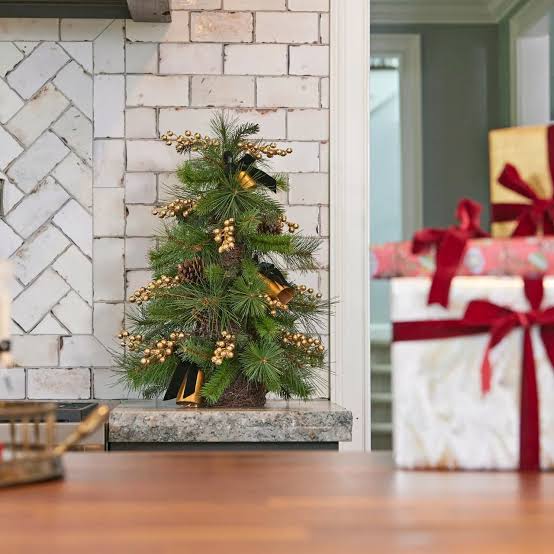
Strip this wreath down to one element and it’s the twine hanger. Not the berries, not the pinecones — the plain, slightly uneven loop at the top. It signals that a person made this with their hands, and it sets the tone for everything below it. A store-bought metal hook or a satin ribbon would push the whole thing toward retail. The moment you use twine, the wreath stops being a product and becomes a foraged object.
31. Snow-Dusted Pinecone Ornaments on Silver Wires
Getting that half-snowed look is a two-tier job:
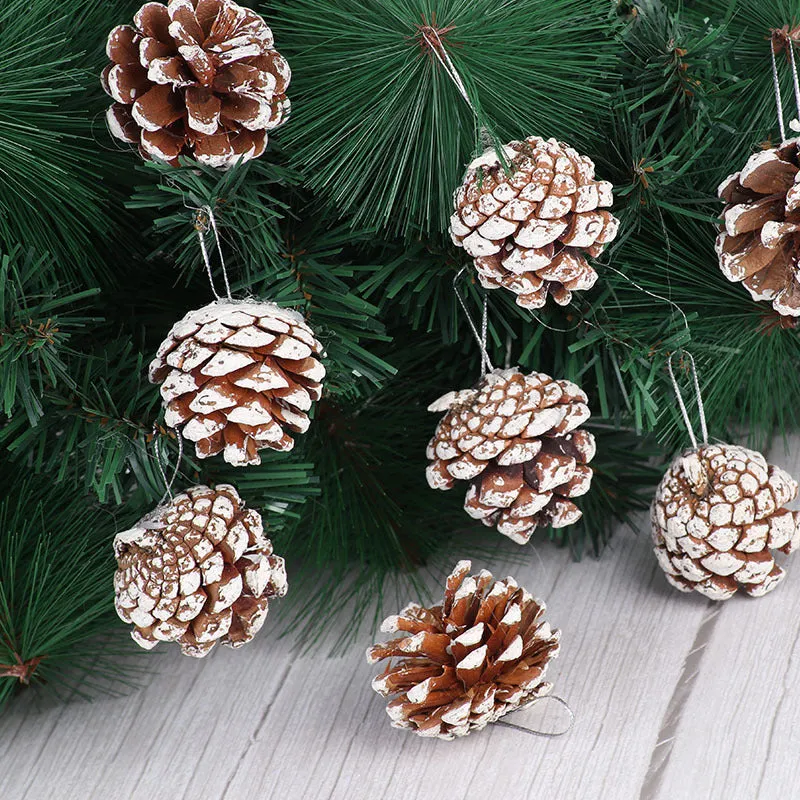
- Dip only the top third of the cone into white craft paint thinned with a little water.
- Roll it gently on a paper towel to knock off the excess, leaving paint in the scale gaps.
- Dry two hours, then dry-brush a little more white onto the outer edges.
- Wire a silver loop through the base with 20-gauge craft wire.
Roughly 20 minutes per cone plus drying, and about $12 in materials for a dozen.
These read best in quantity. One or two snow-dusted cones on a large tree vanish; a cluster of eight to twelve at varying heights creates an actual moment. They also work on a 4-foot tabletop tree, where five or six is plenty. Over 8 feet tall, mix in a few larger 4-inch cones so the smaller ones don’t get lost. Pair them with the natural cones in Idea #16 for a mix of snowed and unsnowed — it always looks more collected than one finish.
32. Barn-Shaped Wooden Ornaments on a Rustic Tray
Three ornaments, three colors, one shape. That’s the whole system. Because each barn is identical in silhouette — same X-braced doors, same mini holly wreath, same jute hanger — the red, green, and white versions read as a set instead of a random mix. If the shapes varied, the colors would feel chaotic. Repetition of form is what lets you get away with three paint colors, and it’s the same principle that makes a matched set of anything look expensive.
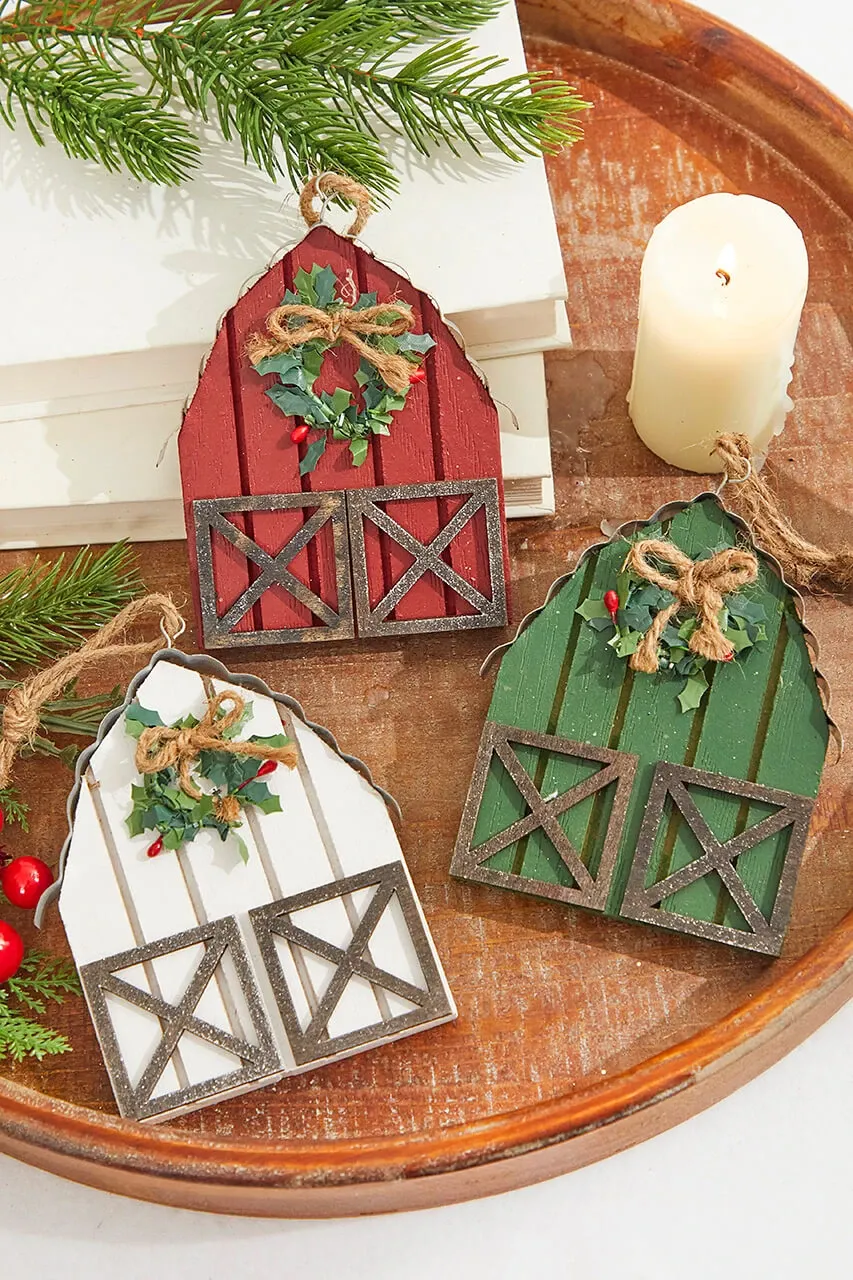
The mini holly wreath is the detail that sells the whole ornament, and it’s easier than it looks. Use a 1-inch grapevine ring, wrap three small sprigs of faux pine around it with floral wire, then hot-glue three red bead berries in a triangle at the bottom. Build the wreath on a separate surface and let it set fully before attaching it to the barn — assembling it in place always ends with glue strings across wet paint. Ten minutes per wreath, about $6 for a dozen.
33. Carved Wooden Pinecone on a Cream Fluffy Textile
The composition is 60% cream textile, 25% carved wood, 15% green pine needles and dark book. The fluffy cream surface is doing the work of a lightbox — it bounces warmth up onto the carved wood and makes an $8 object look considered. Swap the cream for dark grey felt and the same ornament turns modern and moody. Swap it for plaid flannel and you’re in a cabin. The ornament never changes; the surface underneath sets the entire mood.
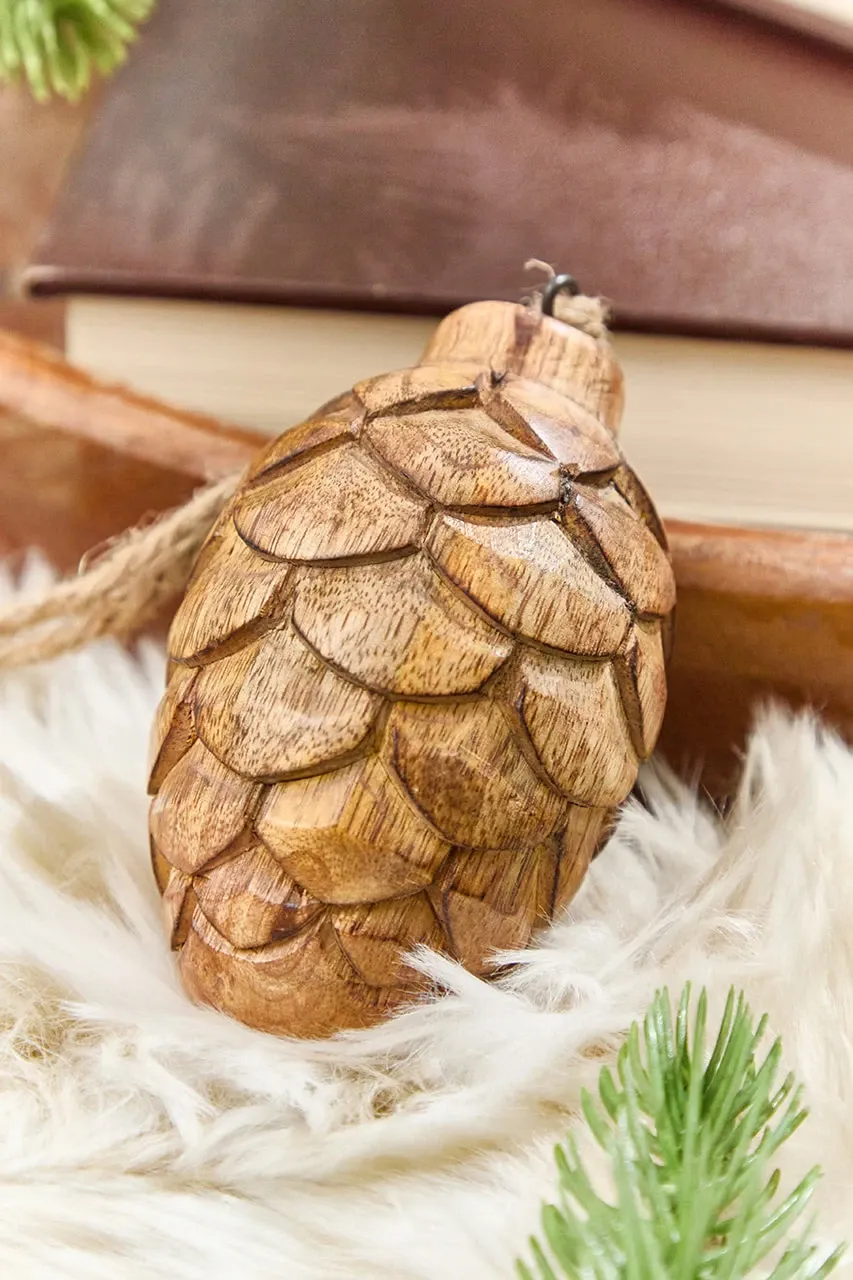
Styling this vignette:
- Carved wood pinecone ornament: $8-$18
- Cream faux fur or boucle textile: $15-$35
- Vintage hardcover book: $3-$10 at a thrift store
- Fresh or faux pine sprigs: $5-$12
- Small wooden riser or tray: $10-$22
Total: $41-$97. Budget alternative: fold a $6 cream throw blanket into a square, and pull greenery from your own tree’s lower branches.
34. Paper Craft Ornaments in Classic Christmas Red and Green
The appeal of paper ornaments is also their weakness: they photograph beautifully and then get crushed. If you’re making a set for a tree that gets handled — kids, pets, guests who can’t resist — reinforce the back of each piece with a second layer of cardstock glued cross-grain. It adds two minutes per ornament and doubles the stiffness. Use heavier thread for hanging, too. Fine craft string snaps, and a falling ornament can take three others with it.
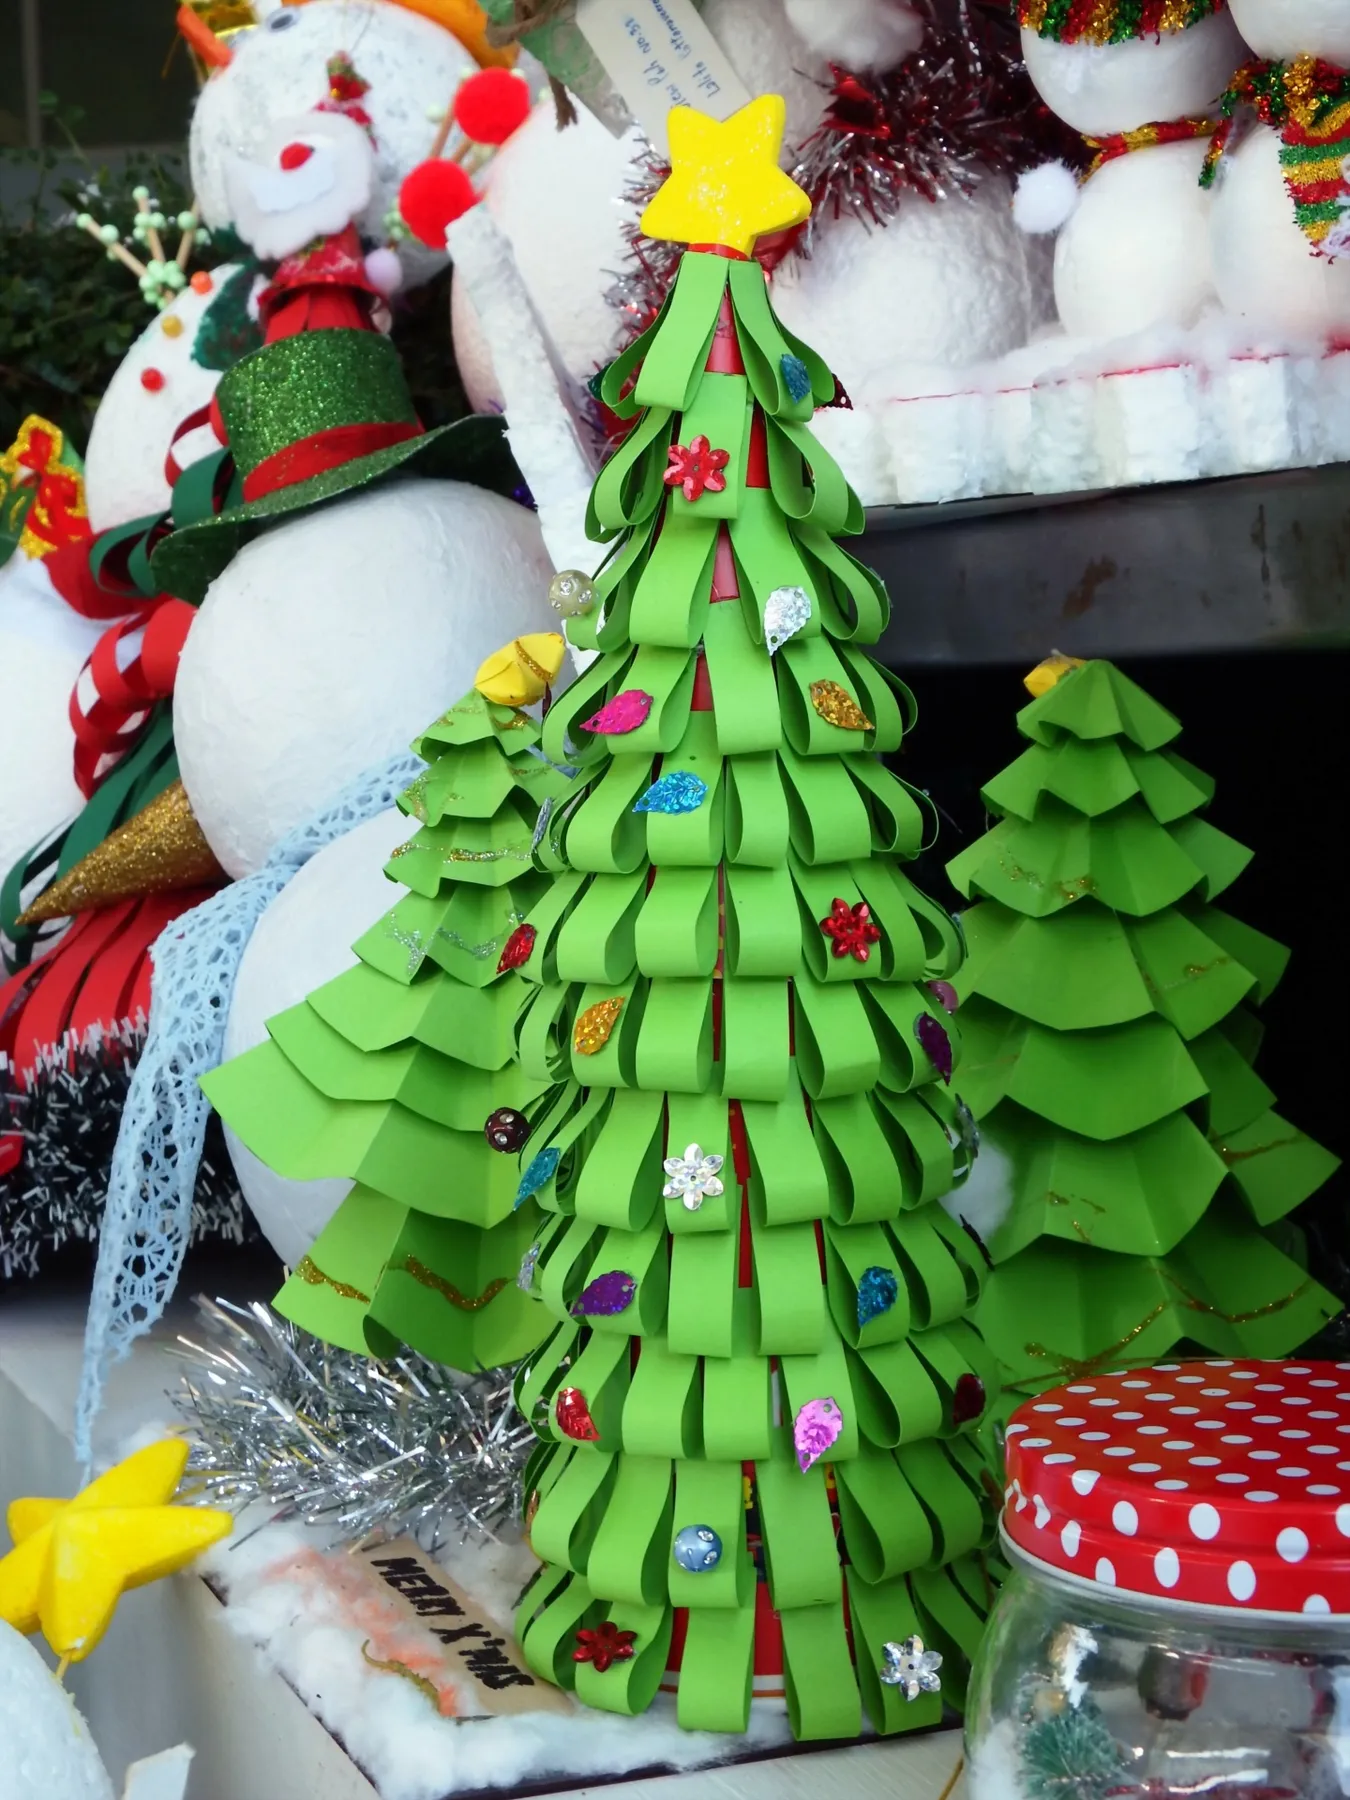
Paper crafts have the shortest lifespan of anything on this list, and the honest number is two to three seasons if you store them well. That means a rigid box, tissue between layers, and a cool dry spot — a garage or attic that swings from freezing to 100°F will warp the whole set in one summer. On the plus side, replacing them costs a few dollars in paper. Think of these as the seasonal, renewable part of your ornament collection rather than an heirloom.
35. Green Yarn-Wrapped Craft Stick Tree Ornament
This is the most affordable project in the article, and it’s not close. A pack of 150 craft sticks is $3, a skein of variegated green yarn is $4, and you probably already own the glue. That’s about $7 for a dozen ornaments. Walmart sells 500-count craft stick boxes for $5, and thrift stores constantly have half-used yarn for a dollar. Leftover worsted weight works fine — you need roughly 2 yards per ornament. See Idea #34 for another paper-and-glue project at a similar price point.
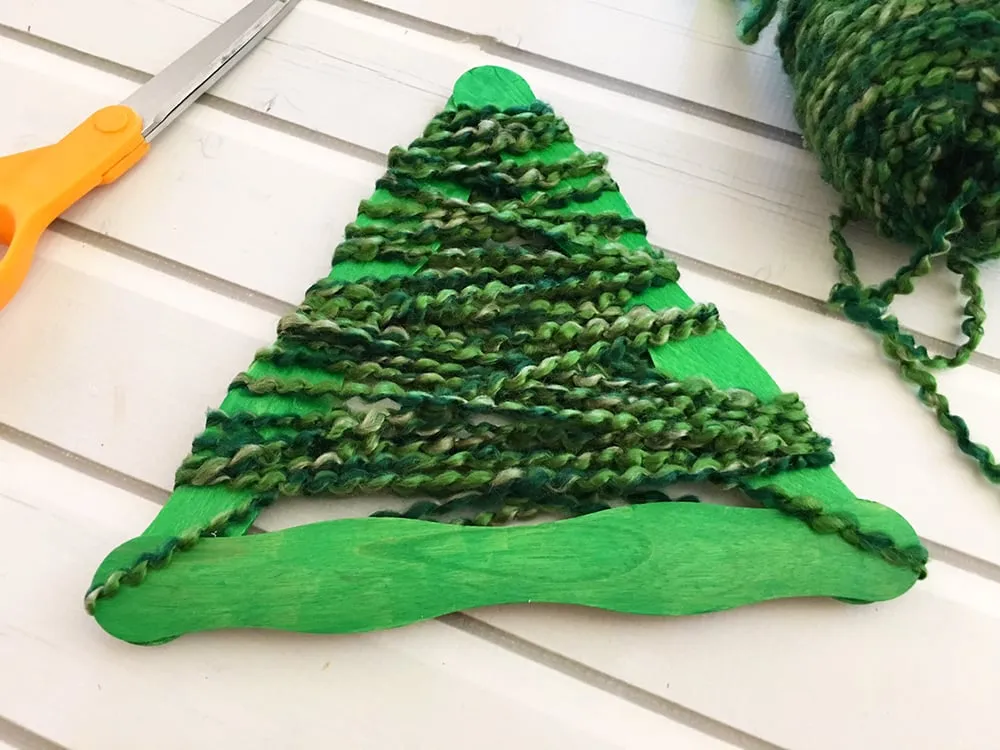
Craft stick ornaments run about 4 inches tall, which makes them ideal for a small tree — a 4 to 5 foot tabletop or a slim corner tree that can’t carry anything heavy. On a 7-foot tree they look tiny unless you cluster them in groups of three. They’re also light enough for a wreath or a garland. If you’re working with a full-size tree, scale up with felt pieces that have a bit more visual presence.
Thirty-Five Ideas, One Glue Gun, and a Very Merry December
Not every idea here will fit your home, and that’s fine — the point is to pick two or three that make you want to clear the kitchen table on a Sunday afternoon. Start with the paper grocery bag snowflakes or the yarn-wrapped craft stick tree; both cost less than a coffee and take under an hour. The rest will still be here next December, and so will you.
📌 Pin this guide to your Christmas crafts board now — future you, standing in the craft aisle in November, will be genuinely grateful.