
Dollar store Christmas crafts are having a moment on Pinterest right now — and the 2026 versions are a long way from the pipe-cleaner snowmen you remember.
We spent serious time browsing Dollar Tree, Five Below, Dollar General, Walmart, and Target’s dollar section to find projects worth your attention, from $1 fillable ornaments to a $52 lantern scene that reads like a boutique buy. Inside you’ll find 20 curated ideas across rustic twine-and-plaid farmhouse, glitter glam metallics, natural botanical styling with moss and pinecones, and vintage mercury glass — with budget and luxury versions compared side by side so you know exactly where the money matters.
Handmade, hand-tied, and slightly imperfect is the look driving holiday decor in 2026, and the dollar aisle happens to be the fastest way there. And stay until the end — we break down the most common mistakes that can ruin these looks.
📌 Save this to Pinterest for later — you’ll want to revisit these ideas.
1. Twine-Wrapped Ornament with a Plaid Bow on Frosted Pine
Wrapping a 3-inch foam ball in jute twine isn’t hard, but it falls apart if you glue wrong. Run a thin bead of hot glue in a spiral first, then press the twine into it as you turn — dabbing every 8 to 10 wraps, not every wrap, so the ball stays round instead of lumpy. Tuck the last tail under the ribbon at the top. For the bow, use 1½-inch wired plaid ribbon; unwired grosgrain flops by December 20th.
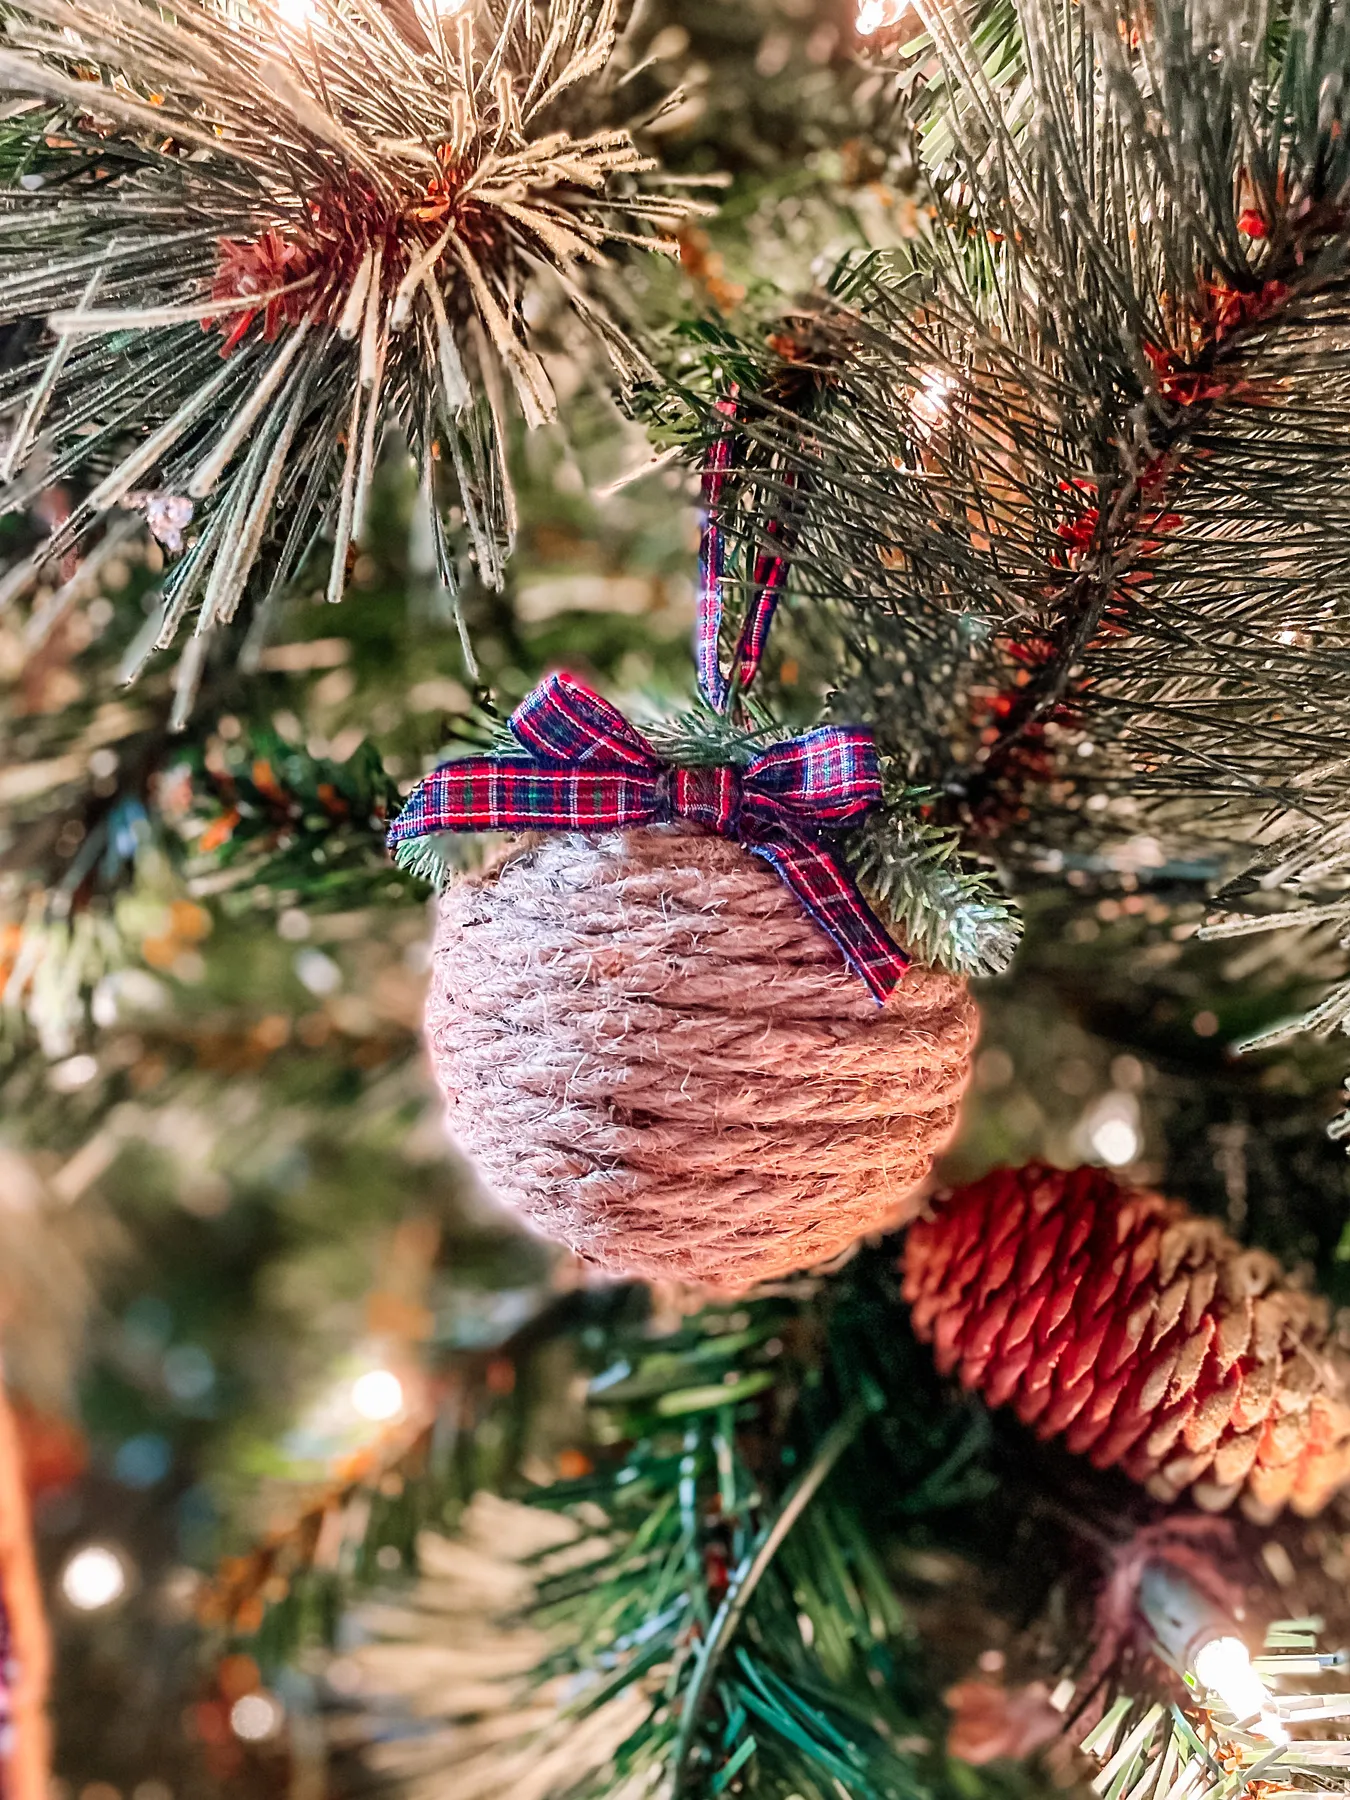
The whole ornament lives or dies on that red-and-blue plaid ribbon. Take it away and you’ve got a brown ball of string. The plaid is what tells your brain “Christmas” before you’ve registered another detail, and the navy in it is what keeps the look from sliding into full rustic-farmhouse cliché. If you only buy one thing, buy the ribbon in bulk — you’ll want it on the next dozen ornaments, and matching ribbon is the difference between a tree that looks collected and one that looks scattered.
2. Santa Belt Bauble: A Dollar Store Ornament That Looks Custom
This one is pure formula: 85% glossy red sphere, 10% black glitter belt, 5% gold. Change any single piece and the whole thing stops reading as a Santa suit. Go matte red instead of shiny and it looks like a craft fail; swap the square gold buckle for a round one and it becomes a generic belt buckle. The lesson travels — pick one dominant color at 80–90%, one supporting detail at 10–15%, and keep your metallic under 5%. That ratio works on ornaments, wreaths, and mantels.
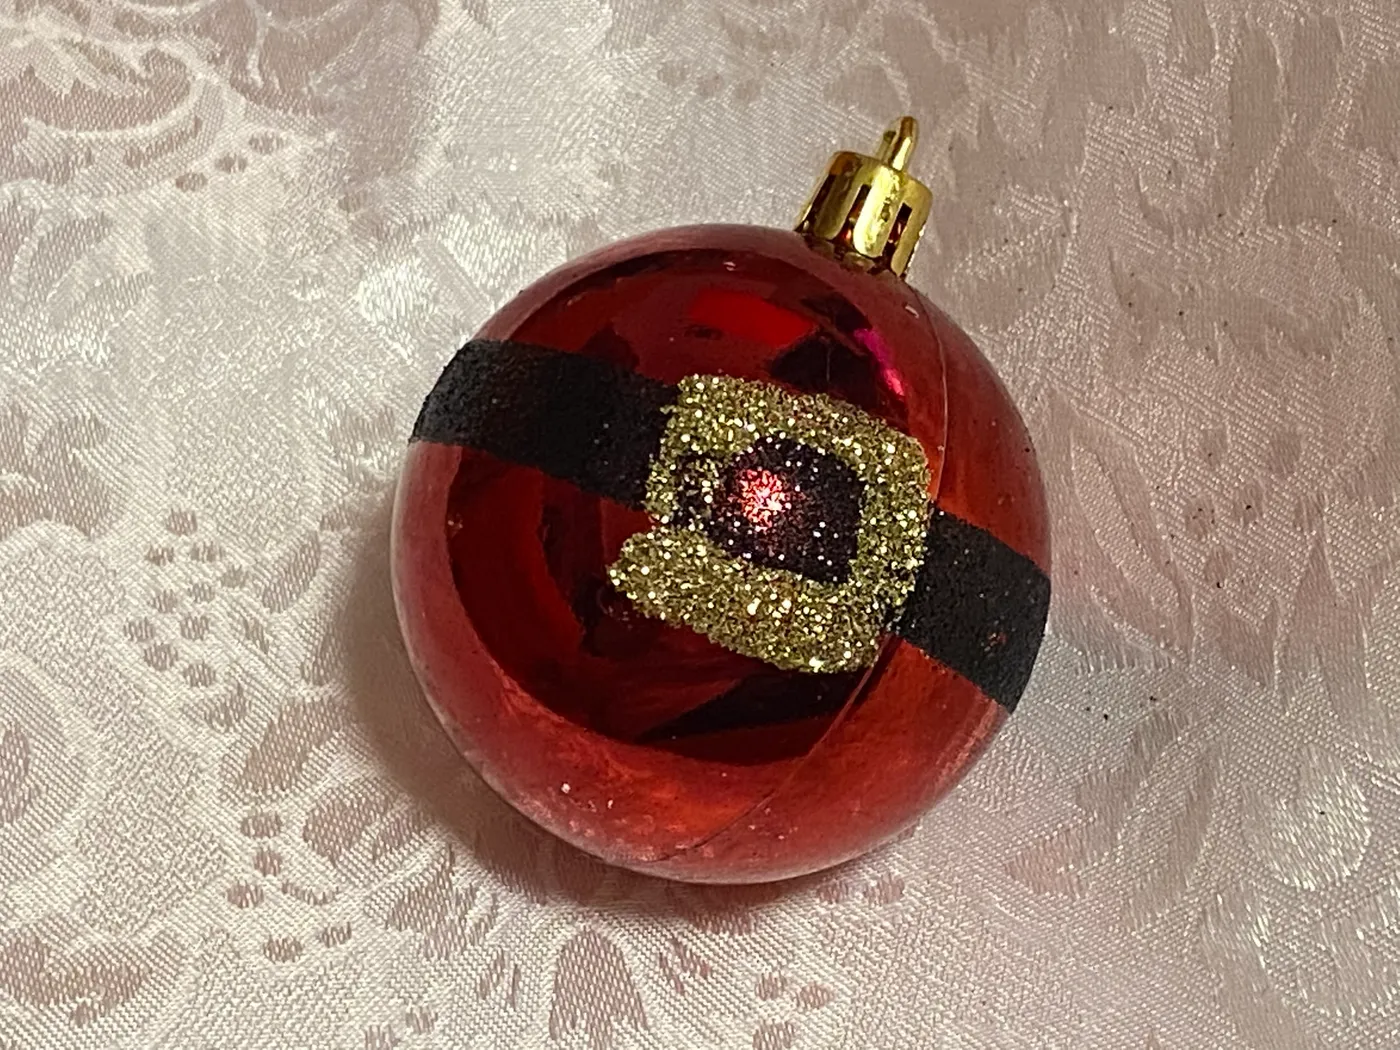
Glitter is a commitment. The black band on a bauble like this sheds — a lot — and you’ll find it on the light beige fabric underneath, on your hands, and somehow in the kitchen. Seal it with one light coat of matte clear acrylic spray before it goes on the tree and you’ll cut most of the shedding. Also check the cap: dollar-store ornament caps are thin stamped metal, so if you’re hanging these on a heavy real branch, swap in a sturdier cap or the loop bends open by New Year’s.
3. Frosted Bottle Brush Tree Inside a Clear Jar Ornament
- Pop the metal cap off a clear fillable jar ornament and set it aside — you’ll re-glue it at the end.
- Spoon in two tablespoons of faux snow, then tap the jar so it settles into a flat layer.
- Trim a small frosted bottle brush tree so it stands about two-thirds of the jar’s height, then set it on the snow.
- Drop in three or four red glitter berries and a pinch of flocked pine sprigs around the base.
- Run a bead of hot glue around the rim, press the cap back on, and hang. About 15 minutes per ornament, roughly $3 in supplies.
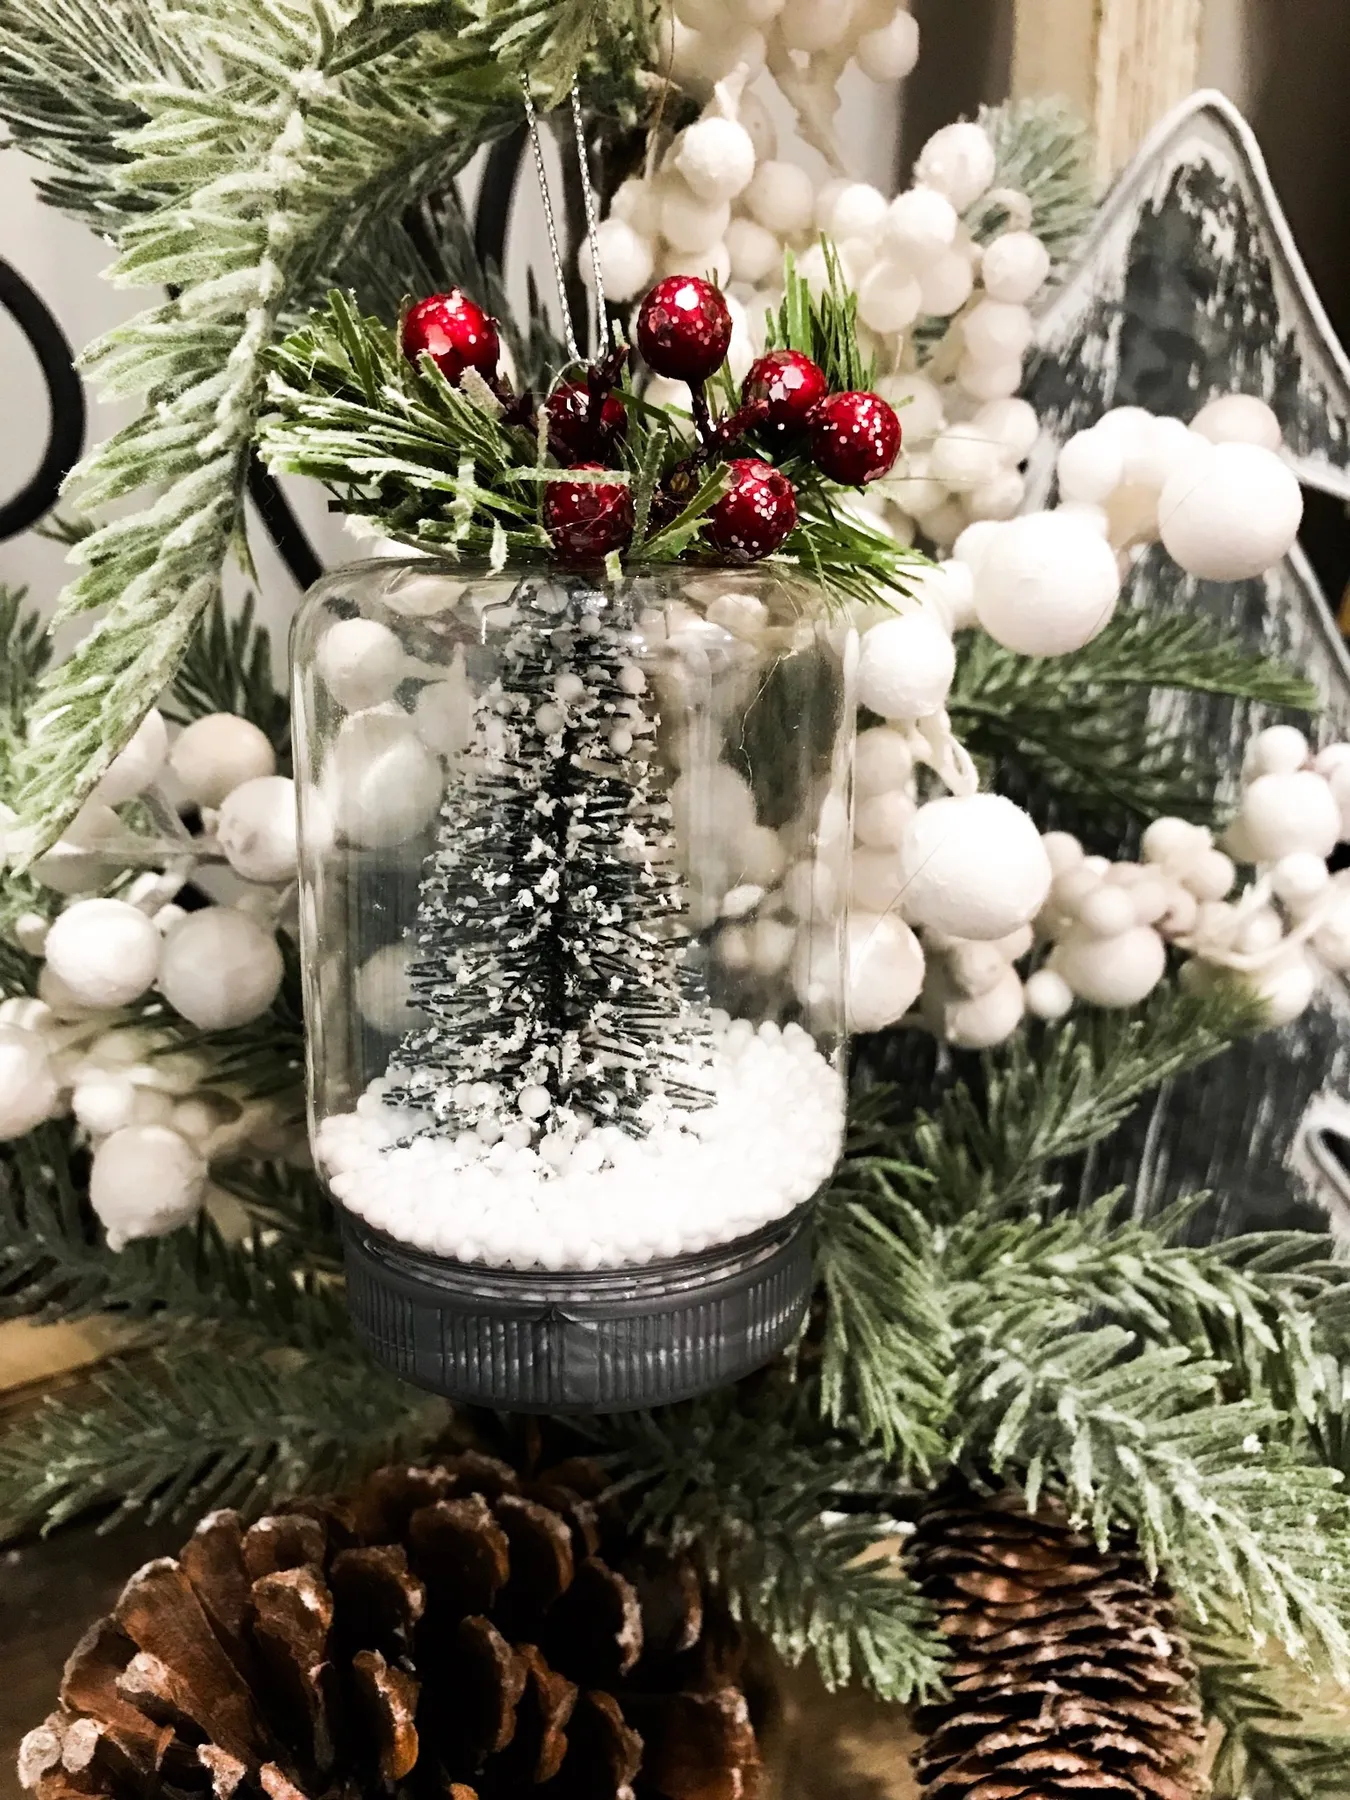
Miniature scenes work because of containment. The clear glass gives you a frame, so a tiny tree suddenly reads as a landscape instead of a trinket. The other trick is layering order: snow at the bottom, tree in the middle, berries and greenery at the top edge where light catches them. That’s the same three-tier logic you’d use on a mantel — heavy at the base, height in the center, sparkle up top.
4. Glitter Tapers, Red Berries and a Gold Tinsel Base
- Two glitter taper candles: $4–$8 (dollar store two-pack)
- Red berry sprays, three stems: $3–$6
- Silver glitter-dusted branches, two stems: $4–$6
- Red sheer ribbon for bows, one roll: $1.50–$3
- Gold tinsel garland for the base: $2–$4
- Candle holders you already own: $0
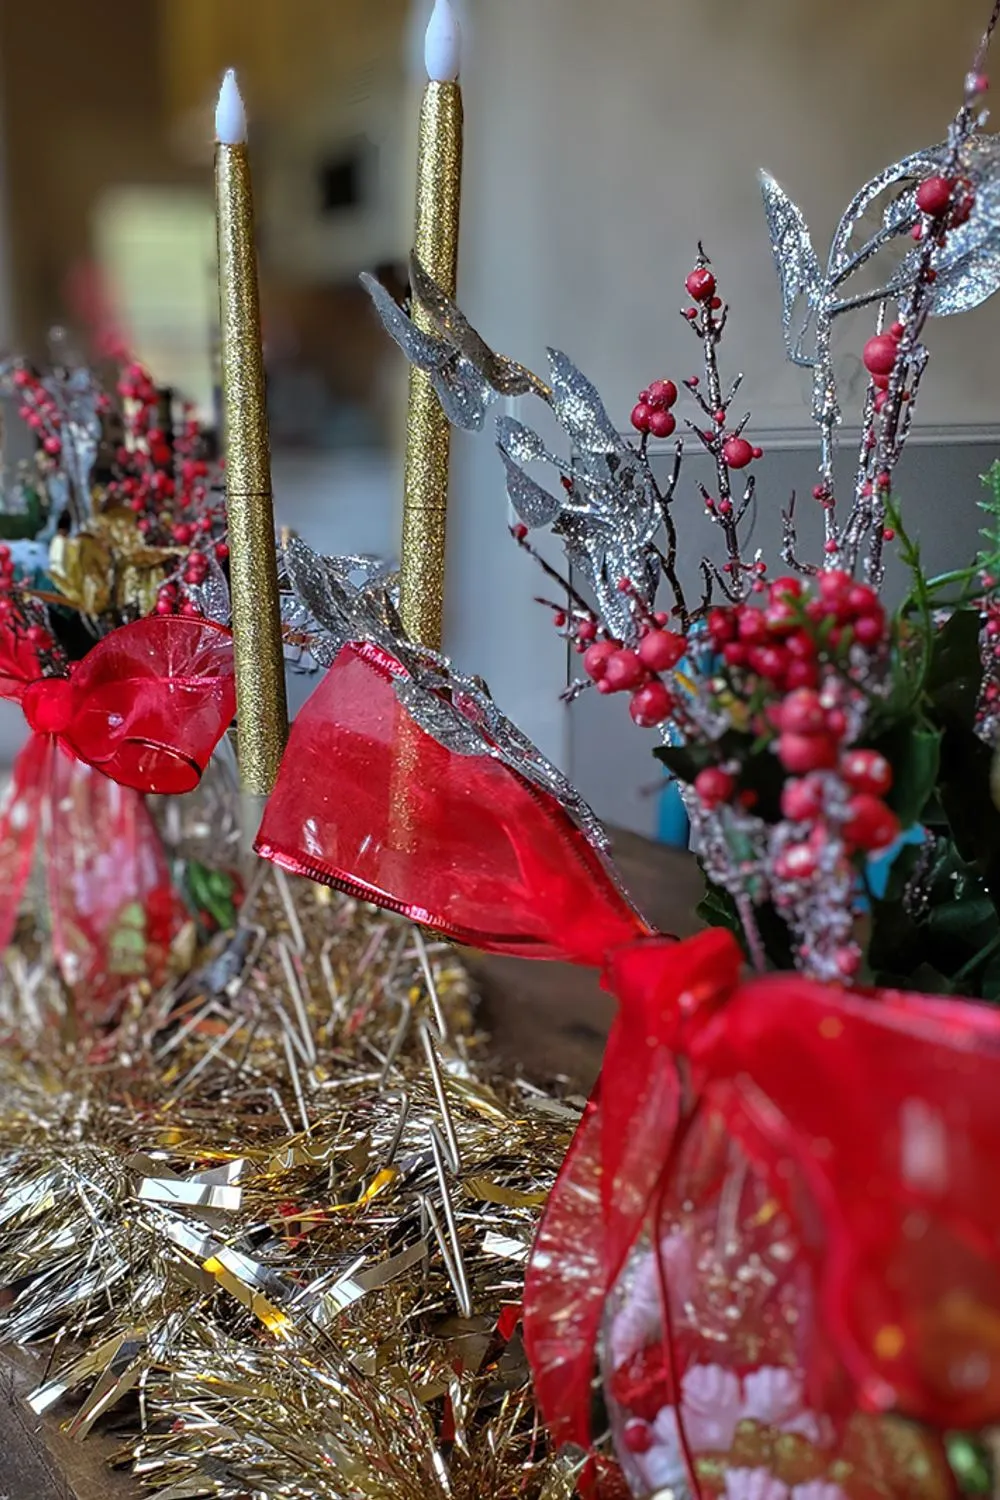
Total: $15–$27 for a full centerpiece. Budget alternative: skip the glitter-dusted branches and spray plain dollar-store evergreen sprigs with silver craft glitter you already have — saves about $5 and takes ten minutes outside.
Set your tapers at two different heights — roughly 10 inches and 7 inches — and never let the taller candle sit directly behind the shorter one. Offset them a few inches so the eye travels on a diagonal instead of a straight line. Keep the tinsel base tight: pile it into a 6-inch-diameter footprint, not a wide scatter, so the arrangement reads as one object. If your candles are real, trim wicks to a quarter inch and stop burning them 2 inches above the greenery.
5. Living Terrarium Ornaments with Light Blue Satin Bows
These globes need breathing room. They’re 3 to 4 inches in diameter and far heavier than a standard bauble once you add soil, so give them branches with some space — a 6½ to 7½ foot tree with open, layered boughs handles them best. On a sparse or narrow tree (under 4 feet, like the mini trees in Idea #11), hang one per branch and skip the dense ornament piles. In a room under 100 square feet, three of these read as a moment; eight read as clutter.
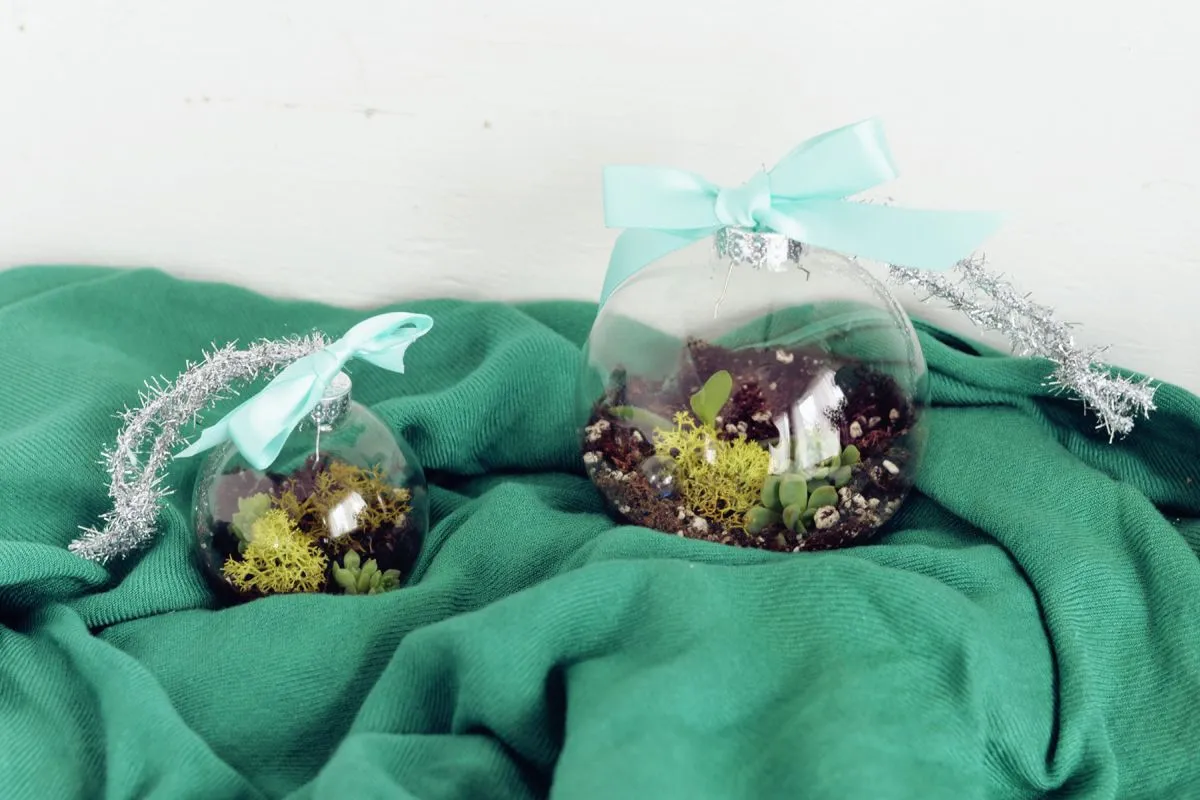
The trick is that the “expensive” part is the glass. Fillable clear globes run $1–$2 each at dollar stores and craft aisles — it’s the plants that add up. Steal cuttings from a $4 supermarket succulent and let them root; you’ll get four or five ornaments from one plant.
- Six fillable globes: $7
- One supermarket succulent: $4
- Bag of moss: $1.25
- Light blue satin ribbon roll: $2
6. Three Clear Baubles, Three Different Fillings
The charm here is repetition with variation — same clear glass sphere, same red velvet bow, three completely different insides: a snow globe reindeer, peppermint candies, faceted red and green gems with gold sequins. Your eye reads them as a set because the container and the bow never change. That’s the rule: vary one thing, hold everything else constant. Try it with three clear ornaments and three fillings, but keep the ribbon identical across all of them or the grouping falls apart into random baubles.
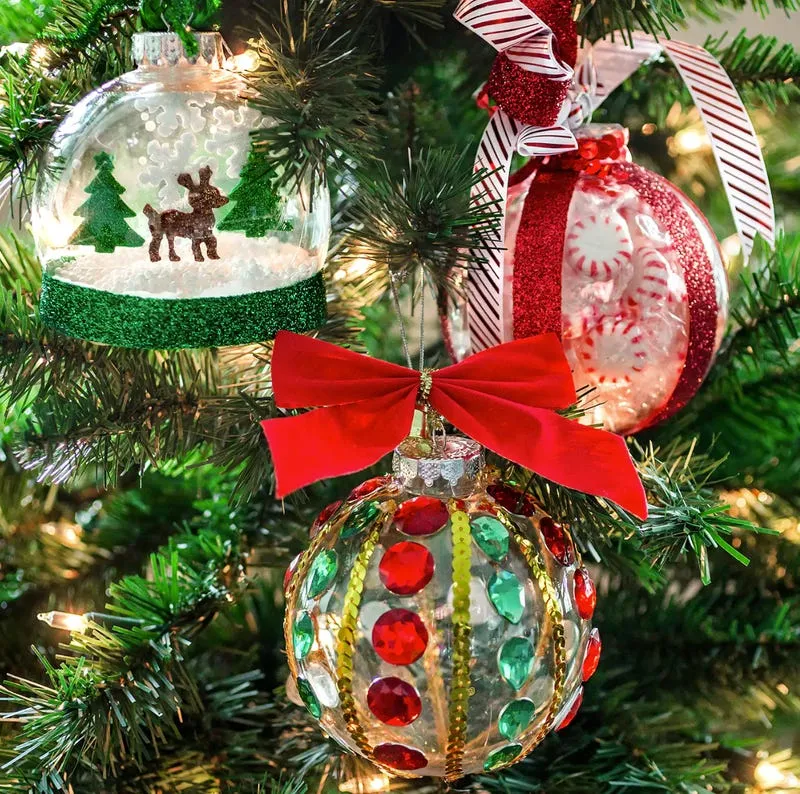
It’s the red velvet bows, and here’s why they outrank the fillings. Without them you’d have three clear glass spheres full of stuff — cute, but clearly handmade in a slightly chaotic way. The matching velvet bow turns them into a collection and makes them look bought. Velvet specifically, not satin: it absorbs light instead of reflecting it, which is what gives a dollar-store ornament that custom, faintly expensive edge. Buy one roll and use it everywhere.
- Decide the filling before you buy the ornament — some need a wider mouth.
- Check branch strength; filled glass clings get heavy fast.
- Confirm ribbon width: ⅝ inch for small baubles, 1½ inch for large.
- Cover your workspace — glitter and faux snow migrate.
7. A Shaggy Snowman Wreath with a Red Scarf on a White Door
Shaggy faux-fur wreaths look cheap when they’re flat, so build in dimension. Wrap a 14-inch wire form, then mount the black top hat on a small separate loop so it sits proud of the body — a hat glued flush against the fur disappears into it. Tie the red scarf rather than gluing it, so you can nudge the knot slightly off-center. Hang the whole thing about 5 feet 6 inches up so the hat isn’t cropped by the door frame when you look at it from the walkway.
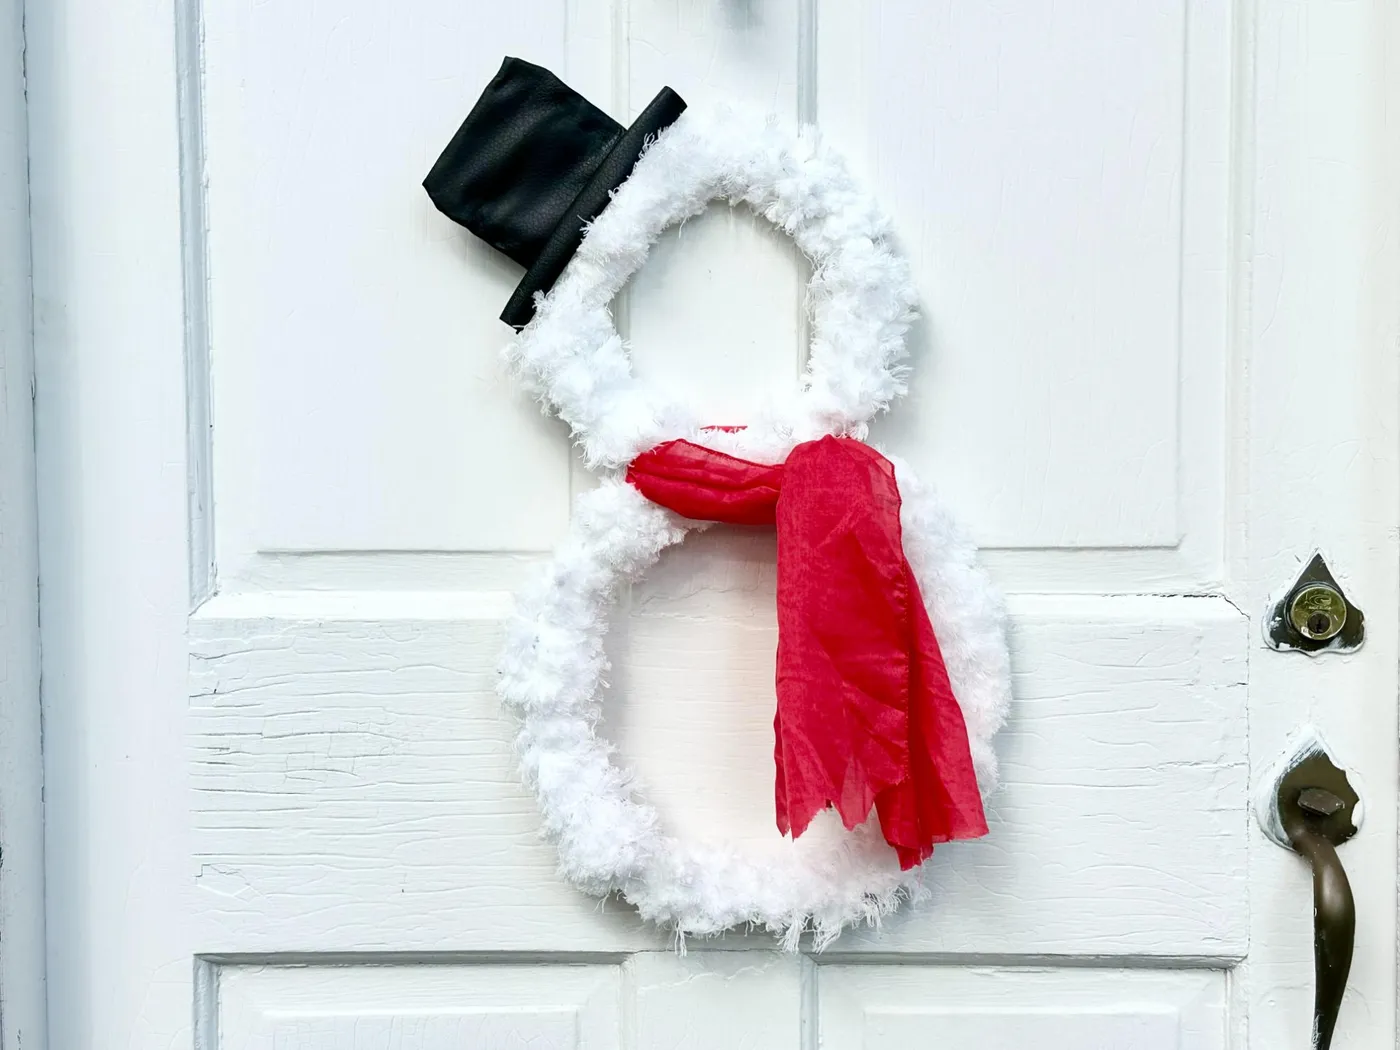
Faux fur plus a front door equals weather. This wreath will collect pollen, road dust, and spider webs, and shaggy white shows every bit of it. Plan on a shake-out every two weeks and a gentle hand vacuum — never a brush, which mats the pile. If your door faces direct sun, the white will yellow by spring; an overhang keeps it crisp. And if kids slam that door, hang it from an over-the-door hook instead of an adhesive strip, or you’ll be re-hanging it weekly.
8. Flocked Tree with Teal, Pink and Red Glitter Baubles
The palette looks chaotic and isn’t. Call it 55% snowy white base (the flocking plus warm white lights), 30% saturated color split evenly between glitter red, matte teal, and shiny pink, and 15% pattern from that red-and-white striped ribbon. Teal is the odd one out on purpose — it keeps red and pink from turning into Valentine’s Day. Want to shift the whole tree? Swap teal for matte navy. Keep the shine ratio intact, one shiny to two matte, and it still reads as the same tree.
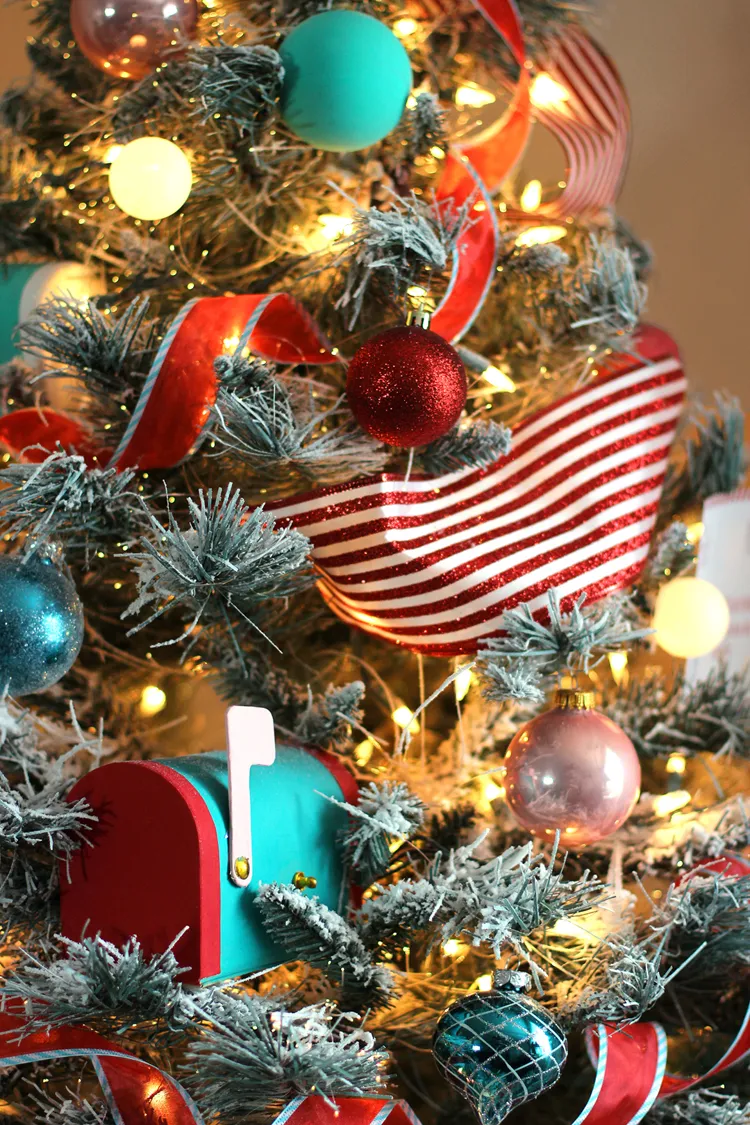
Mixed-color flocked trees are trending because the all-neutral flocked tree finally wore out its welcome. Pink-and-teal holiday palettes picked up serious momentum on Pinterest in 2025 and search interest in non-traditional tree colors has climbed for three seasons running. This one has staying power, unlike most novelty palettes, because the structure is classic: classic ball shapes, classic ribbon, classic tree. Only the color is young, which means you can refresh it in two years for the price of a few ornaments.
- Flocked 6-foot tree: $45–$120
- Shatterproof ornament set, 30–40 pieces: $15–$30
- Striped ribbon, one roll: $3–$6
- Warm white lights, 300 count: $8–$15
- Miniature mailbox ornament: $2–$4
Total: $73–$175, or about $60 if you spray-flock an existing $30 tree yourself.
9. Twine Sphere with Plaid Ribbon and Pine Sprigs on Oak
- Finish the twine-wrapped sphere first and let the glue cure a full hour before touching it again.
- Cut a 6-inch length of plaid ribbon, fold it into a loop, and hot-glue the ends together behind the ornament top.
- Snip three short faux pine sprigs and glue them in a small fan angled away from the bow — not straight up.
- Add one frosted pinecone at the base of the cluster so the ornament has a bottom weight.
- Cover the glue joints with a tiny wrap of twine. Total time: 20 minutes per ornament.
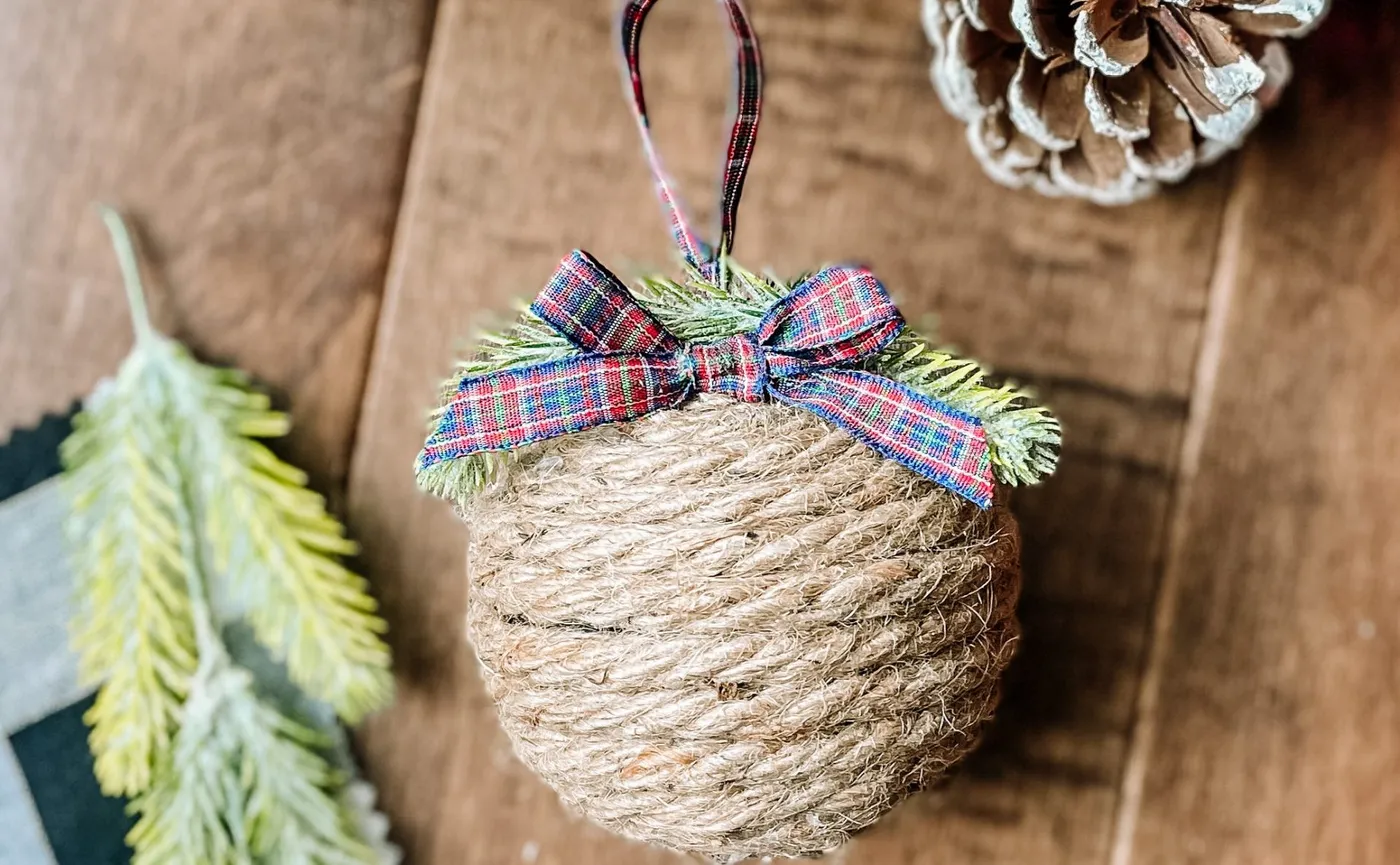
Jute twine is a dust magnet, and it yellows in direct sun. Expect to dust these with a dry soft brush once a month during the season and to retire them after two or three years if they live on a sunny windowsill. Store them in a tissue-lined box, not a plastic bin — trapped moisture makes natural twine smell musty by the next December. Want the same rustic look with zero upkeep? Swap twine for matte tan yarn or beige cotton cord.
10. The Glue Gun Batch: Making Twine Baubles Assembly-Line Style
- Clear a flat, heat-safe surface — a light wood table works, but lay down parchment first.
- Buy foam balls in one size only; mixed sizes slow the assembly line down.
- Test your glue gun on scrap twine — cheap glue strings badly and it shows.
- Cut all your ribbon bows in advance, one per ball, before you start wrapping.
- Count your hanging loops; dollar-store metal loops bend if you pry them twice.
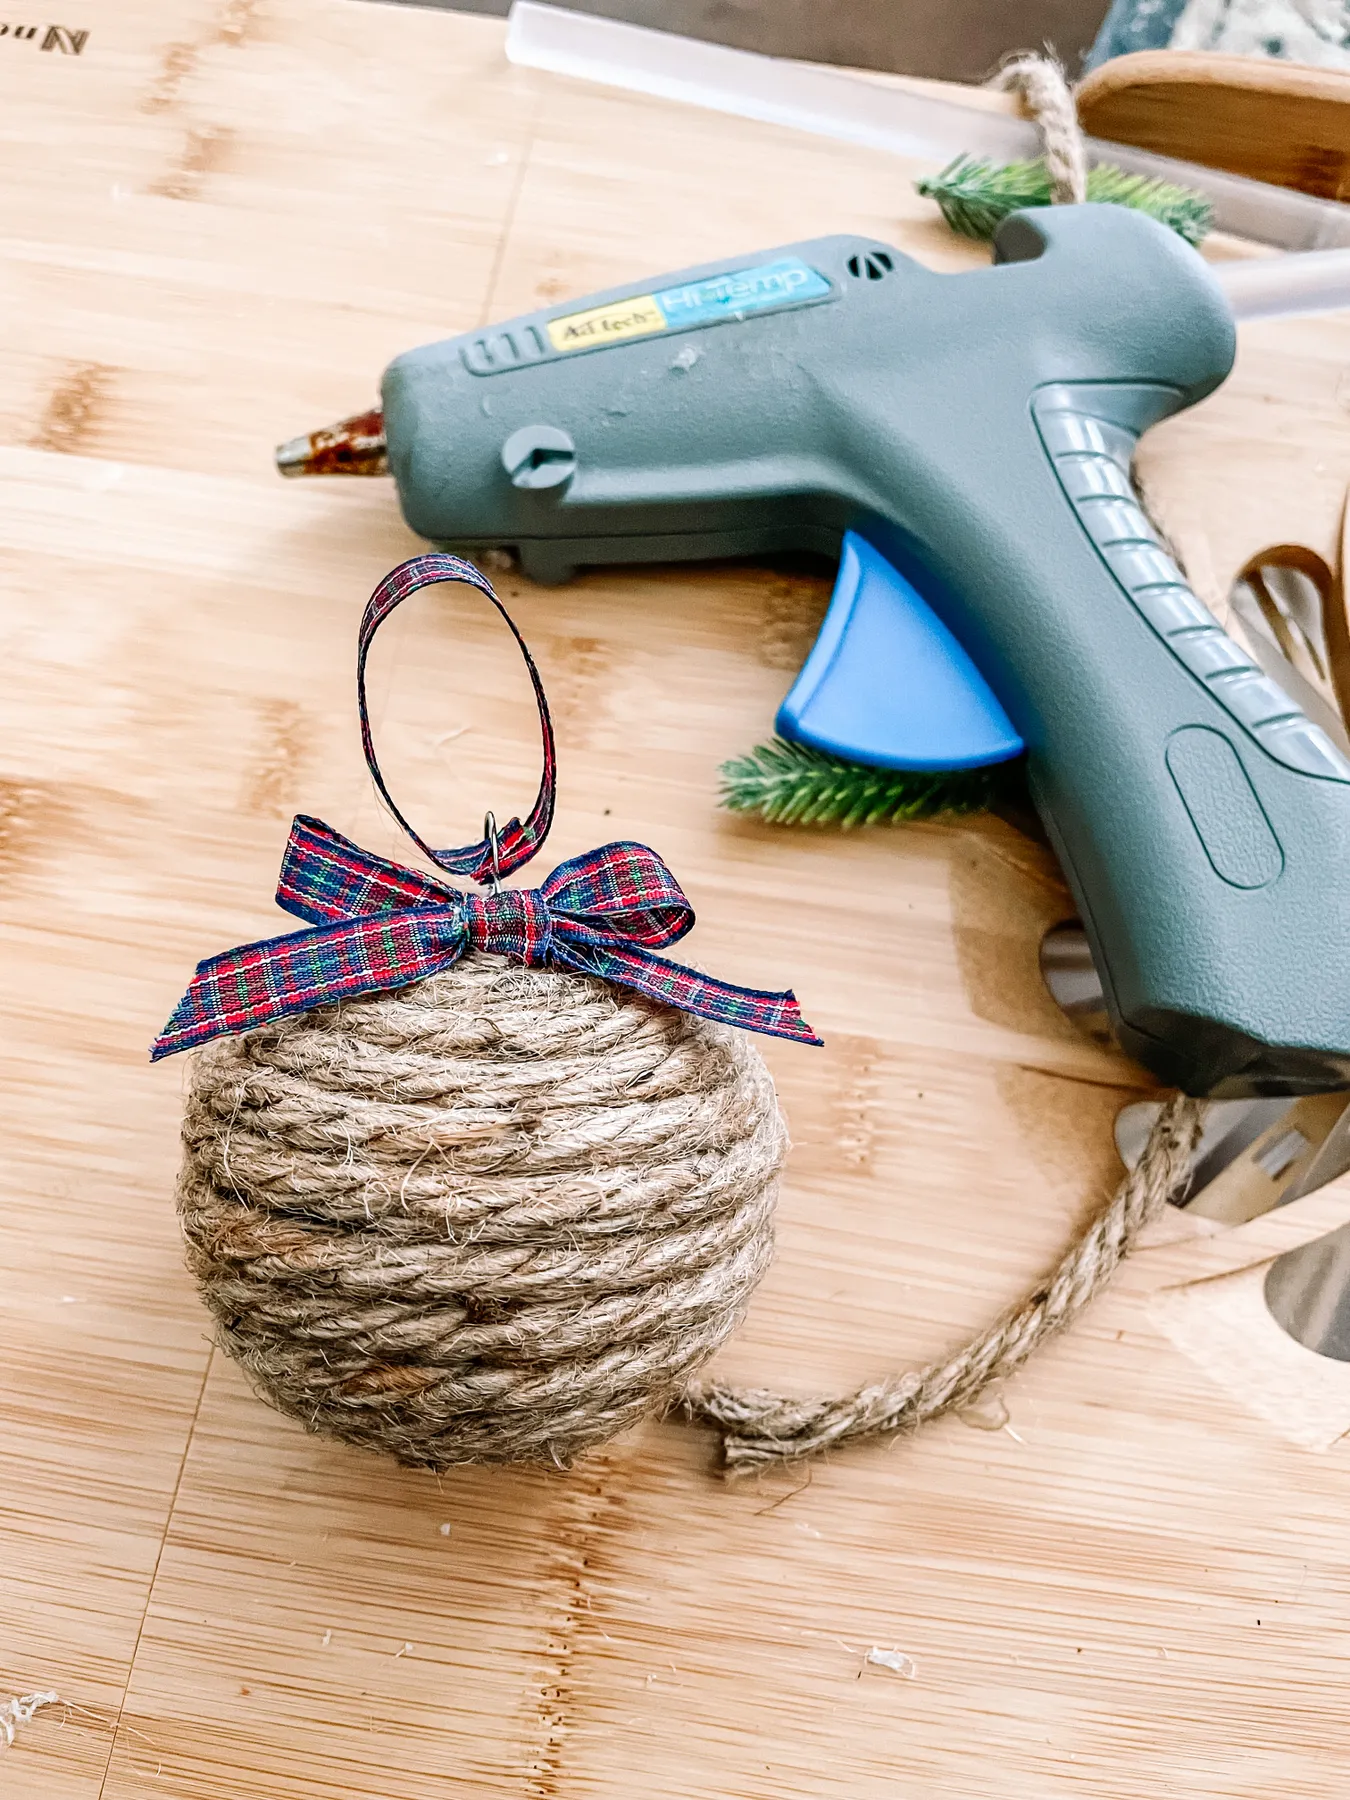
Work in batches of six, not one. Wrap all six balls with glue and twine in a single sitting, then stop — hot glue needs to fully cure before you add ribbon, and rushing this is why homemade ornaments shed their bows by mid-December. Keep the gun at medium heat; high heat melts foam and leaves dents twine can’t hide. If your glue strings, drag the tip upward when you lift it instead of pulling sideways.
You don’t need a craft-store haul. Dollar store foam balls run $1.25 for a three-pack, and a 200-foot roll of jute twine is around $2 — enough for roughly 15 ornaments. The plaid ribbon is where people overspend: buy one roll of 1½-inch ribbon and cut it narrower for small ornaments instead of buying two widths. A basic glue gun is $5 at Walmart and lasts years. A dozen finished ornaments lands under $12.
11. A Gingerbread Counter Vignette with Fairy-Lit Jars
- Two flocked miniature trees, 12–18 inches: $6–$14
- Two gingerbread house kits: $8–$16
- Clear glass jars with snow scenes inside: $5–$12
- One battery fairy light strand: $3–$6
- Wooden rolling pin and cookie cutters: $6–$14
- Wooden nutcracker figure: $5–$12
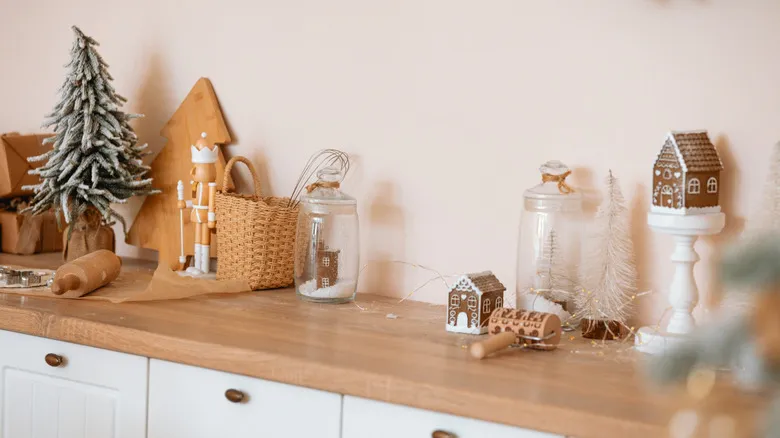
Total: $33–$74. Budget alternative: use the real baking tools you already own as decor — a rolling pin, a whisk in a crock, a real tray of cookies. Saves $20 and looks more lived-in than a prop set.
This vignette wants a counter run of at least 30 inches and a wall behind it — it’s a layered display, not a floating one. Anything narrower than 24 inches and the trees crowd the rolling pin. Ceiling height barely matters here, but cabinet height does: if your uppers sit lower than 18 inches above the counter, drop the tall tree and keep everything under 14 inches. For a wider island, see Idea #19 — a lower, broader arrangement that fills more surface.
12. Embossed Metal Ornament on a Vintage Glass Tree
Candle-shaped tree lights are charming and they’re also a fire-safety conversation. The vintage-look bulbs run hot — check that yours are LED, not incandescent, and never leave them on unattended. The distressed metal ornament is another issue: that beige, chipped finish is often paint over thin stamped metal, and it flakes. Handle it by the twine loop, not the body, and keep it away from where a pet can bat at it. If the finish is already shedding, one thin coat of matte sealer stops it. For the same warm glow without the bulb heat, see Idea #13.
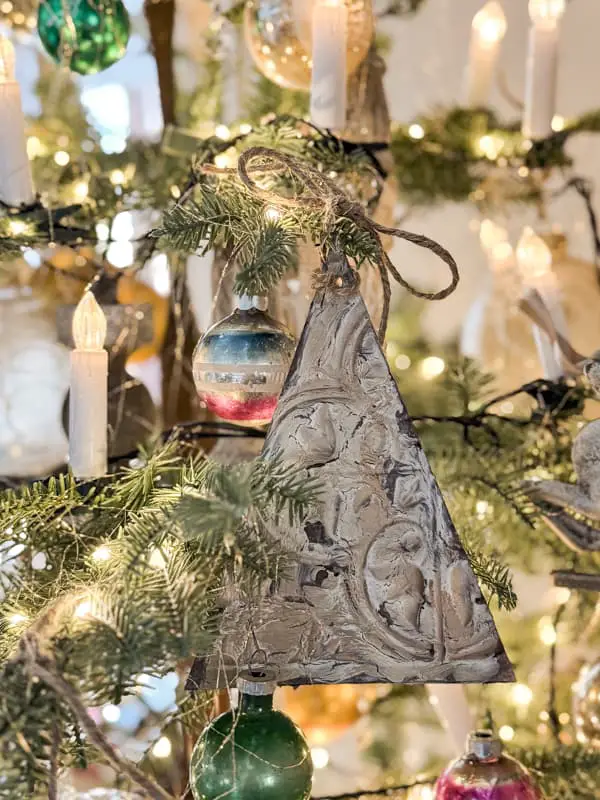
The twine loop. It’s a two-cent detail and it’s the reason this ornament looks like it came from an antique shop instead of a bin. A shiny gold hook would read as “new ornament in a vintage costume”; rough twine ties it to the tree’s rustic palette and to everything else hanging nearby. This is the cheapest upgrade in the whole article — one roll of twine, thirty seconds per ornament. Swap the hooks on every ornament you own and your tree ages ten years, in the good way.
13. Snow-Dusted Evergreen with Golden Stars and Berries
For a snow-scene arrangement that photographs as well as it looks in person, build in odd numbers and keep the tallest element off-center. Three gold spheres, two star ornaments, five berry clusters — odd counts never look staged. Then use light: warm string lights behind the arrangement and slightly out of frame create the bokeh glow that flatters gold. If your surface is a shelf, keep everything under 14 inches tall; on a table, 22 inches is the sweet spot. And don’t mix snow textures — one faux snow, one frost spray.

Two principles are doing all the work here. First, contrast of finish: matte flocked branches against high-shine gold baubles means neither reads flat. Second, restraint in color — white, gold, green, and one punctuation of red from the berries. That’s why it feels calm with a lot going on. If your snow scene ever feels busy, the fix is almost never removing ornaments; it’s pulling out a color.
- Swap gold for rose gold to warm it up.
- Swap berries for white pinecones to cool it down.
- Trade glass baubles for matte to go more modern.
14. Mercury Glass Baubles Styled on a Round Wood Tray
Call this 50% mercury glass (the patterned silver and gold), 25% matte gold glitter texture, 15% evergreen, 10% cream knit. The knit is the sleeper — without a soft matte textile underneath, a tray of shiny ornaments looks like a store display. Mercury glass also needs a warm light source behind it to glow; under cool white light, silver reads grey. Swap the cream knit for charcoal flannel and the same tray turns modern. Swap the gold for pewter and it becomes Scandinavian.
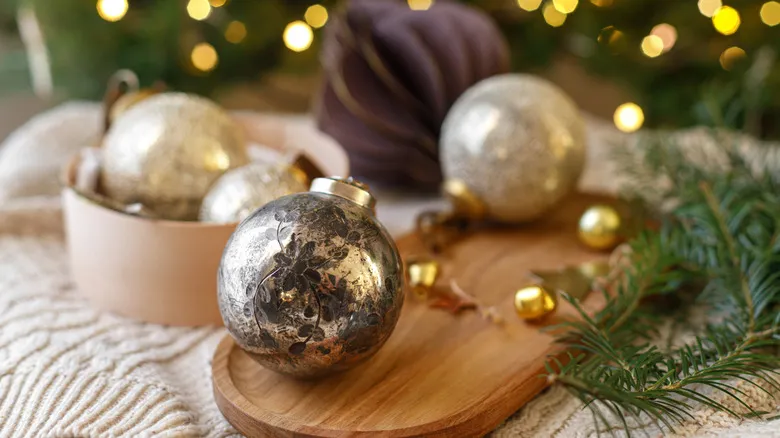
Real mercury glass runs $6 to $15 per ornament. The dollar-store version is a clear glass or plastic ball with metallic craft paint swirled inside — pour in a tablespoon, roll it around, drain the excess, and dry it upside down overnight. Six of them cost about $6 plus one $2 bottle of paint. From three feet away, nobody knows. Add a $1.25 wooden tray and a thrifted cream sweater cut into a square, and the whole styling lands under $10.
15. A Glittered Miniature House in Blue and Pink
- Start with a plain paper or cardboard house form from the dollar store craft aisle — around $1.25.
- Coat the roof and base in white craft glue, press into fine white glitter, and tap the excess off over a tray.
- Paint the windows light blue and the door and chimney light pink; one coat is enough on cardboard.
- Glue two tiny white glittered bottle brush trees to the base, one slightly forward of the other.
- Let everything dry two hours before placing it near lights. About $5 and 40 minutes total.
These houses are small — usually 3 to 5 inches — and they disappear on a big shelf. They work best in clusters of three or more on a windowsill, a narrow mantel, or a tiered tray, where 12 to 18 inches of width gives them context. Low-traffic spots are ideal: the white glitter catches light and glows on its own. Decorating a full-size tree instead? See Idea #17 for baubles that hold their own at 7 feet.
16. Folded Paper Rosettes on a Glittered Sphere
Paper ornaments have a short shelf life and that’s fine — this is a project, not an heirloom. Folded cardstock creases permanently if it’s stored in a crowded bin, so keep these in a rigid box with tissue between layers and don’t stack anything on top. Glitter sheds for the first week or two; a light coat of matte sealer after the glue dries fixes that. Damp basements will ripple the paper by February, so store them inside the house, not the garage. Two seasons is a realistic lifespan.
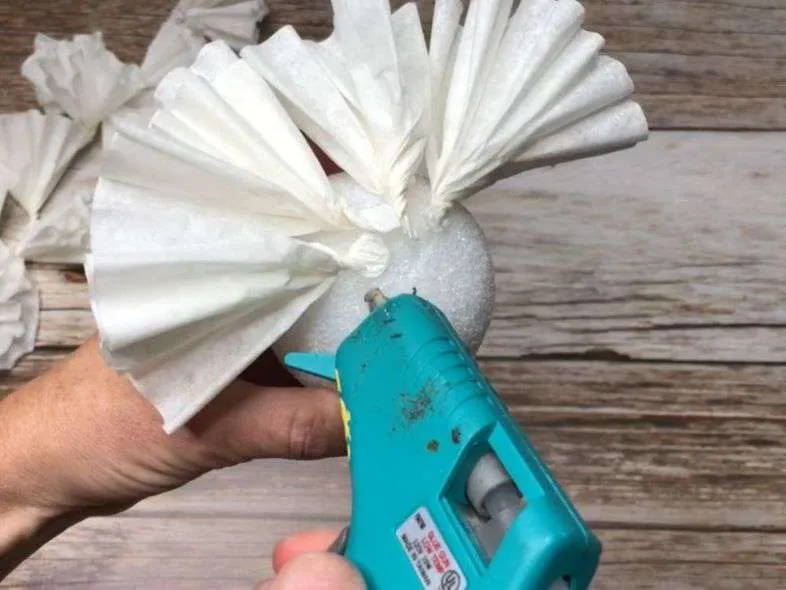
Space your folded paper pieces before you glue — the instinct is to pack them tight and it always looks worse. Mark the sphere with a light pencil grid of about 12 evenly spaced points, then work in alternating rows so each fold sits between the two below it, like roof shingles. Use a thin line of glue along the fold’s back edge, not a blob at the tip; blobs create bumps that show through. Tweezers help more than you’d think on a 3-inch sphere.
17. Frosted Bauble with a Fuzzy Champagne Bow and Berries
It’s the fuzzy bow, and it’s not a small thing. A satin ribbon on a frosted ornament looks fine. A fuzzy, textured champagne bow looks expensive — because the matte texture picks up light softly instead of throwing a glare, which is exactly what the flocked sage leaves and the frosted sphere are already doing. Every element on this bauble is matte. That is the entire design. Copy it by buying a fuzzy knit or velvet ribbon instead of satin, and keep your berries deep red rather than bright, so nothing outshines the ornament itself.
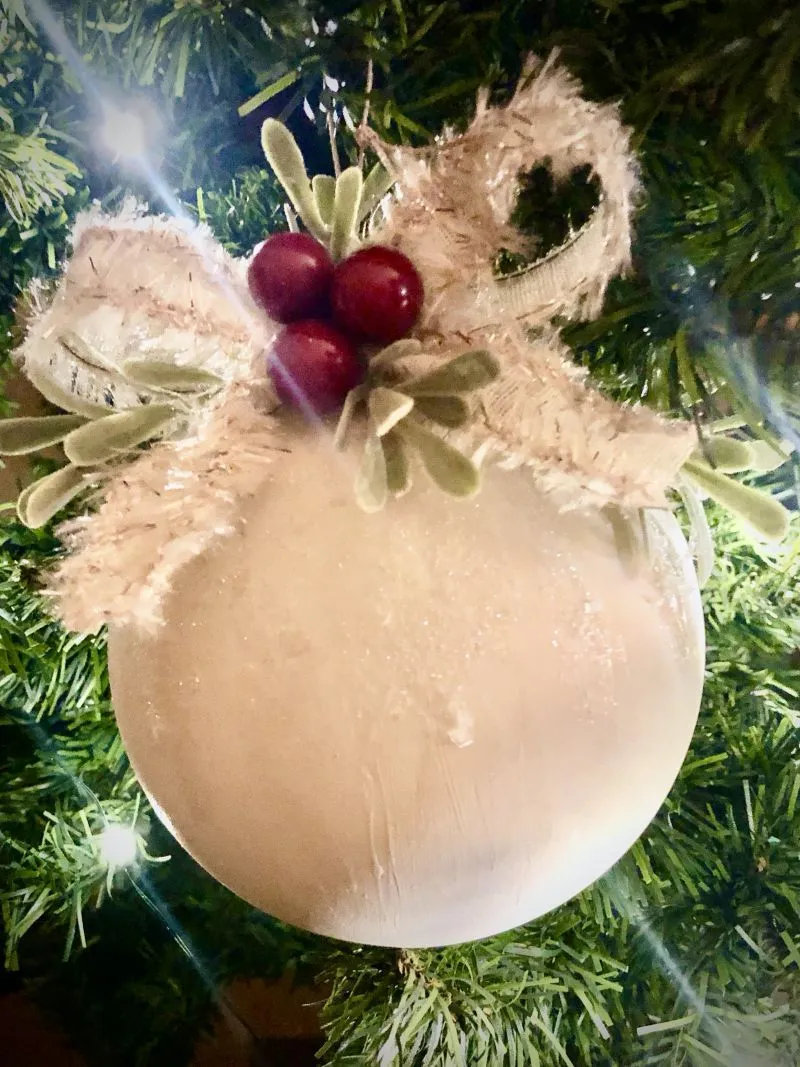
The “quiet Christmas” look — frosted neutrals, deep red, sage green, nothing shiny — has been building for a couple of years and it’s fully mainstream in 2026. It’s a reaction to glitter-and-tinsel maximalism, tied to the same instinct behind the return of handmade, hand-tied bows over clip-on plastic ones. This one has legs because it’s essentially classic: cream, red, green, and texture. It won’t look dated in three years, and you can layer brighter ornaments over it if you change your mind.
18. A Glitter Church Under Glass in a Gold Lantern
- Gold-framed glass lantern: $12–$28 (thrift stores often have them for $5)
- Glittery gold miniature church: $4–$9
- Two bottle brush trees: $3–$6
- Bag of faux snow: $2–$4
- Mini pine sprig with red berries: $2–$4
- Small pinecone: $0–$1
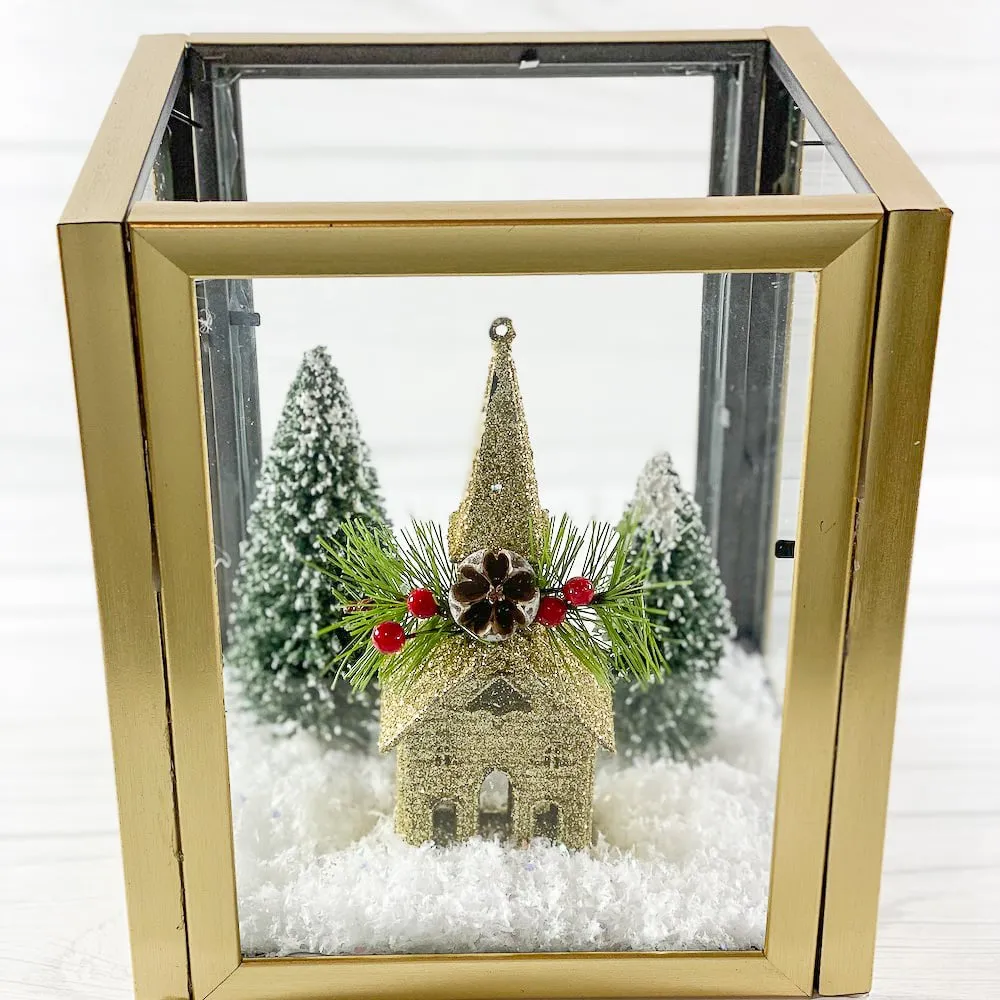
Total: $23–$52. Budget alternative: skip the lantern and invert a clear dollar-store glass jar over the scene — the same glassed-in effect for $1.25. This is the tabletop cousin of Idea #3‘s jar ornament: tiny scene, bigger frame.
- Pour an inch of faux snow into the lantern’s base and press it flat with the back of a spoon.
- Set the church slightly off-center — dead center always looks like a store display.
- Tuck one bottle brush tree in front of the church and one behind it to create depth.
- Add the pine sprig and pinecone at the base so the church looks grounded, not floating.
- Close the lantern, step back three feet, and adjust before you place it. Ten minutes, no glue needed.
19. Pinecone in a Burlap Pot with Snowflake Cutouts
Real pinecones bring real guests. If you’re using foraged cones, bake them at 200°F for about an hour first — that kills anything living inside and hardens the sap so it doesn’t drip onto your grey cloth. Burlap also frays faster than people expect; a dot of clear glue along the cut edge stops it unraveling. And if this display sits somewhere humid, the pinecones will close up tight and stay that way. Keep it in a dry room and it holds its shape all season.
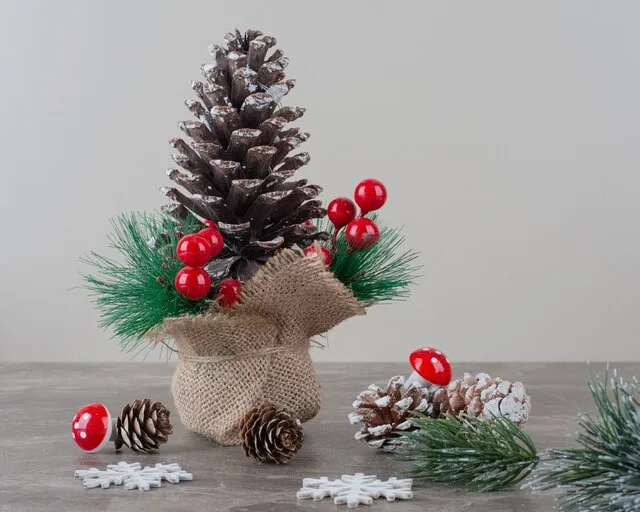
Texture stacking is the whole idea: rough burlap, spiky pine needles, glossy red berries, flat matte snowflake cutouts. Four materials, all in the same brown-red-green-white family, so the eye reads richness instead of noise.
- Keep the palette to four colors max.
- Put the biggest object in the center.
- Scatter the small pieces loosely — grids look stiff.
- Repeat the red at least twice so it feels intentional.
20. A Wood-Sided Entry with Wreath, Garland and Snowflake Decals
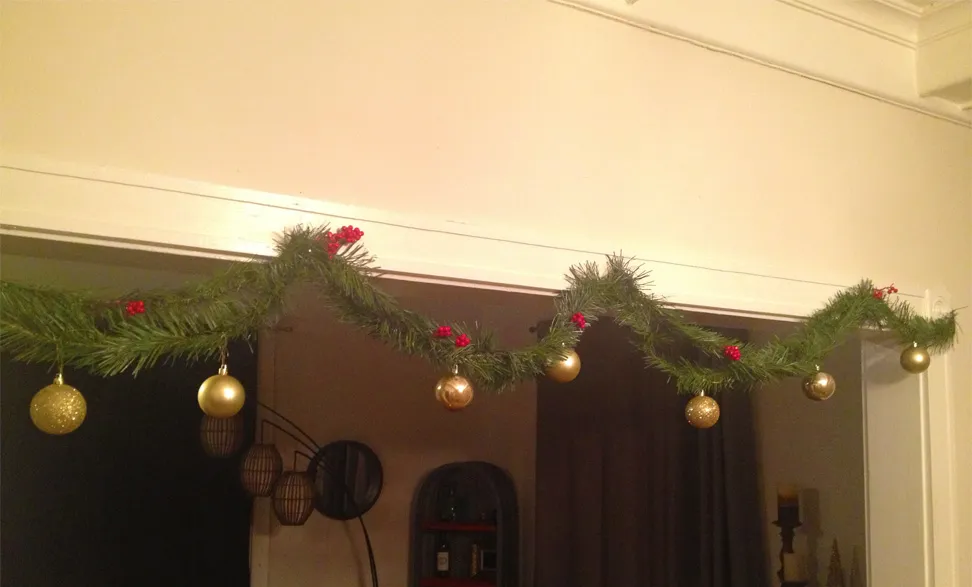
Wreaths are the biggest dollar-store win of the season. A plain 12-inch evergreen wreath base runs $4 to $6, and a bag of red berries plus a roll of ribbon costs about $4 more — that’s a $10 wreath that reads like the $45 version. Garland is the same story: two $5 plain strands twisted together look like one thick, expensive strand, and a light dusting of spray flock from a $4 can makes it look snow-dusted. If you’d rather skip greenery entirely, try the fuzzy version in Idea #7.

- Measure the door before buying garland — plan roughly 1.5 times the width per swag.
- Check what your frame can hold; adhesive hooks fail in cold weather.
- Confirm your lantern is rated for the outdoors, not just interior decor.
- Match your metal finishes — lantern, door handle, and wreath hook should agree.
- Buy snowflake decals sized to your glass panes, not the whole door.
Your Dollar Store Christmas Starts in Aisle Four
You don’t need a big budget to have a tree, a mantel, and a front door that people ask about — you need a plan, a glue gun, and about eleven dollars. Start with the project that matches what you already own, then add one thing each weekend until the house feels like December.
📌 Pin your favorites now so they’re waiting for you on the next craft-store run — and tag us when your twine baubles make it onto the tree.