
There’s a particular kind of satisfaction in opening a box of ornaments and realizing you made half of them yourself — and that feeling is exactly why handmade holiday decor is having its biggest year yet. The low-waste, make-it-yourself shift has moved from a niche hobby to the default way people are decorating in 2026. We spent real time combing through Target, Michaels, IKEA, Walmart, and a very good pile of thrift-store finds to bring you 34 DIY holiday decorations that actually look good in a real living room, from about $6 to $180 depending on how far you want to take it.
Inside you’ll find rustic evergreen centerpieces, coastal shells on flocked branches, kid-friendly paper crafts, and table settings elegant enough for company — with budget and higher-end versions of the same ideas placed side by side. And stay until the end — we break down the most common mistakes that can ruin these looks.
📌 Save this to Pinterest for later — you’ll want to revisit these ideas.
1. Woven Basket Centerpiece With Berries, Greens, and Candlelight
If you build a centerpiece on a platter, keep every element inside a triangle no taller than 12 inches from base to top. Anything above that becomes a wall between you and the person across the table. The dark wicker basket here sits around 8 inches, the tiered woven tree at about 11, and the ribbed glass candle just under that — three heights, one silhouette, all of it contained on a white marble-look platter.
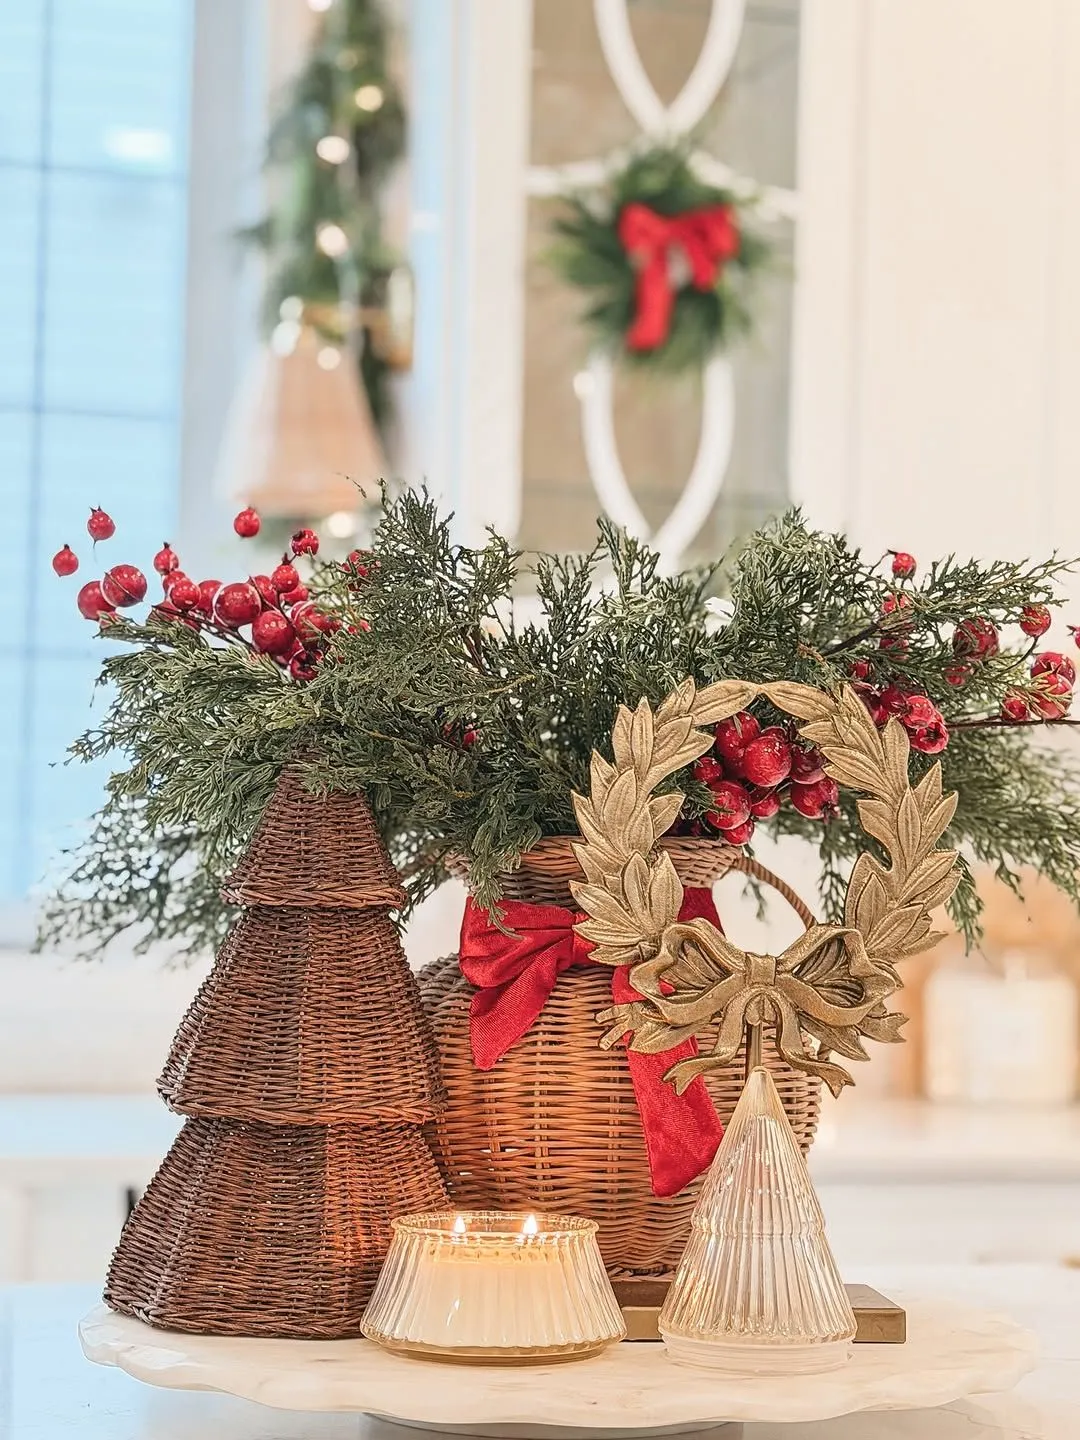
What makes this arrangement work is contrast at the base. That dark brown wicker would vanish against a wood table, so it’s parked on a pale platter for instant separation, and the deep evergreen and bright red berries read as deliberate rather than cluttered. The tiered woven tree quietly repeats the basket’s texture, which is why the whole thing feels like one gesture instead of five objects on a plate.
2. Distressed White Tray Centerpiece With Pinecones and Gold Stars
The two white patterned ceramic bottles are the whole trick. Everyone notices the evergreen and the red and silver ornaments first, but those tall bottles are what raise the arrangement from a pile of greenery into a composition — they give the eye something vertical to climb and they echo the distressed white of the tray beneath. Remove them and you have a nice centerpiece. Keep them and you have a styled one.
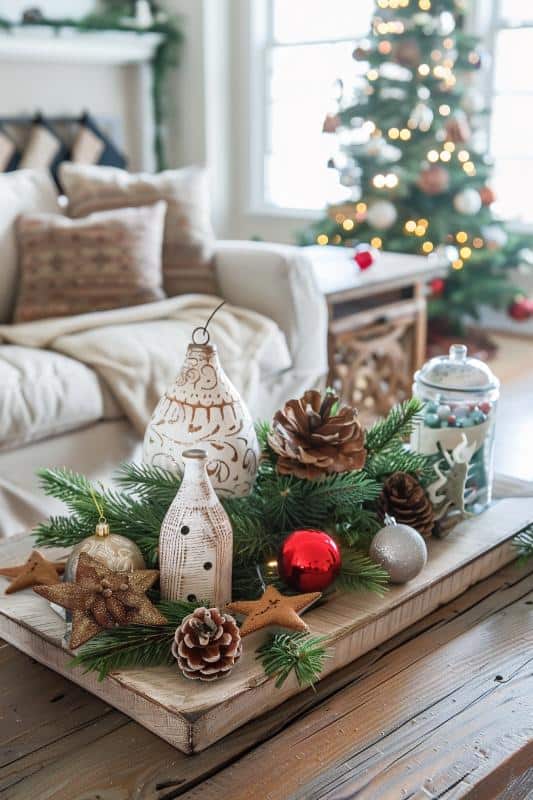
This tray wants a coffee table between 36 and 48 inches long; the distressed wooden tray itself runs about 20 to 24 inches, which leaves breathing room on both sides for a book or a mug. Table height matters more than ceiling height here — if your coffee table is under 16 inches tall, the arrangement will sit right at eye level when you’re on the couch. For longer, lower surfaces, the layered runner in Idea #7 carries the room better.
3. Flocked Coastal Tree With a Handmade Crab Shell Ornament
Here’s how the gilded oyster shell ornament comes together:
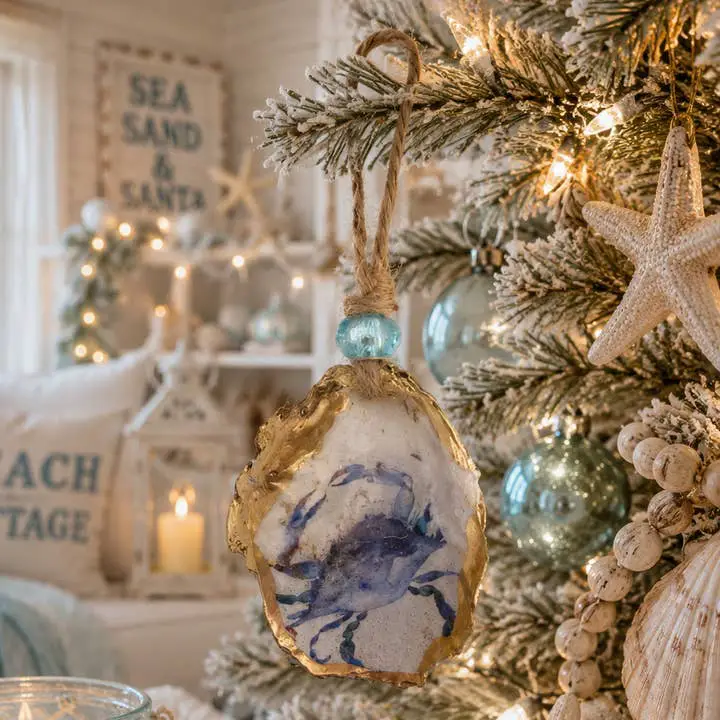
- Scrub a clean oyster shell and let it dry overnight — moisture is the enemy of paint.
- Paint a quarter-inch rim of gold acrylic along the outer edge with a fine brush.
- Decoupage or hand-paint a small blue crab in the center, then let it cure 24 hours.
- Drill a 1/16-inch hole at the top and thread jute rope through, adding a single blue bead.
- Hang it among light blue glass balls and a white starfish so it doesn’t get lost in the flocking.
Roughly 45 minutes of hands-on time and about $8 in materials for a set of six.
Coastal Christmas isn’t a niche anymore — shell ornaments and sea-glass palettes have climbed steadily on Pinterest every season since 2023, and 2026 is the year it moved inland. What’s driving it is a shift away from the all-red tree: people want something that still reads wintry in January. Flocked branches and soft blues do that, and they’re built on neutral whites, which is why this one has real staying power.
4. Felt Animal Ornaments Swinging From Evergreen Boughs
Hanging a dozen felt animals from one bundle of faux boughs, at staggered lengths on red-and-white string, is repetition with variation — the same visual move a gallery wall uses. The warm wooden surface behind does the framing, and the dark green needles make that bright pink, yellow, and red felt pop in a way it never would against a white wall. One bundle. No tree required. Miniature Santa hats on half the animals keep the set from looking uniform.
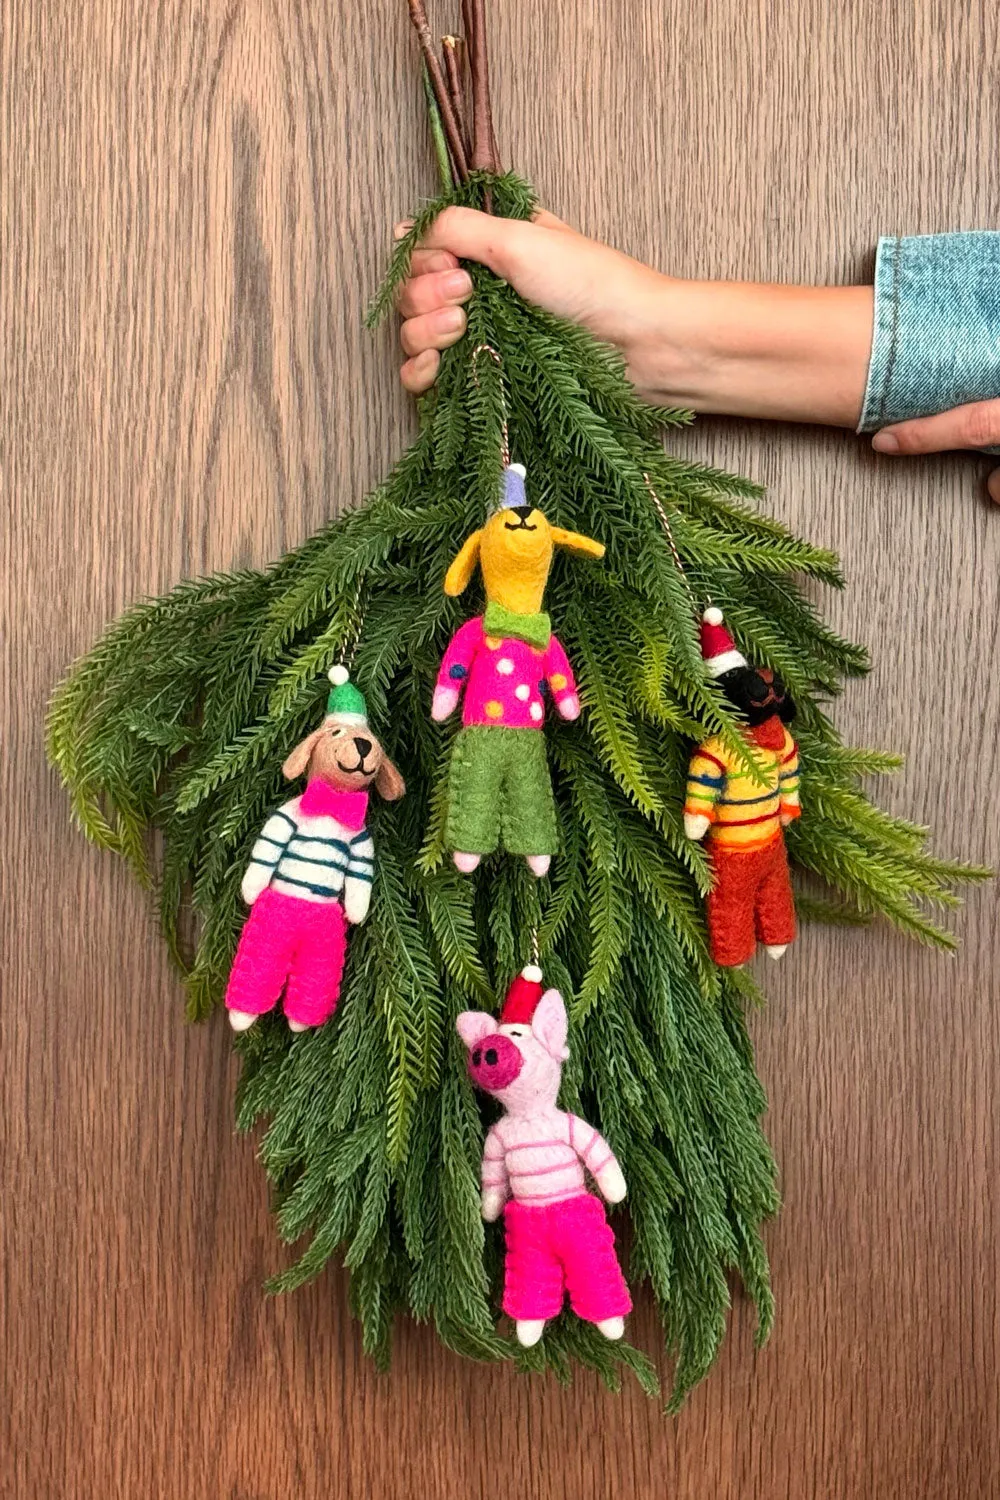
If you’ve got a toddler or a cat, this is genuinely the safest DIY ornament setup you can hang — felt is soft, light, and unbreakable. Two caveats: needle-felted pieces shed, so skip them if anyone in the house has wool sensitivities, and keep the bundle above 4 feet if you have a climber. Also be honest about scale — red-and-white string looks charming up close and basically invisible from across the room.
5. Wood Slice Centerpiece With a Burgundy Candle and Plaid Ribbon
Read this arrangement as a formula: 60% forest green foliage, 20% burgundy and warm wood slice, 15% off-white and black, 5% shine. Swap the red-and-black plaid ribbon for a solid cream linen and the same recipe turns into a winter-neutral look. Trade the burgundy pillar candle for ivory and it goes full farmhouse. Keep those percentages and you can change every single object and still land in the same room.
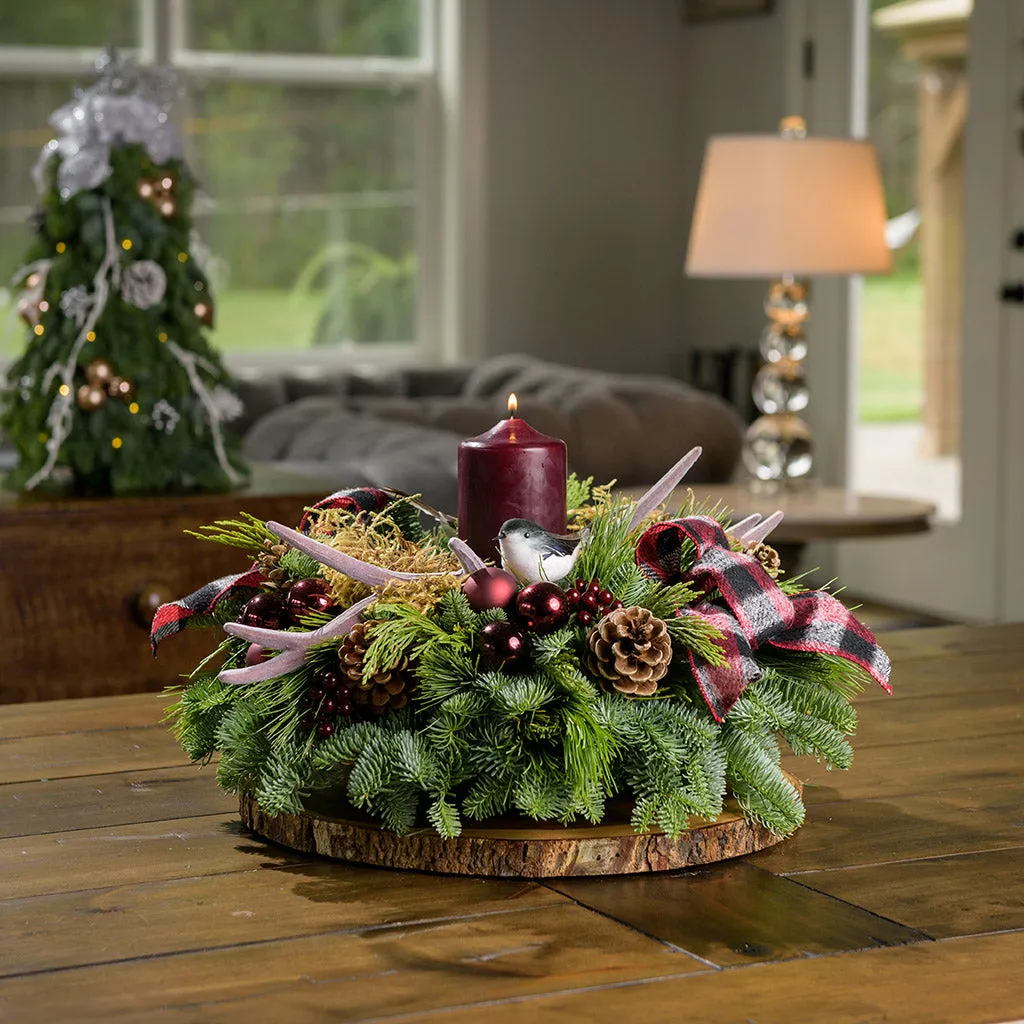
Real evergreen branches are gorgeous for about 10 days in a heated house, then they start raining needles onto your table. If you’re using fresh greens, mist them every other day and keep the arrangement away from radiators and floor vents. Faux cedar and pine have come a long way — a quality faux garland runs $25 to $45 and lasts a decade, but you’ll want to dust it once a season and fluff the branches every time you unbox it.
6. Dried Orange and Pinecone Wreath, Built at the Kitchen Table
Dried citrus is the cheapest luxury in holiday crafting:
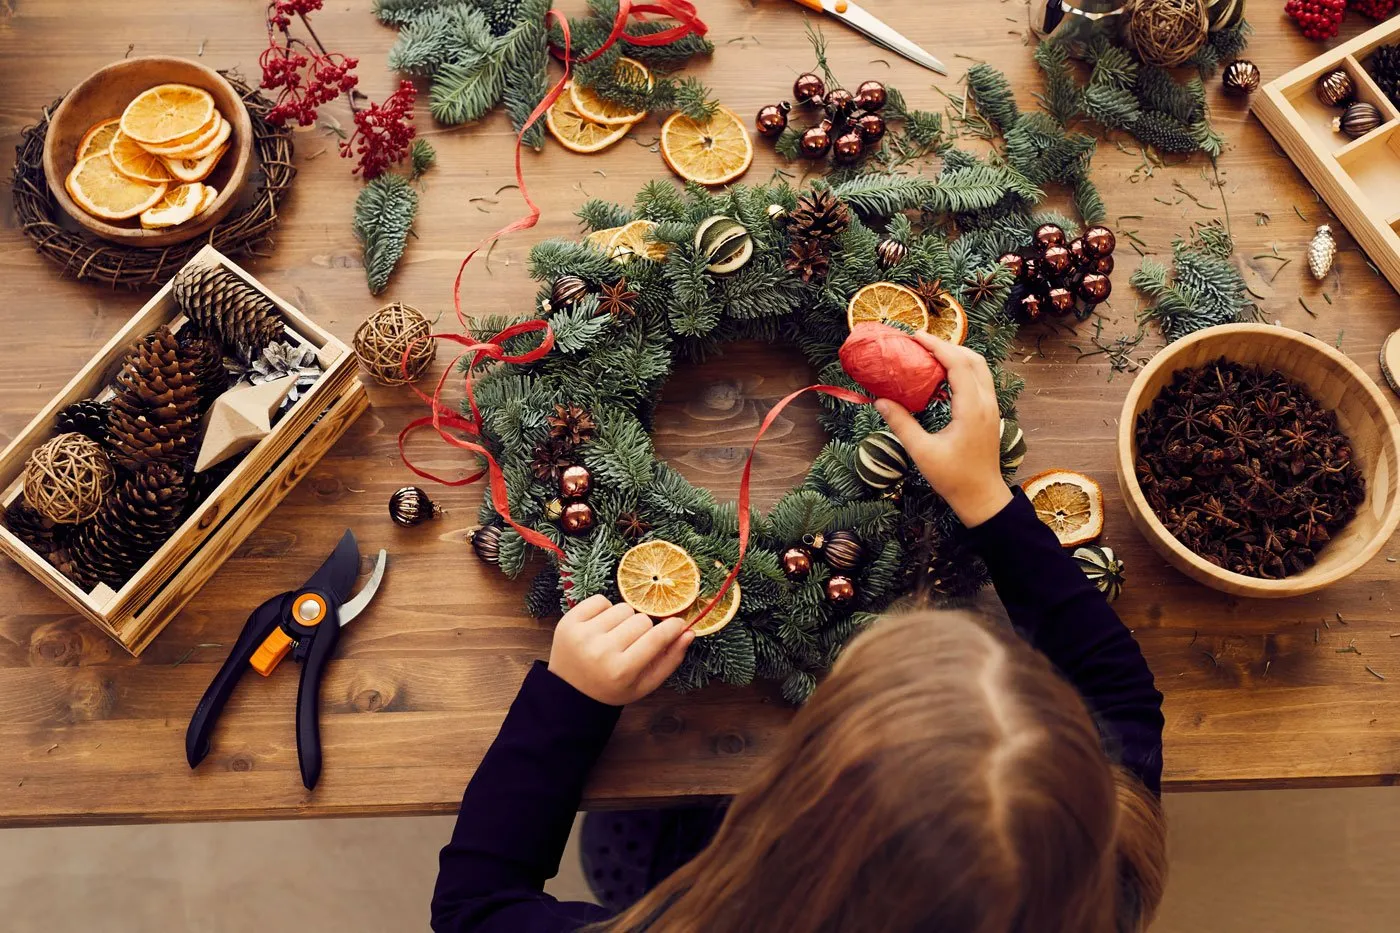
- Slice oranges a quarter-inch thick and blot them dry with a paper towel.
- Bake at 200°F for 2½ to 3 hours, flipping once at the halfway mark.
- Cool them on a rack completely — they should feel like stiff leather, not fruit.
- Wire dried slices, pinecones, and star anise to a grapevine or evergreen base with 22-gauge floral wire.
- Tuck in the red ribbon last, and only after everything else is placed.
About 20 minutes of active work plus oven time, and roughly $12 for a 16-inch wreath.
A plain 14-inch evergreen wreath base is $5 at a dollar store, and a thrifted velvet ribbon runs $1 to $3. Bake your own oranges instead of buying pre-dried slices — nine dollars online versus two dollars for three fresh oranges that yield 30 slices. Facebook Marketplace is full of people dumping holiday bins in early December, and wreath forms basically never wear out. Total: under $15 for something that looks boutique.
7. Double-Layer Plaid Runner With Mixed Evergreen Garland
Two runners beat one every time. Lay a plaid fabric runner as the base, then center a narrower white stitched runner on top — aim for the top layer to be about a third of the width of the bottom one, so you get a visible plaid border on both sides. Then let the mixed evergreen garland overhang the table edge by 6 to 8 inches. That overhang is what makes it read as styled rather than as a centerpiece parked in the middle of a table.
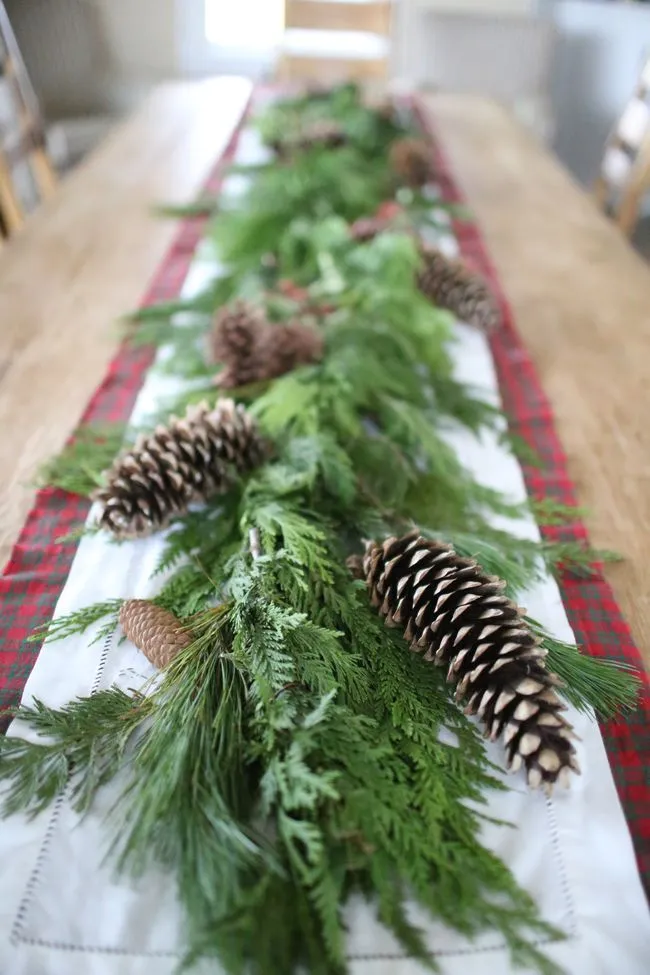
This setup is built for a dining table 72 to 96 inches long; you want a garland 9 to 12 feet so it drapes instead of stretching. On a table under 60 inches, scale down to a single runner and a 6-foot garland or the greenery will win. If you’re working with a small apartment nook, the pedestal arrangement in Idea #18 lives happily on a tabletop under 30 inches wide.
8. Frosted Garland Table With Wood Slice Chargers
Three moves are doing the heavy lifting here. First, the frosted evergreen garland — flocking softens the green so it sits between the grey runner and the dark wood instead of fighting both. Second, wood slice chargers with a gold-beaded rim, which pull the table’s own material up onto the plate. Third, the copper mugs, the only warm metal in the scene, which stop the palette from going cold. A few red accents and plaid pillows finish it.
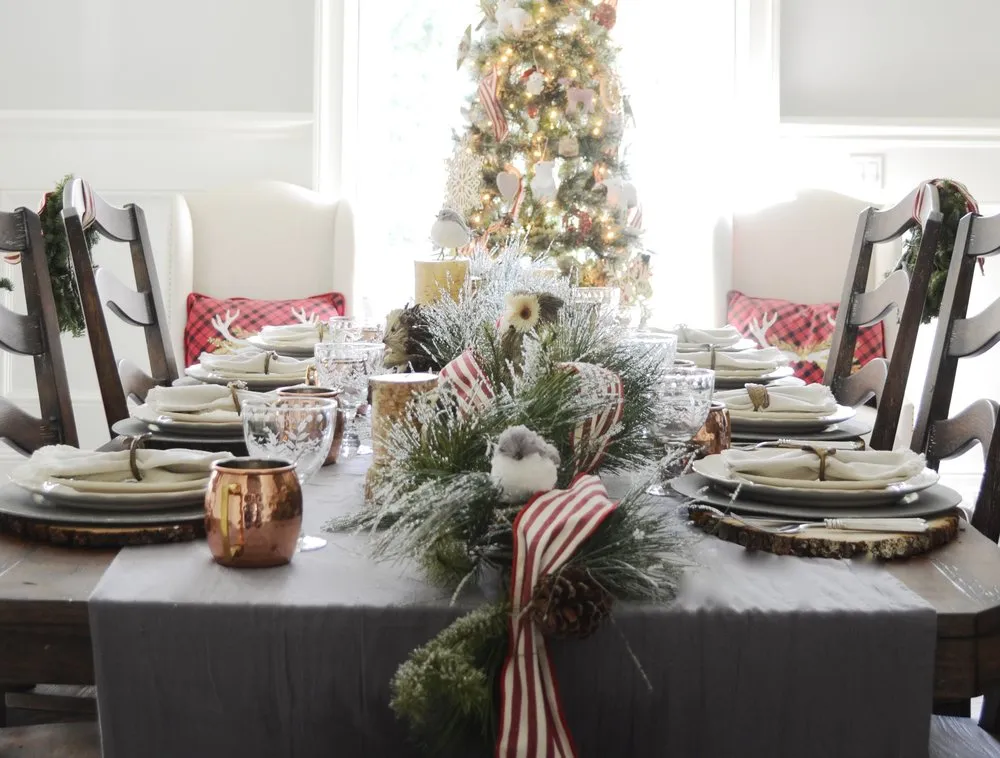
Wood slice chargers are lovely and completely dishwasher-unsafe — they’ll warp, crack, or grow something fuzzy if you soak them. Wipe with a damp cloth and store them flat and dry. Same story for frosted garland: cheap flocking sheds white dust on everything underneath. Give new garland a hard shake outside before it comes anywhere near your table, and if you have pets, confirm the flocking is non-toxic.
9. Paper Roll Stars and Dried Oranges on Twine
The varying hanging lengths are everything. Those brown paper roll stars and dried orange slices are nice on their own, but what turns them into a wall moment is that no two hang at the same height — each drops differently against the light grey wall and throws its own small shadow. Hang them all in a line and you’ve made a border. Stagger them and you’ve made movement, depth, and a reason to look up.
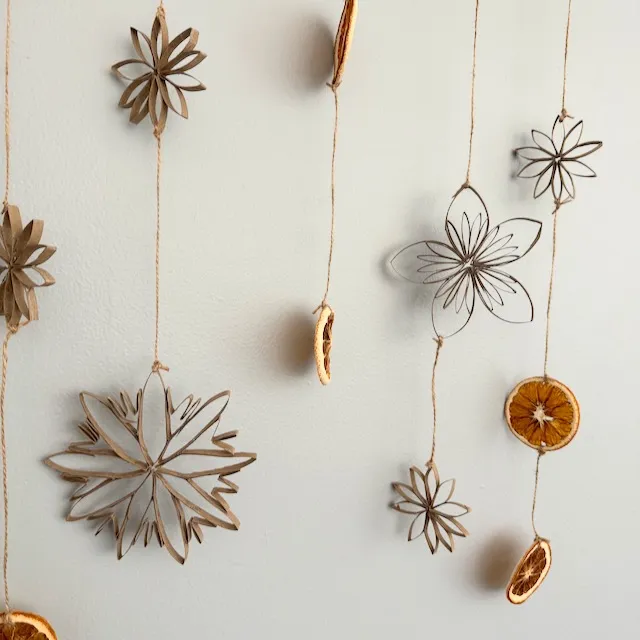
This entire installation costs about six dollars. Toilet paper rolls become the stars, three oranges become 30 dried slices, and a ball of twine from the dollar store is $1.50. Skip the craft-store hanging kit — plain twine and a thumb tack do the same job. If you’re short on time, faux orange slices exist, though they read plastic-y up close. Group them in odd numbers and nobody will be studying them that hard.
10. Weathered Wood Box Centerpiece With Metal House Lanterns
Read this table as a ratio: 50% weathered white and grey wood, 25% galvanized silver, 15% dark green, 10% natural burlap and brown. Switch the galvanized metal for matte black and the whole thing turns modern farmhouse. Swap the grey reindeer plates for cream and it softens into traditional. The palette is doing the work — the objects are just placeholders, which is why this formula survives a change of season or a change of taste.
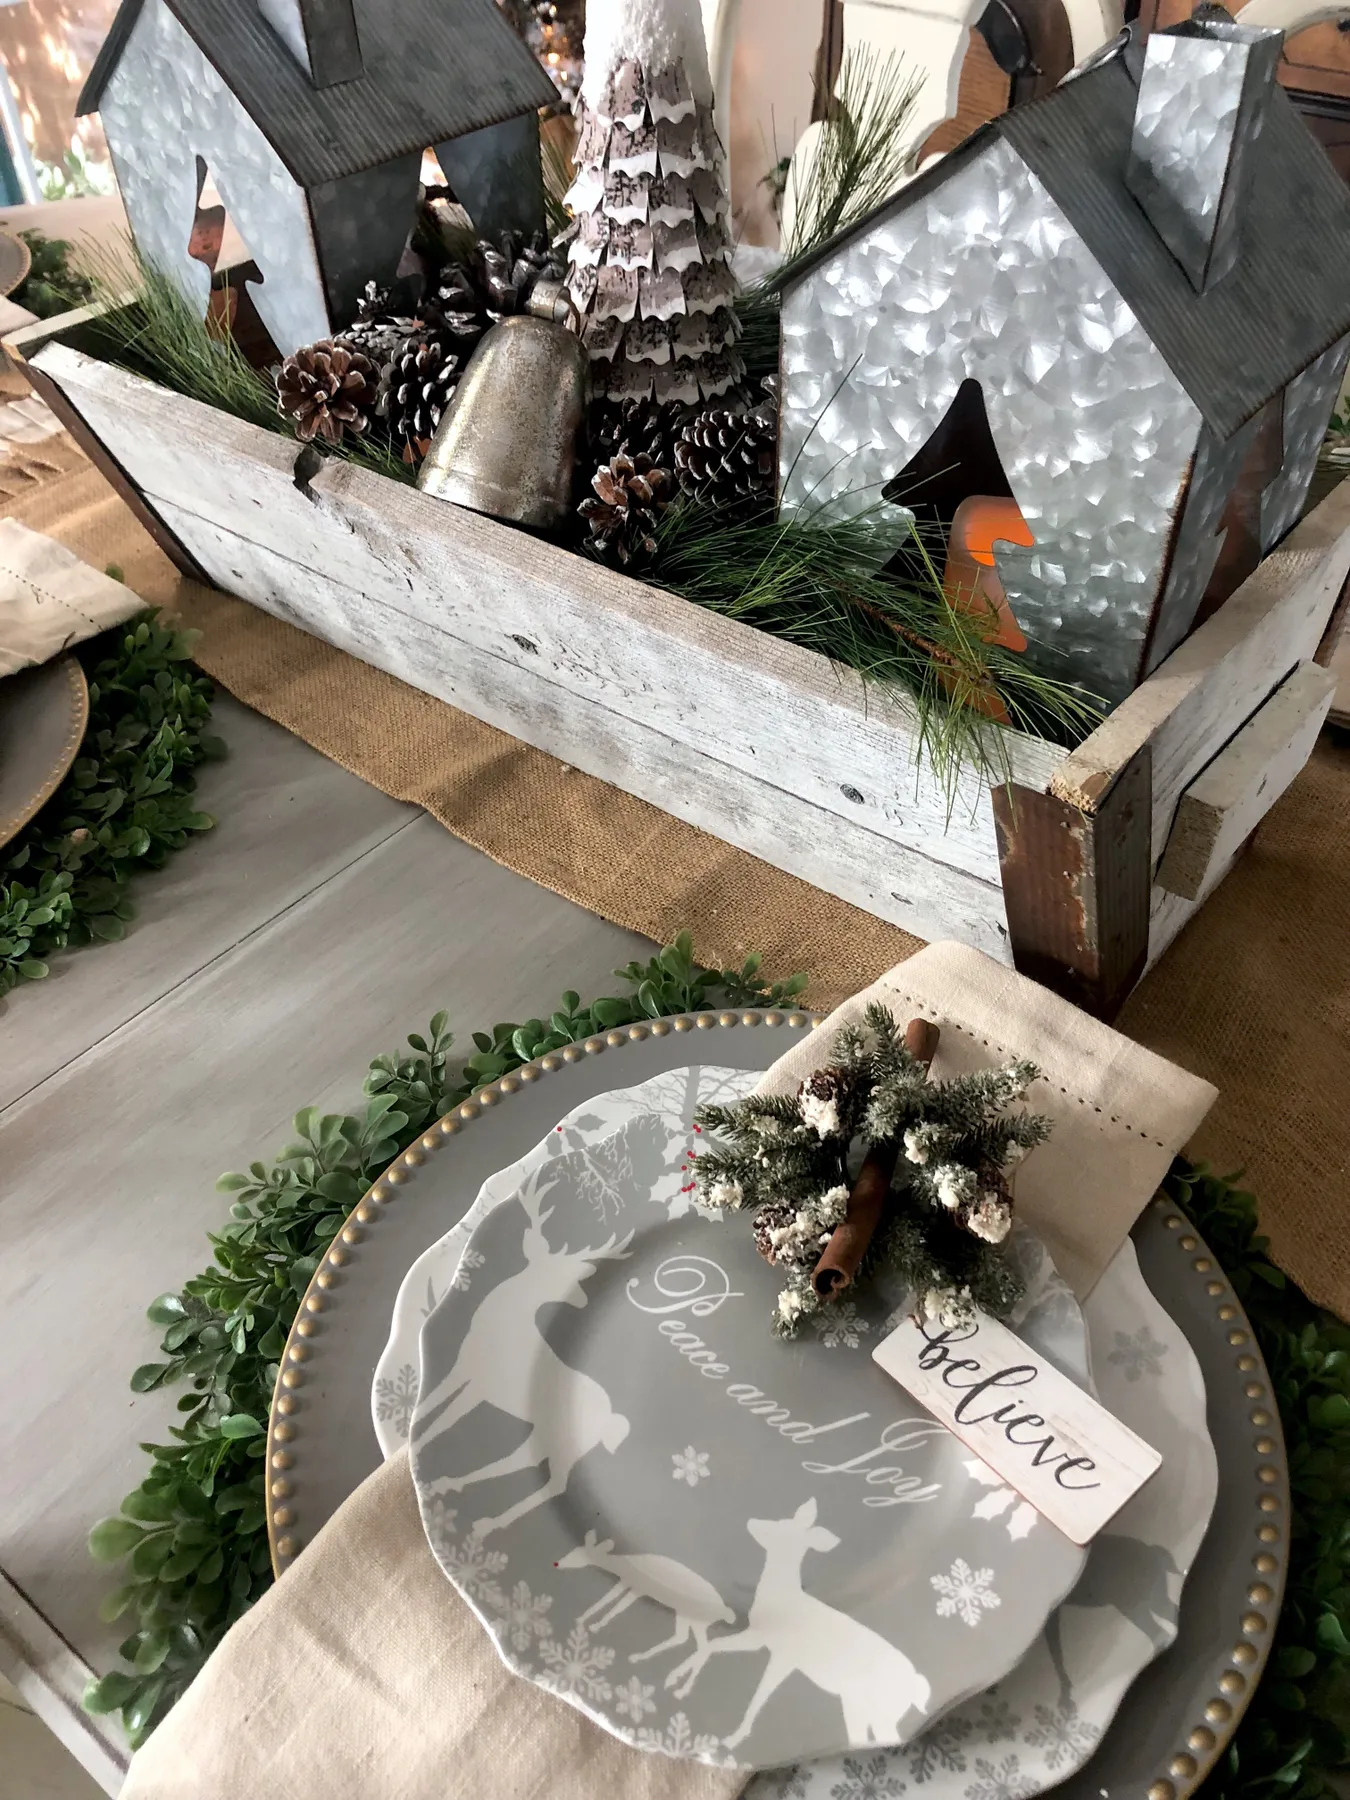
Here’s the detail most people miss: that frosted pine sprig on each plate has a cinnamon stick wired in and a paper tag, and it’s the cheapest thing on the table. Under a dollar per setting, and it’s the reason guests feel expected. For eight people, budget one evening and about $8. Write the names yourself — printed tags never look as good, and a slightly wobbly J in your own handwriting is the whole point.
11. Pipe Cleaner Trees, Beads, and Glitter Snowflakes
Pipe cleaner ornaments work because they’re forgiving in a way grown-up crafting rarely is — bend it wrong and you bend it back. The multicolor bead and sequin accents keep the tree and snowflake shapes from reading flat, and the glitter paper hearts add a hard, shiny counterpoint to all that fuzzy chenille. It’s the rare project where a seven-year-old’s version and an adult’s version can hang on the same branch without either looking wrong.

Craft-store sales of chenille stems and pony beads have been climbing since the kid-core wave hit Pinterest in 2024, and by 2026 this is officially cross-generational — the same technique shows up in adult craft kits and after-school programs alike. Why it sticks: it’s cheap, it’s fast, and it requires zero skill. Expect this one to stay. It’s less a trend than a return to what ornaments were before they got expensive.
12. Reindeer Gift Bags Cut From Light Blue Paper
The reindeer gift bag is a two-evening project:
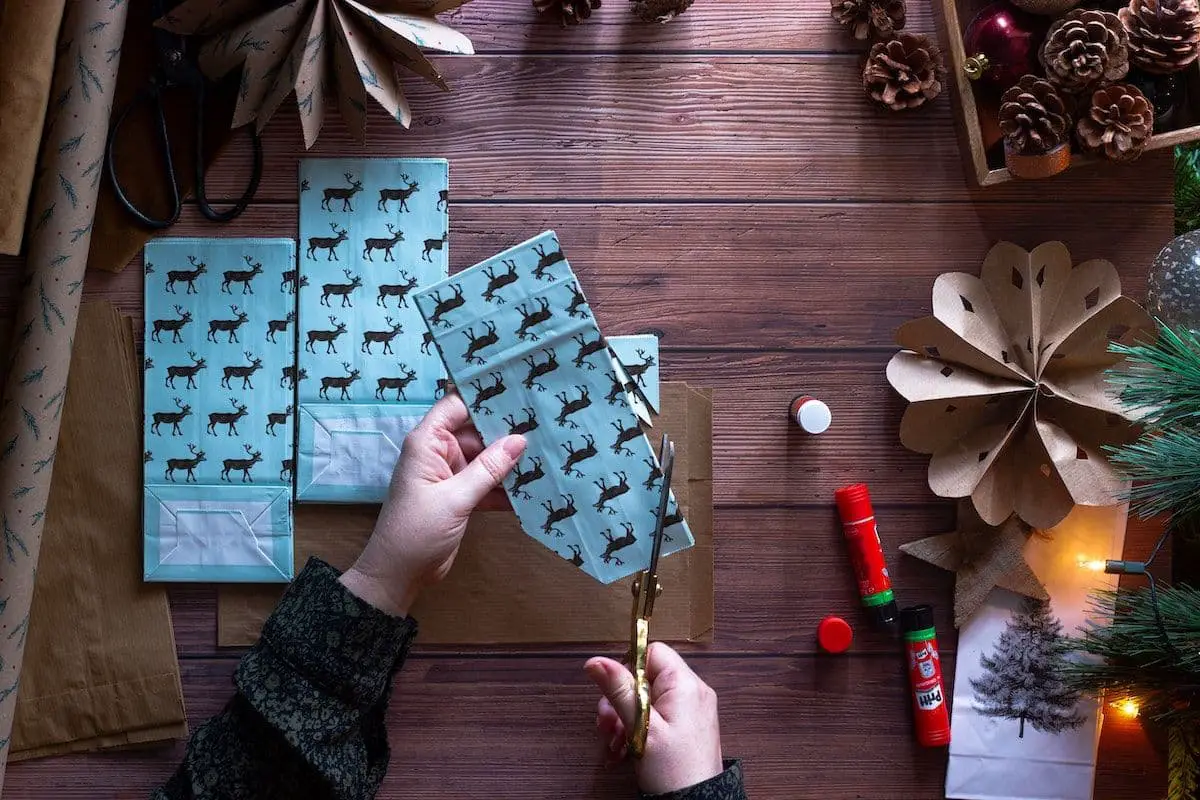
- Print or trace a reindeer silhouette onto light blue paper — a simple black outline works best.
- Cut the shape with small, sharp scissors and go slowly around the antlers.
- Glue the cutout to a kraft bag, pressing from the center outward so it doesn’t wrinkle.
- Fold the bag top over 2 inches and punch two holes 1 inch apart.
- Thread red twine through, tie it off, and add a pinecone or a single red ornament to the handle.
Six bags took one evening and roughly $12 in supplies.
Before you commit to a batch, check four things:
- Measure your gift first — flat bags only work for flat contents.
- Test your glue stick on scrap kraft paper; some grab and wrinkle the blue paper.
- Count how many bags you actually need, then cut two extras.
- Make sure your twine is thick enough to carry weight without cutting into fingers.
13. Yarn Ball Snowmen on a Snow-Filled Silver Tray
The tray is the difference between craft project and display. Three yarn snowmen sitting loose on a sideboard look like toys. On a silver tray under a layer of faux snow, with frosted pinecones tucked in and a couple of white candies in paper cups, they become a vignette. It also solves a practical problem — the faux snow stays contained, and you can move the whole arrangement with two hands instead of chasing fluff around the house.
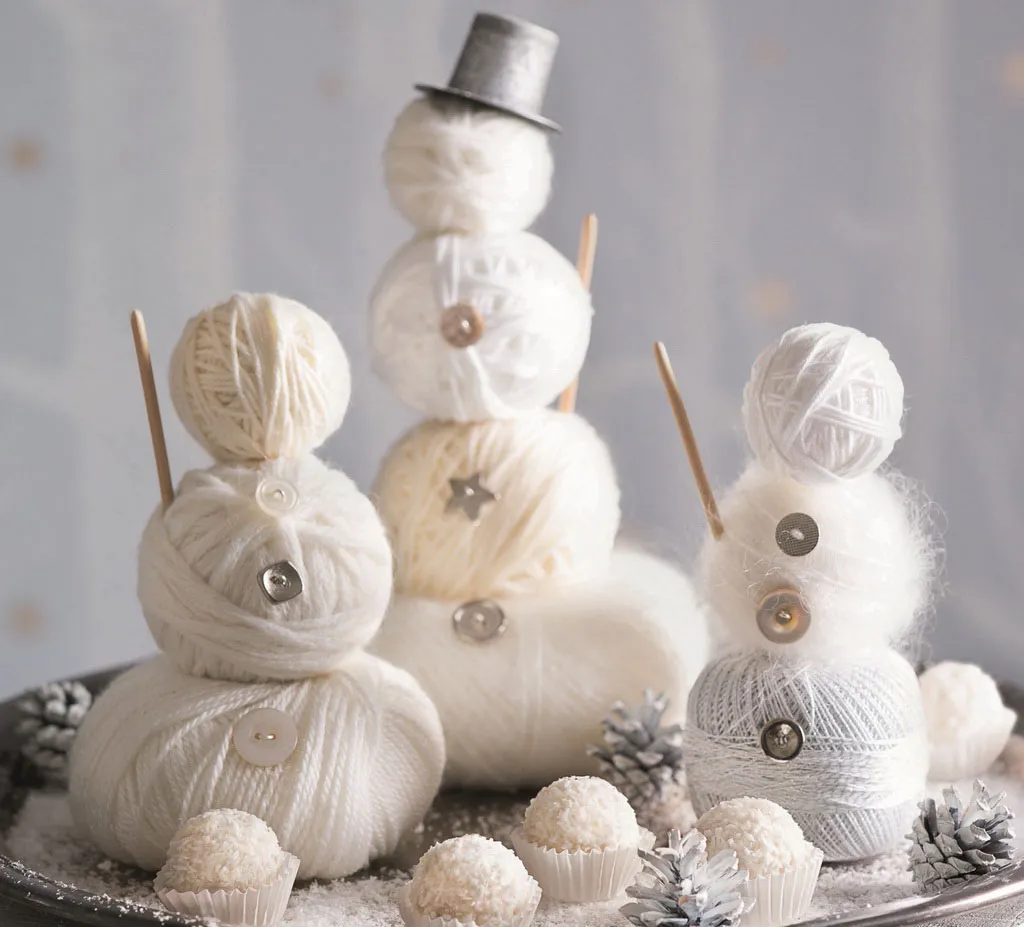
Yarn snowmen are dust magnets, and faux snow gets everywhere. Plan on a weekly swipe with a lint roller, and vacuum the tray rather than wiping it, or you’ll scratch the silver. Want the same look with less upkeep? Swap the loose faux snow for a white fleece insert cut to the tray’s shape. Same effect, one-tenth the mess, and it holds the snowmen in place.
14. Eucalyptus and Pomegranate Garland With Gingerbread Place Cards
The formula here runs about 55% eucalyptus green, 20% white, 15% deep pomegranate red, and 10% gold and pale pink. Notice how the pink-tinted glassware and gold flatware keep that deep red from turning heavy. Swap the pomegranates for clementines and the arrangement goes bright and citrus-forward. Switch the eucalyptus to magnolia leaves and it gets darker, glossier, and more formal. Same skeleton, different personality every time.
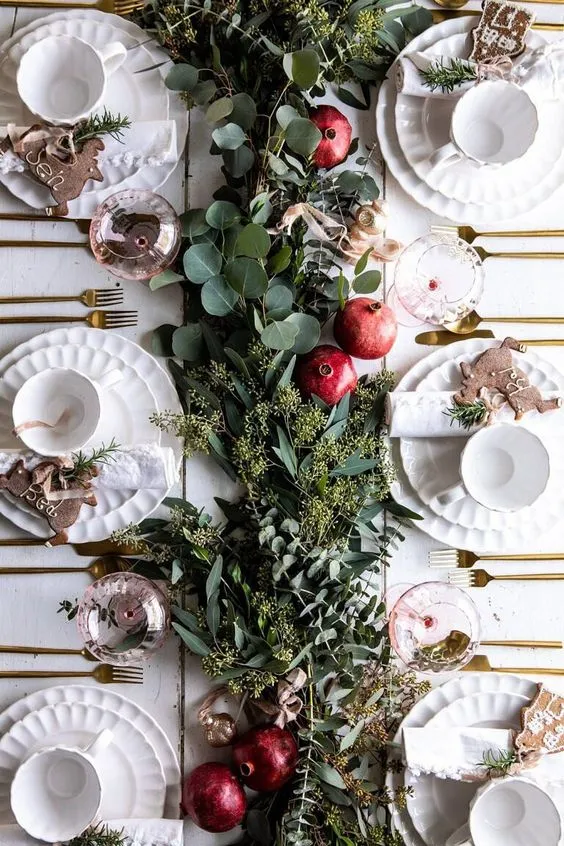
- Eucalyptus bundle, 10–12 stems: $18–$35
- Fresh pomegranates, 5–7: $10–$18
- White scalloped dinnerware, set of 4: $40–$120
- Gold flatware, set of 4: $25–$80
- Ribbon, twine, and cookie supplies: $10–$20
- Total: $103–$273
For less: dried eucalyptus from a dollar store, faux pomegranates, and thrifted white plates at $2 apiece land the same look around $45 to $60.
15. Felt Gardener Santa Gift Wrap With Fresh Parsley
Use a wide ribbon — 2½ to 3 inches — and run it vertically across the top of the package rather than around the middle. That gives the little felt gardener Santa a stage to sit on and hides the seam where the kraft paper overlaps. One dark green velvet ribbon costs about $6 and upgrades four gifts. A real sprig of parsley or rosemary tucked under the ribbon brings the whole thing to life.
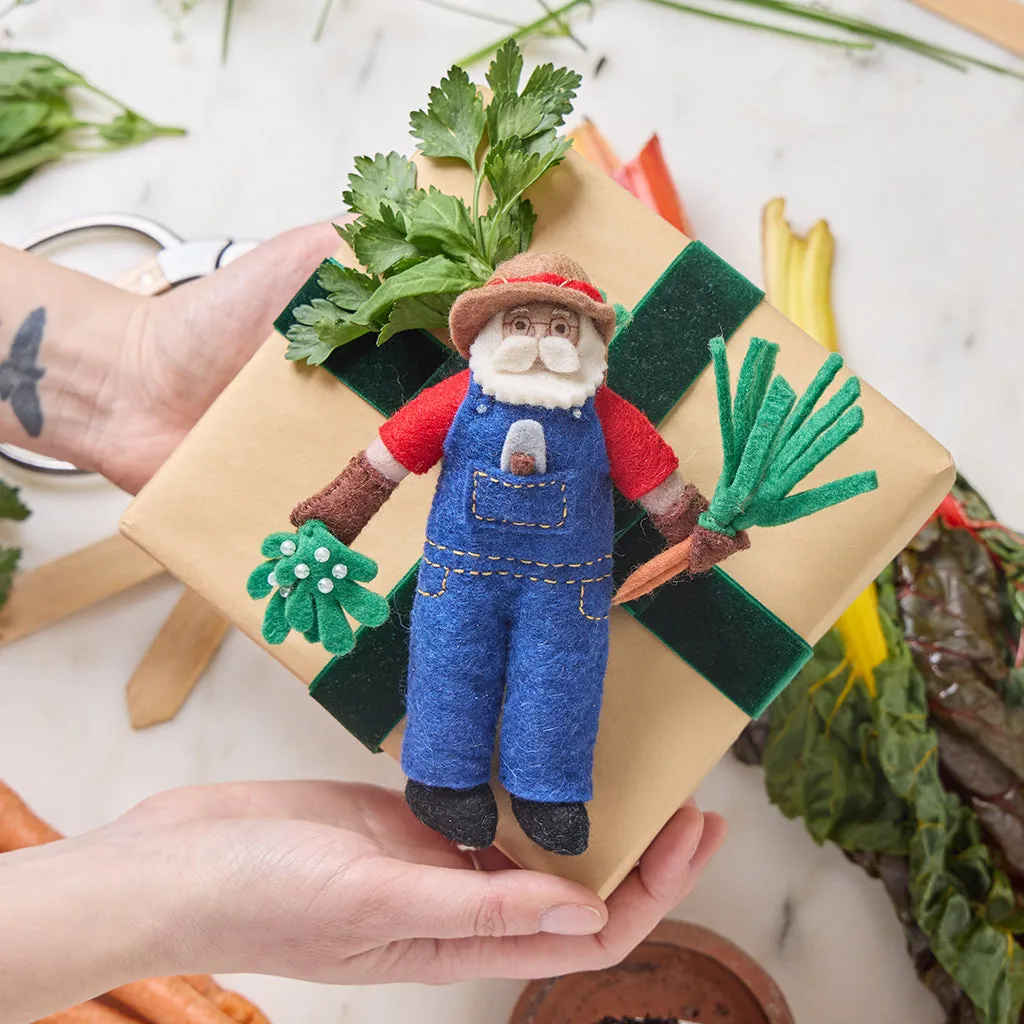
Fresh herbs on a wrapped gift are gorgeous and also perishable — if the present sits under the tree for two weeks, you’ll have a sad brown sprig and a mystery stain on the kraft paper. Snip and add the greenery the day you hand it over. The felt figure is charming but fragile too, so don’t stack that package under anything heavier. Mailing it? Use faux herbs and expect the ribbon to arrive squashed.
16. A Single Evergreen Sprig in a Clear Glass Jar
The restraint is the design. One sprig, a few bright red berries, one small white bell flower, and a plain clear jar — that’s the whole thing. Add pinecones, a ribbon, or a second branch and it collapses into clutter. What you’d lose by filling it up is the negative space, and that empty air is exactly what makes this read as considered instead of thrown together. Three objects, one container, zero effort.
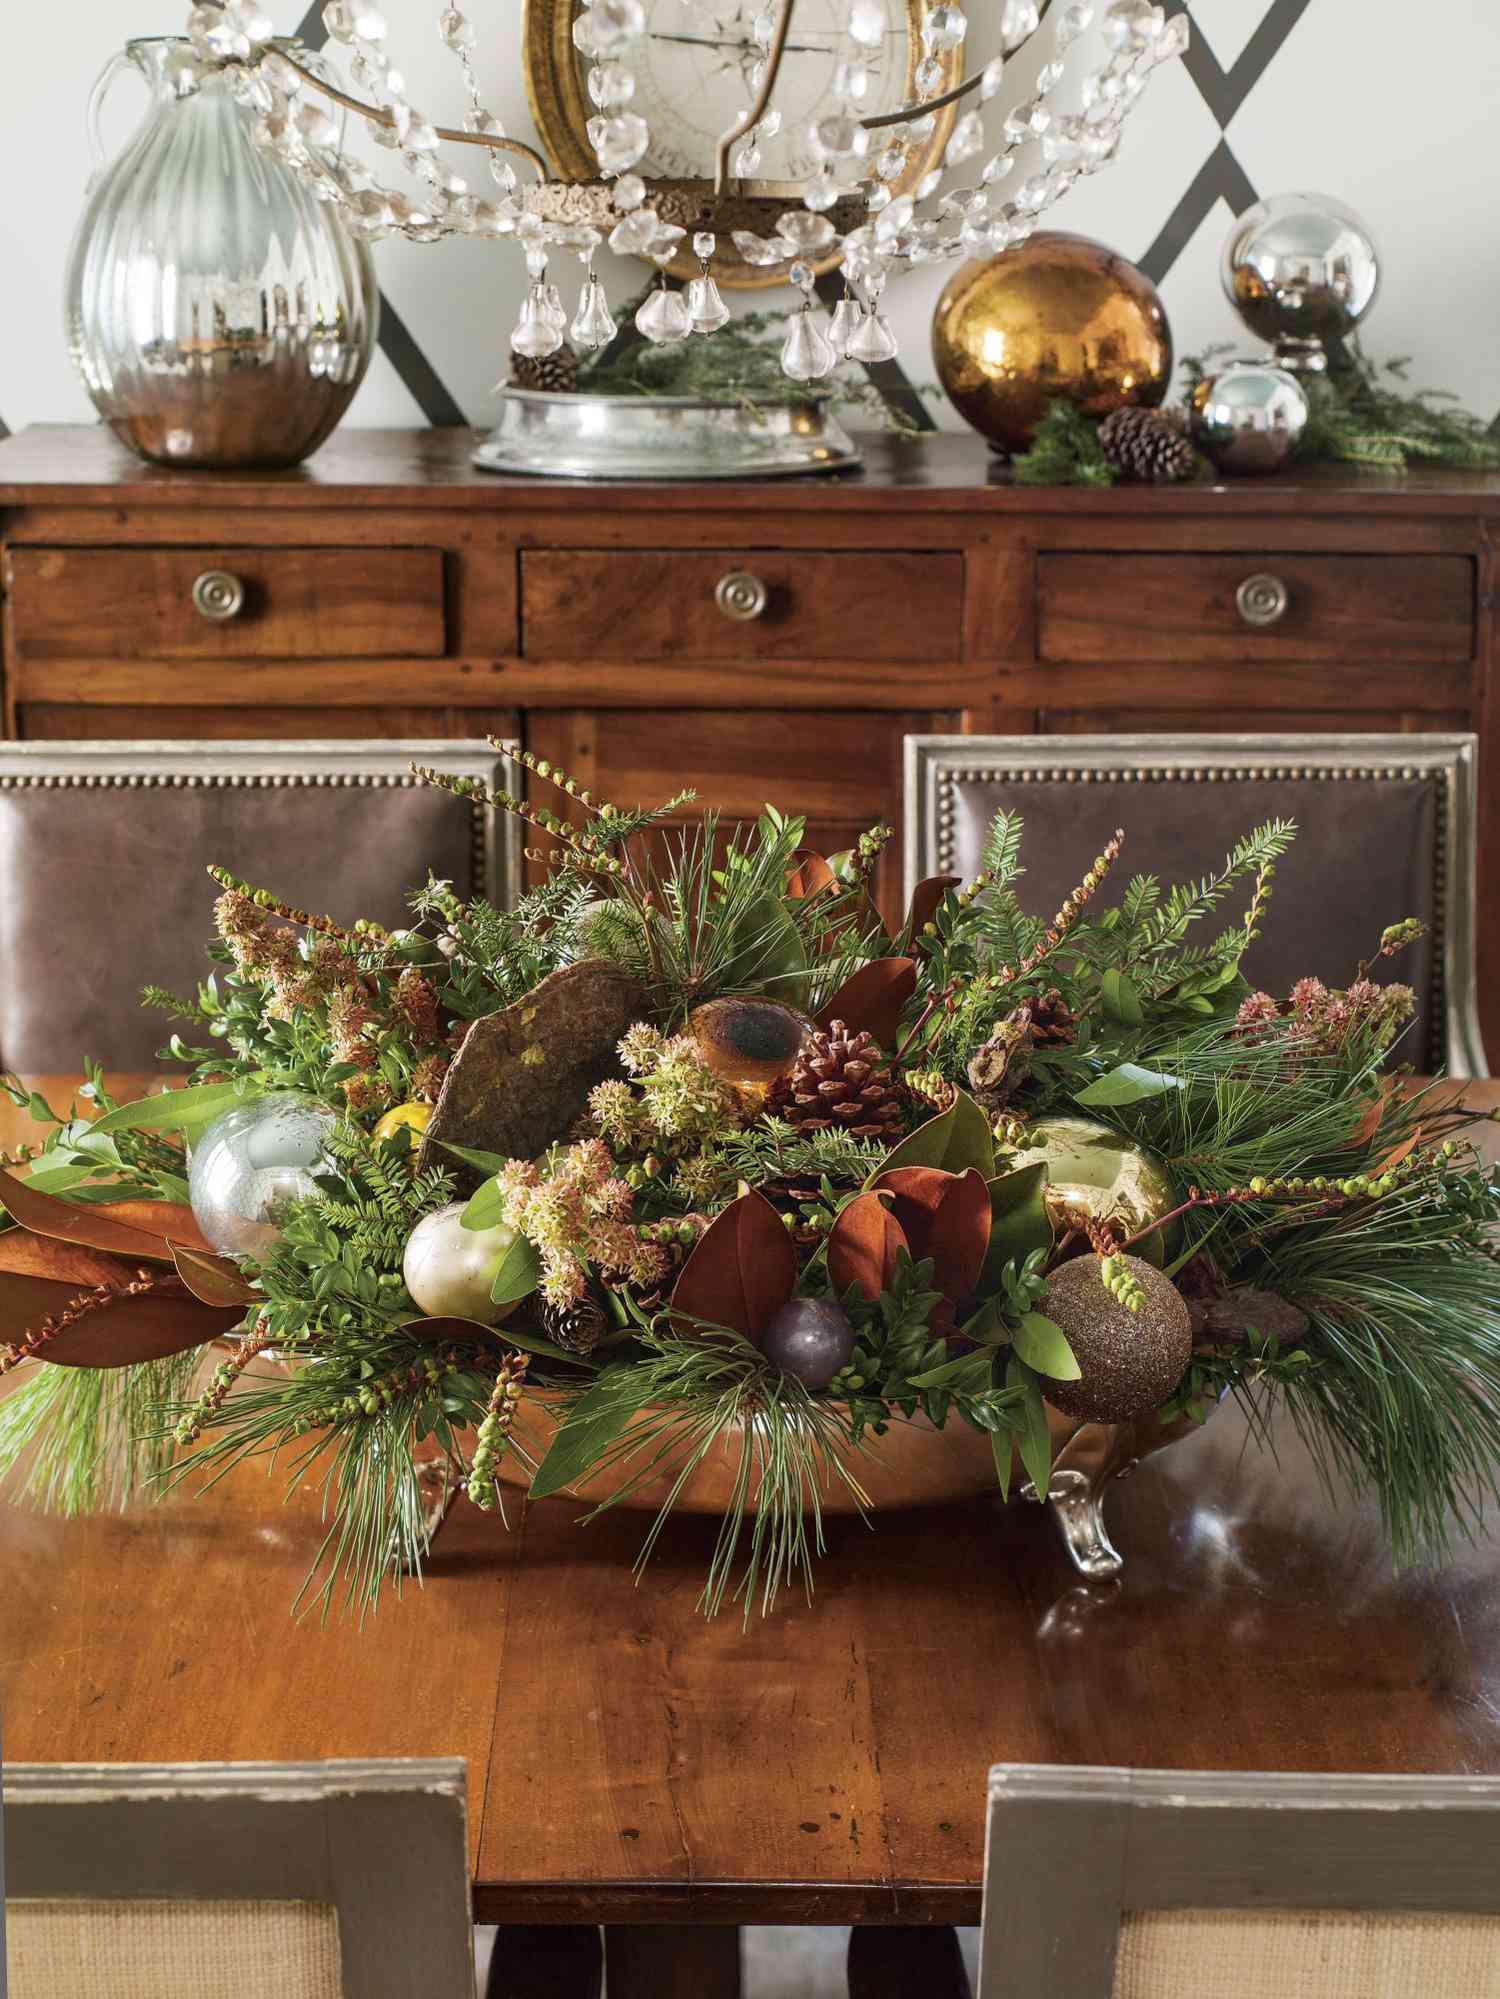
This works almost anywhere. A jar 4 to 6 inches tall suits a bathroom shelf, a kitchen windowsill, or a nightstand — anywhere you’d normally put a candle. On a long dining table, cluster three or five jars at varying heights spaced 10 to 14 inches apart instead of using one. If you want a full-length table moment, the layered runner in Idea #7 covers more ground. This is the version for tiny apartments.
17. Painting Wooden Deer and Trees With Faux Snow
Two things make this craft session work. First, the deer and tree cutouts are a matched set — same scale, same wood tone — so a table full of half-painted pieces still reads as a collection. Second, the faux snow goes on last, in clumps, not in an even layer. Even coverage looks manufactured; piled-on snow looks like weather. The dark rustic table underneath gives all that white somewhere to land, and the lit tree in the background tells you what it’s all for.
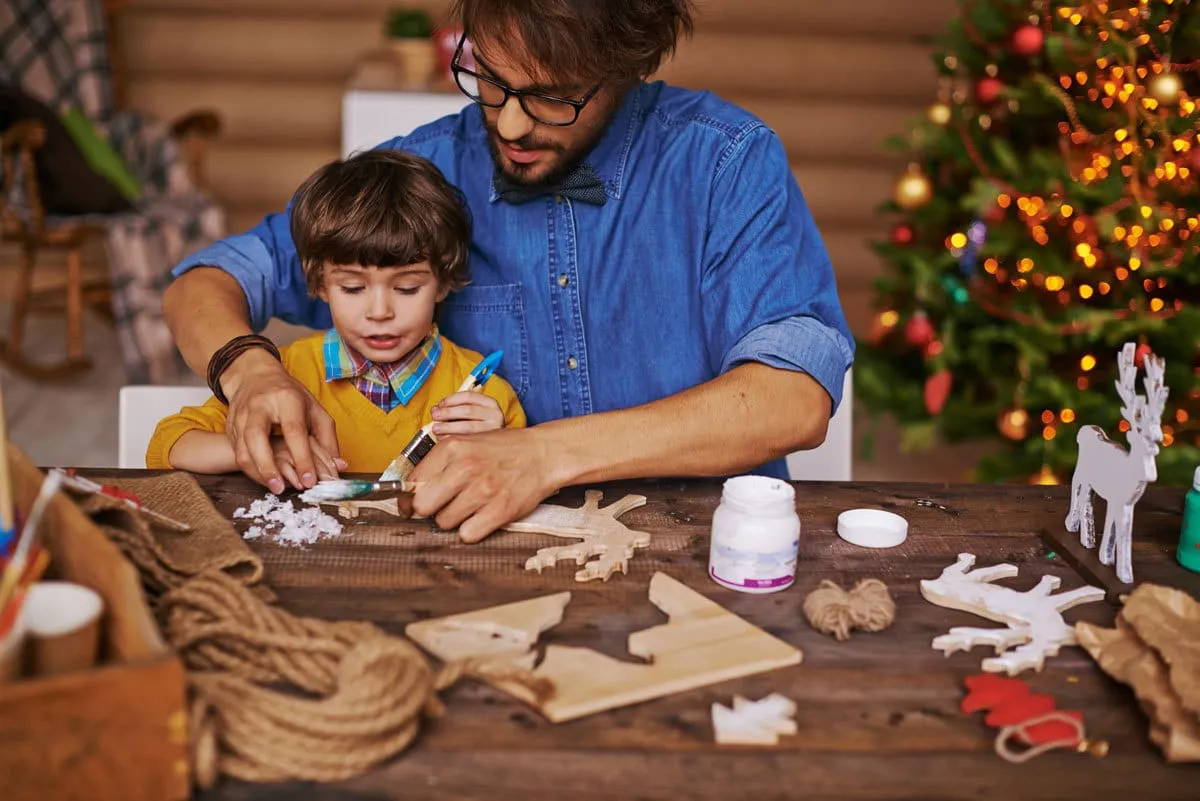
- Wooden cutouts, set of 12: $12–$25
- White acrylic paint and brushes: $8–$15
- Bag of faux snow: $5–$12
- Natural rope for hangers: $4–$8
- Drop cloth and kid aprons: $10–$20
- Total: $39–$80
Skip the pre-cut wood entirely and trace shapes onto cardboard from the recycling bin — free, and honestly charming.
18. Distressed White Pedestal With a Cream Candle and Faux Snow
Faux snow is the most forgiving holiday material there is — it doesn’t yellow, barely sheds, and a bag lasts years in a ziplock. The pedestal is a different story: painted wood chips when it gets knocked, so keep it out of the path between the couch and the kitchen. And that two-wick cream candle will tunnel if you blow it out early every night. Let it burn long enough for the wax pool to reach the glass edge, then trim the wicks before relighting.
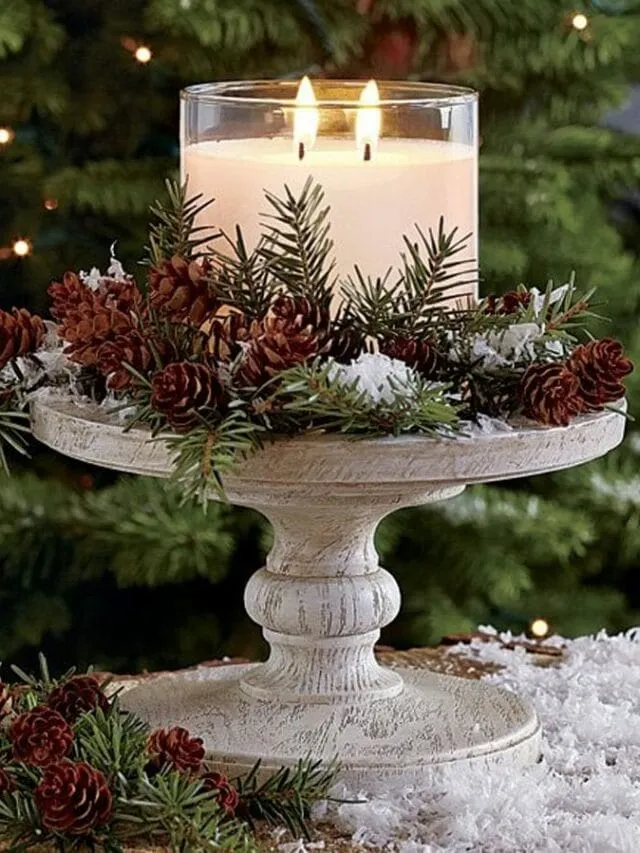
You can build this entire vignette for around $20. A thrifted wooden candlestick pedestal runs $3 to $8 at Goodwill, and a coat of chalk paint handles the distressed finish. White pillar candles from Walmart are $4 to $7 for a two-pack, a bag of faux snow is about $5, and the pinecones are free from any park or backyard. Under $25 total, versus $60 to $90 buying it all new.
19. String Art Christmas Card With a Green Yarn Tree
String art cards take about 15 minutes each once you find a rhythm:

- Cut a 4×6-inch piece of heavy white card stock or watercolor paper.
- Sketch a simple triangle tree in pencil and keep the outline under 3 inches wide.
- Poke small holes along the outline with a pushpin, about a quarter-inch apart.
- Stitch dark green yarn through the holes with a blunt needle in one continuous pass.
- Knot the ends on the back and tape them flat so the card sits level in the envelope.
One skein of yarn makes about 20 cards.
The ratio is 70% white paper, 20% dark green yarn, 10% warm accents — the gingerbread and dried orange slices in the background exist to keep the card from looking clinical. Put it on a colored envelope and the formula changes: cream card, burgundy yarn, warmer read. Keep the tree shape simple, because the moiré of the yarn does the visual work, not your drawing.
20. Paper Snowflakes on a Live-Edge Table With Resin Inlay
Cut snowflakes in three sizes — roughly 3, 5, and 7 inches — and you can build a garland or window display that reads as designed. Uniform sizes look like a classroom project; mixed sizes look like a collection. Fold in sixths, not quarters, for a true snowflake silhouette, and use thinner paper than you think: 20-lb copy paper cuts more cleanly than card stock and hangs without curling at the points.
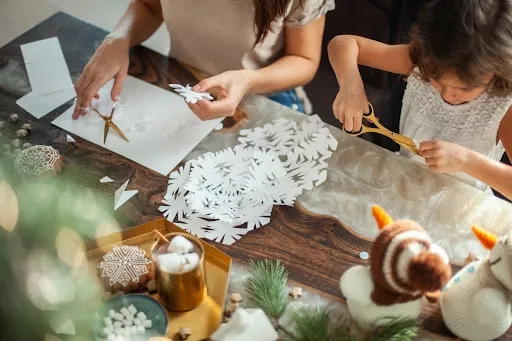
That live-edge table is about 60 inches wide, which is generous — you want at least 30 inches of clear surface to spread out paper, scissors, and a mug of cocoa without knocking anything over. In a smaller kitchen, use a folding card table and clear it between sessions. If your counter is under 24 inches deep, prep the paper somewhere else and only assemble at the table. See Idea #26 for a supply layout that handles tighter spaces.
21. White Painted Jars With Red Stenciled Fabric Wraps
The monogram is the reason this trio reads as a gift rather than a craft. Three painted jars with fabric bands are pleasant on their own. Together, with a red stencil and matching twine bows, they tell you they were made for someone specific. Remove the letters and you’d still have a cute set — but you’d lose the fact that a person thought about another person while making them. That’s the whole value.

Check these before you start painting:
- Wash and dry the jars completely — residue and moisture make paint flake off.
- Test your stencil on scrap fabric; red fabric paint bleeds on loose weaves.
- Confirm the jars will actually hold something — candy, cocoa, pens — so they don’t become clutter.
- Have twine, a glue gun, and one spare jar on hand. You will drop one.
22. Coastal Centerpiece on a Rough-Hewn Beam
This one runs roughly 45% deep green foliage, 25% blue between the pillar candle and ornaments, 20% white and shell, and 10% brown wood. That thick rough-hewn beam matters more than it looks — it grounds all the cool blues so the arrangement doesn’t float. Swap the light blue pillar for cream and it goes full winter-white. Replace the starfish and scallop with pinecones and it becomes woodland. The blue-to-natural balance is the only thing holding the coastal read together.
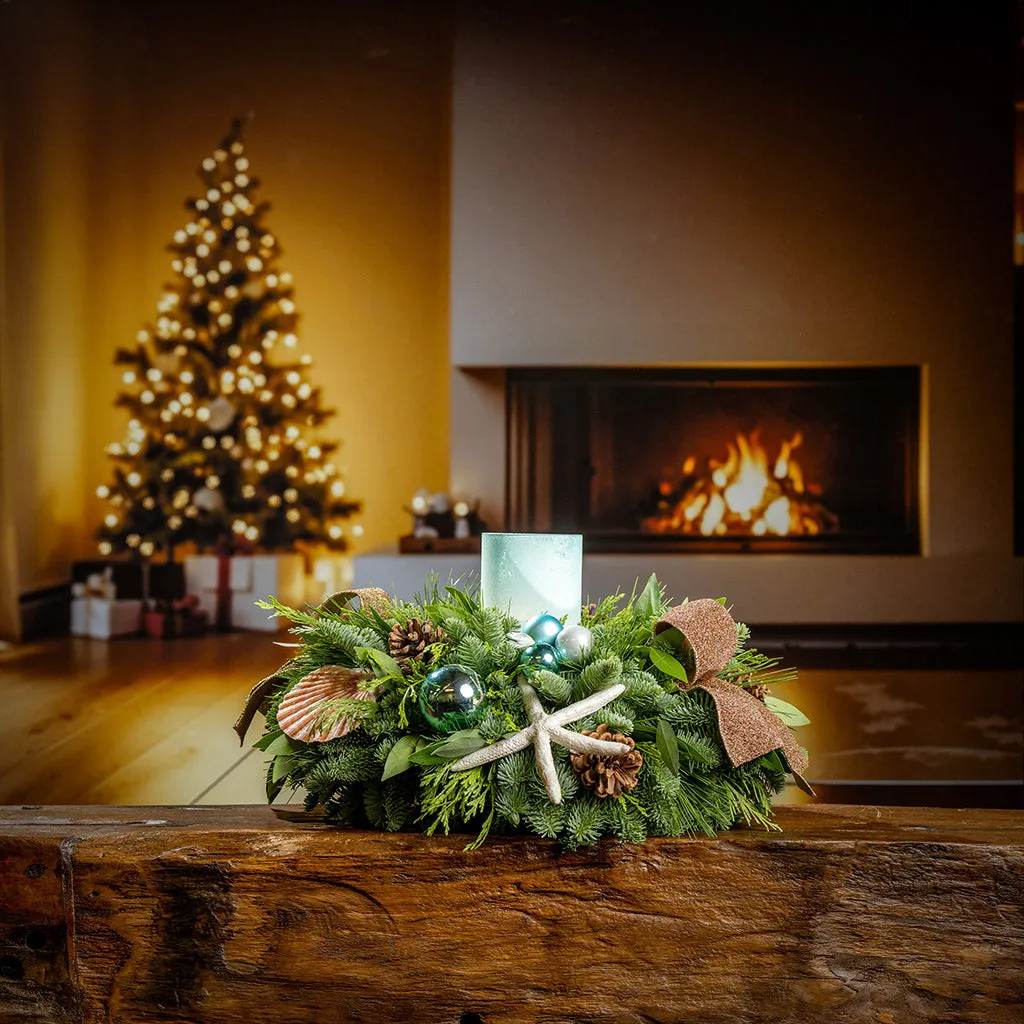
Real starfish and seashells from a beach trip are lovely and also, technically, a little smelly if they weren’t cleaned properly. Soak found shells in a 50/50 bleach solution, rinse well, and let them dry fully before they go anywhere near a flame. Shells are brittle, and this arrangement is heavy enough that you should set it down once and leave it. With kids in the house, swap the candle for an LED pillar.
23. Cotton Pad Snowman and Red Glitter Snowflake Ornaments
The cotton pad snowman works because of scale honesty — it’s small, it’s obviously handmade, and it doesn’t pretend to be anything else. Hung right beside a red glitter snowflake, the tree gets a real texture conversation: soft matte cotton against hard reflective glitter, both at the same size. That contrast is why this reads as a curated handmade tree rather than a craft-fair pile. Silver tinsel woven through finishes it.
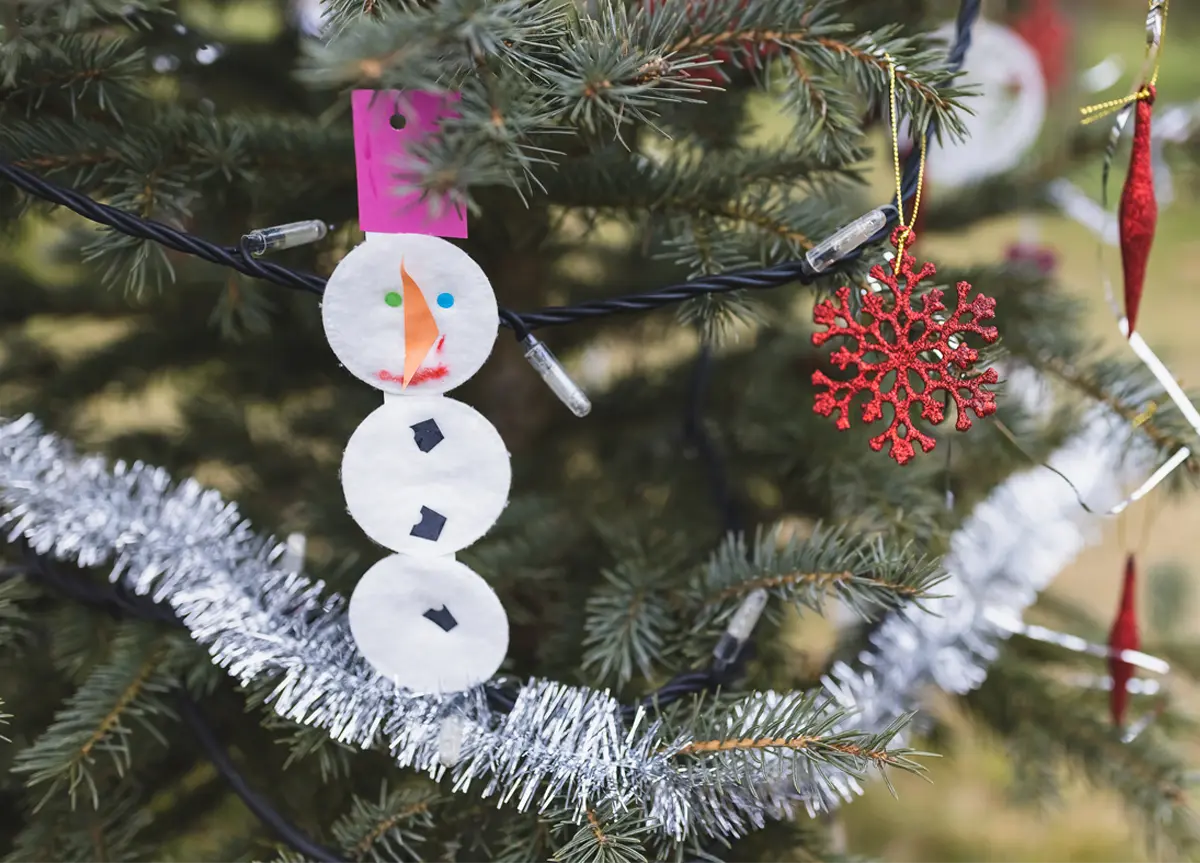
- Cotton rounds, one bag: $3–$5
- Red glitter snowflakes, set of 12: $8–$15
- Silver tinsel garland, 9 ft: $4–$9
- String lights, 100 count: $12–$25
- Black and red felt scraps for faces: $4–$8
- Total: $31–$62
Dollar-store cotton pads plus a $1.25 glitter snowflake pack brings this to about $15.
24. Miniature Evergreen With Red Toadstools and Brass Candles
Set taper candles at three heights — 6, 9, and 12 inches — and cluster them within 8 inches of each other so they read as one light source instead of three lonely candles. That spacing is what makes a small tabletop display feel like a room. Always use a brass or glass holder with a wide drip cup, too: tapers lean once they burn down, and hot wax on plaid fabric does not come out. For the same wood-and-candle mood on a larger scale, see Idea #5.
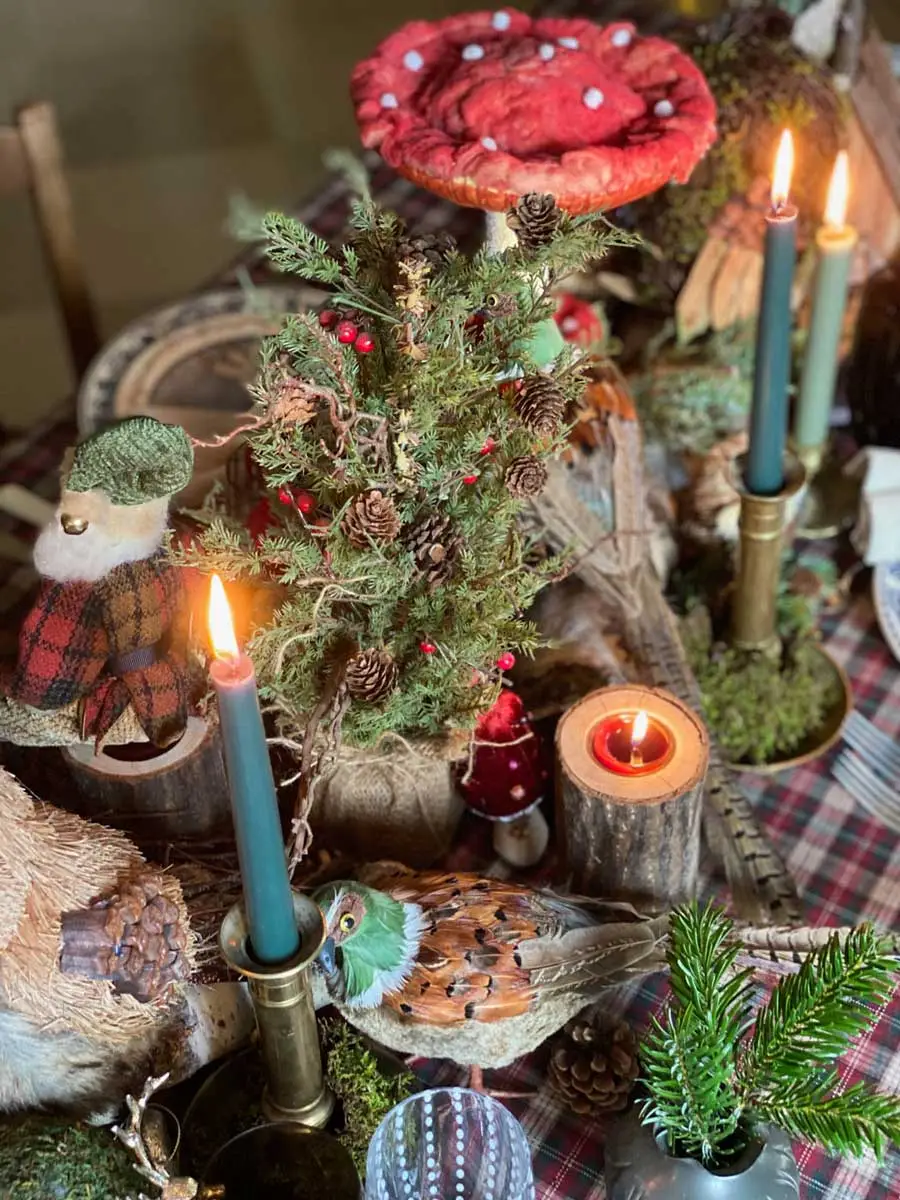
This display mixes a lot of materials, and they age at different speeds. Fresh-cut greens last a week or two, moss goes musty if it stays damp, and the feathered bird needs a gentle dusting with a soft brush every few weeks. Keep the whole thing out of direct sun — plaid fabric fades noticeably by February and the red toadstools chalk over time. Store it in a covered bin, not a cardboard box.
25. Distressed Lantern Centerpiece With Red and Silver Berries
The distressed white lantern is the anchor, and every other element is arranged to frame it. That’s the discipline here: the fir branches, frosted pinecones, and red and silver berries all sit lower than the lantern’s glass, so your eye lands on the candle and then travels outward. Take the lantern away and you’d have a very nice garland on a wood slice. The lantern gives it a center to orbit.
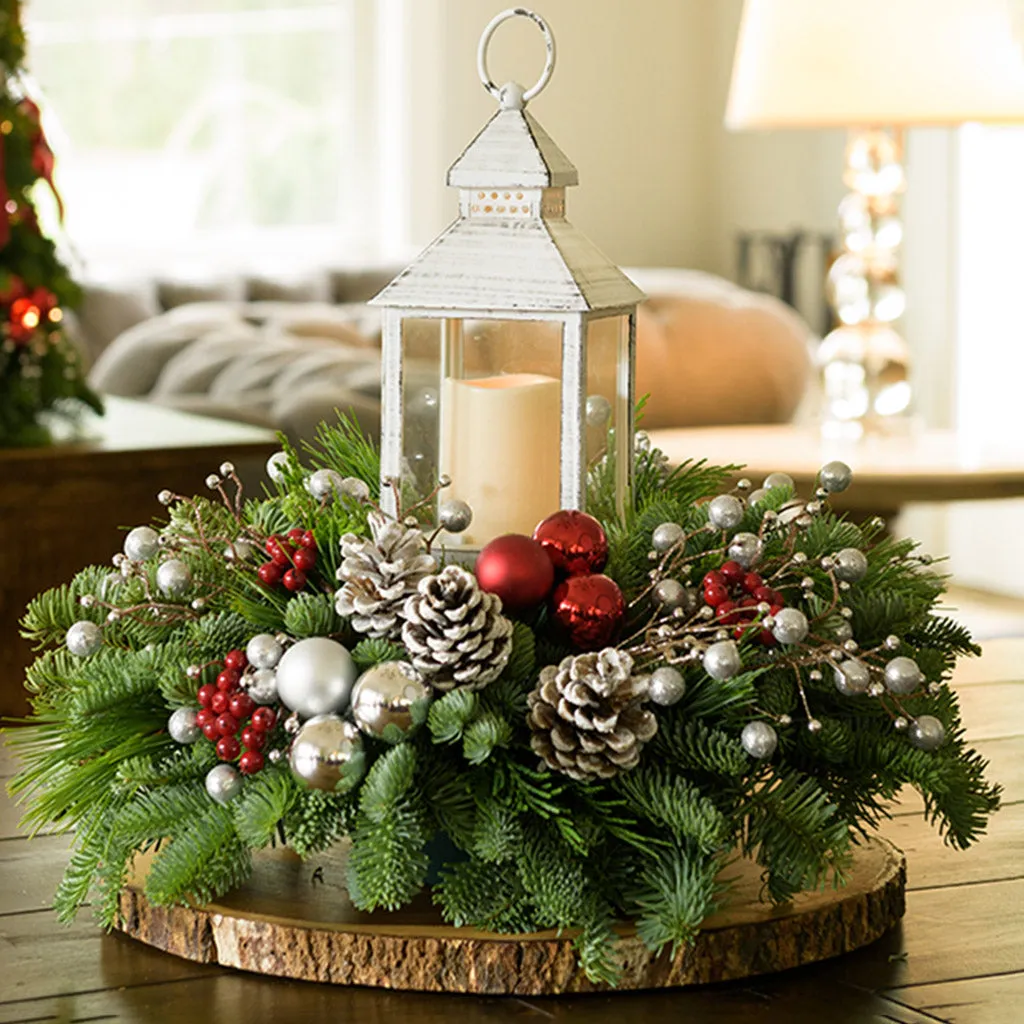
Faux berries are where budget builds usually break. A dollar-store berry spray gives you about 15 berries for $1.25; craft-store versions start at $5. Frosted pinecones are just regular pinecones dipped in white paint and glitter, which costs almost nothing if you collect them in autumn. Thrift stores stock lanterns year-round for $5 to $12, and wood slice bases are often free from a neighbor who just trimmed a tree.
26. Craft Table Covered in Kraft Paper, Twine, and Paints
The middle of a project is a legitimate aesthetic. Kraft paper, twine, a small tree, gold beaded garland, and a half-finished glitter snowflake all sitting out on a pale plank table reads as warmth and productivity rather than mess — because everything shares the same warm, matte palette. Keep your supplies inside that color family and your in-progress pile will look intentional, not chaotic. Red and white accents are the only loud notes.
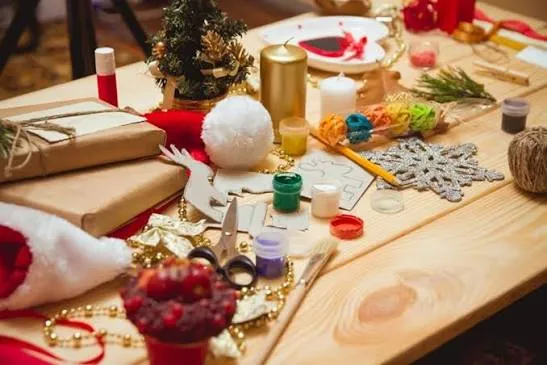
Set up a station that actually survives the season:
- Cover the table with a kraft paper roll and tape it under the edges.
- Put scissors, twine, tape, and tags in one shallow tray so nothing migrates.
- Pre-cut wrapping paper into sizes for your most common gift shapes.
- Keep a small bin under the table for scraps and a second one for finished items.
- Reset the table each night — five minutes saves twenty the next morning.
Setup takes about 30 minutes and under $15 in paper and bins.
27. Gathered Rustic Centerpiece With Layered Wood and Greens
Rustic is the easiest style to overdo, because more natural starts to mean more stuff. The moment a table centerpiece needs two people to move it, it’s too big. Keep it under about 12 inches tall and no more than a third of the table’s length, and the room stays usable. If your dining room is carpeted, skip loose moss and faux snow entirely — that’s a spring cleaning problem you’re setting up in December.
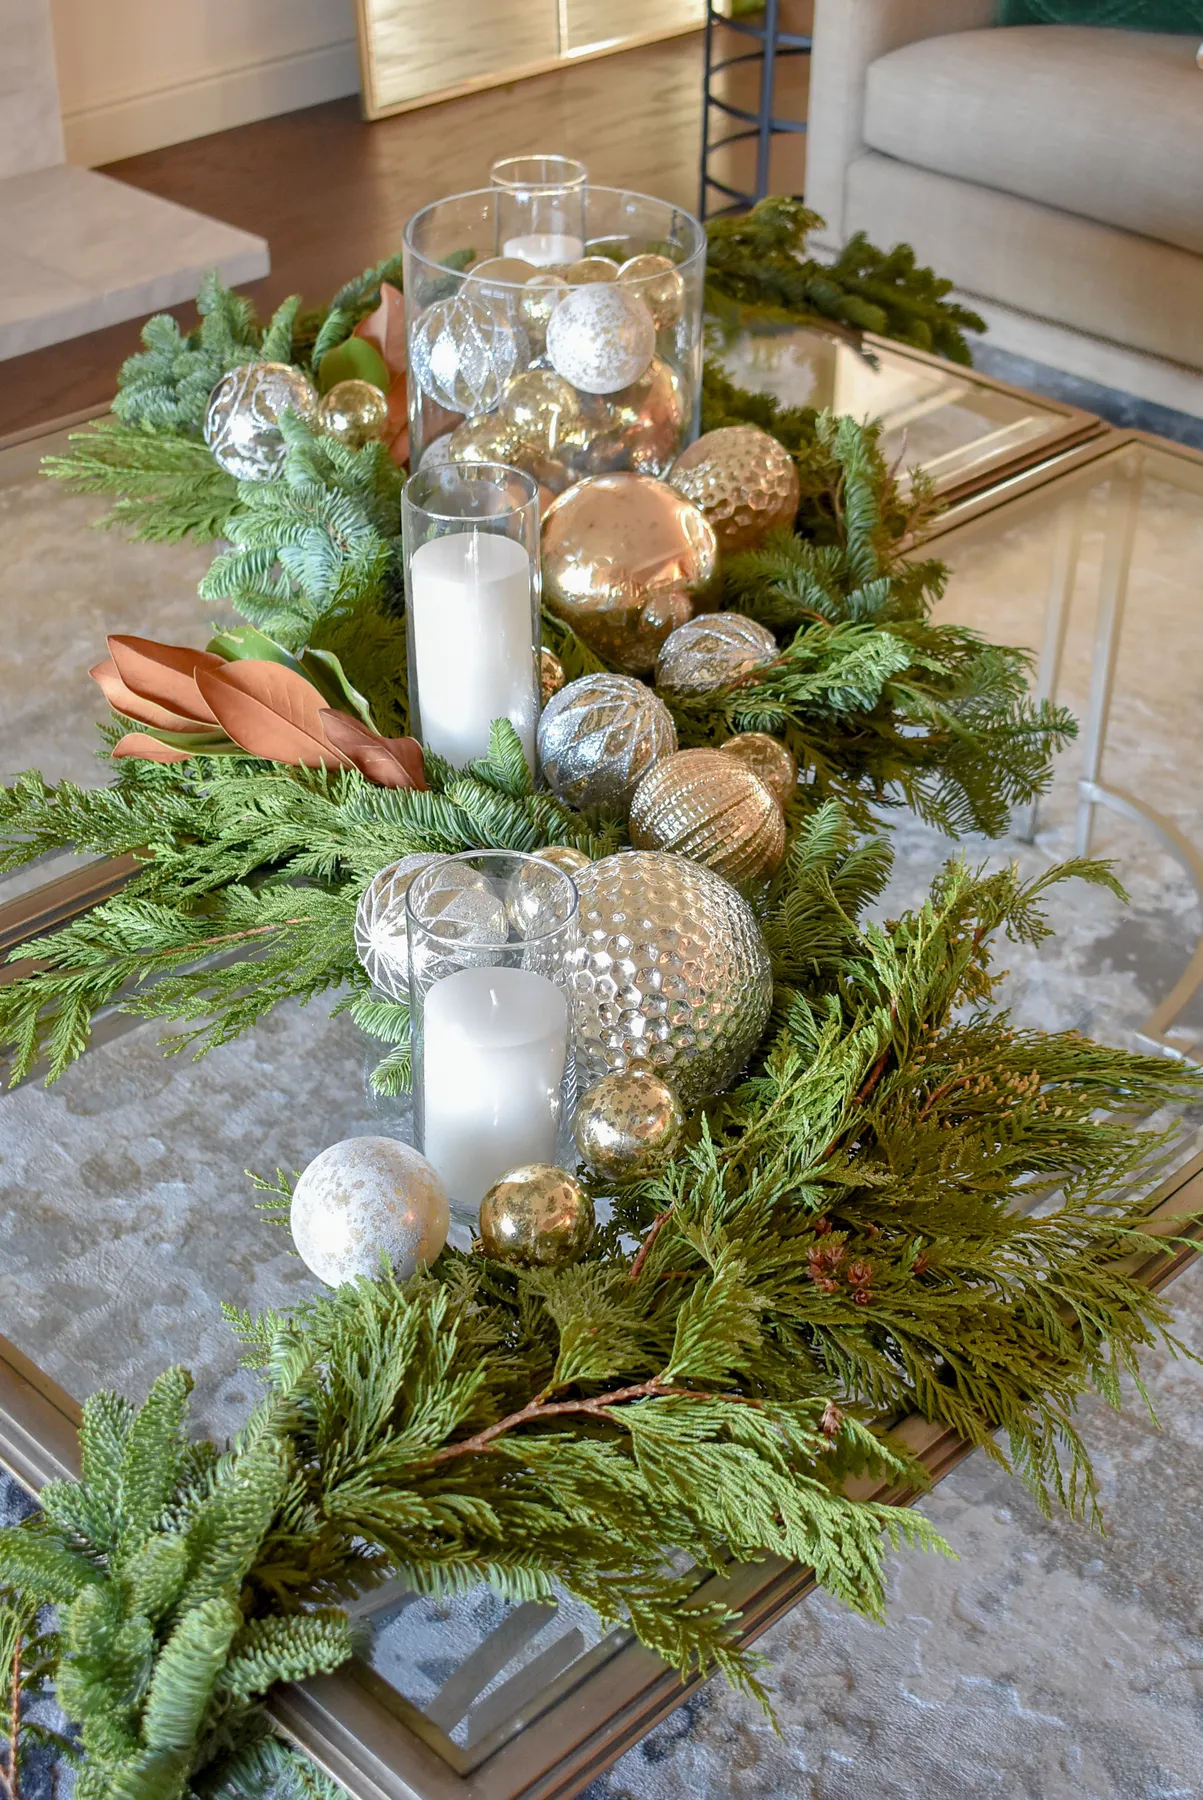
This kind of centerpiece suits a dining table 60 to 84 inches long and 36 to 40 inches wide, with at least 24 inches of clear space left on each side for place settings. Ceilings above 9 feet can carry something taller, up to about 16 inches. In a smaller dining room, scale down and keep the chandelier on a dimmer. For tighter tables, the yarn snowman tray in Idea #13 works in a fraction of the footprint.
28. Dense Pine Garland With Red Poinsettias and Votive Candles
The palette is almost aggressively simple: 70% deep forest green, 25% red, 5% weathered brown wood. Fabric poinsettias, glitter ornaments, berries, and candles are all the same red, which is why an arrangement this dense still reads as calm. Swap in crimson, brick, and cherry tones and the same table looks chaotic in about four seconds. In traditional holiday decorating, one red is worth five.
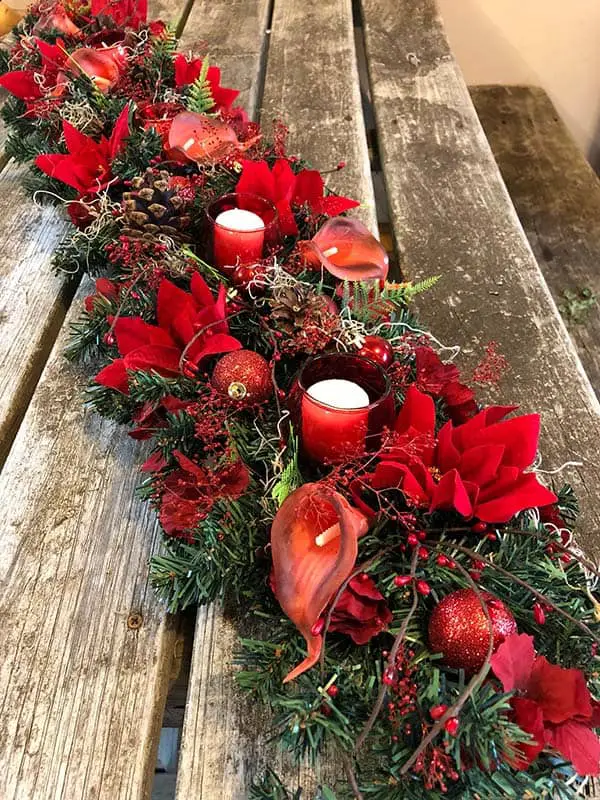
- Faux pine garland, 9 ft: $25–$60
- Fabric poinsettia stems, 6: $18–$40
- Red glitter ornaments, set of 12: $10–$22
- Glass votive holders with candles, set of 6: $15–$35
- Pinecones and red berry sprays: $8–$18
- Total: $76–$175
For less: dollar-store garland, a sale-price poinsettia bush pulled apart into stems, and thrifted votives at $1 each land around $30.
29. Slender Tree With Burlap Wrap and Red Bead Garland
The burlap base wrap is what makes this tree look finished. A slender tree standing bare on a light wood floor looks like a tree waiting for something to happen. Wrapped in burlap and tied with a wide red ribbon, the bottom third suddenly has weight and the whole silhouette balances. It costs about $8 and three minutes, and it’s the difference between a tree in a room and a tree in a home.
On a slender tree, keep ornaments between 2 and 3 inches and hang them no more than 4 inches apart — sparse spacing is exactly what makes slim trees look underdressed. Drape the red bead garland in loose swags of about 18 inches rather than spiraling it tight. Put the lights on before the ornaments and wrap each branch instead of skipping across the surface. It takes twice as long and looks ten times better.
30. Hexagon Wall Shelf With a Miniature Winter Camper Scene
One shelf, one tiny light blue camper, two frost-dusted bottle brush trees, and a handful of faux snow — and it works because the scene has a built-in narrative. The camper reads as a specific story rather than a generic display, and the warm string lights give the pale wood something to glow against that an overhead fixture would kill. Small vignettes live or die on whether they suggest a place. This one absolutely does.
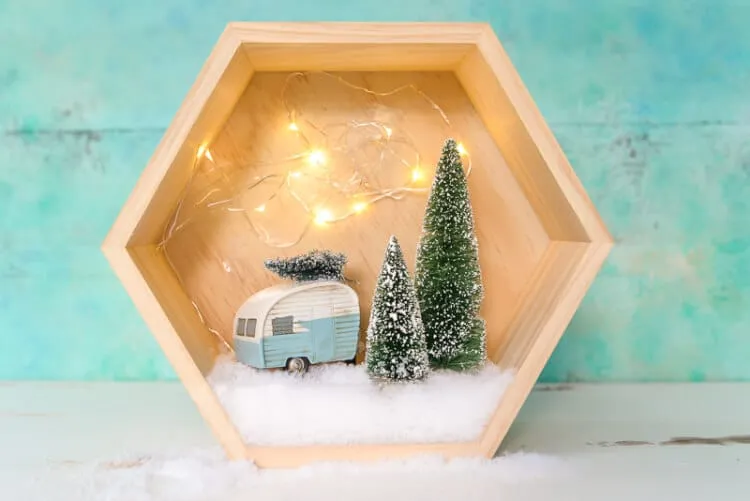
Bottle brush trees run $3 to $6 each at craft stores, but they’re also the easiest thing on this list to fake — sisal rope or a bristle brush over a cone, a dab of white paint, and a wooden base. Maybe $4 for two. The miniature camper is the splurge: check toy shops, thrift stores, or a Marketplace lot of old model cars. Dollar-store string lights work fine here; nobody inspects them.
31. Toilet Paper Roll Reindeer, Santa, and Snowman Characters
These characters come together in about 20 minutes each:

- Paint the cardboard tube with two coats of craft paint, drying between coats.
- Wrap the bottom third in red or gold glitter paper and glue it flat.
- Cut felt shapes for hats, antlers, or a scarf and attach with a glue gun.
- Draw the faces with a fine black marker; a white gel pen adds eyes and cheeks.
- Set each figure on a small paper circle so it stands without rolling away.
All three figures cost under $6 in materials.
Two things to know. Hot glue on cardboard tubes is a bad combination for small hands — the glue bleeds through the paper and burns fingers, so do that step yourself and let kids place the felt. And these are not heirloom ornaments. Cardboard crushes and paint flakes at the rolled edge after a season. That’s fine; the point was the afternoon, not the archive.
32. Kraft and Red Paper Chain Garland Across the Doorway
The doorway drape is the whole move. A paper chain wrapped around a tree is decoration; a chain strung across a doorway so you walk under it is an event. Same paper, same amount of work, completely different feeling — because the garland changes how you move through the room instead of just sitting on something. If you only do one thing on this list with kids, do this one.
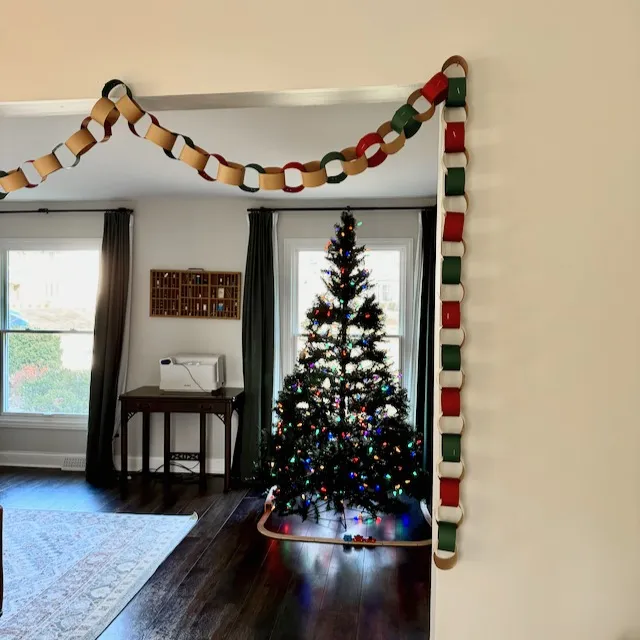
Paper chains have made an unlikely comeback, and 2026 is peak. Part of it is the broader move toward low-waste decorating — paper is recyclable, costs almost nothing, and stores flat in a drawer. Part of it is nostalgia: the people who made chains in classrooms are now the ones decorating their own apartments. It’s the rare trend that fits equally well in a minimalist rental and a packed family living room.
33. Fringed Paper Trees With Personalized Name Flags
The charm here is tonal variation inside one color. Every tree is green, but the shades run from pale sage to deep forest, and that range is what makes the group look collected rather than mass-produced. The pink name flags and gold ornaments tie it to the pale pink backdrop. Make all eight trees the same green and you’d have a nice set. Vary the green and you have a tablescape.
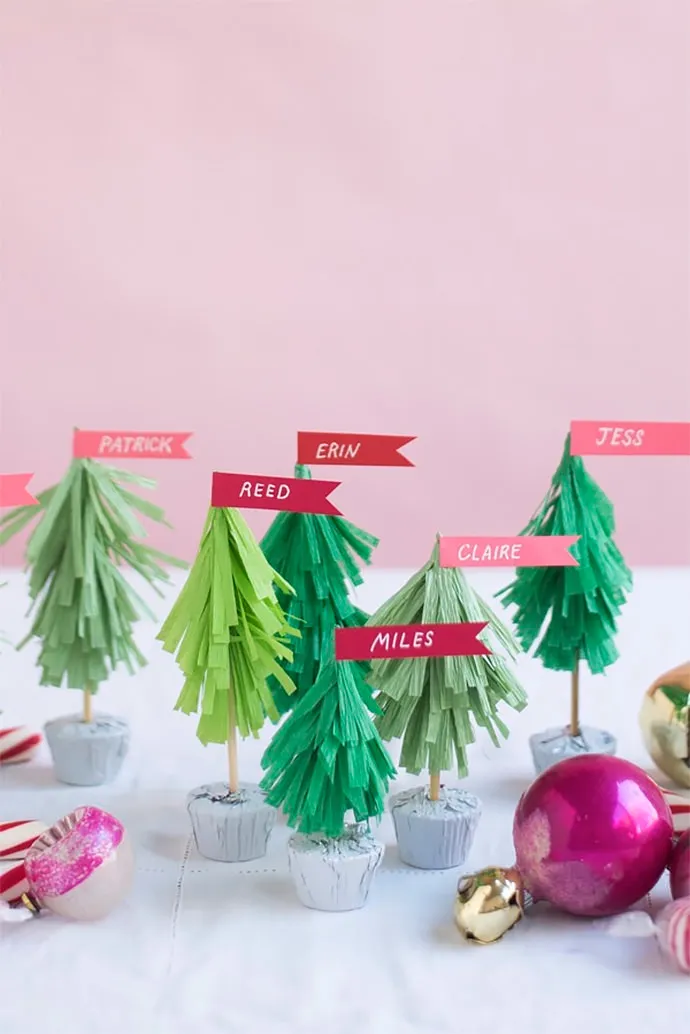
Check these before you cut eighty strips of paper:
- Confirm your cupcake liners fit the cone bases — silver foil ones run small.
- Test one name flag for length before you print the whole set.
- Use double-sided paper or the inside of the fringe will show white.
- Check the finished height — trees should sit below eye level so guests can see across the table.
34. Nature-Inspired Centerpiece With Wood Tones and Candlelight
- Wood slice or rustic tray base: $8–$25
- Fresh or faux greenery bundle: $12–$35
- Candle and holder: $10–$30
- Natural accents (pinecones, dried citrus): $5–$15
- Ribbon or twine: $3–$9
- Total: $38–$114
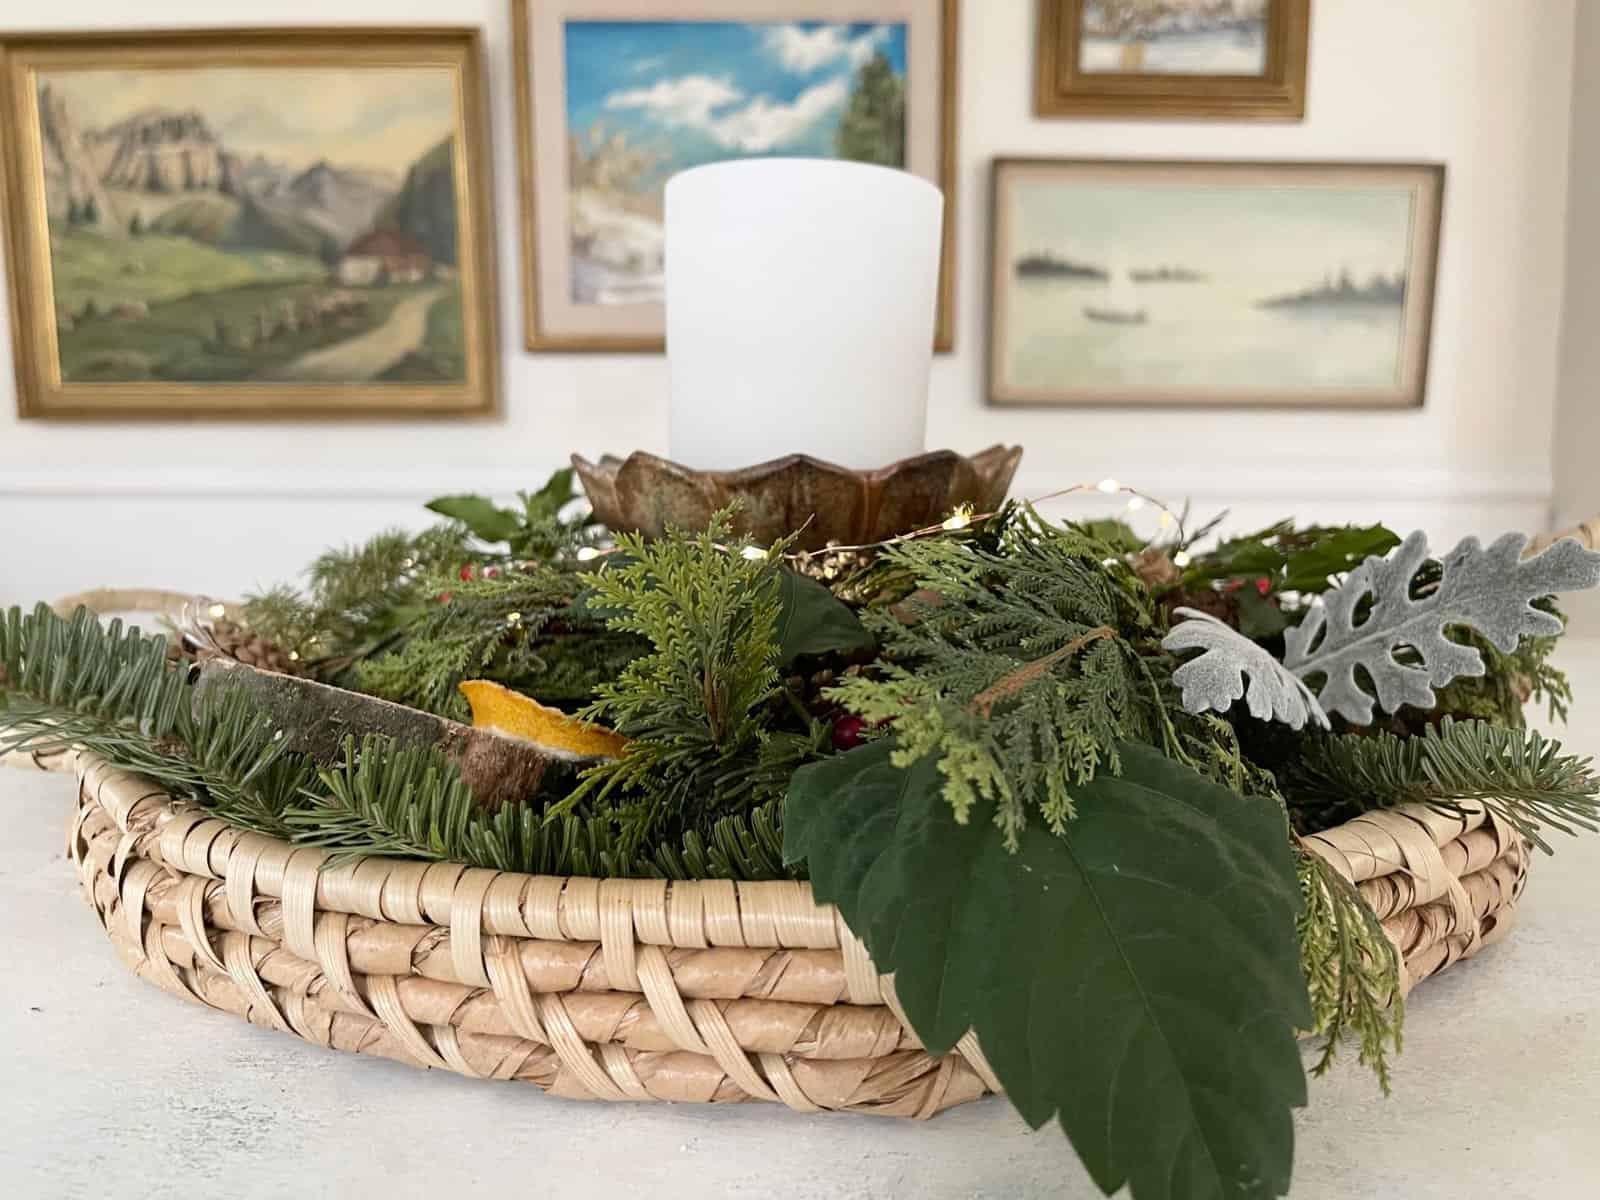
For 40 to 60% less: use a cutting board you already own, greenery from a tree-trimming pile down the street, and dollar-store candles. That lands around $16 to $30 for the same mood.
Whatever you build on, put a cork or felt pad underneath. Wood slice bases and rough-hewn trays scratch tabletops, and you won’t notice until you lift the arrangement in January. Also, don’t coat fresh greenery with aerosol sealer sprays — they clog the needles’ pores and shorten the arrangement’s life by days. A daily mist of plain water does far more.
Box It Up, Label It, Do It Again Next December
The best thing about handmade holiday decor is that it compounds — the wreath you wire this year gets easier next year, and the paper chain your kid cuts crooked becomes the one you actually look for when you open the box. Pick two or three projects from this list, keep your palette tight, and don’t worry about finishing everything.
📌 Pin this guide now so it’s waiting for you when the holiday bins come down from the attic.