
There’s a reason your Pinterest feed is suddenly full of tinsel, feather trees, and glass ornaments your grandmother would recognize on sight. Vintage Christmas crafts are having a genuine moment in 2026 — and it’s less about nostalgia than about how well this stuff photographs, how gracefully it ages, and how good it looks next to everything plastic.
We spent serious time trawling Etsy, eBay, Michaels, Target, and a few very good estate sales to bring you only what’s worth your attention this year, from $1 craft-store baubles to $250 collected centerpieces.
Inside you’ll find 30 ideas spanning antique traditional, rustic handmade, mid-century collectible, and jewel-toned retro. Every idea pairs a budget route with a splurge route, and each one tells you what to buy, what to skip, and where it might go sideways.
Part of what’s driving the trend: shoppers hunting down the decorations their own families owned, and small makers answering with reissues. And stay until the end — we break down the most common mistakes that can ruin these looks.
📌 Save this to Pinterest for later — you’ll want to revisit these ideas.
1. A Jewel-Box Flat-Lay of Indented Glass Baubles
What holds a collection like this together isn’t a color scheme — it’s the finish. Every piece is glass, so the ruby red, turquoise, and hot pink all catch the same highlights, and the indented reflectors bounce light back like tiny mirrors. Hand-painted florals and glitter stripes add variation without breaking the rhythm. Look closely and the metallic silver caps repeat in every single size, and that small constant is what makes a pile read as curated.
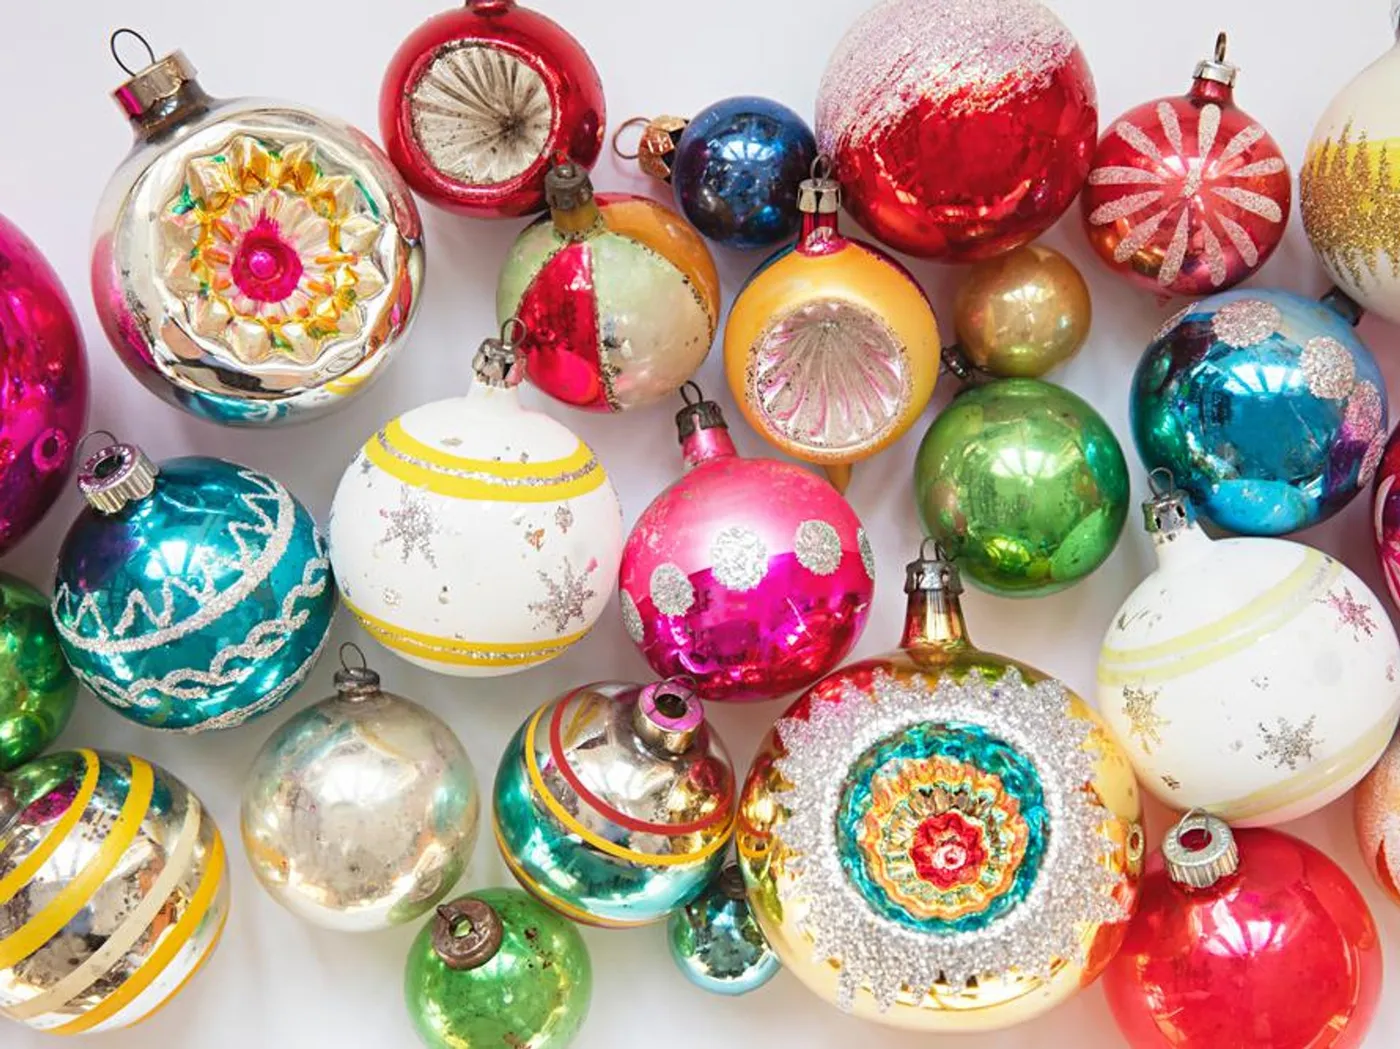
Keep your display sizes inside a two-inch range. If your smallest ornament is 2 inches across, cap the group at 4 inches so nothing swallows the rest, and give anything 5 inches or larger a solo spot on a shelf or in a bowl. Then pick one metal — silver, gold, or brass — and use it for every cap and hanger. Mixing metals inside a collection this saturated turns jewel tones into visual noise fast.
2. Feather Tree Vignette with Vintage Santa Artwork
The feather tree is the whole idea. Take it away and you’re left with a nice shelf of antiques; keep it and those tiny colored glass ornaments and clip-on candles finally get room to breathe. A dense modern tree would swallow them whole. Those sparse, wire-wrapped branches are the reason a nine-piece collection looks like a museum display instead of clutter.
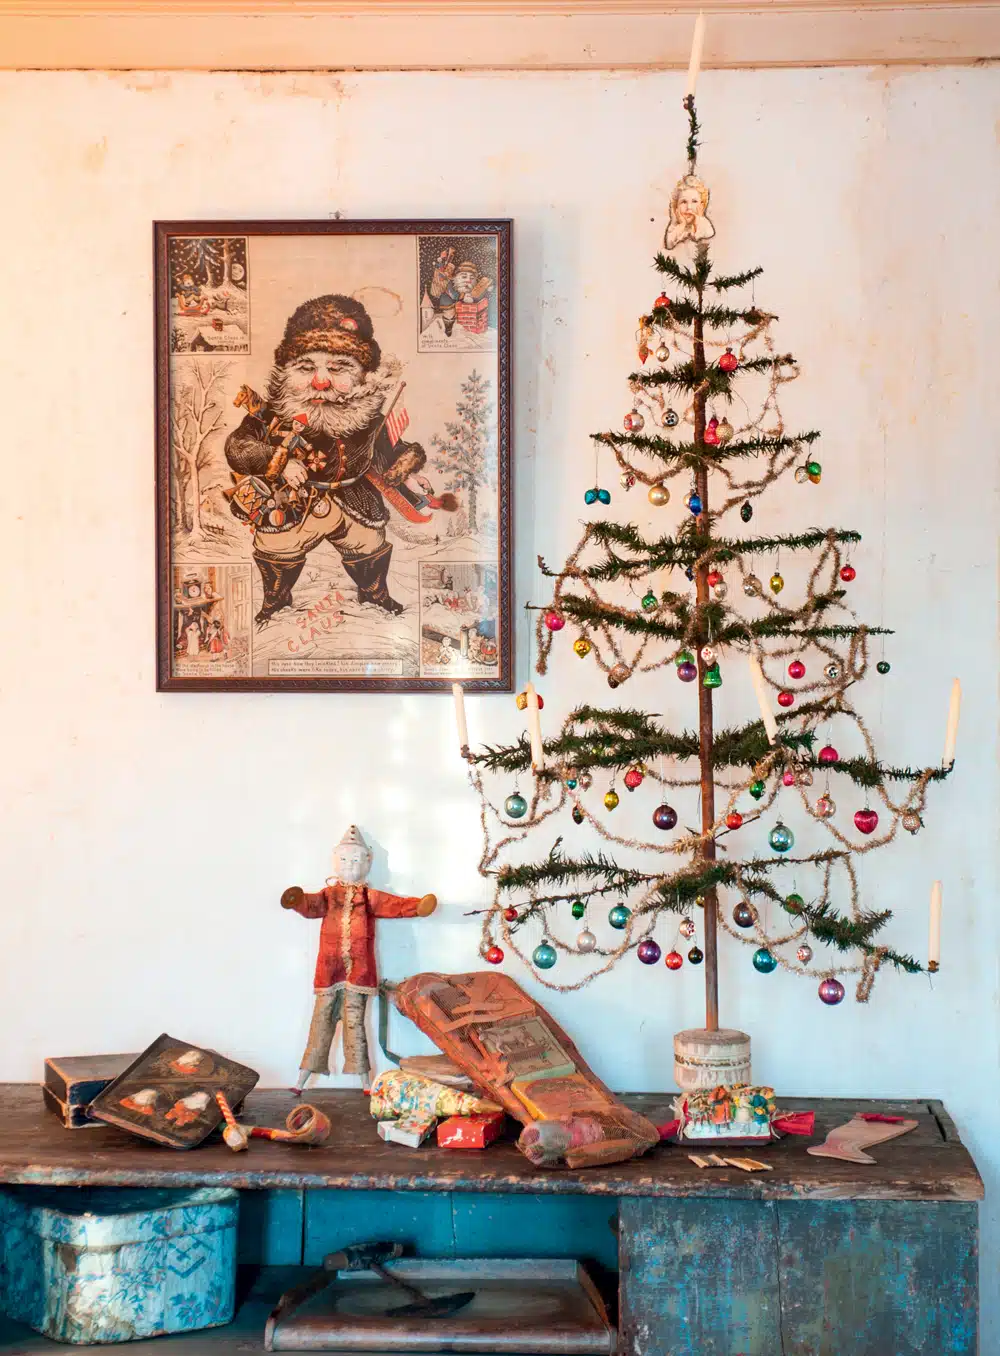
Modern reproductions run $25–$60 at craft stores and online, and most come pre-lit or with candle clips already. Frame a vintage Santa print — an Etsy digital download is $5–$12 plus $15 for a thrifted frame — and you’ve got the wall moment without the antique price tag. The distressed console can be any wooden table you already own; wipe it with a thin coat of wax and it reads old enough. A fabric doll or aged stocking can wait until you find the right one.
3. Blown Glass Treasures on Crinkled Kraft Paper
Here’s the formula: 60% reflective glass spheres with hand-painted detail, 25% plain mirrored baubles, and 15% figural oddballs — pinecones, lanterns, little characters. That last 15% is what keeps it from looking like a store display. The base is 100% neutral: raw wood and crinkled brown paper shred, nothing shiny underneath all that glass.
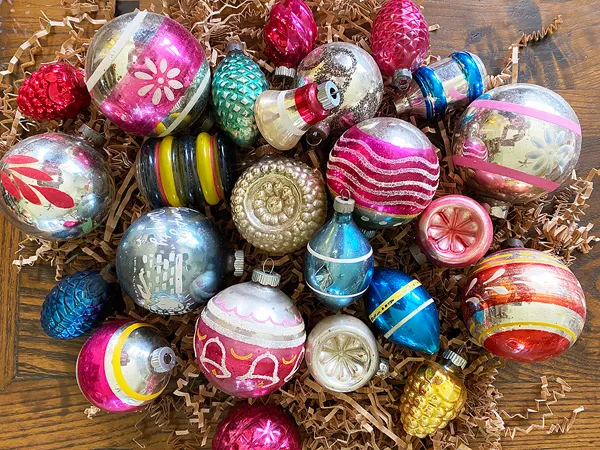
Swap the kraft filler for white tissue or unbleached linen and the whole thing goes cooler and more modern. Trade hot pink and electric blue for red and green and it snaps back to traditional in a heartbeat. The ratio never changes — only the palette does.
- Wooden tray, board, or shallow bowl: $15–$40
- Kraft crinkle filler: $5–$10
- Vintage ornaments from estate sales and thrift stores: $1–$4 each
- Vintage ornament lots online, by the dozen: $25–$80
- One or two figural focal pieces: $12–$35 each
- Total for a 20-piece collection: $90–$250
Budget route: new glass ornaments with a hand-painted look run $1–$3 each, or grab a bag of plain craft baubles and a $6 bottle of enamel paint. Hand-painted stripes and dots get you 80% of the charm for roughly 40% of the cost.
4. The Dark Green Ceramic Tree, Back on the Shelf
Ceramic trees are sturdy, but the wiring inside a 1960s original is not. Check the cord for cracks and give it a five-minute heat test before you leave it plugged in overnight — most people never do, and that’s how these end up as lamps that only work when you jiggle the plug. Replacement bulbs are a scavenger hunt too, so buy a spare set while they’re still findable.
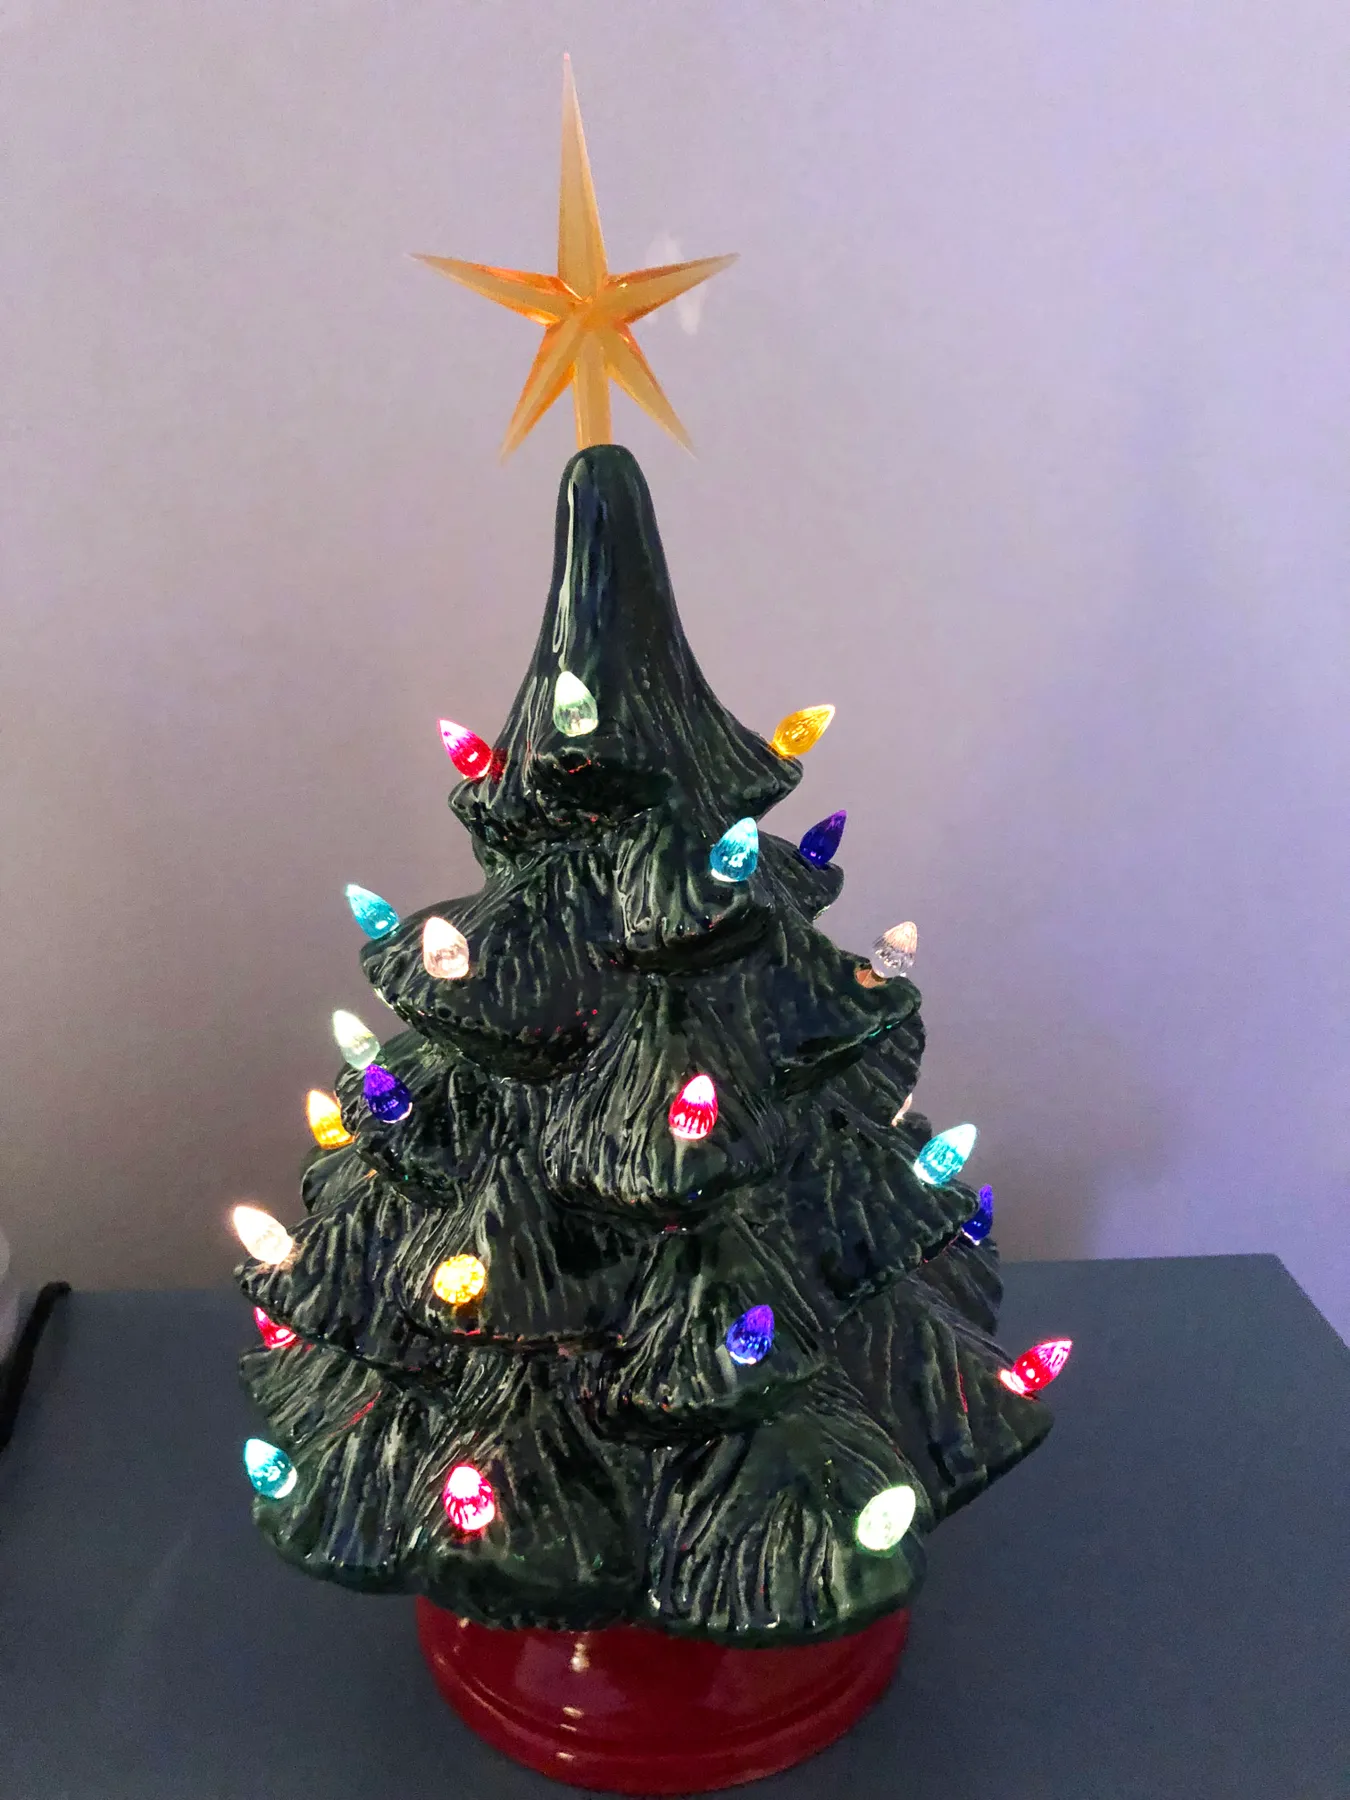
They’re heavier than they look and the bulbs run warm, so keep yours on a side table or shelf above kid height — never tucked behind fabric or a curtain. A newer reproduction with a fused plug is the safer call if you plan to run it every evening through December.
The tabletop ceramic tree never really left; it just went quiet for a decade. What brought it back is the same force driving the whole resale market right now — people in their twenties and thirties hunting down the decorations their grandmothers had, and makers answering with reissues in brand-new colors. On Pinterest, the boards people actually build are the grandmillennial ones.
Because it’s tied to memory rather than a specific color trend, this one has real staying power. It won’t feel dated in 2030 the way a single sage green season will.
5. Ornament-Shaped Candles in a Tray of Fake Snow
- Find three ornament-shaped candles, or plain votives in red, blue, and gold. Three, not four — odd numbers read better.
- Line a shallow tray with a small bag of fake snow, keeping it about half an inch deep so the candles sit level and don’t lean.
- Nestle frosted pine sprigs around the bases, tucking the cut ends under the snow so nothing looks placed.
- Add three to five small red berry picks — that’s your only true color hit.
- Light them only when you’re in the room. Time: 20 minutes. Cost: $25–$45.
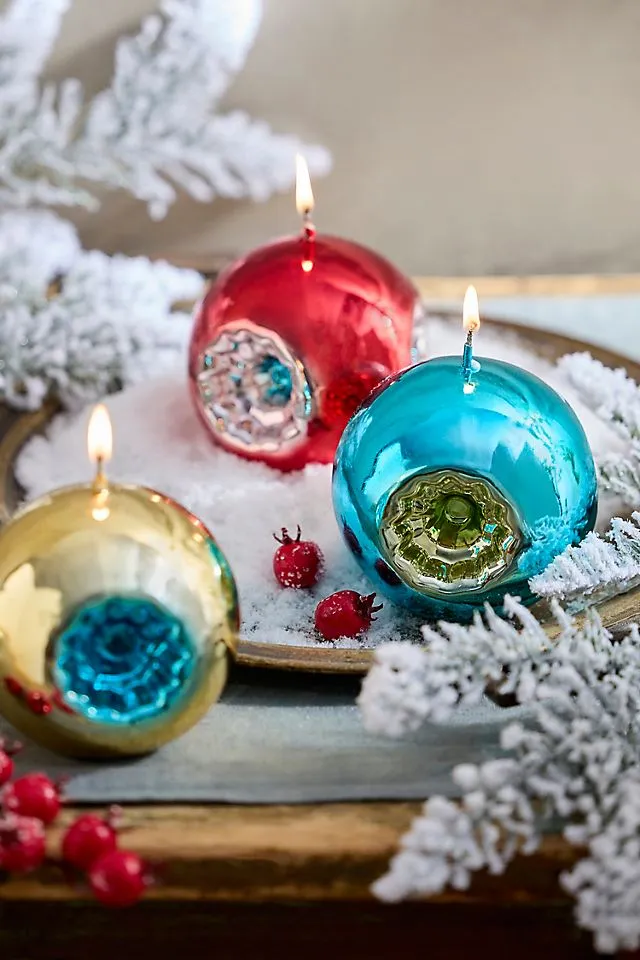
Frosted pine is your color bridge, and it’s the detail most people skip. Pull red from the berries and blue from one candle, then repeat those two colors nowhere else in the vignette. Two colors over white snow looks deliberate; four colors looks like a clearance bin. It’s the same discipline at work in Idea #1, just in candle form.
6. Tinsel-Framed Father Christmas in a Blue Robe
The silver tinsel frame is everything here. Without it, a vintage Father Christmas die-cut is just paper — pretty, but flat enough that it vanishes against a tree. Outline it in tinsel and the shape becomes an ornament: a defined teardrop that catches light from six feet away. That single border does about 90% of the work.
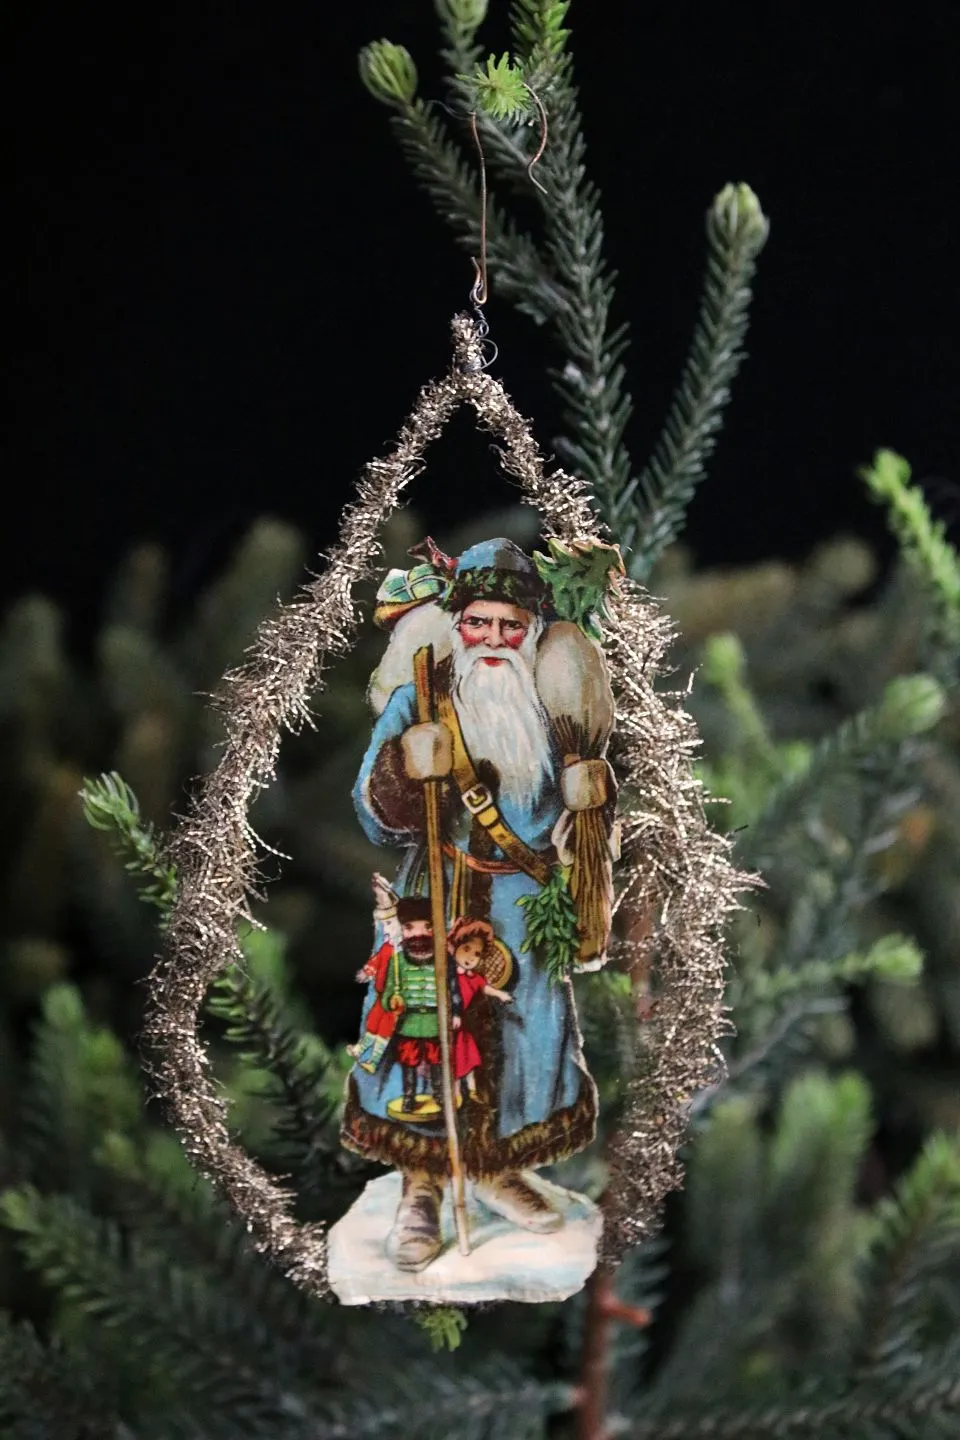
It solves a practical problem too. Loose paper die-cuts are nearly impossible to hang without creasing, and the frame gives you something solid to anchor a wire loop to. If you collect vintage paper decorations, tinsel outlining is the cheapest way to make them displayable.
Two things are happening stylistically. First, contrast of texture — the aged matte paper face against the sparkle of tinsel and the soft blur of pine behind it. Second, scale: the figure is small and detailed, so it needs a frame roughly a third of its height to feel balanced. Any thicker and the tinsel becomes the subject instead of the border.
The blue robe is doing quiet work, too. Against green pine and warm lights, a cool blue figure pulls the eye instantly — and if you have other blue pieces on the tree, this becomes the anchor they all hang around.
7. One Molded Santa Head Among Glittering Baubles
When a cluster has one hero, hang the hero about an inch and a half closer to the front than its neighbors and give it three inches of clear space on either side. On a tree that means bending the branch forward, not just switching branches. The surrounding baubles blur into bokeh and your eye lands on the Santa head instantly — the same trick stage lighting uses to isolate a performer.
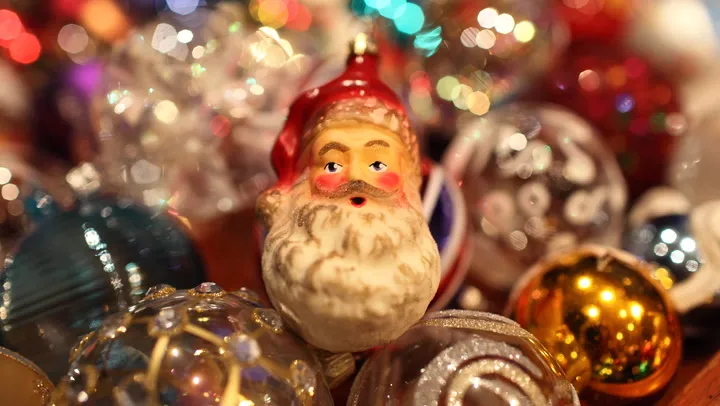
Build the cluster itself from 9 to 12 pieces. Fewer than that and it reads as three ornaments that happen to be near each other; more and the hero gets lost in the crowd.
The mix: 60% round reflective glass, 25% textured or figural pieces — molded faces, pinecones, berries — and 15% glitter or other light-catching finishes. Ruby red carries the base, with gold and teal as accents and a touch of antique white to keep it from going too sweet.
Want it cooler? Trade ruby for cranberry and teal for icy blue. Want it moodier? Keep the ruby, drop the white, and let the gold run the show. The percentages hold either way.
8. Figural Fruit and Reflector Ornaments, Clustered Tight
Figural vintage glass is where prices get silly — single fruit or berry ornaments regularly hit $15–$40. But they turn up in mixed lots at estate sales for a dollar or two, and Etsy sellers clearing out collections list destash bundles that bring the average down fast.
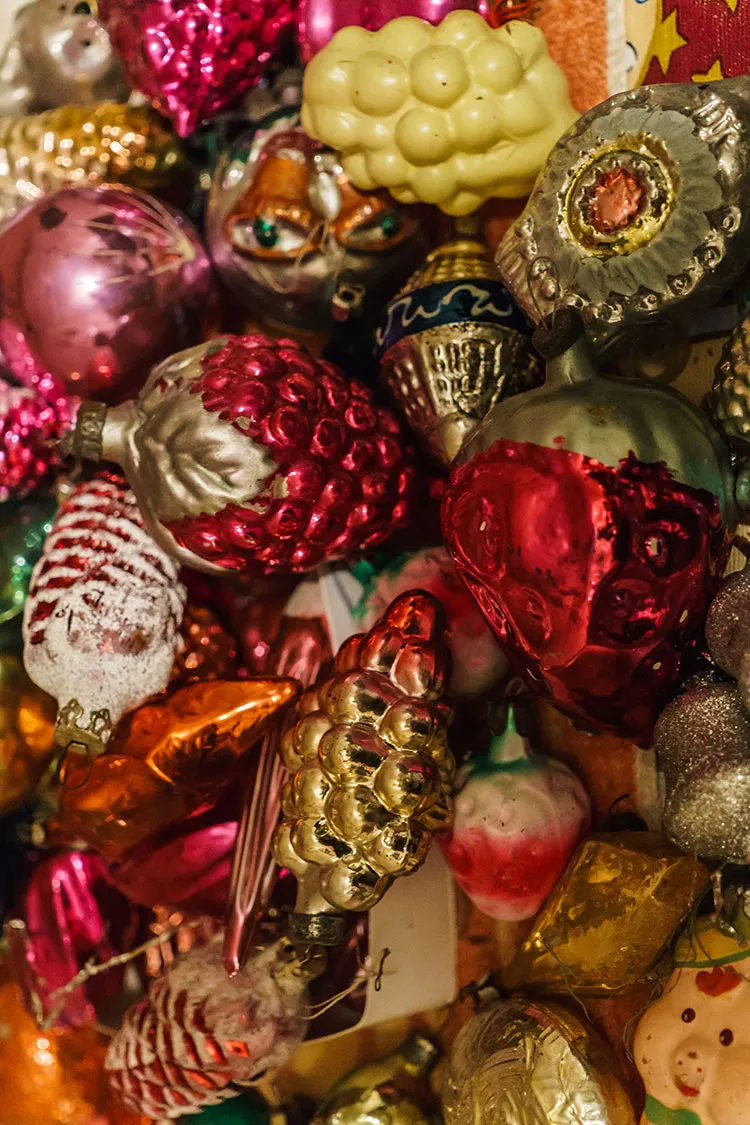
New glass fruit and pinecone ornaments with a similar molded look run $1–$3 each at craft stores and even some dollar chains, especially in November. Layer a few new pieces in among the old ones — nobody’s inspecting the caps, and the mix honestly looks better than a perfectly matched set.
These are the most breakable things on your tree. Berry and fruit shapes have thin stems, and stems snap. If you have kids, pets, or a cat with a tail, keep them on the upper third of the tree — a hook that drops one onto hardwood is a $20 mistake.
Handle them by the cap, never the body, and put on cotton gloves if you’re unpacking a whole collection. Oils from your hands dull the lacquer over a season, and once the finish clouds, it doesn’t come back.
9. Cream Embroidered Stocking on a Pale Mantel
- Measure your mantel depth — you need at least 6 inches so a filled stocking doesn’t rest against the firebox.
- Check what’s above the mantel. Art or a mirror hung lower than 12 inches will crowd the stocking’s cuff.
- Confirm your hanging hardware is rated for at least 5 pounds. Stuffed stockings are heavier than they look.
- Empty anything heavy before hanging — mini ornaments and candy canes only.
- Photograph the mantel as it is now, so you can see what you’re actually working with.
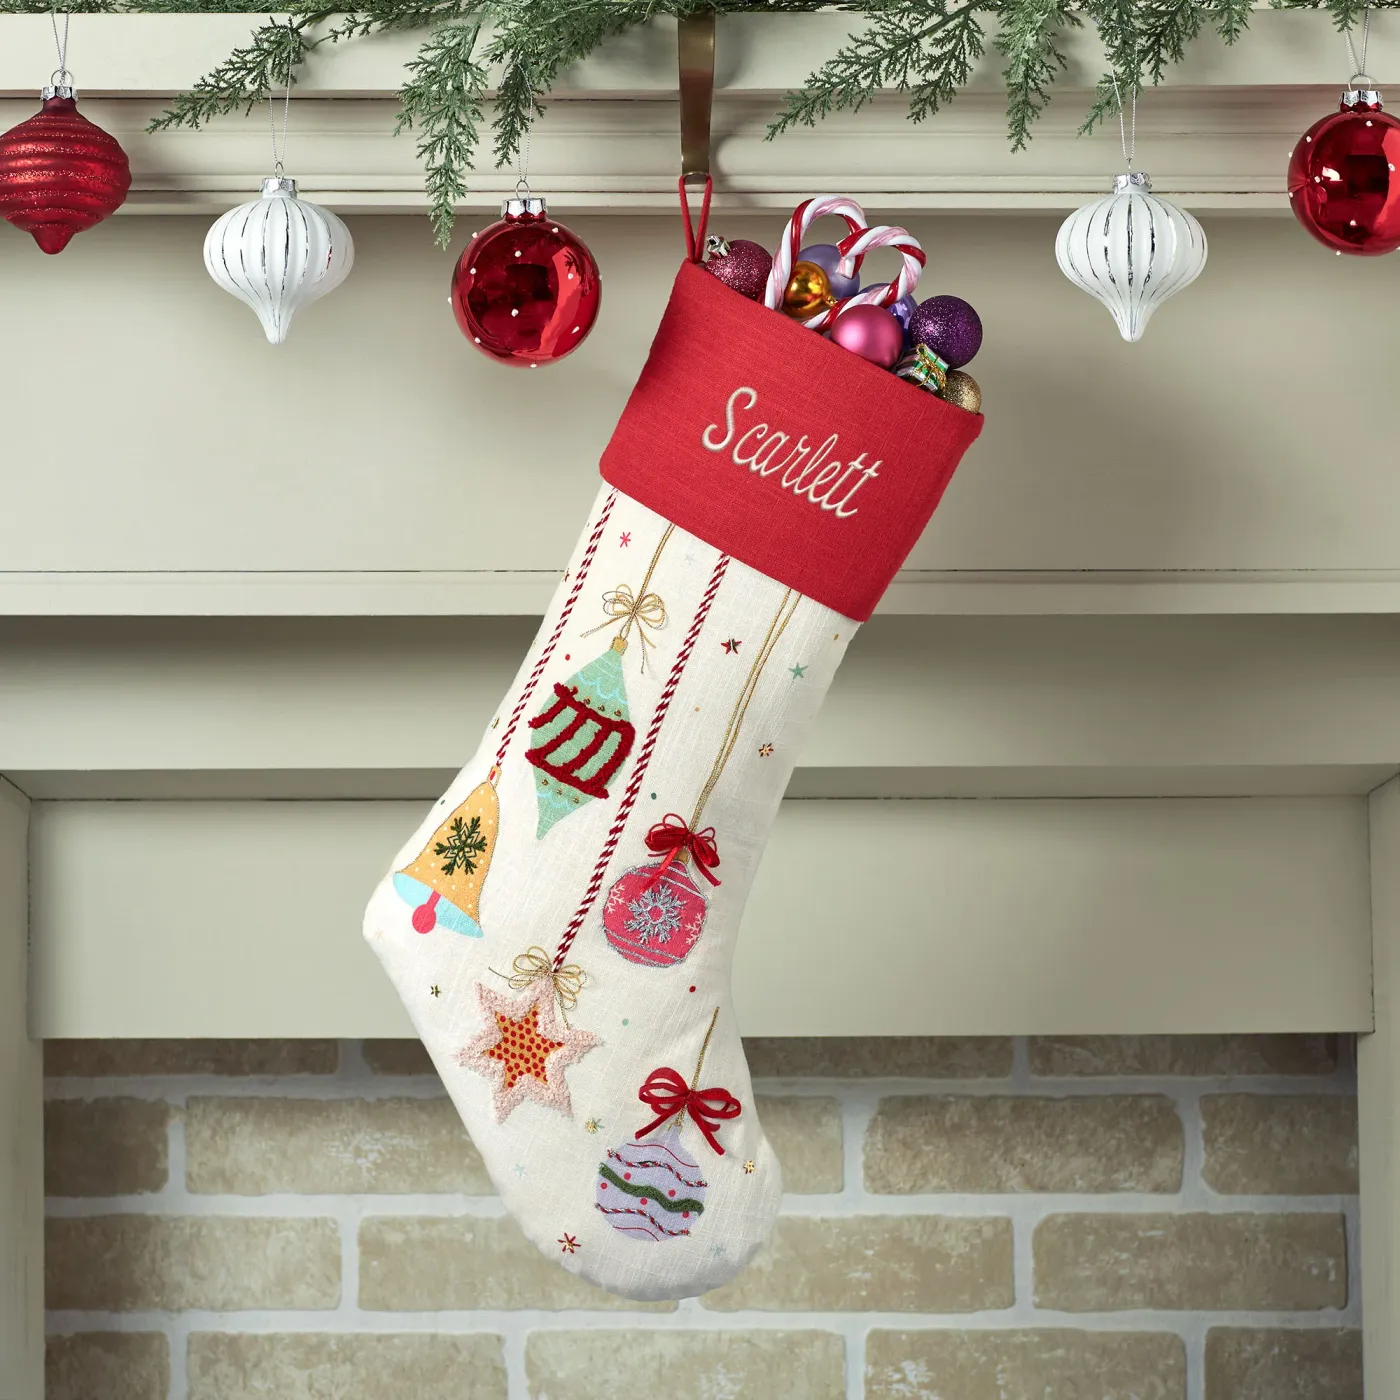
Once it’s hung, shape matters more than what’s inside. Roll two sheets of tissue paper into a loose cylinder and stand it upright inside the stocking. Add a small box or folded hand towel in the toe so the shape doesn’t collapse. Layer miniature ornaments and candy canes at the top so the cuff overflows by about an inch. Then arrange three to five small glass baubles on the mantel beside the stocking, never in front of it. Ten minutes total, and $0 if you’re pulling from your own ornament box.
10. Striped Ceramic Bell Tied with Rough Jute
A bell this size — roughly 5 to 6 inches tall — needs room. On a tree 6 feet or taller, one reads as a deliberate focal point and three or four spread out reads as a theme. On a 4-foot tabletop tree, one is plenty and two is already too many. If your tree is under 5 feet, hang it in the top third where the branches are dense enough to hold the weight without drooping.
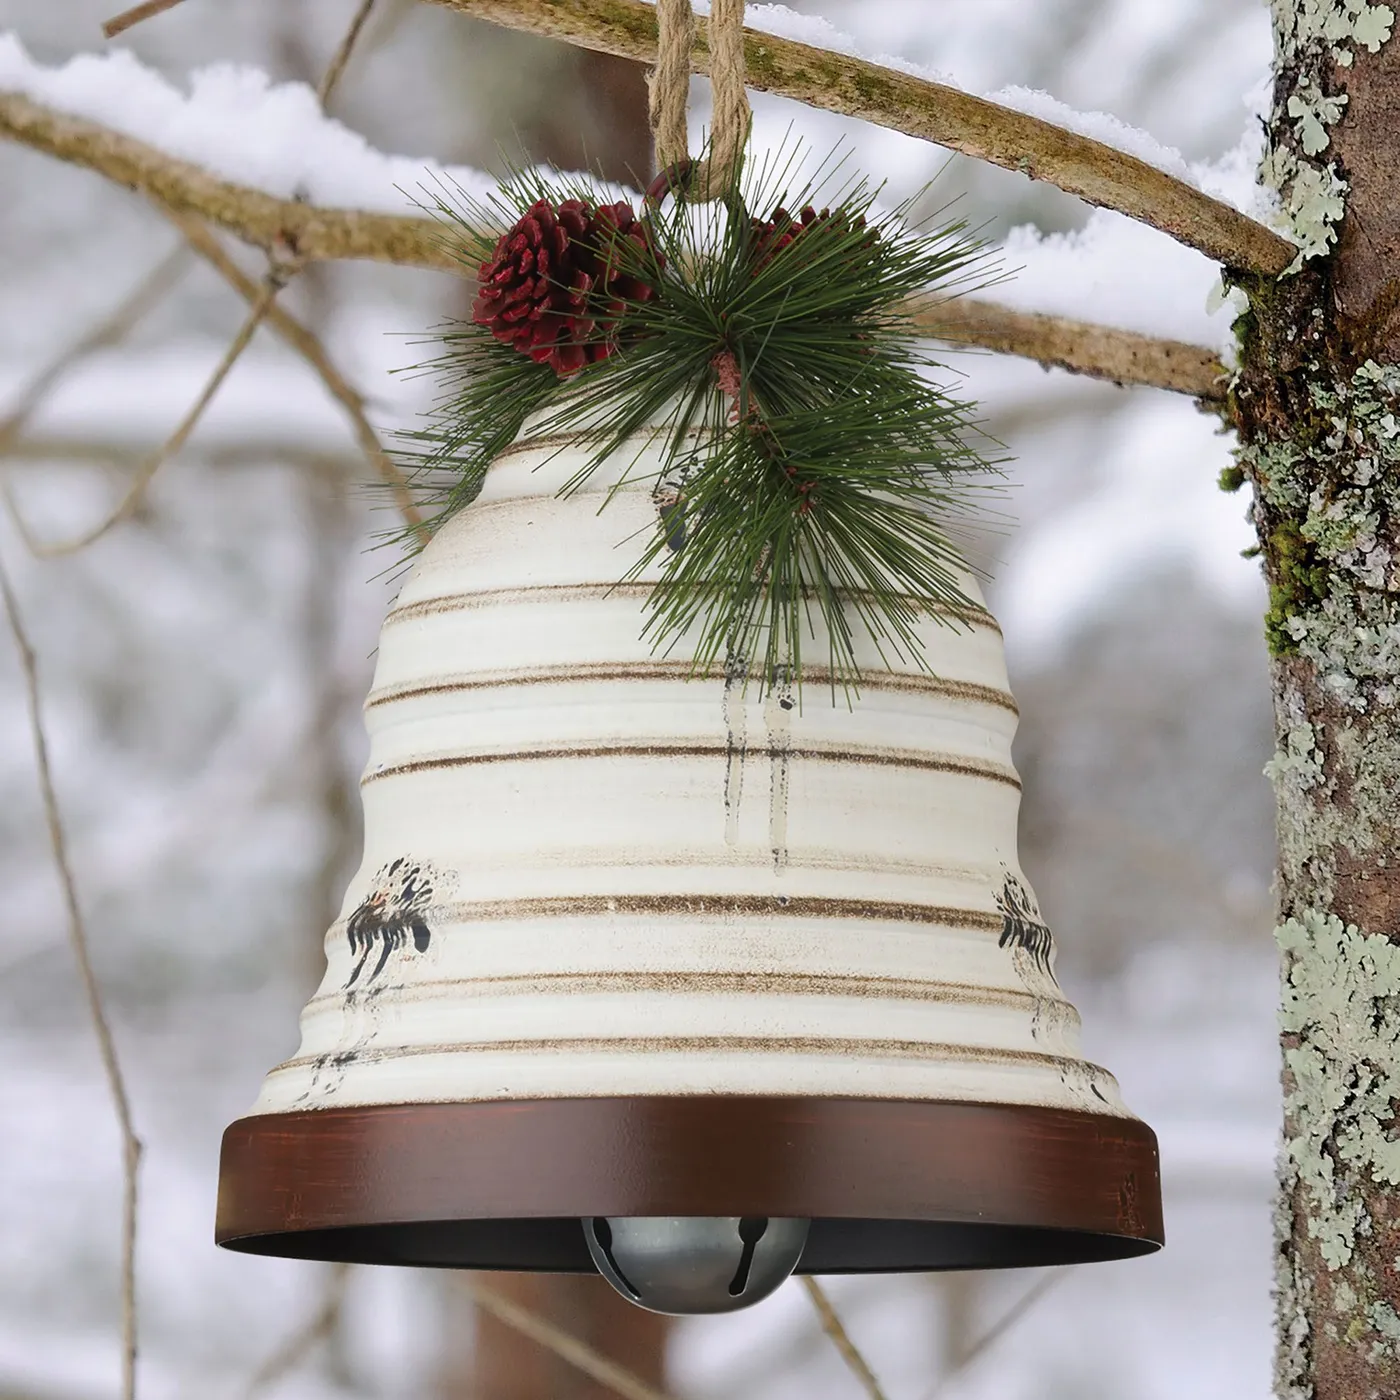
In a room under 120 square feet, hang it at seated eye level so it lands in your line of sight. In a large open living room, drop it lower and let it anchor a wider view.
The jute twine and pinecone topper are the thing. Swap that for a satin ribbon and the bell turns precious; keep the rough twine and it stays honest. Same with the faux pine sprig and two little red pinecones clipped at the top — they tell you this was made rather than bought, even if it wasn’t.
The brown stripes matter too. They tie the cream ceramic to the wood and pine around it, which is why this ornament sings on a rustic tree and would look completely out of place on an all-white one.
11. Bottlebrush Trees Perched on Antique Alphabet Blocks
Bottlebrush trees went from flea-market filler to a full-blown category. Part of it is miniature-village nostalgia — the putz village look that shows up in mid-century holiday photos. Part of it is that they’re cheap, come in every color, and photograph beautifully, which matters more than we’d like to admit now that half of decorating is really about how it looks on a screen.
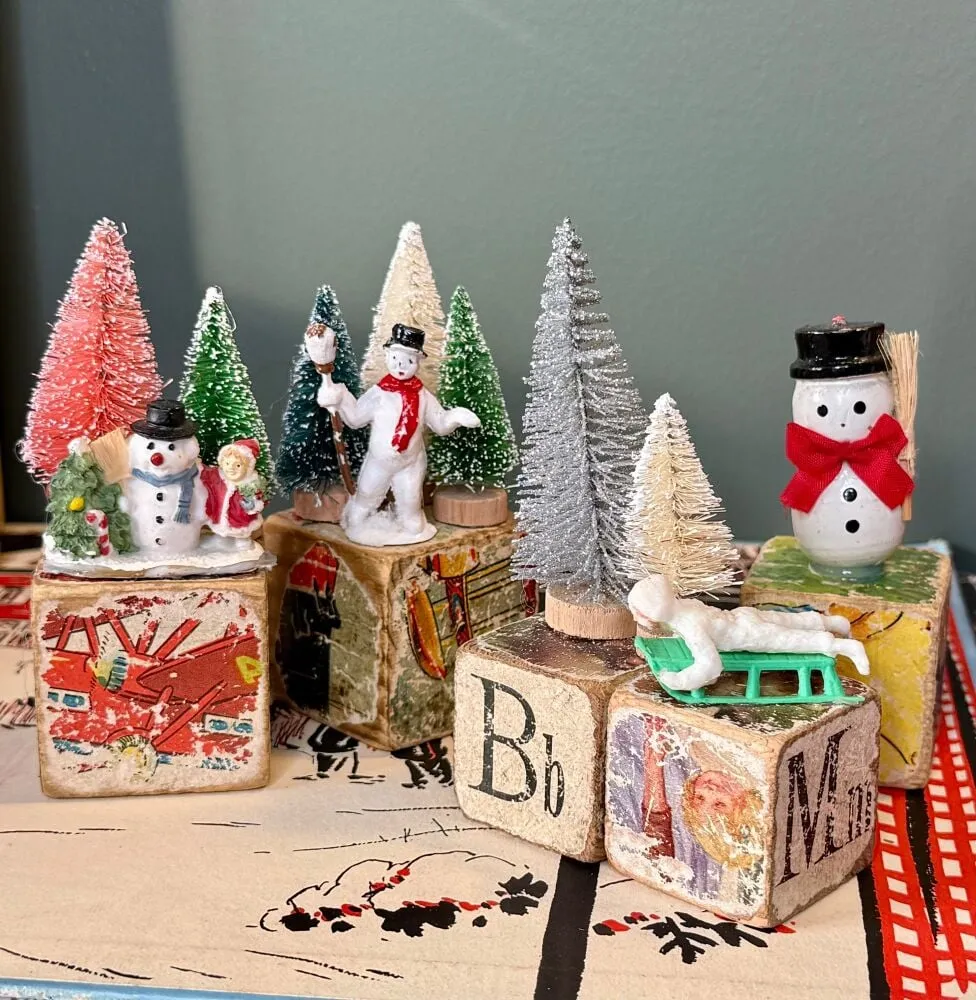
This one has staying power because it’s a form, not a color. Bottlebrush trees have survived every palette shift since the 1950s by simply changing shade.
- Vintage-style bottlebrush trees: $3–$12 each
- Alphabet and picture blocks from flea markets: $2–$6 each, or $15 for a mixed bag
- Small snowman and child figurines: $5–$15 each
- Toy sled figure: $8–$20
- Backdrop — paint a scrap board or use an existing shelf: $0–$12
- Total for a seven-piece vignette: $50–$150
Budget version: dollar-store bottlebrush three-packs at $3, a set of unfinished wood blocks for $8, and a sheet of fine sandpaper. A quick scuff plus a wipe of watered-down brown craft paint gives you the aged look for under $25.
12. Beaded Pipe-Cleaner Figures Under a Snowflake Garland
- Paint a scrap board or shelf in a matte blue — two coats, then let it cure a full 24 hours before you set anything on it.
- Thread white plastic snowflakes and pearl beads onto 20-pound fishing line or thin floral wire.
- Build a repeating pattern: one snowflake, three pearls, three dark blue beads. Repeat until you run out.
- Knot both ends and drape with about a 2-inch sag between attachment points. A taut garland looks like a wire.
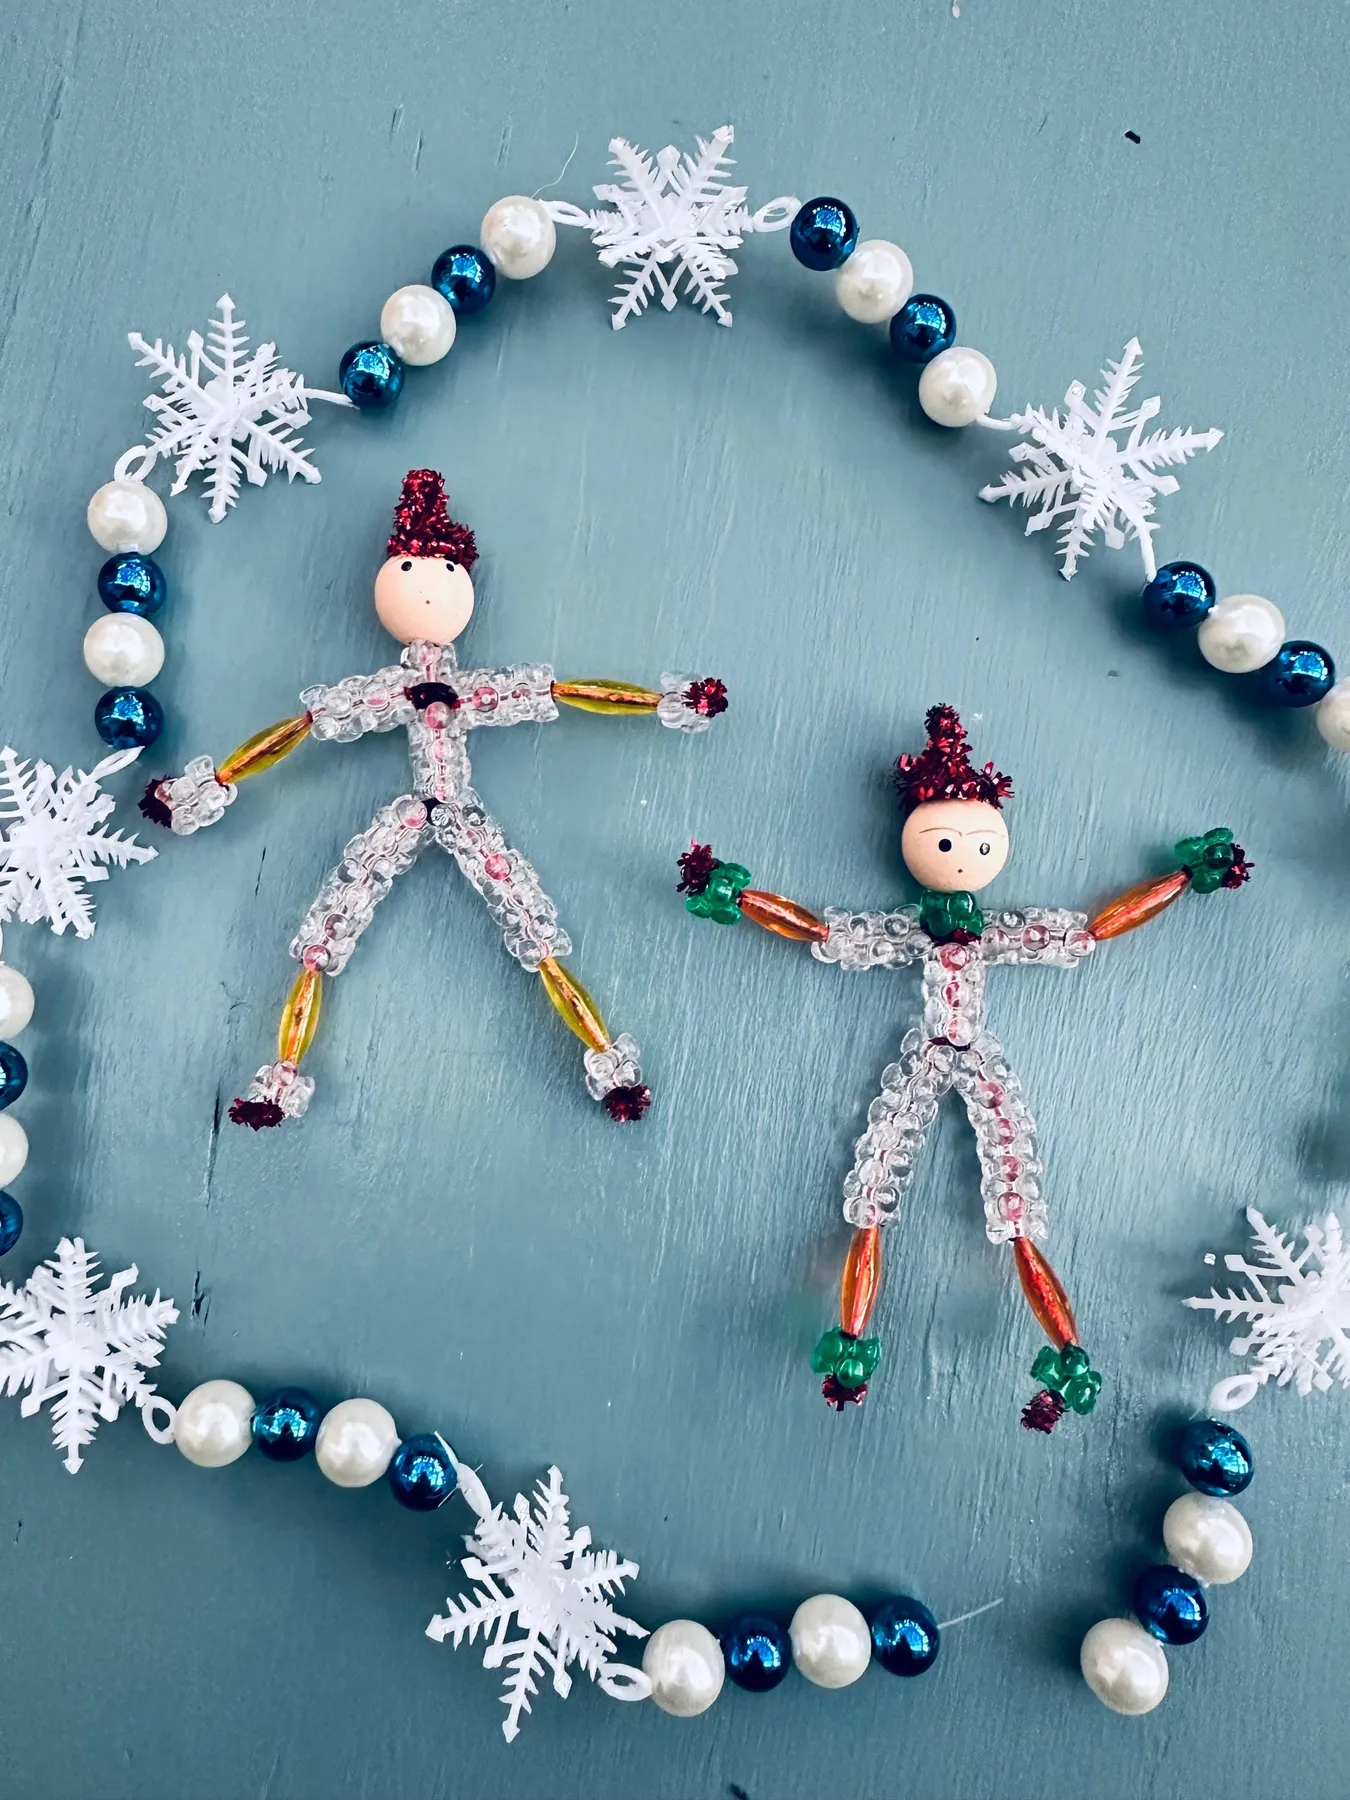
About 45 minutes for a 6-foot garland and $12–$20 in supplies.
The painted blue board is the reason those clear beads show up at all. Clear plastic disappears against white or cream; against a saturated blue it picks up a rim of color and reads as glass — the same principle behind Idea #23, which uses a teal ground for a nearly identical figure.
The white snowflakes do double duty. They repeat the white pearls in the garland and give the arrangement a shape to hang from. And those tiny red and green tinsel accents? That’s your 10% color, and it’s enough.
13. Layered Paper Stars Above Kraft-Wrapped Gifts
Kraft brown 60%, cream 25%, deep green 10%, muted red 5%. That’s the entire recipe, and notice that nothing in it is bright — the paper is unbleached, the twine is natural, the greens are forest rather than emerald.
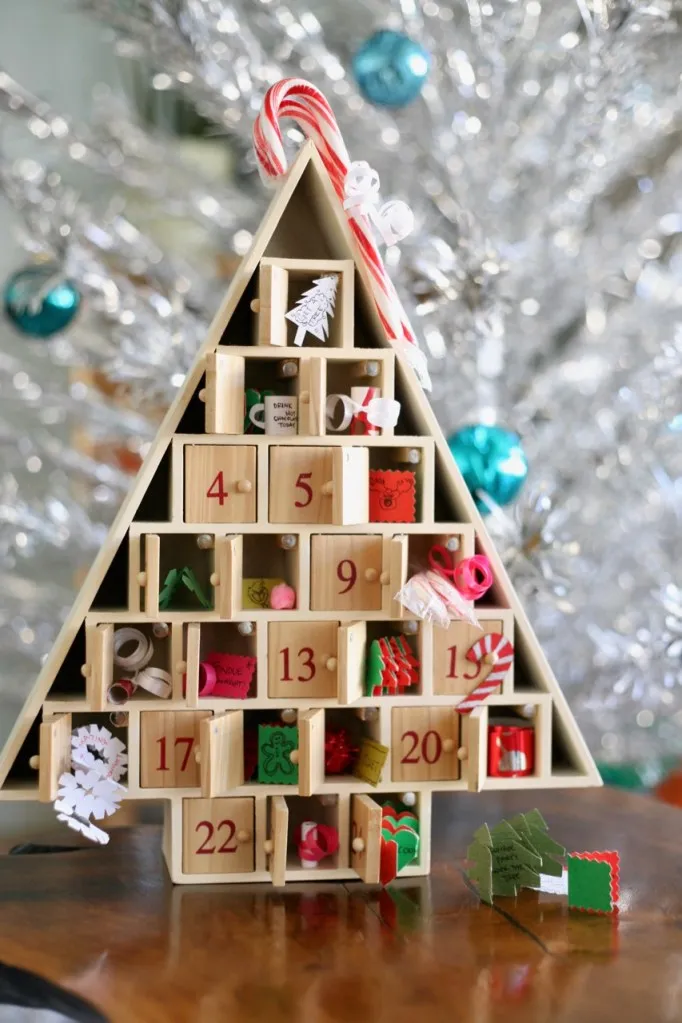
To shift it warmer, swap deep green for olive and add a piece or two of amber glass. To sharpen it, take the cream to white and use a true red ribbon instead of twine. The proportions never move, which is what keeps the look consistent even when you’re adding pieces year after year.
Folded paper stars crush, and once a crease goes in, it stays. Store them flat in a box with tissue between layers and never stack anything on top. Dust with a dry, soft brush — a damp cloth will bleed the ink right off printed paper.
Kraft paper fades unevenly in direct sun, and natural twine yellows within a season or two. If your display sits near a bright window, either rotate it or accept that it’ll look slightly different by next December. Nothing here is meant to last forever, which is honestly part of the charm.
14. A Tiny Illuminated Wooden House Under the Tree
Light temperature makes or breaks a miniature building. Skip the tiny cool-white LEDs that come in most craft kits and look for 2700K warm micro string lights instead. Then tape a small square of vellum inside the roof cavity, right over the bulb — it turns a hotspot into an even glow, the same trick dollhouse builders have used for decades. Four dollars of vellum changes the entire read.
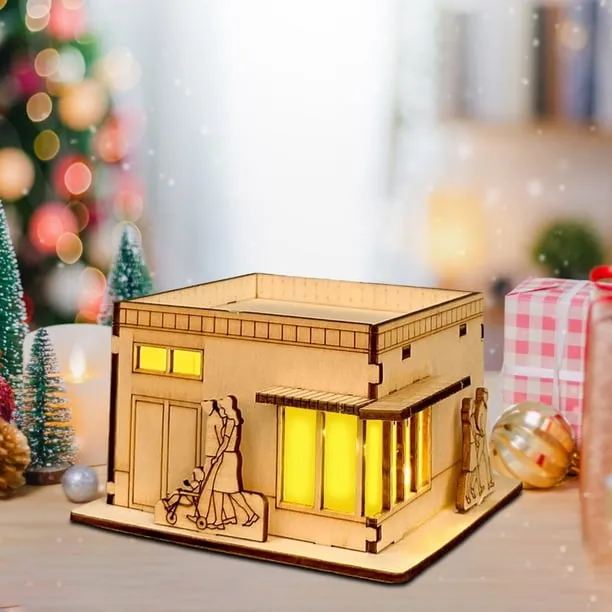
These models usually run 4 to 7 inches tall, which means they need a stage, not a shelf. Give the building at least 18 inches of clear space around it and 12 inches of height behind it — under a tree with low, lifted branches is ideal. On a console, put it at the end rather than the middle so the background stays open.
For a narrow entryway under 4 feet wide, use a single building instead of a whole village. Three small structures crammed into that space read as clutter, which is the opposite of what you want by the front door.
15. Glitter Baubles Against a Charcoal Paneled Wall
It’s the dark gray paneled wall. Move these exact ornaments onto a white wall and the whole thing goes soft — gold glitter needs contrast to look like gold instead of beige. The charcoal background makes every metallic finish read a full shade richer, and it costs nothing if the wall is already painted.
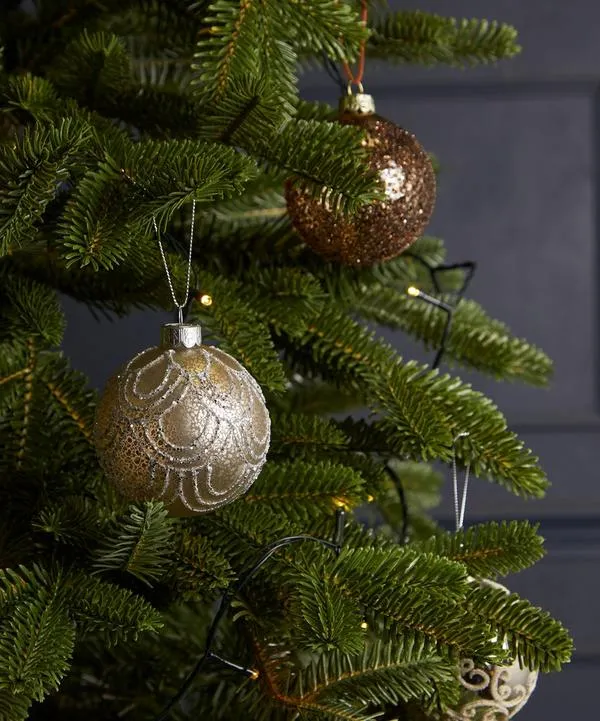
If you’re not repainting, a dark fabric backdrop or even a large charcoal-wrapped canvas behind the tree does most of the same job for about $20.
Peel-and-stick paneling in a charcoal tone runs $40–$90 for a feature wall and comes off clean when you move. Or skip it entirely: a $35 can of matte charcoal paint on one wall does the same work. Pair it with Idea #24, which uses the identical dark-wall trick to flatter a single hand-painted ornament.
For the ornaments themselves, big-box stores carry textured and glitter-finished baubles at $3–$6 each, or $15 for a twelve-pack of mixed finishes. Mix two or three shapes — a round, a finial, a textured sphere — and the group looks collected rather than purchased.
16. Lavender and Aqua Finial Ornament in the Pines
Temperature mixing. The lavender, magenta, and aqua are all cool tones, but the gold glitter linework and the warm string lights behind them run warm. That tension is why the ornament looks lit from the inside. If every element were cool it would feel icy; if everything were warm it would disappear into the pine.
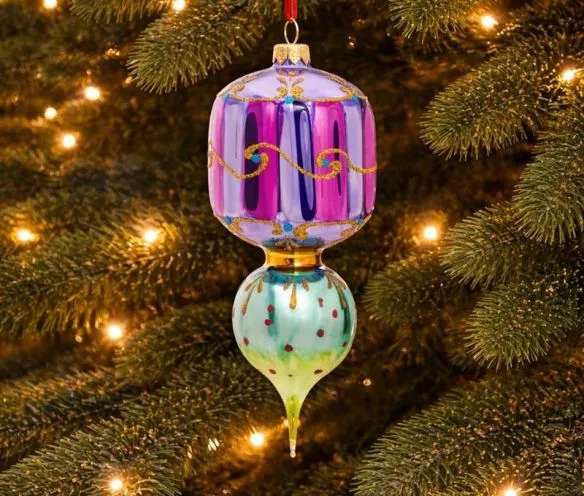
The shape matters too. That elongated segmented top with a teardrop base pulls the eye downward, so it hangs best on a branch with open space beneath it rather than nested in a cluster.
Hand-painted and glitter-lined finishes chip. The linework on pieces like this is usually applied over paint, and it flakes at the edges within a season or two of regular handling. Display it, don’t fiddle with it — and store it in its own tissue pocket, not loose in a bin with metal hooks.
Keep it out of direct sun. Magenta and aqua pigments fade faster than reds do, and you’ll notice it as a duller version of the same ornament by year three.
17. Distressed White Metal Tree with Scattered Pinecones
- Distressed white metal tree, new: $30–$80
- Same tree style, thrifted or from a flea market: $5–$15
- Pinecones — collected free, or $8 for a bagged set
- Reclaimed wood plank backdrop: $20–$60
- Warm white micro string lights: $10–$20
- Total: $60–$160
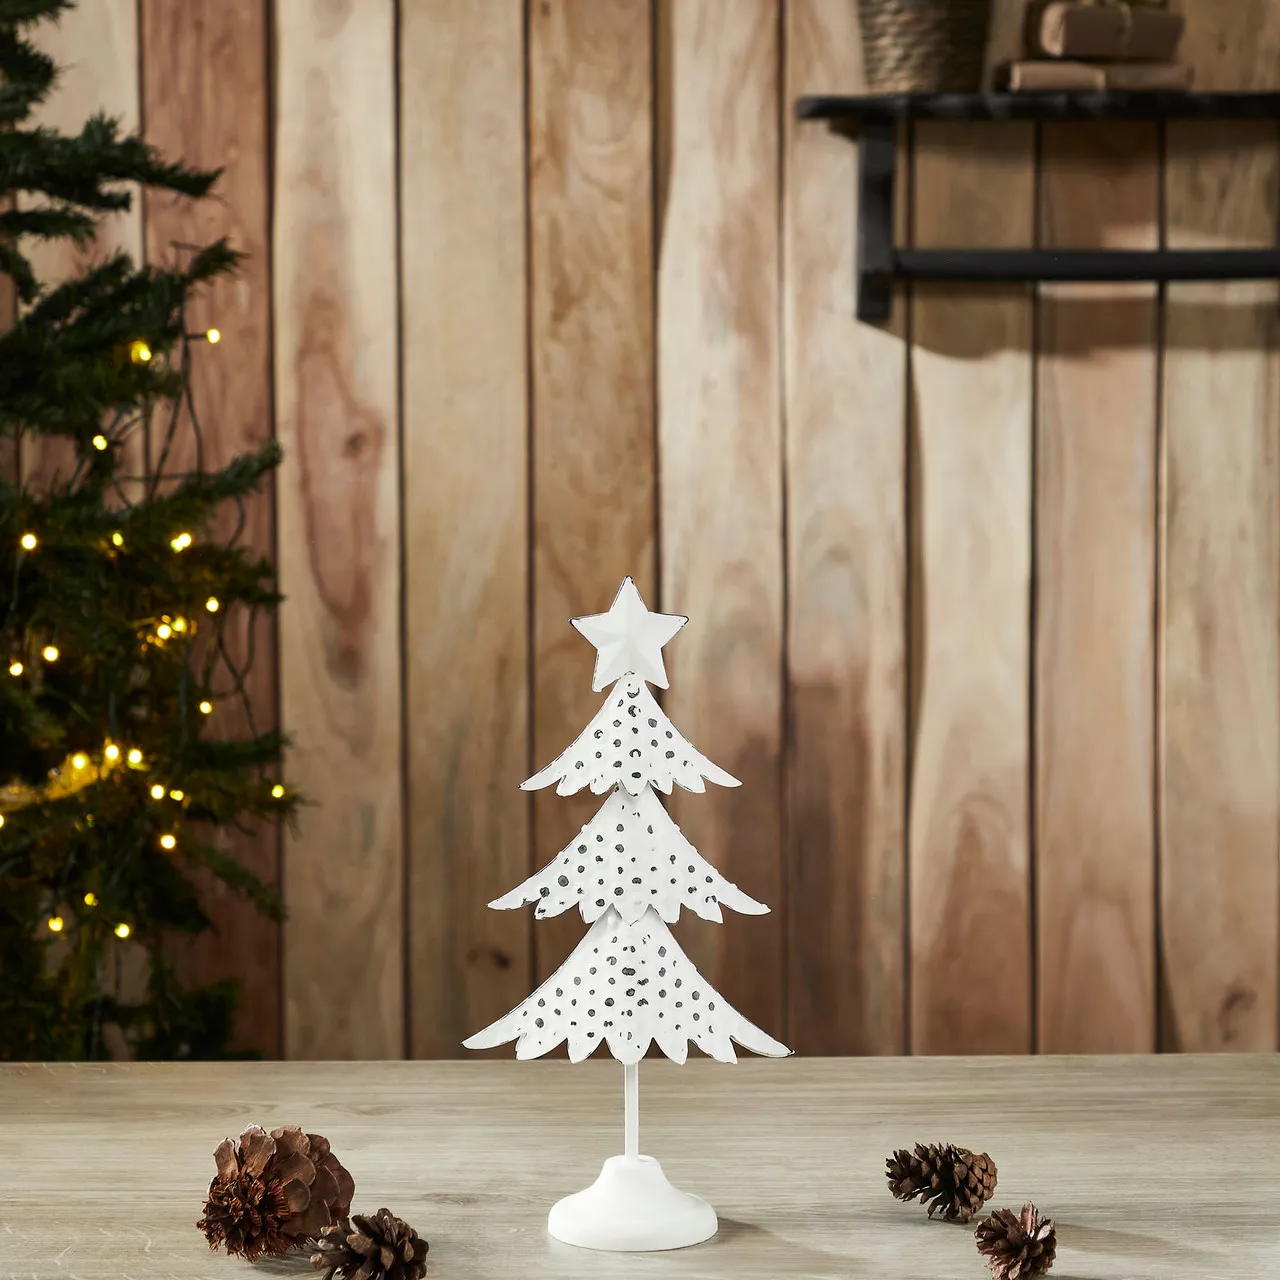
Cheapest route: a dollar-store cone tree, a can of matte white spray paint, and a sheet of 220-grit sandpaper. Paint it, let it dry, sand the edges back, and you’ve got the look for about $12.
Distressing metal is about where you sand, not how much. Hit the edges, corners, and any raised detail — places that would wear from handling — and leave the flat faces alone. Then rub a thinned dark wax into the crevices with a cloth and wipe the surface back immediately. The wax stays in the low spots and gives the white depth instead of that flat, freshly sprayed look.
18. Speckled Mercury Glass on Sparse Branches
Mercury glass isn’t glass with a silver lining you can polish — it’s usually a sprayed or etched finish, and it hates moisture. Never soak one. A dry microfiber cloth is all it should ever touch, and if you must, a barely damp cloth on the outside only.
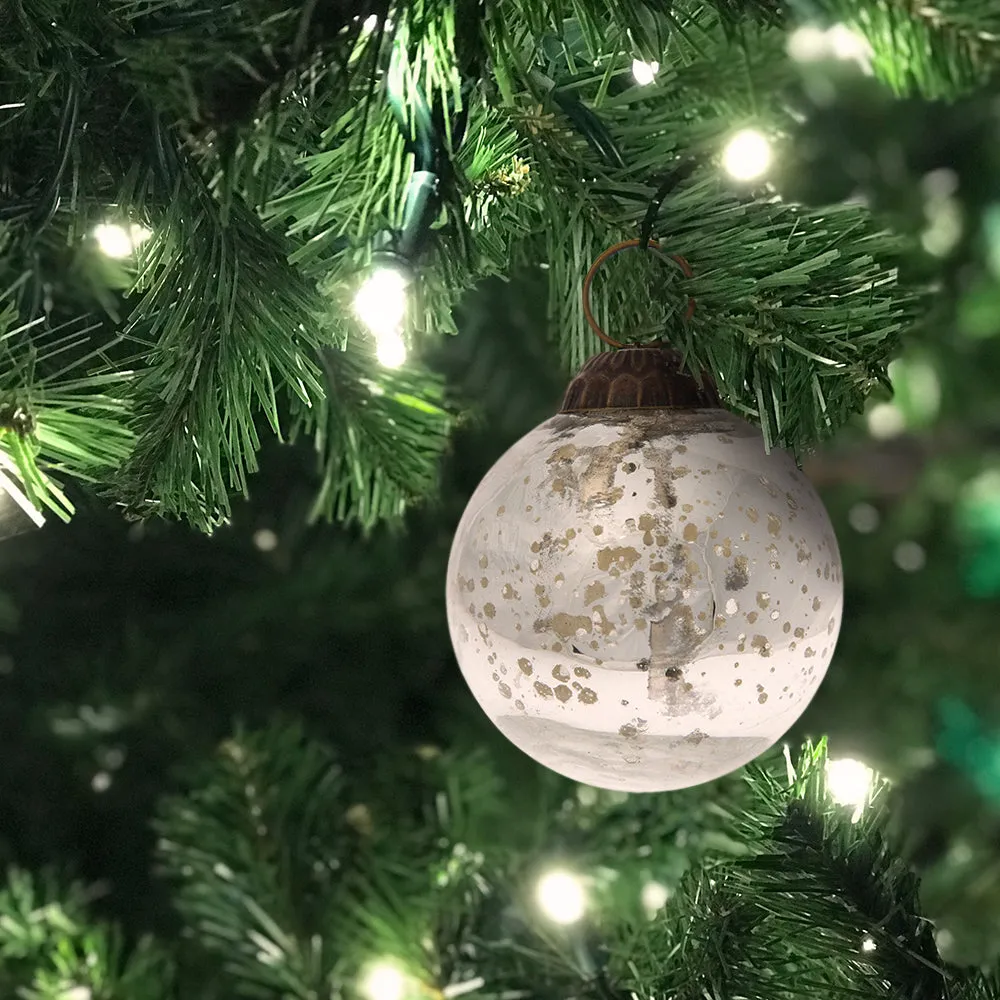
Store it in low humidity. Basements and garages cloud the finish over a single summer, and glitter-speckled versions shed loose flakes into whatever they’re packed with. One zip bag per ornament is worth the two minutes it takes.
A 3-inch mercury glass ornament is a supporting player, not a focal point. It works best grouped in threes at slightly different heights, with at least two inches between them so the sparkle reads individually. On a smaller tree — 5 feet or under — a single one near the top does the work of an entire cluster.
If your tree is narrow or skinny, mercury glass is a great choice: reflective finishes read across a room even when the branches are sparse, which is exactly the opposite of how matte ornaments behave.
19. Hand-Painted Santa in Blue on a Glossy Red Bauble
- Clean a thrifted glass ornament with rubbing alcohol and let it dry completely — paint won’t stick to oils.
- Base coat in gloss enamel red. Two thin coats beat one thick one; wait 30 minutes between them.
- Sketch the Santa figure lightly with a white charcoal pencil, then block in the blue coat first.
- Add the face, staff, and toy sack with a fine liner brush, then dot white snowflakes around the figure.
- Cure 24 hours. If the enamel label says oven-cure, follow that exactly.
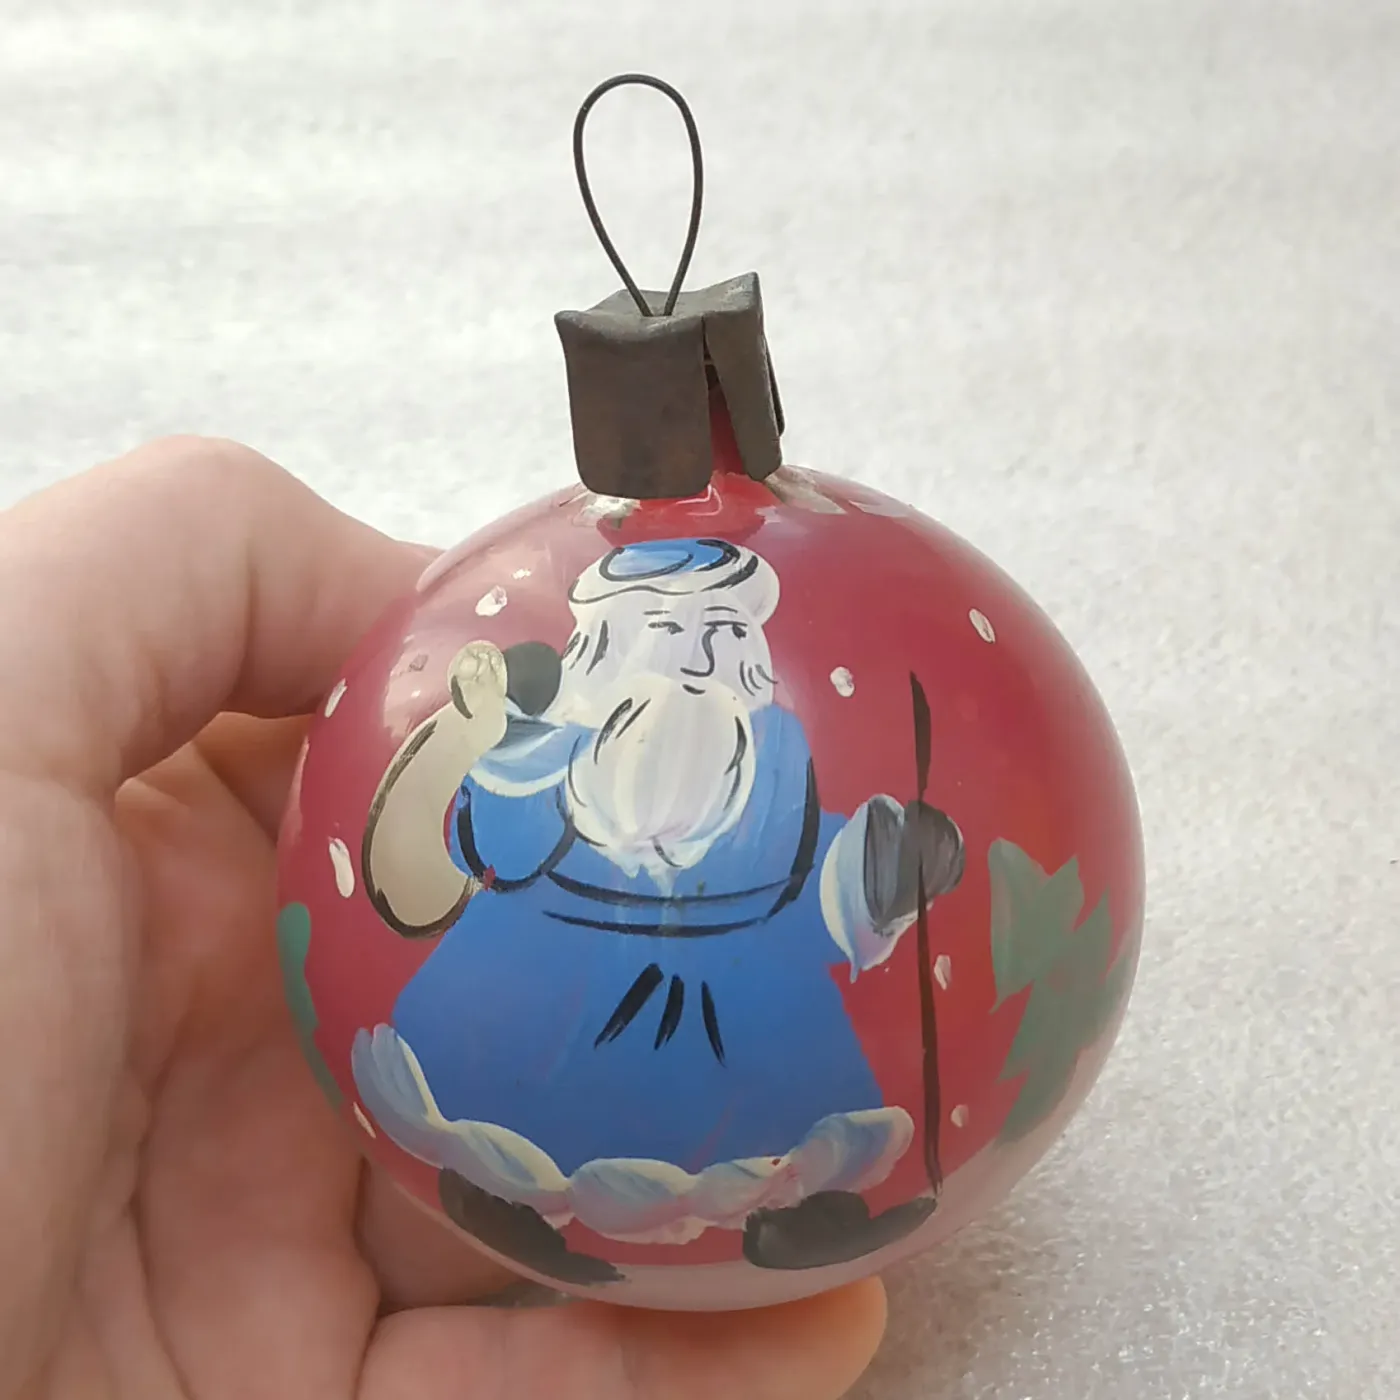
Roughly two hours of work, $8–$15 in paint, and $2–$5 for the ornament itself.
Santa wasn’t always red. The blue-robed Father Christmas comes from pre-Coca-Cola illustration traditions, and the look has been quietly gaining ground online as people get tired of the same red-suited figure on every shelf. It reads as researched rather than mass-produced.
There’s a practical appeal, too: hand-painted ornaments are the one category where a hobbyist can genuinely match what sells for $40 online. Two hours, a thrifted blank, and a bit of nerve.
20. Popsicle-Stick Snowflakes and Painted Wood Cutouts
This is the cheapest idea in the whole list. A hundred popsicle sticks run about $1.25, craft paint is $1–$3 a bottle, and twine is $2. Painted wood cutouts are $1–$2 each at craft stores, or you can cut your own from scrap plywood. A full tree’s worth of kid-made ornaments lands under $20.
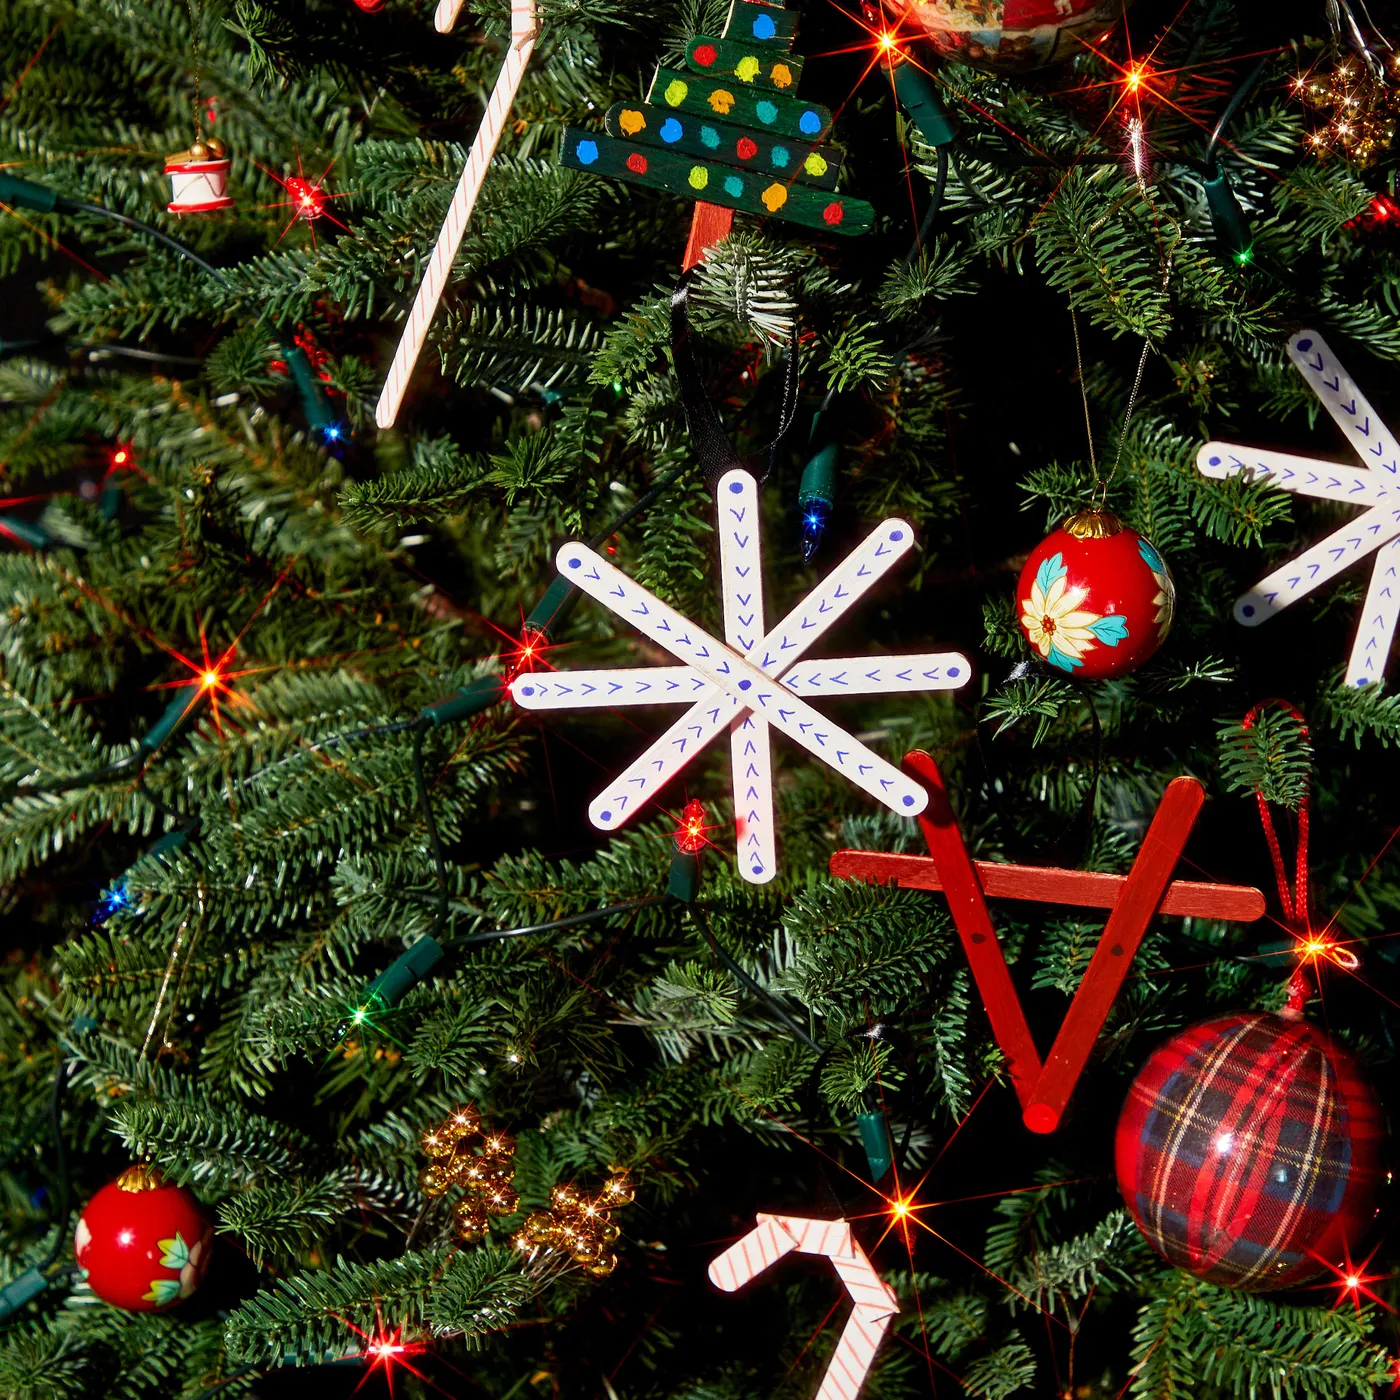
Compare with Idea #13, where the handmade version — layered paper stars — sits at a similar price point but stores flat. If you’re short on space, that’s the better pick.
Handmade ornaments are chunky. Popsicle-stick snowflakes run 4 to 5 inches across, which is fine on a 6- or 7-foot tree but will dominate anything under 5 feet. On a small tree, use four or five as accents and fill in the rest with smaller glass pieces.
They also need sturdy branches. Lightweight as they are, a wide flat ornament catches air and swings, so hang them on inner branches an inch or two back from the tip rather than at the very end.
21. Dried Orange Slices and Vintage Glass in Pine Green
Pine green 50%, warm amber 25%, kraft brown 15%, white 10%. The dried orange slices are doing most of the amber work, and that’s what keeps a mostly-green tree from feeling cold.
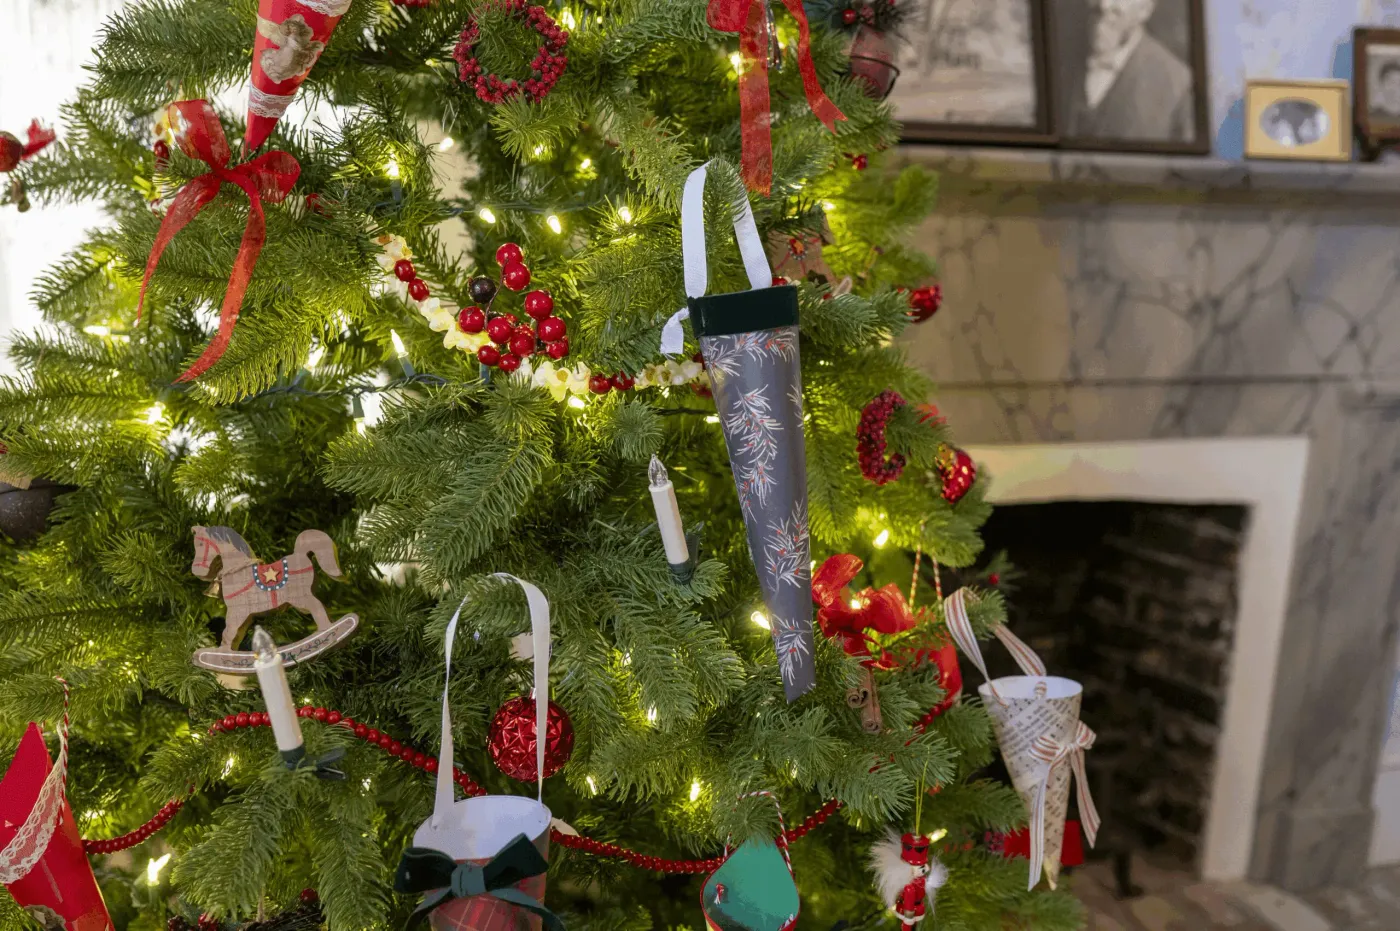
To go more classic, push the amber down and bring in a true red ribbon. To go Scandinavian, take out the kraft brown, keep the orange, and add natural linen. The greens and the white stay put either way — those two are the anchor, and they’re the reason this palette works on almost any tree shape.
- Check your string lights’ color temperature. Warm white (2700K) suits dried oranges; cool white makes them look muddy.
- Measure your ceiling clearance — a topper needs at least 6 inches of air above it.
- Decide your ratio before you start: about half vintage glass, half natural or handmade.
- Count your hanging materials. Dried orange slices need ribbon or twine loops, not wire hooks.
- Sort ornaments into three size piles so you can hang large pieces low and small ones high.
22. White and Gold Scrollwork on Brown Velvet Ribbon
Swap the standard gold string for a ⅜-inch velvet ribbon cut to 6 to 8 inches. That one change is what makes a mass-market ornament look collected. Velvet is matte, so it doesn’t compete with raised gold scrollwork, and the brown tone reads vintage in a way a shiny metallic cord never will. Buy it by the yard for $4–$8 and cut on the bias so it doesn’t fray.
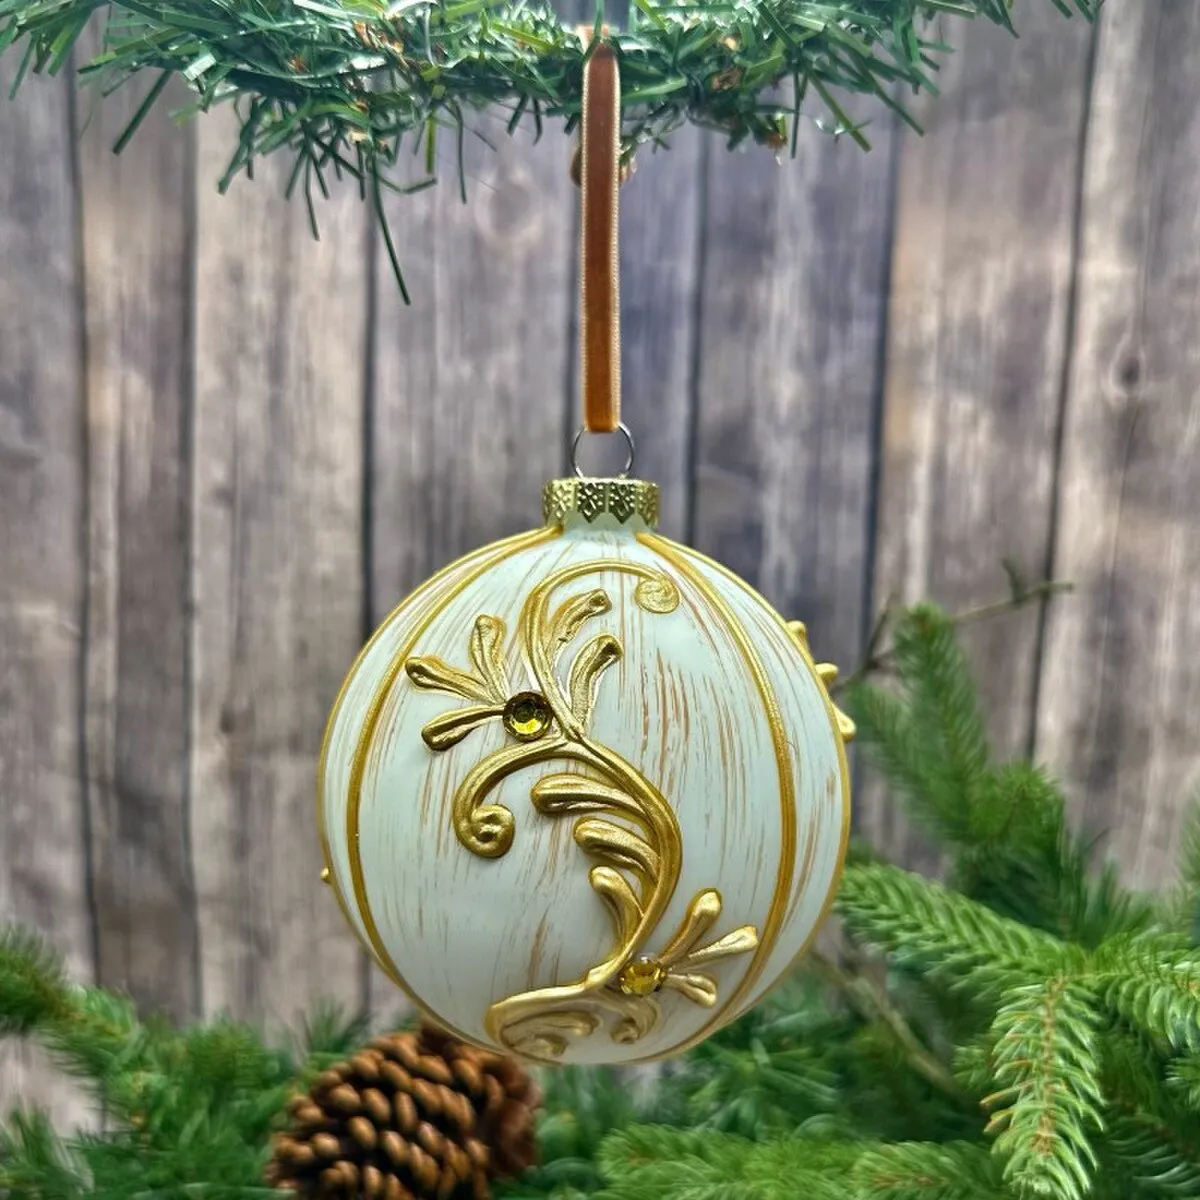
An ornament like this sells for $15–$30 at boutiques. Make one for about $6: a plain white glass or plastic ball, a tube of gold dimensional puff paint for the stripes and scrollwork, and a small pack of yellow rhinestones. Let each layer dry before adding the next one — the whole thing takes about 40 minutes and looks nearly identical from two feet away.
Brown velvet ribbon at $4 does the rest. Nobody will guess.
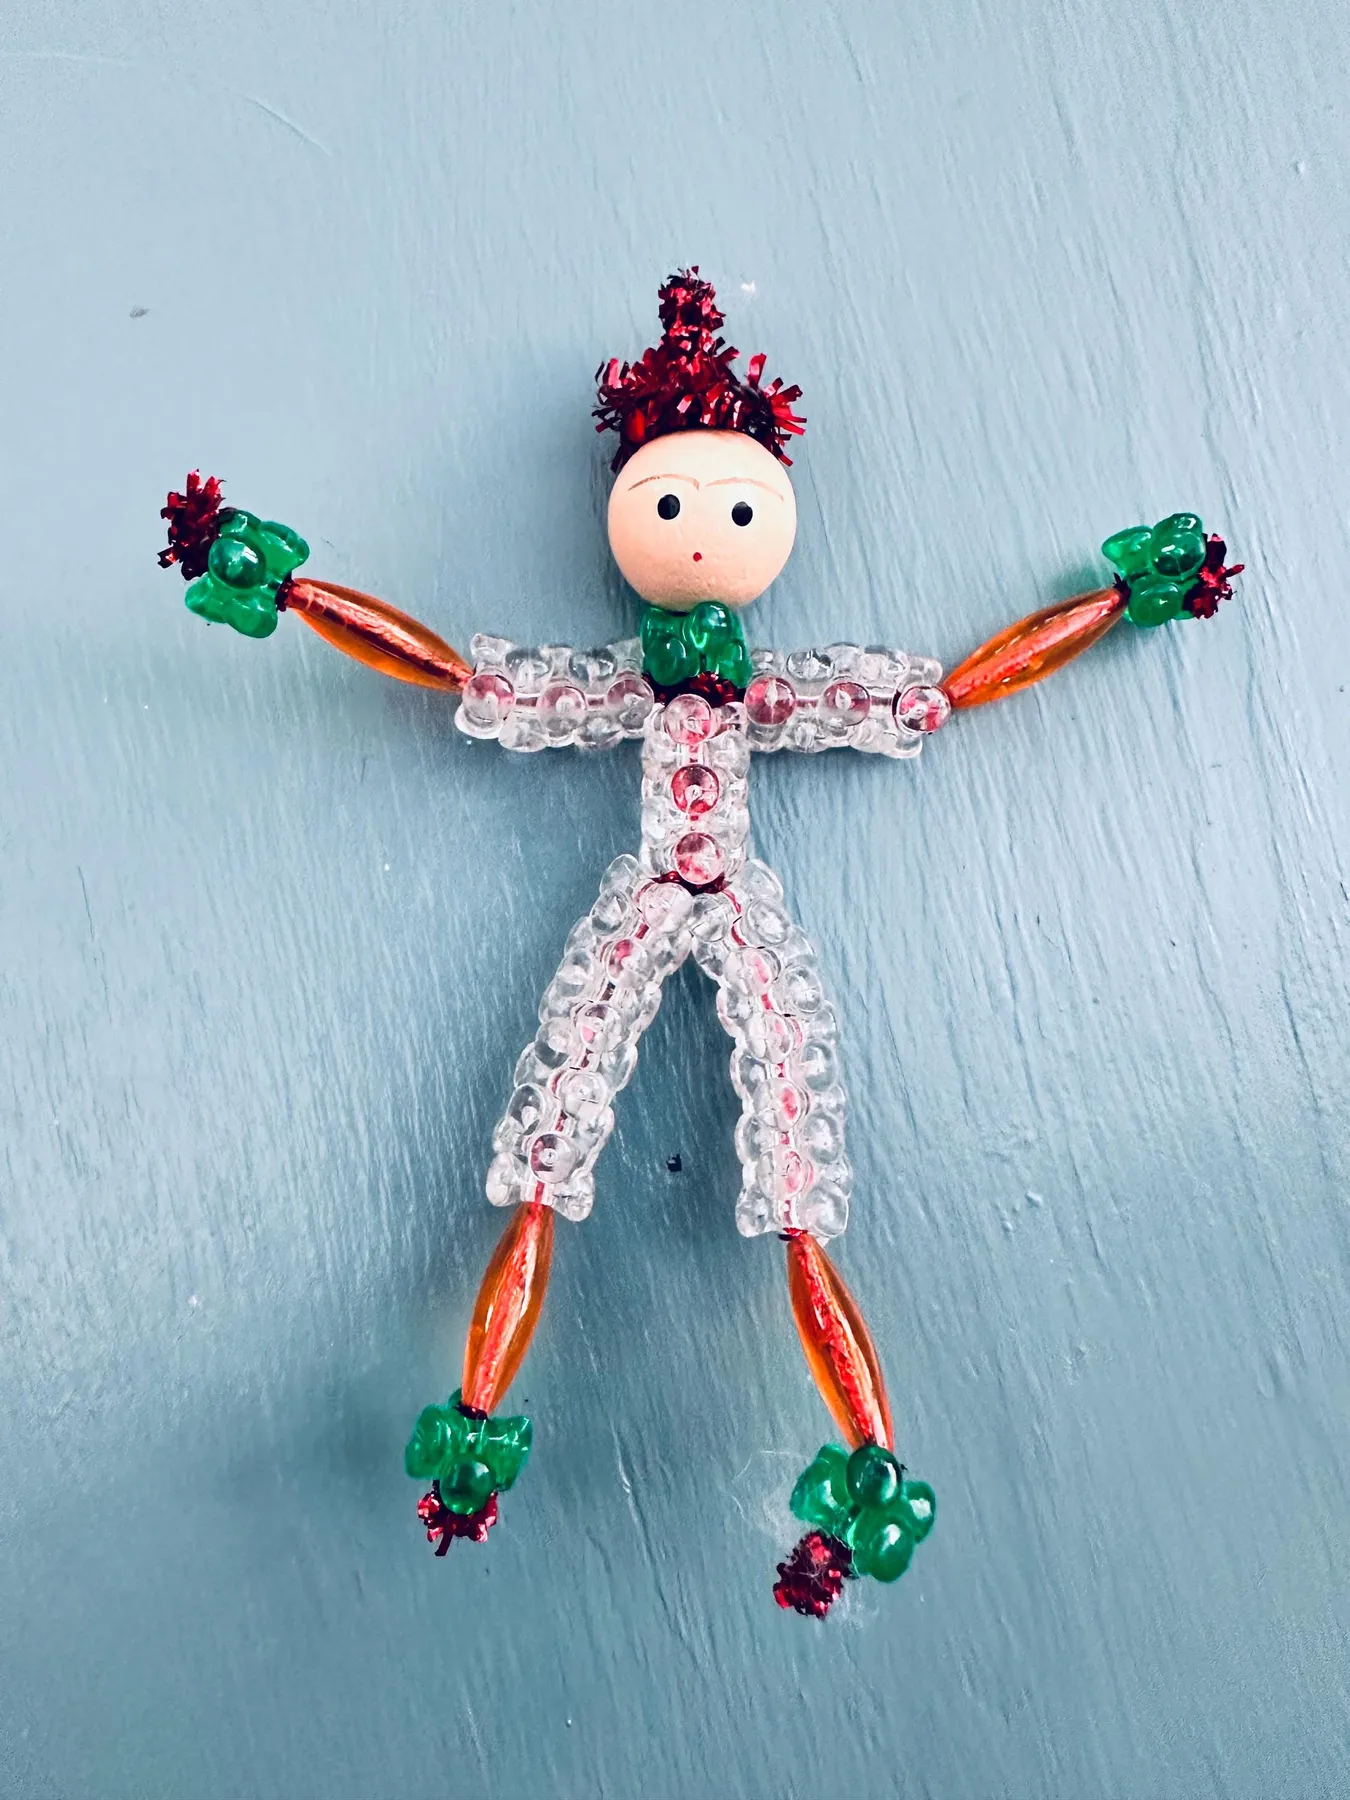
23. Red Tinsel Hats and Clear Beads Against Teal
Wire-and-bead figures are charming and slightly hazardous. Cut pipe cleaner ends are sharp, and they poke through bead holes over time — check each one before you hang it anywhere a kid can grab. Clear faceted beads also crack if they’re squeezed, and a cracked bead will cut a finger without ever looking dangerous.
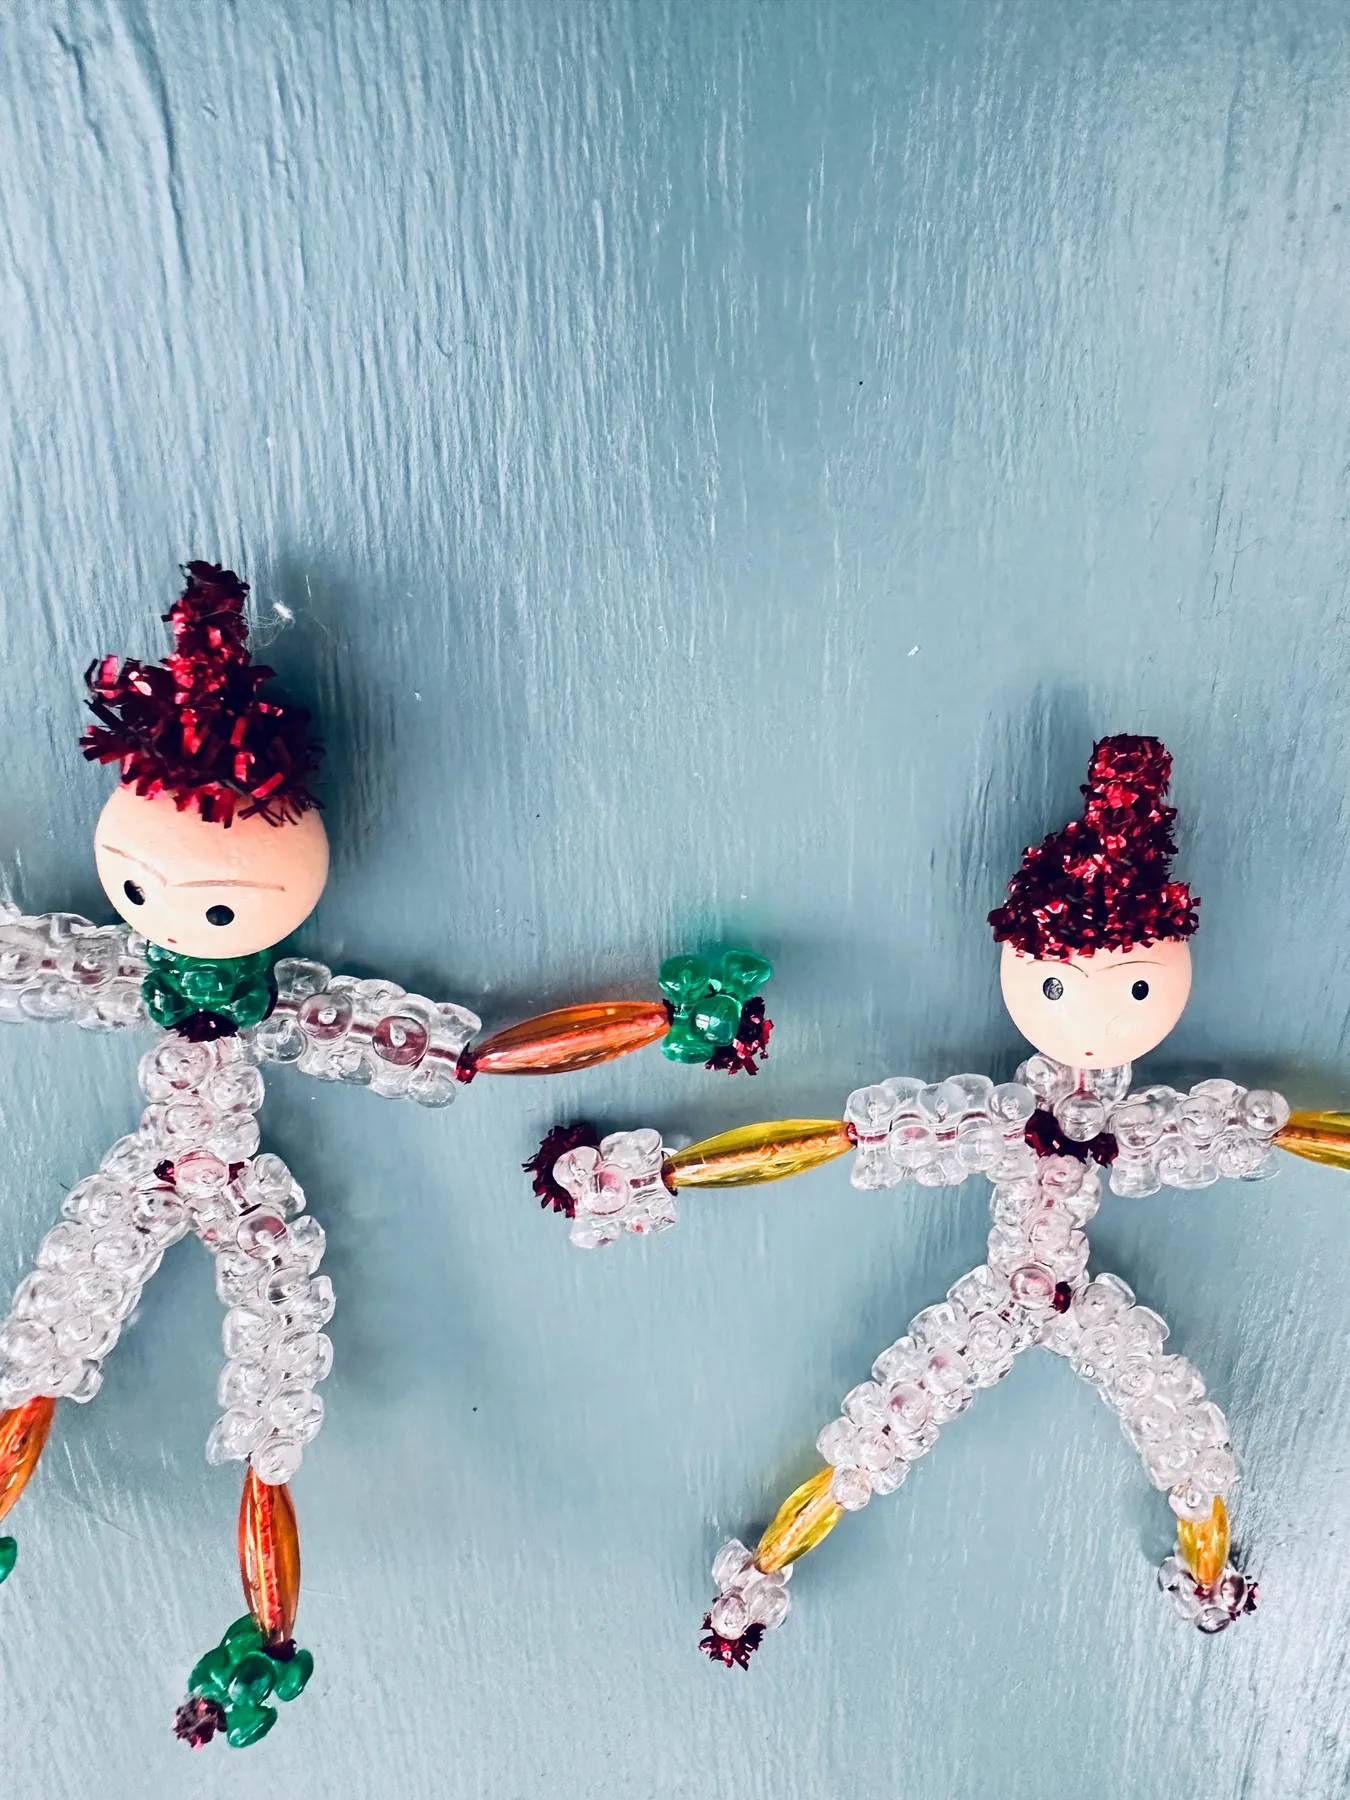
Keep them above toddler reach, and if you’re making them with kids, pre-cut the wire and do the threading yourself. The beads are the fun part for them anyway.
- Bend a clear pipe cleaner in half for the body, then thread clear faceted beads down both legs.
- Twist a second pipe cleaner into arms and thread alternating glass beads in orange and yellow on each side.
- Push a wooden bead head onto the top with a dot of glue to hold it, then paint the face with a fine-tip marker.
- Coil a short piece of red tinsel pipe cleaner into a hat and wrap it over the top of the head.
- Loop a length of thread through the back for hanging.
About 25 minutes each, and $6–$10 in supplies makes three or four.
24. Magnolia-Painted Gold Ornament in the Branches
A 4-inch hand-painted ornament wants breathing room. On a 6-foot tree, give it a clear 5-inch radius and hang it on an outer branch where the shape silhouettes against the wall rather than the needles. On a tabletop tree, it should be the only painted piece on the whole thing.
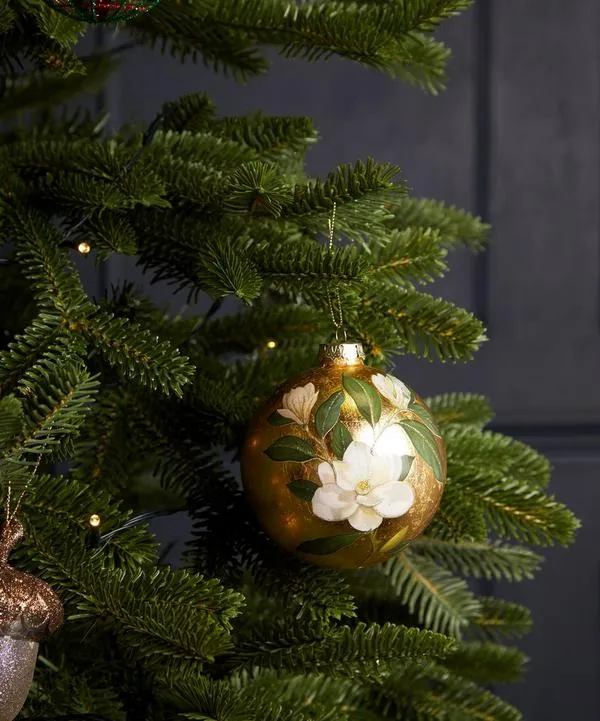
If you’re displaying a collection of painted ornaments instead of hanging them, a shallow bowl with a 9- to 10-inch diameter holds three comfortably without crowding. Much bigger and the group spreads so thin it stops reading as a set.
The painted magnolias are matte, and the ground they sit on is high-gloss gold. That contrast is the entire trick — if the flowers were painted in gloss too, the ornament would just look printed. Same story in Idea #7, where a matte paper die-cut against shiny baubles does the heavy lifting.
The dark paneled wall behind it plays a role as well, letting the gold read warm instead of washed out against white.
25. Star-Punched Brass Angels on Twine Above the Sofa
- Six brass-toned angel ornaments: $30–$90
- Nine feet of evergreen garland, faux: $25–$70, or real for $25–$60
- Jute twine, 100-yard spool: $5–$10
- Small brass cup hooks: $4–$8
- Brass polish, if you want a shine: $8
- Total: $68–$178
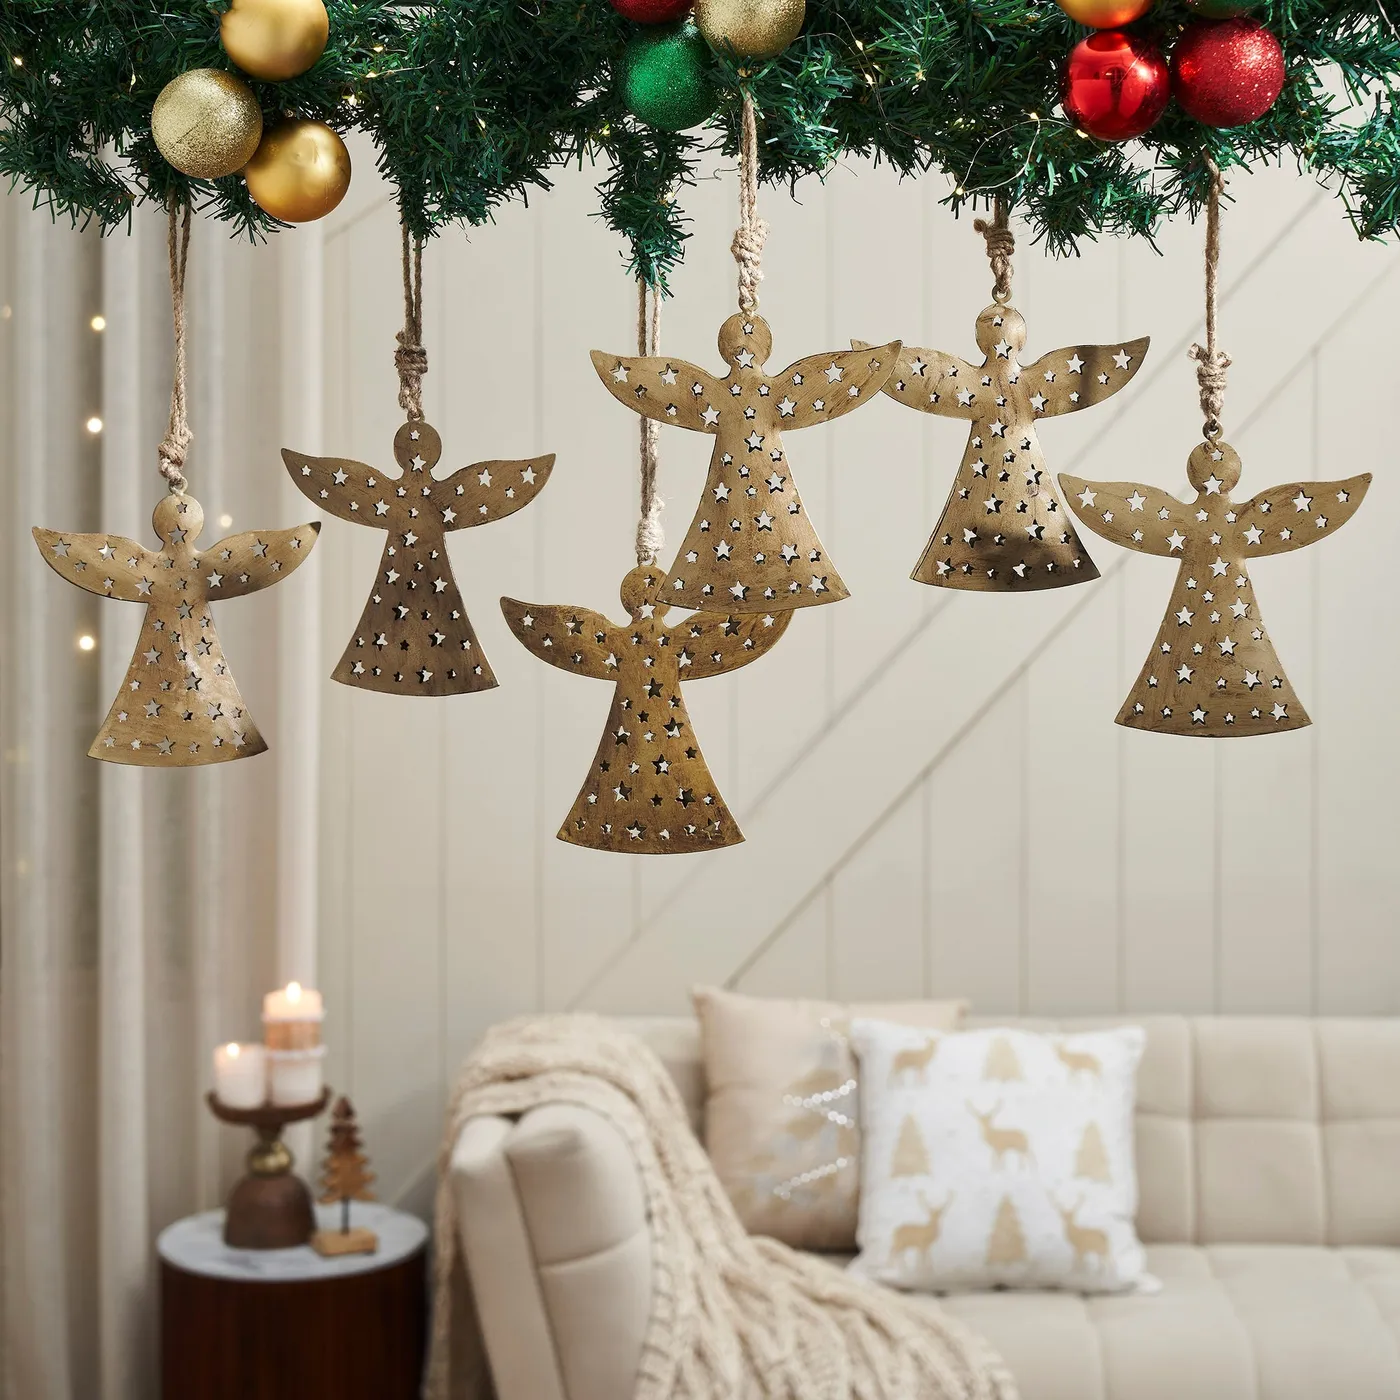
cut angel silhouettes from white cardstock using a $5 downloadable template and punch star shapes with a hole punch. Twenty figures for under $15, and the paper version actually reflects less glare in a living room.
The twine is the thing, not the angels. Rough jute cord against polished brass is the entire personality of this display — swap it for satin and they instantly look like something from a hotel lobby. The other key is staggered drop lengths, roughly 4 to 6 inches of variation, which keeps the garland from reading like a curtain rod.
26. The Silver and Magenta Molded Glass Pinecone
Molded glass with a distressed finish is fragile in a specific way: the silvering flakes off the high points first, which are exactly the places that catch light. Once a scale pattern starts shedding, there’s no fixing it. Handle these by the cap only, never the body.
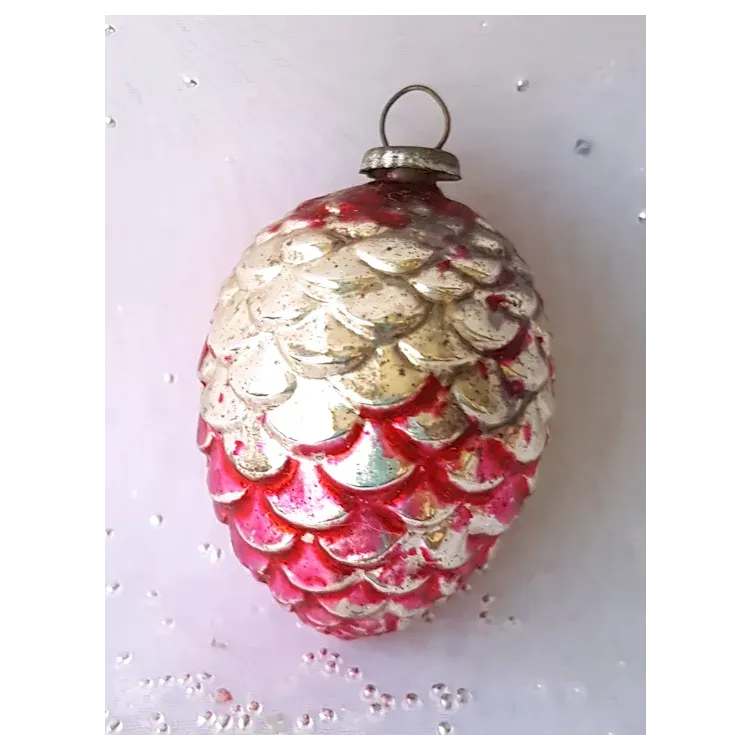
Don’t stack them, even with tissue between — the scales catch and chip each other. Individual tissue pockets in a divided box, or back in the original packaging if you still have it. Keep them out of a damp basement, and obviously never near a dishwasher.
Pinecone ornaments look best in odd numbers at three different heights — say 12, 16, and 20 inches from the top of the tree. Closer together and they merge into a lump; farther apart and they stop reading as a set. The silver-and-magenta combination also gives you a built-in bridge between cool ornaments and warm lights, so these are the safe pieces to hang in the gaps.
27. Silver Tinsel Garland and a Hand Mid-Hang
Tinsel came back. The same pendulum that swung hard toward minimalism for a decade has swung the other way, and the maximalist tree — silver garland, a dozen finishes, zero restraint — is what people are pinning now. Part of it is pure nostalgia; part of it is a reaction against the perfectly coordinated tree that takes a spreadsheet to build.
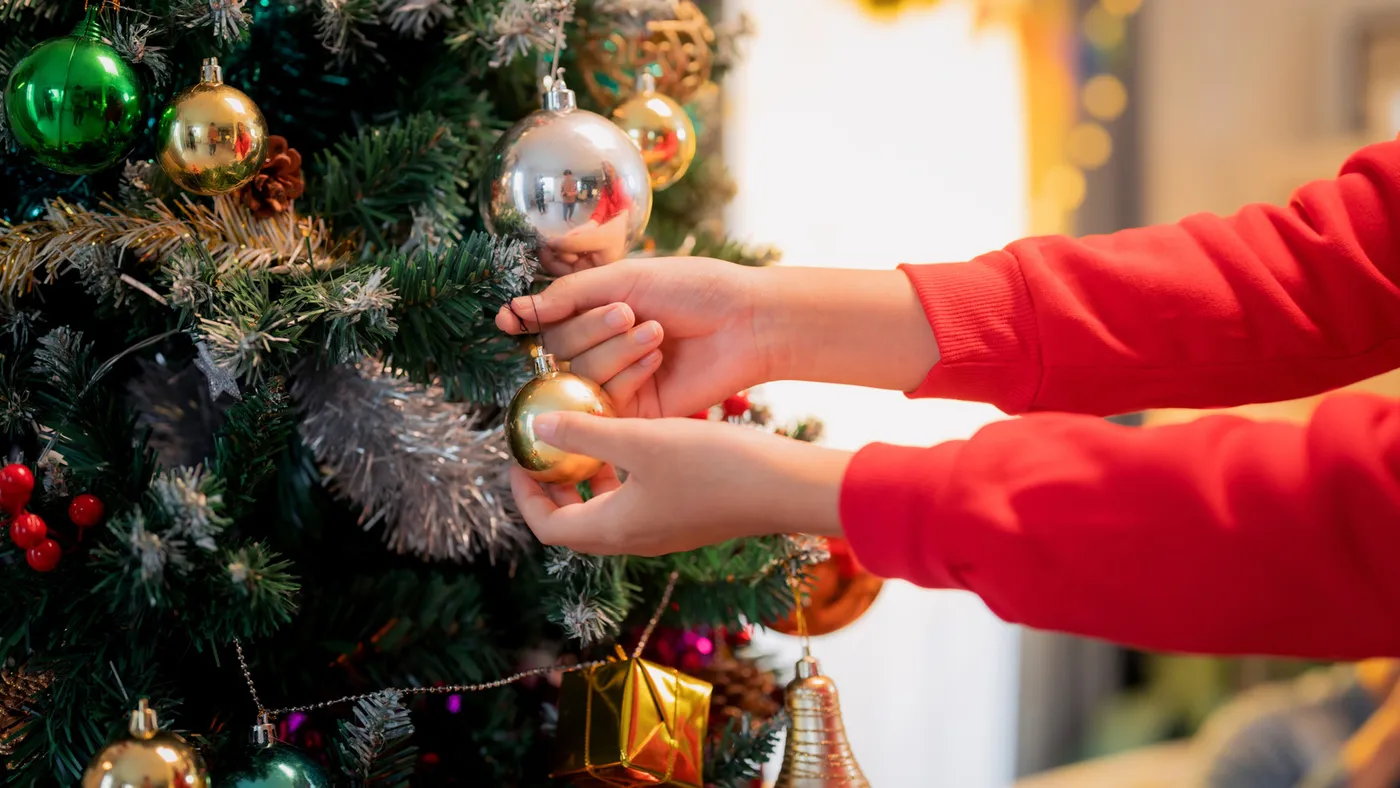
It has staying power because it’s about abundance, not a specific palette. You can rebuild it in any color scheme and it still works.
Two real warnings before you buy vintage tinsel: it sheds, and old garland made before the 1970s may contain lead. Expect to pick strands off the rug and untangle them from your vacuum brush every January. Wash your hands after handling old tinsel, keep it away from kids and pets, and never let an animal chew on it — swallowed strands are a genuine vet emergency.
New tinsel from a big-box store avoids the lead issue entirely and costs about $3–$8 a strand.
28. An Arched Wooden Santa with Jute Twine
The arch is everything. A rectangular wooden tag would read as a gift label; the arched top turns it into a portrait, and an illustrated Santa framed that way feels like a tiny piece of art rather than a craft project. The jute twine hanger finishes the idea — anything glossier would fight the matte print.
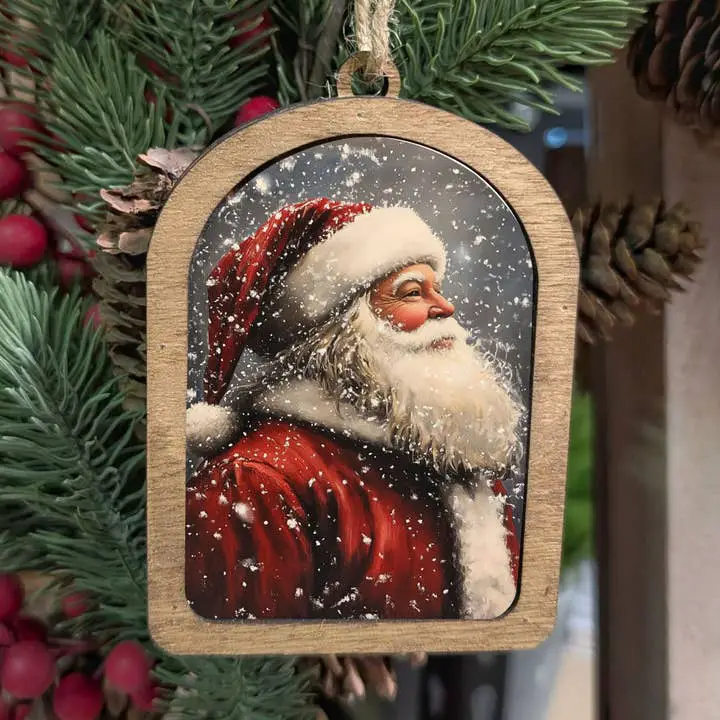
The backdrop matters too. This hangs among pinecones and red berries, which echo the red suit and the warm wood. On a bare branch with nothing around it, the same ornament would lose half its charm.
Buy unfinished arched wood tags — about $6–$10 for a dozen at craft stores. Print vintage Santa illustrations onto sticker paper (or just use Mod Podge), trim to fit, and seal with two coats of matte finish. Total for twelve: around $18. Compare with Idea #10, where a single handmade piece does the same job on a bigger scale.
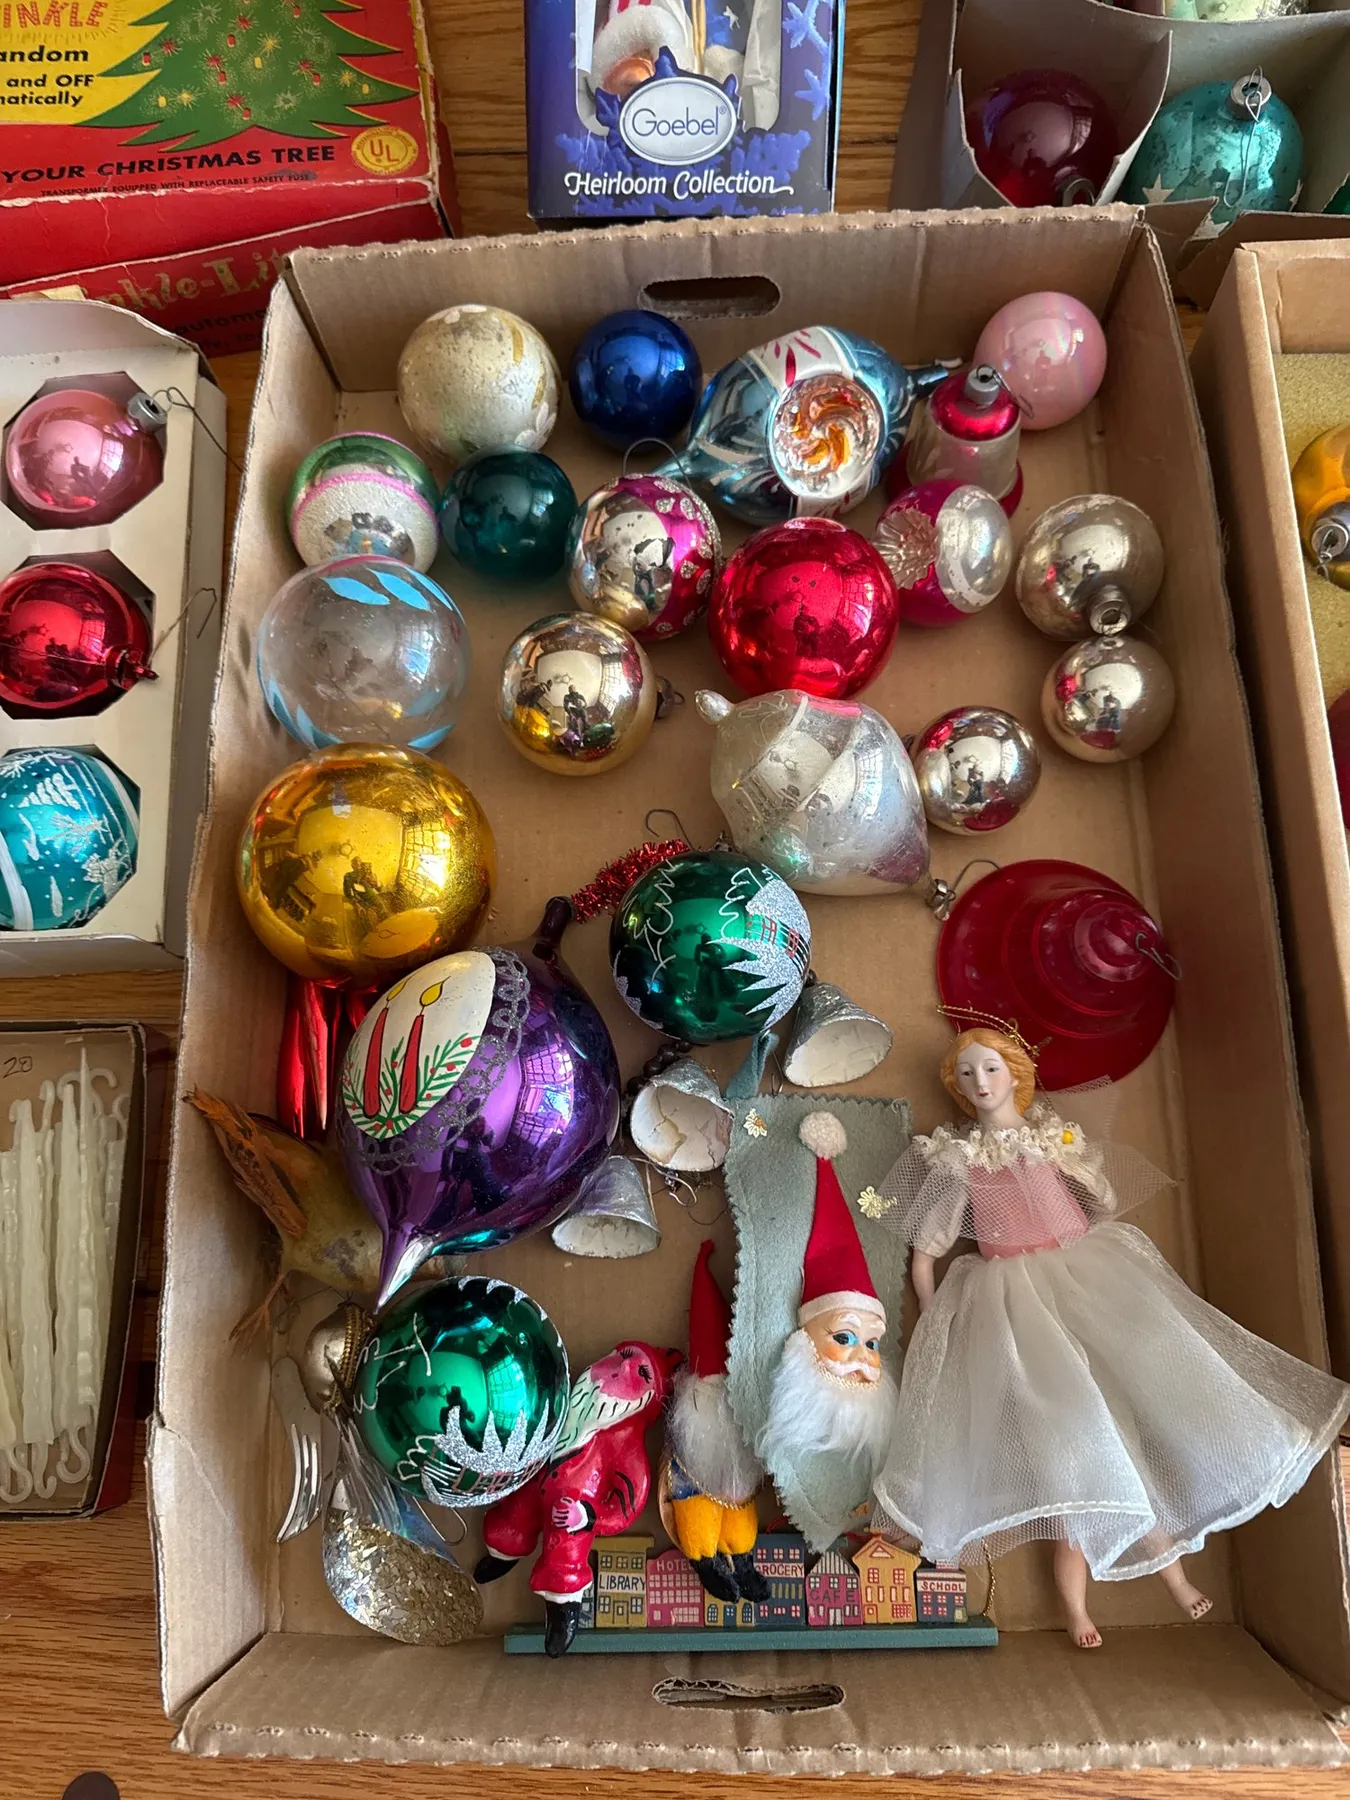
29. The Original Cardboard Box, Still Full
- Inspect each piece for cracks and loose caps before it goes on the tree — glass dust is invisible and unpleasant.
- Test unfamiliar ornaments on a padded surface first to see how they hang; indented reflectors tilt differently than spheres.
- Check metal caps for rust. A rusty cap will stain whatever it’s packed with next season.
- Keep the original boxes if you have them — they protect better than anything you’ll buy and they hold value.
- Decide now on one bin, one box, or one shelf. Collections grow whether you plan for it or not.
- Vintage cardboard boxes with original ornaments: $40–$120 at estate sales
- Single mid-century glass baubles: $3–$12 each
- Pointed reflector ornaments, premium: $15–$40 each
- Ceramic Santa and angel figurines: $10–$35 each
- Acid-free tissue for repacking: $8
- Total to build a shelf-ready collection: $120–$400
Slower and cheaper: buy one mixed box at a time and add a single piece each December. Shopping the day after Christmas cuts prices by half, and the collection ends up telling a better story.
30. Pale Blue Backdrop for a Red Tinsel-Haired Bead Figure
The pale blue background is doing quiet work. Clear beads read as gray against white and disappear entirely against cream, but a light blue ground gives them a tint that looks deliberate. And the red tinsel hair is the only warm color on the figure, which is why your eye goes straight to the head every time.
It’s the same principle behind Idea #12 — a tinted backdrop is what makes budget craft materials look like a collection instead of a pile of beads on a table.
Figures like this run 3 to 4 inches tall, which makes them shelf ornaments rather than tree ornaments. Group three at staggered depths on a 24-inch shelf and leave at least half the shelf empty. On a tree they need a dense spot — a thin branch will let them sag and look like they’re falling.
For an entryway shelf under 30 inches wide, one figure plus a small dish of loose ornaments is the right amount. Crowd it and the handmade quality gets lost in the shuffle.
Hang the First Ornament — Your Vintage Holiday Starts Now
You don’t need a matching set, a big budget, or a perfect tree. Pick one idea from this list, start with what you already have in the box in the attic, and add a single piece each December — that’s how the good collections get built anyway. Vintage decorating rewards patience far more than spending.
📌 Pin this guide to your Christmas board now — next December you’ll be glad you saved it.