
You know that feeling when you’ve saved forty fabric Christmas photos to Pinterest and your own tree still looks like it’s missing something? Same. That’s exactly why this list exists. We spent real hours digging through Etsy, Joann, Michaels, and Amazon to find the handmade fabric ideas that actually photograph well and hold up through December — and we kept the range friendly, from about $6 for a felt ornament up to $180 for a full garland-and-mirror moment. Inside you’ll find 30 curated ideas spanning traditional red-and-green, farmhouse plaid, rustic handmade, and soft blush elegance, with budget and luxury versions compared side by side, and every idea shoppable straight from the scroll. In 2026, fabric is the story: crafters are trading mass-produced plastic baubles for folded, stitched, and quilted pieces that feel personal, and the saves prove it. And stay until the end — we break down the most common mistakes that can ruin these looks. 📌 Save this to Pinterest for later — you’ll want to revisit these ideas.
1. A Flocked Red-and-Gold Garland Draped Over an Ornate Mirror
Here’s what it actually costs to recreate the mirror moment, and where you can trim.
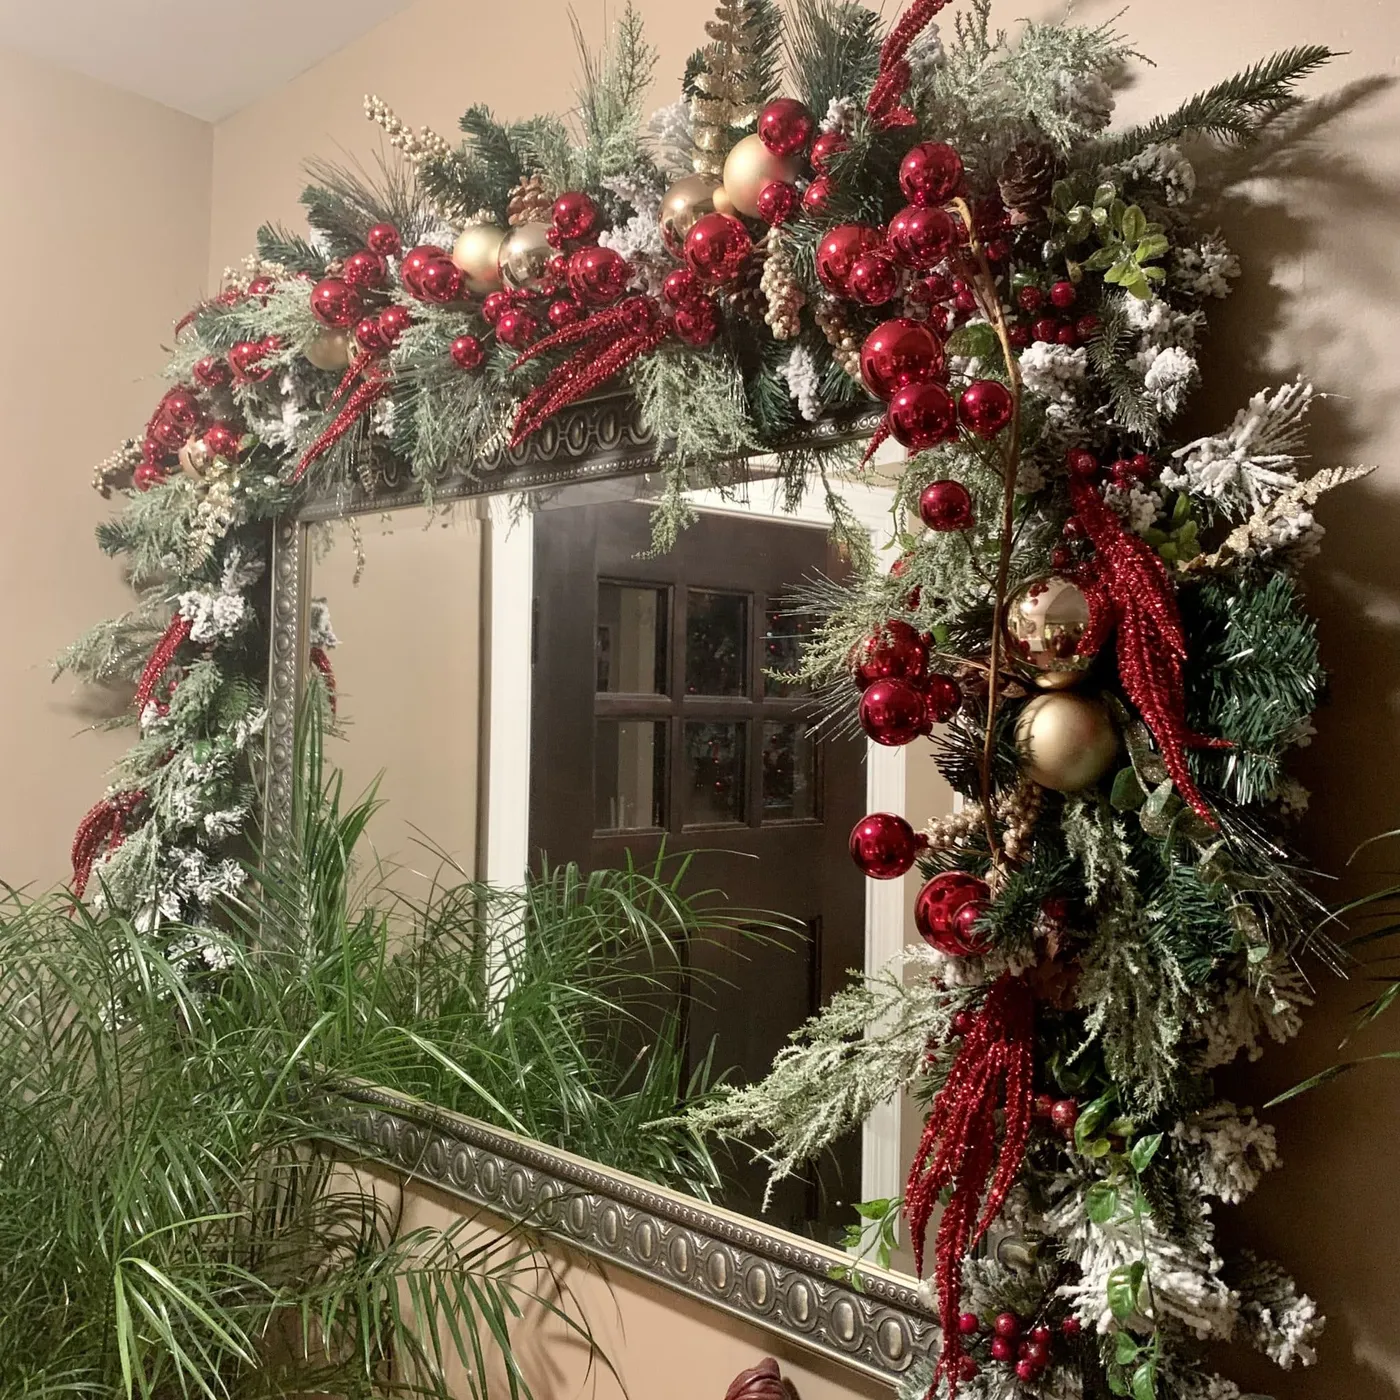
- Flocked 9-ft evergreen garland: $35–$90
- Ornate silver-framed mirror: $120–$400
- Shiny red plus matte gold ornament set: $18–$45
- Glitter sprigs and picks: $8–$20
- Leafy green plant for the base: $15–$40
Total: $196–$595. Budget alternative: reuse a mirror you already own, swap flocked garland for plain green, and use thrifted ornaments — the same silhouette lands around $60–$110.
Build the garland in two layers, not one. Wire a plain 9-foot green strand to the top corner of the mirror first, then lay the flocked garland on top and twist them together with floral wire every 8 to 10 inches. Weight both ends with an ornament so the drape holds its curve instead of creeping upward. And resist symmetry: two-thirds of the garland on one side and one-third on the other reads intentional, while a perfect 50/50 split reads like a store display.
2. A Forest-Green Fabric Advent Calendar Shaped Like a Christmas Tree
Three things are doing the heavy lifting here. First, scale — the calendar is big enough to hold its own against a lit tree in the background, so it doesn’t disappear. Second, the round woven jute mat underneath gives all that soft fabric a hard base, because soft things floating on a bare floor look unfinished. Third, the appliqués vary in shape but never in palette, which keeps 24 little pockets from turning into visual noise.
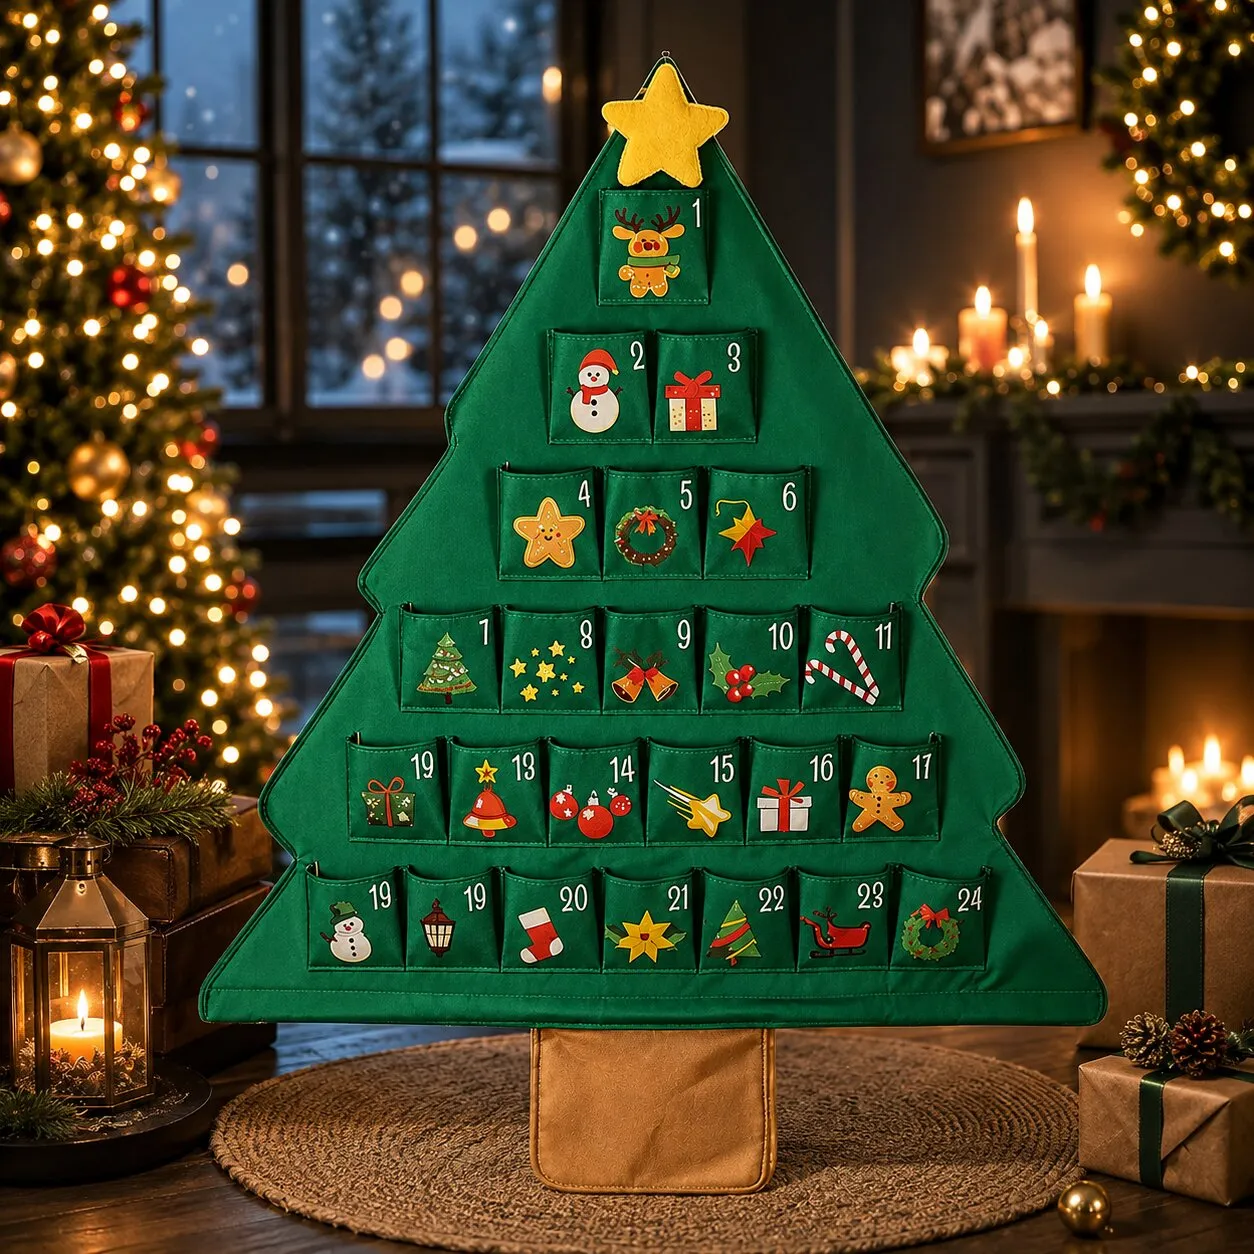
You don’t need a $200 heirloom calendar to get this. A plain green felt tree panel from a craft store runs about $12, and felt numbers plus appliqué shapes add another $15 to $25. Buy a mixed bag of felt scraps instead of individual sheets and you’ll save roughly half. A round jute mat from a discount home store costs $15–$30 and does exactly what the original does: anchors the fabric and gives a floor corner a finished edge.
3. A Cream Embroidered Star on Red-Striped Ticking Linen
- Cut two 5-inch star shapes from cream linen and one from thin batting.
- Sandwich the batting between the linen stars, right sides out, and pin.
- Blanket-stitch around the edge in gold thread, keeping a 1/4-inch seam allowance.
- Embroider a small floral motif in the center and tack on three amber beads.
- Loop a 4-inch length of twine through the top point and knot.
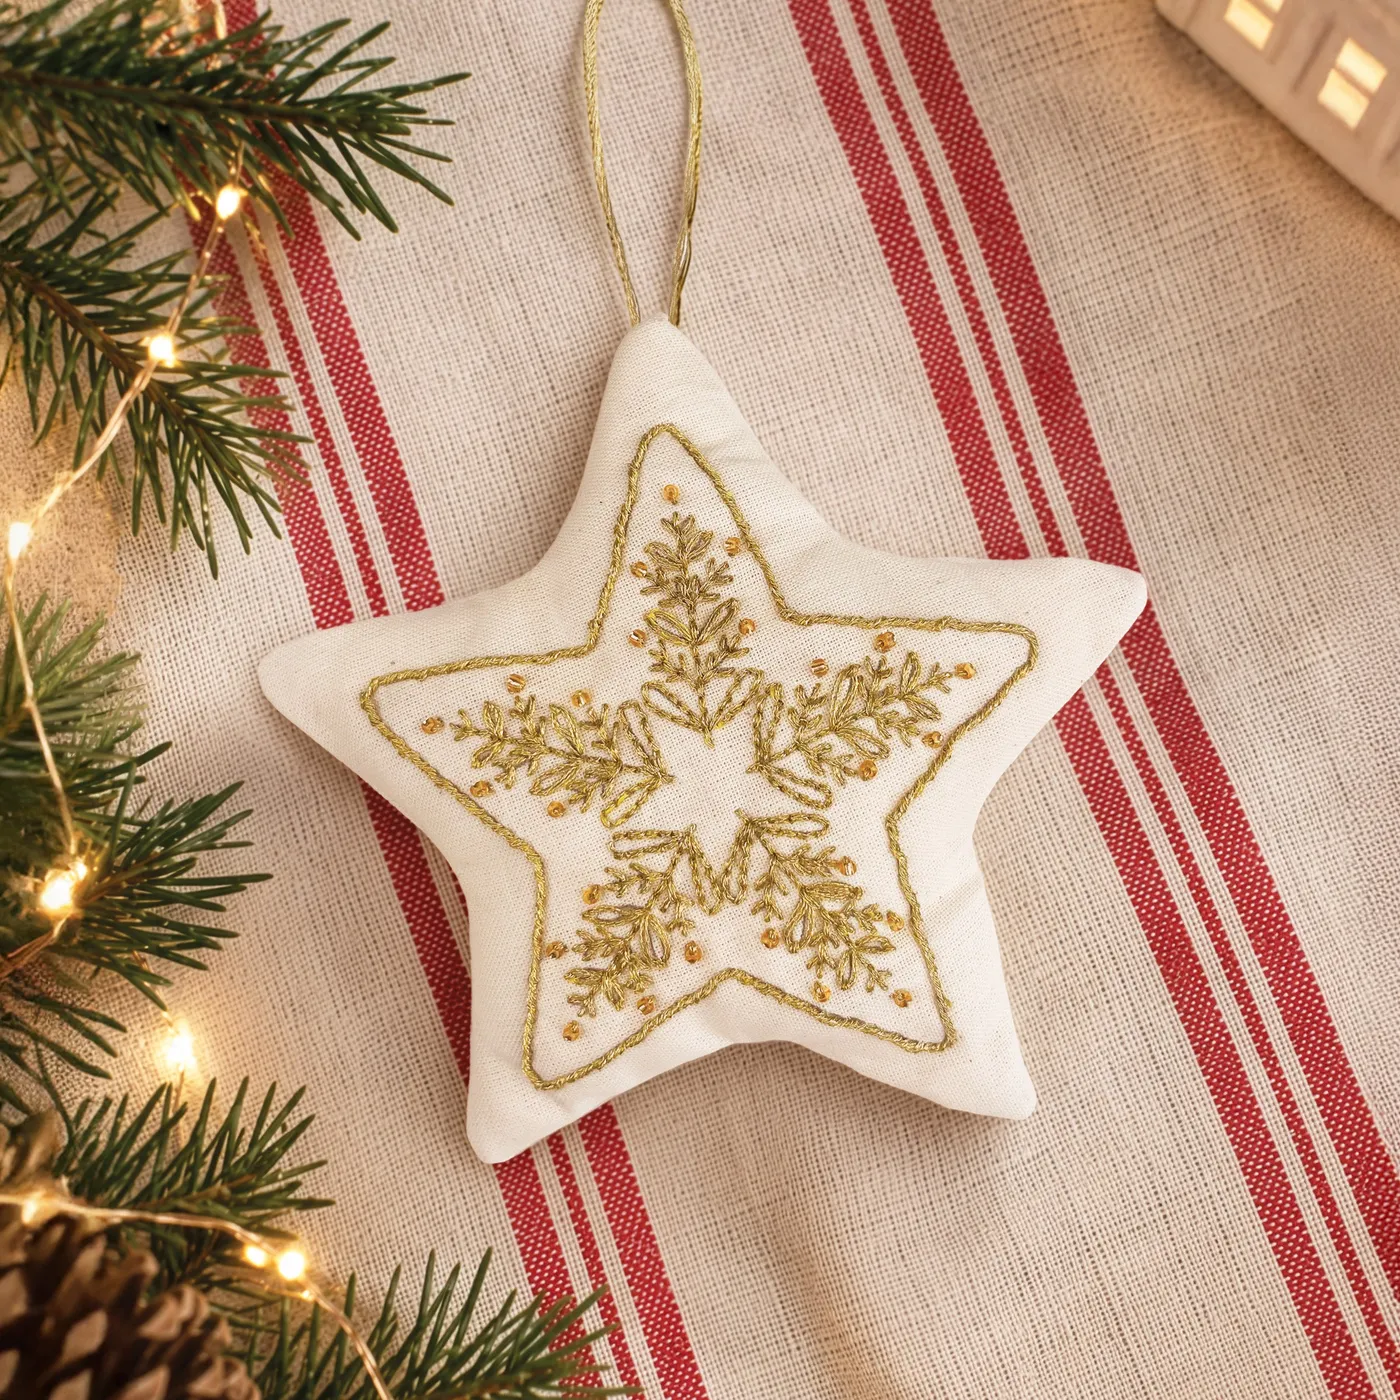
Time: about 90 minutes for the first one. Materials: $8–$14, and less for every star after.
The ticking stripe underneath is the whole trick. Put this same cream star on a plain white cloth and it reads flat, almost sad. Set it on red-and-white striped linen and suddenly the gold embroidery has something to argue with. That’s your move whenever you style a handmade ornament: choose a surface with a repeating pattern in one of the ornament’s accent colors, then let the star sit slightly off-center. Compare the palette with Idea #15 — same warm cream, completely different energy.
4. Orange-and-Yellow Embroidered Stars Hanging From Green Branches
Hang soft ornaments from branches at staggered heights — 3, 5, and 7 inches below the branch line — so the eye travels instead of stopping. And keep the thread thin. Anything thicker than 1/16 inch reads as a craft project; fine twine reads as styling. If your branches are delicate, weight each ornament with a small bean bag tucked inside the stuffing so it hangs plumb instead of slowly twisting to face the wall.
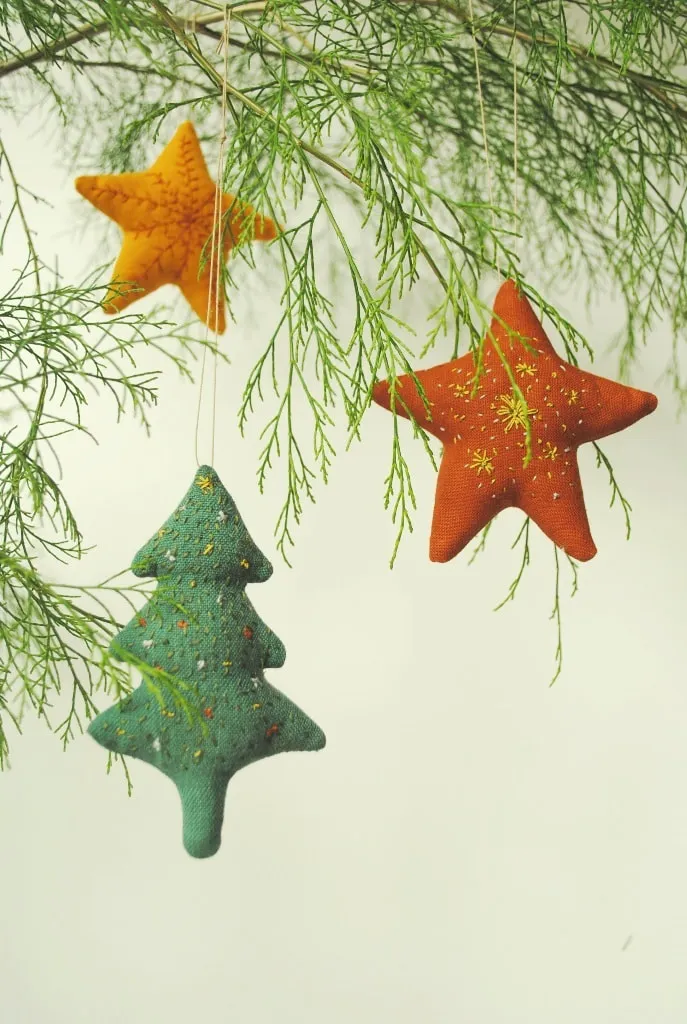
The formula is 55% green foliage + 30% warm fruit tones (orange and yellow-orange fabric) + 10% yellow embroidery + 5% pale brown string. That’s the whole recipe. To swap seasons, keep the percentages and change the hues: plum and mustard for autumn, sage and blush for spring. Orange is the warmest note on the wheel, so it pops hard against cool green without needing a single drop of red.
5. Grey Plaid Stuffed Trees With Silver Jingle Bells
Fabric trees on little wooden stands look precious until a toddler or a cat discovers them. They tip. If your house has either, glue a 4-inch metal washer to the underside of each base — a $3 fix that drops the center of gravity and saves the whole arrangement. Also, grey plaid is unforgiving about dust. Flannel and felt attract lint, so keep a lint roller in the drawer and plan on a quick pass once a week through December.
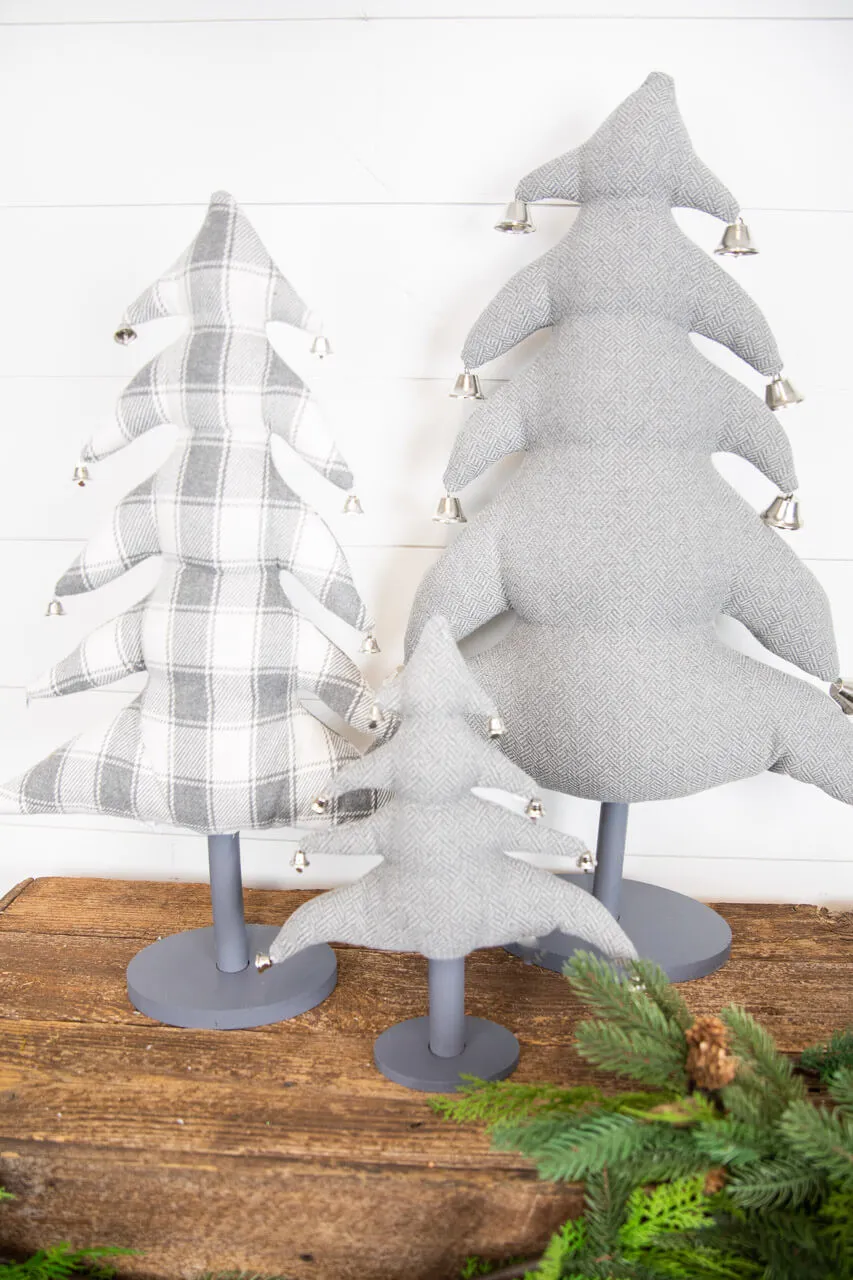
- Three stuffed fabric trees, made: $18–$45 in fabric and fiberfill
- Pre-made set of three trees: $35–$70
- Silver jingle bells, 24-pack: $6–$12
- Grey paint plus wood rounds for the bases: $10–$18
- Rustic wood riser or cutting board: $15–$35
Total: $49–$125. Budget alternative: cut the trees from an old grey sweater and a flannel shirt you already own, then skip the paint and leave the wood raw — roughly $20 all in, and honestly warmer looking.
6. A Quilted Snowflake Ornament Finished With a Grosgrain Bow
The genius is in the geometry. Those white fabric strips aren’t decoration — they’re the arms of a star, and because they’re quilted flat instead of stuffed, they stay crisp against the rounded red snowflake panels. The white grosgrain bow at the top echoes the white strips, and the small snowflake charm repeats the motif one more time at a smaller scale. That’s the same shape at three sizes, which is why your eye keeps circling back to it.
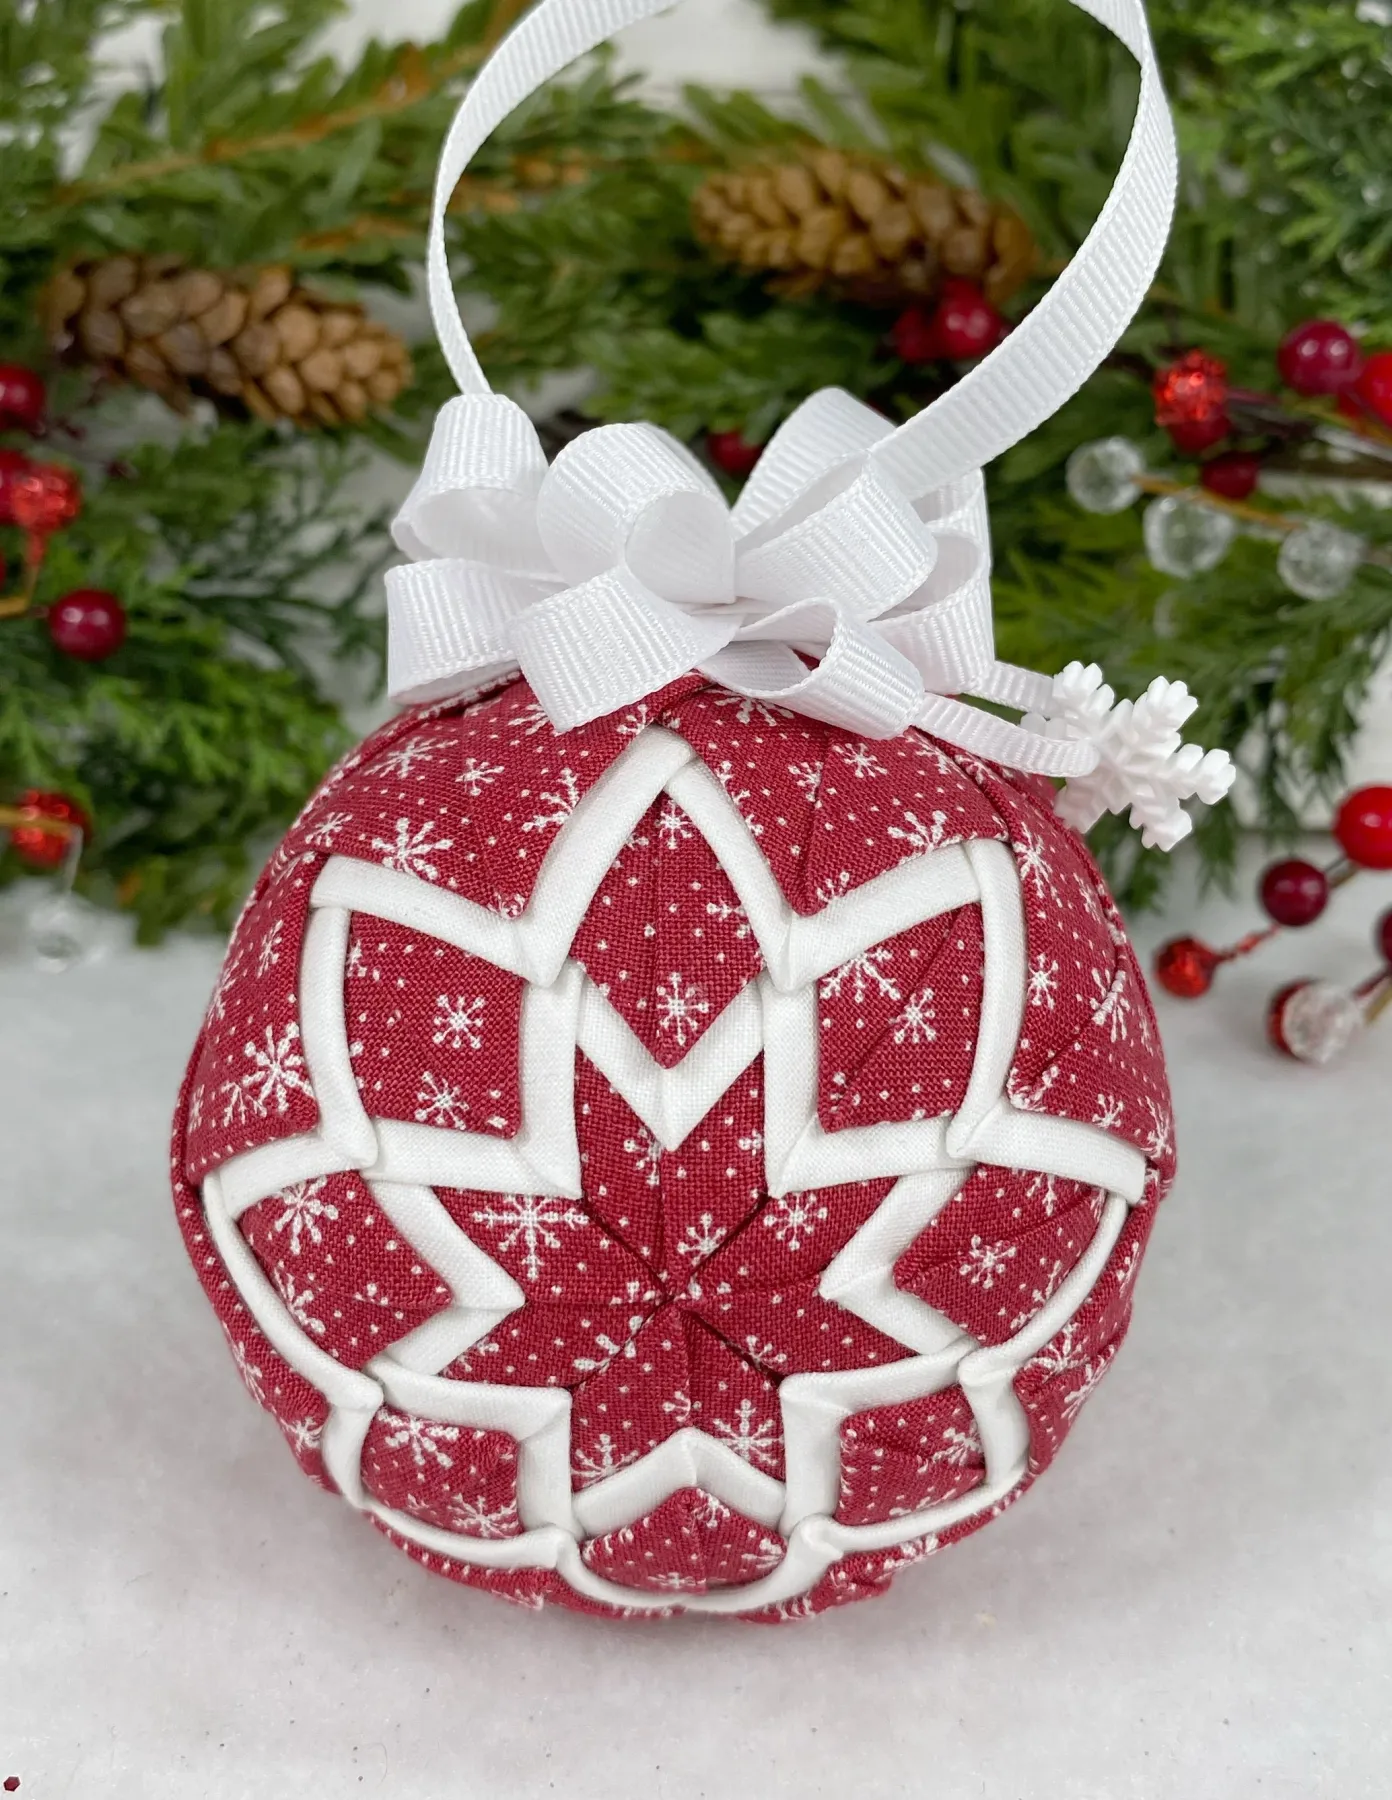
Cotton quilting fabric holds up for decades, but it fades. Keep these off south-facing windowsills unless you want crimson to go rosy by year three, because one season of direct sun does real damage. Dust settles into quilted seams, so a soft brush or a hair dryer on cool and low beats washing every time. If a panel stains, spot-clean with a damp cloth and mild soap only — a full wash destroys the batting structure and the ornament never sits flat again.
7. The Power of One Bold Crimson Circle on a Dark Wall
The whole image is one shape and one color: a saturated crimson ring against a near-black ground, slightly blurred, no decoration and no apology. That’s the lesson. When you build a holiday vignette in a dark corner — a charcoal wall, a black bookcase, a shadowed hallway — you only get one bright punctuation mark. Make it a single red fabric hoop wreath, a red wool garland, or a length of bound crimson ribbon, then give it empty dark space on all sides and let it be the only loud thing in the room.
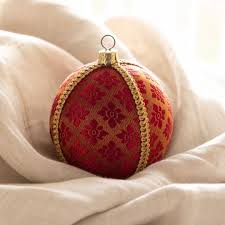
Moody, high-contrast color blocking has been building on Pinterest for a couple of seasons, and holiday styling caught up in 2026. Deep green, charcoal, and oxblood are replacing the all-white fireplace because they photograph beautifully in low evening light — which is when most of us actually see our decorations. Red-on-black isn’t really a trend so much as a classic: saturated crimson against a deep neutral has worked in interiors for a hundred years.
8. Layered Folded-Fabric Trees Finished With Vintage Buttons
- Cut eight 3-inch fabric squares per ornament from mixed holiday scraps.
- Fold each square into a triangle, then fold again into a narrow wedge.
- Layer the wedges around a 2-inch cardstock circle, points facing outward.
- Glue or stitch each layer down, overlapping like roof shingles, three rows deep.
- Sew a mismatched vintage button through the center and add a ribbon loop on top.
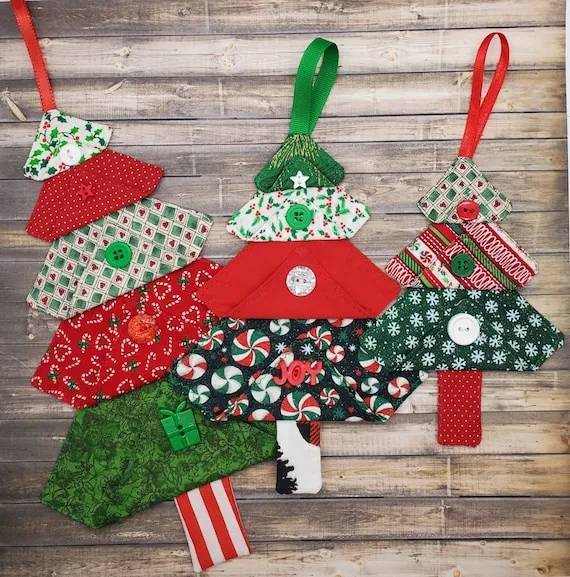
Time: 30–40 minutes each once you find a rhythm. Cost: about $4 in scraps and fiberfill.
This is the cheapest idea in the whole list to mass-produce, which is exactly why it’s the one to make twelve of. Fabric quarters run $1.50–$3 each and yield four to six ornaments. Buttons are free if you cut them off worn-out shirts — and that faded, mismatched look is the point here. Check thrift store craft bins and estate sales for tins of old buttons; $5 buys a lifetime supply. Compare with Idea #16, which uses the same scrap-bag logic for a completely different silhouette.
9. A Red-and-White Pinwheel Ornament Framed in Charcoal
These pinwheel ornaments run 4 to 5 inches across, which puts them in the sweet spot for a standard 7-foot tree but too small for a 12-foot foyer tree, where anything under 6 inches vanishes. On a tabletop tree under 4 feet, scale down to 3 inches or they’ll swallow the branches. Room-wise this look is flexible: it works on a 6-foot entry console, a narrow mantel, or a tree in a 10×10 living room where bigger decor would crowd the seating.
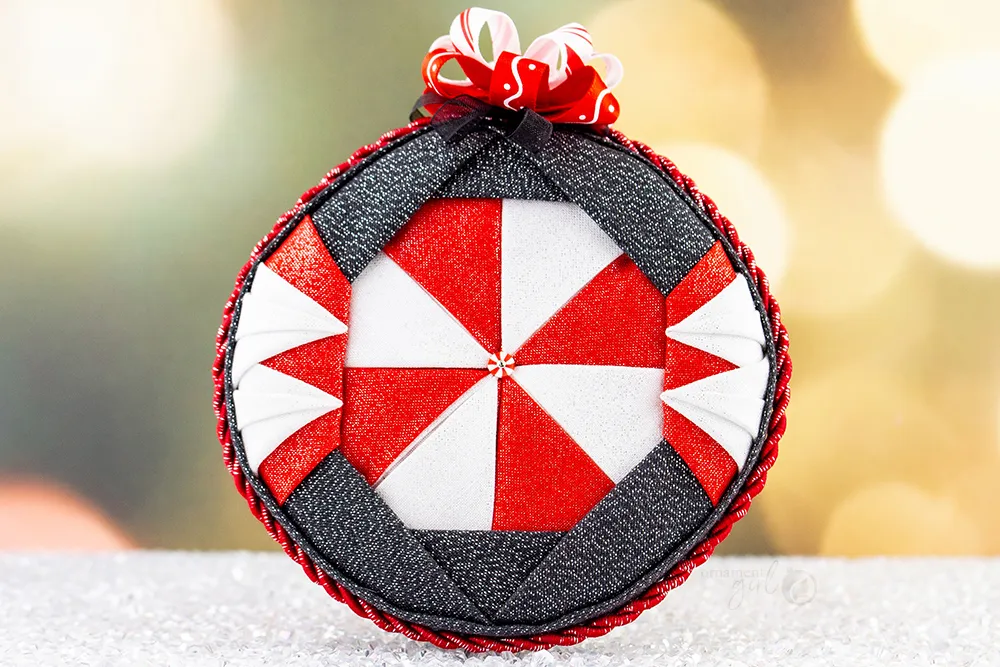
That dark grey border is doing more than framing. When you quilt concentric shapes, always make the outermost ring the darkest value in the piece — it visually pulls the ornament forward off the tree and keeps a busy center from reading as a mess of fabric. Keep the border width at 20 to 25% of the total diameter. Pale center, mid-grey border. Saturated red center, charcoal or black border.
10. A Floral-Green Fabric Cone Tree Tied With Red Satin Bows
The recipe: 50% patterned green (small red flowers on a green ground) + 25% solid red satin + 15% tiny mixed ornaments + 10% gold. Notice the pattern is doing double duty — the green fabric already contains red, so solid red ribbons feel inevitable instead of added. Swap the floral for a green-and-white polka dot and you get a lighter, more modern tree. Swap the red satin for cream velvet and the whole thing goes quiet and elegant without changing a single line.
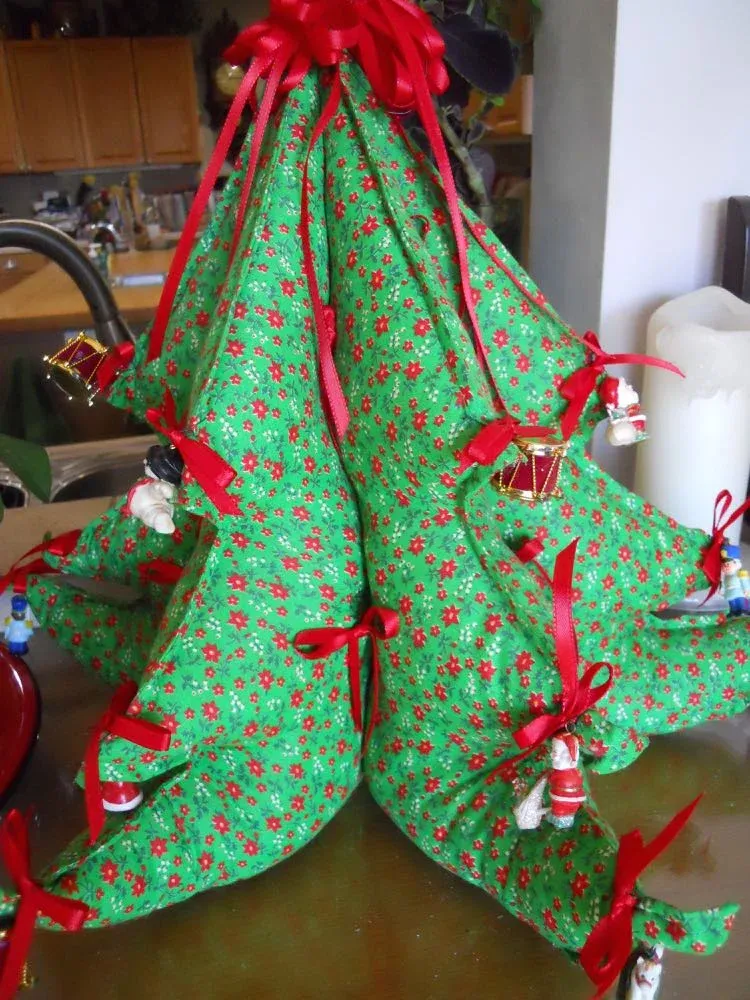
Small ornaments tied to ribbon bows look charming until they’re all hanging at the same height. Vary your bow placement vertically by at least 4 inches, or the cone reads as a stack of stripes. Satin also slips: if you attach bows with hot glue alone, the knot pops off in a warm room. A dot of fabric glue plus a hand-tied knot survives the season. And keep this above three feet off the floor, because those little drums are exactly bite-sized.
11. Folded Fabric Pinecones With Metallic Gold Leaf Prints
- Fabric squares, six to eight prints: $18–$36
- Styrofoam or felt core forms: $8–$16
- Decorative finials and ribbon: $6–$14
- Straight pins and fabric glue: $5–$10
- Metallic gold-print fabric, splurge print: $9–$15 per yard
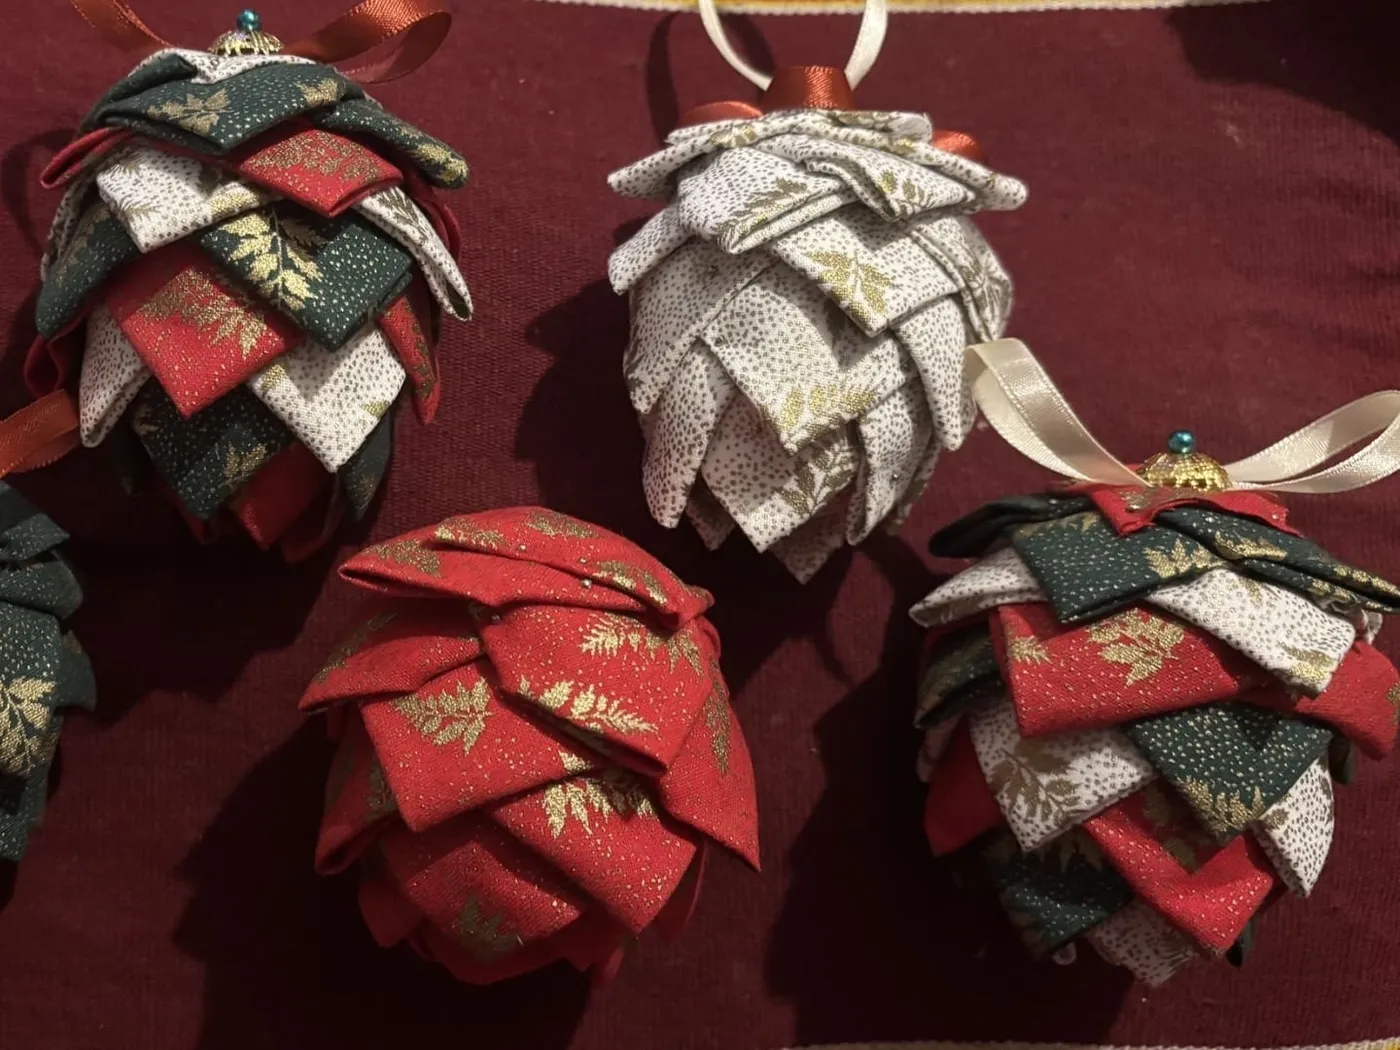
Total for a set of six: $46–$91. Budget alternative: buy one gold-print remnant instead of a full yard, and build the core from crumpled paper wrapped in scrap fabric — under $25 for the set.
Shape is the entire argument. A pinecone silhouette is organic and slightly irregular, which is why a fabric version reads sophisticated instead of kitschy — it’s the same trick a real pinecone plays, just scaled up and softened. Metallic gold prints catch tree lights in small flecks rather than a solid mirror shine, so the sparkle feels scattered and natural. And the little finial on top gives every ornament a deliberate top and bottom, which is what separates handmade from homemade.
12. A Mixed-Set Tree: Stripes, Checks, and Floral Fabric Trees
What makes this tree work isn’t any single ornament — it’s the refusal to match. Stripes, checks, florals, and solids all cut into the same tree silhouette, tied together by shared fabric and a red berry garland threading through the branches. Remove the garland and the mixed patterns start to look like a rummage sale. That red berry strand is the connective tissue, and it costs about $12.
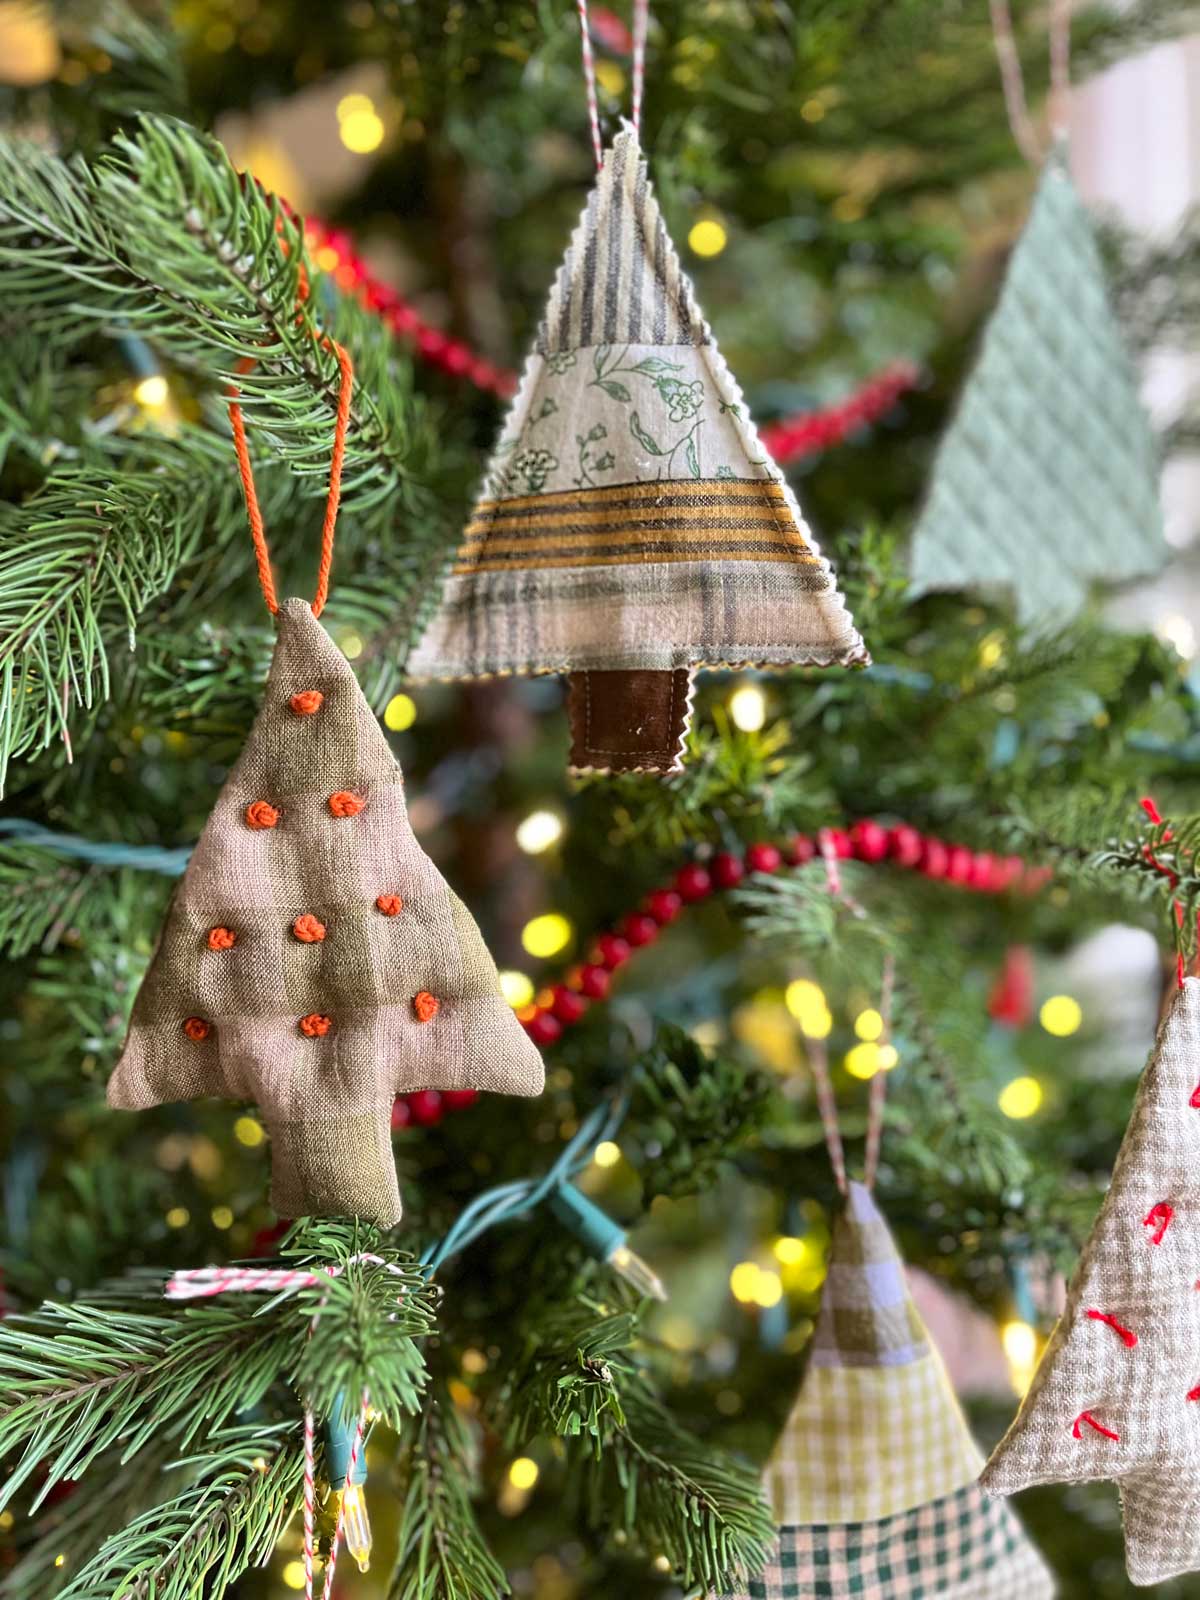
This approach needs room to read. On a tree under 6 feet, mixed patterns in the same shape get muddy fast — cap it at three fabric families. A 7- to 9-foot tree in a living room of at least 12×14 feet gives the assortment enough real estate. In smaller spaces, keep the mixed-fabric ornaments but confine them to one branch-heavy corner and go solid or neutral everywhere else. Bigger rooms can easily take twenty or more.
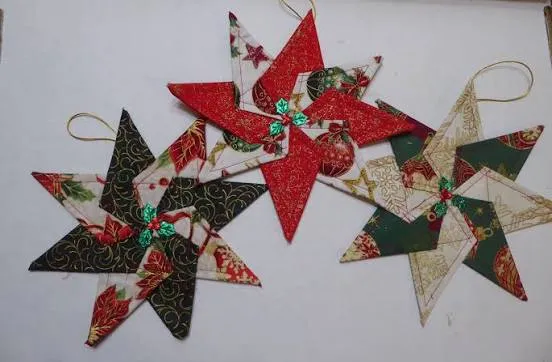
13. A Folded Star in Red, Green, and Gold-Printed Cream
- Cut 12 fabric squares, four each in red, green, and gold-print cream.
- Fold and press each square into a narrow triangle, then fold again.
- Arrange the folded points into a five- or six-point star on a cardstock circle.
- Stitch each point down with a single hidden tack stitch.
- Cover the center with a dark button and thread a white ribbon hanger through the back.
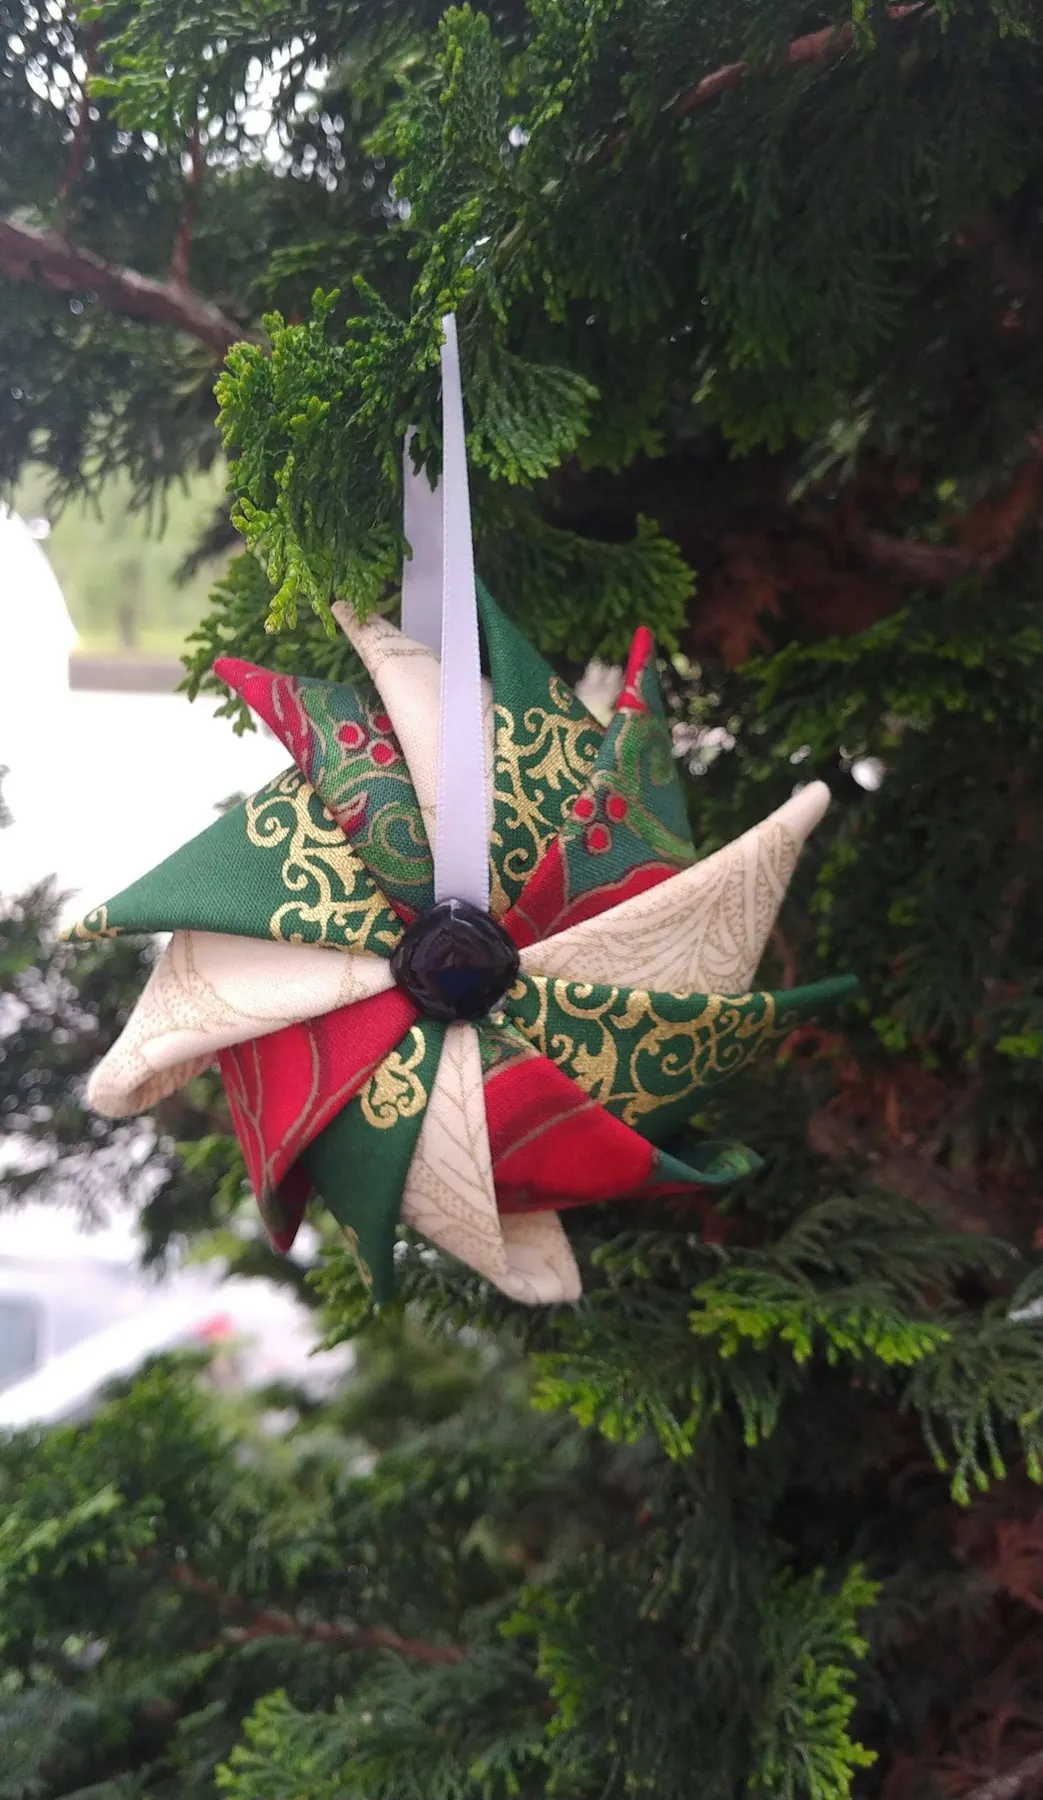
Time: 45 minutes. Materials: $6–$10 using scraps you probably already have.
Three-color folded stars live or die on value contrast, not hue. Before you cut anything, squint at your fabric stack — if all three read as the same mid-tone blur, the star turns into a pinwheel. You want one light (cream), one dark (deep green), and one that sparkles (gold print). Metallics count as their own value on the wheel, which is exactly why the gold panels make the cream look brighter than it actually is.
14. A Patchwork Star With Tiny Gold and Red Bells
Almost everything in this shot came from a dollar store or a scrap bin. The red-and-green print fabric: $3. The striped baker’s twine: $2 for a spool that will do forty ornaments. Tiny gold and red bells run about $4 for a mixed pack. Faux berry sprays are the only real spend at $6–$10 each, and one spray gives you enough clusters for six separate vignettes. All in, under $20 for the ornament plus the styling.
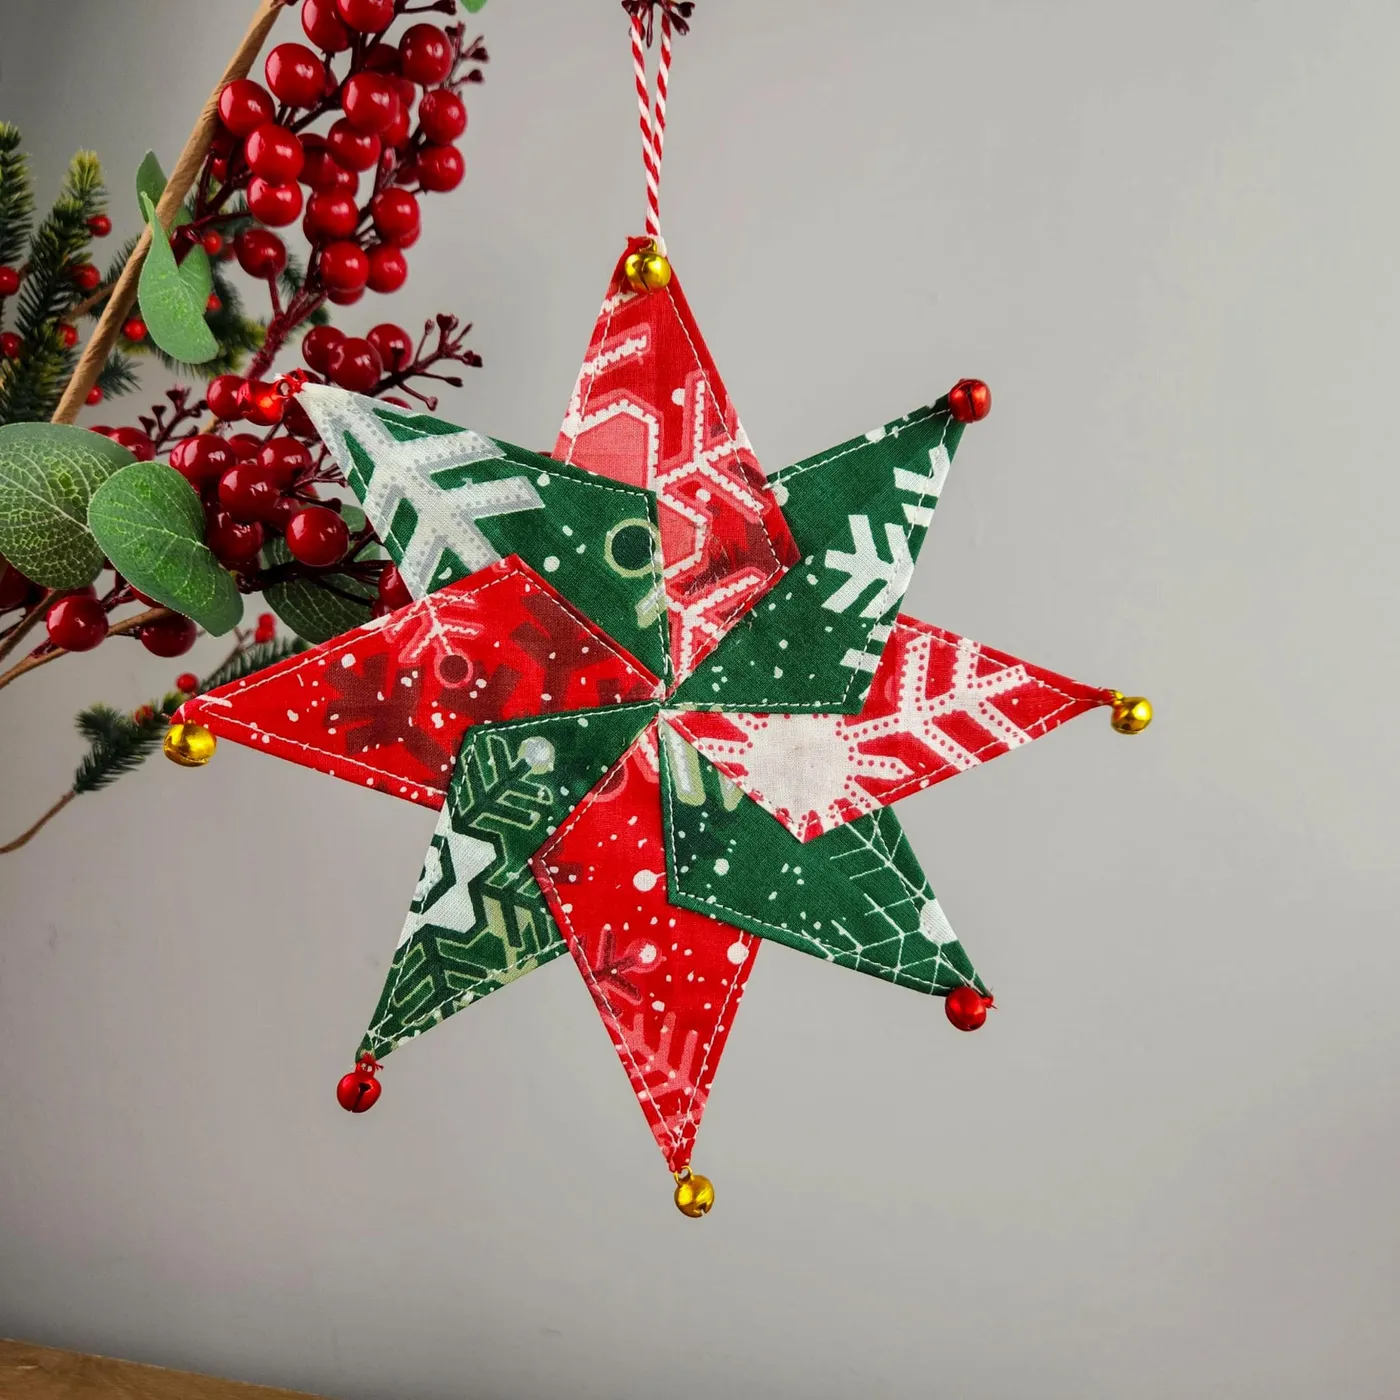
Bell-topped ornaments have one flaw: they tangle. Thread your hanging twine through the star first, then attach the bells last, knotting them tight against the fabric so they can’t swing free and hook neighboring branches. Matte gold bells read vintage; shiny ones read like party favors. If yours are too bright, one coat of watered-down brown craft paint dulls them in about 20 minutes.
15. An All-Cream Bow Tree — Nothing But Ribbon and Light
Cream fabric bows are gorgeous and unforgiving. Every fingerprint, every pine needle, every cat hair shows up. Realistically you’ll spot-clean them once mid-season with a damp white cloth, and store them flat in a box rather than hung in a bin where the loops crush. If that sounds like too much, choose a slightly warmer ivory or oatmeal linen instead of true cream — it hides three times as much. And keep fabric bows well away from lights that run hot.
Simple formula, lots of flexibility: 75% green foliage + 20% cream fabric + 5% metallic. No red, no pattern, no busywork. Because there’s only one accent color, you can go dense with the bows without it reading as clutter. Swap cream for sage green and you have a woodland tree; swap for dusty blue and it goes wintry without a single snowflake. Use warm white LEDs only — cool white turns cream bows grey in photos.
16. Scrap-Bag Trees: Layered Fabric Triangles With Raw Edges
- Measure your finished size first — layered scraps add about 30% bulk to your base triangle.
- Sort fabric by weight. Heavy wool, quilting cotton, and lightweight linen in one ornament looks intentional; two heavy fabrics look lumpy.
- Test your ribbon loops with real weight — these ornaments are heavier than they look.
- Decide whether raw edges are the design or a mistake. They’re the design here, so don’t pink or fray-check them.
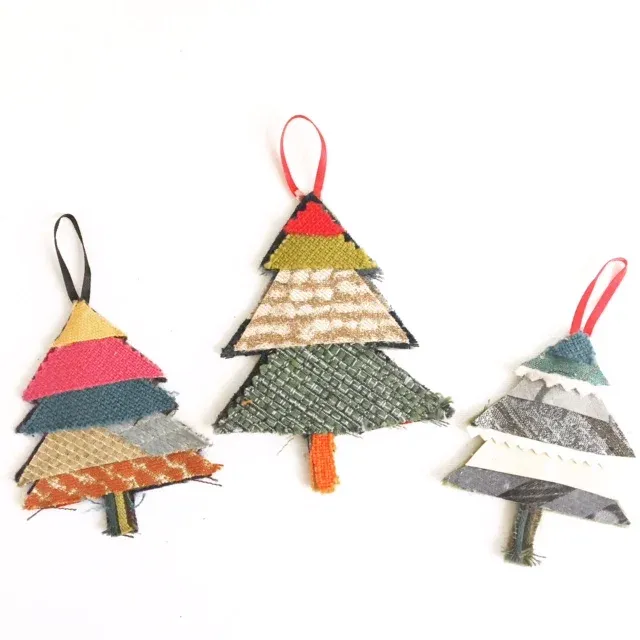
- Assorted fabric scraps or one fat-quarter bundle: $12–$25
- Fiberfill stuffing: $4–$8
- Ribbon loops, mixed widths: $5–$10
- Fabric glue and small sharp scissors: $10–$16
- Jute twine for trunks and hangers: $4–$7
Total: $35–$66. Budget alternative: raid the remnant bin at a fabric store the week after Thanksgiving — trees are already up, scraps get dumped, and you’ll walk out with a bag for $5.
17. Six Hand-Embroidered Ornaments Styled on Distressed Wood
Style handmade ornaments in odd numbers on a flat surface, spaced unevenly, before you ever hang them on a tree. Six pieces works. Five works better. Four nearly always looks like you ran out. And display them on a distressed wood board rather than white — the rough grain grabs the eye and makes simple twine hangers read purposeful instead of unfinished. If you’re photographing a flat lay, let one ornament fall half out of frame.
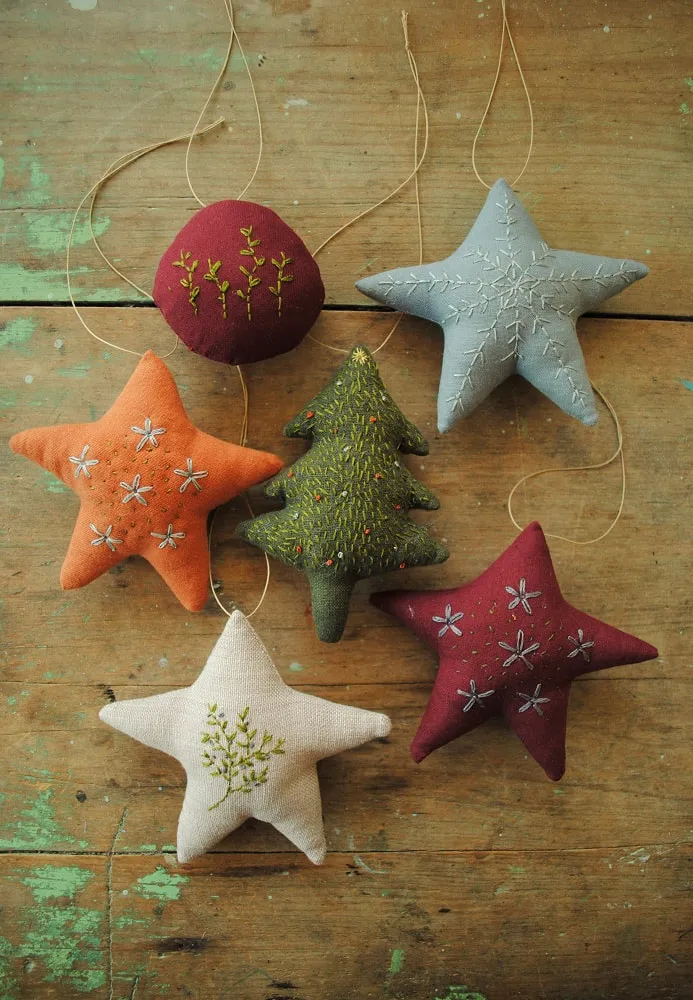
Look at the hangers. Every single ornament hangs on plain natural twine — no ribbon, no satin, no metal hook. That’s the discipline of this collection. The embroidery is the luxury, so the hardware stays humble. Swap in gold ribbon and the set starts competing with itself, and it reads like a store display instead of somebody’s box of keepsakes.
18. Yarn Gnomes and a Felt Tree Beside a Snowflake-Wrapped Gift
Handmade gnomes have been climbing for three straight holiday seasons, and 2026 is the year they grew up — yarn beards instead of faux fur, twine bodies rather than polyester. Part of the appeal is speed: a gnome takes about 20 minutes, so you can build a whole village in an evening. The other part is that they don’t read as a literal Santa, which means they can sit out from November through February without feeling out of season.
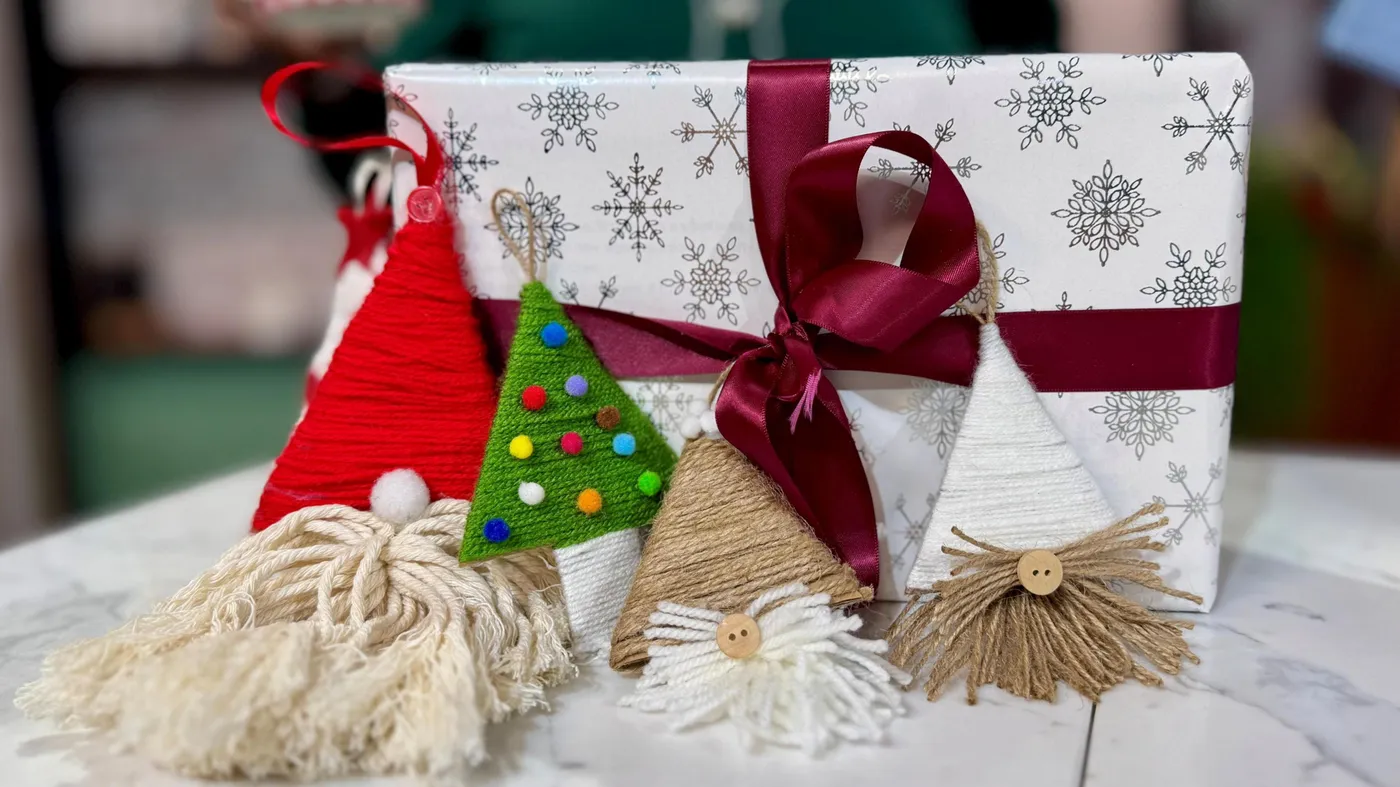
- Cut a cone from felt or quilted fabric — 6 inches tall, 4 inches wide at the base.
- Roll the cone closed, hot-glue the seam, and stuff it lightly.
- Wrap yarn around a 3-inch cardboard form about 60 times, then cut one end for the beard.
- Glue the beard under a small wooden bead nose, then add the knitted hat.
- Finish with a pom-pom tip and matching pom-poms on the little felt tree.
Time: 20–30 minutes per gnome. Cost: $3–$5 each, less if you already own yarn.
19. A Berry-Print Fabric Tree on a Little Wooden Trunk
This little tree ornament is roughly 4 inches tall with a dowel base — short enough to sit on a shelf without getting knocked over, which makes it one of the most versatile pieces in this whole list. It works on a 4-foot tabletop tree, a windowsill, a stacked-book vignette, or a narrow entry shelf under 10 inches deep. It won’t register on anything taller than 9 feet unless you cluster five or six together. For a big tree, scale the pattern to 8 inches and use a 1/2-inch dowel.
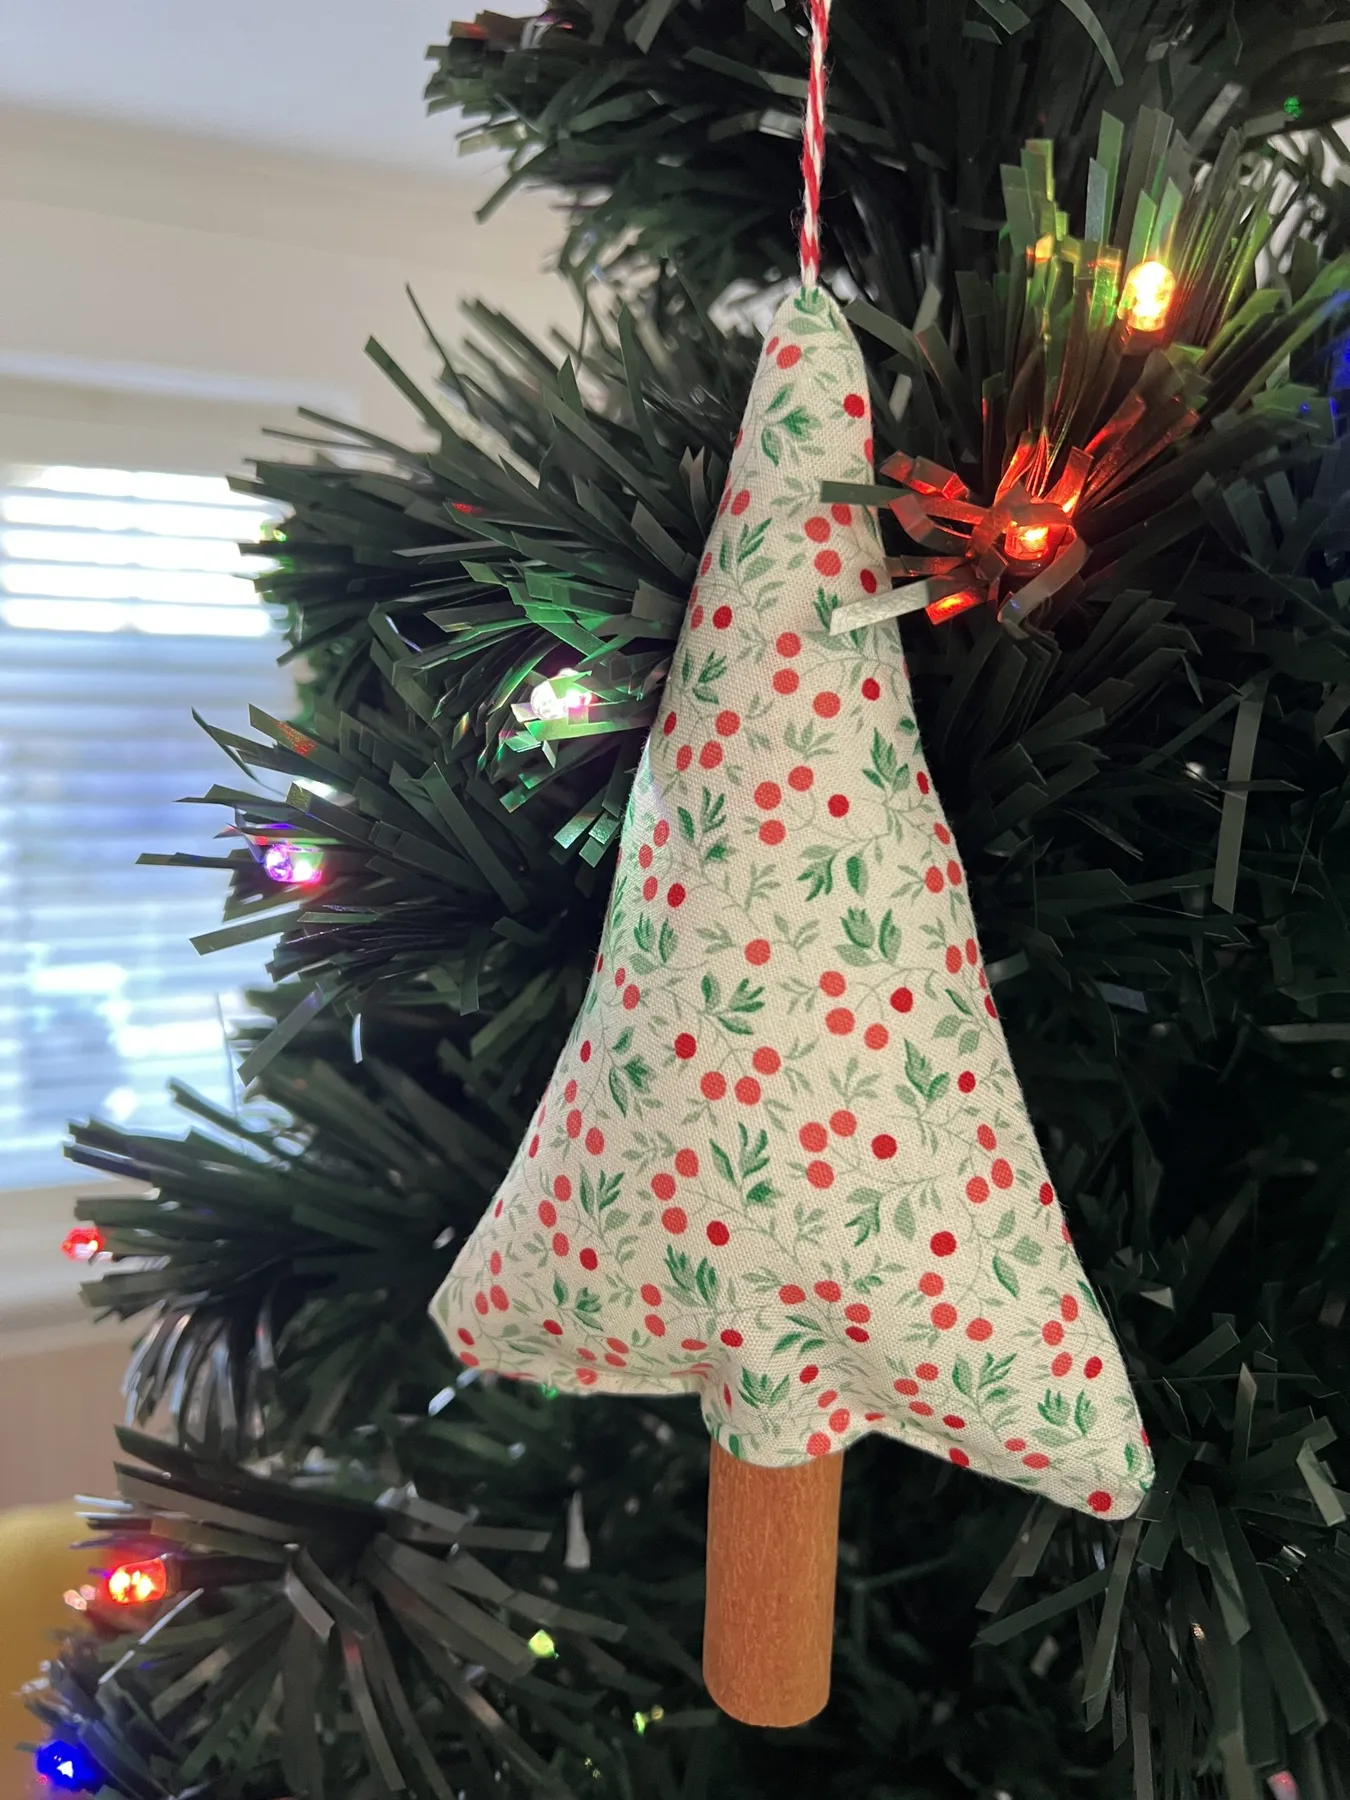
Dowel and all, one of these costs about $4 to make. Fabric runs $1–$2 from a remnant, fiberfill is pennies, and a 12-inch dowel from a hardware store runs about $1.75 and yields three trunks. Striped baker’s twine for the hanger is $2 a spool. If you’d rather buy than sew, Etsy sellers list similar pieces at $12–$18 each, so making six yourself saves roughly $60 to $80.
20. A Trio of Mini Stocking, Tree, and Gift Ornaments
Three shapes, one scale. The stocking, the tree, and the gift box are all roughly the same finished size, so they read as a set rather than a pile of separate projects. Gold jingle bells repeat on all three, which is the visual glue holding them together. And each piece uses a different construction — appliqué, embroidery, and folding — so the grouping shows range without ever looking mismatched. Line them up and you can see the thinking behind every choice.
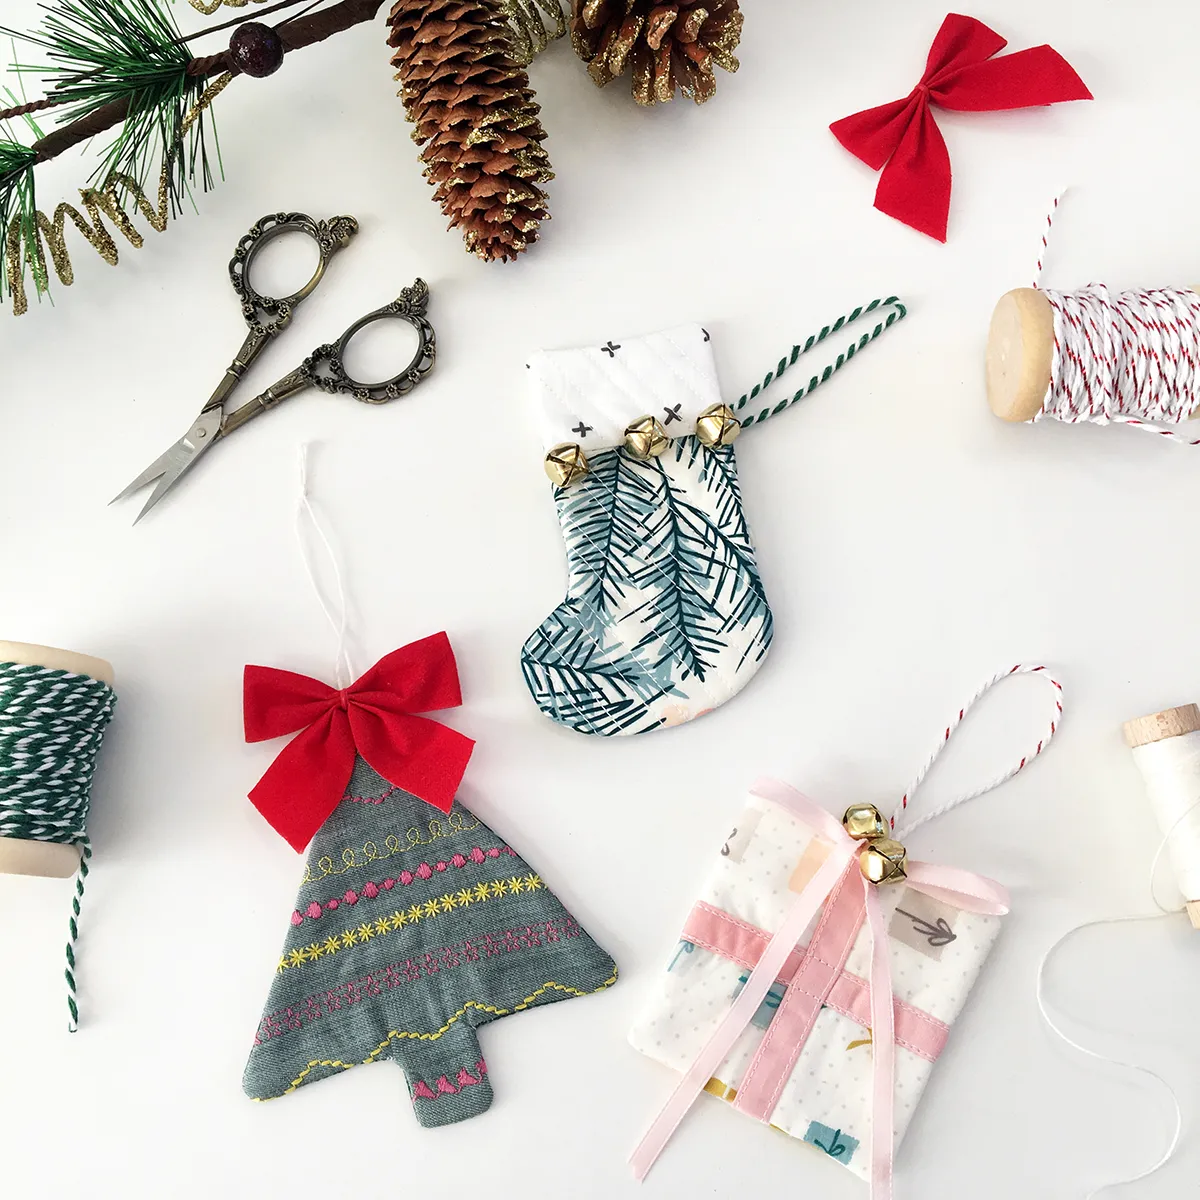
Small stuffed ornaments need more stuffing than you think, or they go flat and sad within a week. Pack them firmly and they hold their silhouette all season. The other honest caveat: mini stockings this size are decoration only. Don’t hang them where someone will try to stuff a gift inside, because the seam will give. And if you’re gifting these, skip the glittered pinecones in the packaging — loose glitter ends up on every fabric surface in the box. More on that in our mistakes section.
21. A Pillow-Stuffed Tree in Green-Gold and Speckled Red
Formula: 60% deep green with gold foliage print + 30% deep red with white speckle + 10% light wood. Two patterned fabrics, one plain base, no third accent. It doesn’t feel busy because both prints sit at the same density — small scattered marks, no big motifs. If you swap in a large-scale floral, cut the green to 40% and add a solid, or the tree starts to look like wallpaper. Keep the wood base light so it visually disappears.
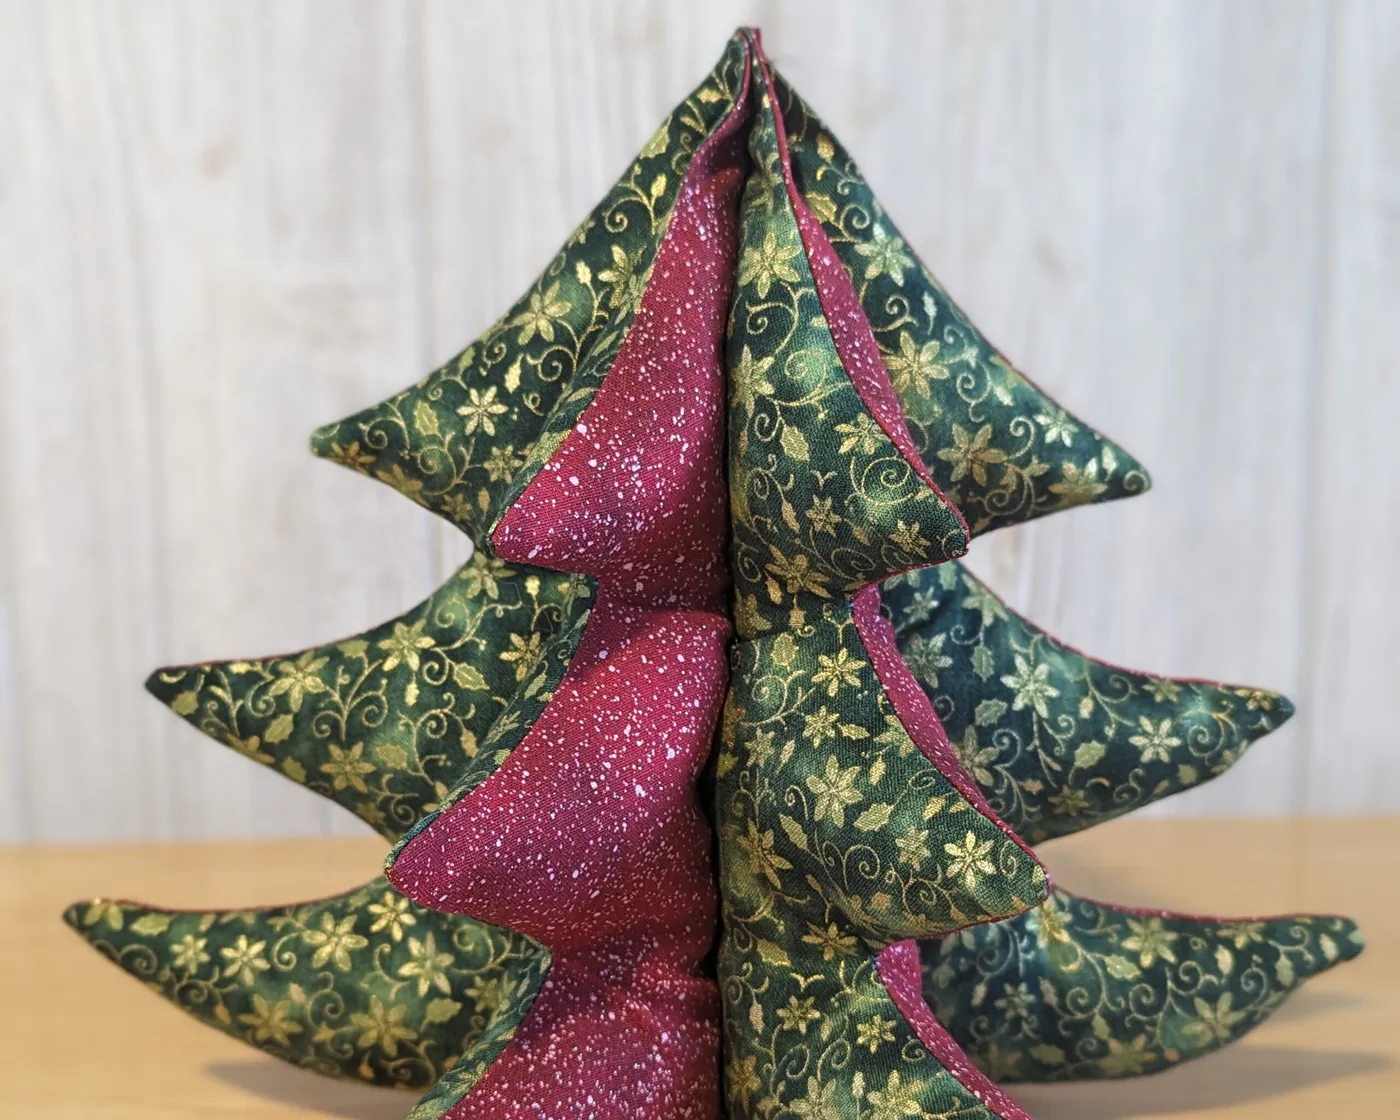
Pillow-constructed fabric trees can be gently hand-washed, which is rare in holiday decor — but only if the fabric is colorfast. Test a corner of the red speckle print in cold water first, because deep reds bleed more than any other color. Dry flat, never in a machine, or the stuffing clumps into the bottom. Realistically, one careful wash every few years is plenty. Store it in a breathable cotton bag, not plastic.
22. Buffalo Check Meets a Stylized Deer Face
- Deer-motif cotton print, 1/4 yard: $4–$8
- Buffalo check fabric, 1/4 yard: $3–$6
- Fiberfill stuffing: $4–$8
- Twine for hangers: $2–$4
- Pre-made printed fabric ornament kits: $12–$22 for a set
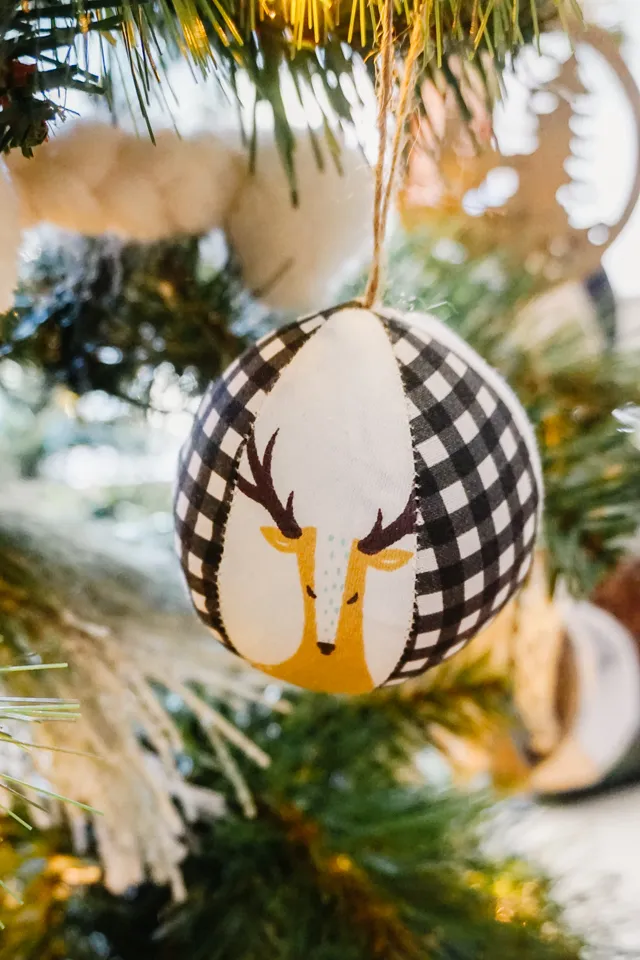
Total: $13–$26 for a set of six. Budget alternative: buy a buffalo check shirt at a thrift store for $3 and cut it up — you’ll get fabric for ten ornaments, plus free buttons for the next project.
- Test your printer or transfer method on actual fabric before committing — cotton takes ink, polyester repels it.
- Decide which side of the buffalo check faces out. The pattern has a direction, and inconsistent hanging looks sloppy.
- Cut circles with a template, never by eye — a 1/4-inch difference is obvious in a set.
- Check hanger length. Anything over 3 inches lets the ornament swing into the branches.
Prefer a simpler path? Try Idea #28, which gets the same patterned-ball effect with zero printing.
23. A Lime Tree, Yellow Star, and Red-Zigzag Candy Cane
It’s the button on the tree. That single mismatched button turns a lime-green striped triangle into something with a face and a personality. Everything else here — the bells on the star, the ribbon loops, the red-and-white bows — is supporting cast. Take the buttons away and you have three nice ornaments. Leave them on and you have three ornaments somebody will actually remember and ask you about.
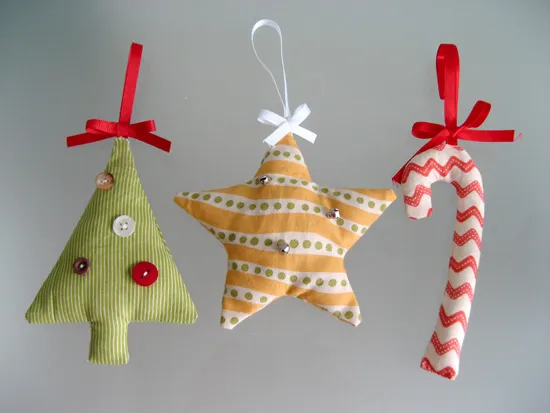
Pair these with a small tree, 4 to 6 feet, or use them as garland accents on a mantel where bigger pieces would overwhelm. At 3 to 5 inches tall they’re comfortable on a shelf, a wreath, or a tabletop centerpiece. In a 10×10 bedroom or a dorm room, three of these hanging from a single hook above a desk is a complete vignette. On a 9-foot tree they’d disappear unless you make fifteen.
24. Cloud-Faced Stockings Hung on a Pegboard Wall
Display stockings on a pegboard or rail instead of a mantel and you solve two problems at once: no holes in the woodwork, and the stockings hang flat so the fabric pattern actually reads. Space pegs 10 to 12 inches apart so the shapes never touch, and hang the lightest stocking in the middle — it creates a natural dip that feels composed rather than lined up. If the fabric is dark, paint the peg rail a light neutral. Contrast is what makes a pattern legible from across the room.
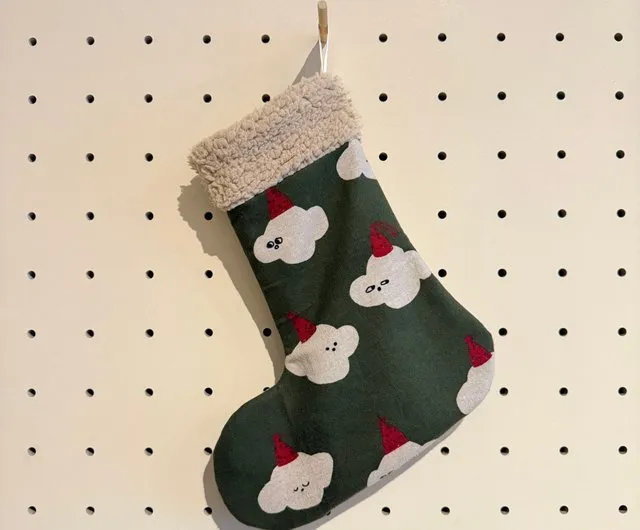
- Cut two stocking shapes from dark green cotton, plus a cuff from fuzzy beige trim fabric.
- Sew the cloud shapes on as appliqués before you assemble anything.
- Add a small red triangle and two dots for each Santa hat and face.
- Sew the front to the back, right sides together, leaving the top open.
- Attach the fuzzy cuff, then add a twine loop at the top corner for hanging.
Time: 1.5–2 hours. Materials: $10–$16.
25. Plaid-Bodied Gnomes in Grey and Red With Knit Hats
Fabric gnomes are the rare holiday project where cheap materials actually look better. Acrylic yarn from a big-box store, about $3 a skein, gives a fluffier beard than expensive wool ever will. Body fabric can come from a plaid shirt at a thrift store — $4, and you get enough for two gnomes plus the wooden buttons. Skipping specialty trims and using a small black bead instead of a jingle bell saves another $5. Realistically: $8–$12 per gnome, versus $35–$60 for a boutique version.

The mix here is 40% grey + 40% red + 15% white beard + 5% green holly. Two dominant colors in near-equal measure, one neutral they both share, and a tiny jolt of green. That balance is why two gnomes side by side look like a pair instead of a mismatch. To build a bigger village, keep the 40/40 split and rotate only the accent: green holly, a gold bell, a tiny knitted scarf. Never add a fourth color family.
26. A Plaid-Ball Tree in Red, Beige, and Black Buffalo Check
Buffalo check is a texture magnet. That brushed cotton surface snags on pine needles, picks up fuzz from storage bins, and develops pilling wherever ornaments rub. Nineteen fabric balls on one tree means a whole lot of surface area to lint-roll. Keep them individually tissue-wrapped between seasons, and if a ball starts pilling, a cheap fabric shaver fixes it in about 15 seconds. Skip fabric ornaments entirely on a tree near a working fireplace — ash and brushed cotton are enemies.

Plaid fabric ornaments came back hard around 2020 and never left, because they’re the cheapest way to make a tree look expensive. In 2026 the shift is toward tighter, smaller-scale checks and warm beige tartans instead of the red-and-black buffalo check that dominated 2021. Designers are pairing them with matte finishes and skipping shiny red altogether. This one has real staying power — plaid is a winter staple that outlives trend cycles.
27. Blush Bows and Draped White Ribbon on Green
Everything here is about restraint with one soft color. The blush bows are all the same fabric and the same size, so repetition does the decorating instead of variety. White ribbons hang in long vertical lines, which pulls the eye upward and makes the tree read taller than it is. And the gold glitter baubles are the only shiny thing in the shot — when exactly one element sparkles, the softness around it feels chosen rather than accidental.
- Blush pink fabric for bows, 2 yards: $14–$30
- White fabric ribbon, two spools: $12–$24
- Warm white LED fairy lights: $15–$30
- Gold glitter baubles, set of 12: $12–$25
- Matte white baubles, set of 12: $10–$20
Total: $63–$129. Budget alternative: make the bows from a thrifted blush bedsheet ($4) and skip the gold baubles entirely — the white ribbons and warm lights alone carry this look.
28. Three Patterned Fabric Balls, Three Red Ribbon Hangers
Fabric balls are the lowest-maintenance ornaments you can own. They don’t shatter, they don’t tarnish, and they survive a six-foot drop onto hardwood. The one thing that ages them is light: red plaid and printed cotton fade unevenly, so rotate their position on the tree each year. And check your red ribbon hangers every season — ribbon that’s been knotted for a year tends to crease and fray right at the knot, which is exactly where it carries the weight.
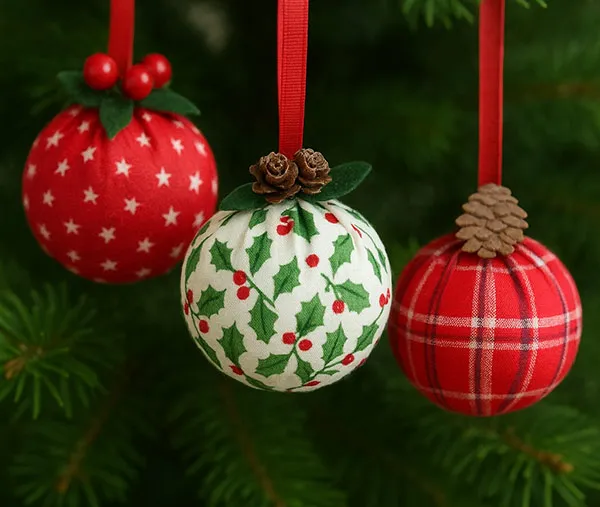
If you’re making ball ornaments from flat fabric, cut panels as circles, not squares. Square panels bulge at the corners and the seam line turns lumpy. A 4-inch circle yields roughly a 3-inch finished ball. Sew with a 3/8-inch seam, clip the curves before turning, and stuff with small pinches rather than one big handful so it fills evenly. Finish with a slip stitch and the seam disappears completely.
29. Pinecone Birds With Wooden Heads and Fabric Wings
These birds run about 4 inches long, which is ideal for a tree between 6 and 9 feet, where they can nestle into the branches without poking out. On a bigger tree, cluster three together on one branch. On a small tree they’re a bit much — you’d want nothing larger than 3 inches. Natural materials also suit rooms with more square footage: a farmhouse living room of 15×20 or more, where light wood and pinecone texture have space to breathe.
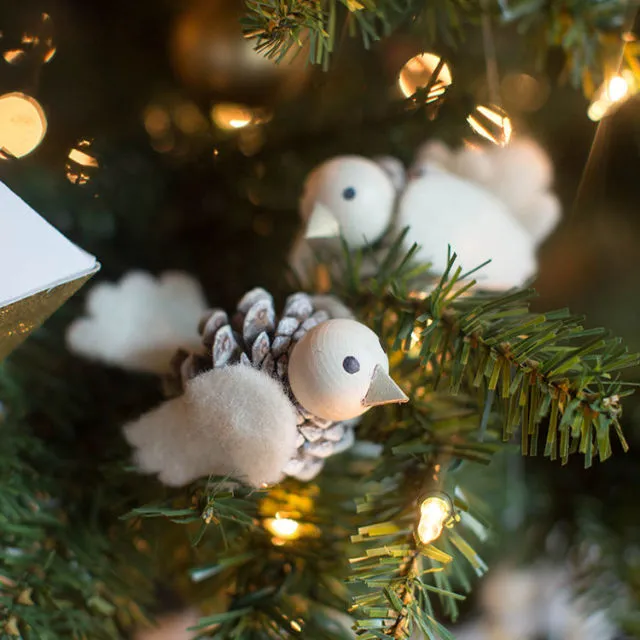
The wooden head is what makes these work. A pinecone with fabric wings alone would read as a rustic blob. Give it a turned wood head with a painted eye and a pointed beak and it becomes a creature — funny, a little odd, completely memorable. That single swap from natural to crafted is the difference between decoration and character. It’s the same trick that makes a shelf of fabric gnomes feel alive.
30. Felt Blueberries With Embroidered Stars and Kelly-Green Leaves
- Cut two 3-inch felt circles per ornament in your main blue.
- Cut two small leaf shapes from kelly-green felt and pin them between the circles at the top.
- Blanket-stitch around the edge in a contrasting thread, leaving a small opening.
- Stuff lightly, then close the seam.
- Embroider a five-point star in the center with metallic or pale thread.
- Thread a narrow satin ribbon through the top for hanging.
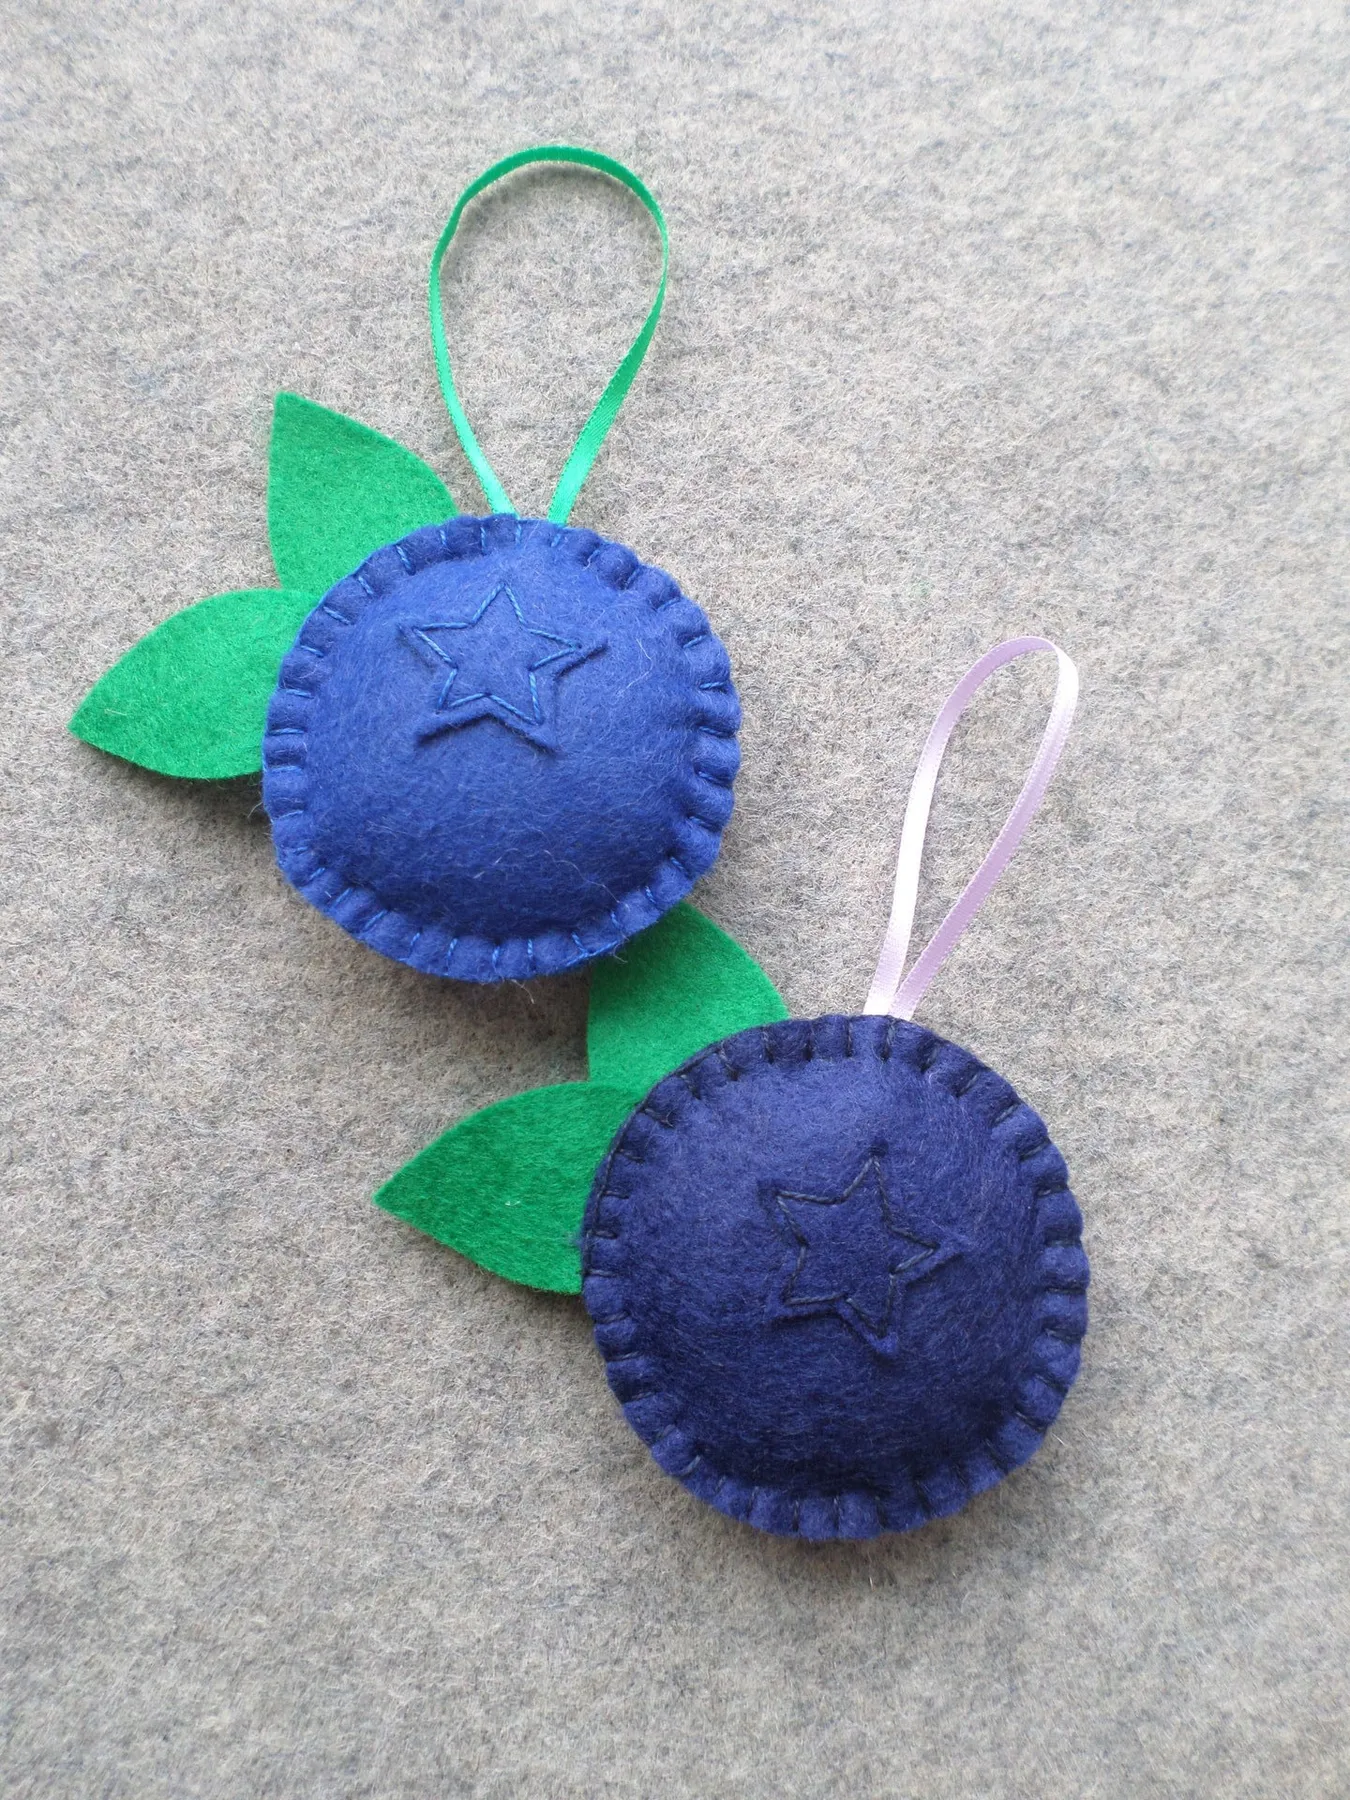
Time: 30 minutes each. Materials: $2–$3.
Felt is the cheapest quality material in holiday crafting — a single 9×12 sheet runs about 40 cents, and each ornament uses less than half of one. Ribbon scraps, embroidery floss, and poly-fill from a basic sewing kit make up the rest. Buy a 12-sheet felt bundle in mixed colors for $8 and you can make a dozen ornaments for roughly $12 total. Compare with Idea #17, another embroidery-forward set that costs about the same to produce.
Your Fabric Christmas Starts With One Good Fold
You don’t need a craft room, a sewing machine, or a single perfect ornament — you need one fold, one scrap of fabric, and about twenty minutes on a Tuesday night. Pick the idea here that matches the fabric you already love, make three of them, and hang them where the light hits. 📌 Pin this to your Christmas board now, so when December gets busy you already know exactly what you’re making.